|
|
Post by Franklin1 on Mar 6, 2014 22:38:25 GMT 10
Fiddle-faddle!  Three years ago you had never painted a vintage van, and now you can do it! Same with upholstery.  When I remade the canvas poptop skirt for that van I had, I had no idea how to sew the zippers around the curve. My first attempt was a shocker... 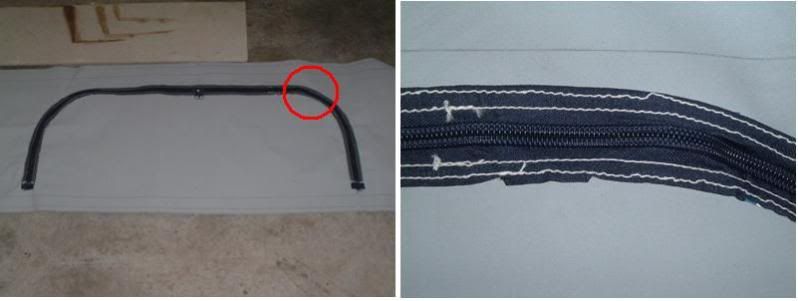 So I got on the internet and searched for the right way to do it. I found out it is known as "easing a zipper around a curve", and there is a proper way to do it. With all that new knowledge, I had another go... 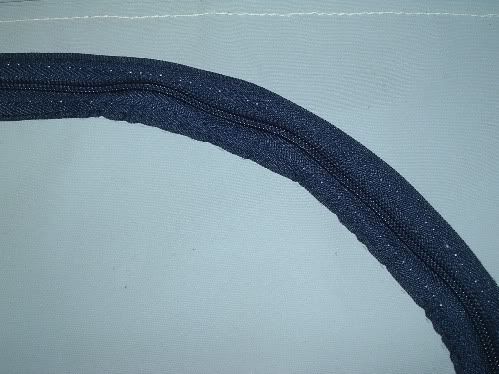 That ended up being good enough for this mug sewer, so I carried on and finished the whole skirt... 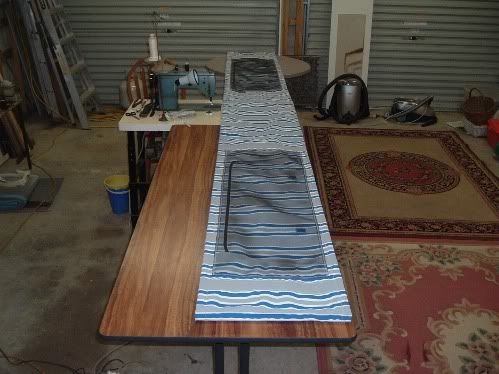  Took me 16 days to get it finished, but hey, people have spent that much time sanding back a caravan! I'd been quoted $820 to have the skirt made by a caravan repairer, and I ended up doing it for $150 worth of parts and material. All ya gotta do is have a go.  cheers, Al. |
|
|
|
Post by Franklin1 on Mar 6, 2014 18:31:44 GMT 10
Very nice, sgtl!  That upholsterer doesn't seem very customer-focussed, huh?! I hope you slapped him with one of the cushions when you picked them up.  You don't need an industrial machine to do the sort of upholstery required in a van. I replaced the fabric facings on the cushions in the poptop I restored, using a Singer domestic machine that we bought in the 1980s... 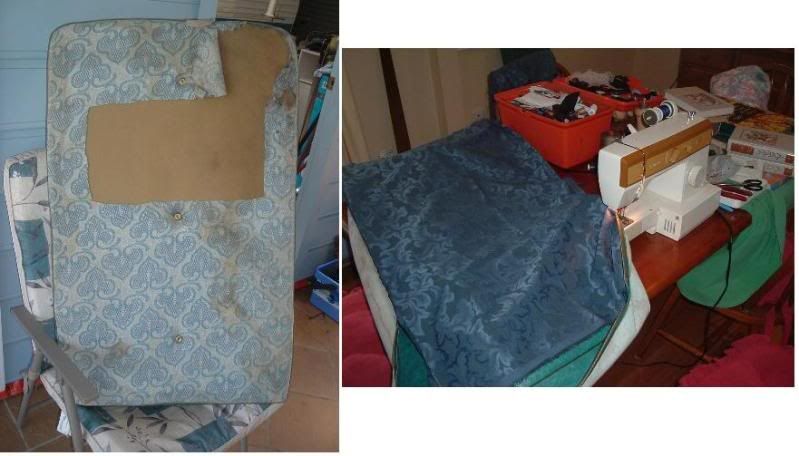 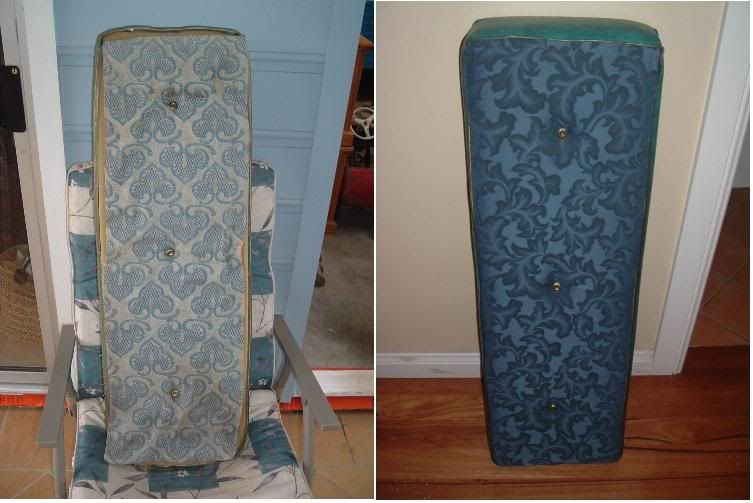 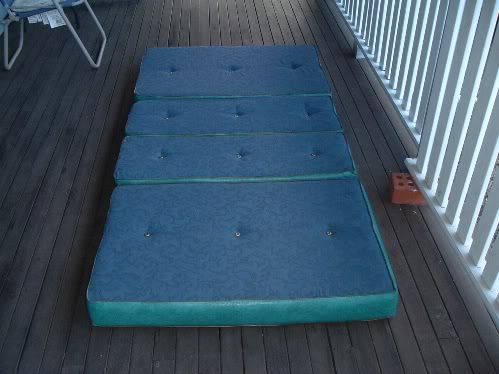 You just need a machine with enough grunt to pierce through 4 layers usually - 3 of vinyl plus 1 of fabric. I use a size 16 needle, and buy upholstery thread from Spotlight in 100 metre reels. That's more than enough for a set of dining cushions. Sometimes when you sew through more than 4 layers (for joins, overlaps, etc), you have to turn the wheel through that section to help the needle go through, but mostly it's fairly plain sailing. Grab a few layers of vinyl and a piece of fabric, and see what your machine is capable of. Good quality old domestic machines sell for around $40 in our Op Shops, whereas the industrial/professional machines are now priced up around $275 (I was lucky enough to get mine 5 years ago at the Salvo's for $60). Once you get the hang of it, there'll be no stopping you.  cheers, Al. |
|
|
|
Post by Franklin1 on Mar 6, 2014 11:13:53 GMT 10
Thanks for your comments, Greg.  Kitchen cupboard: Kitchen cupboard: I've continued to plod along with this job. Crikey!, it would have to be the most fussiest, complicated part of the whole project! (or maybe I've just selectively forgotten some of the previous complicated bits  ). I got the push-button catch sorted out with my brother. In a couple of minutes he had the old rod out of the cap, and a replacement longer brass rod hammered back in, so the catch is now working fine... 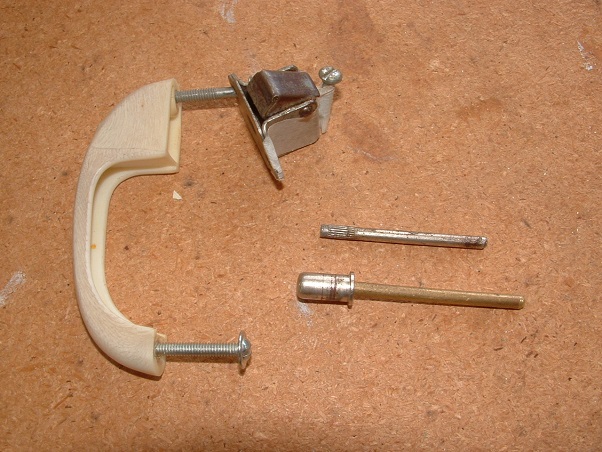 I got the cutlery drawer framework finished in the cupboard...  I used the cardboard template method to measure and cut the plywood for the face of the cupboard... 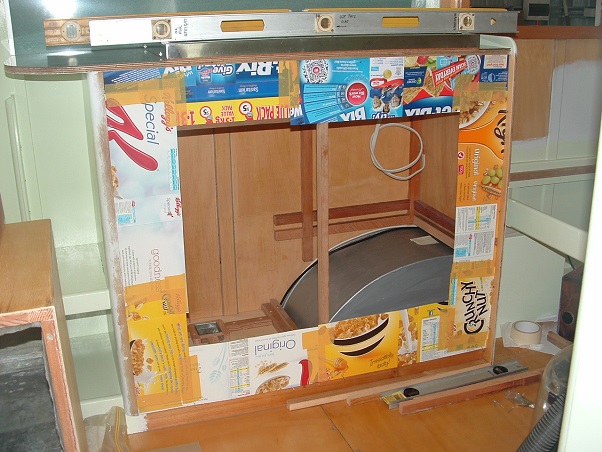 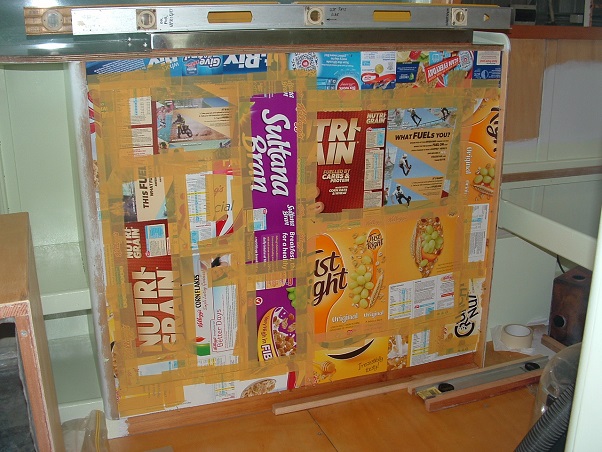 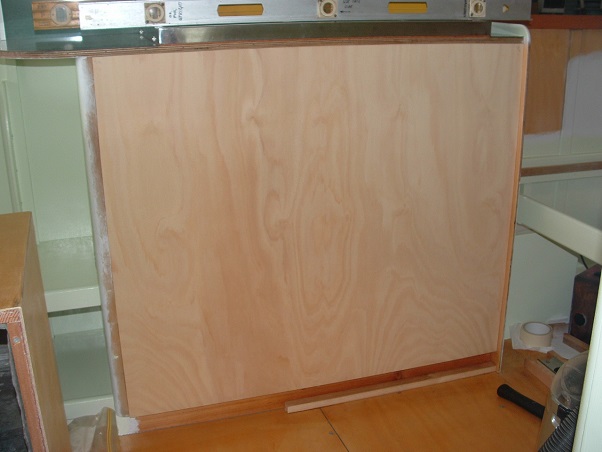 I think it's a great method to use when you have to cut something to fit fairly accurately inside a border (like, say if you wanted to add a shelf in your wardrobe in the van). I also used that method to cut the shelf for inside the cupboard...  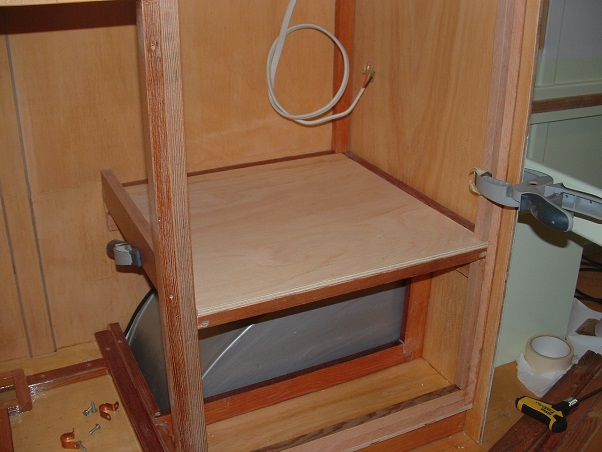 I had to do some hard thinking about the drain hose for the sink. I needed it to be somehow kept clear of the shelf underneath the sink. After destroying a fair few brain cells in the process, I came up with the idea of making a drain hose out of second hand copper pipe, plus some pieces of water hose... 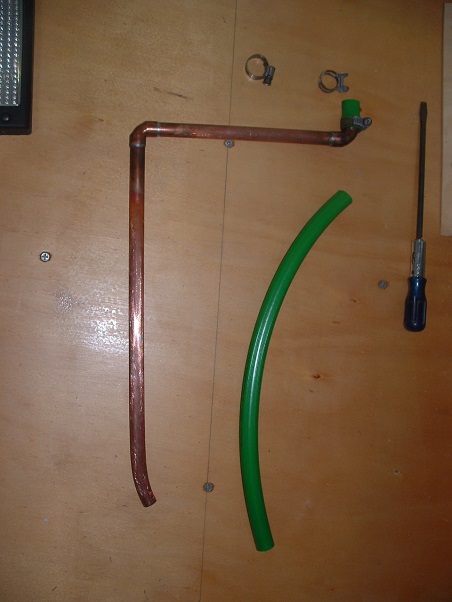 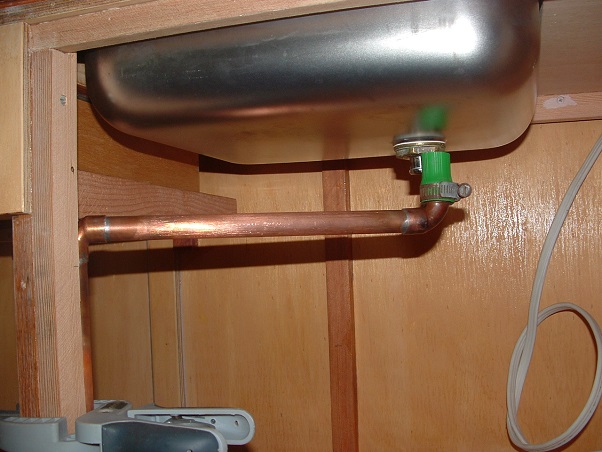 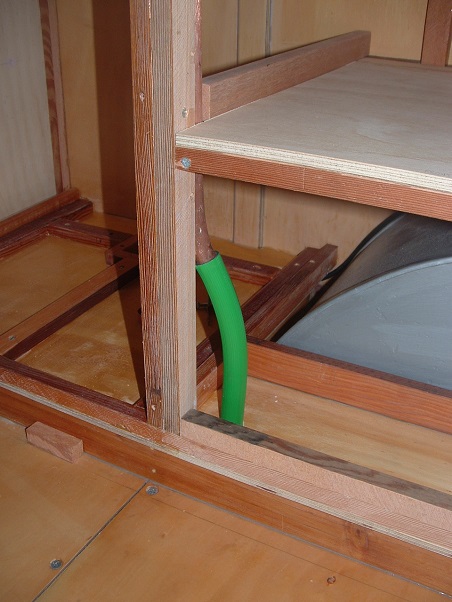 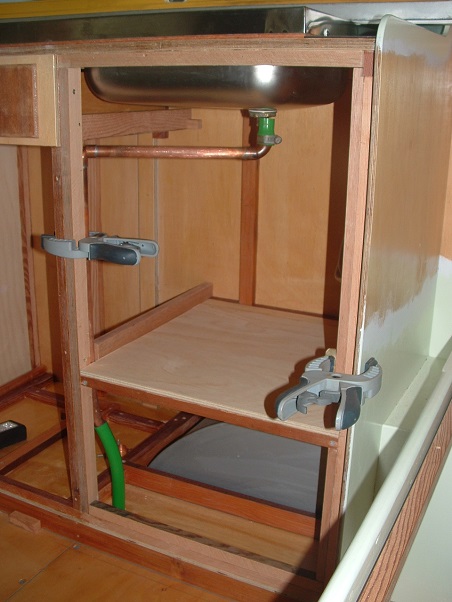 It feels like I've been working on this part of the project, like, forever!  I'm probably about half-way through this bit, but I thought I'd post an update while I wait for some glue to dry. cheers, Al. |
|
|
|
Post by Franklin1 on Mar 4, 2014 21:05:44 GMT 10
G'day hilldweller, Just thinking a bit more about the bowed ceiling battens not being able to be turned on their edge... Could it be a simple matter of turning them over so they are bowed upwards? You could get another fifty years out of them before they sagged again...maybe... ps. Enjoy your work commitments. I seem to remember they were something positive, but I've been retired seven years now and have forgotten what a work commitment actually is.   cheers, Al. |
|
|
|
Post by Franklin1 on Mar 4, 2014 10:04:04 GMT 10
Trust me, tania - there is information on that forum about your camper. Maybe not a lot, but certainly a few entries. Would I lie to you??...    See the top two threads here for information about how to post photos. But post them over on the other forum where they will get more interest. cheers, Al. |
|
|
|
Post by Franklin1 on Mar 3, 2014 15:26:43 GMT 10
That looks very nice in the daylight, thewhinge! And hasn't the van come up a treat after all the hard work! Well done to you and your pinstriping friend. Every time I look at your updates, I'm reminded of our Supalite vans over here. Not as sharp a radius on the corners as yours, but the triple windows front and rear give the same impression. I gather you are nowhere near where the flooding caught a great many people recently. Just a few puddles by the look of your photos. Lucky you, hey?! Congratulations on your efforts so far. Great work!  cheers, Al. |
|
|
|
Post by Franklin1 on Mar 3, 2014 14:43:49 GMT 10
G'day tania, and welcome to this forum!  What you've got is a Viscount Explorer camper trailer, which was made in 1976. Pop over to our sister forum for Classic Caravans built in the 1970s, and join up. Somebody was talking about Explorers just recently on that forum, so you might be lucky with getting some information. See you over there! (I'm the Moderator over there  ) cheers, Al. |
|
|
|
Post by Franklin1 on Mar 2, 2014 22:44:21 GMT 10
G'day clairavan, and welcome to the forum!  I think you'd be pretty close in your estimate of early 1960s for your van. The fella that had all the production records doesn't come on the forum anymore, which is a shame because he could most likely tell you the exact date it was built. Hopefully you can master the art of posting photos on the forum, and we'll get to see what you've inherited.  cheers, Al. |
|
|
|
Post by Franklin1 on Mar 2, 2014 20:21:34 GMT 10
I can still view the photos in your album, freeway. A couple of good photos of your trip there. People might like to see more of your van on the road in your honeymooners thread back in 2010. A very nice shot in that thread of the car/van with the mountains in the background in Tassie (right down near the bottom of the thread). cheers, Al. |
|
|
|
Post by Franklin1 on Mar 2, 2014 18:00:19 GMT 10
G'day tonyb1953, and welcome to the forum!  Millard closed down in the middle of 1979, but a deal was done with Viscount to continue building the Millard Series 80 vans. So, it depends on what van you actually have, as to how it is built. Your best bet is to join our sister forum for Classic Caravans built in the 1970s ( click here ). There are a number of Millard vans on that forum that have been worked on, and you'll be able to see how they were constructed. cheers, Al. |
|
|
|
Post by Franklin1 on Mar 2, 2014 8:37:01 GMT 10
G'day mcgoughs, When you read through the list of items/areas that are likely to contain asbestos ( Asbestos website ), you'll see that not only the old vinyl tiles will contain asbestos, but also the adhesive. So, you might remove the old tiles carefully, and then not think about the glue and just get stuck into removing that with a belt sander or disc sander, or something like that. Bad move!! The trick with asbestos is to not let it become particles floating around in the air. If you can remove the tiles without breaking them, then that's a good thing. If you can't, you have to use methods that stop the asbestos fibres from being released. Usually that means wetting/dampening down the surface of the item, or coating it with a diluted solution of PVA adhesive, or something along the same lines. Any method that prevents the fibres from being released into the air is what you're looking for. Have a read of these other threads on the forum... Asbestos adviceAsbestos in old caravan sealantscheers, Al. |
|
|
|
Post by Franklin1 on Feb 28, 2014 18:27:32 GMT 10
Yep, in different places around the van, but unfortunately you have to dismantle the van to see them. If you ever have to remove any of the cupboards/wardrobe/etc, look for the chassis number written in crayon on the inside of the plywood. The mass production methods used at the time meant that a lot of stuff was built in the carpentry section at the same time, and then taken out to the assembly line. The only way they knew which cupboards were for which van was to mark the chassis number on those parts. One day you'll come across it.  cheers, Al. |
|
|
|
Post by Franklin1 on Feb 27, 2014 20:21:13 GMT 10
Ahhh, beautiful work there, hilldweller. You'd think the whole frame had been replaced, the way it all looks. Nicely done.  My guess for the small holes is... egg cups?? Gotta get me one of those multitools. They must make some of those fiddly jobs pretty easy, hey?! cheers, Al. |
|
|
|
Post by Franklin1 on Feb 27, 2014 16:05:58 GMT 10
G'day cssherry,
Can you post the chassis number of the van, please? I'm thinking your van must be pretty close to the end of the 1960s, if not early 1970s. That log cabin profile on the cladding was used by Viscount from mid-1969 and later. By around 1969, the Valiants were being given chassis numbers starting with the letter 'C' followed by some numbers, so I presume your chassis number will be something like that. Look for it welded on the drawbar just near the jockey wheel somewhere.
cheers,
Al.
|
|
|
|
Post by Franklin1 on Feb 25, 2014 19:59:21 GMT 10
The van is coming along quite nicely, sgtl. It's certainly looking heaps better with all your hard yakka.  I was wondering how you fixed the framework that was rotten in the back bottom corners? You posted the 'before' photos, and then skipped straight to the finished cladding photo. I'm curious to know how you got it sorted. The other question I have is about the rubber moulding for the back window. I also have to go through this process in the future, so do you know what the radius of the old window corners were, where the rubber wouldn't bend around the curve? Looking at your photos, I think the glass in my van has curved corners that are fairly close to your old glass, and I'm wondering if I'll strike the same issue that you've discovered. Is that the Clark Rubber stuff you're using? ps. I hope hubby is busy polishing the Phoenix badge, now that he's mastered the art of polishing porthole windows.  cheers, Al. |
|
|
|
Post by Franklin1 on Feb 25, 2014 19:40:42 GMT 10
G'day paulvintage, and welcome to this forum!  Your best bet is to switch over to our sister forum for Classic Caravans built in the 1970s. We have a number of members with Travelhome vans on that forum, so I'm sure you'll find the help you need. cheers, Al. |
|
|
|
Post by Franklin1 on Feb 23, 2014 10:31:15 GMT 10
I've been working on the cutlery drawer for the kitchen cupboard. The following photo shows how the width of the cutlery drawer was the same as the ice chest door in the original kitchen cupboards... 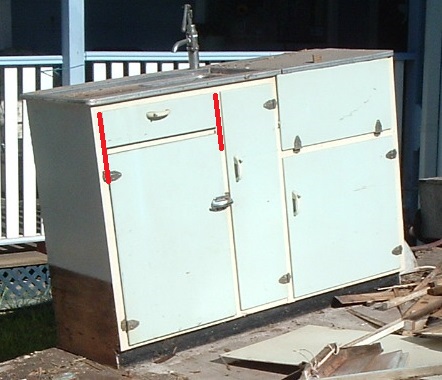 But when the drawer was pulled out, it looked like this... 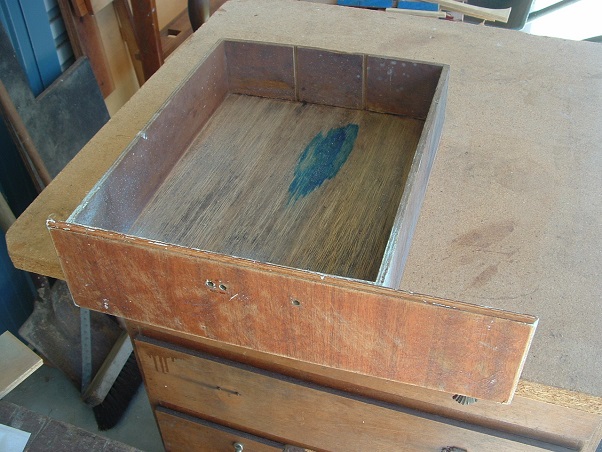 So, even in 1960, caravan builders were doing sneaky things in their vans (so I'm not the only one who's doing it  ). The reason the drawer was narrow was because of the sink bowl... 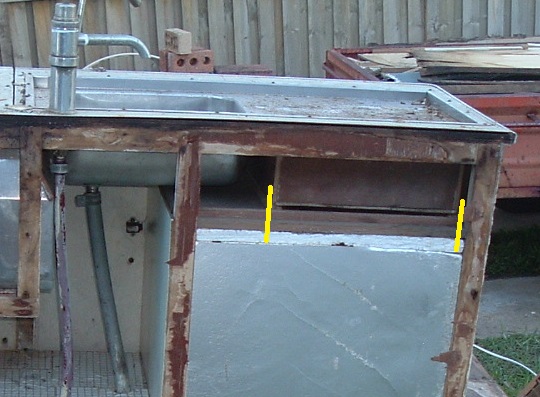 In the rebuild, I can use the full width of the drawer, and I was going to just add an extra bit on the side of the original drawer. But when I thought about it, I figured I might as well build a new drawer with different compartments, and whack the original faceplate back on it. The old drawer was demolished... 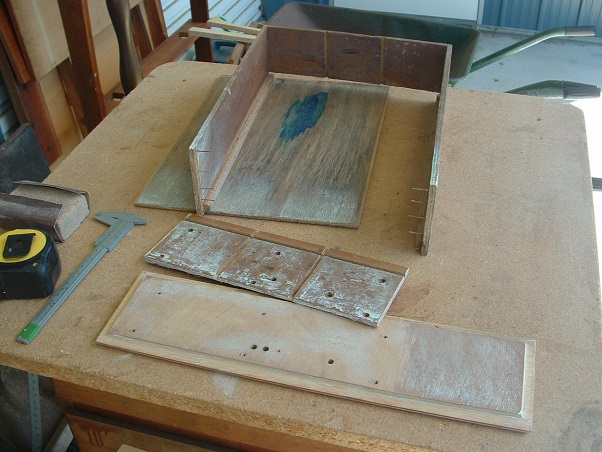 ...and a replacement one built... 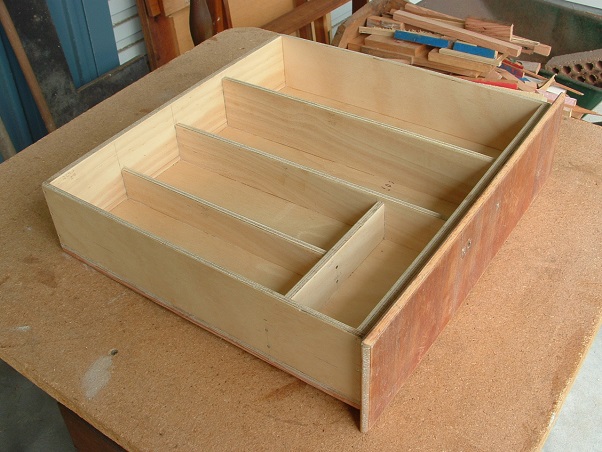 But I've stuffed up in my calculations, and the pushbutton rod in the handle is not long enough to go through the plywood properly. If anybody has a spare pushrod sitting around doing nothing, I'd be interested. It has to have a minimum of 47mm length in the rod... 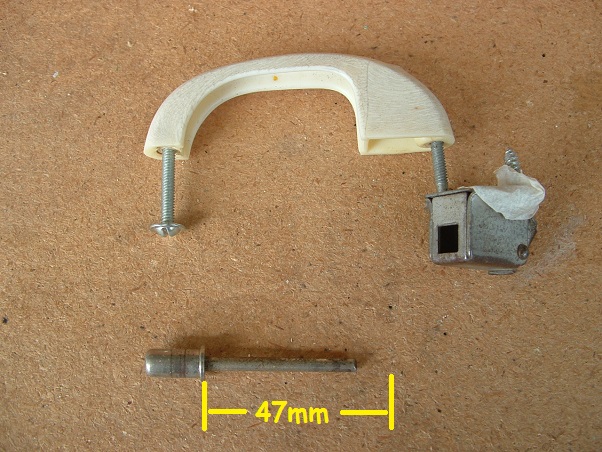 If I can't find a longer rod, I'll see if my brother can make something for me on his metal lathe. cheers, Al. |
|
|
|
Post by Franklin1 on Feb 23, 2014 9:48:16 GMT 10
By gees that HAS come up a treat, Andrew.   You'd have to wonder whether coating a whole bondwood van in that stuff would waterproof it for a "lifetime", ay? Great quality work, there!  cheers, Al. |
|
|
|
Post by Franklin1 on Feb 23, 2014 9:42:29 GMT 10
At least when it rains you have plenty of fresh water available from your roof.  It's dawned on me that you don't have a hatch on your van. I wonder if that's one of the reasons why the front and rear windows are set so high up? Are there vents somewhere up near the roof to let stale air out? |
|
|
|
Post by Franklin1 on Feb 22, 2014 17:03:15 GMT 10
Hilldweller, I'd personally be a little nervous about taking the roof off before the four corner steam-bent timbers are in position and glued-and-screwed. I'm only saying that because your photos show the perimeter roof frame is acting as an end-stop for the steam bent timbers at the top, and is helping to prevent them from straightening out as you clamp them in position. If you are not planning on removing that perimeter roof frame, you could go ahead an remove the roof covering, I guess.
What internal head height is there in the van? It seems to me that those roof battens should be sitting on their edge and not on the flat, considering the span they have to support from side to side of the van. If you have plenty of head room to spare, I'd be looking at turning those timbers 90 degrees. The issue you're facing is exactly the reason I ended up putting a partition wall in my project van in line with the hatch. That partition wall on one side, and the wardrobe on the other side, are virtually supporting the whole width of the roof at that point. I'm not saying I won't get roof sag elsewhere in the roof of my van over time, but I think it will be minimal if it happens. I notice there's a gap at the top of your cupboard, so you're not getting any roof support from that.
There's a lot to like about the South Australian double-cambered roof design. It's a great design for getting rid of water, and a great design for preventing roof sag. Maybe some roof bows running front to back might be worth thinking about in your van, if turning the existing timber 90 degrees is not an option.
cheers,
Al.
|
|
|
|
Post by Franklin1 on Feb 19, 2014 19:04:29 GMT 10
G'day hilldweller, Usually there is a tube that runs from inside the ice chest all the way through the floor in one go. For certain reasons, I had to do it differently, and this is the idea that came into my head. reddo, not many people have been inducted into your Shed Of Invention Hall of Fame, so I am really honoured. There are still a few more ideas I'm working on for this van, so hopefully I continue to satisfy your rigorous selection process.  humpyboy, I was chuffed with the way this worked out. Sometimes things go really well in our projects, so we've gotta celebrate the 'wins', hey?!!  cheers, Al. |
|
|
|
Post by Franklin1 on Feb 19, 2014 15:43:50 GMT 10
Many thanks for the wonderful feedback. Hopefully this thread will provide some useful information for other people in the future.  I finished another little project today, and one which I was never confident would turn out ok, but fortunately it did. I wanted to put a drain funnel into the floor of the kitchen cupboard, to allow the ice chest to drain to the ground. After thinking about various options and possibilities, I happened to come across a square galvanised fence post cap in Bunnings one day, and thought it could be the start of something good... 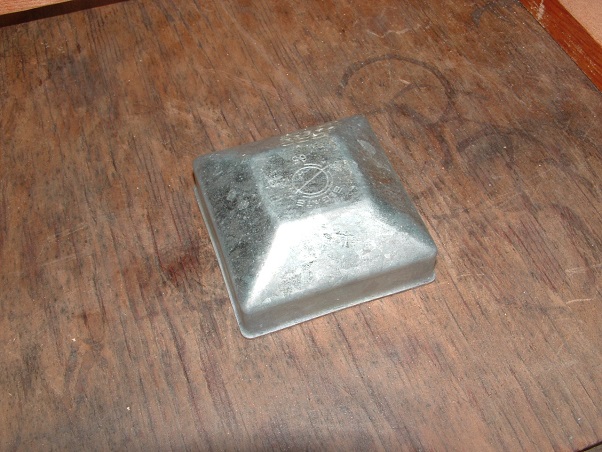 I drilled a hole into the centre of the cap, and flared that hole out a little bit using a larger bolt... 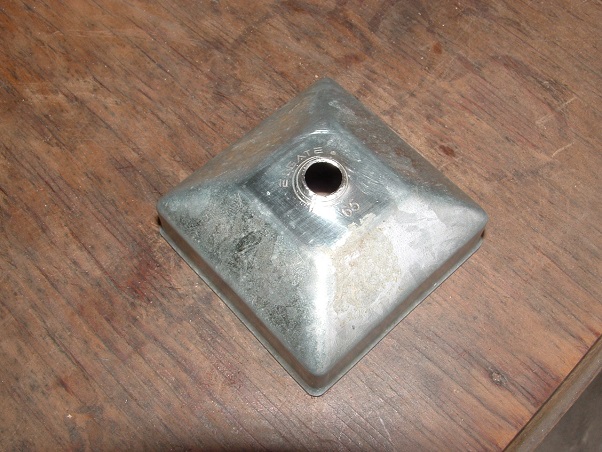 Then I found some copper pipe with a flared end on it, and soldered that flared end to the cap... 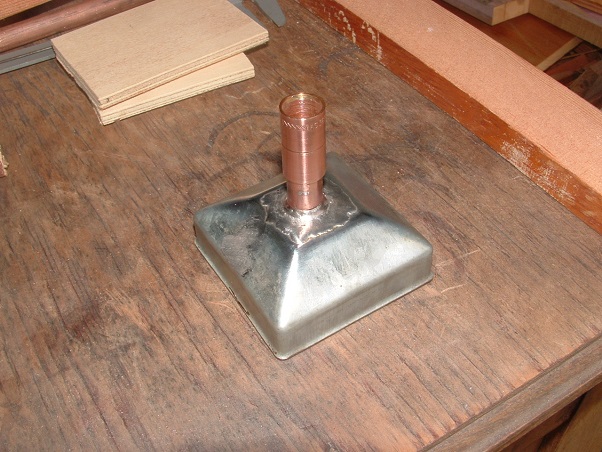 A little bit more copper pipe was soldered onto the fitting, and I finished up with this... 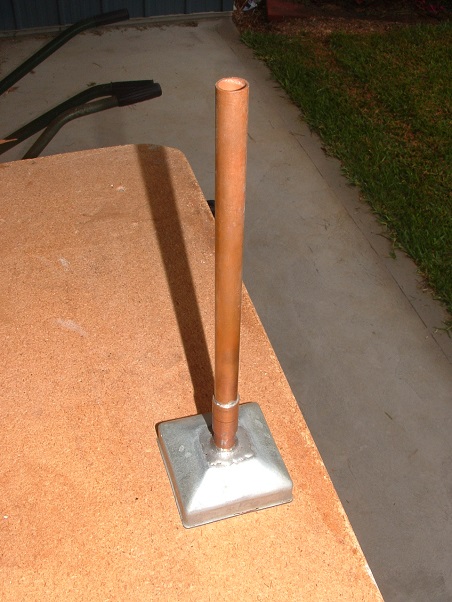 Inside the kitchen cupboard, I cut a square hole in the floor and another drain hole in the lower floor, and put some framework around the square hole... 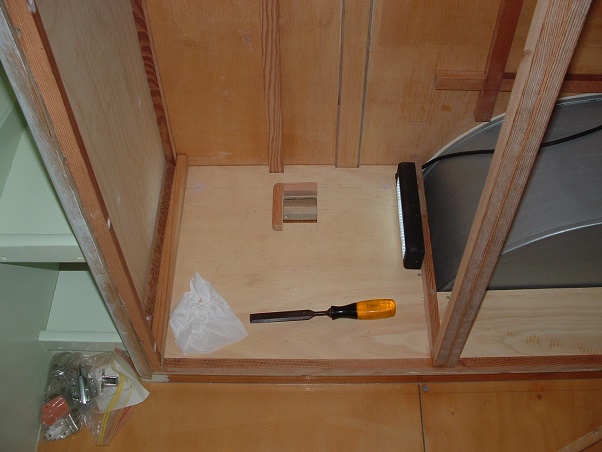 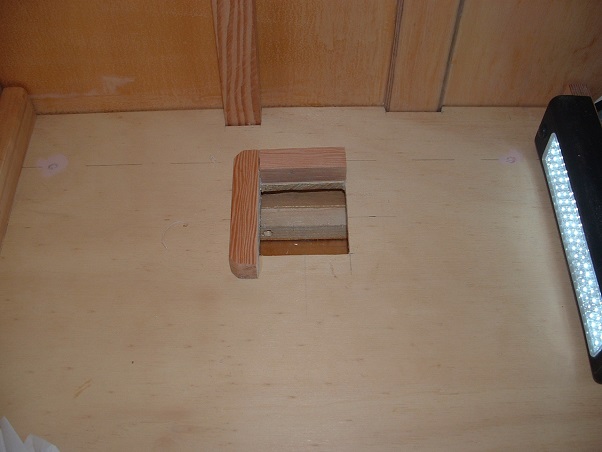 ...and then fitted the funnel... 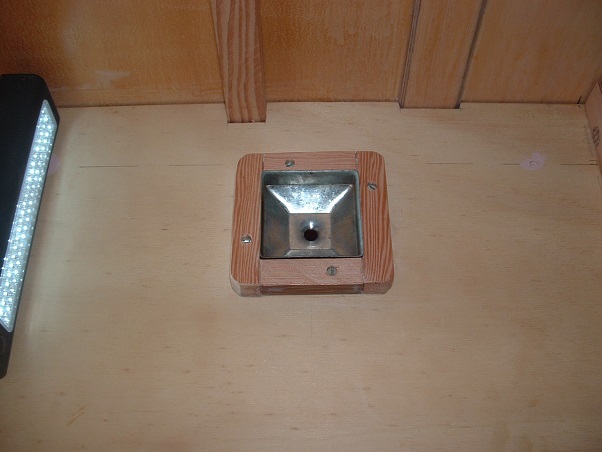 You'll have to trust me when I say that when the ice chest cabinet is slid into the kitchen cupboard, the ice chest drain pipe lines up directly above the funnel... 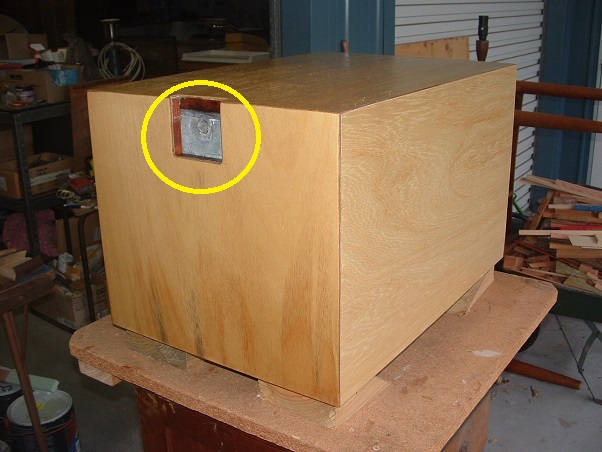 Well, it had better line up or I'll have one soggy caravan...   cheers, Al. |
|
|
|
Post by Franklin1 on Feb 19, 2014 13:56:52 GMT 10
G'day sgtl, That's pretty interesting. When I did a bit of a search on the internet, it seems the two products are related: Sylglas - Denso tapeFrom what I can see on the web, the Sylglas tape would be quite satisfactory for use under the J-mould. I know when I dismantled my 1956 Franklin van, every joint in the exterior plywood was covered with a strip of cotton webbing impregnated with some sort of sticky brown substance. I never did find out what it was, but maybe it was a Denso type of tape... 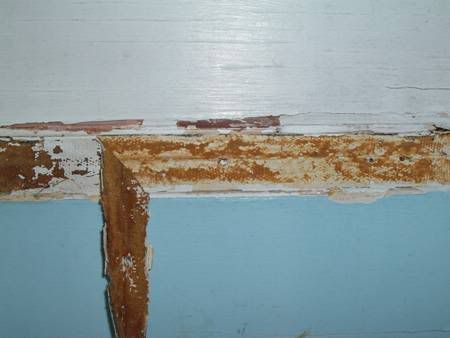 A timber cover strip was nailed over the top of the waterproof tape, and the joints were in very good condition when I pulled the tape off a few years ago, which was approx 50 years after it was applied. I would think that if Sylglas has been making tape since 1958, they must be doing something right.   cheers, Al. |
|
|
|
Post by Franklin1 on Feb 18, 2014 20:33:59 GMT 10
Gabby, if you're not familiar with using the search function on this forum, here's a quick lesson for your specific needs... Aim: Search for all the threads in the Members Photo Album section that have the word Sunliner in the heading. How to do this: Click on the word Search in the dark blue band at the top of the screen. Wait for the screen to reload. Fill in the blanks as follows...   For Step 3, the 7000 goes in the "days" field. You should get three pages of threads in the results, and if you read all those threads you will be the Sunliner expert!   cheers, Al. |
|
|
|
Post by Franklin1 on Feb 18, 2014 19:32:02 GMT 10
Hi Gabby, is this a duplicate post to your other request, or a new request? Wanted: side window for 1962 Sunliner CaravanGiven the current popularity of Sunliners (and it was only a few short years ago that Don caravans were all the rage  ), I think your chances of finding a genuine Sunliner window are probably none and buckleys. I can't see anybody wrecking a Sunliner for parts in the current market. Forum member cruisindoug was exploring the possibility of having windows custom made for his Sunliner. You can read all about his restoration here: Doug's 1962 Sunliner. If you look at the photo of claireandruth's Sunliner in the third post in this thread ( New members with a 1965 Sunliner ), you'll see the two rear windows are the wind-out style that were used in the caravan industry from 1973 onwards. Somebody has retrofitted some later windows into that Sunliner at the rear, so searching for that type of window may be an option for you to think about. Maybe you could even get one of those windows and remove the little plastic grey window link boxes (the little grey things on the outside of the window frame, near the top), and turn the window back into a push-out style. cheers, Al. |
|