|
|
Post by Franklin1 on Apr 16, 2014 18:22:13 GMT 10
It's a topic that keeps coming round and round on the forum every couple of years or so, Dirk. The opinions depend on people's own individual interpretation. I'm in the same boat with my Newcastly project, and I've steadfastly avoided referring to it as a "vintage van" after all the work I've done on it, mainly because it has been changed considerably from what it was originally. There will be people at the purist end of the spectrum who will only accept a certain criteria. There will be people at the "I-don't-give-a-stuff" end of the spectrum that really don't give a stuff. And there will be people everywhere in between who will have varying opinions. So, what's the truth? The way I look at it personally is that if the majority of the public who will look at my van say that it is an 'old van', then I've achieved my aim. I can truthfully say my van was originally built in 1960, and conveniently leave out the fact I've changed a lot of stuff in it. Most members of the public don't know about the term "vintage" in relation to ages of caravans, so they aren't going to be critical of whether it is or it isn't actually a true vintage van. I guess it depends on who you are trying to "impress" with the final result of all your hard work. People who look at my progress in my shed say it looks fantastic. They don't know any better about authenticity. I'm more than happy to have those people on my side. That'll do me fine...  cheers, Al. |
|
|
|
Post by Franklin1 on Apr 16, 2014 13:24:54 GMT 10
G'day Bernie, and welcome to the forum!  Your best starting point is to look at the Coronet history information in our Down History Lane section.Once you've digested that info, you can do a search of the forum to see what else is around. If you're not familiar with how the search function works on this forum, have a look at the pictures I posted in this thread showing how to do it. Just substitute the word 'coronet' for the word 'sunliner'. To post photos, have a read of the first few threads in this section of the forum: Forum Guidelines & Helpful Forum HintsIf your van is genuinely a Coronet, you may find the chassis number welded on the inside of the channel of the drawbar arm on the doorside. Get a torch and lie on your back and slide in under the drawbar, about where the arm disappears under the front of the van. Look for a number welded inside the channel there. Let us know if you find anything. cheers, Al. |
|
|
|
Post by Franklin1 on Apr 16, 2014 13:11:59 GMT 10
Funnily enough, the only mention I could find about Siesta caravans on the forum was in a post back in 2010 about your collection: The Tubby Gray CollectionI've never heard of that name outside of your post. cheers, Al. |
|
|
|
Post by Franklin1 on Apr 16, 2014 13:00:22 GMT 10
Anybody looking for fire safety equipment for their van, Aldi stores have stuff on sale this coming Saturday 19th April... 1kg extinguisher - $14.99 - 5 year warranty Fire blanket - $7.99 - 1m x 1m size Photoelectric smoke alarm - $9.99 - 10 year warranty - includes hush button which is mandatory in vans in NSW Prices are pretty good compared with what I see in other stores. See the Aldi catalogue and scroll down the page to the Home Security heading/items. cheers, Al. |
|
|
|
Post by Franklin1 on Apr 16, 2014 12:32:48 GMT 10
Ok, I went for a walk up the road to look at the Valiant, but it was a bit of a waste of time. They've given the whole van a coat of white paint, and I can only now see the outline of the sticker. However, the outline shows the sticker to be the same as the one on mike's van, so there must have been a couple of versions used - which I'll call the 'before' and 'after' the Alumvan strip versions. In the 'before' version, the bottom strip is shorter than the Alumvan 'after' version. The van up the road has the chassis number B2233, and the Google streetview photo from a couple of years ago looks like this... 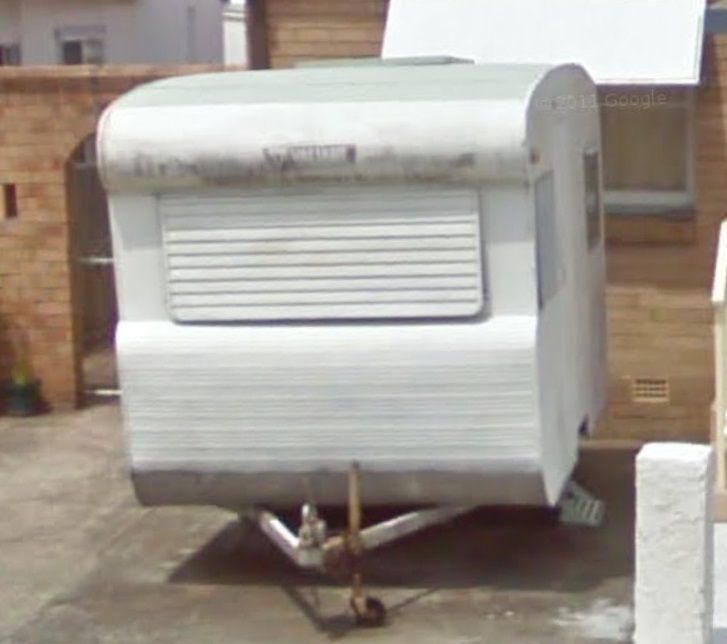 About four years ago, bobandjacqui posted some photos about a little Valiant with the chassis number of B2307, which has the 1966 side stripe pattern on it... 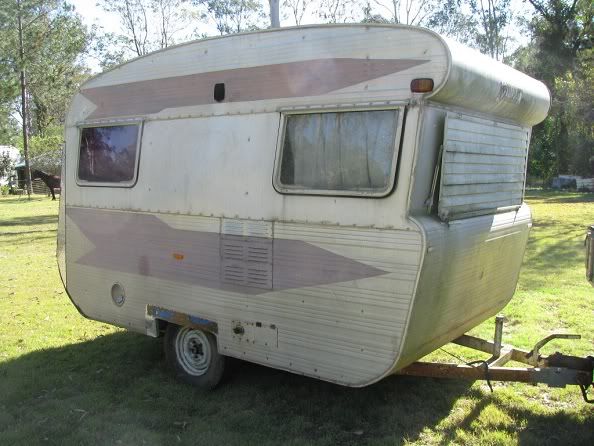 A close-up photo of the logo on that van shows it to be identical to mike's van, and to the B2233 van up the road from me... 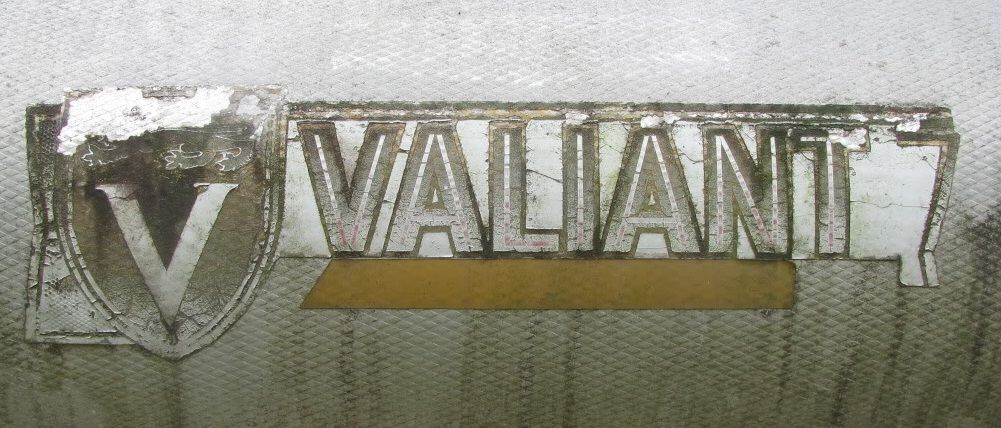 That throws up some doubt about my theory that the Alumvan tag was put on the all-aluminium Valiants, because by 1966 they should have been all aluminium. So, now I'm not sure about any of it...   cheers, Al. |
|
|
|
Post by Franklin1 on Apr 16, 2014 9:57:01 GMT 10
There wasn't any difference between the B-series and C-series Valiants per se, DonR. One of the quirky things about the Valiant brand in the 1960s is that the chassis numbering didn't follow a logical sequence. They didn't exhaust all the B-series numbers before starting with the C-series. I have no idea why that was so (it also occurs in the Viscount and Ambassador models as well). And just thinking about the logo on mike's van a bit more...you may well be right in what you said earlier. My understanding is that the 'Alumvan' tag was used from 1964/65 when the Valiants and Ambassadors started getting aluminium frames, to become completely aluminium. The Viscount model got the tag 'Duralvan', probably for a bit of class distinction. Having looked back at the start of this thread, I see that mike's van has a timber frame, so it most likely doesn't deserve to get the Alumvan tag on the bottom of the logo. I'll see if I can find any other Valiants from the early B-series numbers, to try and see what that strip on the bottom actually shows. (Actually, there's a Valiant about two streets away from me with an early B-series number. Will take a walk up there and have a look to see if the logo tells me anything.  ) cheers, Al. |
|
|
|
Post by Franklin1 on Apr 15, 2014 22:33:43 GMT 10
G'day cobber, Great to see your Newcastle van getting out to see lots of other places besides, err, just Newcastle...  Also interesting to see Luke O'shea bring his own cheap non-vintage imitation plastic fly strips from Bunnings, to hang in the doorway. Maybe the "genuine originals" weren't available back then. You should tell him to re-record the video and bring only genuine stuff with him next time.  I reckon Nicole Kidman is a shoo-in for a photo shoot at the Nats in Broken Hill in this van. Ya better make sure she doesn't shop at Bunnings though...could be curtains for your reputation.   cheers, Al. |
|
|
|
Post by Franklin1 on Apr 15, 2014 22:07:08 GMT 10
Sorry DonR, but the logo does actually carry the "ALUMVAN" strip along the bottom. We have a member on the Classic forum who turned up with a Valiant that has chassis number C221, which I've estimated to be a 1965 model. You can see the logo in this attachment photo: Valiant logoYou can read more about this van here: Valiant C221Why is this van on the Classic forum? Well, we get people joining up over there who decide to stay after they've found out their van is a vintage van. We serve better coffee over there...   cheers, Al. |
|
|
|
Post by Franklin1 on Apr 14, 2014 9:31:25 GMT 10
Thanks for kicking off this thread, DonR.  I was supposed to start this one about four years ago, but I never quite got around to it.  chippydave chippydave's Fairland shown in the first post is very similar to the Franklin Safari models that were built around the mid-1960s, but the intriguing thing is that there is no signature Franklin shelf above the sink. On the other hand, the Sapphire-type Fairland only has a rear half that looks similar to a Franklin Safari and yet it carries the signature Franklin shelf. All a bit mysterious, eh what?! General Overview of Fairland history...
I get the impression from the archives that Fairland was another one of those brands that started life as a trailer manufacturer, before progressing to caravans. The first mention of the name pops up in 1966, and then fizzles out around 1970, so it appears to be a short-lived brand name. Even within that short lifetime, they appear to have been making caravans for only a couple of years, before succumbing to the big players (Viscount, Millard, et al), and reinventing themselves as a Franklin dealership.
1966: In July 1966, this advert shows the trailer heritage...
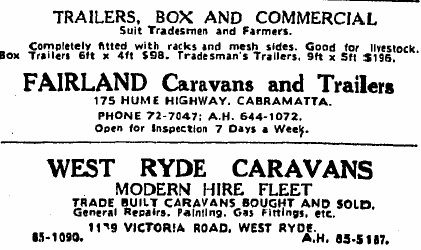
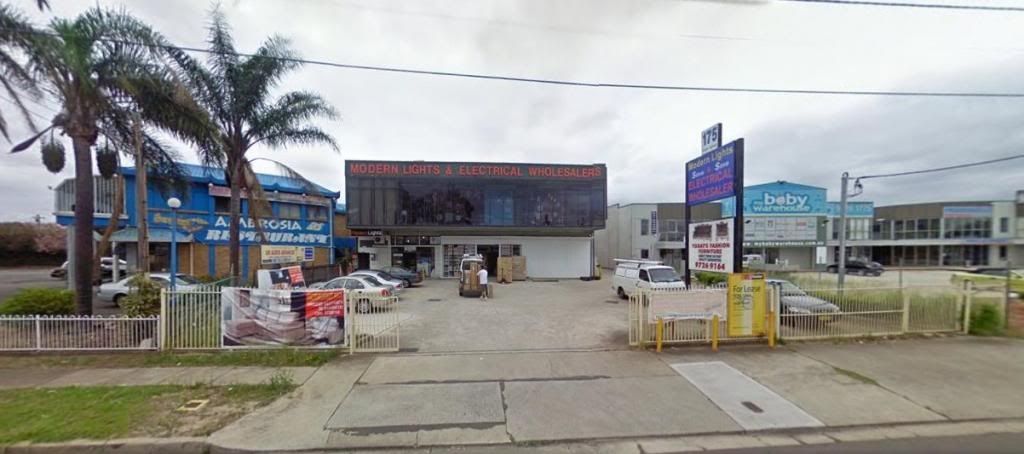
Google street view now shows the address of 175 Hume Highway, Cabramatta, to be a light industrial area, and somewhat updated from what it was back then...
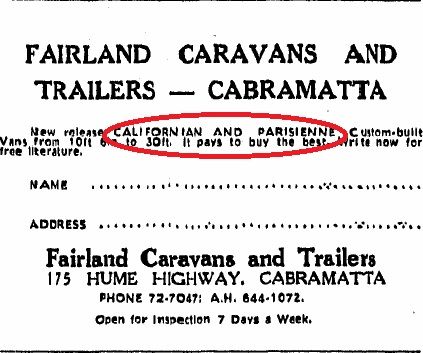
We can see in this advert from July 1966 the mention of the Californian and Parisienne models, ranging from 10ft 6 to 30ft...
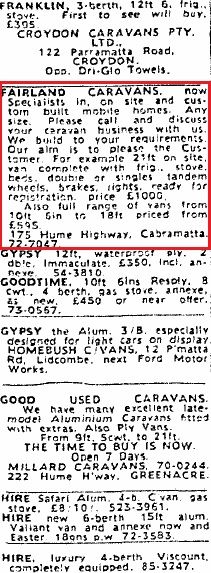
1967: In March 1967, Fairland were claiming to now be "Specialists in on site and custom built mobile homes. Any size.", but were also continuing to sell the smaller sized vans...
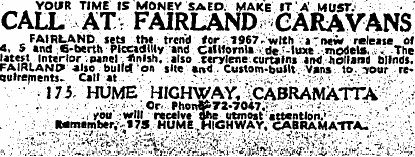
In April 1967, Fairland were advertising a new range of Piccadilly and California de-luxe models...
In July 1967, we see an advert for a second-hand 13ft Fairland van...
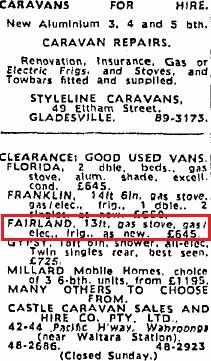
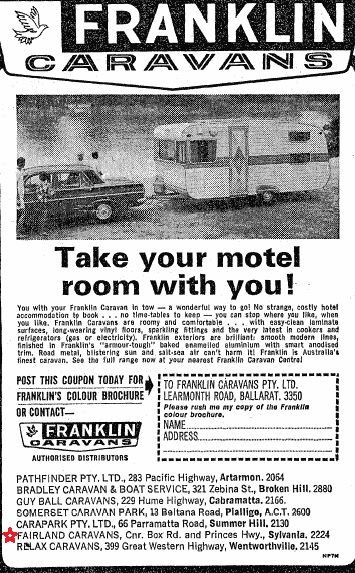
1968: In March 1968, we see that Fairland has become an authorised distributor of Franklin Caravans, and a new address of Cnr. Box Rd. and Princes Highway, Sylvania, is showing...
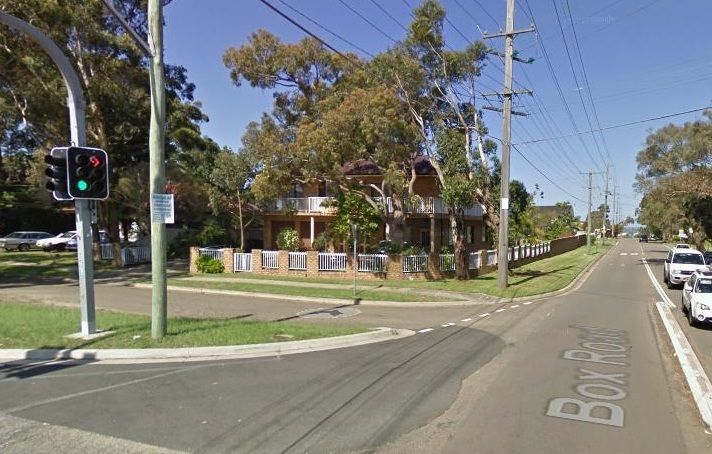
Google Streetview shows that address to now be a block of units...
In February 1968, there is a second-hand Fairland for sale...
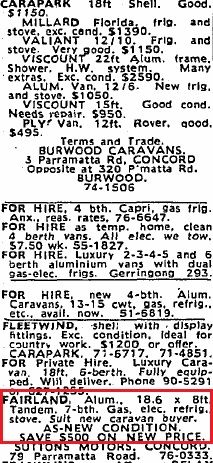
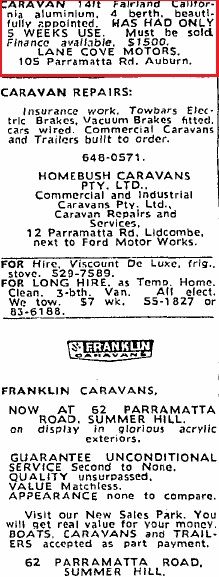
...in May 1968, a second-hand Fairland California aluminium van is for sale...
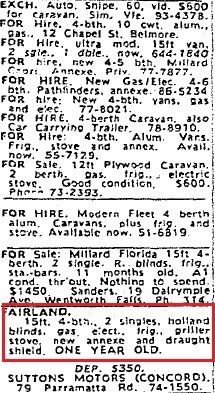
...and in August 1968, a second-hand Fairland 15-footer...
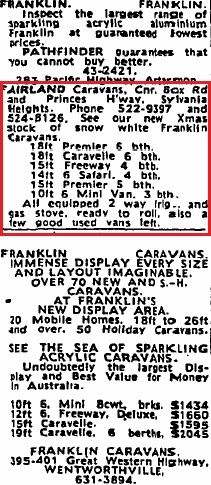
In December 1968, Fairland are focussing on the Franklin range of caravans, with the white acrylic cladding that Franklin started using in 1967...
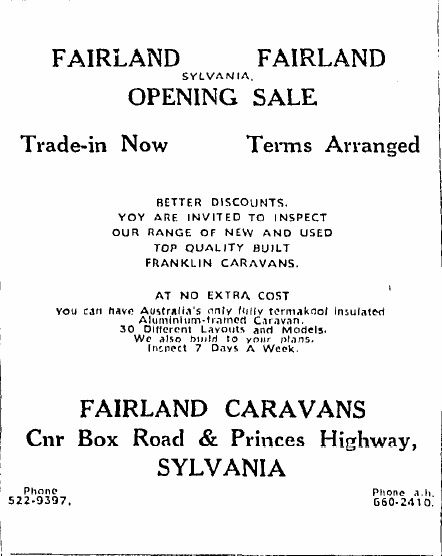
1969: It's rather weird that 15 months or so after moving to the new address in Sylvania, Fairland decide it's time they had an "opening sale". No point in rushing things, is there?!... 
The only other mention of Fairland in 1969 is this advert for a second-hand 21-footer alum van in March...
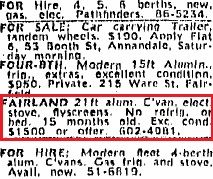
1970: Well, the bubble has burst, and Fairland seem to have disappeared off the face of the earth. The last mention of them is this advert for a second-hand 19ft tandem van...
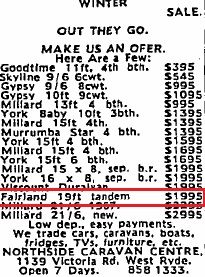
Like a good firecracker, there was a 'boom'...then a shower of sparks and colour...and then darkness...
---------------------------------------------------------------------
DonR, I keep plugging the need for people to capture chassis numbers whenever they can, because I believe they are really helpful in putting together patterns in history. It would have been good to get the chassis number off chippydave's van when he had it, and off the Sapphire-type vans as well. There's something about those Sapphire/Fairland vans that makes me wonder whether Franklin were experimenting with some "outlandish" designs in the mid-1960s, but didn't want to put the Franklin name to them. Maybe there was a hot-shot thinker in the Franklin factory that was looking for an edge in the market - something along the lines of the Franklin fibreglass vans from the mid-1960s, as well as the Sapphire shape alum vans. But when Franklin built their spanking new factory at Wendourie in 1967, all that innovative thinking would have been shoved back in the box, and only mass-produced sausages-sausages-sausages came out of the despatch doors. 
cheers,
Al.
|
|
|
|
Post by Franklin1 on Apr 10, 2014 13:46:40 GMT 10
I'll send you a message and give you an email address that you can send any or all of the photos to, that you'd like posted into this thread. Next time you log in, look for the word 'Messages' in the toolbar at the top of the screen... 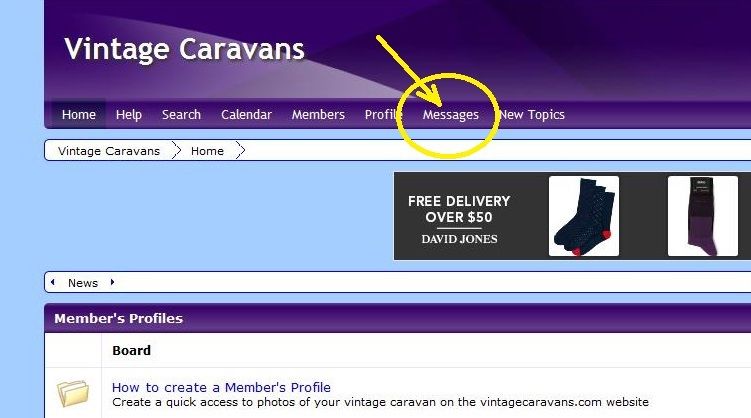 Click on that word, and you'll get another screen come up with the message heading. Click on that heading and the message will show up. I'll have a look through my collection of Millard photos and see if I've got an early version of the Florida sticker/logo, although I can't remember seeing one like you've decribed. Is there one showing in the brochure you've got?? cheers, Al. |
|
|
|
Post by Franklin1 on Apr 7, 2014 16:03:36 GMT 10
Give up, johno...that bloody Chesney of yours just DOESN'T want to show its face on this forum!   Did you know your other posts about this van have been shifted to a new thread in the General Section?: 15 ft Chesney Tandem QuestionsI'd go buy a Franklin if I were you. They don't give half as much trouble as Chesneys when you're trying to post photos...    cheers, Al. |
|
|
|
Post by Franklin1 on Apr 7, 2014 15:56:19 GMT 10
G'day harlequin, and welcome to the forum!  Thanks for posting your information, even if you can't post an attachment (that function has been switched off, as you'll see if you read the very top thread in this section: Forum Guidelines & Helpful Forum Hints . See the couple of threads below that one for other methods for posting photos.) At least we now have confirmation of your chassis number and the year of purchase, which will help us to get a better handle on the other chassis numbers we've come across. It's great you found us and contributed that. cheers, Al. |
|
|
|
Post by Franklin1 on Apr 5, 2014 19:04:58 GMT 10
For you, cobber, anything...  I've selectively edited the copy to make it read a bit more sensible as a stand-alone post, rather than the version above. cheers, Al. |
|
|
|
Post by Franklin1 on Apr 4, 2014 15:47:26 GMT 10
Fynspray pump tap refurbishment:The first issue to be addressed with this pump was that one of the original brass bolts in the handle had disappeared, and a crappy steel bolt had been used as a replacement... 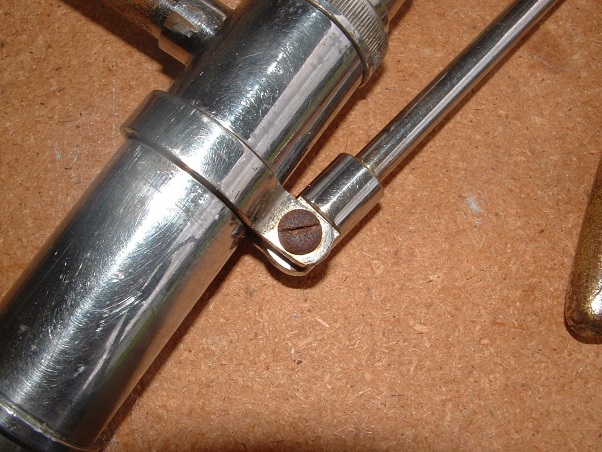 My brother found a brass bolt in his junk pile, and added a short length of brass tubing, plus a bit more brass got silver soldered onto the head of the bolt, and a reasonable likeness of the original bolt was achieved... 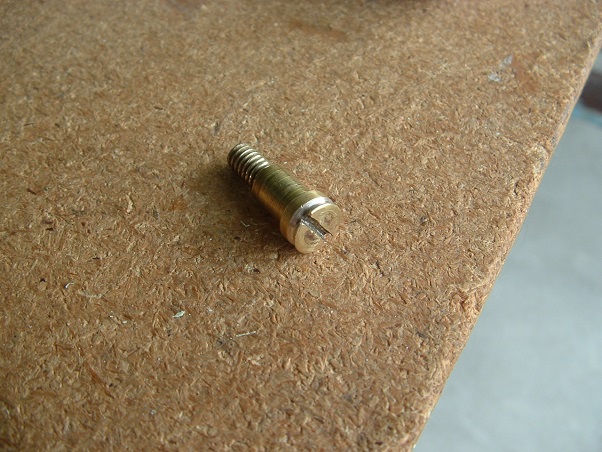 This picture shows the new bolt fitted, with one of those chrome-plated caps on the other side... 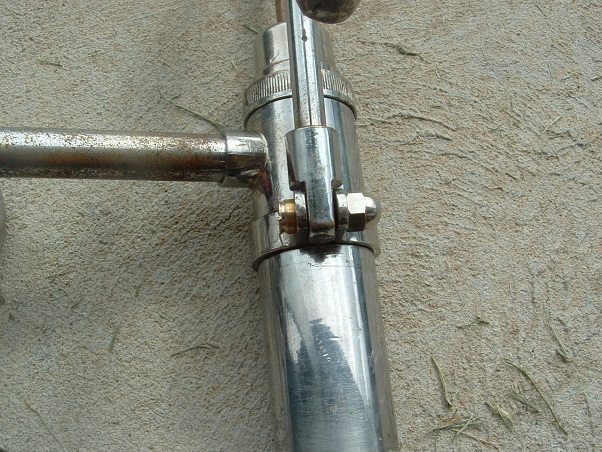 The second issue was the plunger washer, which was pretty-well cactus... 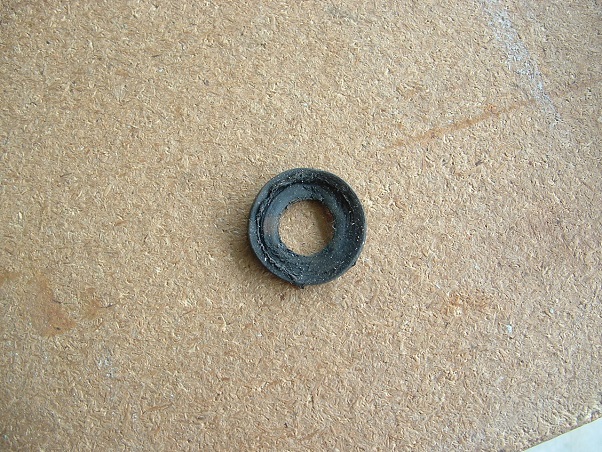 My brother machined up a new washer out of a product known as "Delrin"... 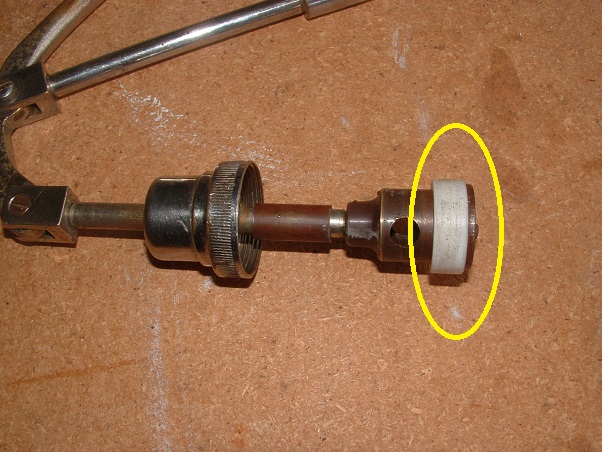 You can read all about Delrin here, but your eyes will glaze over very quickly.  It's probably best to just accept that it's a high-tech plastic. The bore of the pump housing was also "honed out" and made nice and smooth... 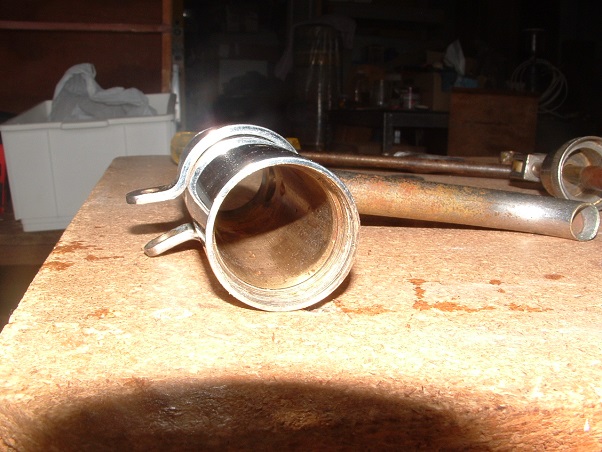 The tap was reassembled, and tested sitting in a sink full of water, and everything worked beautifully. I packed it all up and took it home and installed the tank and tap into the van. Pumped the handle, and pumped the handle...and pumped the handle some more... Nothing... Zip - nix - zilch... Not even a drop showing...   I took it all back out of the van and set it up outside the workshop for testing. The pump had to be lowered to within 18 inches of the ground before it would suck up enough water to work properly. Any higher than that and it was a definite no-go... 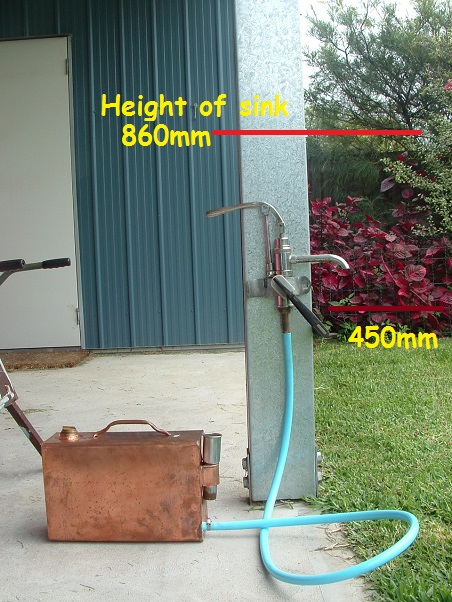 I got in touch with my brother and discussed the problem further. He recommended I bring it back to him for a "warranty claim" (which was good because I was just inside the 5-day warranty he gives on any work he does  ). When we looked into the pump design a bit further, we realised there needed to be a pretty good seal in both the top and bottom valves when they are in the 'closed' position. It meant polishing the valve and valve seat where they make contact, to remove the build-up of tarnish... 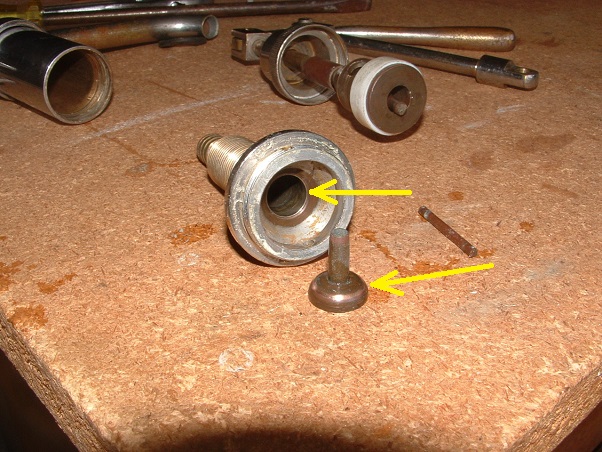 A smear of Loktite thread sealant was placed on the pump housing thread at both the bottom and top, to further help with creating a vacuum for the water sucking process... 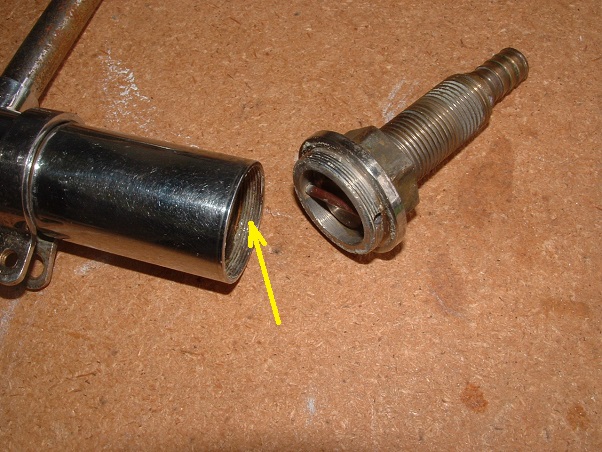 A preliminary test in his workshop showed the pump to work a lot better at higher heights, and a confirmation test outside my own workshop showed it will work well up to a height of 1150mm above ground... 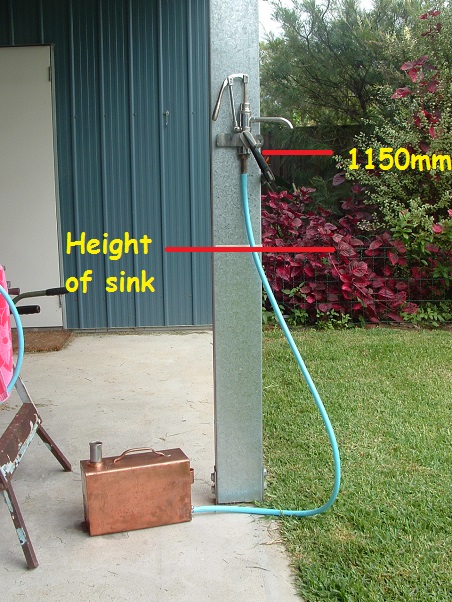 It's a bit hard to hold a camera steady and pump the tap at the same time, but here's proof of it working at 1150mm above ground... 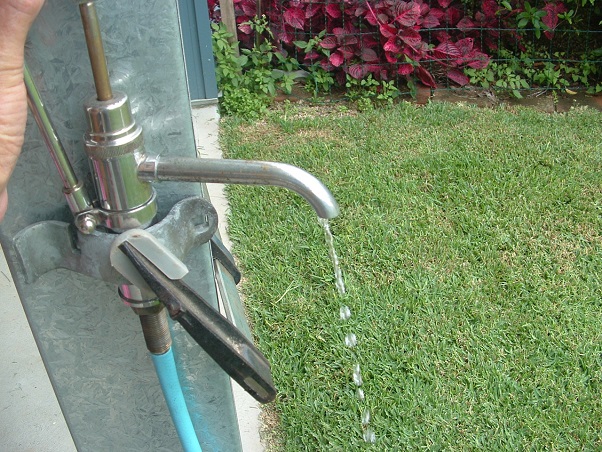 It takes 12 pump cycles (one cycle is pumping the handle up and back down again) to get the water up to the 1150mm height. The moral of this story is that if your pump is not working all that crash hot, just putting a new washer kit in the pump may not solve all your problems. You may have to explore polishing the top and bottom valve stoppers to improve the seal in them (doesn't matter whether you've got a ball stopper arrangement, or a tap valve stopper arrangement like mine. The principle is the same.) Hope this helps, cheers, Al.
|
|
|
|
Post by Franklin1 on Apr 4, 2014 14:36:37 GMT 10
Well, I don't wanna dob anybody in   but you could probably have a read of this post. |
|
|
|
Post by Franklin1 on Apr 3, 2014 22:11:43 GMT 10
And then there's the lazy way of resizing your photos in Photobucket... Step 1: Log into your Photobucket account "home page" and click on the [Upload] button at the top of the screen... 
Step 2: Wait for the page to reload and then click on the gear wheel on the right hand side... 
Step 3: A pop up box will appear on the screen. Change the dot to the 800 x 600 pixel setting, and click the [Save] button...  All photos uploaded from this point on will be resized to 800 x 600 if they are LARGER than that size when you upload them. If they are already LESS than 800 x 600 pixels, they will stay the same lower size. All photos already in your albums that are LARGER than 800 x 600 pixels will stay the larger size. Photo sizes will only change from the moment when you [Save] this change. The three photos I've posted above are 800 pixels wide by 450 pixels high, so an 800 x 600 photo will be the same width as mine but a bit higher. If you think 800 x 600 is too large, put the dot in the 640 x 480 pixel option. That's approximately the size I use when posting in my Newcastle thread. Depends which size you prefer. Make sense?? cheers, Al. |
|
|
|
Post by Franklin1 on Apr 3, 2014 15:43:05 GMT 10
G'day johno, I can't see any photos in your last two posts, so if you are talking about the Chesney showing in your avatar, it's the Series I Regal that was produced from about 1965 up to mid-1971. In January 1970, they released a 15ft model with an ensuite.
What info are you actually looking for?
cheers,
Al.
|
|
|
|
Post by Franklin1 on Apr 2, 2014 22:03:36 GMT 10
G'day Chris, just Google "canvas repair patch". You'll see lots of options, including invisible mending.
cheers,
Al.
|
|
|
|
Post by Franklin1 on Apr 1, 2014 16:02:56 GMT 10
Copper water tank:
Apologies for this long-winded post, but I thought it was worthwhile... Last year my younger brother donated a copper water tank to use in this project. I thought I'd taken some photos of it when I brought it home, but I'm blowed if I can find them on my computer. It is a small tank from one of those instant hot water heaters that are fitted above a sink, usually seen in workers' amenities cabins or suchlike. It has a capacity of 7.5 litres, which is enough water to visit the Simpson Desert in summer for all of 48 seconds before getting the heck out of there for a refill.  Now that the kitchen in the van has essentially been completed, the water tank needed to be modified to suit the van requirements. The tank looked like a smaller version of this one in akeepsake's van, and was the same tarnished colour...  There were three flanges crimped to outlets on the tank, one for the heater element and two for the inlet/outlet water pipes. These flanges were removed... 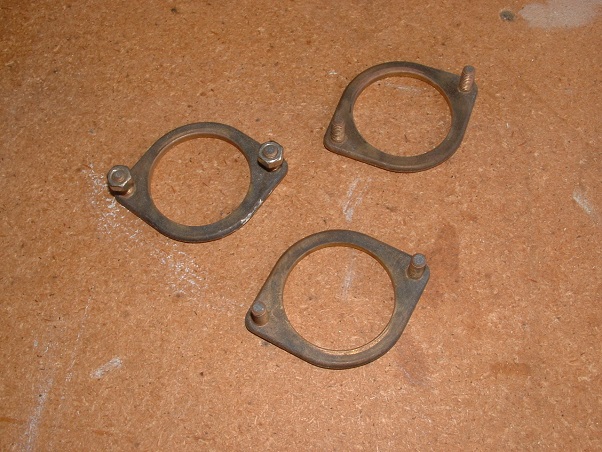 It was then up to my brother to weave some magic on the tank itself, and full credit to him for what's been achieved. One of the outlets was blanked off with a piece of copper sheet and some silver solder... 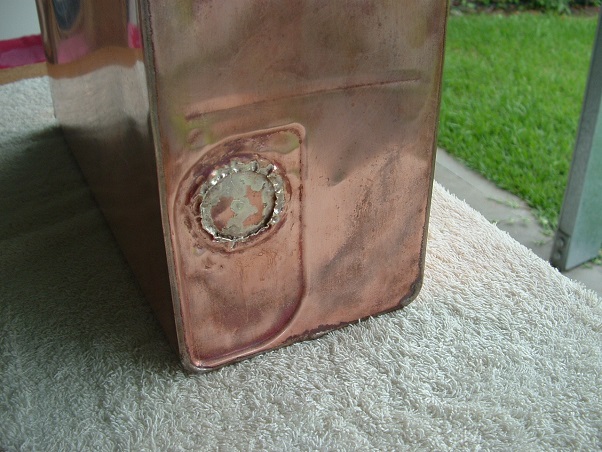 The second outlet had a brass hose tap fitting soldered into position... 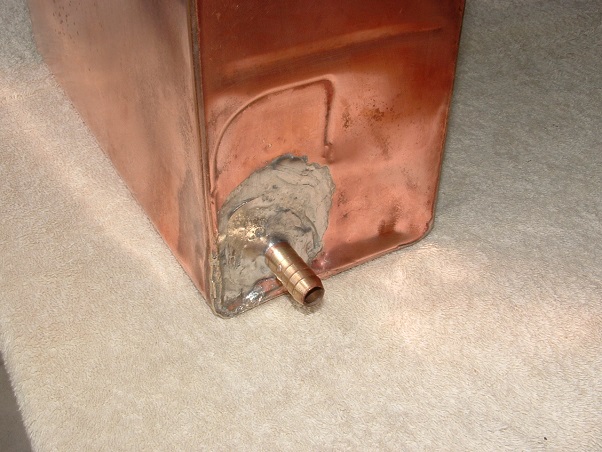 ...and the third outlet became the filler cap. He found some old tap fittings in amongst his junk and cut them up and machined a screw-in thread and a cap. A handle for the tank was fashioned out of some copper pipe, and soldered into position... 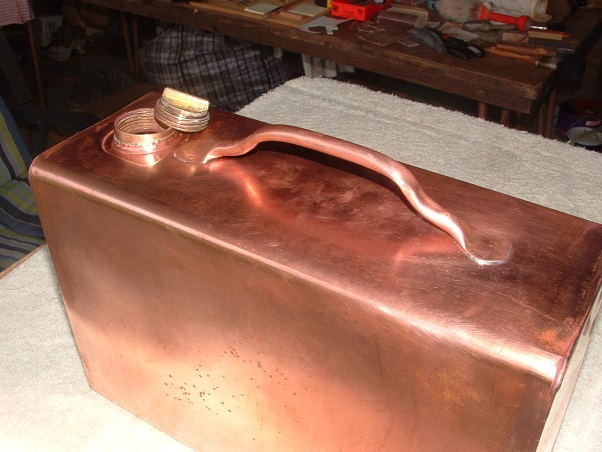  I happened to notice a nickel/chrome-plated brass nozzle in amongst his junk, and claimed that for the water tank...  It fits neatly into the inlet for use as a filler pipe... 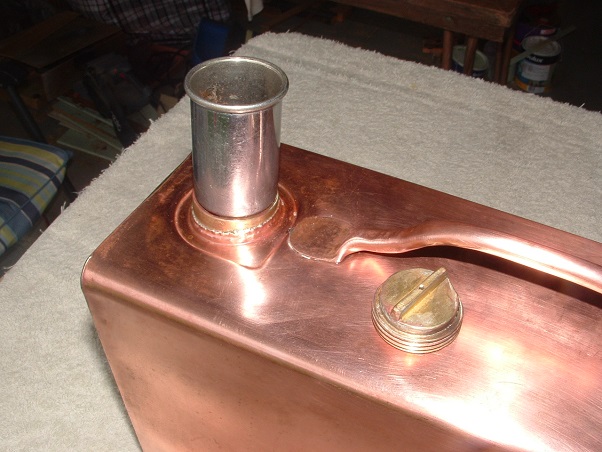 I got him to make up a copper holding bracket and solder it to the end of the tank. The filler nozzle is now stored in that bracket... 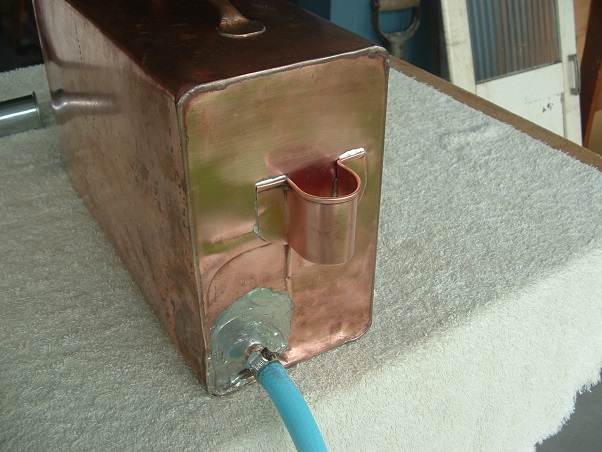 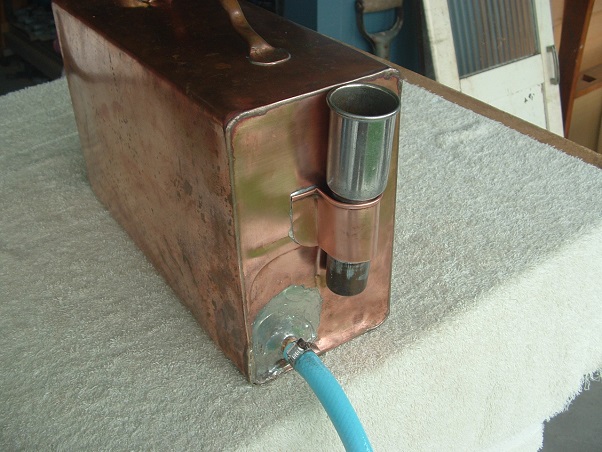 The completed tank fits into the section of the kitchen cupboards down next to the mudguard...  Needless to say, I'm very happy with how the whole job turned out, even though a tank as small as this one is really just a token effort at water storage. It allows the pump tap to be operated to show that it works, rather than being a tank that will provide sufficient water for us to survive.   The next instalment of this story tomorrow will show how the pump tap was refurbished... cheers, Al.
|
|
|
|
Post by Franklin1 on Mar 29, 2014 21:20:49 GMT 10
Thankyou all for your great comments.  It's been a hard slog getting to this point with the kitchen (seems like it had gone on forever), so it's nice to sit back and cast an approving eye over the result. Glad you all like what's been done. sgtl, I have to confess I'm a chemical stripper (I wanted to be a burlesque stripper, but they said the ladies in the retirement village mightn't be able to cope - or maybe they meant that I mightn't be able to cope  ). My doors had a coating of varnish on the ply surface, and then the varnish was painted over with enamel. The paint stripper took the paint off fairly easily, but the varnish was a bit more stubborn and took another coating or two of stripper to get rid of it completely. The paint came off in layers, but the varnish ended up being turned to sludge... 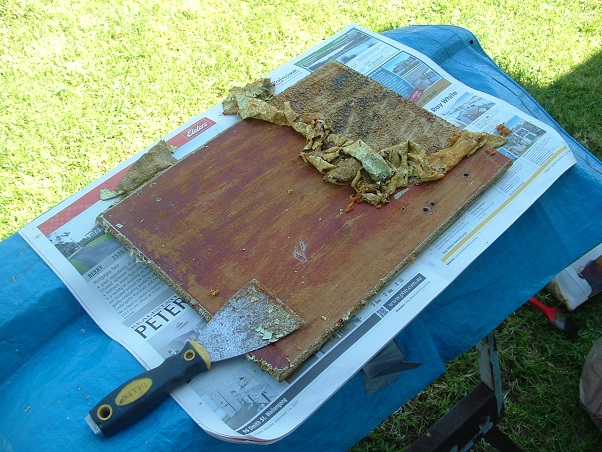 I honestly don't know whether a heat gun would work on varnish?? Never tried it myself. cheers, Al. |
|
|
|
Post by Franklin1 on Mar 29, 2014 10:09:48 GMT 10
G'day Don, Sorry to hear things are not well with Jane. Hopefully she'll be back to best in the near future. I took a couple of photos of your Viscount van at the Cowra Nationals. They can be seen in this other Viscount thread here . The thread about your second van is here , but unfortunately the photos have disappeared along with a former member's posts.  cheers, Al. |
|
|
|
Post by Franklin1 on Mar 29, 2014 9:38:04 GMT 10
I think I'm getting somewhere with this kitchen   This is the "before"... 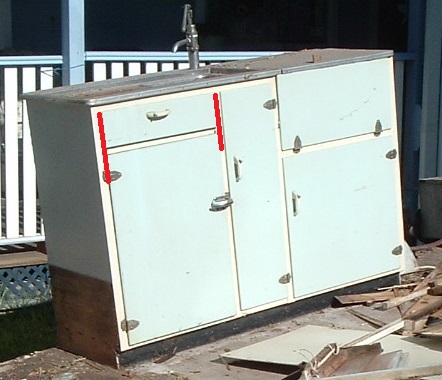 ...and this is the "after"... 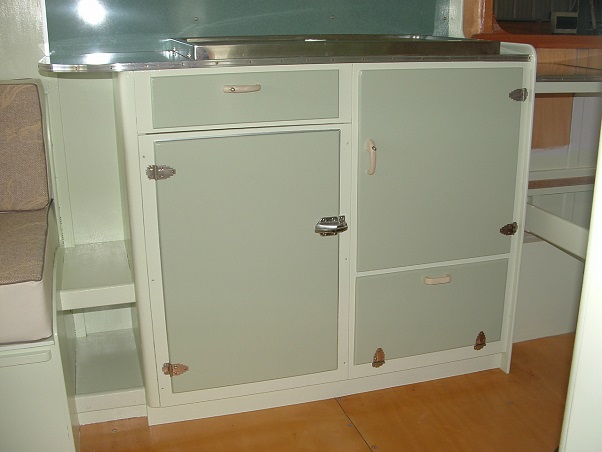 Along the way I had to do a few things to make it all happen... The galvanised sheeting in the ice chest was originally roughly tack-nailed around the front of the chest...  The edge looked pretty unsightly in the new cabinet, so I cut and fitted some aluminium angle to make it look neater... 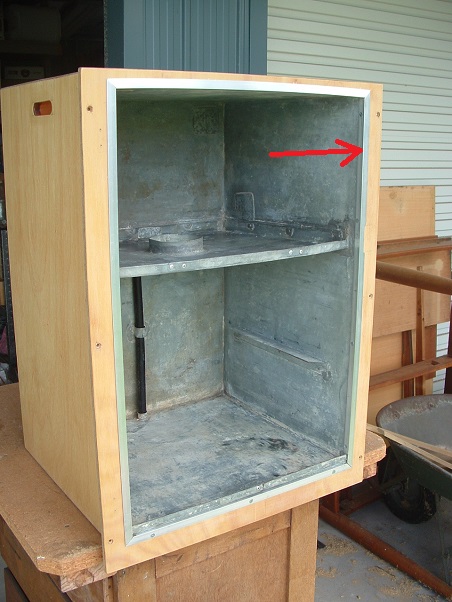 New paint was put on the insulation frame inside the door, as well as new 3mm closed-cell foam for the door seal... 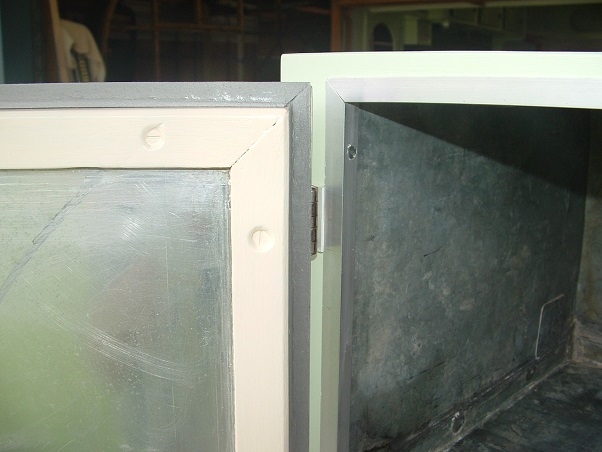 Elsewhere, I had to cut one of the larger cupboard doors down a bit narrower, and router the cut edge to match the rest of the door... 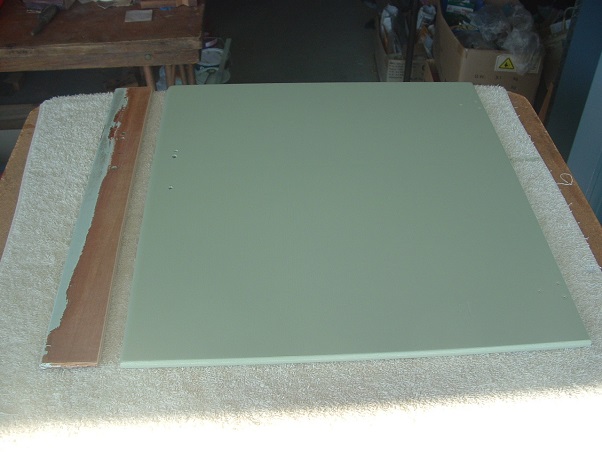 ...and I had to make a small door from scratch for the bottom opening. I ran out of push-button handles for this door, so I've used a similar colour handle and one of those roller catches. Maybe one day I'll find a replacement push-button handle...  A small detachable extension bench was made for the end of the kitchen. This gives us back the bench space that was lost in the kitchen redesign due to the shorter length and the larger sink... 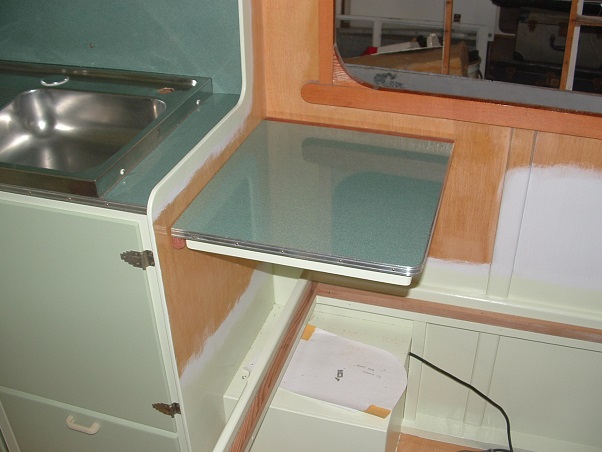 The bench fits onto a small length of marconi track screwed to a frame on the wall...  ...and a couple of marconi clips were screwed into a trench routered into the timber frame of the bench... 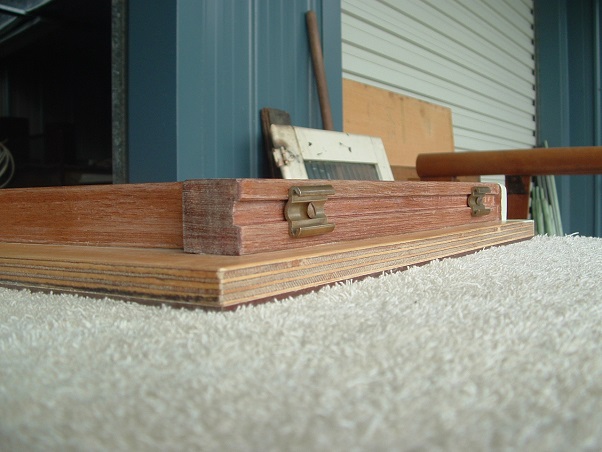 ...along with an elbow catch on the adjacent side... 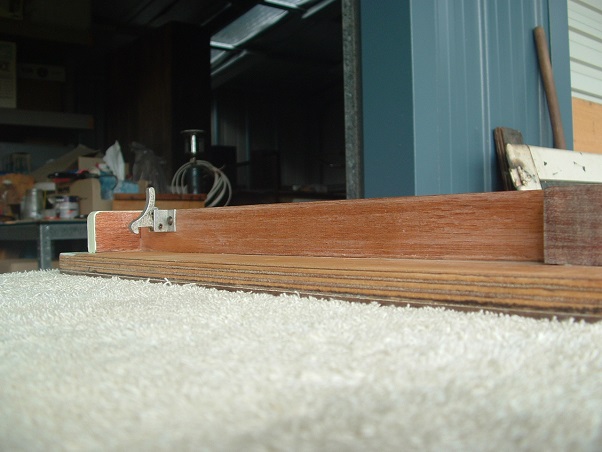 Because the bench extension is only supported on two sides, it can't stay in position while travelling, so a bloke I've known all my life made me a canvas carry bag to store the bench in...  ...and the bench gets stored in the wardrobe... 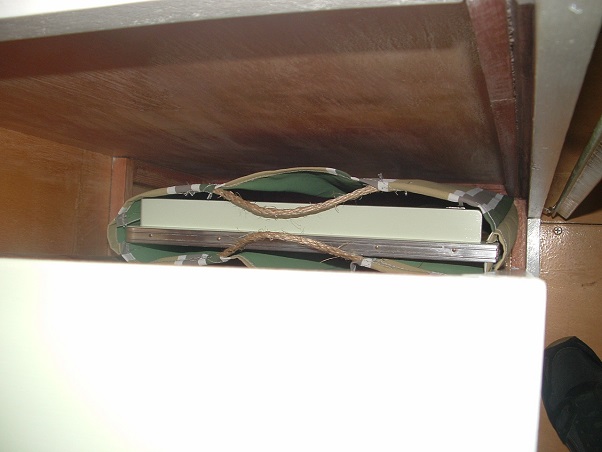 I was hoping to have the tap and water tank fitted by now, but we've got some issues with getting the tap to work properly, so that's being attended to. cheers, Al. |
|
|
|
Post by Franklin1 on Mar 27, 2014 21:02:37 GMT 10
Nice mirror, sgtl!  I hope you insure it separately to the van - darn thing would be worth a fortune, hey!! And I gather you were the winning bidder for those three vintage lights on ebay the other day (the mirror never lies...  ). No problem with using the old power point again, eh? Lucky you - "keep it original", so the ol' fella says.  Looking good!  (sometimes I wish I could draw larger sunglasses on that stupid "cool" face - Who designed that dumb version?!) (sometimes I wish I could draw larger sunglasses on that stupid "cool" face - Who designed that dumb version?!)cheers, Al. |
|
|
|
Post by Franklin1 on Mar 23, 2014 19:37:06 GMT 10
It's ok, DonR - no vintage vans were harmed in the making of the pink cafe, or the bookmobile. The pink cafe is a mid-70s Franklin Hunter, and the bookmobile looks like a mini Franklin Regent from the early '70s, but hughdeani will correct me on that one if I'm mistaken.  (there are more pictures here ) You only need to get the chassis number from genuine vintage caravans.  cheers, Al. |
|
|
|
Post by Franklin1 on Mar 23, 2014 14:22:55 GMT 10
This is a very impressive result, thewhinge! I think you've done a marvellous job with this project, including the wheel spats. The spats will certainly be a head-turner in your neck of the woods!  cheers, Al. |
|