|
|
Post by Franklin1 on Sept 13, 2019 14:13:03 GMT 10
G'day grandad, Yes, interesting question! One of the downsides with researching Franklin history is that Franklin didn't seem to spend much on advertising in the media until around 1968. The Franklin brand made its way into the NSW market in 1964, but it seems it was left to the dealers to do all the advertising. The term "Mini" was widely used in NSW Franklin advertisements from 1966. For example, the following 1968 advert from a dealer in western Sydney shows the Mini tag... It is not until 1968 that we start to see some corporate Franklin advertising, which would show a photo of one of the models at the top, and sometimes would include the name of the model, for example this Caravelle (print is a bit blurry above the rear window, but says "Illustrated 6 berth 18' Caravelle")... On two occasions in 1968, Franklin ran advertisements showing what appeared to be the range of Franklin models available at the time. Unfortunately, there are no names printed beside each of the models... I'm presuming that since the depiction of the "Mini" (No.2) is separate from the "Caravelle" (No.3), then Franklin considered the Mini to be a separate model, rather than a mini Caravelle.
Your other question about stickers is also interesting. I have heaps of photos of Franklins from the 1960s, and I've never seen a Caravelle sticker or a Mini sticker. The introduction of stickers showing the model name seems to have started with the change of ownership of the Franklin business during mid-1970.
cheers, Al.
|
|
|
|
Post by Franklin1 on Sept 12, 2019 17:36:12 GMT 10
G'day stooy,
The triangular timber is really just a means of fixing the skin to that section of the front. The majority of load-bearing is done by the seatboxes inside the front section, providing the boxes are interlinked with the flooring, plus both the front skin and side skins. When you say you had a fair bit of movement previously in the front area, it would seem to me that there wasn't enough interlocking of bits and pieces ABOVE the steel cross-beam, rather than just the triangular timber rotting out.
Cheers,
Al.
|
|
|
|
Post by Franklin1 on Sept 9, 2019 22:43:22 GMT 10
G'day sgtl,
That is a super professional job on the flooring!😎
I have found time and time again that the cardboard template method is well worth the effort required to put all the pieces of cardboard together to get an accurate template for tracing around.
Long after the job is done, you will be pleasantly pleased with how good the end result looks!😁
Nicely done!!
Cheers,
Al.
|
|
|
|
Post by Franklin1 on Aug 28, 2019 22:13:54 GMT 10
G'day Ray,
Congratulations on such a great achievement!  I have a lot of admiration for people who can dream up an idea, and then follow through to complete a high-quality result. It will certainly be a talking point wherever you go... (which leads me to ask: "Quo vadis with Cino Vardo??"  )
I doff my cap to you, Sir! 
cheers, Al.
|
|
|
|
Post by Franklin1 on Aug 28, 2019 21:58:39 GMT 10
G'day All, Ten years down the track, and the Joker III Hallmark van is listed for sale on Gumtree today... Asking price $12,000 negotiable. Listing details: "this is a 1999 hallmark single axle pop top van 17,6 long.has 12 mnth rego,has had wheel bearings greased and brakes checked and adjusted.led lights throughout.has near new roll out awning,full annex and floor.also full length privacy screen and a end screen.also has some extras,tv aerial,extra poles 240v lead,waste waters hoses etc.van has been stored under cover all its life also.van is located drouin in victoria,any questions please call steve ******7700.price neg." If you'd like to own a bit of Arthur and Pat Pullin history, coupled with the quality of a Hallmark caravan, this could be your chance. cheers, Al. (no connection whatsoever with the sale).
|
|
|
|
Post by Franklin1 on Aug 26, 2019 21:28:37 GMT 10
G'day mustang,
I fitted four of the quadrant stays to my hatch, in a similar fashion to how firefighter did in his van (as per the link wodnas gave you above). I carefully measured where to position the bottom brackets so the sliders would stay clear of the flyscreen when the hatch is closed. When the van is actually set up on site, I tend to only have one end of the hatch open (away from the wind direction). The set-up has worked well for me over 4 years of travel. After installation, I added an 'improvement' to the locking bolts, by punching some leather washers out of 2mm scrap leather. A washer was placed either side of the slider and the locking bolt passed through the eye of the washers. They act as friction washers when the bolt is tightened onto the slider. They clamp the slider securely in any position, and protect the chrome plate on the slider from scratching against the bracket/bolt.
I like the idea of the quadrant stays because you can open the hatch just slightly (in heavy rain or wind) or open it fully in calm sunny weather, or anywhere in between. The drop leaf brackets seem to be an either/or proposition - either full open, or shut
cheers, Al.
|
|
|
|
Post by Franklin1 on Aug 26, 2019 20:54:29 GMT 10
G'day Cobber,
Congratulations on a truly remarkable discovery! And congratulations to former Senior Detective (now Chief Inspector) Don Ricardo for his super-sleuthing skills in "joining the dots".
Such a shame to find out the lady connected with the van was still around up until a couple of years ago. Imagine how many pipes you could have shared with her over the previous 10 years, as you collected all her memories of the history of the van.
This discovery would have to be one of the best Fathers Day presents you've been given??
cheers, Al.
|
|
|
|
Post by Franklin1 on Aug 18, 2019 21:54:20 GMT 10
G'day nickyoo, and welcome to the forum!😁
Coronet closed down in 1978, so your van will be 1978 or earlier. Yes, pop over to our sister forum for caravans built from 1970 to 1980, and you'll get some helpful info there.
Cheers.
Al.
|
|
|
|
Post by Franklin1 on Aug 16, 2019 23:49:15 GMT 10
G'day sgtl,
I really can't give any accurate dates with the Globe vans. Your van looks very similar to one of the Globe vans pictured at a display in page 1 of the Globe DHL thread. Don Ricardo gives his usual professional 'forensic analysis' of that photo and concludes it would have been taken around 1958/59.
Your chassis number of 713 would have to be one of the earliest recorded on the forum, which would certainly put the van in the 1950s somewhere, I would think.
Obviously you haven't found any pencil marks around the van that would indicate a date. It would have been really helpful if the original builders had left their mark on all these old vans, hey?!
cheers, Al.
|
|
|
|
Post by Franklin1 on Aug 9, 2019 22:16:45 GMT 10
G'day sgtl,
This is certainly a super job being done on this van!
Full credit to all the experts involved in bringing the van back to 'showroom condition'. Very impressive!
cheers, Al.
|
|
|
|
Post by Franklin1 on Aug 9, 2019 21:59:28 GMT 10
I have found the Google Maps app on my mobile phone to be a very good alternative to the traditional Tomtom/Garmin/Navman units. As long as I've got phone coverage, and data allowance, the Google Maps system has guided me successfully through a number of travelling trips lately.
The latest upgrade includes fixed speed camera notifications, as well as vehicle speed indication on the screen.
The next upgrade release for Australia will enable street view with an overlay map to guide you when exploring on foot.
cheers, Al.
|
|
|
|
Post by Franklin1 on Aug 2, 2019 11:40:58 GMT 10
G'day dizzi, and welcome to the forum.😁
Forum member 'twocutekelpies' keeps a database of collected Viscount chassis numbers, and according to her information the chassis number range of approx 92000 to 96200 is from 1980. Shelley may be able to confirm this when she reads your post, and provide other details you require.
Cheers,
Al.
|
|
|
|
Post by Franklin1 on Jul 16, 2019 7:29:38 GMT 10
Hi DonR, what a fantastic milestone to reach! Congratulations and a BIG Happy Birthday wish to the Don!!🎂🥂
And... congratulations to you and your family for the "Aged Care" services provided to the Don over the years.😎
Cheers,
Al.
|
|
|
|
Post by Franklin1 on Jul 3, 2019 21:40:54 GMT 10
G'day sgtl,
Yes, I think the secret to success with the calico is not having the hatch frame getting in the way of stretching/laying the fabric tightly over the whole roof. Wish I'd known that before putting the new canvas on my roof.
Is that No.1 son in the photos, looking like he's back in the caravan restoration game?? Bet he wishes he still had that old Franklin he started many years ago. 
cheers, Al.
|
|
|
|
Post by Franklin1 on Jun 27, 2019 21:46:20 GMT 10
It's a York van from the mid to late 1970s by the looks. Check beside the jockey wheel clamp for the chassis number starting with Y followed by numbers. Post that chassis number and forum member 'twocutekelpies' will tell you the year of manufacture.
Cheers,
Al.
|
|
|
|
Post by Franklin1 on Jun 21, 2019 21:30:25 GMT 10
G'day mustang, another super job out of your shed!
Do my eyes deceive me? Are the rear clearance lights, above the windows, facing the wrong way?? I'm thinking the standard requirement is that red faces rear, and yellow faces front.
cheers, Al.
|
|
|
|
Post by Franklin1 on Jun 20, 2019 22:09:06 GMT 10
G'day dano,
You may have misinterpreted the info I gave you about the scrap of newspaper. What that date suggests is that the paper was stuck to the linoleum flooring some time after Nov 1951. That does not mean the van was built in the 1950s. I agree with the other opinions about it being from the 1930s or thereabouts.
The 5 32 stamp on the Austral plywood could mean it was 5/32 inches thick (or 4mm, near enough).
cheers,
Al.
|
|
|
|
Post by Franklin1 on Jun 19, 2019 20:39:41 GMT 10
G'day dano, and welcome to the forum!
One of your photos shows a scrap of newspaper stuck to the linoleum flooring. On the left side of that scrap of newspaper is a story about a racehorse named "Iron Duke" who had recently missed the start in the "Fisher Plate" horse race at Flemington racecourse. That race was held on Saturday 10 November 1951, so the article would have been printed perhaps a week or two after that. This would mean that the original linoleum flooring was laid a number of years prior to 1951.
There is a saying on this forum that goes: "It's your van and you can do what you like with it." However, we don't often see vans from the era that your van appears to be from, and many of us would strongly encourage that such a van is preserved as it was built. I would hope that you keep the original chassis, so that sometime in the future it could be mated back with the van, to restore the van back to its original appearance.
So endeth my sermon.
cheers, Al.
|
|
|
|
Post by Franklin1 on Jun 17, 2019 22:15:55 GMT 10
G'day fozy,
Which section of the van do you need a template for??
For the curved front/rear faces of the van you can use cardboard such as that found in breakfast cereal boxes. You can also use painters tape. You can use a pencil tied to a piece of string to make curved lines (that's how I did the V-shape paintwork on the front of my van).
Depends on what you are actually trying to do.
cheers, Al.
|
|
|
|
Post by Franklin1 on Jun 17, 2019 22:06:42 GMT 10
G'day jp63, Congratulations on some very impressive work there!
It sure has come up quite nicely, with very professional results. Well done!!
I fitted those dogbone tail lights to a light board across the back of my van, just over two years ago, and they still look as good as new...no fading of the colours in the lens, and no blown diodes yet.
Keep up the good work!
cheers, Al.
|
|
|
|
Post by Franklin1 on Jun 17, 2019 21:33:45 GMT 10
G'day All, Are you interested in becoming a more knowledgeable driver when towing your caravan? A new "Truck Friendly" program has commenced in Qld, with the hope it rolls out nationwide.
cheers, Al.
|
|
|
|
Post by Franklin1 on Jun 12, 2019 22:15:12 GMT 10
G'day All,
Once again I have gone through all the photo links in this thread, and edited them so they are now showing again. Hopefully PostImage doesn't shift their hosting location to a new web address anytime soon, like they did last year. Takes me hours to get them all sorted again. 
cheers, Al.
|
|
|
|
Post by Franklin1 on Jun 11, 2019 10:13:33 GMT 10
G'day sgtl,
I would avoid using anything classes as an "adhesive" to fix the guards, unless of course you want to do it without using any fixing screws. The benefit of using butyl mastic is that when it comes time to repaint the van (in 10 years), you can easily remove the guards and clean up the butyl mastic sealant with mineral turps before preparing the van for painting. Then you re-fit the guards the same as before.
If you use any of the sikaflex-type adhesives, they will need a jackhammer to break the adhesive bond, destroying the guards in the process.
The downside to butyl mastic is the current price of the product - $26.99 for a 400g cartridge from Bunnings , but it is available in white, grey, and black (I used the grey colour to blend in with the edge of the aluminium better. When I bought it 4 or 5 years ago, it was around $19, so prices have gone up a fair bit since then. I used the cartridge for the splash guards, and to seal the port-hole windows before I fitted them back into the van. If the nozzle on the cartridge is cut to give a 5mm diameter bead of sealant when you pump it, a 400g cartridge will give about a 3 metre length of sealant )
There are cheaper brands of butyl rubber/mastic cartridges, but they are only available in white...
Selleys also have a D-Mastic product ( here ) available in white or black, and is half the price of their other Butyl Mastic. However, I've never explored this product to know whether it would be suitable for use in our caravans.
You could also explore the use of butyl tape (example here ), but again I've not done any research on suitability.
cheers, Al.
|
|
|
|
Post by Franklin1 on Jun 10, 2019 22:16:02 GMT 10
Ha ha ha...the Bureau of Meteorology ALWAYS knows when this event is on, and dials up a stiff Nor-easter wind for that weekend!
cheers, Al.
Edit: dates should read Wed 16 to Wed 23. |
|
|
|
Post by Franklin1 on Jun 10, 2019 21:56:14 GMT 10
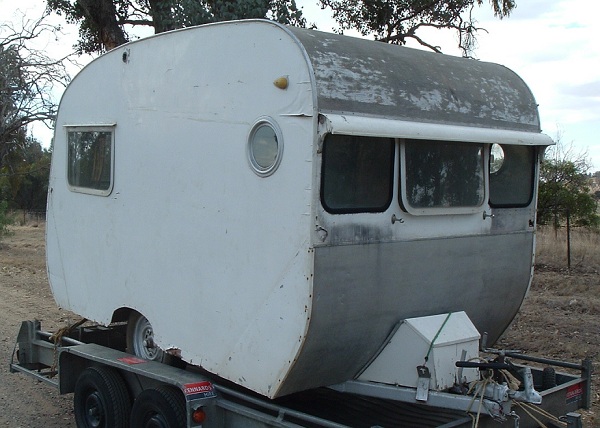
G'day fozy, Apologies for this slow response. When I bought my van it had a full-width sheet of aluminium across the lower front half... I accidentally put a noticeable 'ding' in the sheet during the trailer transport home. When I got near the end of the rebuilding of the van, I decided to cut that sheet down into two separate 'splash guards' for fixing to either side... I put a bead of Selleys Butyl Mastic around the perimeter of the splash guards, and then fixed them in position with pan-head stainless steel screws, making sure the slot in the screw followed the edge of the guard (ie. horizontal slot across the top and bottom, and vertical slot on both sides). The screws were spaced at exactly the same distances apart, when you look at top vs bottom, and side vs side. This gives a much neater visual appearance.
Using butyl mastic means the guards can be taken off easily if that is ever necessary. Using sikaflex means they'll be damaged if you ever need to remove them. cheers, Al.
|
|


 )
)