|
|
Post by Roehm3108 on Aug 1, 2018 20:41:34 GMT 10
Hi Folks As the regulars know, I recently sold my Caravan Park Ltd Hunter Minor, thinking that I would retire from caravanning. Not much time has passed since then and already I've got the itches!! What to do in all that spare time, now that there is no fixing or mending of the little Hunter Minor? Solution?! Build a caravan!!! But not just any sort of caravan but a contemporary version of the Gypsy style caravan. After some research I have found that in the wake of the Tiny House movement, there is an increasing interest is what can be termed "Mini" Tiny Houses! So I am about to embark on a new project of just such a Mini Tiny House, which I will call Cino Vardo (Small Gypsy). I wonder how many of you got a hint of this from my current Avatar? As with all such projects, they have to start off with a solid chassis. After a couple of cost-saving efforts to alter two existing trailer to suit, which failed dismally, I decided, after finding a great engineer, to have the chassis built from new, to my own design. The following pics is the result what I picked up this afternoon. I am thrilled to bits with the work and thought I might share this build on the forum if you are interested. My ulterior motive is that when you live on your own and do a project such as this, it is always important to get encouragement or advice along the way, so I hope that you out there will support me in this. I know you purists out there will say that this is not really vintage caravan related and technically you are correct. Which is why I have placed this in the "Whatever" Section of the forum. 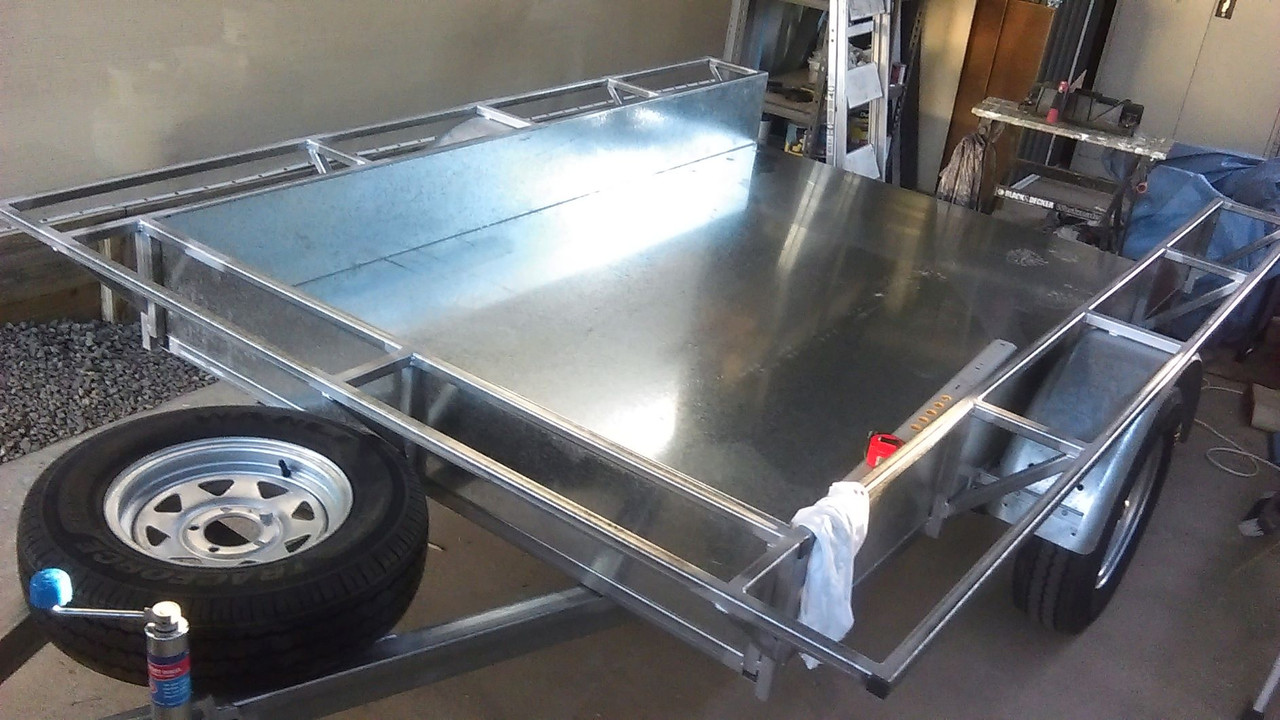 upload img upload img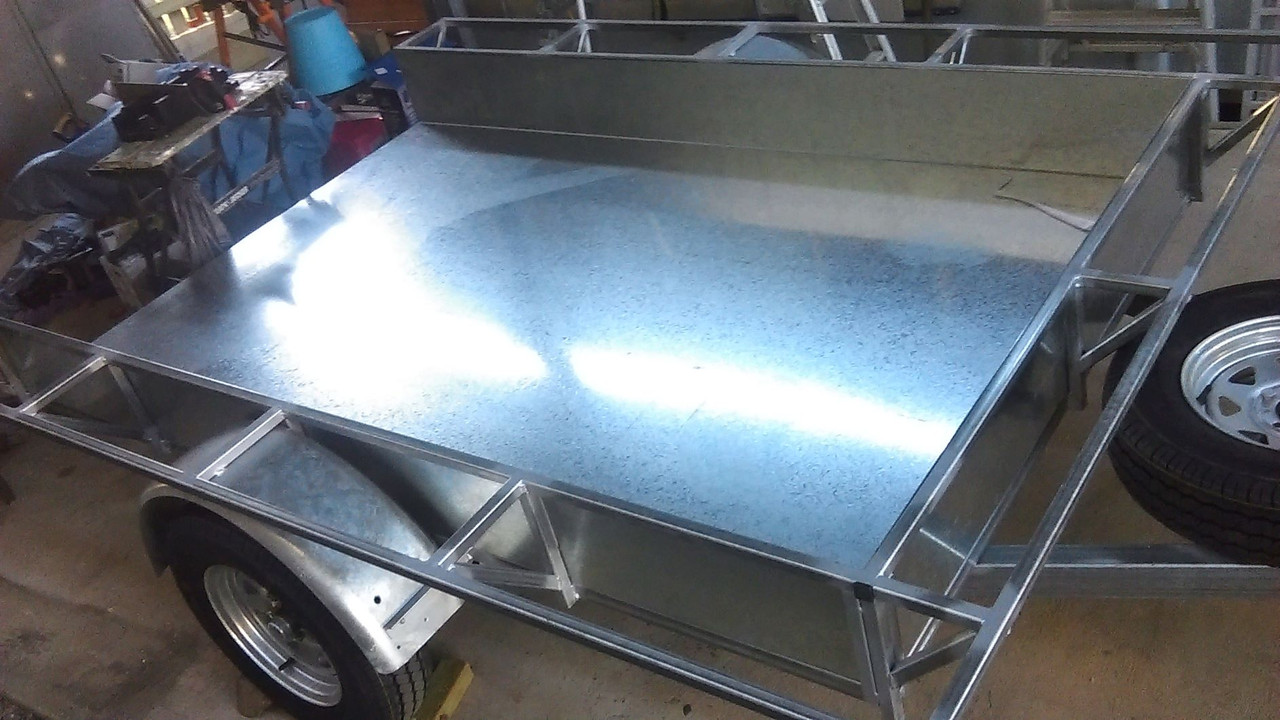 free image hosting free image hostingThere may be some of you out there who don't know what I'm talking about (wouldn't be the first time as I can at times speak double Dutch!). But to give you some ideas, here is a link to the nearest thing to what I want to build : www.instructables.com/id/Gypsy-Wagon-Building/The pictures describe what this build will become. If you want to know more, I suggest you Google words like Ledge Vardo, Gypsy Caravan Not expecting this to be done in a couple of months, but now that I have the chassis to work with, I am excited to put together some drawings etc. Some basic info of what I am doing!: The Trailer base is galvanised with a size of 2400mm by 1500mm. It has a single sheet of 1.6mm steel sheeting glued to the chassis cross-members as well as front and side panels, also glued with Sikaflex adhesive. The floor will next have 6mm ply laid on top of it. The edges of the side and front "outriggers" will be the footings for the outer walls. This effective expends the trailer to a length of 2600mm by 2000mm When I have some drawing/plans I will put them up on this site for you to see. I have already begun some preparatory work such as building windows and ordering the constructions of mattresses. I should stop here for the time being and hope you will join me in this journey. Feel free to ask questions and give feedback both positive and negative, as long as it's constructive too!! Ray |
|
|
|
Post by Gypsy 10 on Aug 1, 2018 22:35:55 GMT 10
OH Roehm please please make it prettier than that one. Looking forward to watching the progress.
Gypsy 10
|
|
|
|
Post by Roehm3108 on Aug 2, 2018 7:13:49 GMT 10
Yes Gypsy10, there are aspects of that Vardo that could be better, but to each their own. We need to remember that whether it be a vintage caravan, or a Gypsy caravan, there is no such thing as bad taste! Romani Gypsy caravans have a very long history, going back to the mid 19th century. They were highly decorated and an expression of the owner's artistic talents.
|
|
|
|
Post by cobber on Aug 2, 2018 12:18:10 GMT 10
G'day Ray, I have long been an admirer of the gypsy waggons as evidenced by the first book in my cobbers library collectionYour project won't be everyone's cup of tea 😉but I'll be watching to see you are true to the fine traditions of the "living vans" including the use of slot head screws, I can't wait to see what livery you choose for it considering some of your previous efforts 😝 What I expect. 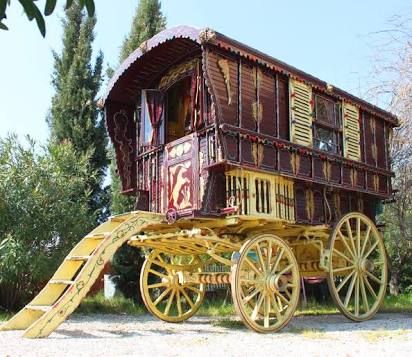 Recommended  Don't let a blonde distract you from the job at hand. 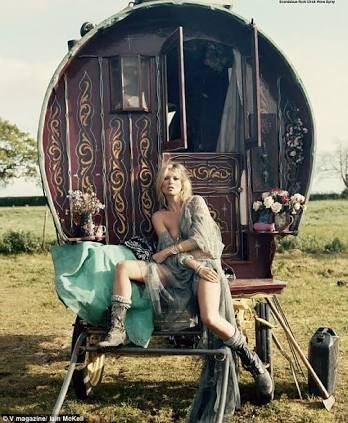 Cobber. |
|
|
|
Post by Mustang on Aug 3, 2018 8:05:15 GMT 10
Something close to my heart, I even bought a book on the same topic.
Thank you for sharing, I think your project will be totally "pure".
|
|
|
|
Post by murray on Aug 3, 2018 11:19:36 GMT 10
G'day Ray, Don't let a blonde distract you from the job at hand. Cobber. you do realise Ray she's not a natural |
|
|
|
Post by Roehm3108 on Aug 3, 2018 20:56:32 GMT 10
Thanks for your feedback folks. Cobber, I feel inclined to use the final pic of yours as my motivator! Might even pin it on my carport wall to upset the village peoples! You second pic reminds me of reading a book on the history of my first ever parish, where one of the first Pastor's there rode around visiting his parishioners on his horse - he generally managed three visits a day and had plenty of time to cogitate on his sermon between sermons. No wonder they went for more than an hour!!!  Murray, I know that you are the experienced one when it comes to blondes, so bow to your greater knowledge. Just so that I know in future, how did you work that out??  The trailer had to be returned today for a couple of hole plugs on the mudguard, (you can see them in the photos) which has now been rectified. The "seen" bits of the sides have been painted in etch primer, for a first topcoat tomorrow. Have also spent time working out the layout and here is a tentative drawing so far.  The bed will be a "slide-out" style, so that it gives more daytime room, like this one: 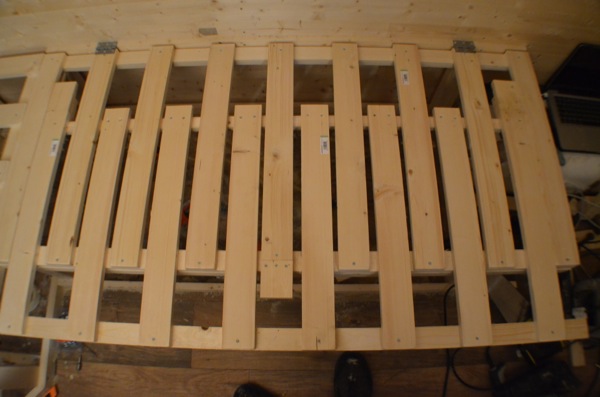 The bed is 1200mm wide but I had two 600mm wide mattresses made, so that when it is slid together during the day, it is easy to stack the mattresses. The mattresses are made of 2 inch high density foam and a 4 inch egg-carton foam. The result is very comfy! I pick them up tomorrow. A further little problem that has come to light is that in a perfect world, I would prefer the roofline to be 75-100mm higher than the height of the carport will allow. I'm hoping that I can do a bit of cut/pasting with a couple of the frame trusses to achieve that perfection. Would hate to think that I might have to regularly bump my head in the Cino Vardo. |
|
|
|
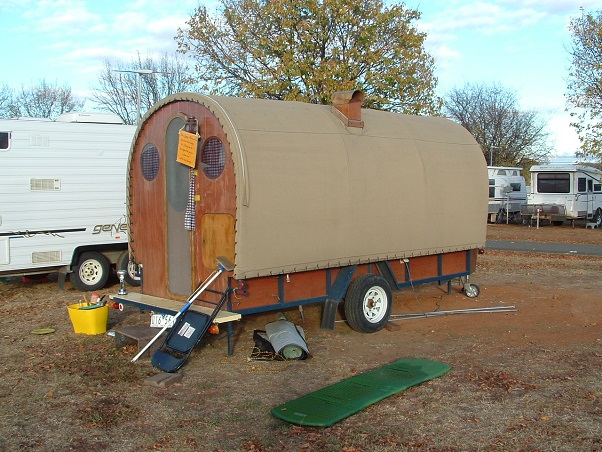
Post by Franklin1 on Aug 3, 2018 22:48:45 GMT 10
Hi Ray, Sooo...giving up caravans via the "cold turkey" method doesn't work, huh?!  I just KNEW it would be hard to keep a good man down!  Back in 2013, a trip to Canberra for a 'week-end away' led to a stay in the Exhibition Park in Canberra (EPIC). One of the 'vans' there was this one... I never did get to catch up with the owners, so I don't know any more about the story of its creation. It was certainly an eye-catcher in amongst the modern white boxes. No doubt the end result for you will also be another eye-catching creation! And yes, do whatever is necessary to get the height you need in the van. As a previous owner of a 1970s pop-top van, it's no fun banging your head numerous times on a lower ceiling.  Great to hear you are back in the 'shed' again! cheers, Al.
|
|
|
|
Post by Surf Tragic on Aug 4, 2018 12:05:57 GMT 10
Hello Roehm3108 I am very interested in what you are doing as it was on my mind to do something similar at one time, so go for it Lad! It will be a lot quicker than restoring basket-case Dons  By the way Cobber, she is a natural blonde, it says so on the bottle. Cheers Surf Tragic |
|
|
|
Post by Roehm3108 on Aug 16, 2018 8:43:01 GMT 10
Hi all All this talk about blondes is distracting me no end!! I’ve even made cobber’s picture the first one I see in my Cino Vardo album!! Thanks for that pic of the shepherd wagon Al. A few weeks ago I followed the framework of one of these when in Caloundra, so someone else is building one of those up here. Surf Tragic, as you know, I have restored 5 vintage caravans and I assure you that you do apply a different mindset to building a Vardo. It allows a greater freedom of imagination for one thing. I took the problem of height clearance to the people who built my carport, asking them about replacing the existing truss framing with a portal frame. I would need to change the first two trusses. No problem, I was told – cost of materials $164! 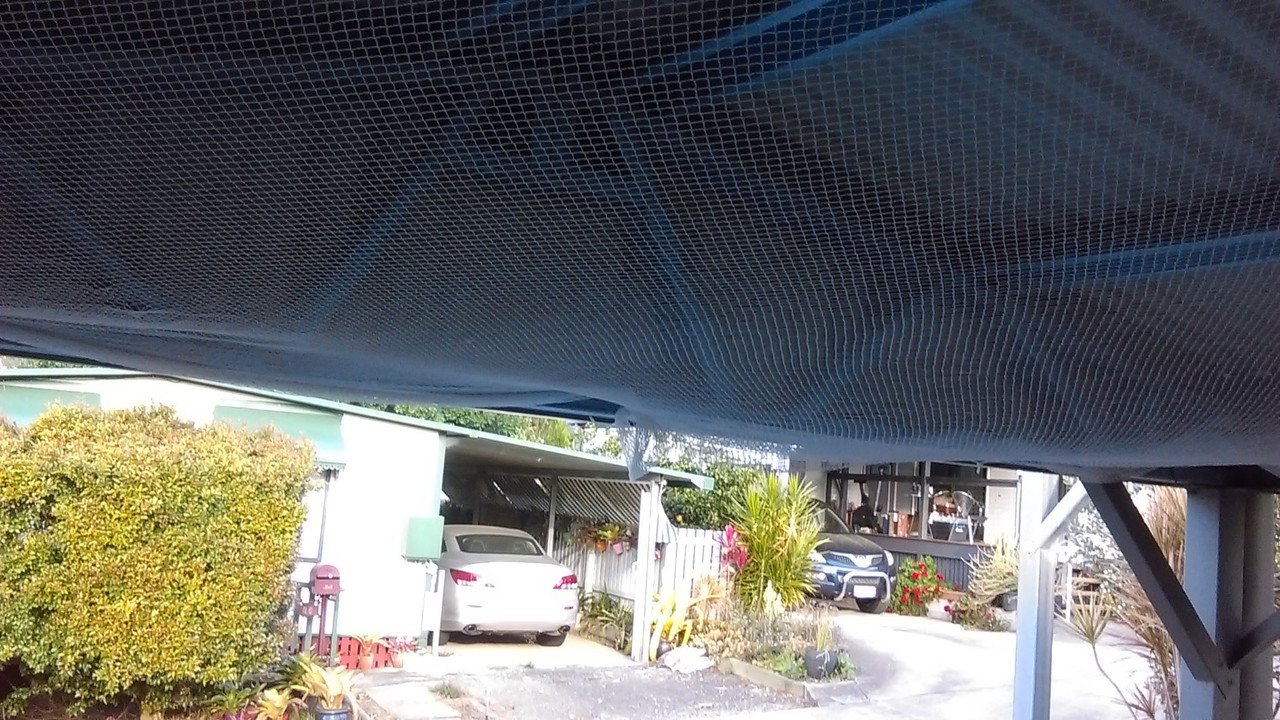 So I’m waiting for it to be prepared to do that job. The things one does for their hobby!! Have also drawn up some elevations of the build, so now I have a better idea of where I want to go. Here are some pics for those interested. 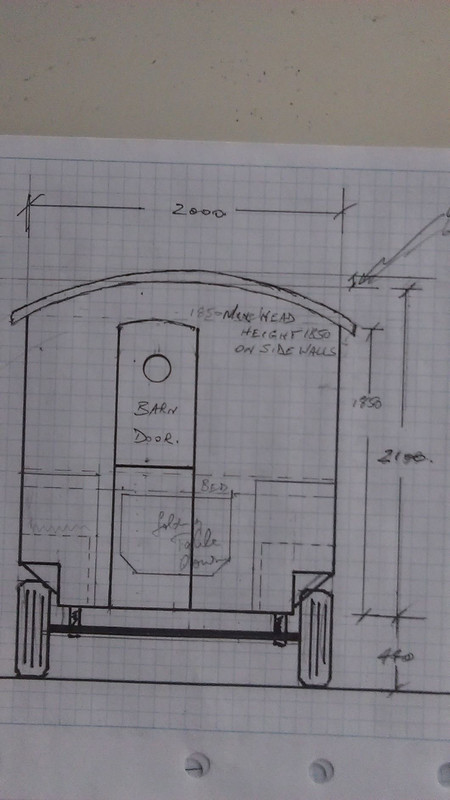 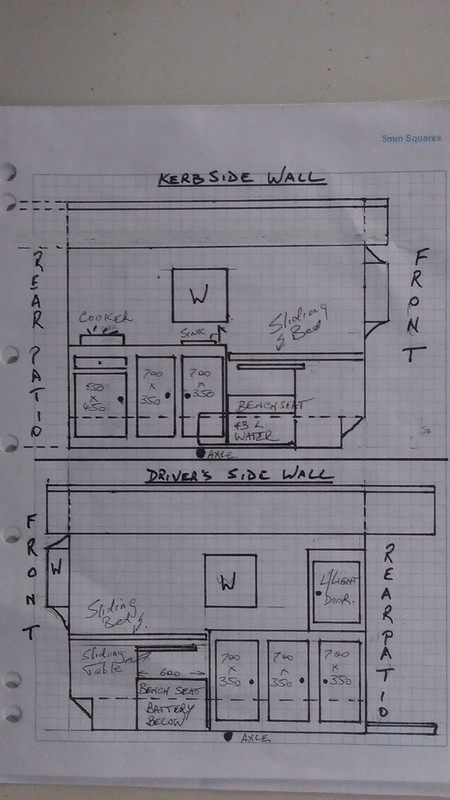 The repairs to the mudguard have been made and I have now painted the base in enamel paint. 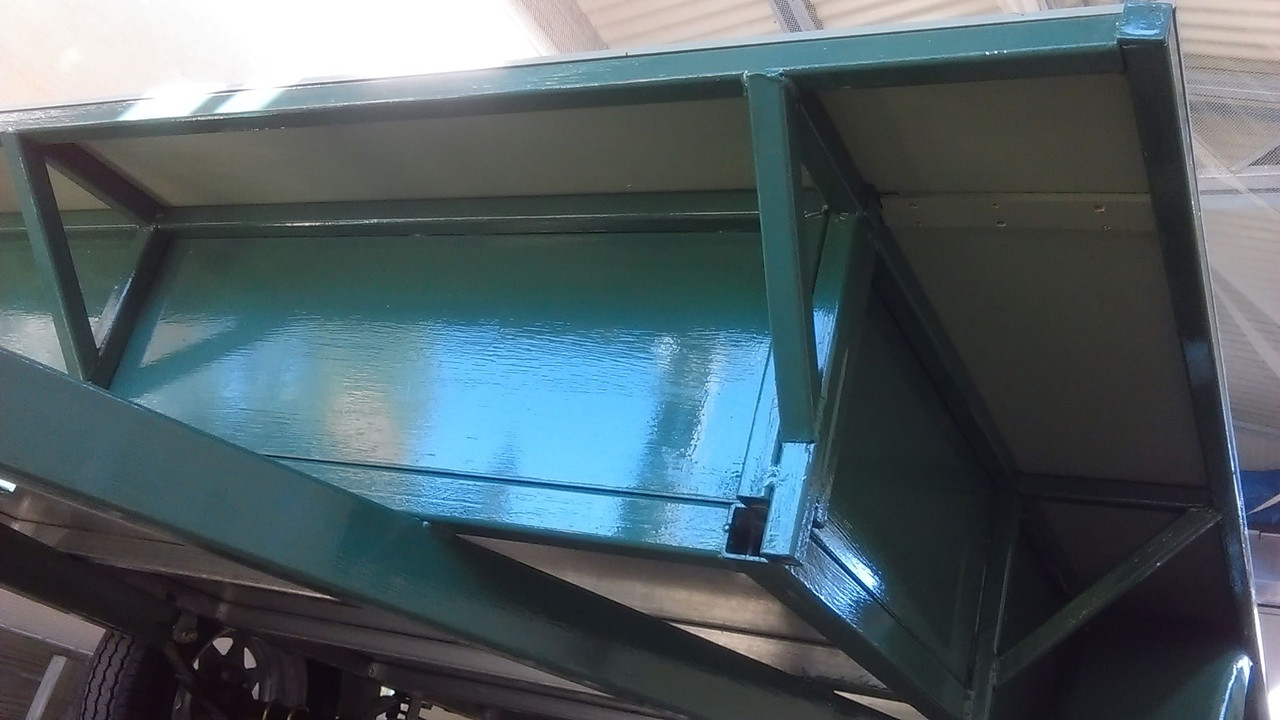 The outriggers have also had marine ply installed and the sheetmetal floor has had a covering of ply as well. You can see the base-plate for the framing running along the edge of the front and outriggers. Still need to do the rear. 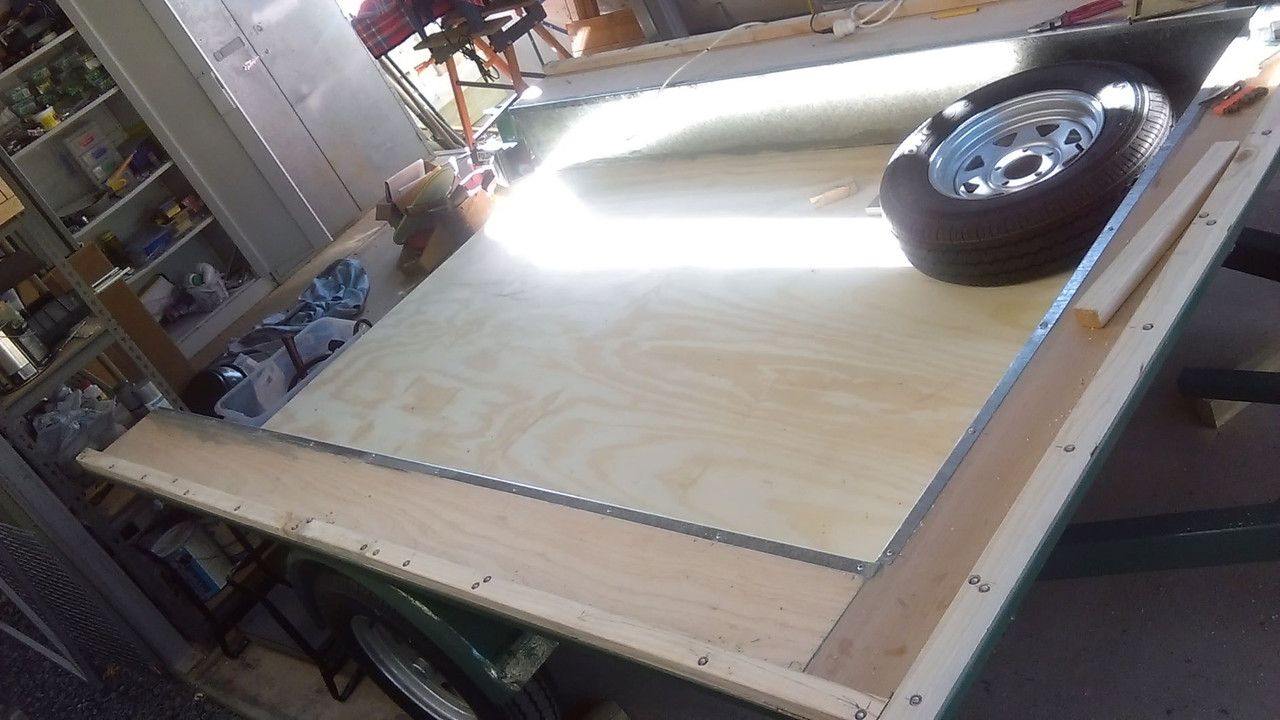 I have now also decided on windows. 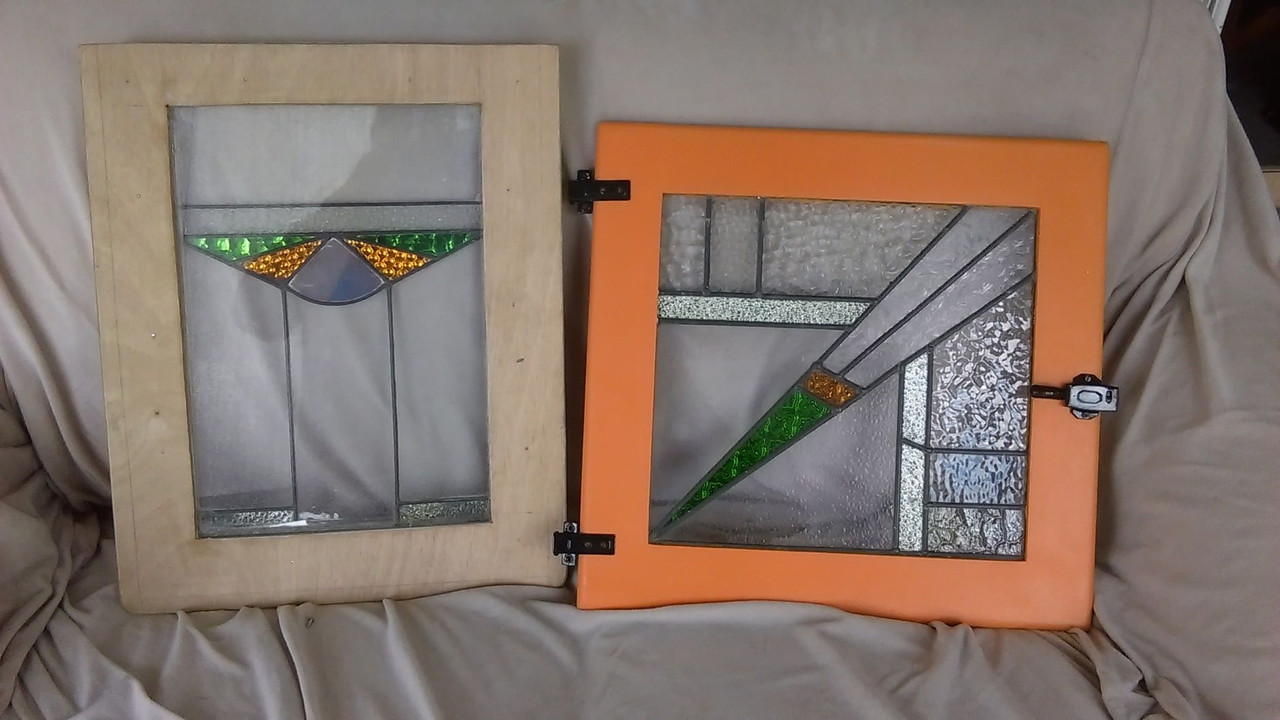 The window on the left is one of a pair I had already sourced and altered. Routered a 3mm deep channel on the front and inserted a clear acrylic piece to protect the leadlight, then added an outer frame of marine ply. The window on the right is one of a pair I got last week and will have the same treatment. Note to same colour leadlighting - a happy coincidence. The left window will be for the front and the right will be the side windows. I had a bit of luck at the big green shed. Whilst buying the flooring ply, I noticed a bundle of 30 by 40 mm framing pine, made up of 28 bits of broken full lengths. They must have been 4.8m broken lengths as they were a minimum of 2.5 metres long. Got the lot for $42! Not all perfect, but I will get enough out of the whole lot for the internal framing of cupboards etc as well. The base plates are from that lot - hence the need for joins, but they won't be visible as the outer walls will cover that. Need to go to the big smoke (Brissy) next week to find 2.7 metre long ply. Have decided to cover the walls in 6mm ply, but need the longer length to avoid too many joins. I must say that at this stage, it is quite mentally stimulating and one needs to be careful that it doesn't become all-consuming. I am going away this weekend, which is probably a good thing to also physically detach from it. |
|
|
|
Post by Roehm3108 on Aug 22, 2018 15:06:05 GMT 10
Hi All Well the portal frame material arrived a couple of days ago and I was bursting to see if this was all going to work. So on with the Superman suit to lift and cajole old trusses out and new frames in. Before and after pics below: 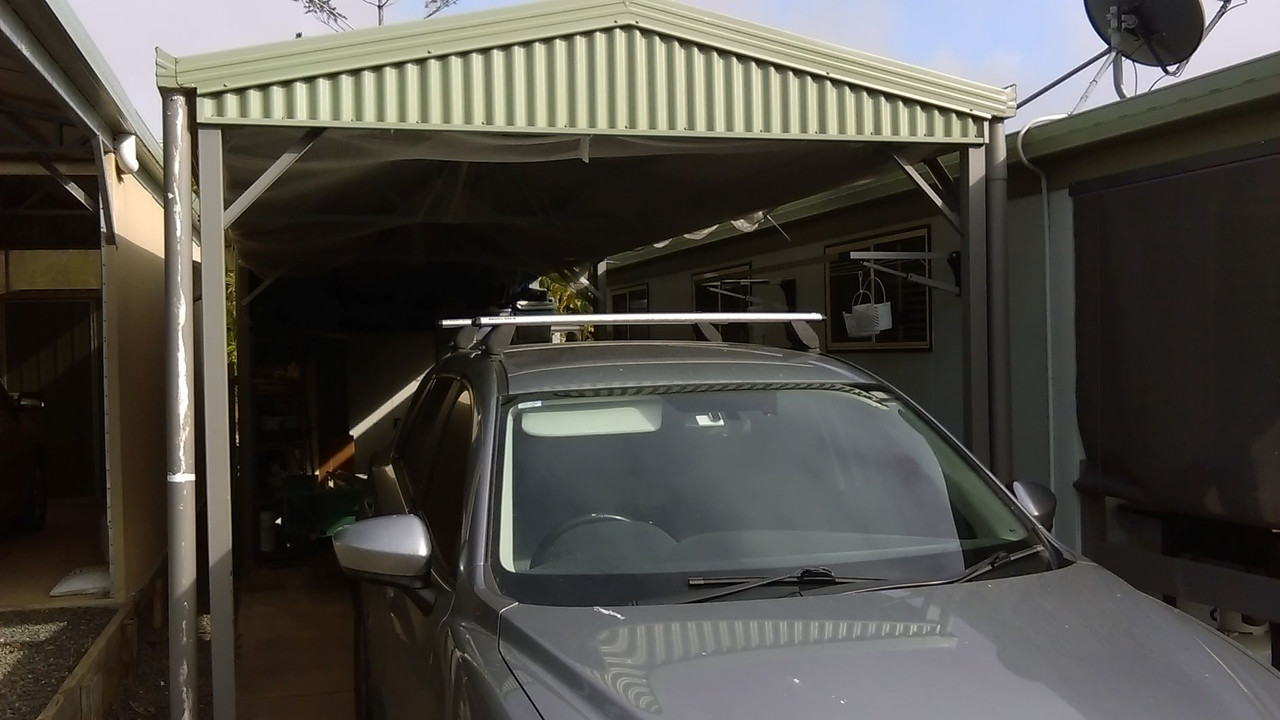 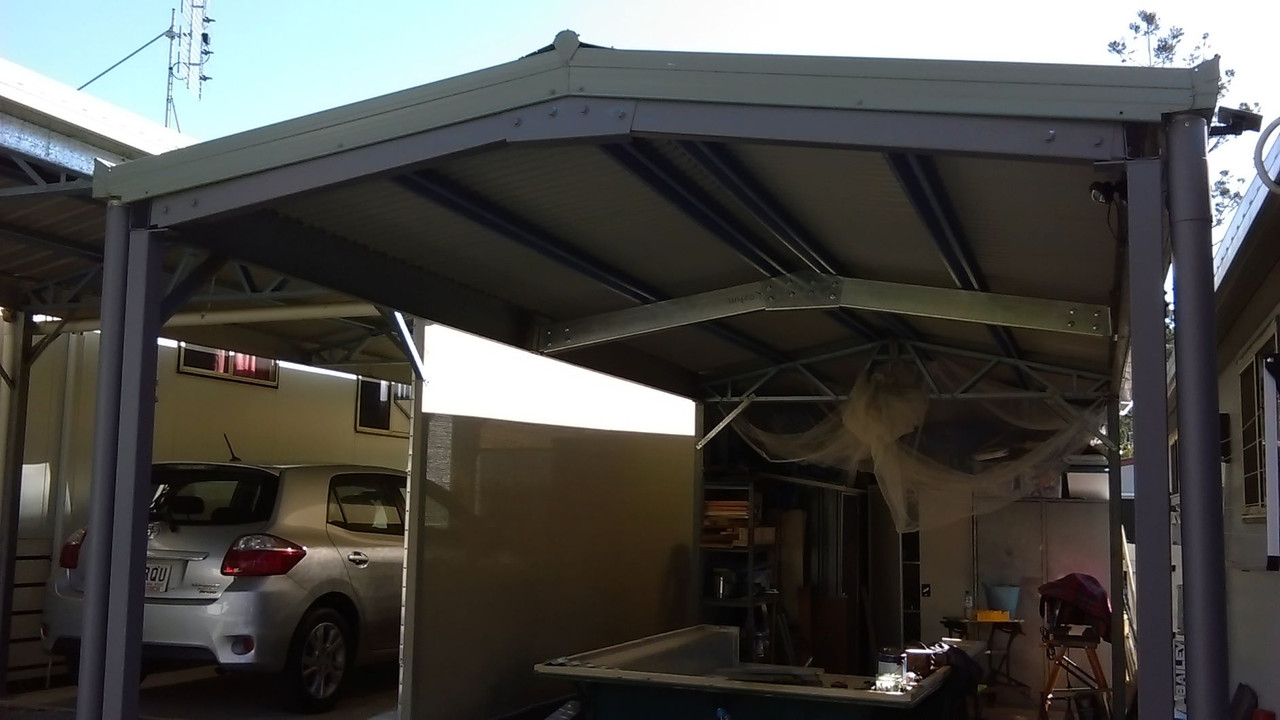 The effort was worthwhile and I got an extra 100-150mm clearance at the crucial point, which will mean I can actually get almost 1800mm at the lowest point of the curved roof! Rightly or wrongly, I've decided to build the window frames next, so that I have the actual sizes for when I put in the wall framing. People I have spoken seem to have differing opinions about which order to do this, so would welcome any feedback. |
|
|
|
Post by Franklin1 on Aug 23, 2018 8:41:04 GMT 10
Hi Ray, excellent job on remodelling the shed roof!
Ahhh, yes, the old "windows first?" question. I well remember working through my 'Walsh' van project, thinking..thinking (Oh, the thinking that went into that project!). The only thing that kept me sane was the mental picture I had of what I wanted it to look like when it was finished. And I think that's the key to these sorts of "fly by the seat of your pants" projects. The final picture will steer you towards putting the windows in the right positions; putting sufficient power points in the right positions; making sure there's enough clearance to get in and out of the dining table seating; putting the bed high enough to leave usable room underneath for storing a 300mm high plastic tub (and not discovering you've made the height 290mm ); and all the rest of the design features you want in the final outcome.
If I was to do a project like yours, I would think I'd definitely do the windows first. You then know exactly how to build the walls to accommodate the windows, but you also get a chance to sit and ponder about where exactly you position those windows for maximum benefit. For example, do you want to sit up in bed and gaze directly out the window? If so, the centre of the window has to be at eye height for the best result. And it's this sort of thinking and planning that gets you to the steps required to do the job (and gets you grey hair as well, but that won't worry you now, hey?!  )
The three opening windows in my 'Walsh' van have a brass rod at the bottom for the window stay. The window stay at the pillow end of the bed sits just above my head when the window is closed or slightly open. I have to remember not to suddenly sit up, otherwise I'll bang my head on the stay. I ended up shortening the rod so it doesn't hang over the pillow as much, but that means not being able to open the window as much as before. If I'd realised that would happen in the design, I would have shifted the position of the window. This issue is probably the only bugbear in my whole project, so all the thinking and planning I went through was 99% successful.
cheers, Al.
|
|
|
|
Post by DC3Td on Aug 23, 2018 9:45:25 GMT 10
|
|
|
|
Post by Roehm3108 on Aug 23, 2018 14:51:27 GMT 10
That is a closed site DC3Td, so not able to check it out.
|
|
|
|
Post by murray on Aug 24, 2018 6:48:24 GMT 10
These are them Ray !! Everybody must remember seeing these in the roadway camps 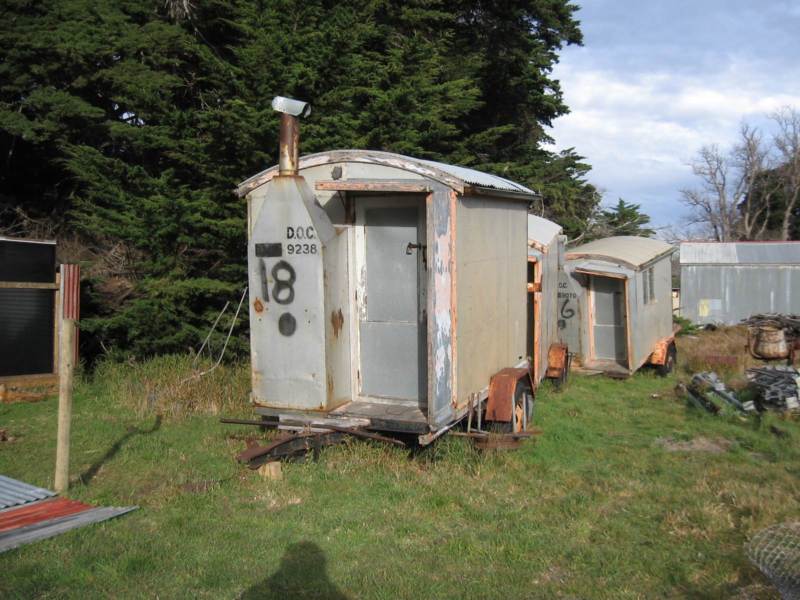 |
|
|
|
Post by Roehm3108 on Aug 24, 2018 7:11:17 GMT 10
They must be a Tassie design, Murray, cos the ones I remember looked very much like the Carapark Toaster. I think that perhaps Carapark even built them. But those in your pic are very cute - love the stove alcove!! Has anybody down there seen what they are like inside?
DC3Td, I presume that this is what you were talking about.
|
|
|
|
Post by Roehm3108 on Aug 26, 2018 7:58:48 GMT 10
Started getting back into actual caravan building type of work. Remember that bright orange painted window I showed earlier? Here's what I did with that: Sanded most of that paint off and routeered a 3mm deep channel on the facing side above the leadlight glass 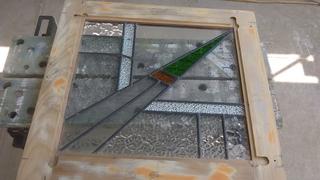 Cut clear acrylic sheet to size which will act as protector for the leadlight as well as provide waterproofing from the weather  Cut a marine ply overlay frame which will be glued and sealed to hold it all together. 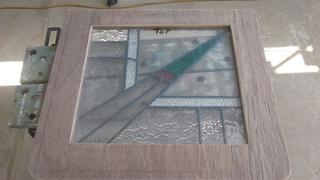 It looks a bit dull because the protective film has not yet been removed. YAY!! Finally worked out how to make the pics smaller!!! |
|
|
|
Post by Roehm3108 on Aug 26, 2018 9:26:19 GMT 10
As this is a "Whatever" thread, I thought I'd share this little tip with you. For some years I have owned a brass porthole window and at one stage wanted to implant it into the Hunter Minor, until friends KB offered me a real caravan porthole. It was dirty and grimy from years of neglect. So, thinking I might use it for Cino Vardo, I googled "how to clean badly tarnished brass" and it regularly came up with this recipe: Mix equal parts of flour, vinegar and salt into a paste. Apply to brass and leave for several hours then clean. Well, I tried it yesterday morning and left it for 24 hours. The paste turned green (sorry, didn't photograph it) and this morning I washed the gunk off. The result was this: 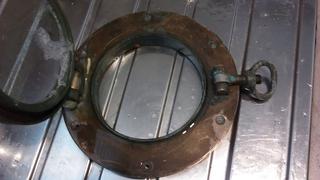 NOT IMPRESSED! But then I remember seeing in a you-tube video on the same subject that the guy used a scrubber on it, after the same result. So got out some superfine steel wool and with little effort got this result: 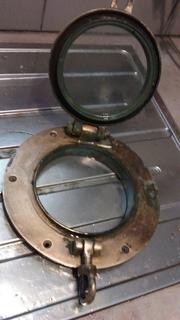 See the difference between the left and right side of the ring? After a further scrub, this was the result: 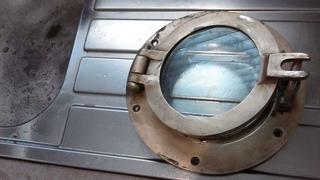 I reckon that after another couple of efforts of the same treatment, it will come up even better. All I need now is for some generous slot-head screw collector to find me a handful of 15-16mm brass screws so that I can eventually instal this porthole in the proper manner.
Oh yes, I would also like to find a flat brass ring for the outside of this window. It needs to have an inner diameter of 6 inches.
|
|
|
|
Post by Mustang on Aug 26, 2018 10:55:34 GMT 10
When I polished my aluminium windows I found the graduation from med/fine steel wool to 0000 very fine (as you have done) was astounding, I also saturated the pad with INOX then de-greased,then used cutting polish for the final result.
|
|
|
|
Post by DC3Td on Aug 26, 2018 13:36:12 GMT 10
Hi Ray. You could also use 'Purple' polish.Finding a flat brass ring might be pretty hard/exy.....maybe cut a ring from marine ply? or.....there`s plenty of old front load washing machines/dryers....lot have pretty decent metal ring. cheers gordo
|
|
|
|
Post by sportsman 1 on Aug 27, 2018 16:03:55 GMT 10
Hi Ray,
what size brass screws do you want?
I guess the length is 15 - 16 mm but what guage - 6g, 8g, 10g, etc.
Also round head, countersunk, oval head (or raised head), etc.
Once I know I will check my stock.
Leigh.
|
|
|
|
Post by murray on Sept 1, 2018 19:00:43 GMT 10
|
|
|
|
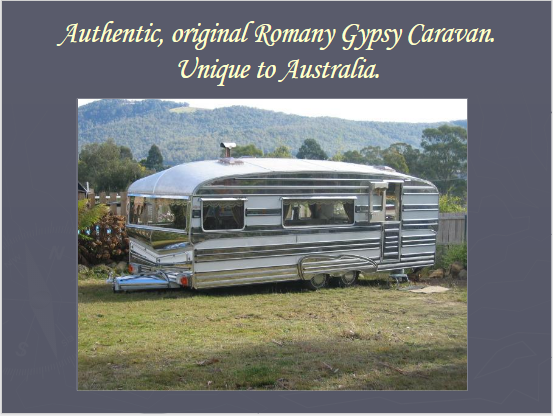
Post by Roehm3108 on Sept 2, 2018 7:32:55 GMT 10
Cino Vardo will be a Tardus version of that van!! Interesting you-tube clip of Gypsy caravans here: www.youtube.com/watch?v=iBqMMyq4sAc Is the van in the clip the same as the one for sale here in Oz?  ? Certainly a lot of bling!! |
|
|
|
Post by Mustang on Sept 8, 2018 17:15:06 GMT 10
Cino Vardo will be a Tardus version of that van!! Interesting you-tube clip of Gypsy caravans here: www.youtube.com/watch?v=iBqMMyq4sAc Is the van in the clip the same as the one for sale here in Oz? ? Certainly a lot of bling!! WOW, Can I order 1 x gold Bedford & any one of those vans please? ? |
|
|
|
Post by Roehm3108 on Sept 11, 2018 7:27:40 GMT 10
Hi all! Thought I should give an update on progress. I decided that I would build the window frames before the walls went up. The side frames were quite easy, despite being a test of my new-found router skills (none!). The router and table were an Aldi special for a tad over $100! 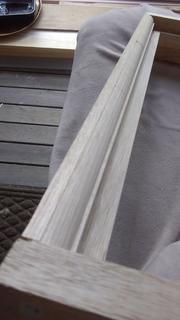 Then came the front window! According to the plan, it is supposed to be a bay window. For quite a while, I intended to merely build a rectangular shape, so that I wouldn't have all those compound angles to deal with! But one morning I woke up and decided to make the effort of having angled returns. The framing was not easy and I nearly tore out what remains of my hair! I now have a new respect for builder who have to work out all those crazy roof shapes that architects come up with. But I suppose they have CAD programs rather than an old brain with limited maths knowledge. While the result may not be perfect to the purist, I am confident that it will work. Still have to make the wall and roof panels, but can't really assemble it all till the window is installed, so that I can access ways to screw the thing onto the wall itself. Frame  Window imagining 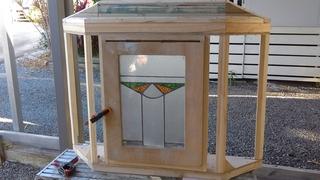 |
|


 )
)

 ? Certainly a lot of bling!!