|
|
Post by Franklin1 on Sept 30, 2013 20:03:36 GMT 10
G'day mike, The first van you've posted has got the 1968 pattern painted on the side. The second van with chassis number E8174 (did you notice you switched the first two numbers around?) is an Ambassador from the late 1960s. If you go to the Ambassador chassis thread you'll see that E8135 had the date of Feb 1969 written inside some panelling. cheers, Al. |
|
|
|
Post by Franklin1 on Sept 30, 2013 19:18:58 GMT 10
cardygeorge, you can also use purlin tape to separate the cladding from the steel framework. I've successfully used this tape along the chassis rails on a poptop I restored a few years ago. Road dust had turned to mud and was trapped between the chassis rails and the cladding, leading to corrosion. The purlin tape is available from your nearest hardware store ( see this example at Bunnings). If the screws on your van are already stainless steel, they won't contribute to corrosion, given the spacing of the screws. If they are galvanised coated screws, you can either do what DCT3 is suggesting and put a washer under the head, or you can just pump a dab of mastic sealant under the head and wipe off the excess. cheers, Al. |
|
|
|
Post by Franklin1 on Sept 25, 2013 18:47:46 GMT 10
G'day All, Just putting the feelers out for a couple of items... 1.) I need two offset hinges (also known as 'stepped hinges') which match this one... 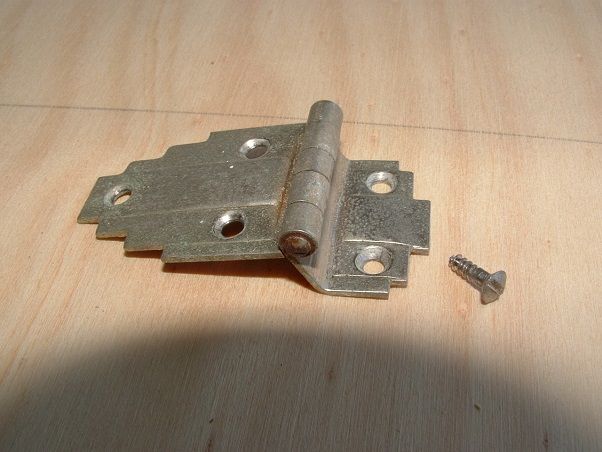 If you have all the 3/8" domed head screws that come with them, so much the better, but I can get away without them. And yes, I know these hinges are available from cobber's parts list, but they aren't available in nickel plated brass, and they don't have the aged patina look about them. 2.) I need one cream coloured push-button handle to match this one... 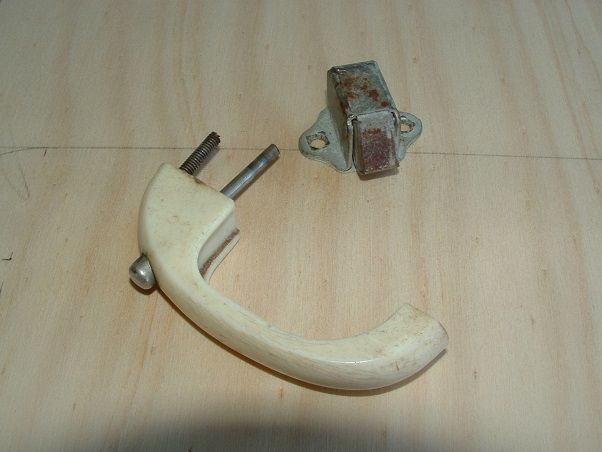 If I can't find a cream one, I have a black one I found in the local "Shed" which I can have a go at painting with cream enamel, but I'd prefer an original matching handle if somebody's got one. 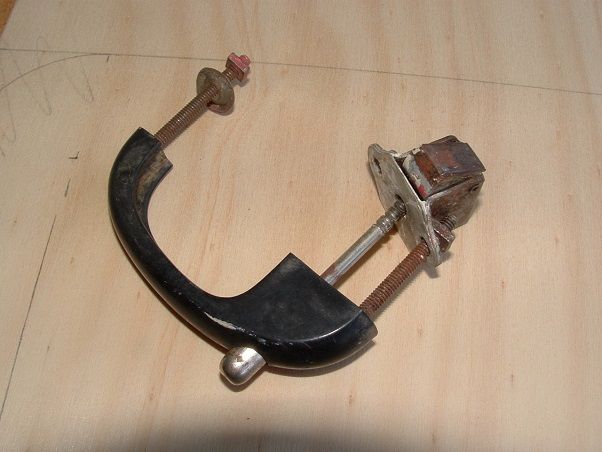 Got me fingers and toes crossed for both items...   cheers, Al. |
|
|
|
Post by Franklin1 on Sept 25, 2013 18:30:35 GMT 10
G'day chubi,
It won't be a 1980s Chesney, because they closed down in the dying years of the 1970s when the caravan industry collapsed.
The Sheraton model was introduced during 1975, so you'll have a van from the second half of the '70s.
No doubt if you've searched the internet, you would have found the results for the threads on the Classic Caravans forum, so that's about all the info we've got.
cheers,
Al.
|
|
|
|
Post by Franklin1 on Sept 22, 2013 20:19:49 GMT 10
G'day revcore, and welcome to the forum! ;D I think you'll find you've got a Viscount Ambassador van. If you check on the front drawbar just next to the jockey wheel somewhere, you should see a chassis number welded there, which should be the letter 'E' followed by some numbers. Check the chassis number against those that are listed in the Ambassador thread in our Down History Lane section: Ambassador (by Viscount) - chassis numbersIf you then go right to the end of page 2 in that thread, you'll see some photos of the inside of another Ambassador, showing the same cupboard handles as you've got. cheers, Al. |
|
|
|
Post by Franklin1 on Sept 15, 2013 21:55:13 GMT 10
G'day All, Those people attending the Coledale event may be interested in this news item from Wollongong City Council... 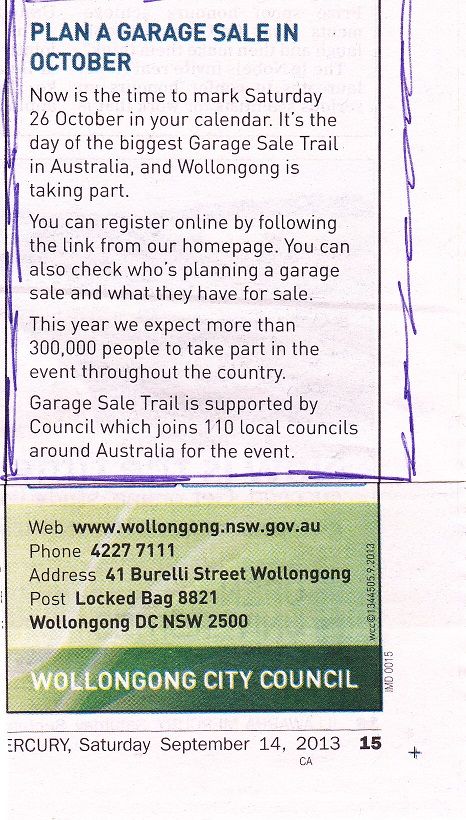 The council's website gives a link to the actual website for the GarageSaleTrail, which is (obviously) www.garagesaletrail.com.auIf you are into garage sales, you can put the Coledale postcode (2515) into the search field and select a radius around Coledale to search for. Not many have registered from the northern suburbs yet, but it's early days, so check the website as time gets closer to the 26th Oct. Who knows, you might even find some wet weather gear going really cheap, and how handy would THAT be in Coledale?!!!   cheers, Al. |
|
|
|
Post by Franklin1 on Sept 11, 2013 20:56:03 GMT 10
I don't suppose the forum lawyers could answer a question for me, could they??  Q: If cobber's post above says the minimum chain size should be 9.5mm for up to 1.3 tonnes, and that relates to a single chain connection, is it ok to have two chains that are only 8mm diameter? I had two new chains welded to the project van I'm working on, but the chains are only 8mm diameter. Would I need to cut these back off and put 9.5mm chains on, or do two 8mm chains exceed the minimum requirement? cheers, Al. |
|
|
|
Post by Franklin1 on Sept 10, 2013 0:44:34 GMT 10
G'day All, Just a note about the booking email I received yesterday. I tried to edit the email to type in my details, but it wouldn't allow it (...in fact I ended up accidentally completely deleting the email from my computer, and had to ask firefighter to resend it   ) When firefighter sent me a second email, I immediately forwarded that email to myself (so I would have a spare copy). I tested whether I could edit the forwarded copy...and I can. I can now type in all my details and forward it again on to Broken Hill. So, the short story is this...if you can't edit the email received from the Moderators, forward it to yourself first, and then you should be able to edit the forwarded copy. Then forward that copy to Broken Hill once you've filled in all the details. Worked for me, anyway...   cheers, Al. |
|
|
|
Post by Franklin1 on Sept 7, 2013 15:04:39 GMT 10
Yep, you've got the 1968 pattern on the side, or at least you've got the outline of that pattern. I don't know how many different colours were available, but this photo shows some of them... 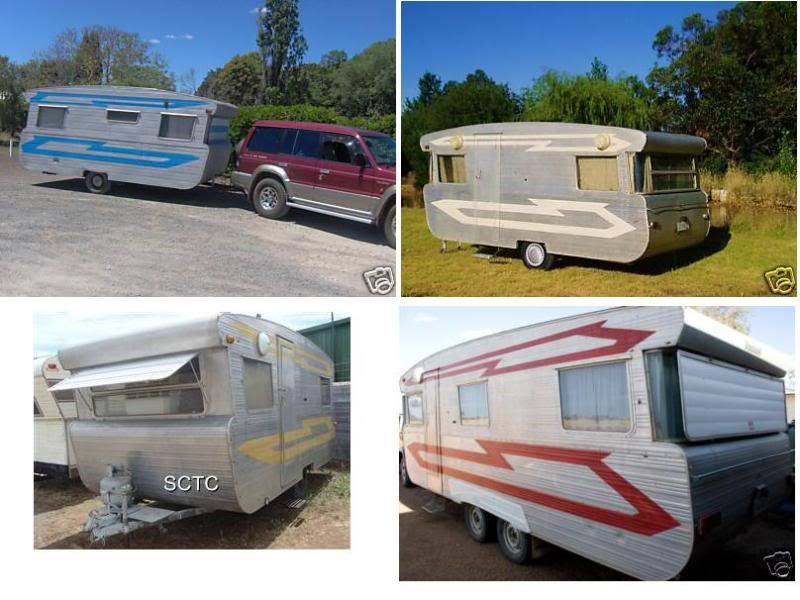 At the time these Viscounts were made, they were known as a Viscount Duralvan. The Supreme name wasn't used until about 1971, when the Duralvan name was discontinued and the names Royal and Supreme were introduced instead. cheers, Al. |
|
|
|
Post by Franklin1 on Sept 3, 2013 10:25:31 GMT 10
G'day again reddo, I'm always looking through piles of junk to see if there's anything there that could be adapted for use on an old caravan (I'm a bit like you when it comes to the ol' Steptoe and Son stuff  ). Something I came across recently that looked like it had a lot of potential for a vent cover was this fan belt cover off the back of a clothes dryer... 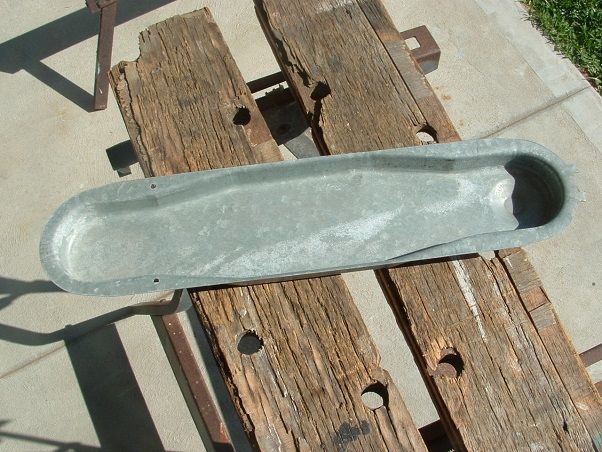 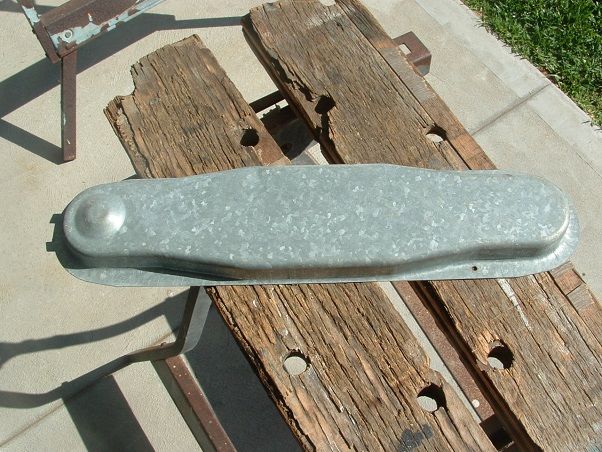 It's about 4 inches wide, and 1 inch deep, with a large flange around the outside (plenty of meat for screws)... 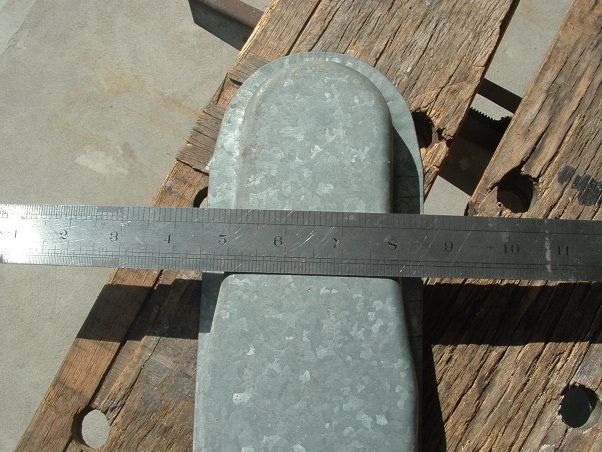 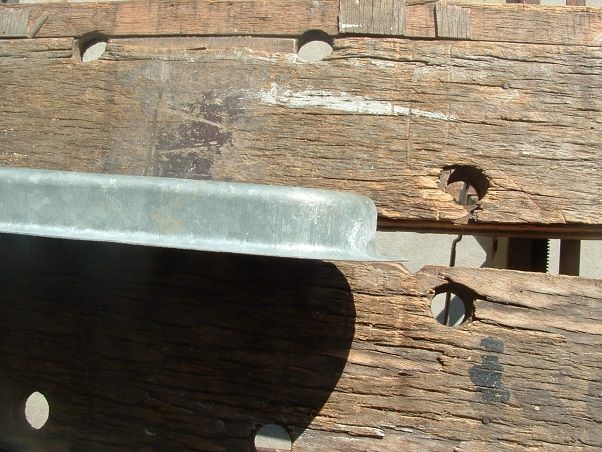 For a flash looking TD like yours, I reckon you could cut the cover at an angle to give a racy look to it... 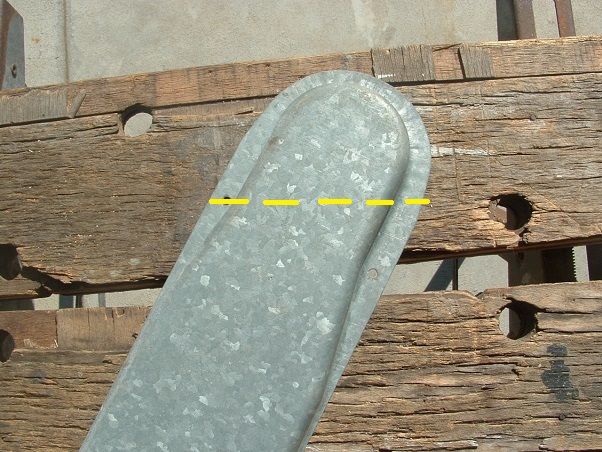 The cover is heavy duty galvanised, so it will last a lifetime. I reckon a bit of flyscreen under the cover, and a bit of chrome spray paint, and she'd be a pretty flash vent.  cheers, Al. |
|
|
|
Post by Franklin1 on Sept 1, 2013 21:21:52 GMT 10
G'day reddo, I think you've done an exceptional job in getting the shelving sorted out. It all looks like it is quite easily set up when required, but cleverly packs up when not needed. The ol' Shed of Invention has really earned its keep in coming up with some brilliant ideas. I picked up on your comment: I have 2 "Propert " sink strainers I am going to mount through the right side of the van just above the gas bottle and battery...Can I suggest you look at having at least some of the venting down near the bottom of the gas bottle if possible. LPG being heavier than air will go to the floor if there's a leak in the bottle. I don't know how your Finch fridge operates, but if there's any chance of a spark from the fridge, you wouldn't want your TD to be the first TD to land on Mars.   (And I know you are involved in Safety Training, so I'm not trying to tell you how to suck eggs... just giving another point of view.) cheers, Al. |
|
|
|
Post by Franklin1 on Aug 31, 2013 21:32:59 GMT 10
12 Volt socket outlet for the annexe lamps:I did a test run to see if my idea on how to conceal the new Clipsal power inlet socket was a possibility or not. Rather than do the power inlet first, I experimented with the annexe side of the van, and had a go at concealing a 12V lighter socket on that side. First I cut a flap opening, and glued some framework behind it. The bottom piece of the framework timber has a 15 o slope cut on it, to deflect any water to the outside of the van... 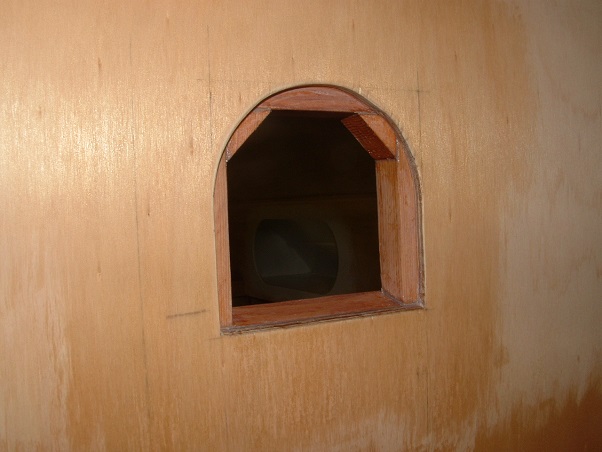 The framework looks like this from the inside...  The flap got an extra layer of plywood glued to the back of it, to give more "meat" for the hinge screws to bite into. The bottom of the flap has also been cut with a 15 o slope... 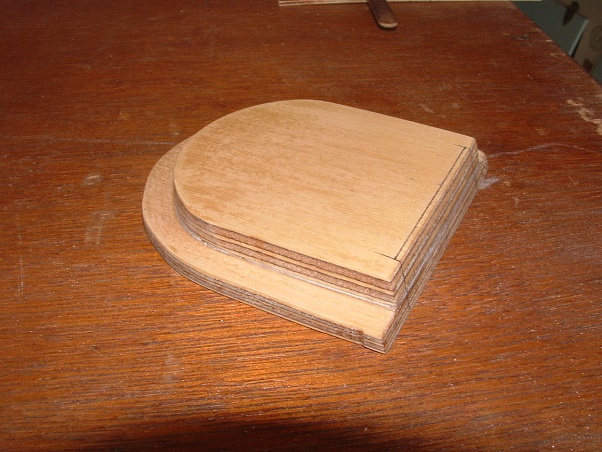 The 12V socket needed a specially shaped hole cut into the plywood it was being attached to... 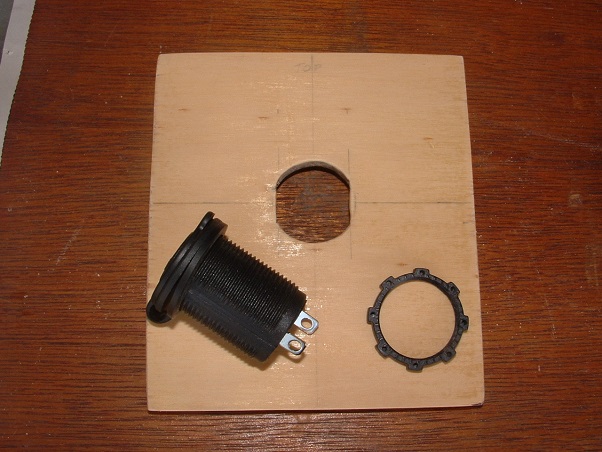 With everything fitted in position, including a ball catch and brass pull knob, it all looks like this...  Here are some aluminium trays I've collected from various Op Shop visits. Each tray showed some potential at the time of purchase, to be used on a caravan in some fashion...  I don't know what the gizmo on the right was used for, but it looks a bit like those drip trays that fit under the coil element on the old-style stove tops. Whatever it was, it ain't that no more, because it got chopped up...  ...and one half of it was test fitted above the flap door to see how it looked...  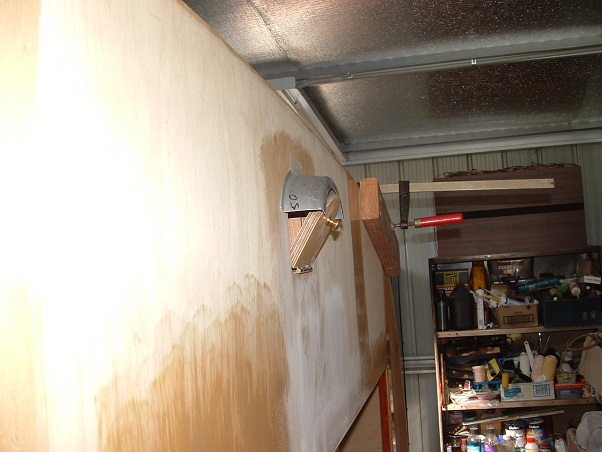 I've decided I can live with the look of it. At least it gives good coverage over the flap door, even if it does look a bit "dorky".   I can now go ahead and copy the process onto the other side of the van for the Clipsal power inlet. cheers, Al.
|
|
|
|
Post by Franklin1 on Aug 31, 2013 20:20:14 GMT 10
G'day jamesandbel, In our local Illawarra Mercury newspaper today, they had a half page classifieds feature about Fulcher Caravans, in the motoring section. I think I might have found your next project... 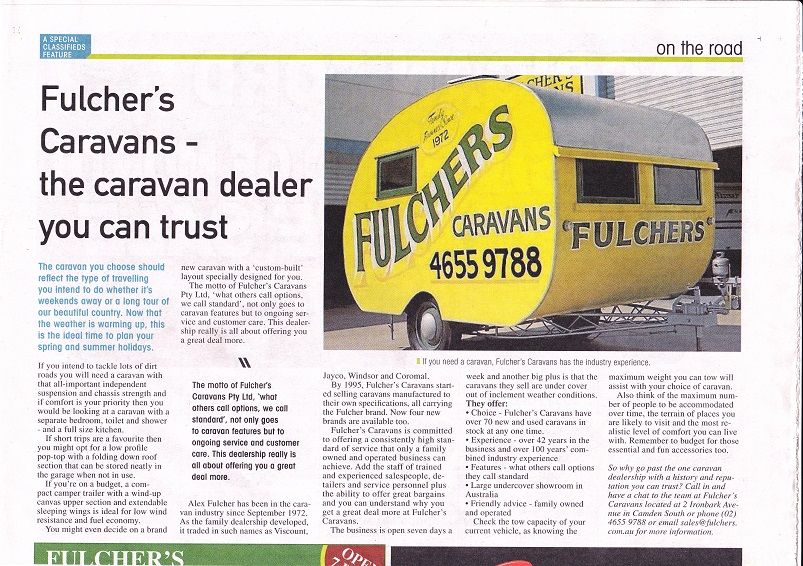 ;D ;D cheers, Al. |
|
|
|
Post by Franklin1 on Aug 31, 2013 18:55:56 GMT 10
Table lamp:I spent a few hours drilling, cutting, filing, and rivetting...and converted a rusty ol' redundant Primus gas lamp into a 12V table lamp to use with the van... 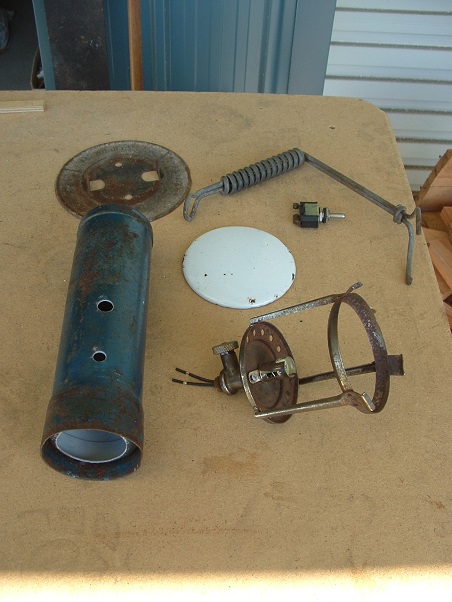 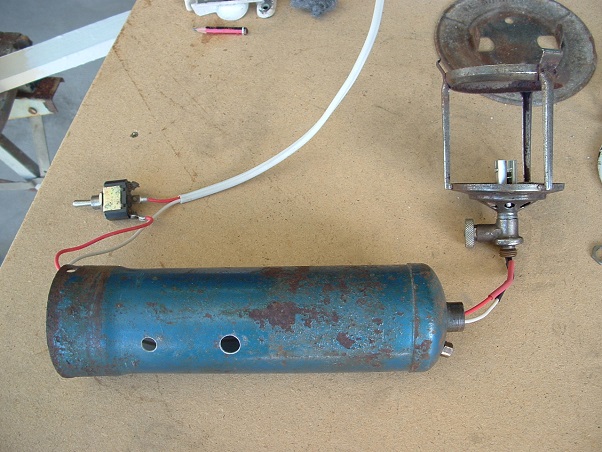 The moment of truth... 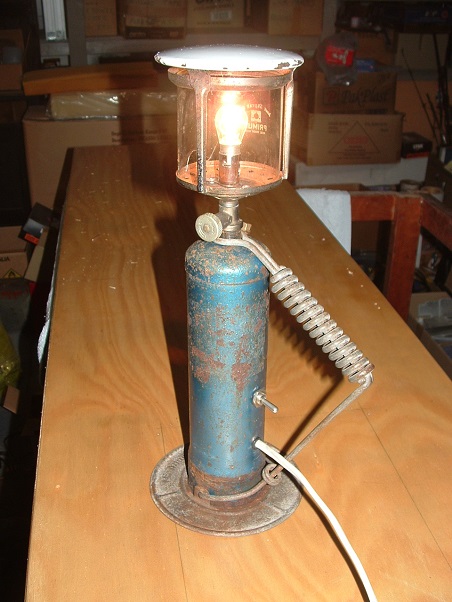 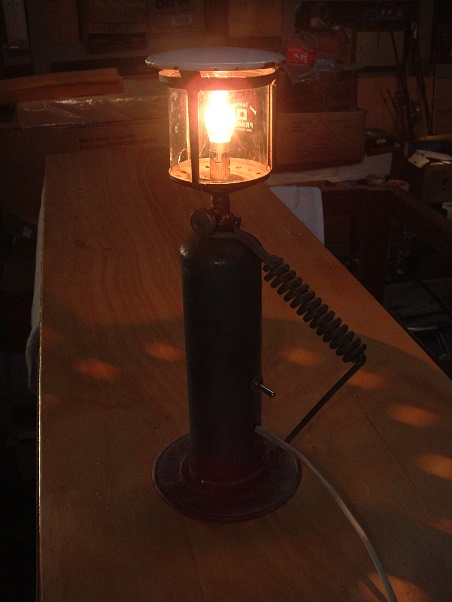 It's even got a dimmer switch...  Ok, ok...I'm pullin' yer leg about the dimmer switch...   Ahhh, the things you do while you're waiting for glue to cure...   cheers, Al.
|
|
|
|
Post by Franklin1 on Aug 27, 2013 21:25:00 GMT 10
Lucky you've got a decent sized hatch, JBJ... Looks like those speakers would blast a smaller hatch clean off the van when you've got your old Johnny O'keefe albums going full bore!! ;D ;D Very impressive job on the van so far.   cheers, Al. |
|
|
|
Post by Franklin1 on Aug 27, 2013 21:05:35 GMT 10
Somebody call me??  Knowing that Korong was a name that a dealer put on other manufacturer's vans, I'd be looking for another name relating to the factory it actually came from. Looks like an early Coronet to me, or at least it looks like an extended version of the one kaybee picked up some time back: Coronet van and the clearing saleIf it is indeed a Coronet, it's probably got a low chassis number like the one kaybee had. Edit: It didn't strike me as a Franklin at first glance, but I notice in your interior photos that a typical Franklin shelf (two of them!) is in the kitchen. It might be a Franklin, but I'm leaning more towards Coronet. Both were from Ballarat, so maybe Coronet was copying the Franklin shelf in the early days (or vice versa  ). cheers, Al. |
|
|
|
Post by Franklin1 on Aug 26, 2013 18:09:00 GMT 10
If you click on this link and go down to Reply #11, you'll see the type of nail that I've successfully used for fixing ali cladding back onto vans: Wanted- Stainless nailsThe 25mm length is ok for fixing the edges of the roof cladding because any extra length in the nail is poking through the frame into the wall cavity. It's a different ballgame for fixing the wall cladding onto the frame. You have to find a galvanised nail that's got a flat head and is only 16-18mm in length (20mm at the most when you add the 3mm wall panelling inside the van to the frame thickness). That's going to be the hardest part. Back in 2008 I could buy the 20mm length fibre cement sheet nails, but when I went to buy some more in 2010 they had been discontinued. I've even stopped at hardware stores in little country towns during my travels, to see if they had an old box of them "out the back", but so far I've not had any success. You could look at the galvanised clout nails in Bunnings, but I think you'll find they are too thick in the stem, and the diameter of the flat head is too large for the job you are doing. Ideally what you are looking for are these galvanised nails listed on ebay in the UK: UK Bolt Store . A 15mm length with a 3mm diameter head would be ideal for the side cladding. Blowed if I know where you'd find them in Oz though. cheers, Al. |
|
|
|
Post by Franklin1 on Aug 25, 2013 20:06:56 GMT 10
G'day mike, As someone who is also dabbling in a van project at the moment, I can appreciate the dedication and sweat that you are putting into your own van. It can sometimes feel like a long hard slog, and you kind of have to grit your teeth and just keep plugging away. Keep posting updates, even though at times it seems like you're talking to yourself on the forum. People are sometimes a bit shy to post encouragement, but rest assured your thread is being read by a number of we "quiet ones" with interest.   It's a pretty fine effort so far, from where I sit! ;D cheers, Al. |
|
|
|
Post by Franklin1 on Aug 23, 2013 12:55:07 GMT 10
G'day S&J,
I'd say the Coronet van was from 1965-66. Those Hella tail lights were being used from 1965 onwards in the industry, and the broad painted stripe on the sides is typical of vans from the mid-60s era.
The Ambassador E2657 has the 1968 side stripe pattern on it, however I suspect the van has been repainted in white at some stage, and the stripe colours redone. I would expect any van with that design on the sides to have plain aluminium cladding, if it's in "original condition".
cheers,
Al.
|
|
|
|
Post by Franklin1 on Aug 18, 2013 13:14:50 GMT 10
G'day kimbo,
I can't see any pictures attached, so if you can put one up, that would be helpful. I have chassis number A5285 in my files and it is a 1968 model, so I guess your number of A5729 is likely to be that year or 1969.
A photo will tell me one way or the other.
cheers,
Al.
|
|
|
|
Post by Franklin1 on Aug 15, 2013 20:59:06 GMT 10
The following post is not about vintage floor tiles per se, but might be an indication of future possibilities for our vans... A company in Sweden ( www.bolon.com ) has been making flooring products since 1949, and recently displayed a new vinyl floor tile at the Milan Furniture Fair. This new tile is being called a "wing"... 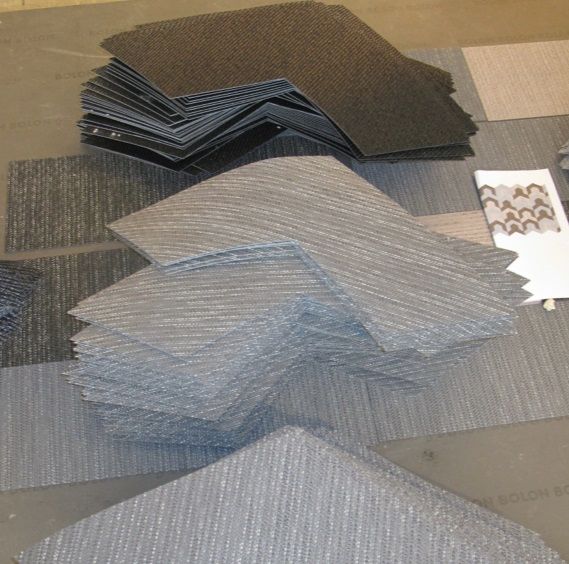 The tile appears to be made in two different styles: one with a square edge at the ends, and another with a tapered edge at the ends. The surface of these tiles is textured, which wouldn't be the ideal surface for our old vans, but the picture that caught my eye was this one... 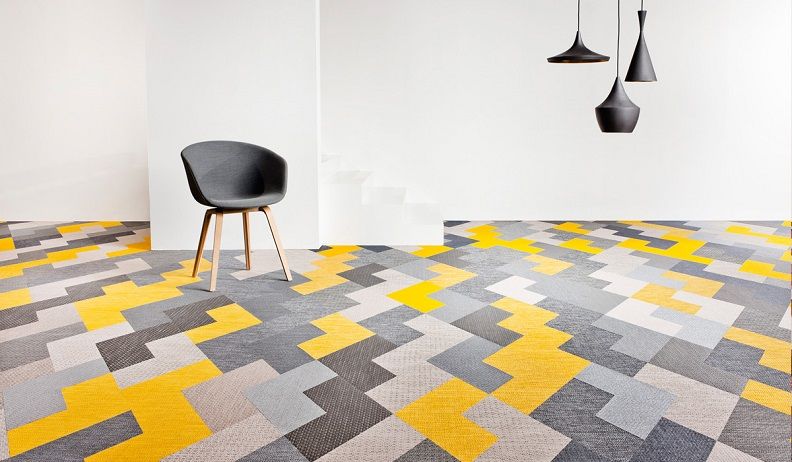 By selecting a lot of off-white tiles, plus a few plain yellow and plain black tiles, I could imagine it wouldn't be too hard to create a floor design that had a "vintage look" about it. The Bolon wing tile is being launched in Sydney this month, and it may hopefully lead to other manufacturers being creative and producing a similar tile but with a smooth surface and in colours that match our vintage era. We can only hope, ay?! cheers, Al. |
|
|
|
Post by Franklin1 on Aug 15, 2013 19:38:50 GMT 10
G'day dorisday74, Your picture shows that the van is likely to be a 1969, 1970 or perhaps 1971 Ambassador. If you check on the drawbar next to the jockey wheel, there will be a chassis number welded there. For the Ambassador model, it "should" be the letter 'E' followed by some numbers if it's a '69 or '70 model. If it's a '71 model, the 'E' will be at the end of the numbers. See our Down History Lane section ( click here ) for more information about the Ambassadors. cheers, Al. |
|
|
|
Post by Franklin1 on Aug 14, 2013 17:16:16 GMT 10
G'day Mike,
You'd need to understand how the front was attached to the back frame originally. I suspect if it's only a 2-3mm thick ply front, it would have been glued only, and no nails. You could perhaps check on that door that you've shown above in your first photo. Peel back those crappy layers of ply, and see if you can make out how the ply was bonded to the frame.
I think they were using caseine glues in those days, after a number of years of scotch glue (animal glue) being used for furniture making. There was also the Selleys 308 glues (2-part) for a waterproof bond. Depending on which type of glue they used, you might have some success pouring hot water over the glue line and waiting for the glue to soften. It won't damage the timber in the rear frame, which will dry out if you leave it for a bit. Alternatively, it might be a careful chisel job to chip the front panel off each frame.
For replacement panels, you can try mdf. I notice people on this forum using mdf for various end uses (window frames; cupboard doors). Obviously you would need to ensure it was protected against moisture getting into the timber.
Hope this helps,
cheers,
Al.
|
|
|
|
Post by Franklin1 on Aug 14, 2013 16:57:35 GMT 10
Ha ha ha, humpyboy  ...that's actually the self-serving window into the warehouse stocks. Just reach in and get anything you need...   |
|
|
|
Post by Franklin1 on Aug 14, 2013 9:47:59 GMT 10
Rear overhead cupboard...You can see in these photos of the original van that there were overhead cupboards down the kitchen side, but nothing across the back. There was a small overhead shelf along the door side... 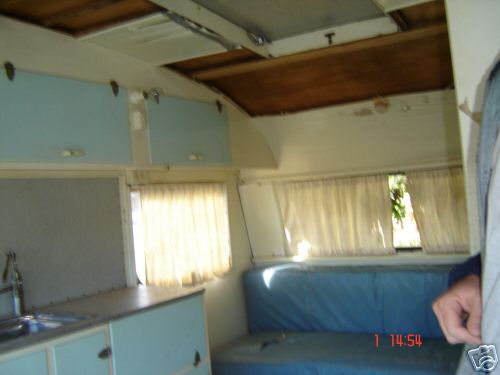 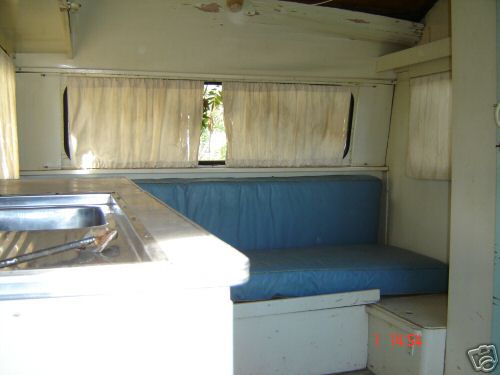 Well, times have changed...and so has the design in the rear of the van...   The final ceiling sheet of plywood was fitted... 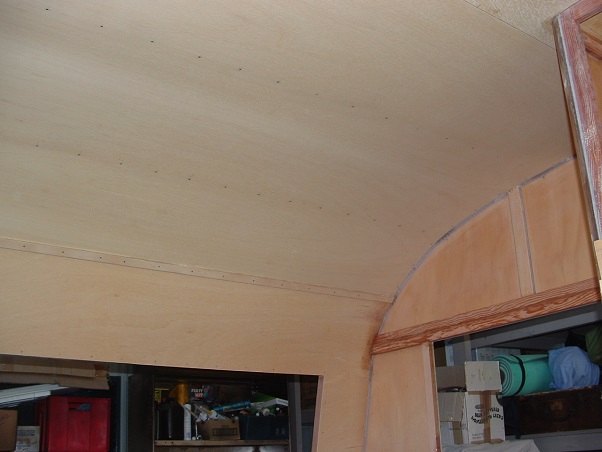 Some framework started across the back... 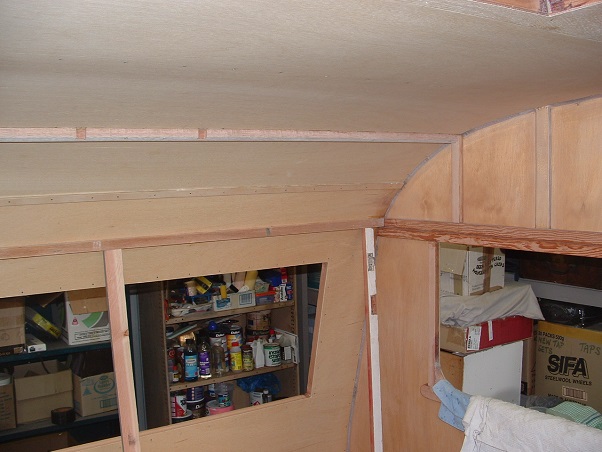 And then a bit more framework...  And then some paint... 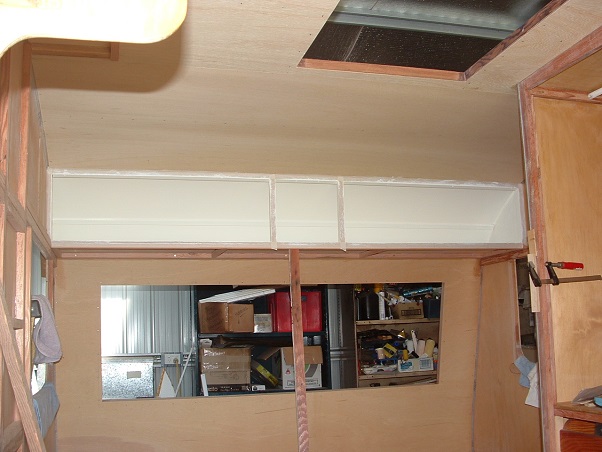 And lastly, a front cover...  You'll be pleased to know that I put that little side shelf in, just like it was originally   ... 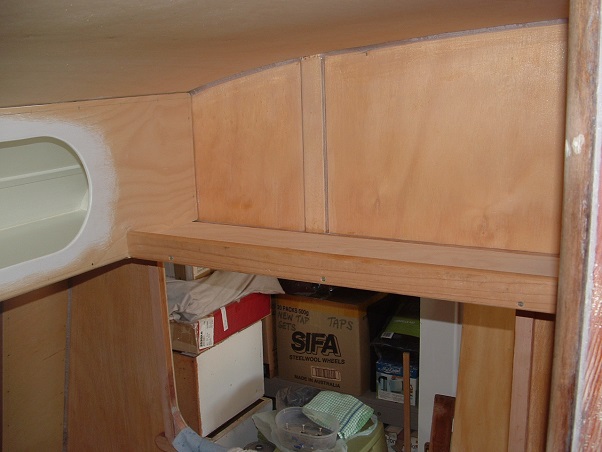 cheers, Al.
|
|