|
|
Post by Franklin1 on Nov 11, 2013 22:23:26 GMT 10
Crikey, lizysu, your photo shows you've got a fairly extensive repair job ahead of you, and you might not make the Christmas holidays if you start hacking into the van too much now. Bote Cote is not designed for the sort of repair you're looking at. I would think the sensible option is to cut the affected plywood out and insert new plywood and framework in that area. Given that you've only got about a month left before the holidays, you might have to go to Plan B and make temporary repairs to get you by. Without seeing the full extent of the problem, I can only give you some possibilities to think about. I'd slap some paint on that ply that you've sanded back (any paint...I wouldn't care what it was). Then I'd stick the J-mould back in position as best I could. Then I'd get rolls of waterproof duct tape and stick a length of tape either side of the J-mould and another length on top of the J-mould overlapping the two side lengths. That (I would hope) would hold it all together and make it waterproof for a few months. Enough to get you away on holidays and back home again, and then you can have time to think about a proper repair. (Orrrrr...the van will fall apart during the trip and you won't have to worry about repairing it anyway.   ) Oh, and take a plastic tarpaulin with you on holidays as well - one big enough to cover the van. cheers, Al. |
|
|
|
Post by Franklin1 on Nov 7, 2013 21:32:45 GMT 10
G'day Doug, My knowledge of cars is limited to how to fill them with petrol, and how to wash them (on rare occasions  ). However, I had a search through the Classic forum for anything relating to brakes, and came across a post that gave a Youtube link to a video about adjusting MGA and MGB brakes. The MGA section of the video (it's the second half) might give some information about how your van brakes work. See here: www.youtube.com/watch?v=xmcaxLzEq6k&feature=bf_next&list=PLC1DC830BCE707FF5&lf=results_mainCheers, Al. |
|
|
|
Post by Franklin1 on Nov 5, 2013 22:17:30 GMT 10
G'day Rex, whatever you do, don't throw the Viscount badge away. Sometime in the future when you least expect it, you'll find an opportunity to have it restored, or copied.
I suspect the badge was die-cast, probably using a white metal compound. Similar to how matchbox cars were made in the early days.
The Viscount crown badge was often used in the early 1960s. I guess you wouldn't be able to find the original chassis number given that the van had a Jones Dolly wheel fitted. Usually the chassis number was welded on the standard drawbar where the jockey wheel was fitted. I've seen these crown badges more on the Victorian Viscounts from the early '60s rather than the NSW models, which tended to get the transfer.
See if there's anybody in your region that has a hobby of making their own miniature military figures, or makes scaled figures for miniature railways. These guys know all about white metal casting, and can give you some pointers on how the crown badge could be reproduced.
cheers,
Al.
|
|
|
|
Post by Franklin1 on Nov 4, 2013 10:26:23 GMT 10
G'day Cruz, I wonder if the van with the Carapark coupling is one of the 1958 "Build Your Own Caravans" that were featured in the Practical Householder magazine, using a kit supplied by Carapark? Your van is not exactly identical to the magazine photo, but it's not hard to see the resemblance, and not hard to think the builder might have modified a few things along the way. See Reply #58 in the Carapark History thread [Note: the Carapark link in the DHL index is not currently working, but DonR will be fixing that in due course.] cheers, Al. |
|
|
|
Post by Franklin1 on Nov 3, 2013 21:51:30 GMT 10
Bloody heck, sgtl... I think I must have fried too many memory cells in the hot weather lately!!   Thanks for the reminder that the other van in my shed (which is right beside the one I'm working on   ) has got the same window rubbers in it, even though the windows are a different style. So, it's Alfab then, according to Sportsman1. Humpyboy, I did have a look through the Spectrum rubber website, and the Scottsautorubber website, but the problem I found with their listings is that they don't give the dimensions of all the profiles. I can find pictures that look the same, but I can't tell if the size is the same as what I've got. It would be good if they updated their photos to include the dimensions (such as what the ex-forum member did in this thread ) cheers, Al. |
|
|
|
Post by Franklin1 on Nov 3, 2013 20:23:42 GMT 10
Thanks hilldweller and seeshell for your comments. It's always nice to see comments from others after posting updates.   Seeshell, the master plan for the project shows completion not later than the end of March next year. That allows for a month of "road trials" before Broken Hill. 'Five months to go' sounds like a lot of time, but there's still a lot to do and enthusiasm is waning after a solid effort over recent months. Xmas and New Year might allow a break from it all. ------------------------------------------------------------ Does anybody know the brand of window that's in my van??... 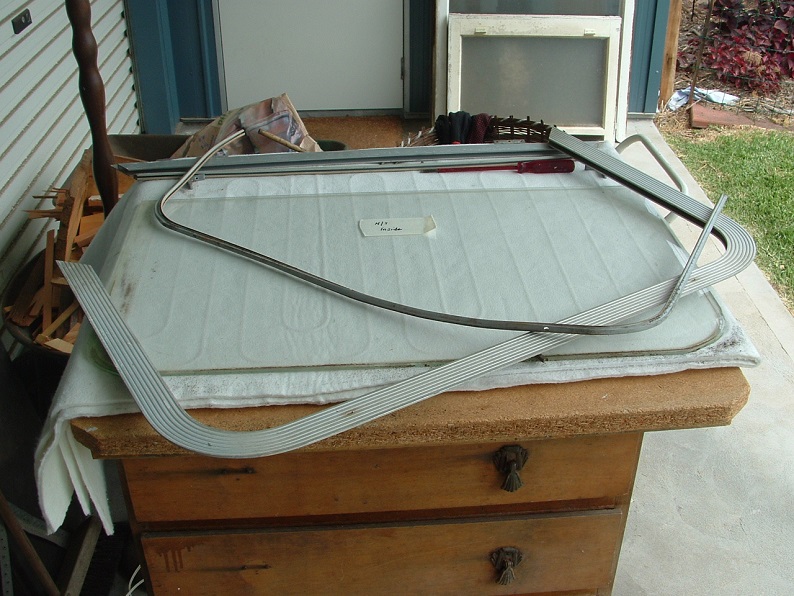 And more importantly, has anybody found the window seals for these windows? The profile looks like this...  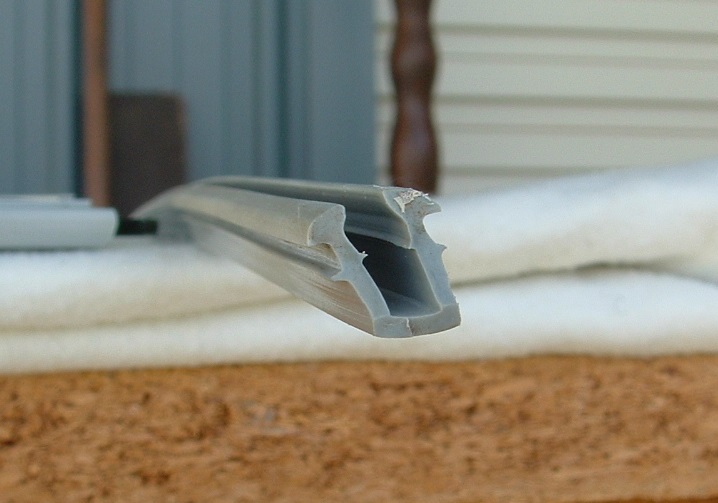 I've searched the forum, but only found info relating to the Sunliners, Olympics, and Franklins. I don't even know what brand of window I've got so I can search for that brand. Thanks for any pointers... cheers, Al. |
|
|
|
Post by Franklin1 on Nov 1, 2013 17:30:15 GMT 10
G'day Ken, Your post has intrigued me. It's almost like I bought a book about your caravan, but somebody had ripped out the first twenty pages. I can see you posted in the Gypsy History thread back in June 2011 to say you'd got a van, but everything's been quiet ever since.   Now you need to spill the beans on what you've been up to. Got any photos of what the van looked like before you pulled it apart? And the BIG question is: how did you get the curved shape on the side wall framework? Forget about the old saying "loose lips sink ships", Ken. On this forum, you need to spill ya guts! ;D ;D (and post plenty of photos   ) cheers, Al. |
|
|
|
Post by Franklin1 on Nov 1, 2013 17:17:23 GMT 10
G'day booma, You'd have to be happy with the way it's turned out. Not a bad job at all!   Have you discovered a chassis number welded on the front drawbar? Usually it is on the drawbar arm that the jockey wheel is attached to, and it could be the letter 'N' or 'V' followed by some numbers. Have a gander and let me know if you find anything please.  cheers, Al. |
|
|
|
Post by Franklin1 on Oct 31, 2013 13:29:31 GMT 10
G'day sgtl, I presume it's an oil-based enamel?? When I stripped the paint off the doors in my project recently, the enamel layers came off fairly easily, leaving the varnish layers reasonably intact underneath (until I aggressively cut into the varnish with my scraper, that is  ). From memory, somebody on this forum discovered and used an environmentally friendly paint stripper that I think was (is) available from Bunnings. Not caustic like your typical stripper (...paint stripper, that is   ...although I've heard some of those other strippers can be a bit caustic as well   ). My memory cells tell me the person was Aquamum, but I don't trust my memory cells any more.   cheers, Al. |
|
|
|
Post by Franklin1 on Oct 31, 2013 13:10:33 GMT 10
Yep, early 1969. They were originally an initiative by a car dealer in Sydney to cash in on the booming caravan market at the time. They were built under licence by Millard caravans, but were initially branded and marketed as "York, by Suttons" (Suttons being the car dealership). About a year or so later, Suttons dropped out of selling them for some reason, but the nameplate carried on through the 1970s as just "York".
cheers,
Al.
|
|
|
|
Post by Franklin1 on Oct 28, 2013 21:06:49 GMT 10
Just rounding off this thread to say that the hinges arrived today from jg33, so a BIG thankyou to you!   After a good scrub with some soapy steel wool, they ended up looking heaps better than the other hinges I already had in the van.  I can now send the spare rusty old hinge to griffin, which means two people will benefit from the generosity of one member. How good is that?!!  cheers, Al. |
|
|
|
Post by Franklin1 on Oct 28, 2013 20:20:01 GMT 10
Thanks for your comments, JBJ.  This project has certainly given my brain a good workout, but it's immensely satisfying to see it start to come together the way I hoped it would. To continue the update... Lighting:In the original van there was a grand total of one 240V light, and one 12V light... 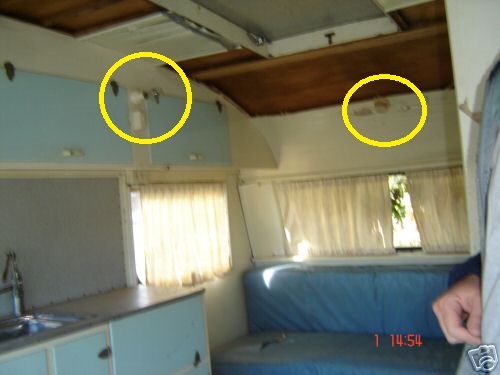 For this reincarnation, all the fixed lighting is 12V only, and I have finally... finally...been able to use some new bus/coach lamps that I bought from an ebay seller in the UK way back in 2007. (Who said I'm not a patient man?!  )... 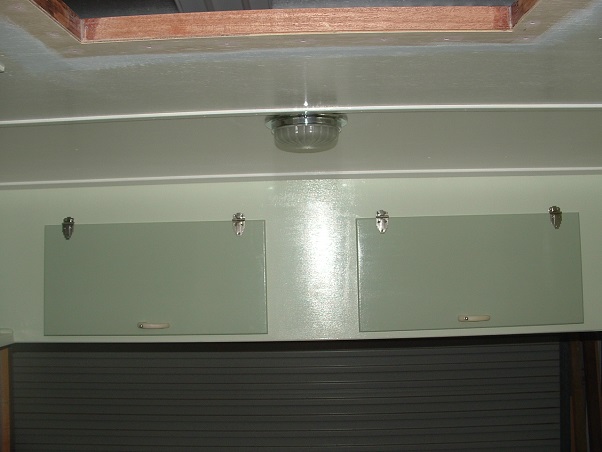 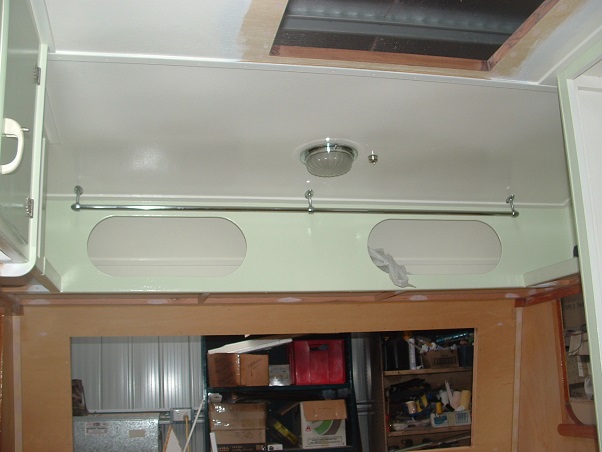 I also bought some little toggle switches from another ebay seller in the UK about a year ago, and each light is operated by a toggle switch...  These little toggle switches are still made in the UK, and they were the nearest I could find to match a toggle switch that is on the 12V power board in my 1956 Franklin...  The control panel for the lighting is in the front offside seatbox...  I have three options for operating the lights: 1. From the 240V mains through a 12V transformer 2. From the tow vehicle battery 3. From an onboard battery The bed lamp I fitted into the side of the wardrobe works really well, just the way I hoped it would... 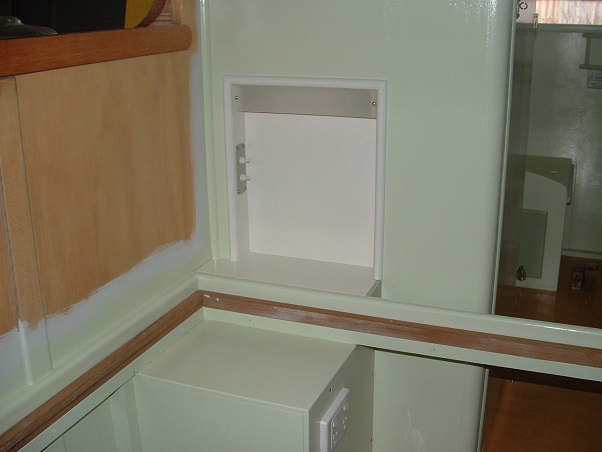 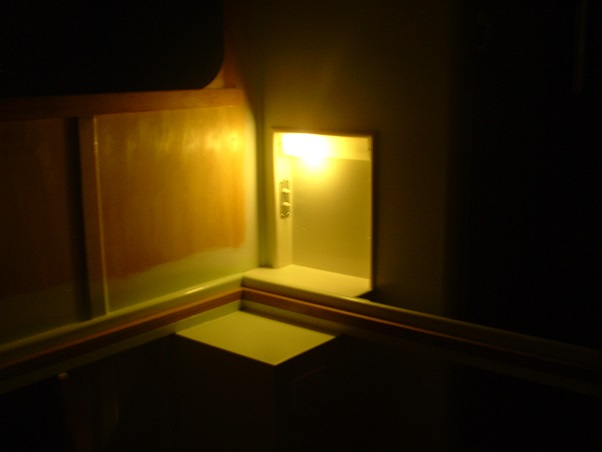 240V mains power: 240V mains power:I fitted the modern Clipsal power inlet to the van. It's a case of 'now you see it'... 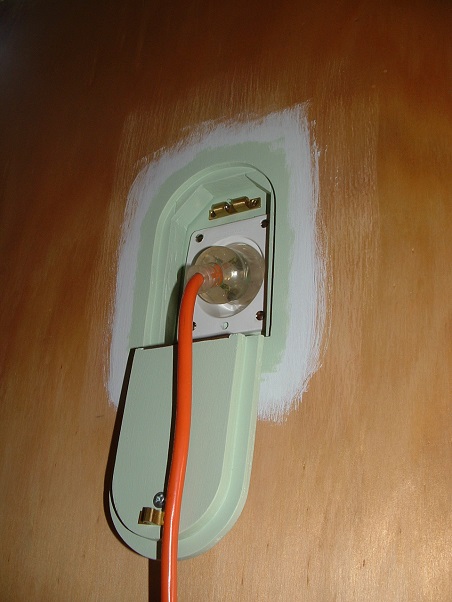 ...and now you don't...  At the back of the Clipsal socket, inside the overhead kitchen cupboard, is the main power board, complete with a safety switch/circuit breaker... 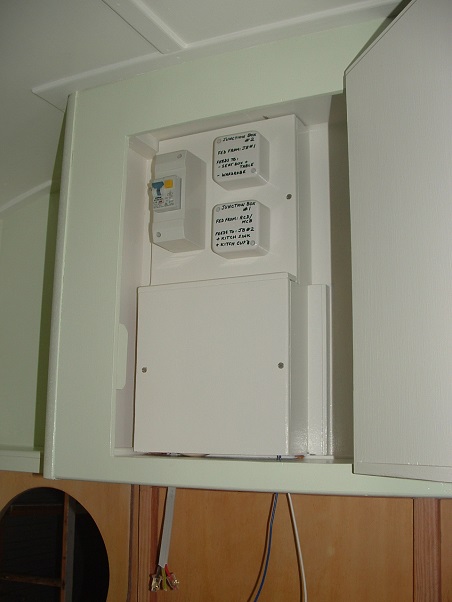 On the other side of the van, tucked in behind the wardrobe where it isn't easily seen, is another smaller power box covering the 12V socket for the annexe light... 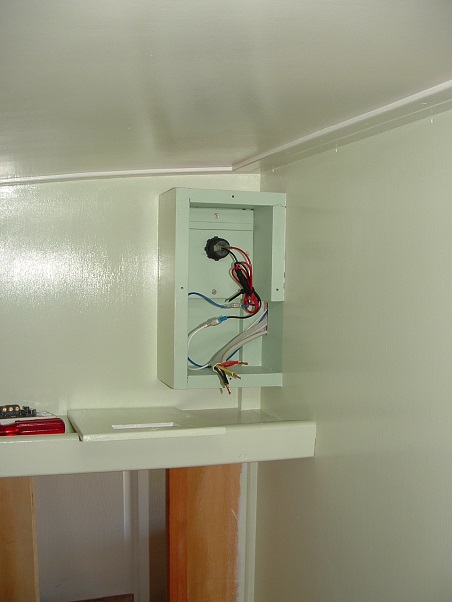  Kitchen sink cupboards: Kitchen sink cupboards:This part of the project has been the big sticking point out of the whole lot. Ever heard of the term "analysis paralysis"?? I have suffered from this badly as I try to get my head around how to build these cupboards. I know how I want it to be when it's finished, but I'm stuffed if I can work out where to start. The problem originates from having to use a larger sink in place of the rusty original... 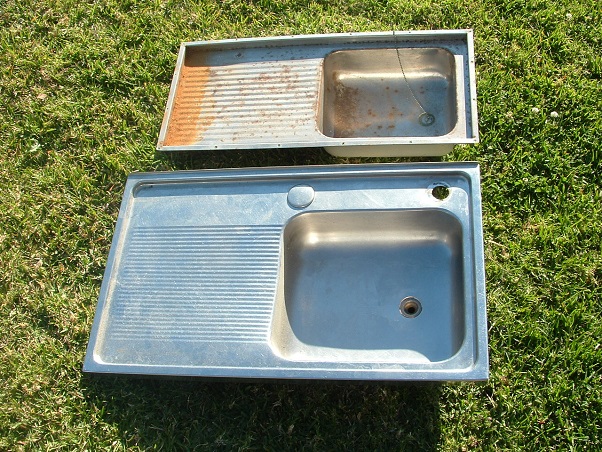 This means other parts of the cupboards have to be different sizes to the originals, but the ice chest still has to fit, and so do some of the other bits and pieces. I've been avoiding this part of the project for quite some time, but it's now the only major thing left inside the van to do. I could very well end up going to Broken Hill next year without a kitchen at all.   Ah well, onward and upward... cheers, Al. |
|
|
|
Post by Franklin1 on Oct 28, 2013 17:41:51 GMT 10
G'day All, Well, it's been a couple of months since I updated this thread, but I haven't been bludging.   Over the next day or so, I will try and get the thread up to date. Overhead kitchen cupboards:The original overhead cupboards looked like this... 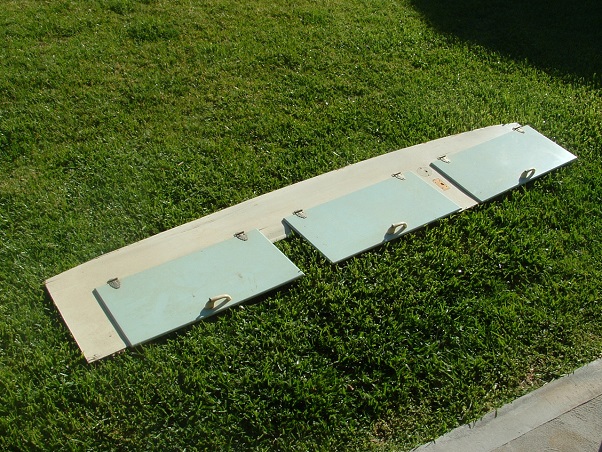 ...but in the redesign along that side of the van, I couldn't fit the three doors back in the way they were. In fact, I couldn't even fit two of them side by side in the space allocated.  After a bit of thinking, a bit of measuring, and a bit of calculating, I ended up cutting the three doors shorter... 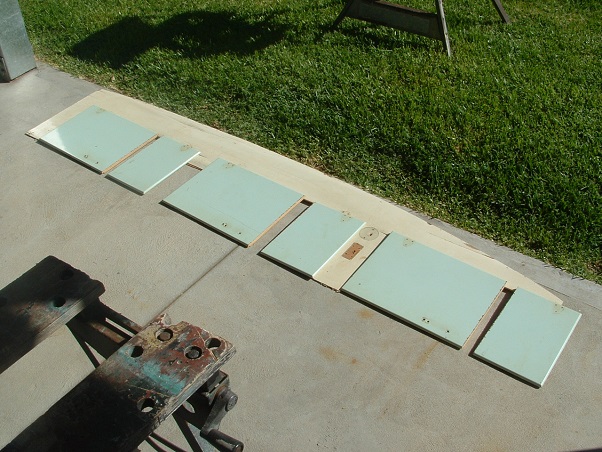 ...and turned them 90 degrees...   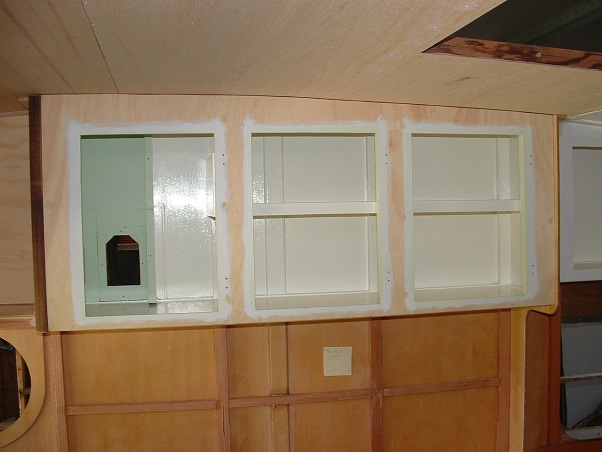  I think they allow much better access to the shelves in the cupboard, compared with how it was originally. At the end of the kitchen section, I've installed a partition wall...  I like the idea of these partitions, because they lock the roof, wall, and floor together, and help reduce any sagging in the roof around the hatch area. Wardrobe:This has been completed... 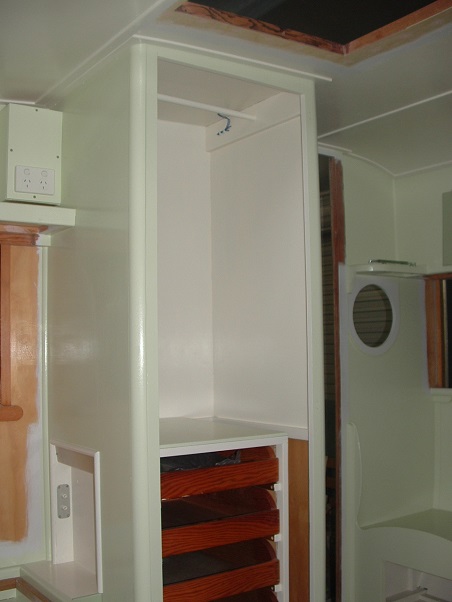 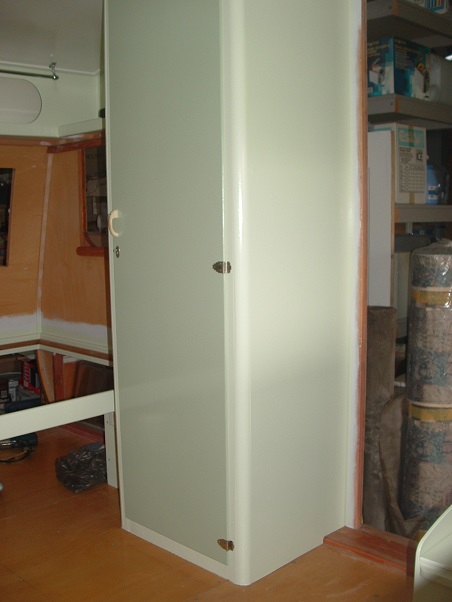 The original wardrobe door became surplus to requirements, so I cut it up to make two smaller doors... 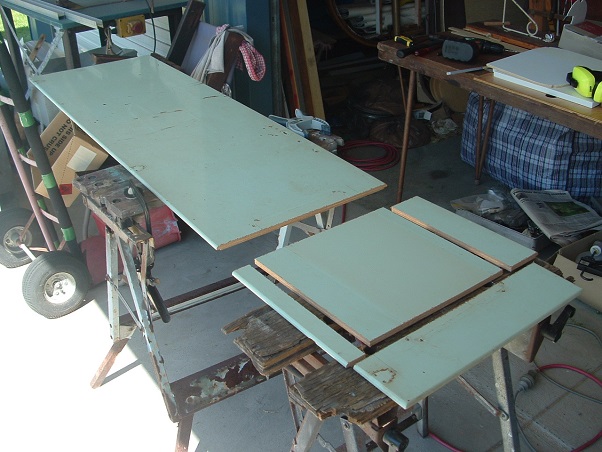 One of the smaller doors was fitted here... 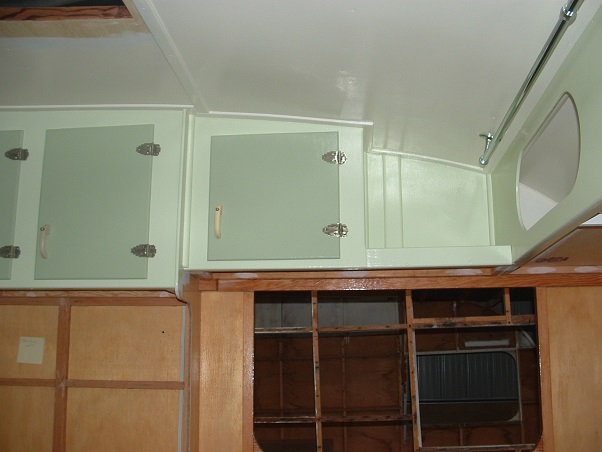 ...and thanks to forum member jg33 for some hinges, the other one was fitted in the seat box... 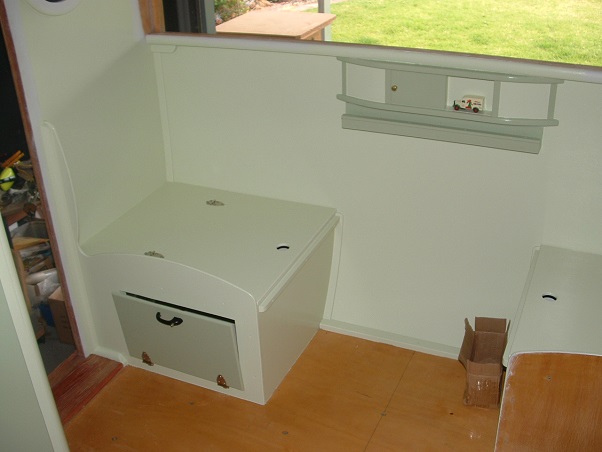 When I stripped the paint off the doors, there was a coating of varnish underneath, so maybe these doors weren't painted originally...  And here is my "paint curing oven", where all the painted bits were left for a week to allow the paint to cure properly...  Back with more later... cheers, Al. |
|
|
|
Post by Franklin1 on Oct 27, 2013 18:07:59 GMT 10
Archie, the search function for this forum is pretty easy to use. Click on the word search on the blue toolbar at the top of the page. Wait for the screen to reload. Type the words you're looking for in the Search for: blank field at the top. Scroll right down to the bottom of that page and change the days field to 3500 and the Maximum results field to 100. Change the dot to the threads (collapsed) option. Click on the [Search] button underneath. For what you're looking for, do two separate searches, one to search for the word calico and a second one for the word Paramount. You'll get the hang of it after a couple of stuff-ups.   You just have to remember to change the fields down the bottom of the search page, and put the dot in the threads option. cheers, Al. |
|
|
|
Post by Franklin1 on Oct 27, 2013 17:27:16 GMT 10
G'day gaysha, No, not a Franklin Safari. The body shape reminds me more of the Coronet vans that were being made in the second half of the 1960s. It's a bit hard to make out the shape of the rear of your van, but the front is very similar. If you click on this link it will take you to the Coronet thread in our Down History Lane section: Coronet caravans - Ballarat, Vic. . Scroll down to Reply #15 and have a look at the shape of the van in the brochure. Go further down to Reply #21 and compare your van's shape with the one under the "carport" (don't compare the size, just the shape of the two ends   ). I can't think of any other brand at the moment that has that shape. Where did you find the chassis number located? Earlier Coronets had the chassis number welded on the inside of the drawbar arm (not easily found). cheers, Al. |
|
|
|
Post by Franklin1 on Oct 26, 2013 20:30:34 GMT 10
retro 64, the Prospect County Council use to be in the western area of Sydney. See Reply #39 in this other thread for a mention of them: Pathfinder President by Jennison
cheers, Al. |
|
|
|
Post by Franklin1 on Oct 18, 2013 19:20:11 GMT 10
hellsbells, one of the three hinges on the wardrobe in the van has been changed at some time, and a steel-based hinge has been fitted. After however many years, that hinge is now showing some serious rusting... 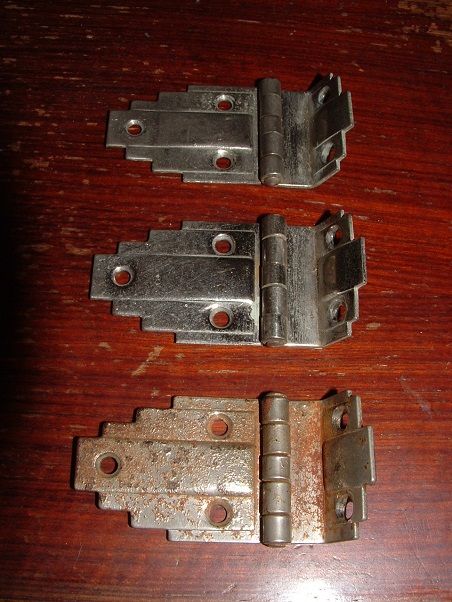 A fridge magnet sticking to the hinge confirms it is steel based... 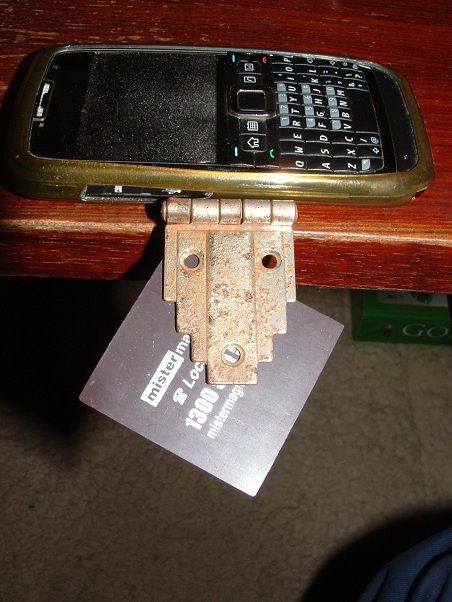 (And how about that vintage mobile phone in the background, huh?!!   None of that modern stuff for me!! ;D ;D ) If jg33 sends me three brass-based hinges, I'll be able to ditch that rusty one as well.   cheers, Al. |
|
|
|
Post by Franklin1 on Oct 18, 2013 18:48:25 GMT 10
|
|
|
|
Post by Franklin1 on Oct 18, 2013 18:06:42 GMT 10
PM sent, jg33 - thankyou!   hellsbells, if they were around $6 they are probably the nickel plated steel versions. I already have some new ones of those but wanted the nickel plated brass versions (which don't seem to be available these days - plain brass yes, but nickel plated no.) cheers, Al. |
|
|
|
Post by Franklin1 on Oct 16, 2013 16:04:05 GMT 10
Ha ha...I was actually thinking the very same thing about you buying something for Doris, but I wasn't sure if you'd venture into the shop.
Maybe you could send reddo in...?
;D ;D
|
|
|
|
Post by Franklin1 on Oct 16, 2013 15:57:19 GMT 10
G'day sgtl, It's worth having a look through your computer folders to see if any nasties are showing there. Back when I was getting a nasty popping up via Proboards on this site, I researched the internet and found out where the nasties are anchoring themselves on my computer. First you need to have your computer set up to "show all hidden files and folders". Do a google and it'll tell you how to do this. Then you go searching and drill down to the Macromedia folder... 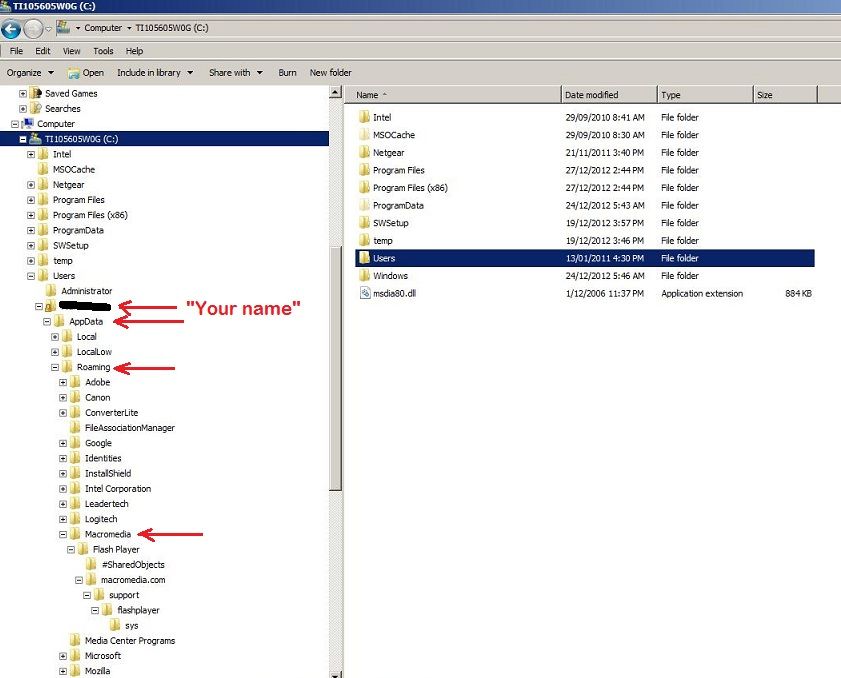 ...and further down to both the #SharedObjects and the sys folders...  Check in both those folders to see if there's anything showing that's related to the kustomink name. If so, delete both the 2AMSUK4B folder (or whatever gibberish numbers and letters are showing on your computer) and the sys folder. And then delete them permanently from your trash folder. I regularly delete both these folders, to try and stop any nasties from anchoring in my computer. These two folders automatically get recreated whenever you link to any website that requires "flash" software to show videos, animated popups, etc, so there's no harm in continuing to delete them. cheers, Al. |
|
|
|
Post by Franklin1 on Oct 15, 2013 22:15:01 GMT 10
You can get the 7-day weather forecast for the Wollongong area hereI would think that if isolated showers are predicted for early next week, there's a good chance they'll be long gone by the Coledale weekend. I'd gamble on BOTH weekends being pretty fine. ----------------------------------------------------- I know you guys attending Coledale usually have something organised for the Saturday night, however just letting you know that Wollongong City Council are organising a free movie night for people in a park at Thirroul (about 5ks south of Coledale). See here for more info. The other event happening in Wollongong on Sat 26th Oct is a Vintage Ball being organised by a shop in Wollongong called "Something For Doris". Tickets for the ball are $75, so I'm not suggesting you go as such (they might even be sold out for all I know), but if you ladies are interested in vintage clothing, the shop might have something that takes your fancy (...my partner seems to keep going back there   ). Do a Google for Something For Doris and you'll get the gist of it all. cheers, Al. (unpaid ambassador for the Wollongong region   ). |
|
|
|
Post by Franklin1 on Oct 14, 2013 22:32:56 GMT 10
I wondered whether the number in the cupboard was supposed to read 253-1, making it a 1971 van. The main query with that is that the Franklin sticker on your van was changed in mid-1970 and I would expect a van made in early 1971 to have the newer sticker. However, stranger things have shown up in the caravan history, so it's possible somebody stuck the old style stickers on a '71 model.
The other query is that the Mini model seems to have stopped being included in advertising around the end of 1970, but that doesn't mean the model wasn't made in early 1971.
Perhaps you need to wire brush the welds to see if the last number shows up more clearly. The van is certainly from the very late 1960s or very early 1970s.
Just by the by...something has happened to the van above the door, and a pretty amateurish repair has been done at some stage. When you're checking the van out, there might be some damage to the framework in that repaired area.
cheers,
Al.
|
|
|
|
Post by Franklin1 on Oct 10, 2013 14:39:49 GMT 10
No, not me. I do remember others on the forum finding old newspaper under their lino. I can't even find old lino, let alone old newspapers under it.   We should probably qualify our allocation of a year to the lantern van, just in case Detective Don Ricardo catches us out   ... The date on the galvanised sheeting means the sheeting was made in 1944, so how long after it was manufactured was the mudguard made?? I guess we could be fairly safe in assuming the lantern van was made within a couple of years of the galv being made, so perhaps somewhere between 1944 and 1946. cheers, Al. |
|
|
|
Post by Franklin1 on Oct 10, 2013 10:16:00 GMT 10
I'm resurrecting a thread from the graveyard here, but during my search for info relating to earlee's Franklin van, the results led me to this thread for some reason.
Anyhoo...something for cobber to confirm or deny is this...
Back on Page 2 of this thread, in Reply #33, the second photo shows the mudguard made out of Lysaghts galv sheeting, and I think I can make out the numbers 44 under the Queen's head. If I understand your galv dating method correctly, that would mean this mudguard was made in 1944, correct?
So, what year does this make the lantern van??
cheers,
Al.
|
|