|
|
Post by Franklin1 on Dec 25, 2013 19:29:11 GMT 10
|
|
|
|
Post by Franklin1 on Dec 24, 2013 12:50:30 GMT 10
I know nothing about teardrop building, so I can't directly answer your question. If you Google hurricane hinge images ( click here ), you'll see heaps of images of the hinge, and each image can be traced back to the website it belongs to, by clicking on that image. You never know, you might find some info about where they got the hinge from. Somebody responded to a teardrop trailer blog a couple of years ago, and talked about a "live plastic" hinge (which Google seems to think is called a "living hinge") as a cheaper alternative to the hurricane hinge. See the reply post at the bottom of this blog page: Teardrop Travel Trailercheers, Al. |
|
|
|
Post by Franklin1 on Dec 16, 2013 20:12:47 GMT 10
G'day All, Due to a silly old fool injuring his hip a couple of weeks ago, all heavy duty work on this van has come to a stop. No climbing ladders. No manhandling sheets of plywood. No twisting the body into awkward positions. "Restricted light duties" gets me out of having to do any hard yakka. At least now I have plenty of time to write out 100 times, nay 1000 times, "I must not try to lift heavy items in my senior years...".   As a result, I've pulled the plug on going to the Nationals. I doubt very much whether the van will be finished in time. In between visits to physio, walking and exercising, I've made a list of 'light duties' jobs that are required for the van, and have started working on that list. First job was to have an amateur go at making the vinyl covers for the seats. I've never made these things from scratch before, so off I went to watch a few videos on Youtube to see how the professionals do it. They make it look easy, which gave me an inflated opinion of my own abilities...   First I made the vinyl piping...  Next, marking out the vinyl (including mistakes  )... 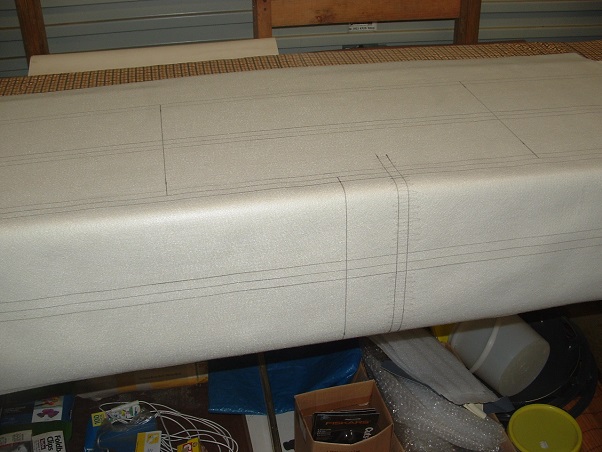 Sewing in the zippers... 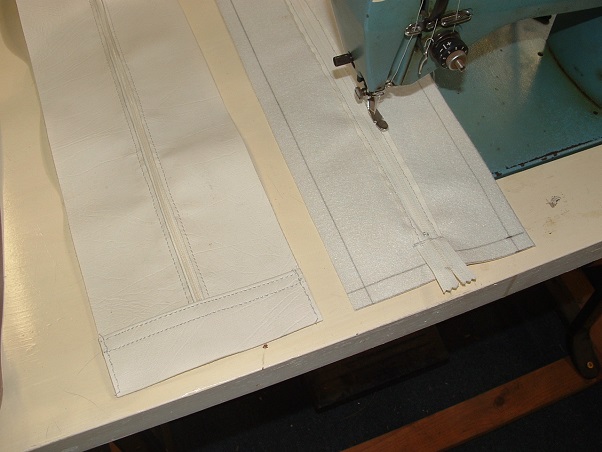 When I tried to pin multiple layers of vinyl together for sewing, the long pins (like hat pins) were bloody hard to get through the layers without putting all my pencil alignment marks out of whack. After a number of attempts, I spat the dummy and went and got my office stapler and stapled around the edges before sewing the line...  After sewing around the edges, I pulled the staples back out with a screwdriver (...a bloke's version of sewing...  ) Bit by bit over a week or so, I finally got a cushion cover finished...  Once you get the first of something done, the rest follow pretty quickly afterwards... 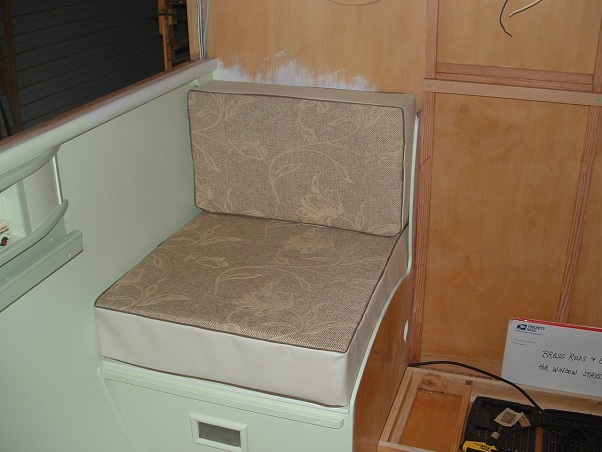 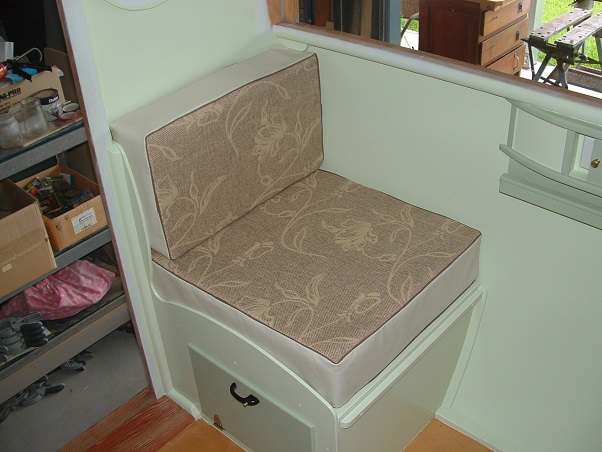 The fabric isn't vintage (it was $5 a metre at a Spotlight clearance sale last year), but it does have an interesting texture. It's very much like a hessian weave with other threads interwoven through it... 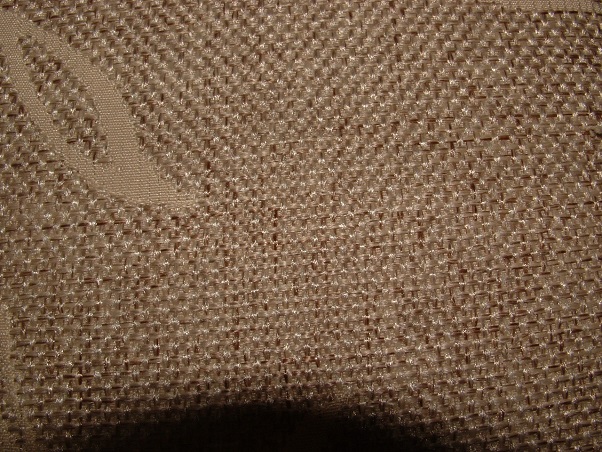 I quite like how the cushions look, and at least I can argue that the fabric is reminiscent of the potato sacks and wool bales of yesteryear.   ----------------------------------------------------- Have you ever seen this trick for getting foam blocks into vinyl covers? I never knew of this until I saw it recently on a Youtube video... Here's a foam seat block... 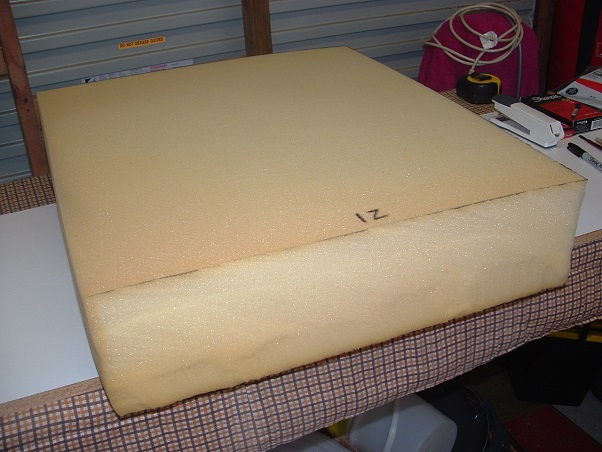 Cover it with a large plastic bag...  Put the nozzle of a vacuum cleaner against the foam, and wrap the plastic around the nozzle so no air can get in... 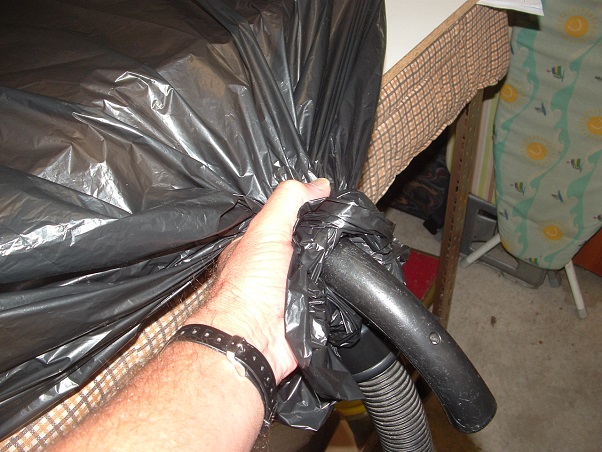 Turn the vacuum cleaner on, and ten seconds later the foam will shrink to a fraction of its size... 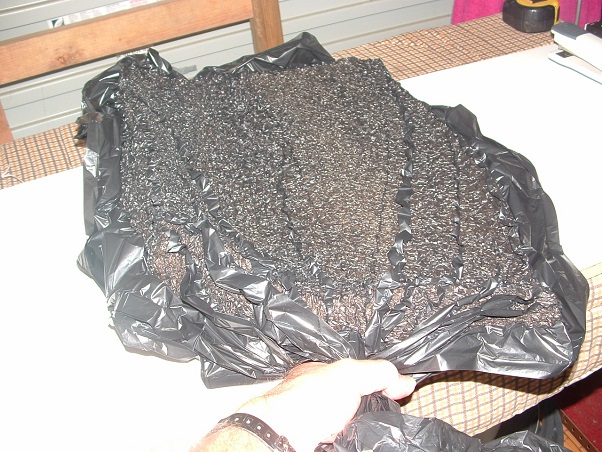 Pull the nozzle away and clamp that end of the bag with your hand. Put the shrunken foam into the vinyl cover - easy peasy... 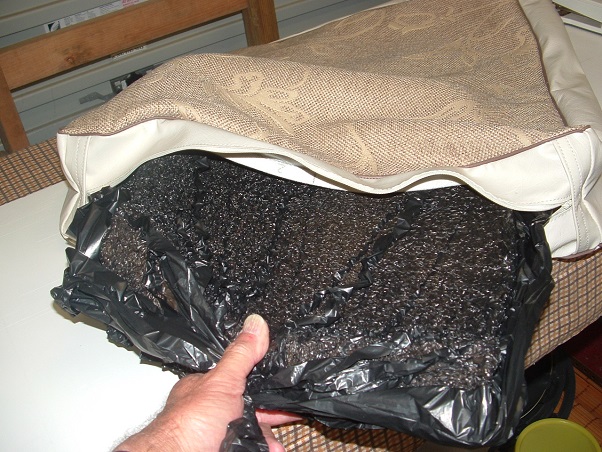 Release the end of the bag and let the air back in. The foam will expand to its original size. Reach into the cover and tear the plastic bag to shreds and pull all the plastic back out. It's heaps easier than the way I've done it in the past, puffing and wheezing trying to squeeze the foam into the cover by hand. See this 1-minute Youtube video if you want to see it done by the professionals: www.youtube.com/watch?v=K5lPw81UvcIcheers, Al. |
|
|
|
Post by Franklin1 on Dec 15, 2013 20:59:45 GMT 10
It might be worth double-checking what size wheels these hubcaps are for. I only say this because in the 1970s Millard made a different style hubcap for both 13" and 14" wheels, and it might have been the case with this design as well.
cheers,
Al.
|
|
|
|
Post by Franklin1 on Dec 6, 2013 22:20:14 GMT 10
G'day ripper, There aren't any.  Your van was built in the new Franklin factory built in Wendourie (Ballarat) in 1967. Completely different construction techniques were used compared with previous Franklins. The walls of your van were built on a worktable as a composite of the cladding, the foam insulation, and the panelling, all bonded together with 3M adhesives. No timber framework required, other than for windows, door, and ceiling framework. If you click on this link, it will take you to a thread on the Classic Caravans forum, showing how a 1974 Franklin was dismantled and various repairs carried out before putting it all back together again: 1974 Franklin Regent - V2541cheers, Al. |
|
|
|
Post by Franklin1 on Dec 5, 2013 20:36:08 GMT 10
Ok, it's a 1971 model (the last digit after the hyphen is the year of manufacture). This means you are more than welcome to join our sister forum for Classic Caravans built between 1970 and 1979. I'm a Moderator over on that forum, and we'll be only too happy to help you over there with any questions about your van. Click here for the Classic forum: ditzygypsy.proboards.com/cheers, Al. |
|
|
|
Post by Franklin1 on Dec 5, 2013 18:53:56 GMT 10
G'day charliebuttons,
The chassis number welded on the drawbar just next to the jockey wheel is the critical piece of information.
Tell me what the complete number is and I'll give you an idea of what year it was built in.
cheers,
Al.
|
|
|
|
Post by Franklin1 on Dec 4, 2013 10:34:41 GMT 10
|
|
|
|
Post by Franklin1 on Dec 4, 2013 10:21:27 GMT 10
G'day Mike, Nice work on the job so far. Looks to have been quite a bit of detailed work involved, so congratulations for your efforts.  Can you post a photo of this citrus cleaner so I know what I'm looking for, please? Having to remove old silicone sealant is a much more common requirement on the Classic Caravans forum, and I'd like to tell the members over there about this very helpful discovery. cheers, Al. |
|
|
|
Post by Franklin1 on Dec 3, 2013 14:51:07 GMT 10
We went away for a holiday in our "other caravan" last May, and spent one of the days looking around Leeton, in the southern central part of NSW (rice growing country). I happened to come across a flooring shop who had some sheet vinyl offcuts in a bin outside, going real cheap. I bought one out of the bin, and then started talking with the lady about what I was doing with it. She took me over the road to another building they used as their warehouse, and showed me a heap of other offcuts available. I bought two offcut rolls for $10 each. One was 1.4m x 0.7m and the other was 1.6m x 0.85m...  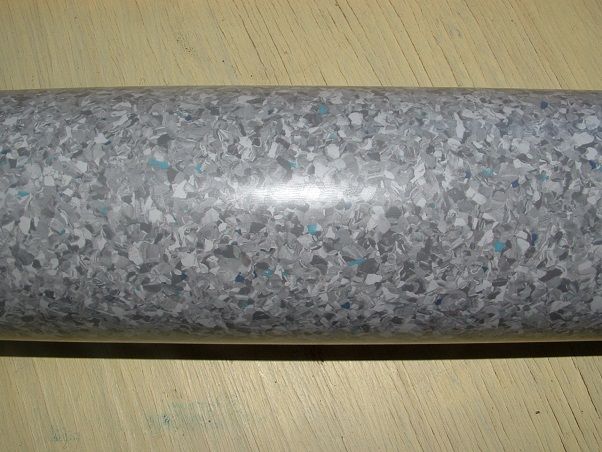 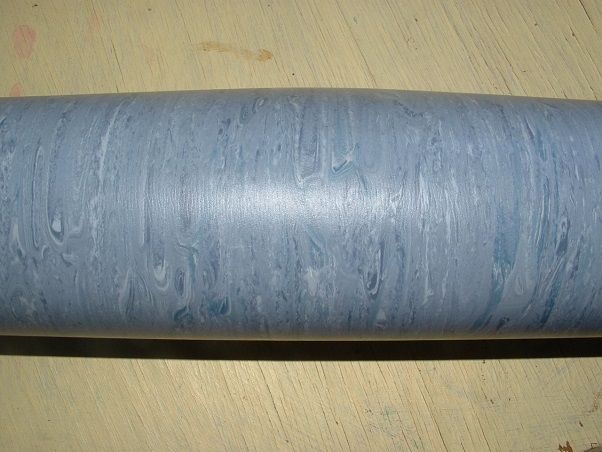 My intention was to experiment with these offcuts to see if they could be cut up into 9" x 9" tiles, in a similar way to the discussion in this thread: Vintage laminate and lino alternatives . I haven't done the experimenting yet, but I will one day. The patterns I bought are not really vintage, but other patterns available from the Armstrong-Aust "Excelon" range look like they would work ok. I think if I can successfully cut sheet vinyl into nice, square 9 x 9 tiles, it would mean there's a viable alternative to hunting for the genuine old stuff. And just by the by...there's an interesting bit of info in this thread ( Flooring Advice ) about not using contact adhesive to stick old lino to the floor. cheers, Al. |
|
|
|
Post by Franklin1 on Dec 3, 2013 12:52:23 GMT 10
I think your biggest concern will be the number of people who stop and brush their hair or fix their makeup in the reflection.   Not to mention the number of blokes who will check "does my bum look big in this??"   You can read this thread: ShinynessAnd you can see the end result of hours of polishing by willyn of his Airstream. Read through to the end of Page 2: will and Lyns new Airstreamcheers, Al. |
|
|
|
Post by Franklin1 on Dec 3, 2013 11:20:17 GMT 10
G'day jcole, Your chassis number of N1164 will be from the 1962/63 time period. You can compare your van with these other Viscounts: Chassis number N925: Unusual Viscount in Carseldine, QldChassis number N1047: Our 1959 Viscount Classic (...and which is not a 1959 model) Chassis number N1055: anglia46 new vanChassis number N1379: owned by forum member donald80, but I don't think there are any photos on the forum for it. I took these two photos at the 2012 Nationals at Cowra... 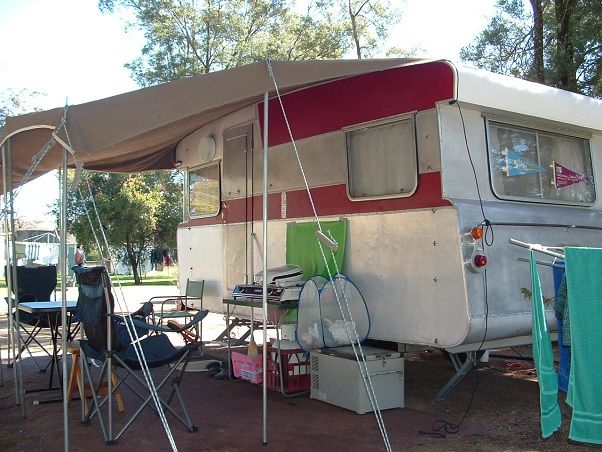 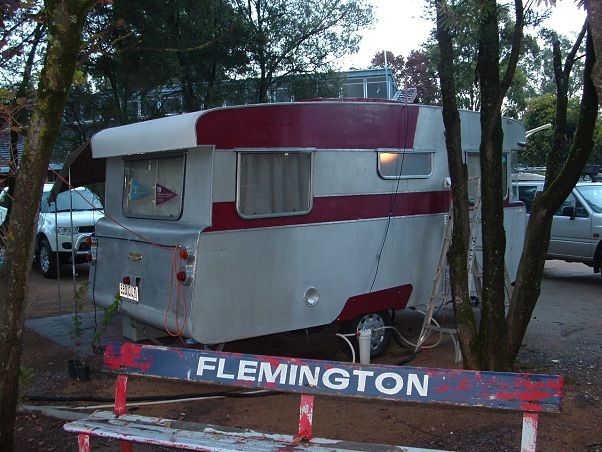 You can read other info about identifying early Viscount vans here: Viscount build date helpps. Sorry for clogging up your thread, sgtl.   cheers, Al. |
|
|
|
Post by Franklin1 on Dec 1, 2013 21:39:06 GMT 10
Perhaps because cars were narrower and you didn't need much space to turn? Also, there were no gas bottles on the drawbar until after 1956, so you didn't need extra space for anything there. But I don't know the answer to your question for sure...  cheers, Al. |
|
|
|
Post by Franklin1 on Dec 1, 2013 20:28:15 GMT 10
G'day hilldweller, It's difficult to give you firm advice based on photos only, so allow me to tell you how I would go about your project, which is different to me telling you how you should go about your project... I wouldn't dismantle any more of the van until I assessed what I've got so far. I would get a sharp-pointed item (a cake skewer; a nail through a bit of timber; etc) and go all around the side and end frames, poking the skewer into the timber wherever I thought there was rot or damage. I'd get a box of coloured chalks, and mark any damaged areas according to a colour code - red means the sharp point easily goes deep into the timber, and the timber needs to be replaced; yellow means the sharp point only goes a few millimetres into the timber, and I could get away with chipping out the rot and filling it with a repair medium; green means the sharp point doesn't penetrate the timber, and the surface is only water stained. I could get away with sanding the surface of that timber to make it good again. After I've assessed the van, it might look like this... 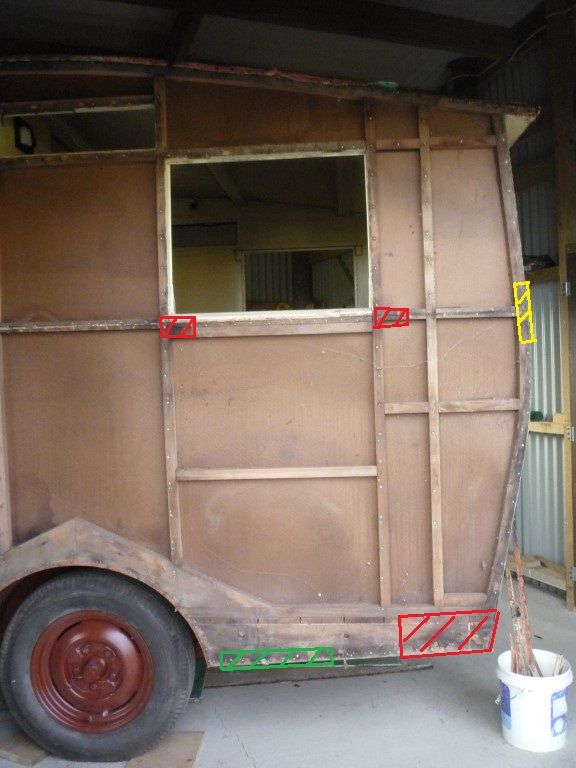 Then I'd put a plan together on how to fix the various areas. For the red areas, I'd make a cardboard tracing of the timber size and shape, and use that cardboard tracing as a template for cutting any replacement timber. Only then would I think about removing the red timber from the van. For yellow areas, I'd educate myself by Googling wood rot repair (or "dry rot repair" - same thing), and learn about the products available today to fill the rotted areas. For green areas, I'd just sand them down with 80 grit sandpaper. For the warped masonite, I would assess whether the warping was really a problem or not. Is it only an appearance issue, or is it interfering with other parts of the van (eg. does it stop doors opening or sitting flush; etc). I might decide to add more framework to the van, and nail the warped hardboard to it so it sits flat again. Or I might do nothing, depending on how fussy and finicky the job would be. As far as extra framing in general goes, remember that the van has stood for 50 years or more with the framework it has already, so it's not a major requirement for additional framework. There might be the odd area or two where adding some additional framework might make sense, but by and large you should be able to get away with the amount you've got already. Perhaps the warping is from water getting onto the hardboard through leaks, rather than the lack of sufficient framework. Hope this helps, cheers, Al. |
|
|
|
Post by Franklin1 on Dec 1, 2013 11:16:34 GMT 10
G'day phillslats, The "V" series of chassis numbers on the Franklins are from either 1974 or '75 (I haven't worked out exactly which of the two it is, yet), so you are more than welcome to join our sister forum for Classic Caravans built in the 1970s (click here: ditzygypsy.proboards.com/ ). I'm surprised it is a Statesman model because I've always thought the Statesmans were the larger family/live-in size vans, not a little 10-footer. I would have identified your van as the Regent model. Does it actually have the Statesman stickers on it? cheers, Al. |
|
|
|
Post by Franklin1 on Nov 27, 2013 13:09:43 GMT 10
Maybe I misunderstood, but I took it that hughdeani was confirming that sgtl's photos were of a Hilandale, not that the mystery van was a Hilandale. Hence my comment, "Yeah, but what about..." Fess up, hughdeani...what's the mystery van??   |
|
|
|
Post by Franklin1 on Nov 27, 2013 9:49:12 GMT 10
G'day zepzep, and welcome to the forum! ;D
Your first port of call for any information about parts for your van is the fourth thread stickied at the top of the index on the first page in this Techo section: VINTAGE RESTORATION PARTS SUPPLIERS/INFORMATION
Scroll down to the WHEEL BEARINGS heading, and start making contact with those suppliers. Both your bearing numbers show up in a Google search, so they must be still reasonably available.
Good luck with your hunt!
cheers,
Al.
|
|
|
|
Post by Franklin1 on Nov 27, 2013 9:05:15 GMT 10
G'day Beetles,
The flat cladding along the window line is fairly common in the aluminium vans from the early 1960s. It allowed the window frames to sit flat on the sides of the van, and meant they didn't have to muck around very much with trying to seal the frame to the cladding.
If you look at the Hilandale pictures above, you'll see how the windows are fitted onto the ribbed cladding (this was the cladding profile launched in late 1963). The window frame sits on the peaks of the ribs, and you then have to fill in the valleys in the profile with a sealant or rubber or something. It's more hassle than fitting to flat aluminium.
I doubt very much whether the mystery van is much later than 1963. I suspect the Hella tail lights have been fitted later to the van. Originally, I'd guess there was just the centre tail/brake light and probably reflectors on either side. I'd be looking for evidence of the wiring for the Hella lights being retrofitted into the wall cavity somehow.
cheers,
Al.
|
|
|
|
Post by Franklin1 on Nov 26, 2013 22:18:06 GMT 10
Yeah, but what about the mystery van up top, hughdeani??    I couldn't identify it when I first saw the post, but I could see that the aluminium cladding on the sides was the profile used in the early 1960s (starting around 1962) and was still used by some manufacturers for a while after the newer profile cladding became available in late 1963. Mostly you'll see the earlier cladding on vans that are composite aluminium and bondwood types (see the Valiants and Vacation brands in the DHL section for examples) [and by the way DonR, I've sent you a PM about the Vacation thread]. The double hopper windows in the front were being used on the new Viscount Ambassador model that was launched in late 1964, but could have been used by other manufacturers earlier than that. The sloping side windows were also used on Viscounts and Valiants in 1963, but again could have been used earlier by others. Certainly the sloping wrap-around windows at the front is a distinguishing feature of this van, but I can't recall seeing that shape on other vans on the forum. To me, the evidence points towards the van being from the time period of around 1963, but as far as the brand goes...err  cheers, Al. |
|
|
|
Post by Franklin1 on Nov 26, 2013 20:48:26 GMT 10
It's a great story you're putting together, Doug, and a really interesting read.   The "how-what-when-where-and-why" of what you're doing, plus the explicit photos, will surely be of immense help to any others contemplating working with fibreglass. It's a quality job you're doing, and a credit to your enthusiasm. ;D cheers, Al. |
|
|
|
Post by Franklin1 on Nov 26, 2013 20:24:42 GMT 10
G'day DonR, The van reminds me a lot of retro1's Castle Deluxe caravan (which I just happen to have in my bookmarks because I think it's a magnificent rebuild, and I'm trying to emulate the standard in mine.   ) cheers, Al. |
|
|
|
Post by Franklin1 on Nov 17, 2013 9:52:11 GMT 10
G'day reddo, I don't disagree with your logic, but it still leaves the issue of the actual caravan lead plugged into the van. Even the heaviest duty 15 amp caravan lead sold by HPM (a reputable brand) has only 1.5mm 2 of copper wire in each of the three cores (see here for the specifications). Are you aware of any caravan extension leads on the market that have copper wiring of 2.5mm 2 cable in them?? cheers, Al. |
|
|
|
Post by Franklin1 on Nov 16, 2013 20:49:01 GMT 10
G'day All, I see in the latest Repco catalogue that they now stock a "Caravan Power Adapter" that will allow conversion of the caravan's 15 amp lead to plug into a 10 amp household power point... [url= 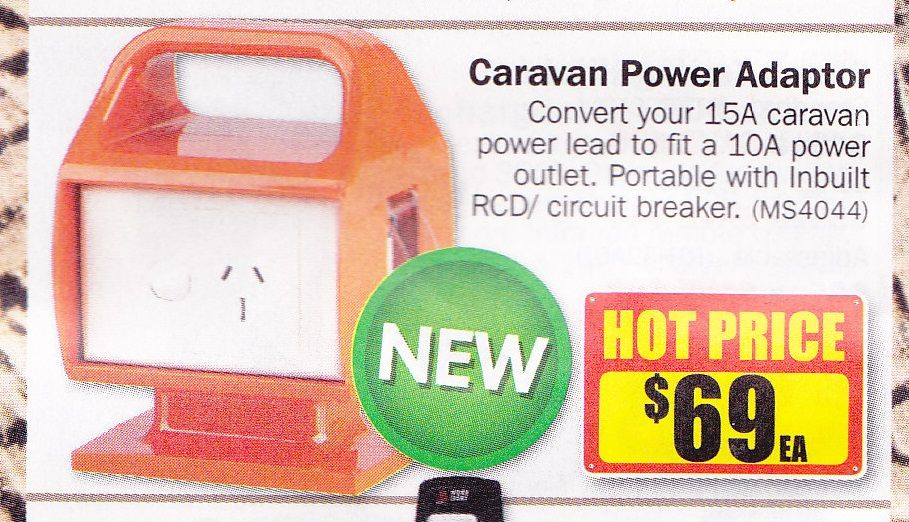 Similar items to the Repco adapter have been listed on ebay for a number of months now (See Reply #18 above). I presume these units have received approval from the appropriate Electrical Authority. They won't be weatherproof like the Ampfibian unit, but would be a cheaper alternative if the unit can be kept under cover. cheers, Al. |
|
|
|
Post by Franklin1 on Nov 12, 2013 21:29:25 GMT 10
I agree with your comments, hellsbells, and certainly wouldn't recommend using the lauan plywood for caravans, after having used six sheets of it on the ceiling of my van. It's normally about $13.50 for an 8x4ft sheet, but old Scrooge here thought it was a bargain when they put it on special for $10.50 a sheet. After working with it for a while, I regretted not spending the extra money for some decent quality Aussie plywood. I'm using Aussie hoop pine plywood everywhere else in the van and the difference in quality between this and the lauan ply is chalk and cheese. They say you're a "Dumbo" if you keep making the same mistakes, and I certainly won't be making that mistake again.   cheers, Al. |
|
|
|
Post by Franklin1 on Nov 11, 2013 22:47:30 GMT 10
G'day Mike,
There is a limit to the radius that 3mm ply will bend around. I can tell you that the imported 3mm lauan plywood that Bunnings sell, will bend around a radius of 480mm or greater. Any tighter than that and you will really struggle with it (and snap it).
If you buy 3mm plywood that's made in Australia, it will bend around a tighter radius than 480mm because the three veneer layers are more equal in thickness than the Bunnings stuff.
The way to test whether the ply you have will bend around the radius you want, is to cut a narrow strip off the short side of the sheet (ie. if you have an 8 x 4ft sheet, you cut a 2" strip off the 4ft edge). Sand the cut edges of the strip to remove any rough cut edges, and then see if it will bend around the curve you want. If the narrow strip will cope with the bend, then a full sheet will cope with the bend.
cheers,
Al.
|
|