|
|
Post by Franklin1 on Feb 21, 2013 11:03:31 GMT 10
G'day Seeshell, There's a van on ebay at the moment with the remains of the Jones Dolly wheel on it. I swung by the van this morning to check the tyre size for you (had already looked at the van last week and decided -> erk!  ): Goodyear 4.50 - 8; 4 ply rating. cheers, Al. |
|
|
|
Post by seeshell on Feb 21, 2013 14:37:52 GMT 10
Hey Al Thanks for that! How interesting about the 8" 4.5 tyre on the Jones wheel. As you know, the nearest thing we could find was a 8" 4.8...so not a bad sort of replacement for a guess, hey? It does seem very narrow though when you look at the tyre and rim under all that assembly clobber. Talk about over-engineered! Very much appreciate the info  Seeshell |
|
|
|
Post by seeshell on Mar 11, 2013 17:51:33 GMT 10
Hi All Well, despite the cruel heat, a three day weekend is too good to pass up to make progress. We decided to try and work through the doldrums - nothing like a bit of progress to change your perspective. The Dear Husband and I got out at 8:30 am on Saturday morning and sanded until 3pm - it was 36 degrees, but at least there was a breeze. Then we got up Sunday and did it again, until 2:00 pm - then took our daughter to see Cirque du Soleil in the city. Practically temperate at 34 degrees! Today we got out there at 7:30am and worked through until 4:00 pm - 37 degrees and not a breath of wind. But not the worst day for painting since it was calm. We're VERY pleased to have completed the second complete hard core rub back, patched and filled anything we missed the first two times, and put on coats five and six of hi-build primer. And it's looking pretty great. Next week, we will be looking for the obvious areas that need a patch treatment again (they're so much easier to spot with a new shiney coat of primer). Then the van will get a light rub all over with 120 grit by hand and then colour. Really. Honest to god - colour! And yes, you guessed it, the first colour is white.  But still it means no more sanding!  When we've got pictures of something that look different from the other white, patched and sanded pictures we've shared before , we'll show you - can't be too far away. Sore arms, and crevices full of primer dust - but feeling more motivated, Seeshell |
|
|
|
Post by Roehm3108 on Mar 11, 2013 18:38:16 GMT 10
|
|
|
|
Post by seeshell on Mar 11, 2013 18:46:48 GMT 10
Hi Ray Working at the Bureau has its advantages! We did know the hot weather was here to stay, so I checked with Norglass before we began this weekend. There is a requirement that you don't apply the primer under 10 deg C, but upper temperature really doesn't matter (according to their tech guy), so long as you're not in full sun. We did our primer in our makeshift paint room which worked out great - a bit like a sauna! The test will of course be next week's scuff sand! We'll let you know how it goes.  Cheers Seeshell |
|
|
|
Post by Roehm3108 on Mar 11, 2013 19:22:32 GMT 10
Glad you did your usual homework SS. Did you realise that stuff has a flash point of 32deg C?? Imagine using a spray gun as a flame thrower - he thinks to himself!!!! ;D ;D ;D ;D ;D
|
|
|
|
Post by seeshell on Mar 11, 2013 19:30:33 GMT 10
Hey Ray For sure, nobody better strike a match! I think you'd find that you'd get the same "exciting" result with most paints - which is only enhanced with the fact they're cut with spray thinners.  Interesting that the two-part system only cures above 20 deg C. So if you were doing a paint job on a normal autumn long weekend the mean temperature would be about 27 - which doesn't happen until about 4pm Melbourne time. The paint takes 48 hours to cure at 20 deg C - so, on that basis, it might take 4-5 days to get enough hours above that temperature for the paint to set up and gas off. So there was some upside to the unseasonable heat and toasty overnight temperatures.  Cheers Seeshell |
|
|
|
Post by hilldweller on Mar 16, 2013 8:05:30 GMT 10
Sounds like you've made huge progress - really broken the back of it  Looking forward to the next set of pics. She'll be blue, right? |
|
|
|
Post by seeshell on Mar 26, 2013 16:18:23 GMT 10
Hi All For some time we've been trying to resolve the build date of The Blue Flyer (1951) with the patent date on the Jones Wheel (1957). Memory is a funny thing; Arthur Conrick's daughter was quite young when it was built, but was sure the dolly had always been on the van. And Nolene, Arthur's wife was sure it was completed in 1951. Both could not be true: either the build was later than thought or the JW was added later. We MAY have an answer. If the van in the picture below is in fact The Blue Flyer, the build date is correct, and the wheel must have been added later. Kate has included a picture that shows what she thinks is the van in the very early 1950s with what appears to be a normal jockey wheel, and without later embellishments like the front window shades or any flash. I'm still a little unsure, because the windows look larger in the front. But this was a picture of a group of people who regularly camped together every year - so little likelihood of "outsider" vans being in these pictures. See what you think. Did he also mod or change the windows, maybe it's just the angle of the shot? Original Picture (our van above the car bonnet): 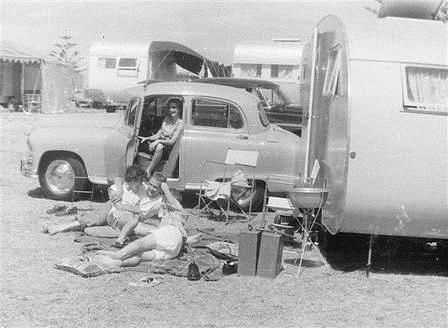 A closeup: 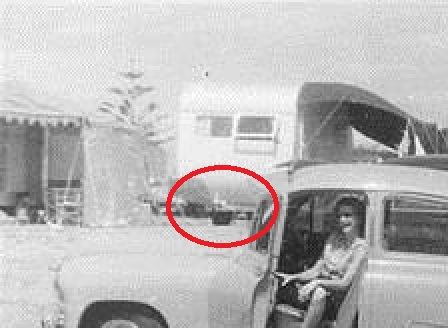 A later look at the van: 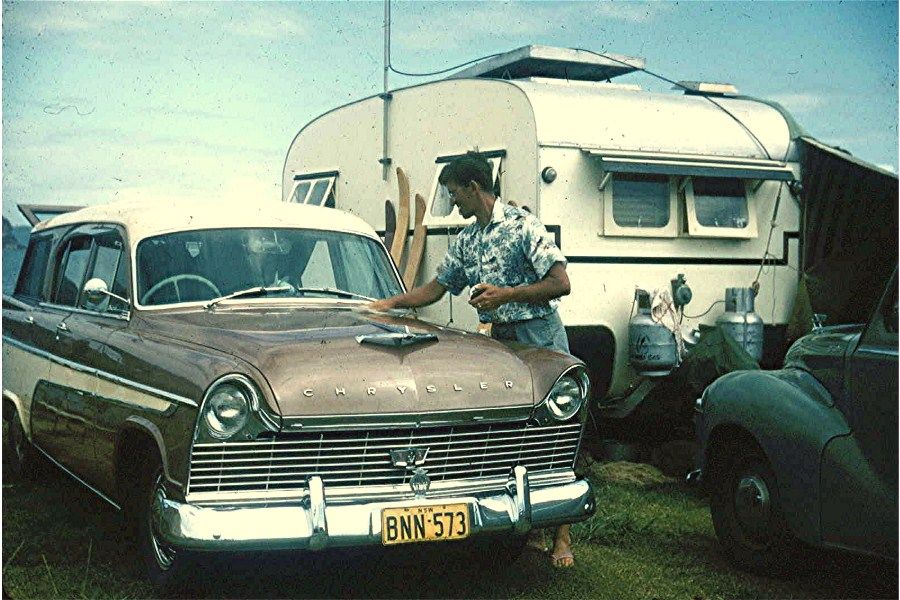 In any case, I enjoy thinking that Arthur continued to tinker with his creation, even after it was in use.  Case closed! Seeshell |
|
|
|
Post by hilldweller on Mar 28, 2013 17:46:12 GMT 10
It's a mystery! Tend to agree with you the windows look more square on the van in the earlier pic but as you say, perhaps he continued to modify it. It's nice to think of these old homebuilts being someone's pride and joy at one time  |
|
|
|
Post by seeshell on Apr 2, 2013 9:53:27 GMT 10
Good morning all - This Easter weekend we got stuck into our Blue Flyer again. We completed the last sand out, and managed to get on the first blast of colour - even if it was off-white "Portico". 
Priming An Old VanLast weekend we put on the 8th and 9th coats of primer. I know what you're thinking - "over the top", "unnecessary", "15kgs of paint!" - and I would be in violent agreement with you except that it took us that long to get a consistent layer of primer that didn't sand through to grain. And whenever paint comes in contact with the wood on the Flyer, it "flies" off. So it was a necessary evil to make sure the paint job stood the test of time! This was a picture of how the wood repelled the paint, during the "freshen up" we planned just before Cowra: 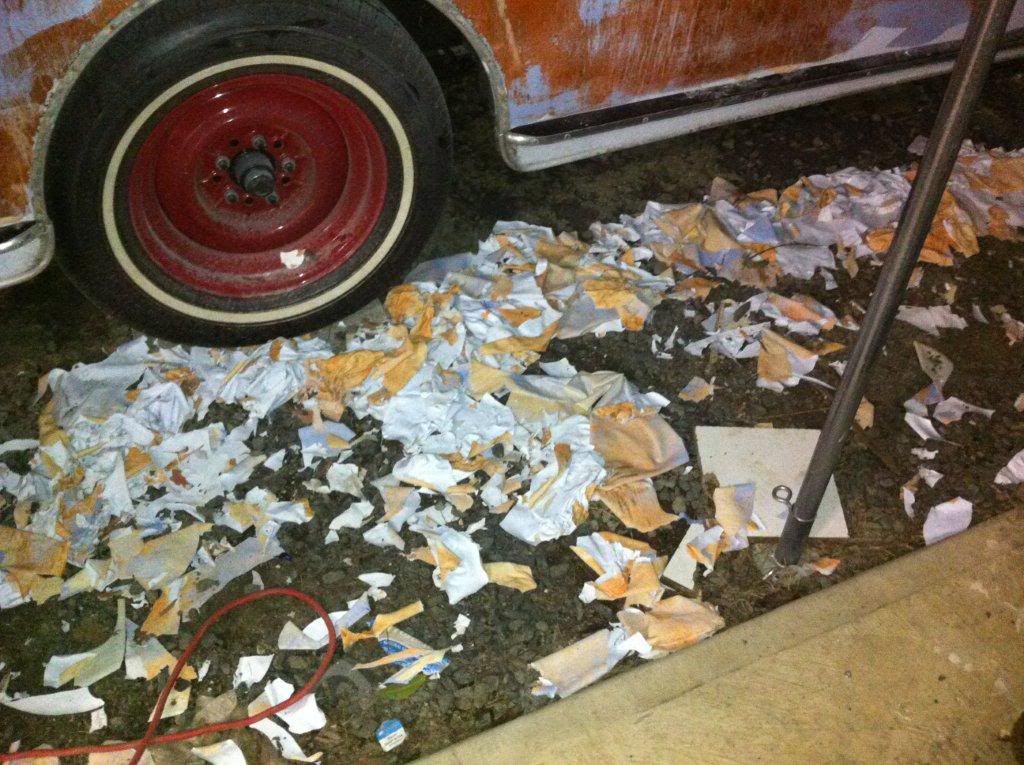 After removing the old paint and sanding back, the grain was very raised. We can't say if it happened as the paint sheeted away, or was like it before the previous owner painted it. Only two products overcame the repelling properties of the wood (which might have been Rescote): Bote-Cote and ShipShape. We learned about Bote-Cote from Franklin1 (Al) and it is a fantastic product that is like a sealing resin. When we tested it on the van it filled all the grain, and paint stuck to it fine. However, we were told that it gets progressively harder (not a bad thing) and if you leave it too long it's hell to sand off. Given we work full time and could only get to the van on occasional weekends, we were afraid it might get away from us and set like stone. The Shipshape is a high build primer, but nowhere as thick as the Bote-Cote, which was like treacle. It was more like thickened cream, and sands out nicely. However, the 2-3 coats that are recommended are probably for wood that is fresh, or doesn't have deep grain issues. In retrospect, I probably should have twigged it would take more coats/effort - but I didn't. When the primer sands back it's a matt white - and you look for low spots by finding shiney patches. But by the end of it we were both going a bit snow-blind. I'm sure we'll find spots later we missed, but damed if I could see them while we were doing it. If I were ever to paint a van in future where there was deep grain: - I'd consider applying a spray putty all over to deal with the graininess before using a high build primer.
- Used Bote-Cote to address the grain, but done small parts at a time so it could be sanded off in the workability window.
- Known what I was in for in terms of effort, and planned for the time and effort needed to let the primer build into the grain.
PaintWe are planning on painting our van in three colours: "Portico" (off white), the original "Waterproof" colour it was painted, and a darker blue contrast. I appreciate the advice we got from others about how to proceed with the flash. The flash is supposed to look a bit like clouds, with the van a sky colour. It fits on a lot of levels: its aviation history, the nod to my Nanna's old Holden, the fact I work at the Bureau, and that Aaron is from NZ - the land of the long white cloud. When the bird is added by the painter, that will finish her off.  The weekend was a bit dark, wet and misty here. Ordinarily what the weather is like is probably of little concern, but the gloss of our paint can be adversely affected by humidity. We found a short patch of sunshine and went for it! 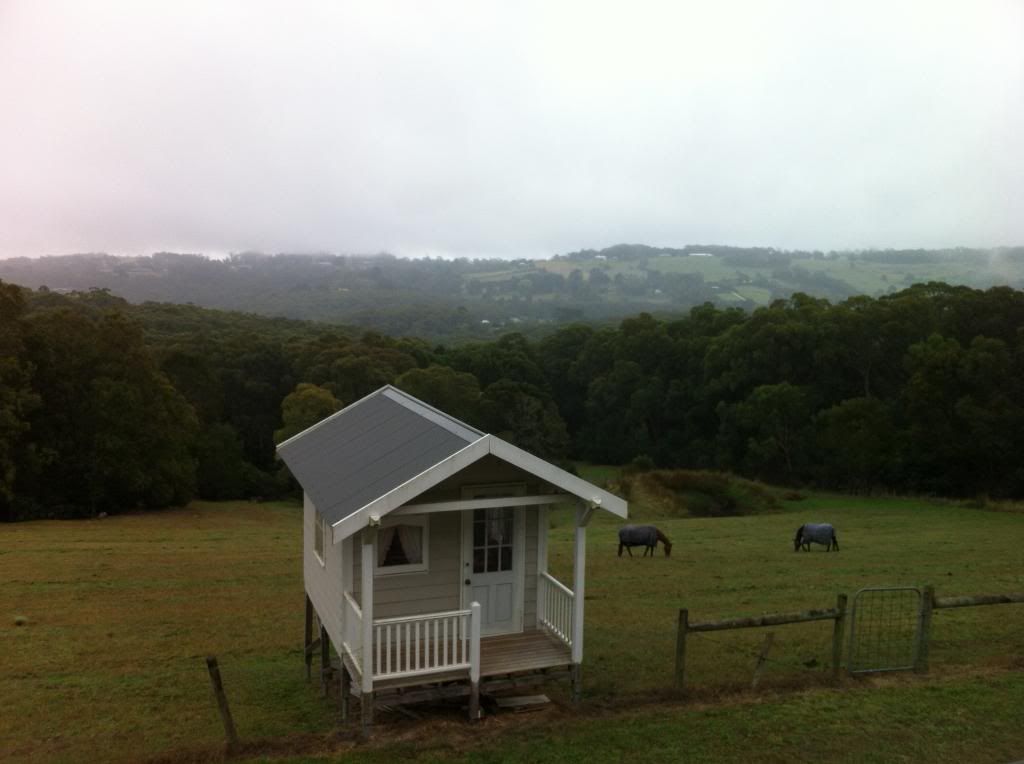 In the end we got the roof painted, and added the waistband colour, which will be masked off to the pattern next week when we add the light blue. Darker blue comes a week later. And it looks like the shine is just fine. 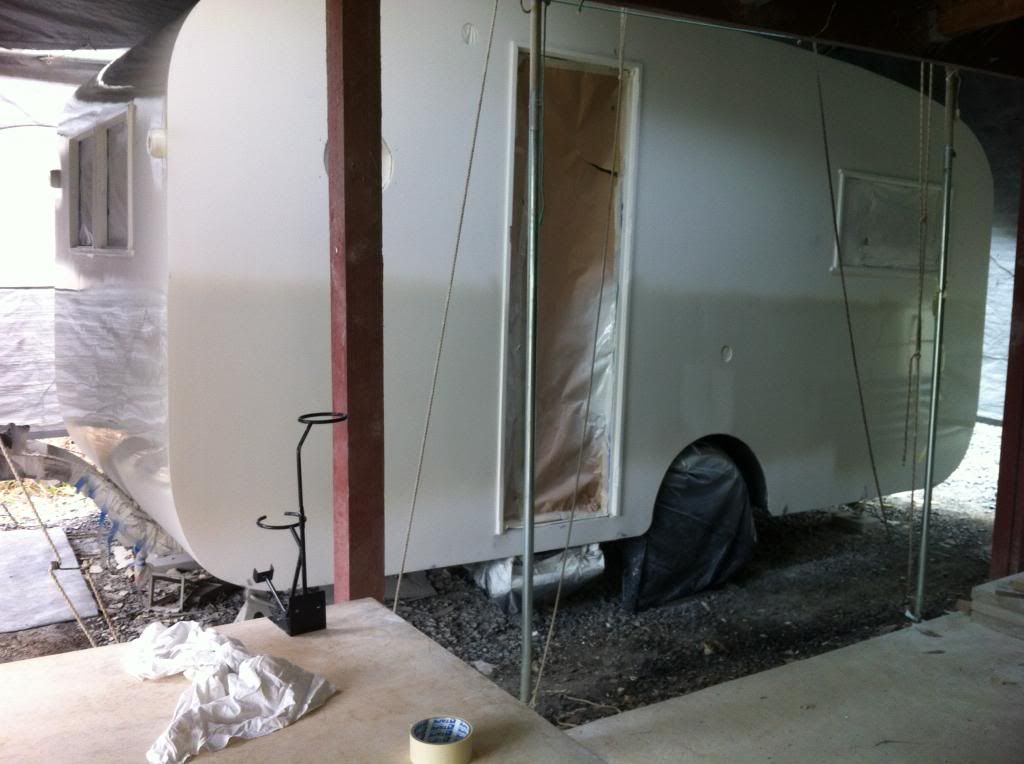 Very happy with the progress, Seeshell |
|
|
|
Post by shesgotthelook on Apr 2, 2013 10:01:55 GMT 10
Will she be ready for Bendigo? ;D
|
|
|
|
Post by seeshell on Apr 2, 2013 10:04:31 GMT 10
Hi SGTL Just! Paint the next two weekends, then a weekend of trim - then we're off! We're leaving the inside jobs for deep in the winter.  Cheers Seeshell |
|
|
|
Post by Roehm3108 on Apr 2, 2013 11:26:58 GMT 10
Hi seeshell I think you've well and truly broken the record for the number of primer coats. If I'm not mistaken, JBJ held the record with Lucille. You've done well to persevere through the weather over Easter, was not nice and continuing that way. But all's looking good, good luck with your deadline. You can always have a "paint-in" at Bendigo!! ;D ;D ;D    |
|
|
|
Post by hilldweller on Apr 14, 2013 10:23:59 GMT 10
How's the flash coming along Seeshell? Looking forward to pics  |
|
|
|
Post by seeshell on Apr 15, 2013 8:19:40 GMT 10
Hi HD
The weather wasn't condusive to painting this weekend - raining and wet. So we did have a play with the windows, fixing the little nibbles that someone has taken out of each corner to accommodate the non-original friction hinges. We glued in pieces, and later in the week we will be able to sand them out and primer. Interestingly, the windows were made of Masonite, with the glass retainers behind made of wooden batons. Didn't expect that.
We also got the "eyebrows" for the van windows and doors - they have turned up edges to stop water coming in around the frames. There were a few on some of the windows when we got it, but they were later additions. Also there was no cover over the door or the front window (which had a sun shade), and both suffered from leaks in wet weather. They need to be sanded lightly and then painted the darker blue.
I've also found an aluminum welder local to me. So I have to go over and make a visit with our porthole, and see if he can braise in some of the worse pitting.
We sourced some stainless piano hinge, window stays in a vintage style made of chromed brass. So progress - but no photos!
Cheers
Seeshell
|
|
|
|
Post by kaybee on Apr 15, 2013 12:15:40 GMT 10
....Hiya SS, I wouldn't let a welder anywhere near a Porthole.....they're super thin when they're in good condition and once they've got a bit of corrosion and a few pits they're even thinner. Aluminium is especially tricky to weld ,soon as the heat gets near it it'll warp even if the welder doesn't blow holes in it. Add to that the patched alloy from the filler rod used will still come up as a different and visible shade even if the weld was successful.....when specialist thin alloy welders build things like car , aircraft and boats they generally use a strip of the original parent metal guillotined from the sheets they are using to maintain the "right" colour in the finished weld. What we did with ours was, we had our friendly neighbourhood metal polisher ( whom you know ;D) give it their treatment and then sprayed it with 2 K clear coat to arrest further corrosion. It's still got a few black pits in it but it's up fairly high on the van and thus far no-one has been rude enough to comment on them ;D ;D. If yours is especially bad , you could have it/them gently bead blasted to clean them up and give them a uniform appearance ,then use car body filler to fill the holes .....lightly sand the filler to level it, then prime, sand and prep. them for a metallic silver/ aluminium shade in auto paint finish ,then clear coat them......if you choose the right colour they'll look just like original and probably no-one will pick it anyway, or be rude enough to comment ;D....cheers, Col.
|
|
|
|
Post by seeshell on Apr 15, 2013 13:11:49 GMT 10
Hi Col Ah well there you go I can save myself a trip. I was taking it over to him to see if it was too thin to work on - he was going to let us know. I'll do a bit more cleaning out of the "low" bits and give her a blast of sealant to keep it nice.  Cheers and ta! Carley |
|
|
|
Post by Surf Tragic on Apr 15, 2013 13:41:39 GMT 10
....Hiya SS, If yours is especially bad , you could have it/them gently bead blasted to clean them up and give them a uniform appearance ,then use car body filler to fill the holes .....lightly sand the filler to level it, then prime, sand and prep. them for a metallic silver/ aluminium shade in auto paint finish ,then clear coat them......if you choose the right colour they'll look just like original and probably no-one will pick it anyway, or be rude enough to comment ;D....cheers, Col. We used to do exactly this in our window factory, same prep with body filler & sanding, then powdercote it. There are many shades of grey colors & metallic finish too.  For what it's worth   ST |
|
|
|
Post by seeshell on May 4, 2013 9:55:28 GMT 10
Hi All We haven't made much progress on the van lately - and that is up to me I'm afraid. Did something very silly to my neck/arm - at first it just seemed like one of those things where you slept like a wild animal and woke up with your elbow in your ear which is sore for a few days. However it has got worse - and the pain has radiated down the arm and now my left hand is numb all over. Being medically trained, at first I freaked out...  Heart attack, etc, etc. They don't call it med school syndrome for nothing. But thankfully (?) it's just a very impinged C5/6 neck disk which is pinching the spine and affecting my arm/hand. The regimen involves some steroids for to reduce swelling - that make you nervy and unable to sleep (never has my house been so clean, shelves fronted, spices arranged, laundry done down to every pair of knickers!). Those are matched with pain drugs - moved up from Panadol Forte to Endone to Oxycontin...which is the medical equivalent of going from roller skates to jet packs! Woo! Needless to say driving and power tools are to be kept out of my hands at all times. And in a week or so more if it doesn't clear up then it's a MRI guided neck injection of steroids. So there you go HumpyBoy - I should never have poked fun at you when you visited. I angered the Fates, and am paying the price!  In the meantime, Telstra have decided to "fix our phone line" and we've been off the air for at least a week, and they say a week more to go still. The old iPhone is getting a blasting as a hotspot - keeping us from going completely stir crazy here with no internet. So my apologies if I seemed random and a bit spacey in Bendigo, now you know why!  Seeshell |
|
|
|
Post by hilldweller on May 4, 2013 11:42:27 GMT 10
Oh bugger! Hope it all comes right quickly, and completely.
|
|
|
|
Post by humpyboy on May 4, 2013 14:10:20 GMT 10
Oh dear, how unfortunate, can relate to your frustration, hope you recover quickly Carley, you'll just need to let Arron go out and do all the work till you are better, pull up a chair and supervise from the outer ;D
|
|
|
|
Post by Roehm3108 on May 4, 2013 17:00:10 GMT 10
|
|
|
|
Post by atouchofglass on May 4, 2013 17:36:28 GMT 10
Hey Seeshell Ouch.... that just isn't nice to wake up to. But with all that housework.... could possibly fit in some sanding priming? ;D ;D   Chin up, the body is great at healing itself..... just takes a little longer the longer we've been around.    Cheers Atog |
|
|
|
Post by dave79au on May 4, 2013 23:33:14 GMT 10
Hi all with regards to the jones dolly wheel the caravan in the movie the long long trailer had one I know it was made in America in 1954 so they had been around in the states a few years before us. Just wondering whatever happened to that caravan that was used for the movie it looked nice wouldn't mind one like that
|
|