|
|
Post by sutcac on Aug 15, 2014 17:47:23 GMT 10
These little babies are gonna hold the floor to the chassis. 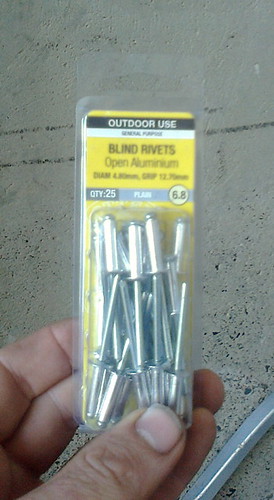 Hmm,dunno.I personally would use self drilling tek screws.Yeah i know they`re a phillips head (don`t tell Cobber!) but reckon they`ll bed in nice & firm. cheers Gordon Or maybe even a through bolt of some sort with a spring washer and nut. |
|
|
|
Post by sutcac on Aug 15, 2014 17:49:10 GMT 10
Or maybe even a through bolt of some sort with a spring washer and nut?   |
|
|
|
Post by Observatory on Aug 15, 2014 18:34:37 GMT 10
Hmmm so I'm guessing that rivets in the floor are a bit unreliable - explains why I found a lot of the original rivets had already popped out of the chassis when I was drilling them out. Thanks for the suggestions; probably leaning more toward the tek screw alternative due to the ease of just drilling them in to the existing 4mm holes in the floor and chassis. (phillips heads nicely concealed below the original tiles  cheers Pete |
|
|
|
Post by DC3Td on Aug 15, 2014 20:28:08 GMT 10
Gday Pete. Do a google search & see the different types that would suit your application. gordon
|
|
|
|
Post by Observatory on Aug 18, 2014 16:27:23 GMT 10
Okay got some different screws for the floor/chassis. (screws are too small for old holes so drilling new holes slightly offset from old ones) EDIT: 28/1/15 screw is in and old rivet hole plugged with all-purpose filler. 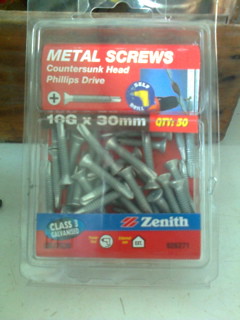  ...some strengthening before lowering the body back down to the chassis. 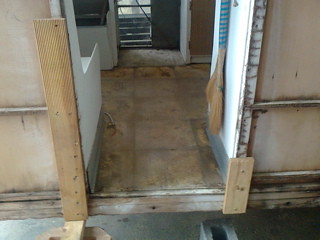 |
|
|
|
Post by Observatory on Aug 19, 2014 16:57:17 GMT 10
Houston the Eagle has landed. 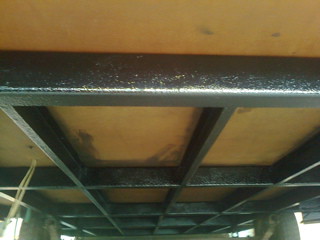 Before jacking it down I attached the guards with pop rivets... This is how we jack it down... 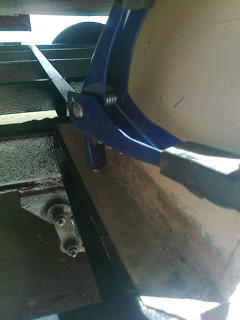 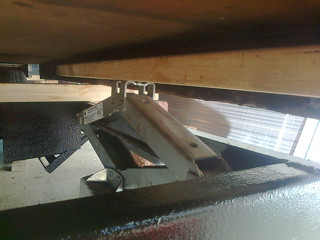 Now decision time - where do I start replacing dry rot; the front and rear or the sides???  ideas welcome. |
|
|
|
Post by Observatory on Aug 20, 2014 19:22:29 GMT 10
Hi Al, This is the date I found under the van table. I've highlighted the pencil as my phone camera is low resolution. I realise this still doesn't confirm and that you have done loads of research on Ambassador D.O.M. Fingers crossed eventually someone on the forum will have a similar serial number/D.O.M.  |
|
|
|
Post by Observatory on Aug 21, 2014 15:34:32 GMT 10
Hi all, got the right side cladding off today... let the games begin! 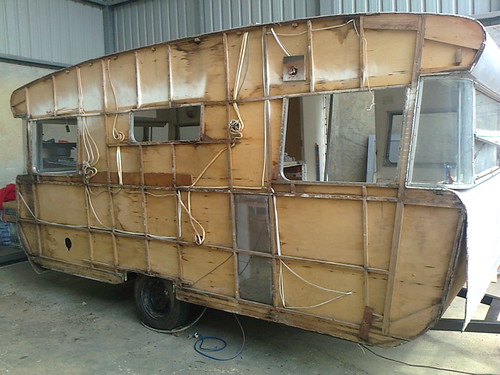 Discovered some interesting writing near the side back window: "15 O S WR WRAPAROUnd". Guessing the "15" means 15 feet in length and "WR - wraparound" being the corner windows. "O S" not sure.  ? [UPDATE 24/10/14: "O" for outer then "SINK"  ] 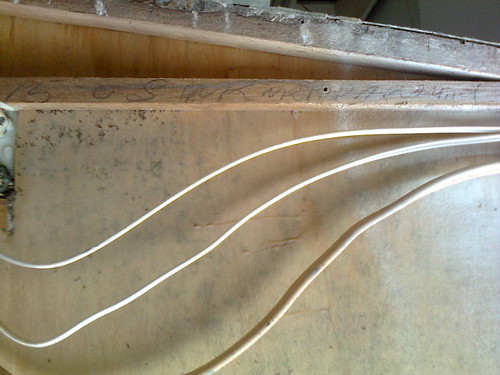 Some tarpaulin poles came in handy for bracing the battens to the chassis... 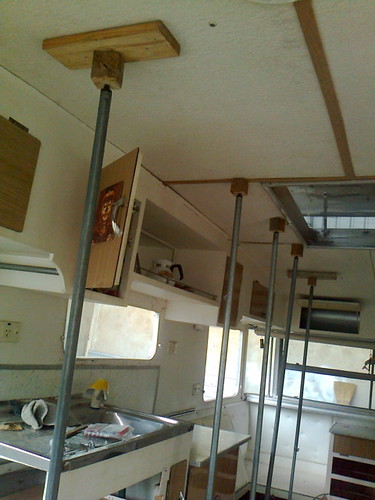 |
|
|
|
Post by Observatory on Aug 27, 2014 13:19:35 GMT 10
Having difficulty sourcing long beams (over 4 metres) to re-build the kitchen wall - perhaps available in Port Macquarie for a price. Another issue is that the studs, beams and rails all have to be custom sized to 24mmm thick. 24mm no longer being used as wood sizes have progressively gotten smaller since the 60's. Thankfully I've found a mate with a thicknesser and ban saw.  I'm carefully diagramming and photoing the whole wall - 12V, 240V, structure etc and eating a little patience. |
|
|
|
Post by Franklin1 on Aug 27, 2014 21:03:31 GMT 10
G'day Observatory, Don't bother chasing 4 metre lengths. Try a different approach and join two shorter lengths with splints above and below the joint. If you stagger the joints on the wall, the resulting strength will be as good as a single 4 metre length. For example, the joint in the timber above the windows might be placed between the rear side window and that little window; the middle run of timber might be joined just back of the fridge opening; and the bottom run just forward of the fridge opening. If you look at working with multiples of 2.4m and 1.8m lengths, you'll be able to sort something out (2.4 + 1.8 = 4.2m). Sometimes when the cladding is pulled off these vans, you discover some of the timberwork is cracked, and splinted joints is an easy way of repairing them in a lot of cases, rather than replacing them. Just put plenty of glue and a couple of screws in the splint, and it'll outlast you. The coding written on the framework might stand for Offside (OS) Window Rear (WR) Wraparound?? Dunno what the 15 relates to. When you take the cladding off the other side, there might be the corresponding scribble for the NSWR Wraparound (meaning Nearside Window Rear...)?? The 1977 Millard poptop I restored needed 23mm square timber in the framework. Such a pain to find timber to match. However, I was in Bunnings one day during the early part of that restoration, and I scored a table saw kit for $70 on clearance, down from $140. It had the table, plus a 7 1/ 4" power saw, plus a jigsaw, plus a router -all in a box. I've given that saw table such a hiding over the last six years, cutting timber to various sizes to suit specific purposes in the restorations. I'm onto the third power saw now - burnt the first two out. The router was fitted to a router table I've got, and is still going well. The jigsaw hasn't been out of its box yet. (Got a good Makita one I use instead.) Best $70 I ever spent, I reckon.  Good progress being made on your project. Keep at it...  cheers, Al. |
|
|
|
Post by Observatory on Aug 28, 2014 19:11:17 GMT 10
Best $70 I ever spent, I reckon.  G'day Al, ...this is perhaps the understatement of the century! Might have a browse tomorrow for a bench saw  Once again I highly appreciate your feedback and definitely love the splint option which I WILL be doing.  Now, time to get some wood. Thankyou very much and cheers, Pete's Observatory |
|
|
|
Post by JBJ on Aug 28, 2014 19:37:40 GMT 10
Hi,
I agree with the saw being great.
I was always hopeless with timber, much preferring to weld, grind & make things in steel.
But I bought a table saw when I started rebuilding "Lucille" a few years back.
I've done 3 vans with it, & when I rebuilt my last van, I made all the timber I used from cheap pine studs from Bunnings. 75x38x2400 studs were about $3 each.I simply trimmed & cut them to the size I wanted.
Other than knocking the top off one fingernail by stupidity, I found the saw good & safe to use.
Certainly a cheap way to cut pine into the sections you need. A big bonus is that you can cut from 2400 long studs, that dont have finger joints like the pre sized crap you get from hardware stores.
I have my saw available if anyone in Northern Rivers NSW wants to buy it, with reconditioned motor. Open for haggling. I'm not going to do any more vans at this stage in life.
JBJ
|
|
|
|
Post by Observatory on Aug 29, 2014 18:49:09 GMT 10
 Okay a little bit proud here. But hey it's my first go at lap joints with a saw and chisel. (the lower beam under the window): 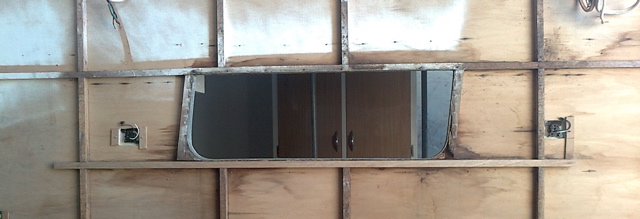
|
|
|
|
Post by Observatory on Sept 1, 2014 16:24:04 GMT 10
Made the bottom supports today. Jammed a panel of 3mm bracing ply in behind which made them sit nice and flush. Still need to bolt them in to the chassis plus glue and screw. Productive day  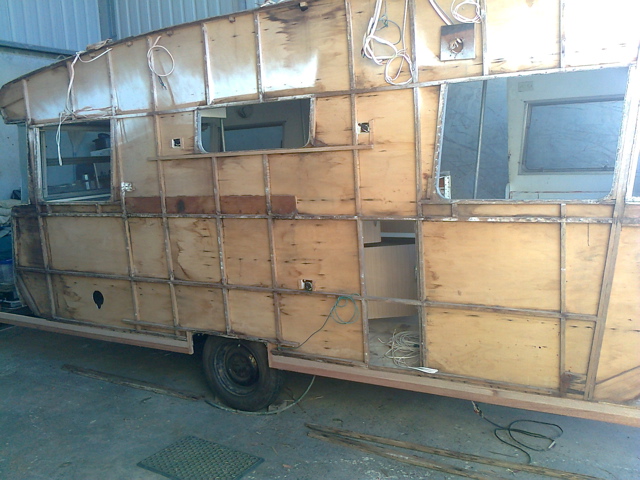 |
|
|
|
Post by Observatory on Sept 4, 2014 18:58:56 GMT 10
Hi Everyone, Thought I'd share the map I found under the stowaway box lid which maps out the NSW coast of I imagine some destinations this old Observatory has traveled to over the years. Haven't worked out the locations yet. Stripping down the interior to allow new 3mm bracing ply on the inner walls. It will also give me better access to the studs on this wall which are being replaced (original ones have cracks and dry rot). Cheers Pete 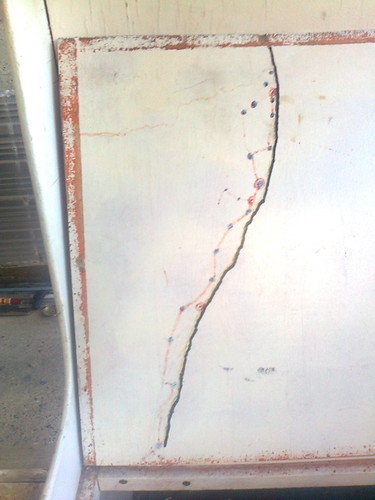 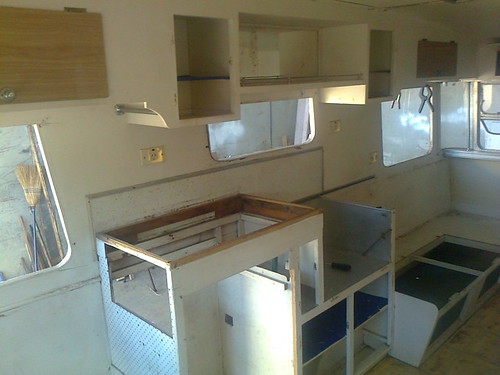 |
|
|
|
Post by Observatory on Sept 5, 2014 18:51:10 GMT 10
I love mates... oh AND their machines.  : Home made bandsaw 14", 6" paul call jointer and a 15" carbatec thicknesser. Now have enough wood to frame up one side of the van. yeah! As you can see, I got lucky and scored 4.2 metre beams of meranti at a local timber yard. 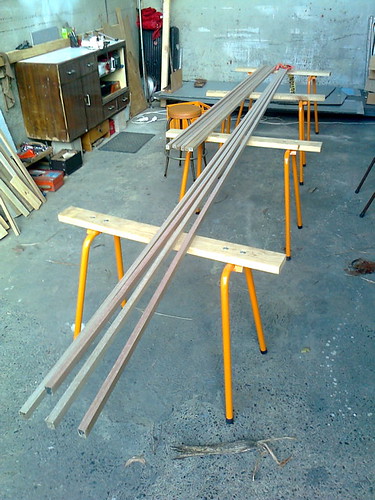 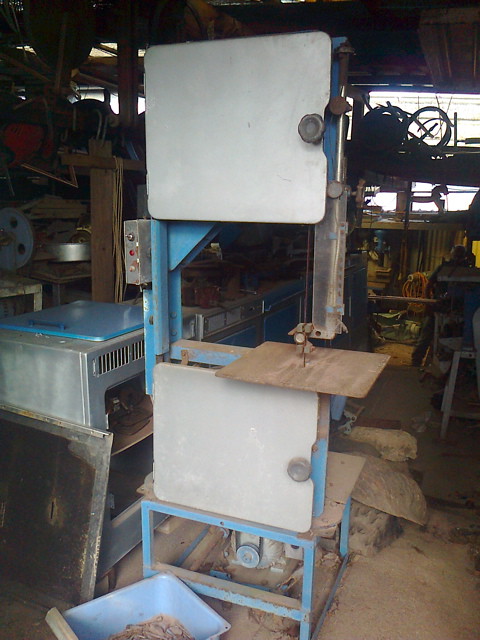   |
|
|
|
Post by DC3Td on Sept 5, 2014 21:20:55 GMT 10
Good lot of kit there Pete.Just watch those blessed saw horses.
|
|
|
|
Post by Observatory on Sept 9, 2014 15:38:15 GMT 10
Two studs done.. 5 to go! I'm using the original frame as a template. By cutting through each joint, I'm able to release and replace individual studs, while the rest of the frame stays attached.  Removing all the lower built in storage has allowed me to re-straighten the wall. 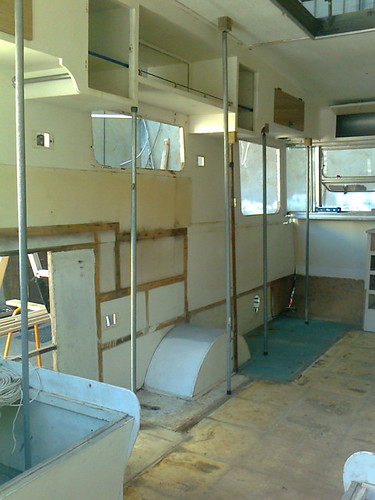 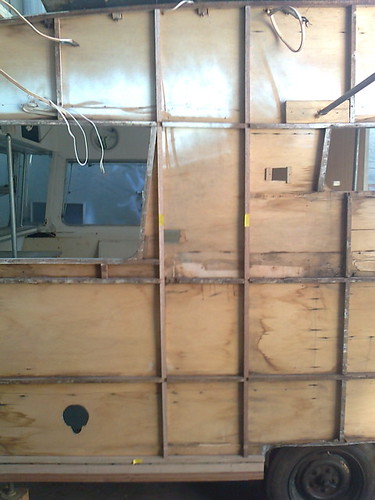 |
|
|
|
Post by DC3Td on Sept 9, 2014 17:41:20 GMT 10
Doing a real good job Pete.Run a spirit level over the cabinetry when you`re putting it back in - out of my curiousity. gordon
|
|
|
|
Post by Observatory on Sept 11, 2014 15:51:35 GMT 10
Cheers Gordon, thanks for the encouragement as always. Got all the uprights done today which is very satisfying. Now just the 3 long beams to do to link it all together and then that's this wall done.  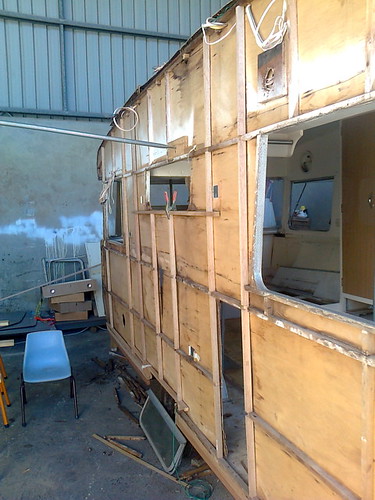 |
|
|
|
Post by Observatory on Sept 12, 2014 20:14:57 GMT 10
Friday update: Framed up the most of the wall this week and its looking pretty straight now. Final beam goes in next week. (photo to come) Will be replacing the inner 4mm ply bracing sheets and I noticed the wooden frame was glued to the ply sheets - anybody know what glue to use - pva or pva waterproof??? liquid nails??? The ply sheets were held in by mini crowned staples (about 10mm x 5mm crown). Will tacking the sheets in with 10mm x 1mm nails be sufficient or should I go hire one of those bigxxx powered staple guns???  Thanks in advance Pete |
|
|
|
Post by DC3Td on Sept 12, 2014 20:43:50 GMT 10
Gday Pete. Staples seem to have worked prior so a quick trip to the big green shed for a hand sized staple gun & liquid nails might be the go. I use same sized one (150mm long) which takes 11mm w x 7mm d Arrow staples for toy garages i restore.Brand name says Tuv GS if that is any help.At least you`ll always have it at hand any time you need it.There`d be others that take wider/deeper staples. gordon
|
|
|
|
Post by Observatory on Sept 16, 2014 16:15:45 GMT 10
Final beam went in today for this wall. Very happy with the result. Looking at 3mm marine ply to do the inner wall panels. Anybody used this? Fairly economical at about $18 a sheet. (EDIT: not marine ply - misinformed at a certain large green shed). The water resistant properties of marine ply to repel damp is appealing. 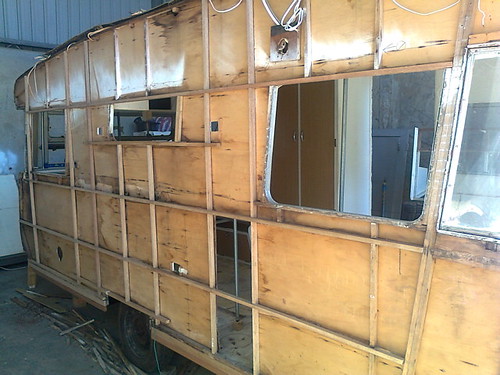 |
|
|
|
Post by gregh on Sept 16, 2014 16:41:51 GMT 10
It's always good to see someone taking the time to do the finite detail of a restoration.  Great job  |
|
|
|
Post by 68adventurer on Sept 17, 2014 12:13:48 GMT 10
Have a look at a wall product called rezilience. Bit dearer but has laminate finish to 3 ply. Google or see your building supplies.
|
|