|
|
Post by JBJ on Oct 4, 2015 12:18:08 GMT 10
Hi All, 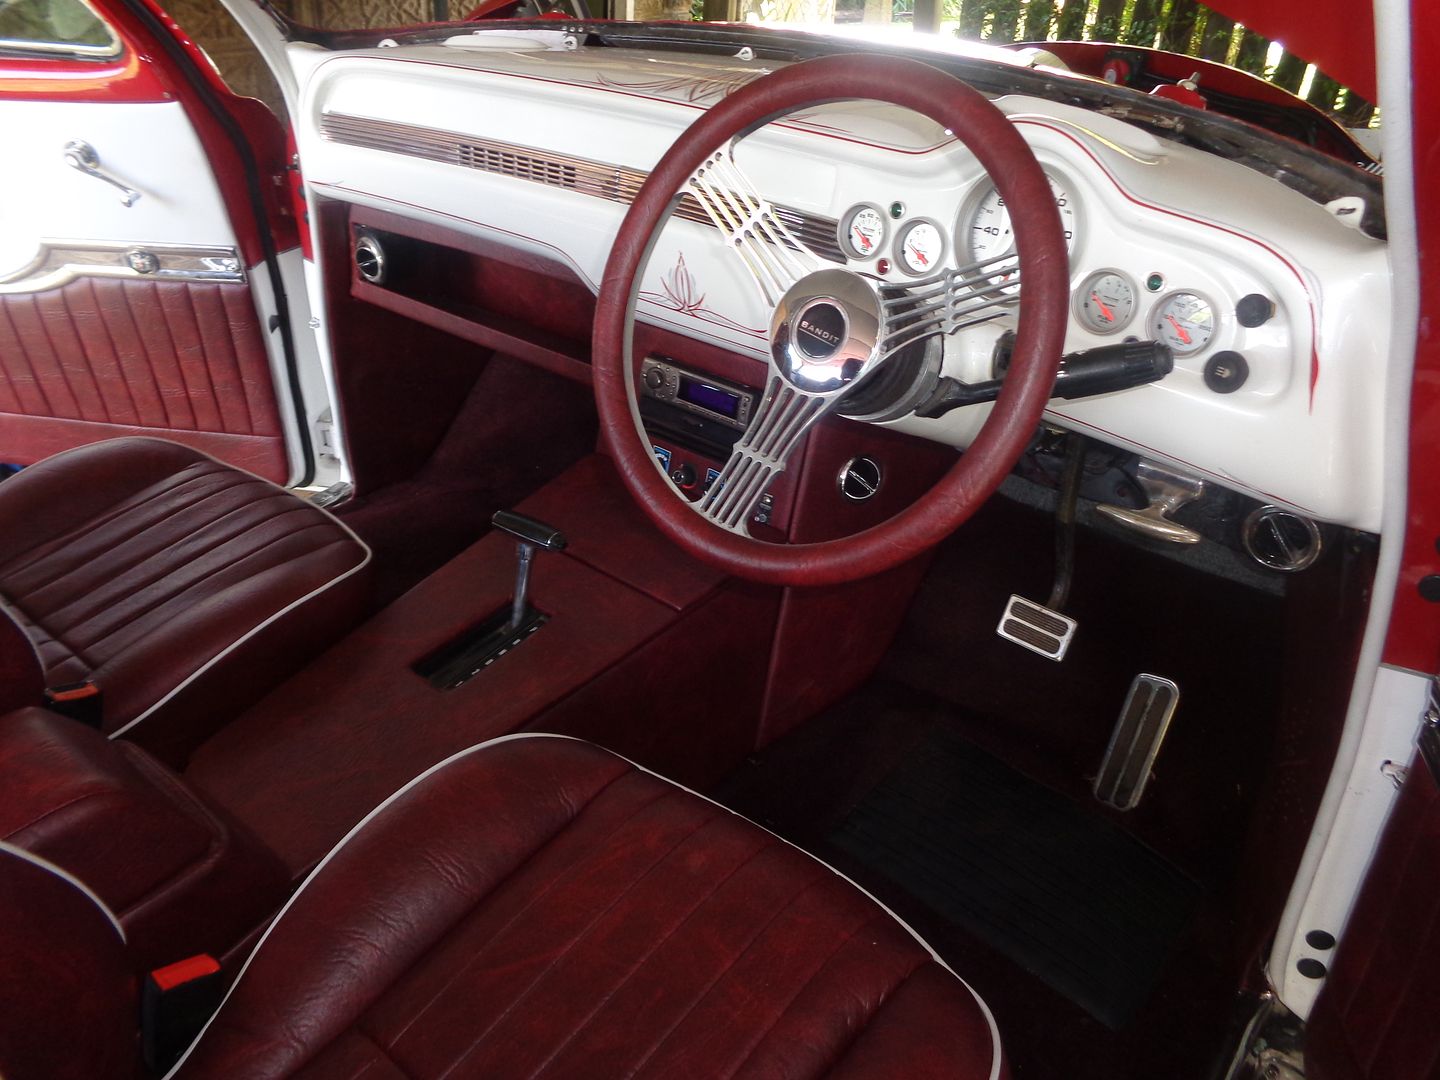 Well the dash went in & everything worked properly first go, & with a bit of work by the Auto Electricians on my stereo ( some of the speaker wires were pinched/shorted by the upholsterer in impossible to access spots), almost everything electrical is doing what it is suppossed to do. Good enough until later at this stage. 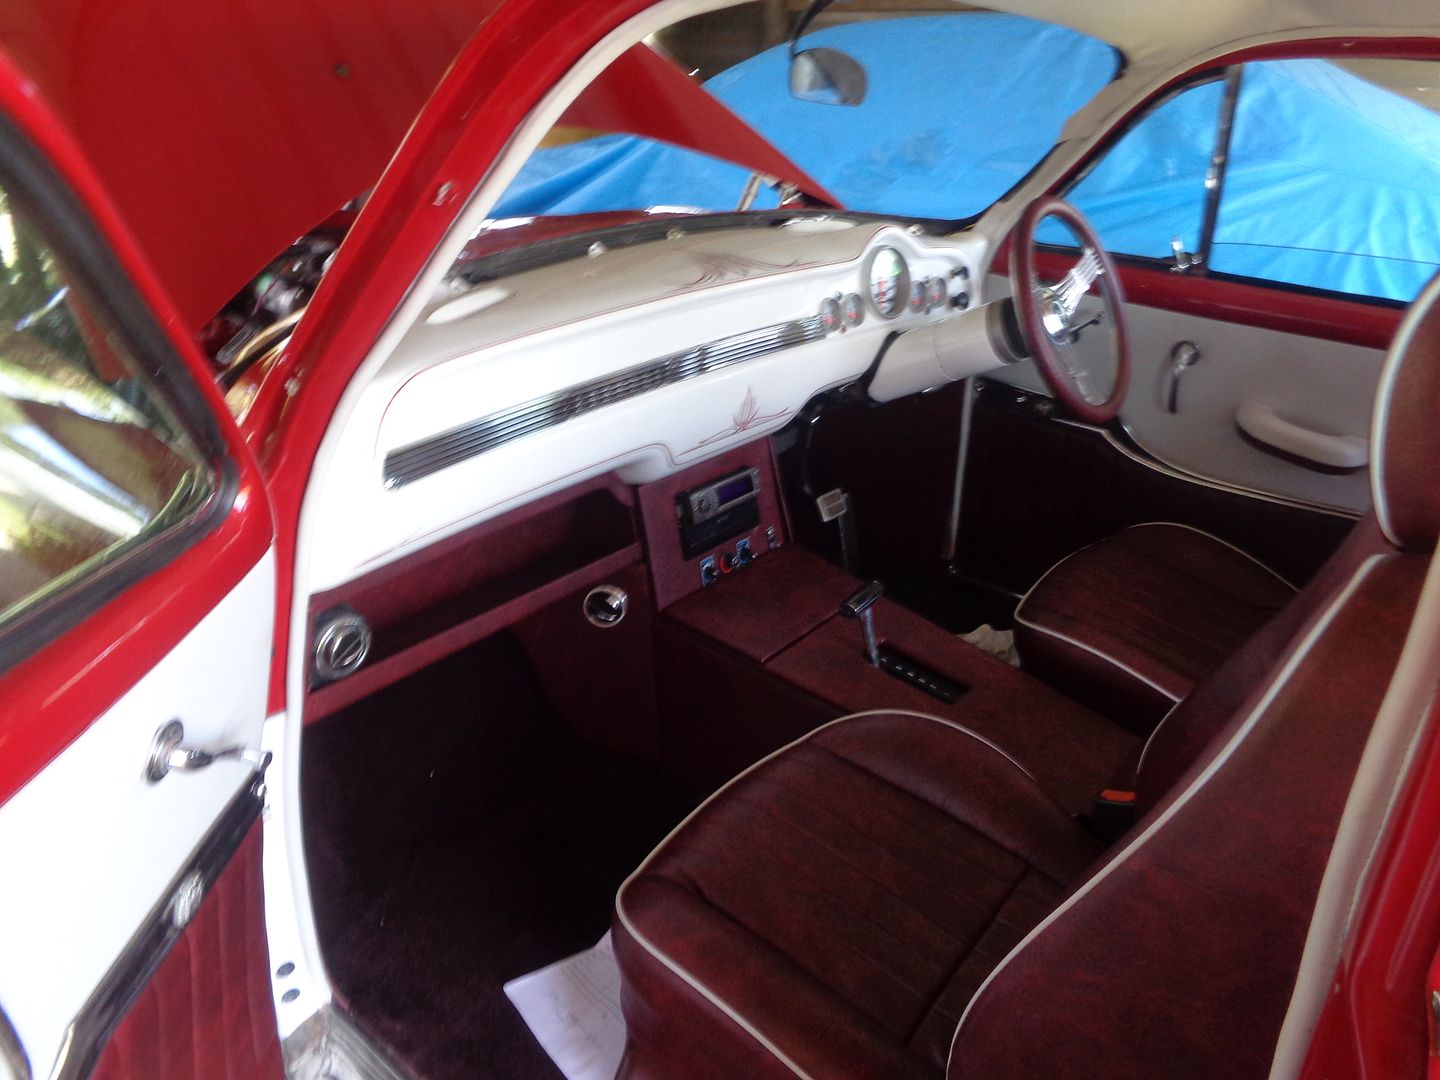 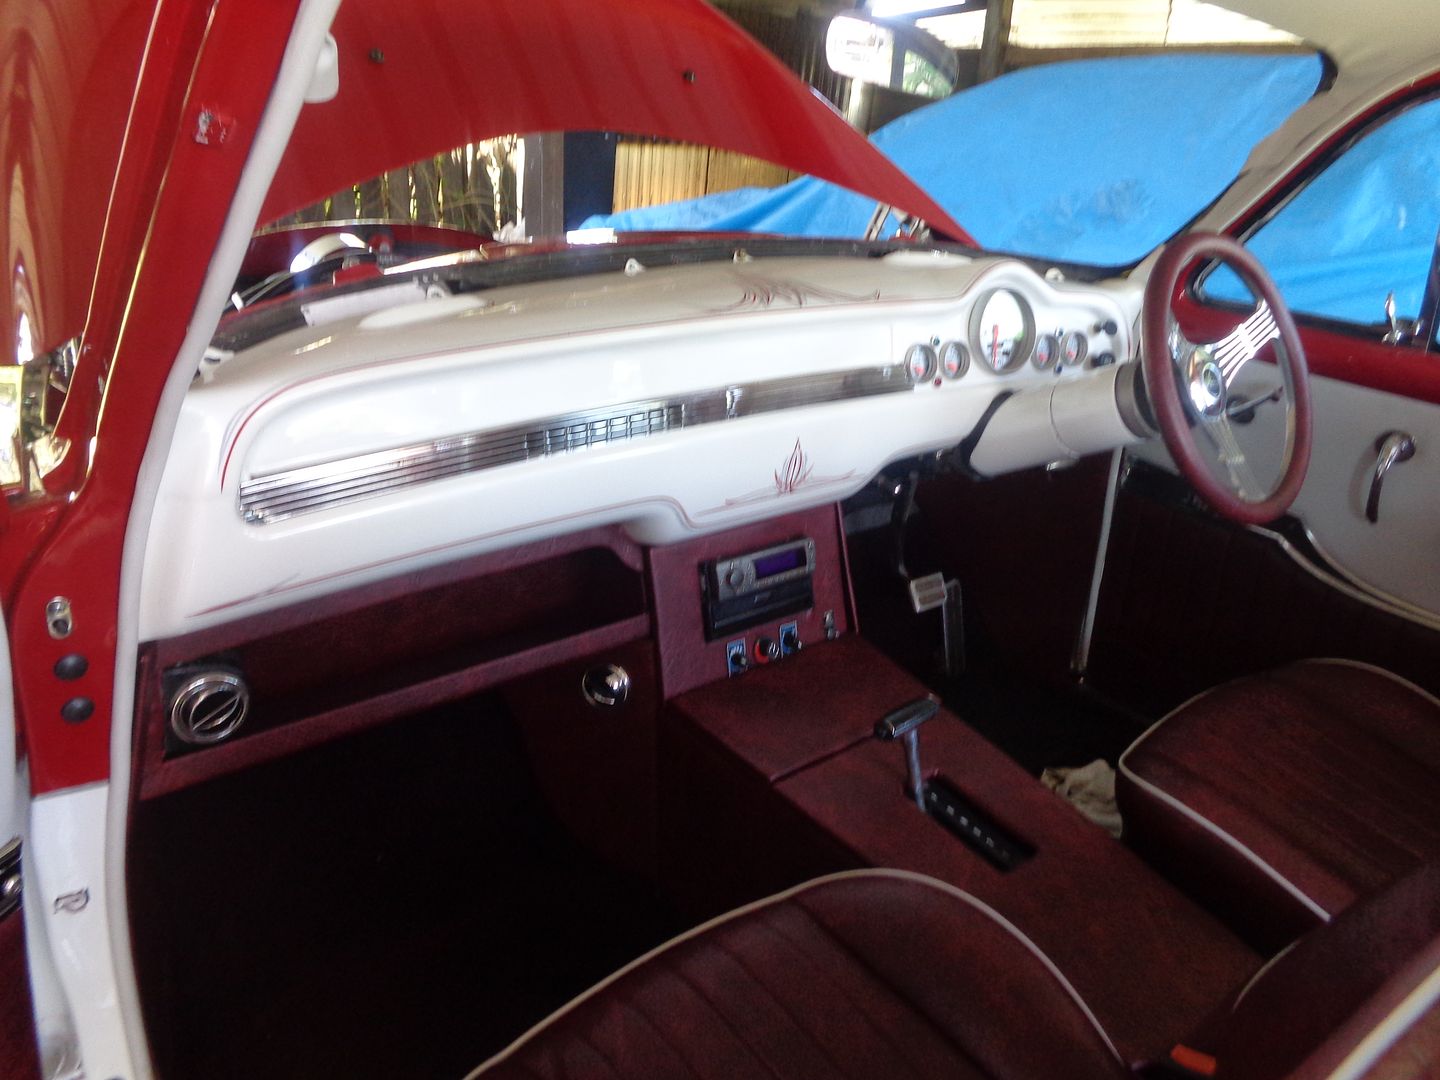 So now I have to wait until We get back from a cruise, to then get windscreens in, then Rego. Its running good, just getting a bit hot. That can be fixed with patience, money & effort. Not much left to do. JBJ |
|
|
|
Post by JBJ on Sept 29, 2015 22:31:37 GMT 10
Hi Cathie ,Like Kimbo the distance is abit daunting  for us but if we leave 5min early we will be at Bangalow. on time so count us in. AS for theme we will go with the flow.Definite for pub meal. Thanks for organising this one. Sue  |
|
|
|
Post by JBJ on Sept 29, 2015 20:05:25 GMT 10
Hi,
The 2 pix are both sides of the same connection.
JBJ
|
|
|
|
Post by JBJ on Sept 29, 2015 7:56:52 GMT 10
Hi Gypsy 10, I hope this is what you are looking for. 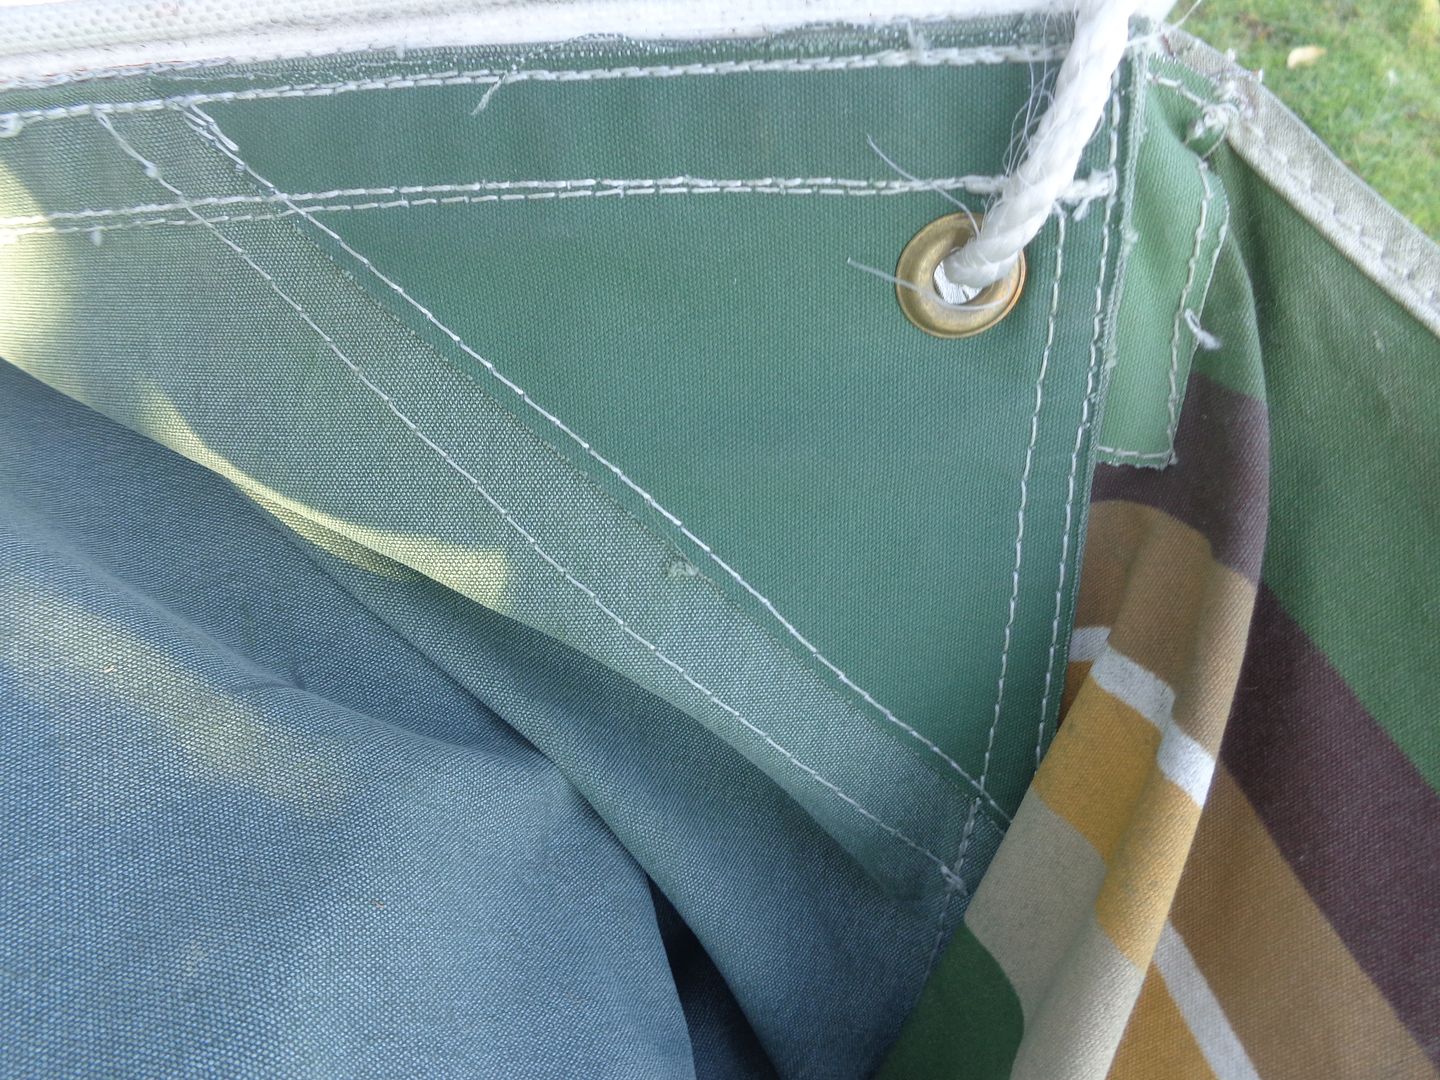 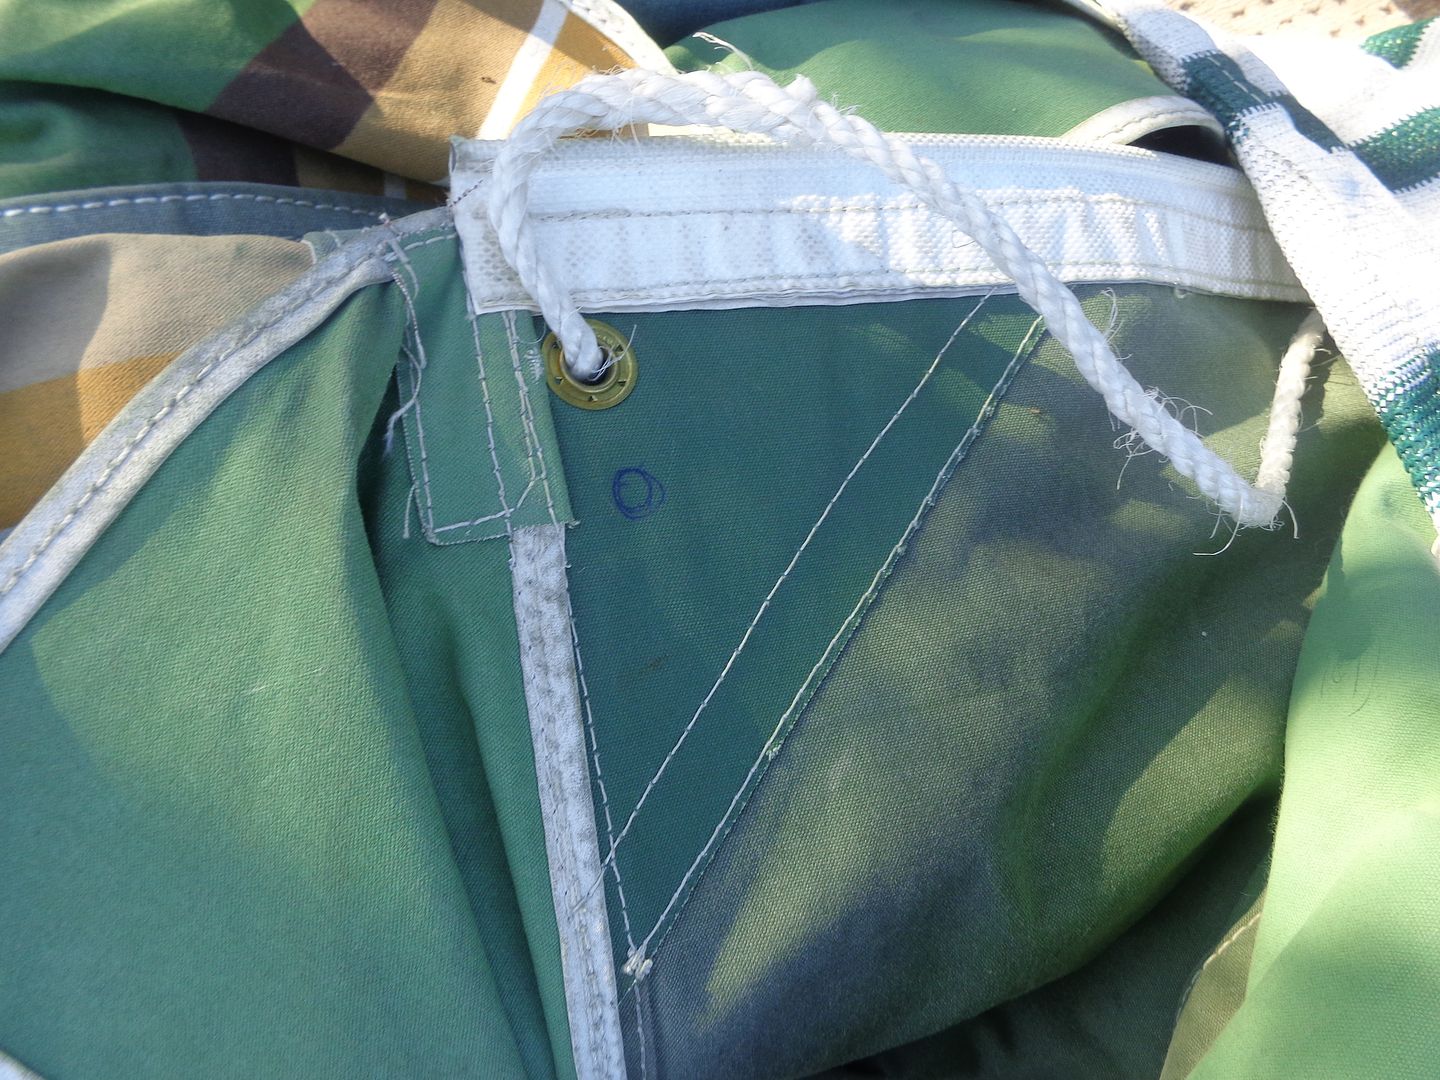 I had a new sail rope section sewed into the annex of my Olympic by the local canvas guy. These are a couple of pix of how he did it. The rope actually goes thru an eyelet pressed into the canvas. I think you may have trouble getting someone to reeve the rope loop together, as I would think it could be a dying art. They actually spread the rope strands, & weave them together. I'm sure my dad, who was amonst other things, a rigger at one stage, called it "reeving" the rope. JBJ |
|
|
|
Post by JBJ on Sept 28, 2015 17:30:26 GMT 10
Hi All, Well I drove it home from upholsterer today. I'm pretty happy with the job, & I guess I am already starting to forget how long I waited for him to do it. I'm booked into auto electrician tomorrow, to fit the dash, & get everything working, & get stereo working. 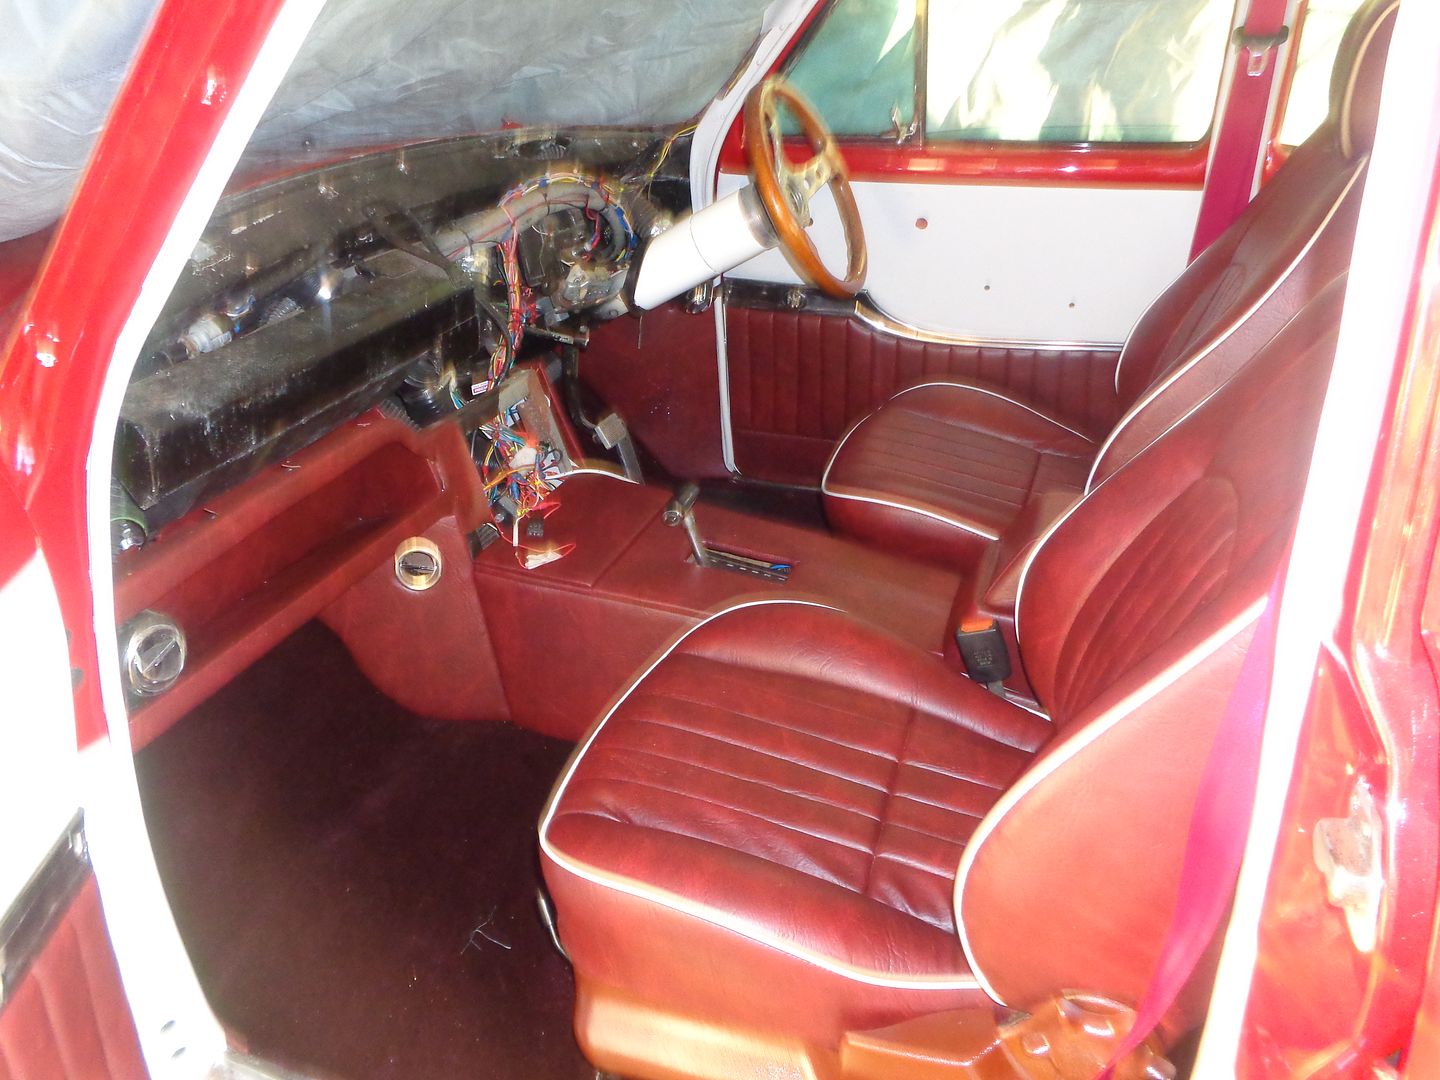 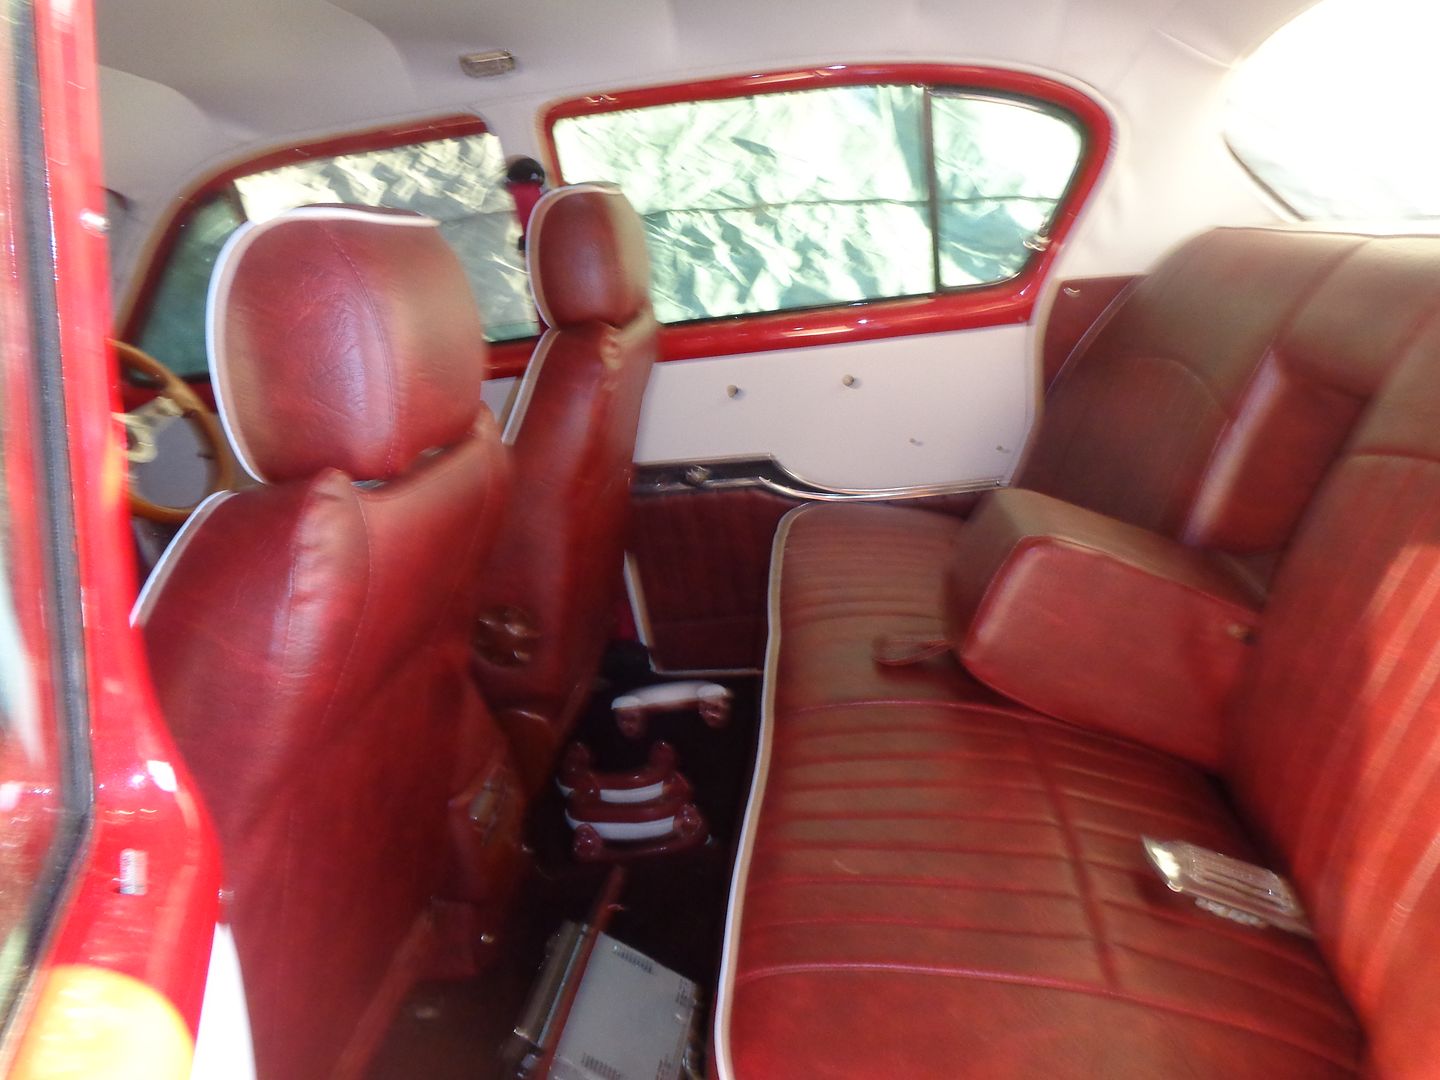 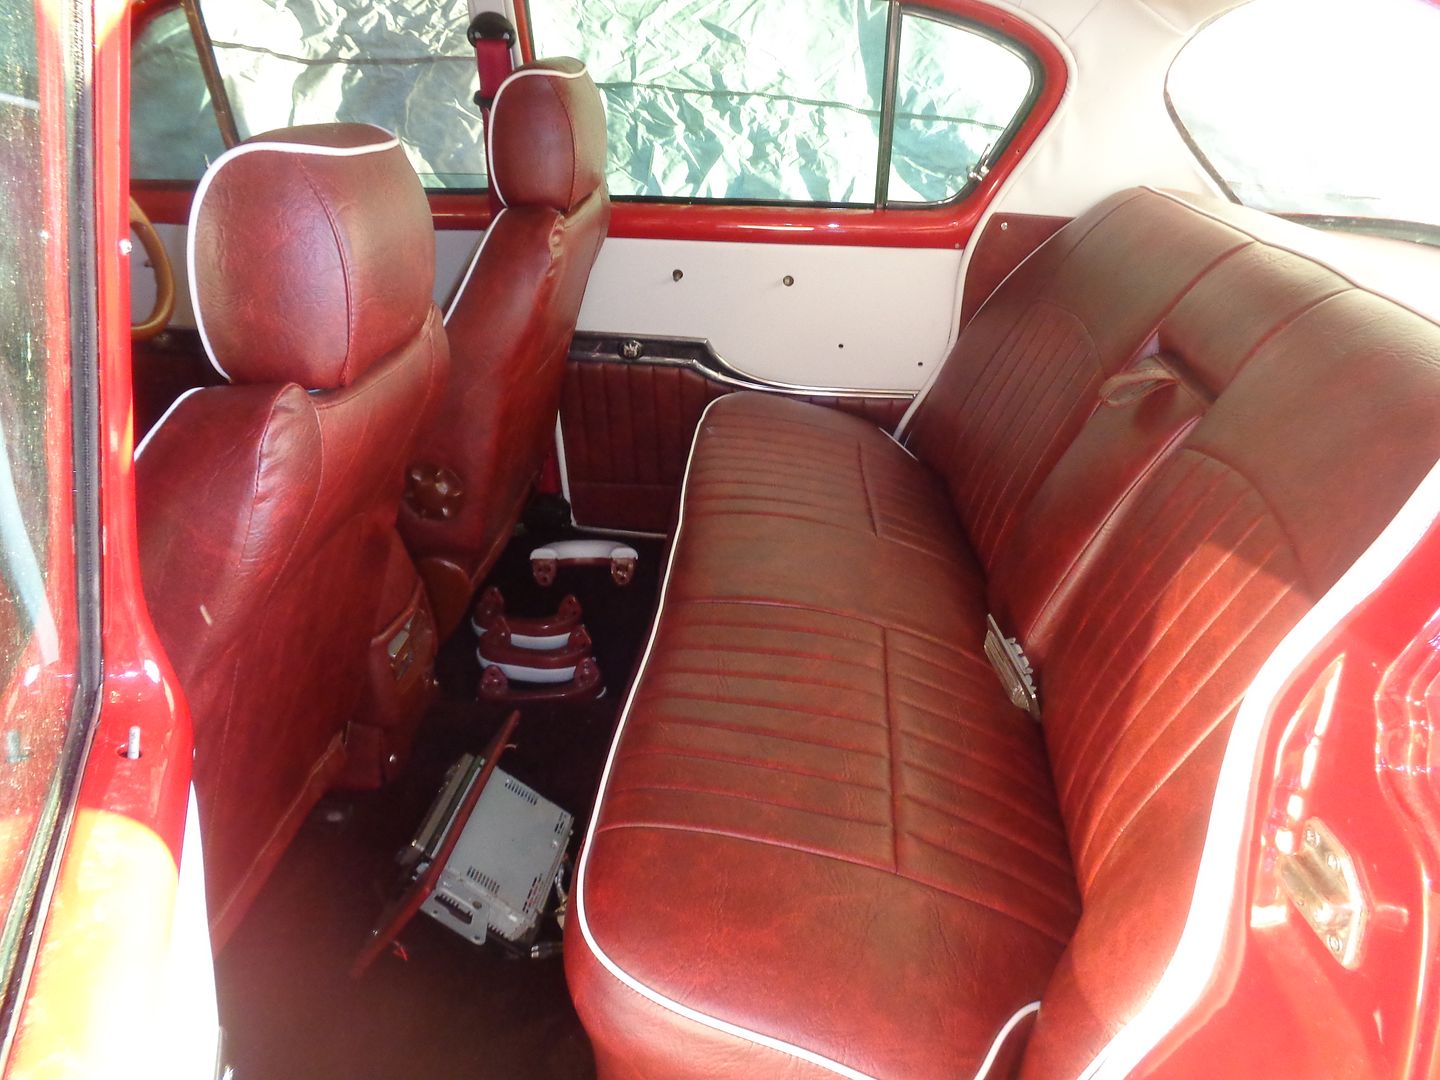 Hopefully all will connect & work like planned. Then a couple of days notice & the local Windscreen O'Brien blokes will fit screens. They reckon one day they can fit front & rear. Then weighbridge , then rego. Hopefully it could be on plates within a week or so, but I know things always seem to go wrong . Its definitely all fun at present. |
|
|
|
Post by JBJ on Sept 26, 2015 9:09:09 GMT 10
Hi,
I've had sailtracks fitted to awnings that had marconi tracks, & the upholsterer used a moulded rope/plastic strip, that they sewed to the awning.
I googled "sail track strip", & found a few options.
I would definitely use this strip instead of trying to sew rope in place. Its so much smoother to slide into the sail track, & I dont believe it would be hard to do.
JBJs
|
|
|
|
Post by JBJ on Sept 23, 2015 16:17:57 GMT 10
Hi Cathy,
We won't be going this time
JBJ & Boots
|
|
|
|
Post by JBJ on Sept 21, 2015 7:01:39 GMT 10
Hi All,
Well things go from bad to worse.
My upholsterer has been very slow doing the interior.
But now he is almost finished, & I engaged a local windscreen installer to put my windows in. He supposedly is one of the better ones up here.
The back window was tackled first. I bought an aftermarket rubber from Jim Robinson Dodge parts in Victoria, & it came in a sealed bag marked 53-54 chrysler/dodge.
The window was the one re moved from the car when I pulled it apart.
The installer has had 3 goes at fitting, & cant get it in. He is now claiming that the roof must have sagged. I think this is a load of crap, & have never heard of anything like that happening.
My thoughts, & those of a well respected car builder, is that it is likely to be a problem with the repro rubber glass channel not being deep enough.
Have any of you vehicle people any ideas on this??
Is it possible to modify the new rubber, & if so, how??
Its not much fun at present
JBJ
|
|
|
|
Post by JBJ on Sept 12, 2015 20:01:09 GMT 10
Hi All, Well more progress. I've been a bit slack lately. Fell off the step going into the van, & caused a bit of grief to my leg. Luckily not the one I hurt a year or so back. But its coming good I finally removed the fridge, & cut out the rotten floor under it. 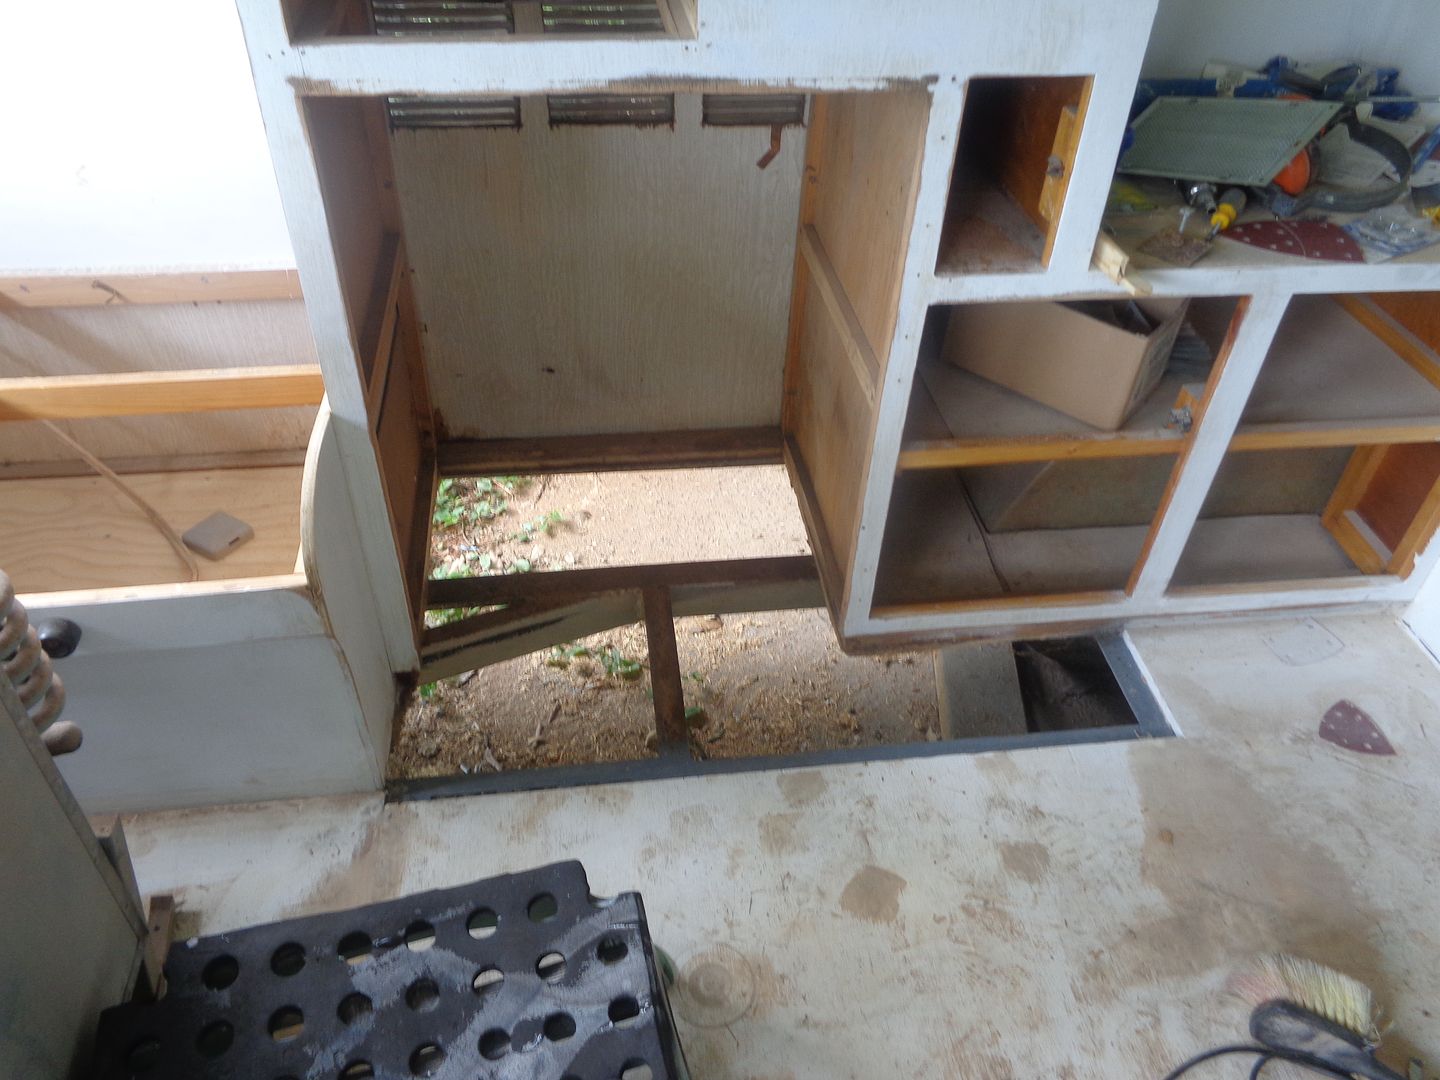 Welded all the required steel bits in, & cut a bit of ply to fit opening. 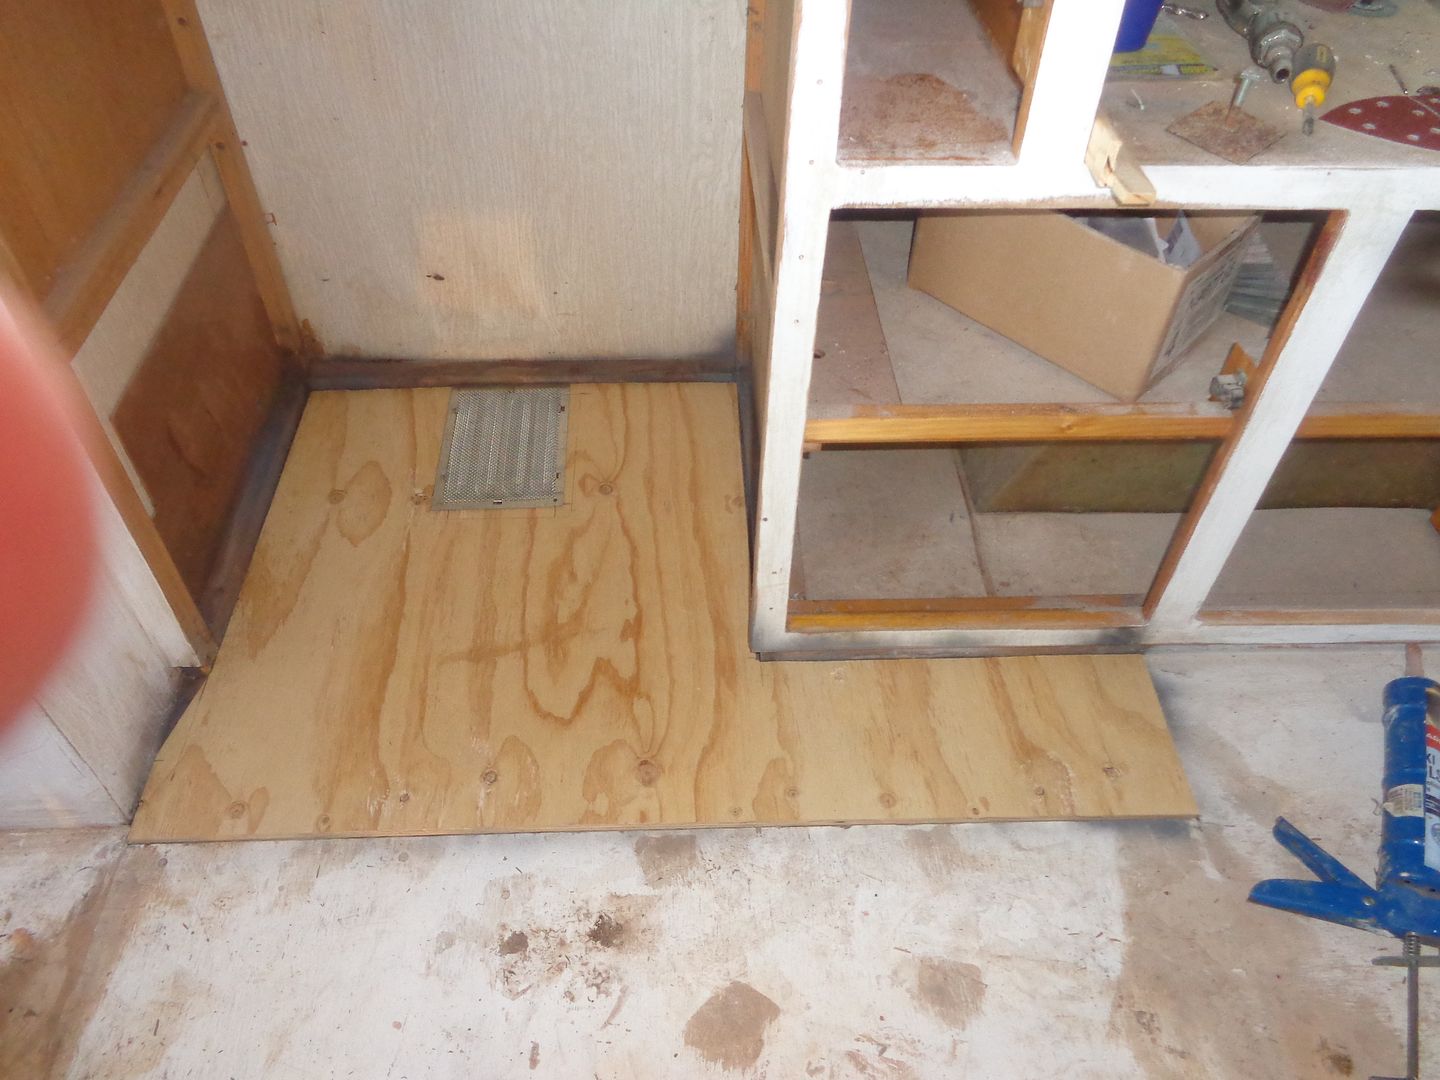 Interesting that its a legal requirement to have ventilation thru the floor, under a gas fridge. So I bought a vent & screen from Bunnings, & cut the floor to accept it. A bit of mucking around is required to refit fridge, but nothing too difficult. I built a new larger shelf at left hand rear, & installed railing same as Deejay had. Its still available from Camec. 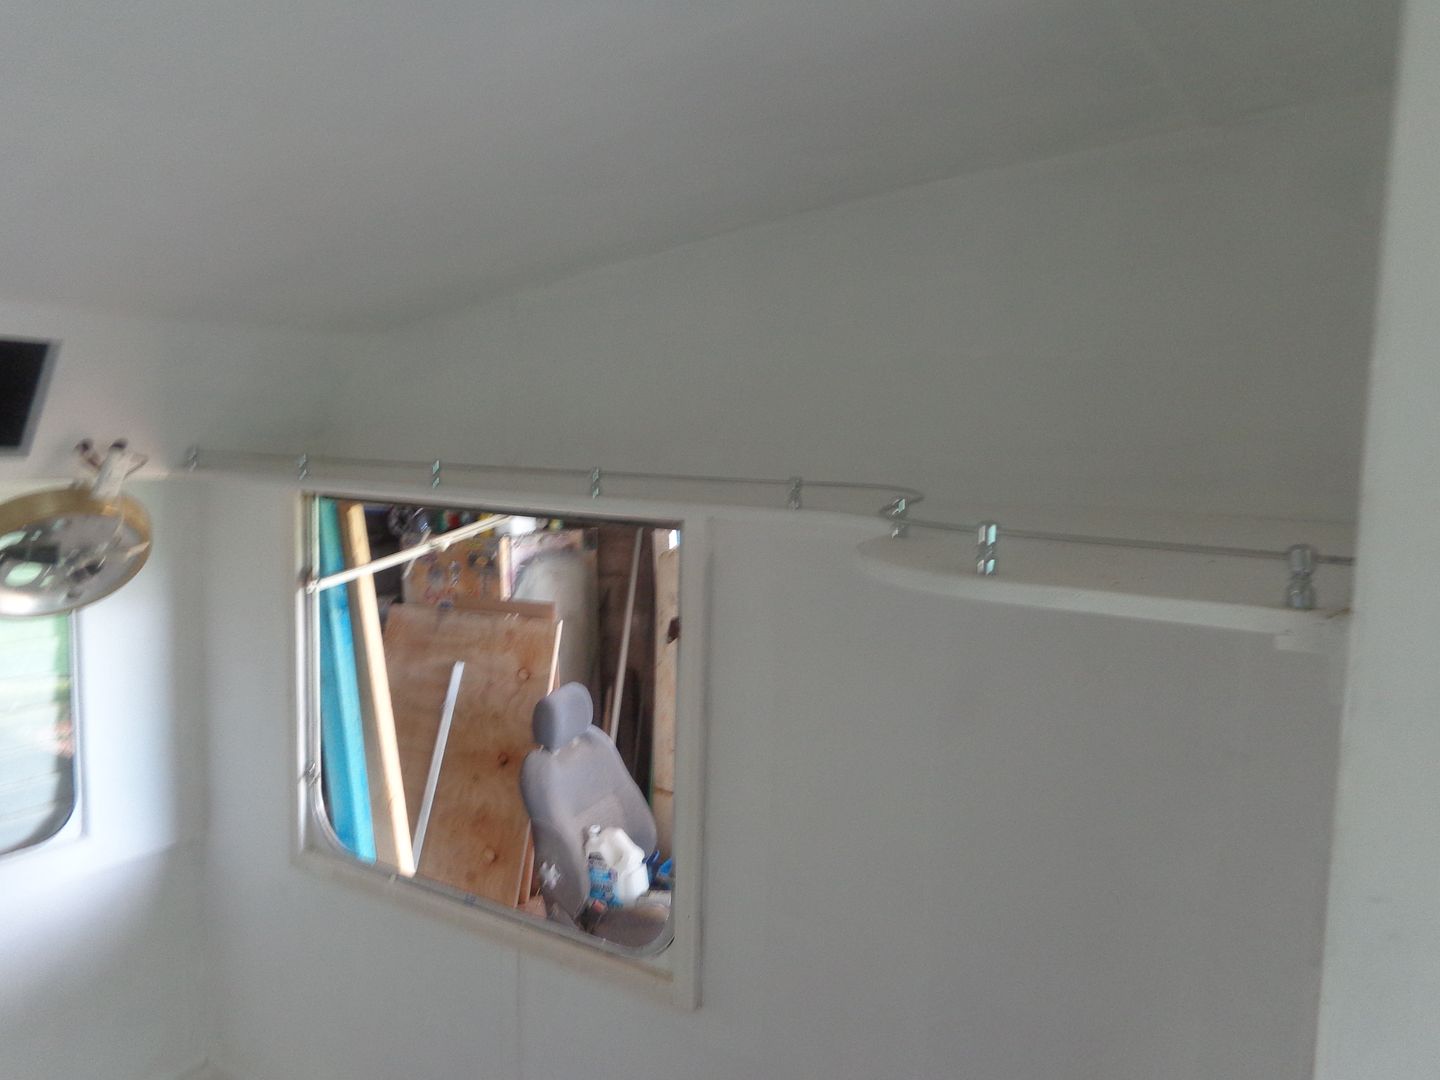 Then I fiited railing to existing front left hand shelf 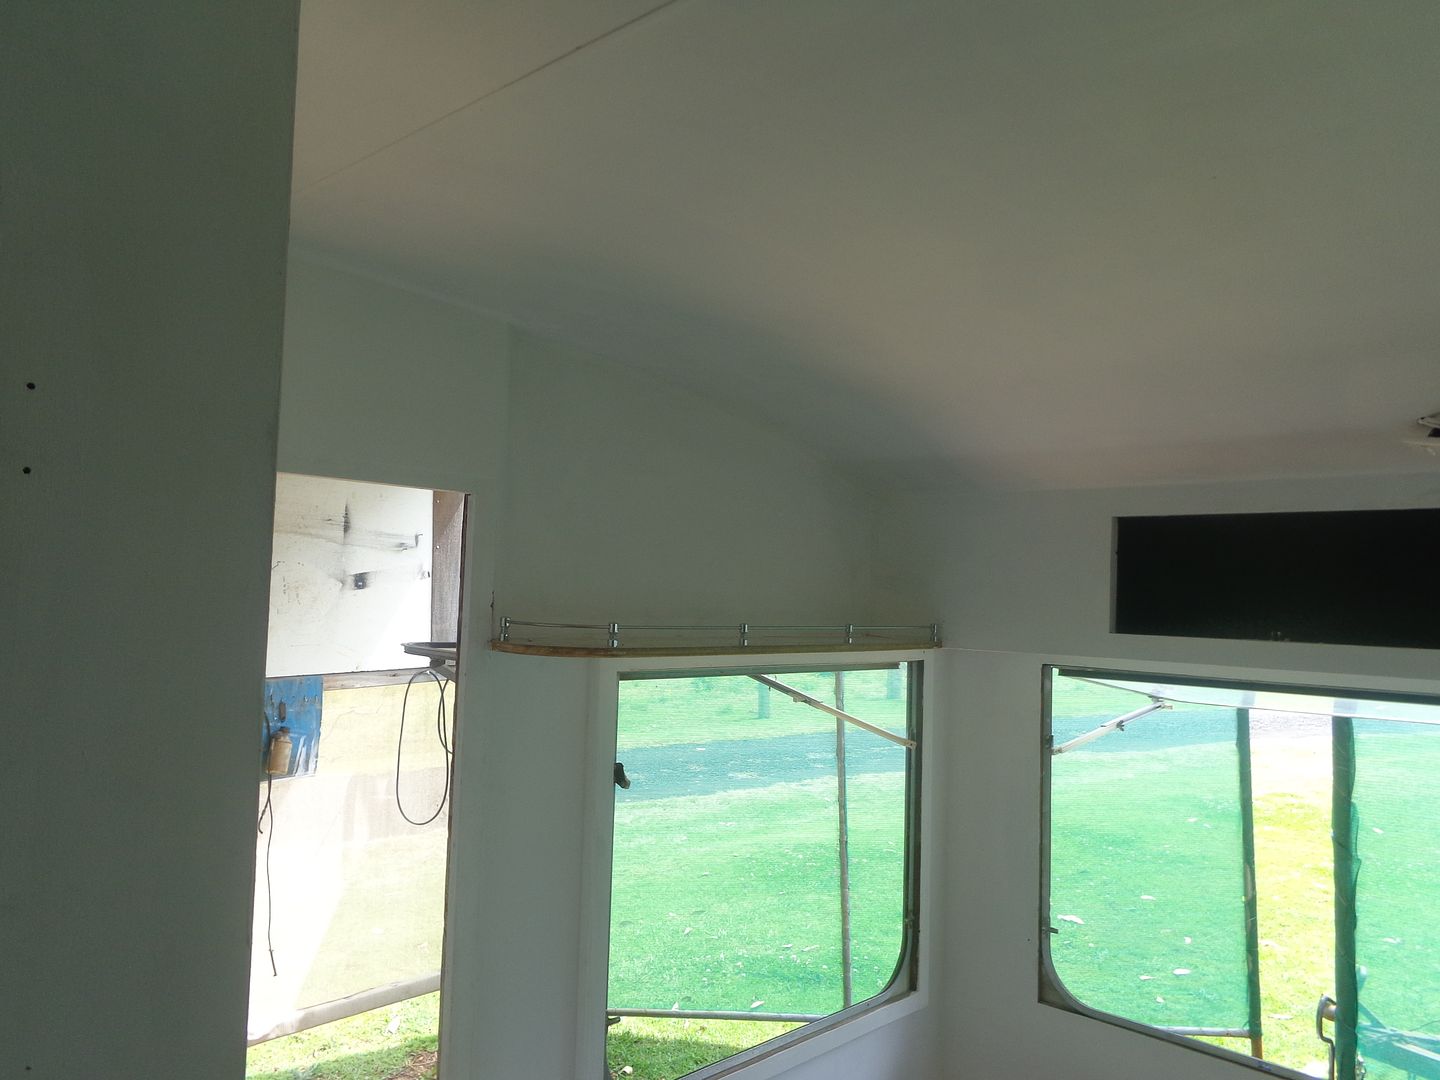 Then a few bits left to do, & I can put final primer in place, then final colour. Its all (mostly) fun JBJ |
|
|
|
Post by JBJ on Sept 12, 2015 17:51:15 GMT 10
Hi,
Hate to be a party pooper, but its impossible to realise how much work is involved involved in rebuilding an old neglected caravan, or car, or piece of furniture, etc.
All you can do, if you think about starting something, is assess whether you have the time , money, tools & motivativation to spend all of your spare time working on it.
Money can be varied dependent on how much you do yourself, but I find regular trips to my local hardware shop & Bunnings occur whenever I work on the van.
I believe it would be difficult for a younger person to able dedicate the time required , & to finish the van in a reasonable period of time
I'm not trying to put enthusiatic repairers down , just to bring reality into the "enthusiastic" period, & to prevent rebuildable vans ( & cars) being destroyed by "gutting" them, then realising that they have bitten off something they shouldnt have.
I think for your first van, you should always try to buy a good well kept one, use it & enjoy what vintage caravanning is about, instead of spending all your spare time on a project that generally doesn't end up as good as you hoped.
Its being out there using them that really matters
But its still all fun
JBJ
|
|
|
|
Post by JBJ on Sept 10, 2015 20:41:04 GMT 10
Hi,
Nothing wrong with covering things under cover. Its only when they get wet that you have moisture problems
I cover my cars ( sometimes) in a carport, it keeps the crap off. But as they dont get wet there isn't a moisture problem.
JBJ
|
|
|
|
Post by JBJ on Sept 10, 2015 18:51:08 GMT 10
No
A caravan or car cover traps moisture underneath.
It keeps them dry, then steams them in the sun.
Under cover really means what it says, being out of the rain, but with free air flow around them.
JBJ
|
|
|
|
Post by JBJ on Sept 10, 2015 12:10:11 GMT 10
hHi,
My Quest is a couple of years younger than that one, but similar in construction I guess.
Mine has lots of water damage, on the side ply sheets under the fibreglass, at top & mainly bottom.
The corners have all suffered as well. It is very difficult to repair the water damaged ply.
They aren't a van I would leave in the weather, as against a "normal" fibreglass like an Olympic or Sunliner.
Having said that, I believe all vans are much better under cover long term
JBJ
|
|
|
|
Post by JBJ on Sept 10, 2015 7:40:40 GMT 10
Hi
Theres a lot more issues with this van than you would think.
the drawbar repair worries me. It would seem that it was cut thru & removed for some reason, then rejoined. Maybe it was lengthened?. But I think the rejoining/patching is pretty ordinary, & think a competent registration inspector would likely be unhappy with it.
With the floor, I'm just finishing off a floor replacement in my Quest, that looked better than yours before I started investigating.
The window repairs will always involve more timber replacement than first appears neccessary. Thats the nature of the caravan repair beast.
My Quest had leaks at the top under the aluminium moulding like yours, & much more is involved in repairs in this area.
I would suggest that you take Cathy's advice. But as you probably are set on this van, you probably will still buy it.
If you do, I hope you have good tradesmen you can rely on, at reasonable prices, because I can almost guarantee that it will be a much more intensive repair than you expect.
Anyone can repair anything, dependent on the amount of time, money & skill you throw at the project.
I've rebuilt 5 vans, so I have a little bit of experience. But I still bought the wrong van last time, & its a much bigger repair than I would have dreamed possible after looking the van over.
In hindsight, I should have forfeited my deposit, & drove home without it
Best of luck with whatever you buy, there are still a lot of good vans out, its just finding & buying them
JBJ
|
|
|
|
Post by JBJ on Sept 9, 2015 19:51:58 GMT 10
Hi Gordon
Wheels appear to be 12" or 13" to me. Not likely to be Holden 4 stud, as they didn't come out until the Torana's/Vauxhall, & only in 13"
Ford had a lot of 13" 4 stud wheels
If 12" I would guess BMC, possibly.
But its all supposition until the diameter of the wheels is known
Definitely an unusual van
JBJ
|
|
|
|
Post by JBJ on Sept 5, 2015 15:53:13 GMT 10
Hi
As a user of this system, I understand the need to do what the people in control want.
I guess I will go along with them & give the trial a go.
At present I dont use my van much more than about 2 days a month average.
But I realise that if in the future I decide to do a lot more touring, say a month or so at a time, the possible changes to the system could help a lot.
But after the way the RTA stuffed my registration on my Dodge, by changing VIN numbers on the system without any input from me, then telling me it was instigated by me, I believe anything they do is fraught with danger for the user (US)
But they will do what they want, hopefully accepting some input on the way. I find them very inflexible most of the time
JBJ ( a firm disbeliever in the RTA at present)
|
|
|
|
Post by JBJ on Sept 1, 2015 19:21:21 GMT 10
Hi,
I agree with Leigh.
Aluminium windows did not appear until mid 1950's.
There is no visible evidence that your van had the timber windows used in 1940's replaced with aluminium.
But whatever, its a neat van, & you have done a good rebuild to suit yourself.
good to see you out using it, & with a pretty fair sort of towcar
JBJ
|
|
|
|
Post by JBJ on Aug 28, 2015 19:32:26 GMT 10
Hi,
I found a Roadhaven, about 12 foot, just out of Mullumbimby yesterday.
Not in great condition, & apparently lived in.
But I didn't think they were made this small??
JBJ
|
|
|
|
Post by JBJ on Aug 25, 2015 9:10:19 GMT 10
Hi,
I cant remember who made the one I used in my Sunliner, but there is a picture of it on about page 4 of" Jailbarjuice Sunliner".
But I custom made my bed frame & base, & didnt use the factory bed structure.
The people were just north of the bridge to Redcliffe, on the main road going north, on the left hand side.
I had to make a template for the curved section, & they made it exactly to the template. So remember to leave clearance to get your sheets & blankets down between mattress & van.
I bought a pillow top innerspring, & it was brilliant. But back then it cost about $900, delivered to my door
I think most custom mattress people would produce similar quality, but I know there is a great range of thicknesses & springs, foam, etc to choose. All of these vary the cost.
Its worth it to have a good mattress, because a cheaper poor quality one is not much of an alternative.
JBJ
|
|
|
|
Post by JBJ on Aug 21, 2015 3:30:05 GMT 10
Hi, I believe that if look thru our section " Technical", you will find many references to Sunliner curved windows. I know they are there One reference on page 40 refers to a company in the liverpool area of Sydney that have supplied a few sets I know of, but the last reference I had was a few years back now. I also remember someone in Melbourne that had a set of bubble ones moulded, again a few years back. So why not try to use our reference library in "technical". I normally start at the oldest page, & scroll thru looking into individual threads about what I am looking for. Not real quick or scientific, but it works if you are patient. No point trying to reinvent the wheel.   JBJ |
|
|
|
Post by JBJ on Aug 16, 2015 20:38:57 GMT 10
Hi,
We towed our Deejay Tandem from Northern NSW to Bacchus Marsh earlier this year.
For a change from using the coast road, we used the Newell Highway. What a difference it was. Much less traffic, road was good, & such a major improvement in driving conditions.
I would use the Newell Highway , without any doubt. Lots of good caravan parks on the side of the road as well.
JBJ
|
|
|
|
Post by JBJ on Aug 16, 2015 20:30:08 GMT 10
Hi, A bit of progress, albeit pretty slow & time consuming. I managed to finish fit the wider boards, then started narrowing the drawer unit. I have found the back of the van is not quite square, & one side bed is lower than the other. Doesn't really matter much, but makes it real hard to align new work, 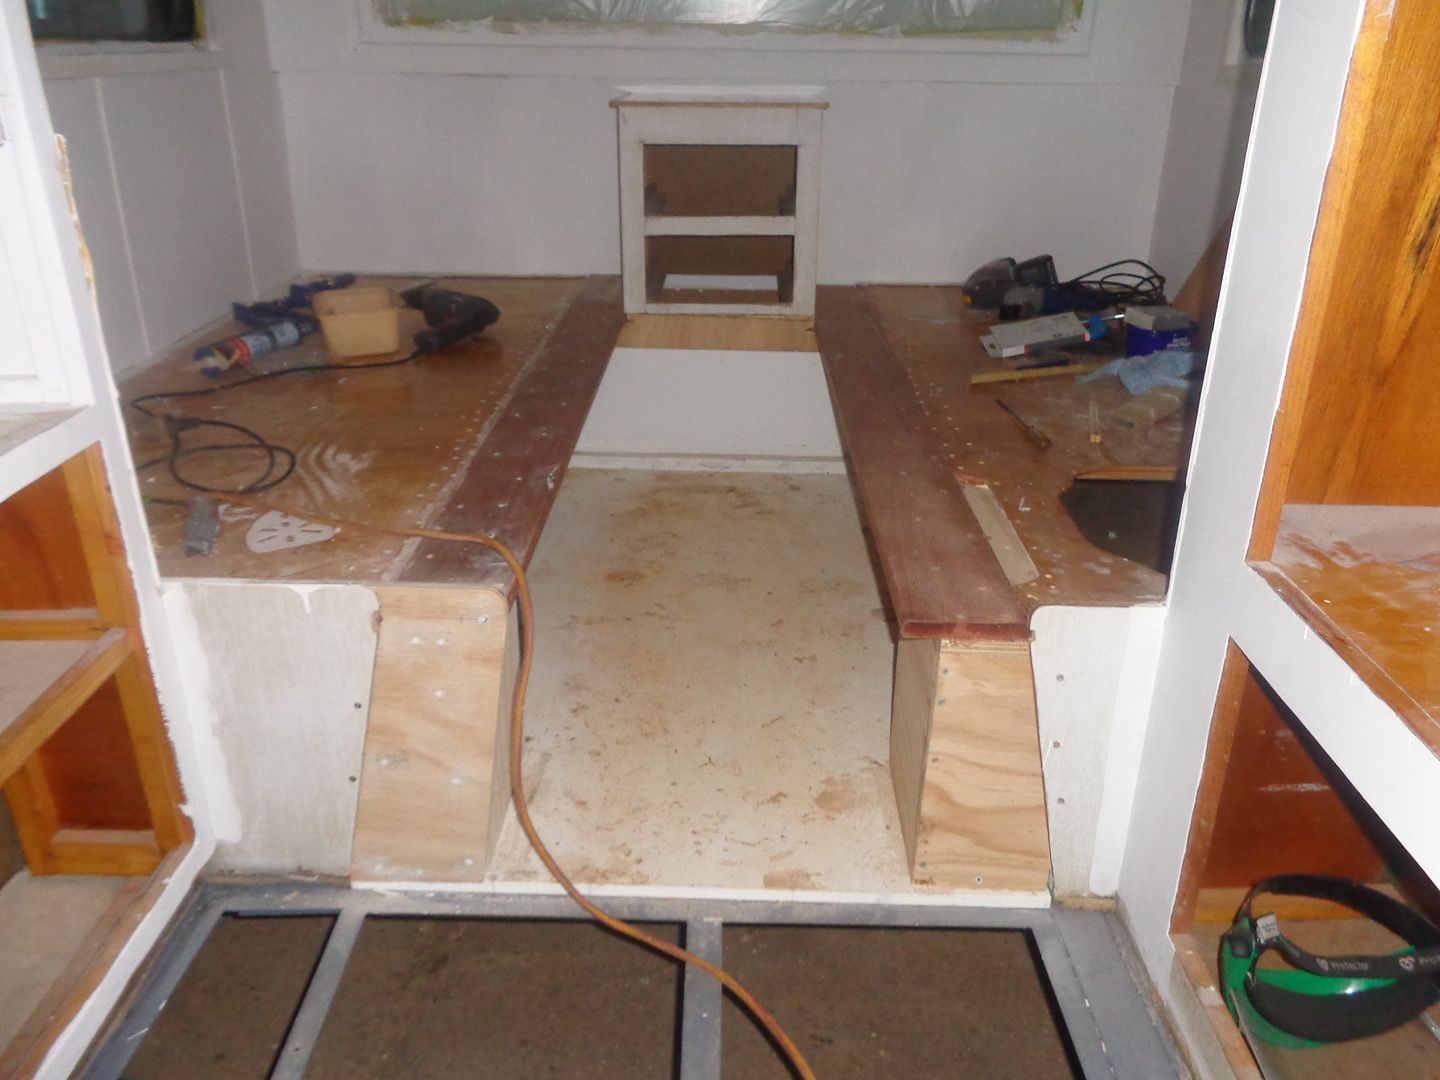 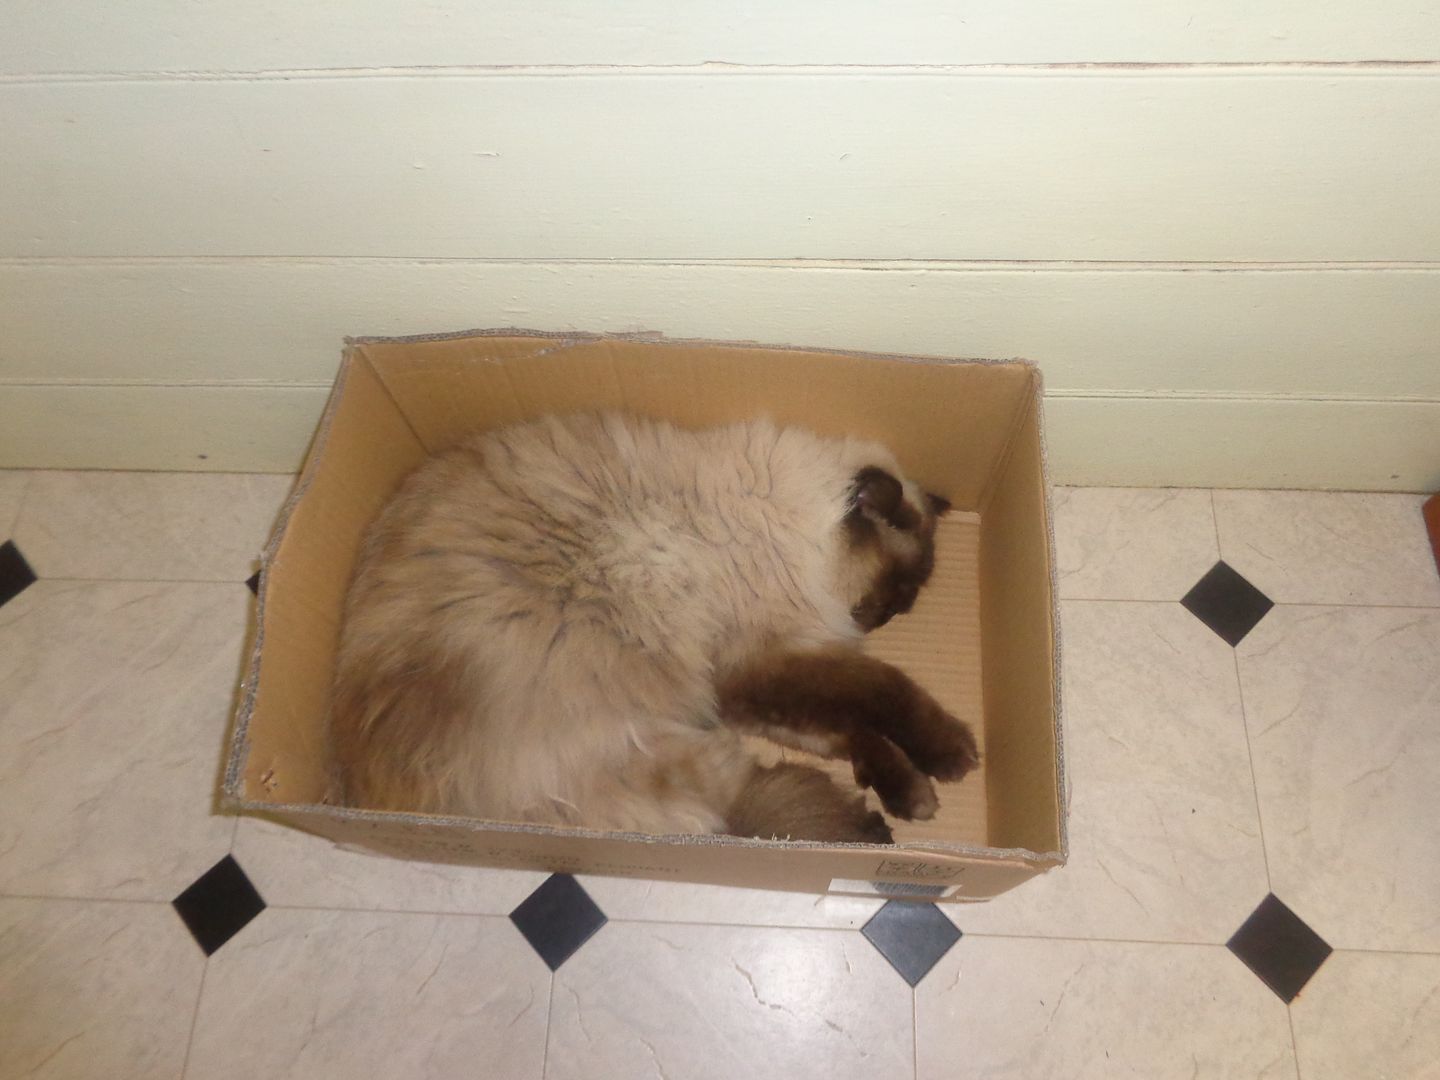 This is my helper. We inherited him about 9 months ago. He is a pug nose long haired Himalayan desexed male. He weighs 6.5 Kg, & we think he is about 2 year old, but we have no definite idea. He is a very people oriented cat, & doesnt like being away from us. I just wish we could have been given him when he was a kitten, so we could train him to travel with us. JBJ |
|
|
|
Post by JBJ on Aug 10, 2015 17:21:08 GMT 10
Hi Al, Well after travelling home from Mexico in the van, we decided that if we rebuilt it we would put better beds in it. What was there was about 700 wide x 1820 long. Plently long enough for a short one like me, but not real wide. We looked around at standard bedding sizes, & rapidly realised that decent bedding wasn't available in those sizes. So if we had to have custom made innerspring mattresses, we may as well make them as big as we could. Nothing could be done about the length, & that didn't need changing. But it isn't that hard to widen the beds. So I got a couple of lengths of 120x19 tas oak from Bunnings, stapled it temporarily in place, & presto we have 830 wide beds.' 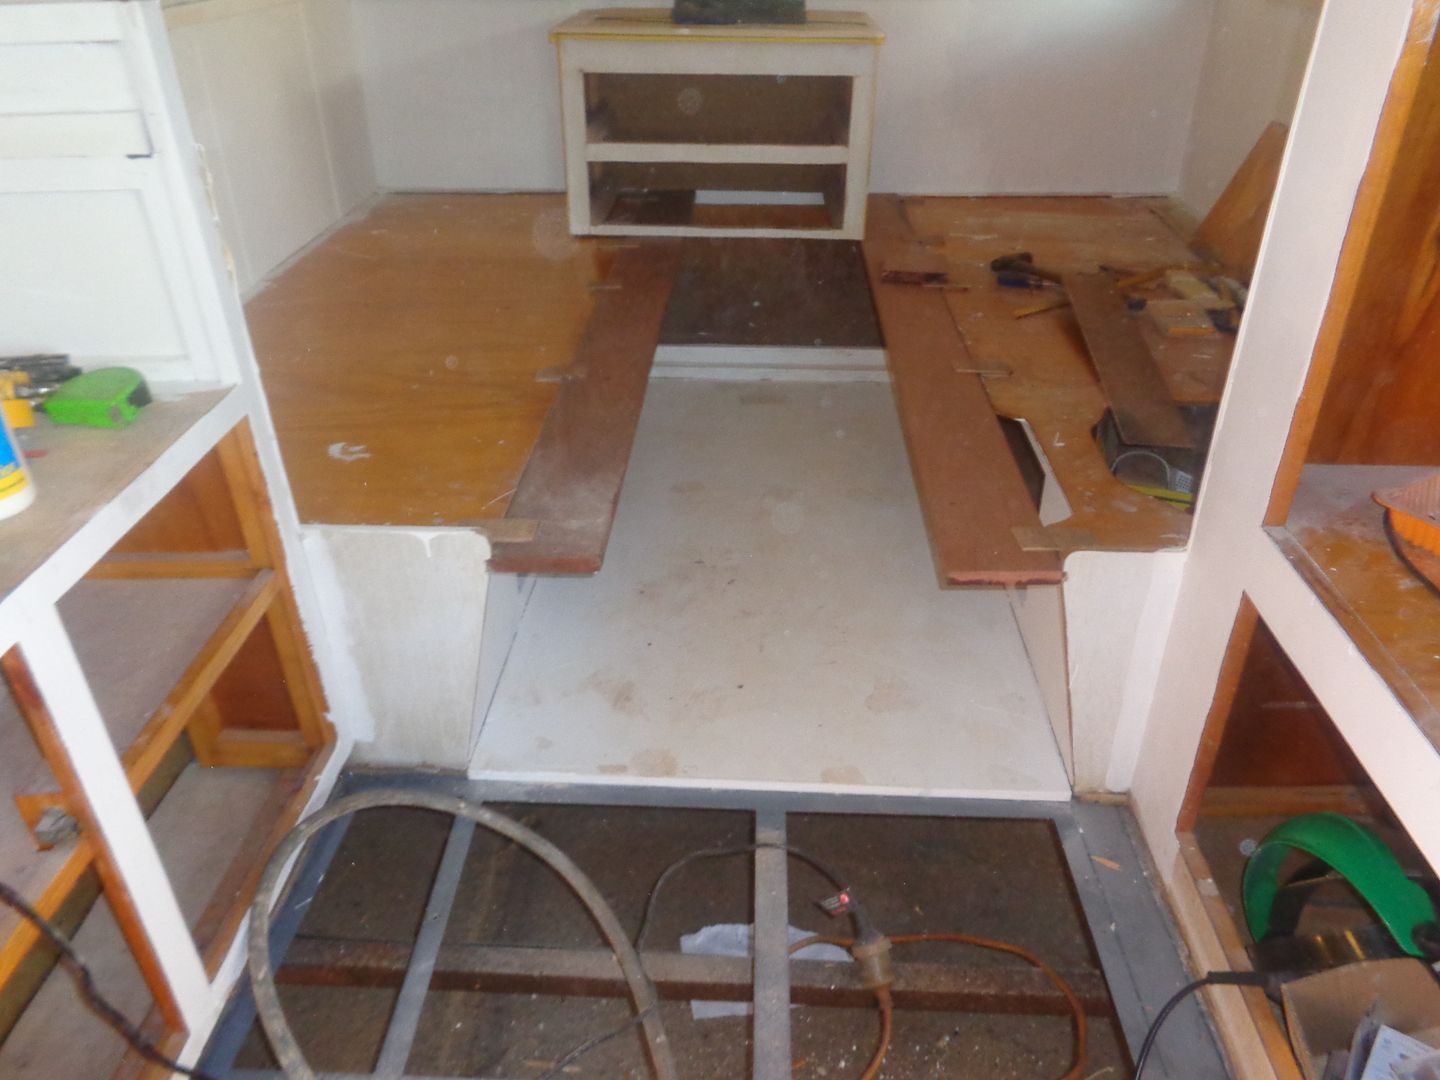 Wont be TOO hard to finish off. have to do a bit of reduction surgery to bedside cupboards, make a few bits, etc, but nothing a few days enjoyable work wont fix. JBJ |
|
|
|
Post by JBJ on Aug 9, 2015 8:40:01 GMT 10
hi all, Well I got part of the new floor in place, & its going together like I hoped. The steel frame I made was from 35x35x2.5 Duragal angle. I welded the two pieces of each support back to back, by short welds then a space, as I didnt see the need to fully weld. When installed as a Tee section, one angle supports the existing cupboard, & the other the new floor. 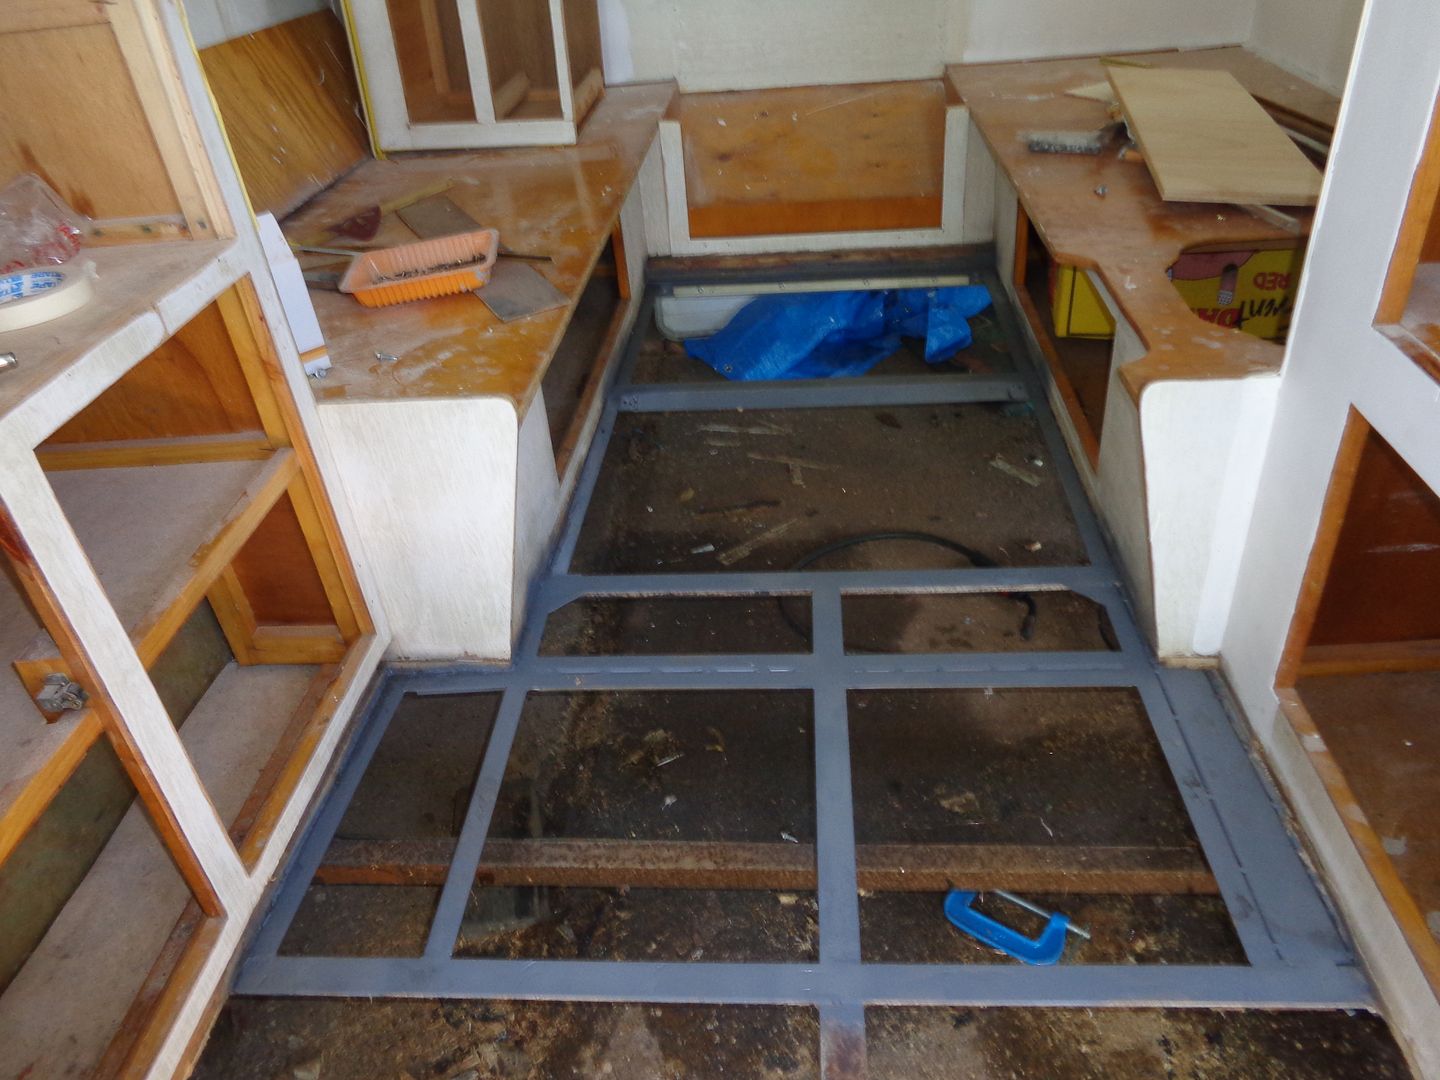 A heavy bead of liquid nails goes along the rotted edge of the chipboard, then the primed 15mm ply is installed. It is then screwed onto the new steel frame & existing chassis rails.  The front section went together similarly 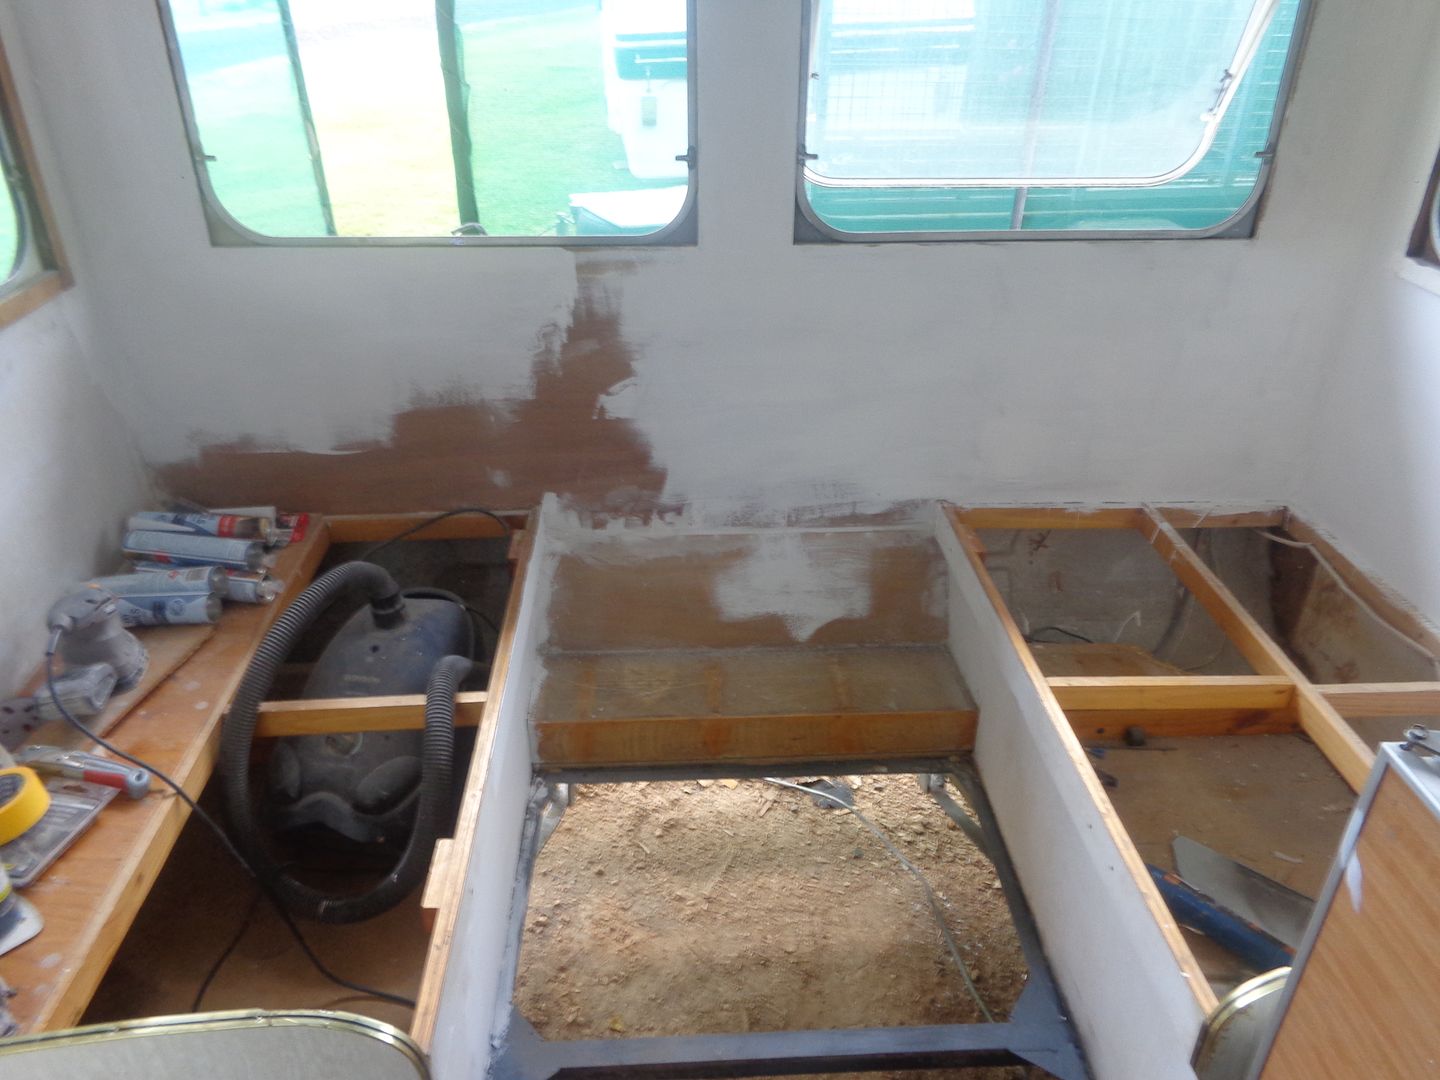 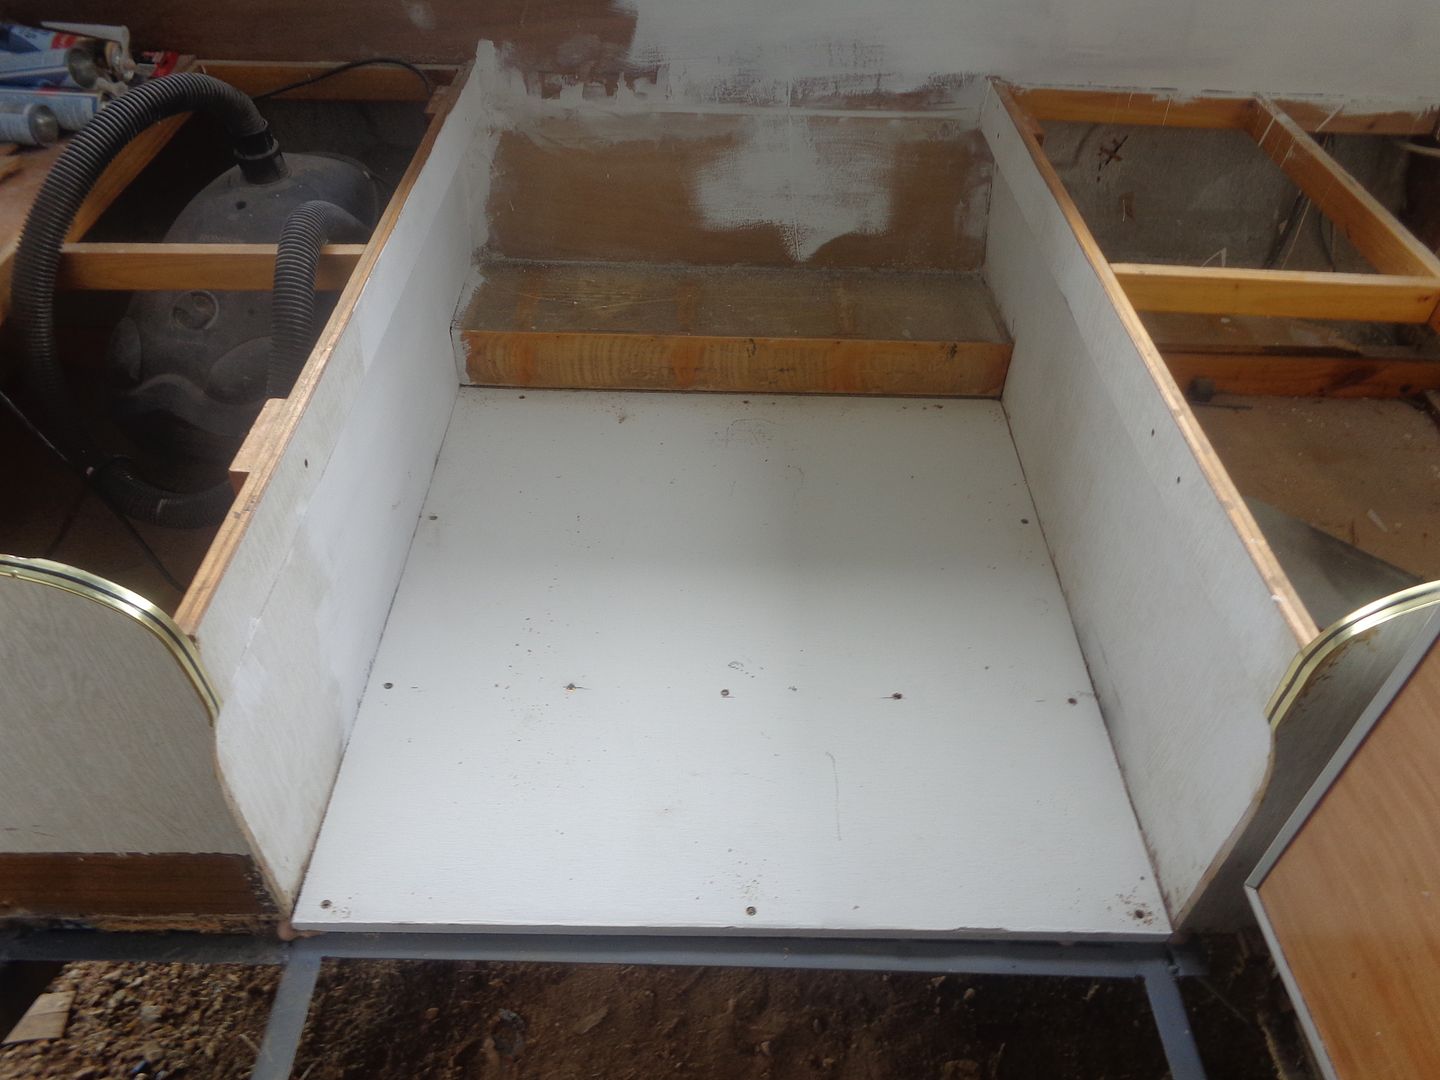 JBJ |
|
|
|
Post by JBJ on Aug 7, 2015 8:23:42 GMT 10
Hi Cathie,
Provided we can get a powered site, we will give it a go. Its a REAL big trip for us, about 50 Km, so I guess we can manage it.
looking forward to getting out again
JBJ & Boots
|
|


 for us but if we leave 5min early we will be at Bangalow. on time


