|
|
Post by jenniewren on Jul 8, 2013 21:31:41 GMT 10
Love it.....so sweet!
|
|
|
|
Post by jenniewren on Jul 8, 2013 21:10:27 GMT 10
That is one good looking van....and the paint tones outside I adore....you are one lucky, lucky lady....good on you. Waiting, waiting, waiting on more pic's......
|
|
|
|
Post by jenniewren on Jul 8, 2013 21:01:31 GMT 10
Awww...I was just getting use to that electric blue colour. Adore the shape....kinda like a space van.
BUT I understand about pbucket.....hadn't done it for awhile so forgot a lot & far out it took me 3 hrs to figure it out....who knows where I sent pics too...out into cyberspace I guess.
Soooo looking forward to seeing some more pic's, can't wait to see transformation
Hey......Seesheeeellll Coooooeeee.....
|
|
|
|
Post by jenniewren on Jul 8, 2013 20:55:20 GMT 10
Wow Murray....that is quite an achievement replacing that rotted timber & I love the tiles! I thought I was the only one who used batteries to hold things together whilst glue dried! Two great minds and all that! Those tiles are in great condition. I thought about lifting a few of the Rambler's but not that fussed...there are a few stains & now I call it "vintage history". Fooling around with tiles that contain asbestos scares the hell outta me! Knowing my luck they wouldn't come off as easily as yours......
My Rambler Deluxe is a very similar shape to yours except mine is baby size, so the retro shape really hits you in the face! I love ally unpainted with the stripes.....keep posting those pic's I am intrigued what you are going to do with the interior. Will you be keeping the pink stripe paint colour outside?......raining yet???
|
|
|
|
Post by jenniewren on Jul 8, 2013 20:37:07 GMT 10
Lovely van....it will come up a treat.
AND the shelf....Al has this thing about the "shelf" in Franklin vans.....just has to have one before you get your certificate of authenticity.........still up to your old tricks I see Mr Franklin!
Enjoy your resto....but most importantly....enjoy your family holidays in your treasure.
|
|
|
|
clocks
Apr 25, 2013 10:31:23 GMT 10
Post by jenniewren on Apr 25, 2013 10:31:23 GMT 10
Hey there...if you look under thread...Rambler....which I have acquired....it has a really cool little retro clock that is a wind up and it works a treat. For such a small retro looking clock it sure has the loudest tick tock I have ever heard! The vv is about 1966....the little retro clock is ONE of the reasons I actually bought the van. Perfect size for our little vv! J
|
|
|
|
Post by jenniewren on Apr 21, 2013 10:25:04 GMT 10
Thank you Rattles.....just went and bought a test lamp.....printed out your instructions....I'm armed and ready! Let you know what transpires.....I think the pin socket is right....it's all the brown/black wires in tail light fitting that had us "rattled" (pardon the pun!)....many thanks
|
|
|
|
Post by jenniewren on Apr 20, 2013 22:34:42 GMT 10
Hello....decided to replace the rear tail lights with new lenses & shiny chrome surrounds also replace the socket to suit "the boy's" ute! The lights on Roy were geared up for previous owners light truck....ok....this can't be too hard! Replaced socket with 5 pin to suit ute. Followed directions on pack....easy. This is going to be a breeze....NOT! Took off rear tail lights...bit stuck but managed to prize off. Hmmmm.....three wee globes that were dusty etc etc...cleaned them held them to light...yep....all fine. I knew the trick of cleaning contact points etc and replaced. BUT the wiring on right hand side...oiy! Where are the red, green, yellow white & brown?  Huh?!!! This is not what it is suppose to look like! Black, brown & 1 one red everywhere looping around and into globe bracket! The boy wandered over (perhaps saw me standing there glaring!) and decided to offer his assistance....he has done trailer wiring before and basically took over. Handed over the screwdriver with just a slight smug smirk as he eyed the offending wires  There are....can't quite remember now but I think....something like a red, a couple of black & about 3 or 4 brown...... Am guessing that they feed all the lights...but....what is what??? He replaced wires back to where they belonged (he thought)....I sit in ute & we proceed..... turn on right indicator, turn on left indicator, foot on brake, turn on lights... Nothing...... re affix a different way....change socket wires... Nothing..... Redo it a different way.... turn on right indicator, turn on left and so on.... I was getting a little, dare I say it, bored.....it went on for 4 hours!!!! I can tell you, "the boy" was getting a little testy....time to turn up the radio..... The best we could get was brake lights....nothing else....or if not brake lights...flashing hazard on both sides. Grrrrr......arghhhhhh!  This is harder than figuring out the new GST instructions 20 odd years ago but even that didn't beat me...this has.... HELP! I think we need an auto electrician cause we are literally STUMPED! Has anyone else had this problem? If so, would you know what they represent as far as colour matching with the current colours? There must be some system... Hope this makes sense....  |
|
|
|
Post by jenniewren on Mar 12, 2013 20:11:21 GMT 10
Love the shape of your van.....and that very NICE laminate!!! J
|
|
|
|
Post by jenniewren on Mar 6, 2013 7:39:31 GMT 10
Lovely sunny you have.....I love the cupboards & the mint green colour fibreglass...all goes extremely well together.
Is that a wrought iron draw bar? It looks great with the van.
We have seen your car also....at Wintersun(?) the big car display on the Gold Coast....and I think it was at Hanging Rock, Victoria recently??? At the big (massively huge) car display.....positive it was.....
If not, there is one identical.
|
|
|
|
Post by jenniewren on Mar 4, 2013 21:11:07 GMT 10
Beautiful van.....stunning! So glad you are using such a family icon!
|
|
|
|
Post by jenniewren on Mar 4, 2013 20:12:36 GMT 10
Errr, sorry...that would be in the "Members" section....thread "Rambler" J
|
|
|
|
Post by jenniewren on Mar 4, 2013 20:11:03 GMT 10
Hi Topogon.....if you have a look under "Rambler" thread.....you will see how the "gumption" has worked it's magic.
Not perfect by any means but 100% better than it was.......time 8.5hrs total!!!
That's a nice Sunday job for you....................good luck!
|
|
|
|
Rambler
Mar 4, 2013 19:52:35 GMT 10
Post by jenniewren on Mar 4, 2013 19:52:35 GMT 10
Well have a look at this and see what you think! This is the side view after the attack with "gumption" 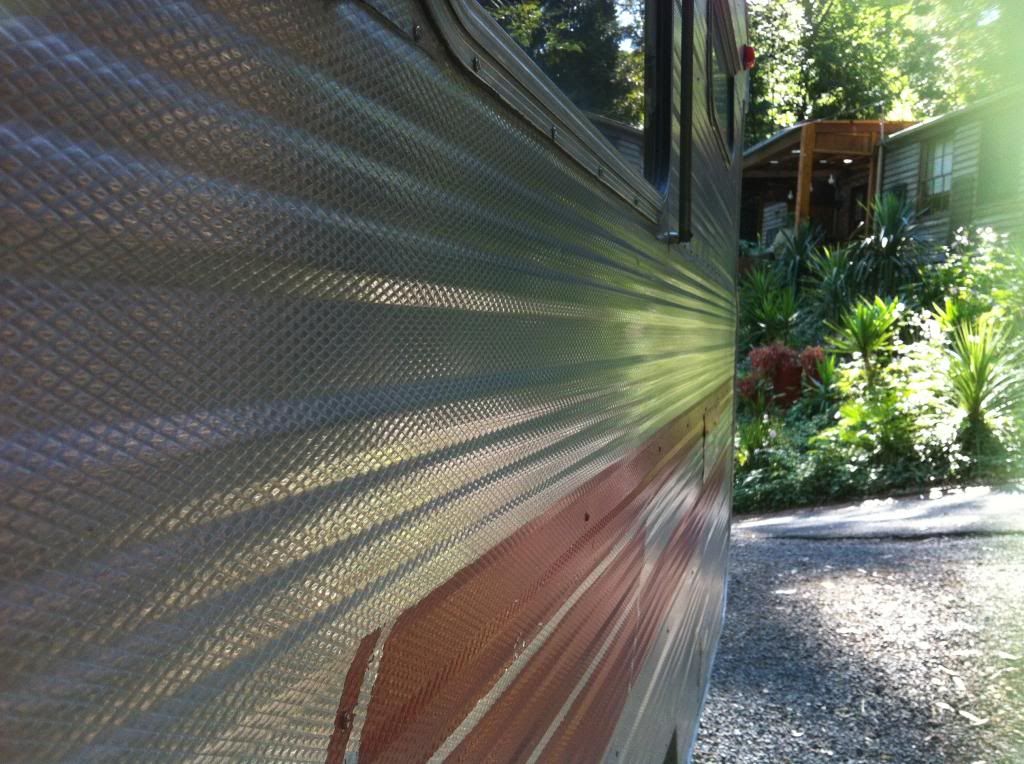 It has shown up the small dents more predominately, but hey, it's vintage  The other side...... 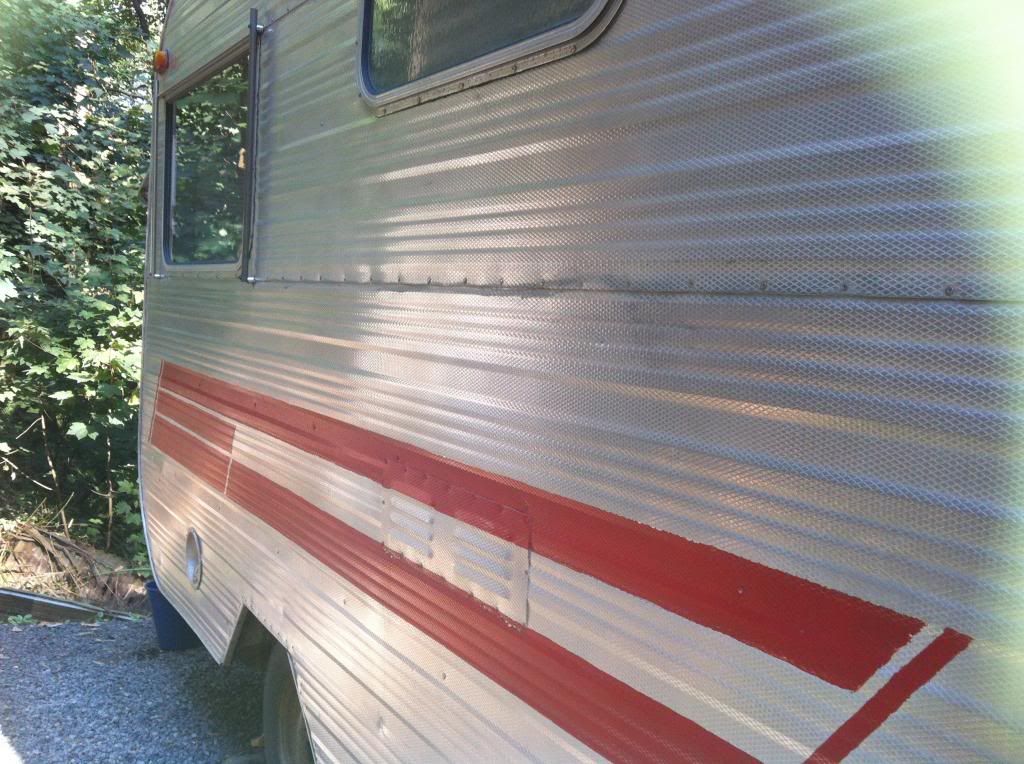 Ummmm....no .....not quite what I had in mind to "gently" knock out that brow dent! 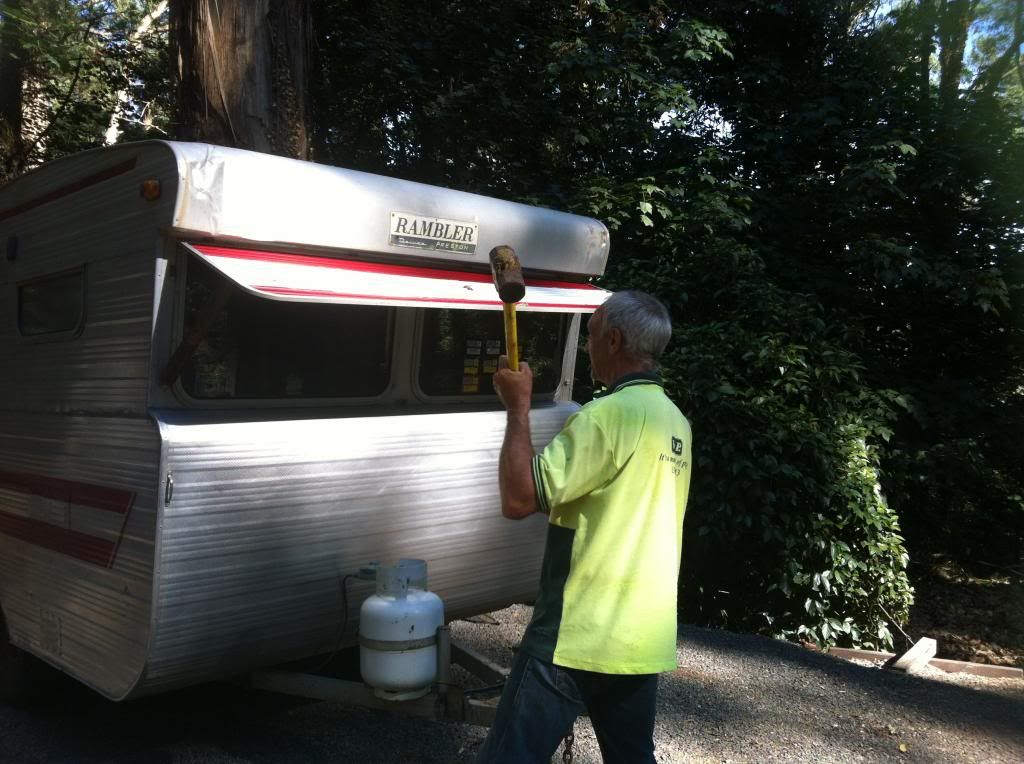 The front had tar, horse poo & lots & lots white oxidization marks...the sill area still has dark dots but no where near as bad after the polish..... 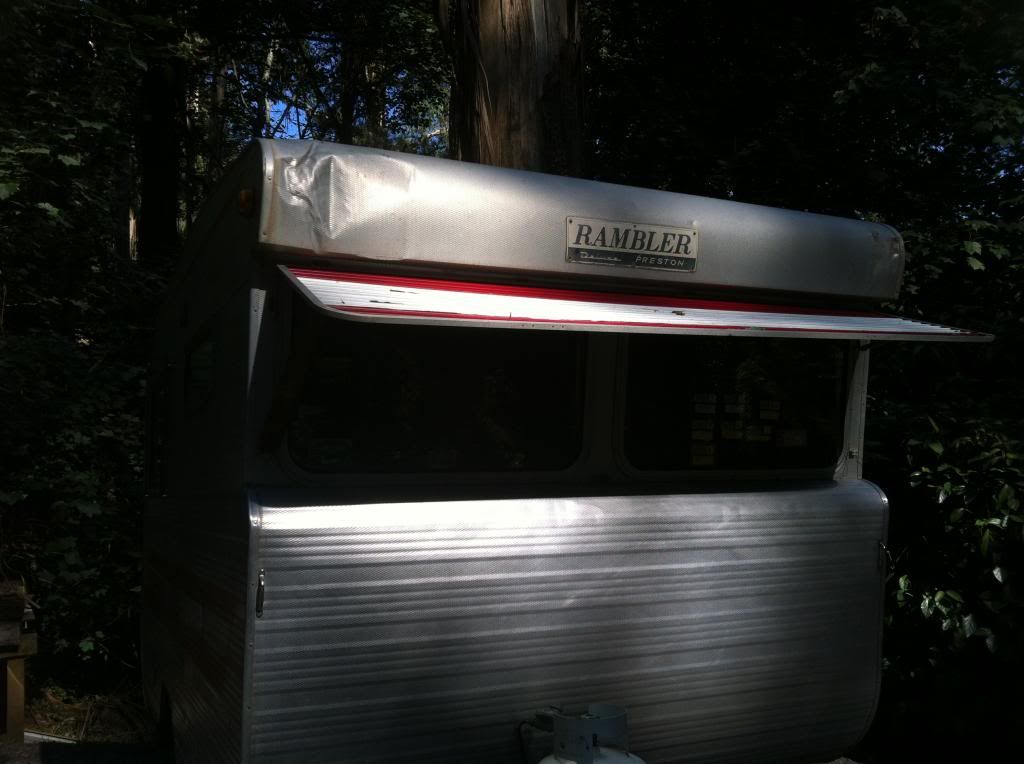 These are the offending little devils......they won't budge. It's the only area with them..... 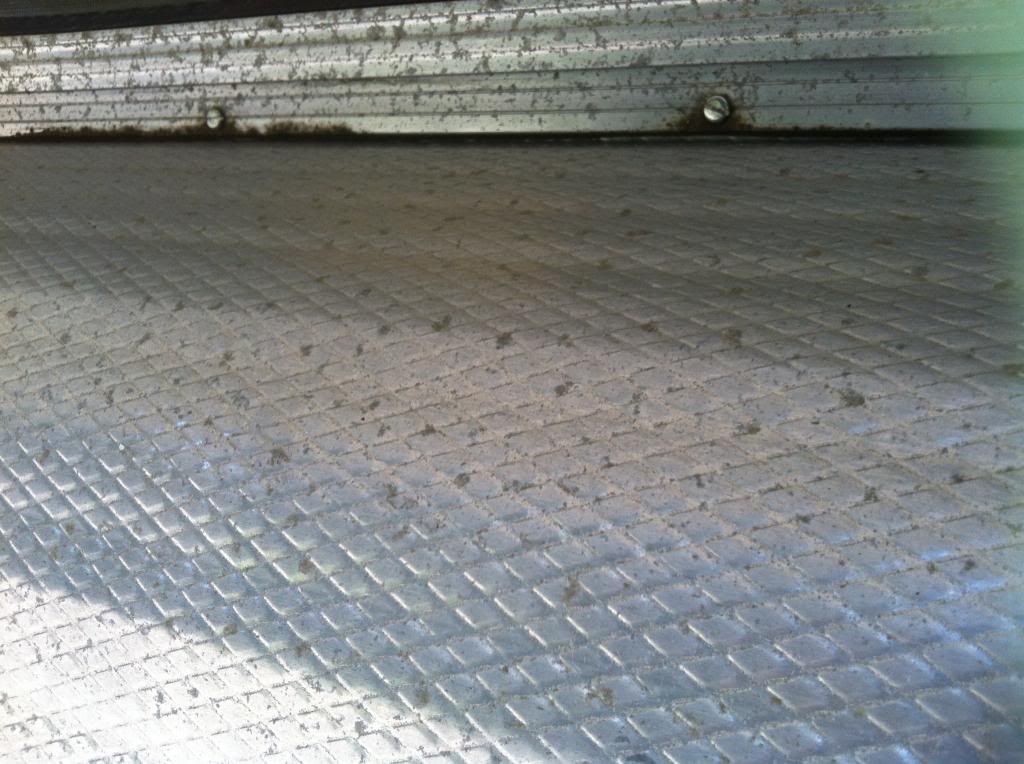 You can see the white dots very clearly on this pic!!! Go back a pic and you can see the difference ;D 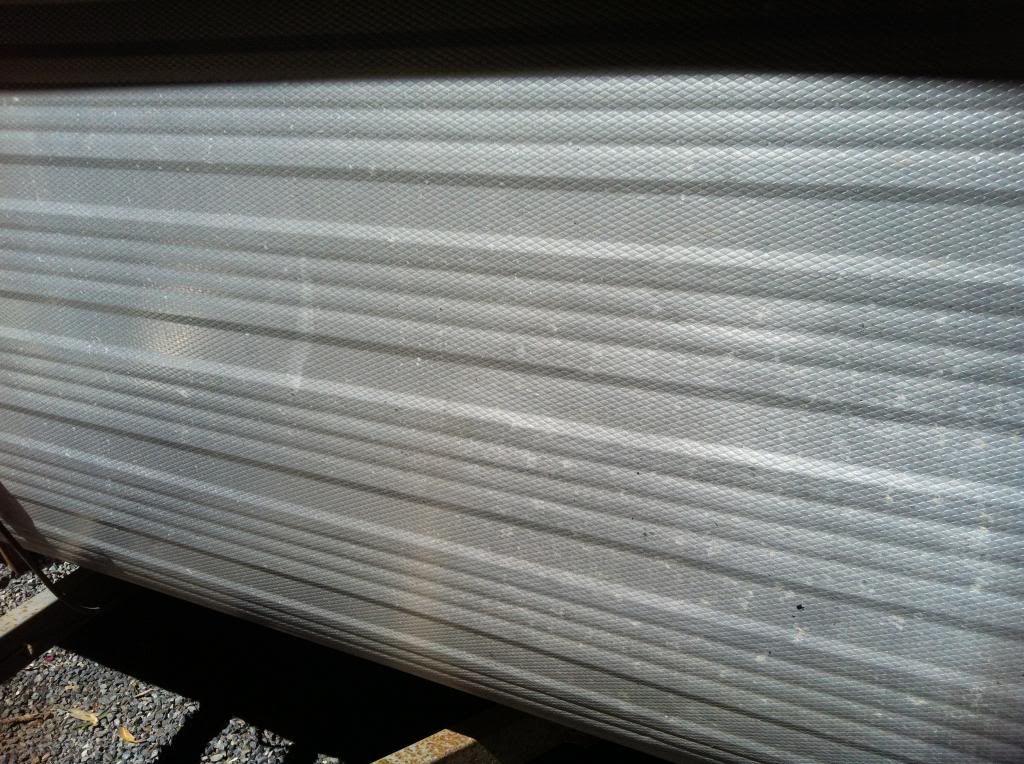 I did the rear also today and total time 8.5hrs....pretty happy with that....better than your 4000+hrs Mr (slow coach) Franklin1 ;D ;D It was a work out I can tell you & perhaps Purple polish would have done even a better job.....I don't know but I was VERY happy with the good ol gumption & I think it would have cost me...oh $1. In fact, I still have a quarter of it left over!! I could go over it again I guess if I was pedantic....perhaps I shall in another life. What I need to do is strip back the red paint and redo it but not sure what to use? Anyone have any suggestions? |
|
|
|
Post by jenniewren on Mar 4, 2013 8:46:12 GMT 10
Well, actually it's out of my league also, but I have had to hold "things" whilst the boy does this....many, many times. So I know how it's done. Looks easy.....!
You will need a rivet gun as well & the correct size rivets for replacement. That I can't use as my hands are too small to grip the rivet handles & apply the pressure needed to secure them...
AND mine are rivets also....this could be very interesting. I certainly know how to use an electric drill but.......oh dear I can see I will have to use bribing tactics when it comes time to refit new ones!
|
|
|
|
Post by jenniewren on Mar 4, 2013 8:37:18 GMT 10
Soorry folks....thread is under "easiest method to clean alli etc etc" other members thread if you want to know how I went cleaning/polishing!
I really need to not write posts after 10.30pm.....obviously the brain stops working!!
|
|
|
|
Post by jenniewren on Mar 4, 2013 8:31:27 GMT 10
Thanks Hughdeani....had a feeling it was around mid sixties....'66 sounds fine by me!
Really the "gumption" has worked a treat and cheap as chips. I still have some left over in tub & it wasn't full.....I worked out the cloth needs to be damp....not "wet" and after the swirling motion, I followed the line of diamond pattern to get into the groove line.....quite an amazing transformation.
Probably not as good as that purple polish but I am more than happy with the end result & cost me $1!!!!!
|
|
|
|
Rambler
Mar 2, 2013 20:35:18 GMT 10
Post by jenniewren on Mar 2, 2013 20:35:18 GMT 10
You will read what I did regarding spotting on alli in "Blemishes on alli" under another members thread!
It's not perfect BUT WOW....
It's a workout but it was worth it....Very very happy with end result!!
I think it will tally up to about 8hrs or so to do whole van....
|
|
|
|
Post by jenniewren on Mar 2, 2013 20:15:55 GMT 10
Why thank you Don Ricardo....DC3 aircraft! WOW.....shall read...I am intrigued
|
|
|
|
Post by jenniewren on Mar 2, 2013 20:04:55 GMT 10
Guess what..........I have just spent a leisurely afternoon (not) doing exactly what you want to do! I am the one with the spotted alum problem.......I decided I couldn't just spot clean you have to do the lot!  I first washed the whole van with warm water and dishwashing liquid... works just as good as anything.....wiped it over with dry cloth..... The ONLY way I could remove all of the spots (bird poo) & imperfections was using "elbow grease" a "fairly damp cloth" with a cream cleanser. Good old Gumption. Cheap as, I had a little over half tub and have enough for the other side tomorrow!! Just did a big swirling motion, no hard rubbing. Try the underside of the back first till you get the right pressure to clean...You kind of get the hang of it after about 15 mins or so! It's a top workout!!! I didn't use jex as I found this to be too harsh on the ali....just my opinion when I did a test patch. I washed it down with a soft brush to get into all the diamond pattern.....then just simply dried it off with another old towel. You are thinking...no way.....well have to say the front & side that I managed to do in less than 4hrs have come up an absolute treat!!!! I am VERY HAPPY with doing it this way!!! ;D ;D Even though I whinged a lot & tried to worm out of doing it the hard way beforehand............. So much better than a solution I bought to originally do it! Quite frankly it was a waste of time!! But it wasn't Purple polish but guessing the same kind of thing. I am by no means a perfectionist.....not slap happy either...more in the middle.....there are still a few imperfections but hey it's a vintage van. There was some stubborn tar & dried horse poo on front....the boy wandered over and dabbed them with petrol, they wiped off easily.....I was a little concerned about fuel on alum but not a problem (he uses it all the time to clean his beloved motorcycles!)....I simply washed it off & polish dried it. As for Purple polish don't know.....Gumption did exactly what I wanted it to do....cleaned & polished. You should be able to do it in a weekend!!!! Plug in the ipod and go for it ;D ;D ;D Good luck..... PS: No I will not put anything on it....mainly because it's too hard when it deteriorates to get off and start again. It's easier to just wash it down with warm water & dish washing liquid every now and again with a soft bristled kitchen broom!! ;D ;D ;D ;D ;D ;D ;D ;D ;D ;D ;D ;D ;D ;D ;D ;D ;D ;D ;D ;D ;D ;D ;D ;D |
|
|
|
newbie
Mar 2, 2013 19:11:01 GMT 10
Post by jenniewren on Mar 2, 2013 19:11:01 GMT 10
Hey there lulu......lots of Olympics for sale at the moment......best of luck as you become addicted to finding one that suits your needs!
|
|
|
|
Post by jenniewren on Mar 2, 2013 12:50:00 GMT 10
Thanks DC3Td...(what does that stand for by the way??) I have some WD40 which I will go and try.....sorry it was 2up who suggested WD40 for tar.......but I will try your Purple & see how it polishes up...maybe back end underneath first! Thanks J
|
|
|
|
Post by jenniewren on Mar 2, 2013 12:43:41 GMT 10
I have watched the boy electric drill out rivets......need a drill bit that is a little smaller than rivet so that fits into the head of rivet....drill away....carefully. 9 times out of 10 the rivet will simply wind up the drill bit & it pulls out. Hopefully this technique might be your solution? More advanced guru's than I might know a better way but this seems to work for him. I may have to do the same as I think mine are rivets also......must go take a look can't remember! |
|
|
|
Post by jenniewren on Mar 2, 2013 10:38:16 GMT 10
Love your van......stunning what a great find! It will be gorgeous when complete! Send more pic's I need inspiration!!!!
|
|
|
|
Post by jenniewren on Mar 2, 2013 9:36:02 GMT 10
Can anyone pinpoint a date on the Rambler? Thinking mid/late sixties perhaps. Be good to have a year however.
I am ask because the rego will run out in a few months & as I am not suppose to be the owner (couz is the phantom owner & he has flown the coup o/seas)....things we do to obtain what we want...I may have to re-register if he isn't back in time to obtain transfer signature from prev owner.
|
|


 Huh?!!! This is not what it is suppose to look like! Black, brown & 1 one red everywhere looping around and into globe bracket!


