|
|
Post by murray on May 23, 2013 21:31:15 GMT 10
|
|
|
|
Post by shesgotthelook on May 23, 2013 22:13:25 GMT 10
Very nice Murray, welcome  |
|
|
|
Post by firefighter on May 23, 2013 22:29:47 GMT 10
    Onya Murray Good to see you got the van in the end......looks a lot better now than the few photos you sent me last week Starting to get a few new members from Tassie    cheers f/f ;D ;D ;D ;D
|
|
|
|
Post by akeepsake on May 24, 2013 0:20:15 GMT 10
Murray just found this thread  Lovely original van ! A lot of similarities with my 63 millard Florida ...Lino, cabinets door furniture etc !! Looks in good nick. You must be pleased!! Keep in touch Andrew ;D |
|
|
|
Post by Franklin1 on May 24, 2013 12:53:43 GMT 10
G'day Murray, you ol' galah, you! ;D ;D As I said to you in my PM, I'm thinking your chassis number of B358 is from "around 1963". Now that I've seen a photo of your van, I can give you some more info to help narrow down the age of your van. The Valiant model seems to have been launched in early 1962. It also seems that at first they were given an 'A' series chassis number, the same as the Viscount models. In fact, I'm guessing they just allocated the next chassis number available, irrespective of whether it was a Viscount or a Valiant. I'm thinking that if we saw a line-up of the chassis numbers A01 to A500 in order, some of them would be Viscounts, and some would be Valiants. At some point during the first year of marketing, they've changed the Valiant numbering system and started a 'B' series. Somebody must have decided it was better to distinguish between the Viscount and the Valiant models. The Viscount continued to get an 'A' series number, and the Valiant started to get the 'B' numbers. In mid-1962, the Valiant was being advertised as "aluminium and rescote", which I presume means that the sides were Rescote plywood, and the roof/ends were aluminium...  Then in late 1962, they were being advertised as "all aluminium", meaning the full cladding was aluminium (but not the framework, which came later)... 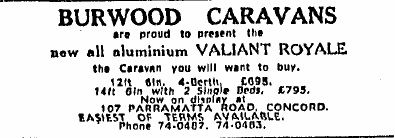 In February 1963, customers were being offered the choice of figured aluminium or the latest American ribbed cladding... 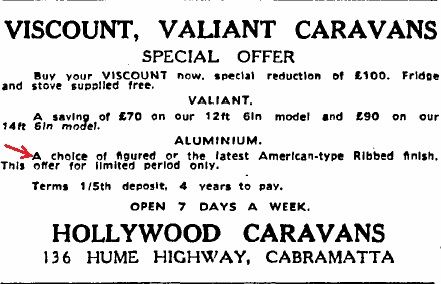 From what I understand about the history, "figured aluminium" is the flat diamond pattern aluminium that was used in the early 1960s. If you look at the first Valiant in the DHL thread and note the photo when it was the original plain cladding with the green stripe, you'll see what I think was called the "figured aluminium" cladding. (And no, that van is not a 1968 Valiant. We've learnt heaps more about Valiants since that post was made in 2007.   ) In November 1963, they started using the sloping windows on the Valiants, "as in Viscounts"... 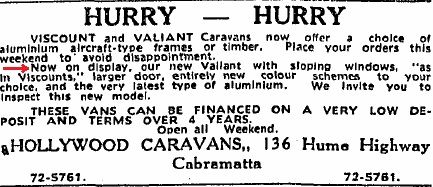 So in summary, I reckon you've got the American ribbed cladding that was optional in early 1963. You've also got the straight windows before the sloping windows came in at the end of 1963. I've only ever seen this particular ribbed cladding on the Valiant model, never the Viscount, and it only seems to have been a short-term thing, because in late 1963 the new ribbed profile from Comalco became available and was being used in both the Viscount and Valiant models. Does all that make sense??  cheers, Al. |
|
|
|
Post by murray on May 24, 2013 13:24:53 GMT 10
You just have way too much time !!
Is it raining there ?? No gardening or lawns to mow?
From what I have digested from all your material it's a 1963 model. The aluminum pattern is really standout now you have pointed it out.
Learning something new every day( can I go home now)
should have saved another hundred pounds and brought the longer one ....next time.
The door definitely isn't a wide one, that's me. Thought it seemed tighter.
Thanks for all the effort
Cheers
|
|
|
|
Post by firefighter on May 24, 2013 22:07:53 GMT 10
    Hi This thread has been moved from general to members photo album as requested by Murray cheers f/f ;D ;D ;D
|
|
willow5075
Full Member
   Willow & the MOTH
Posts: 355
|
Post by willow5075 on May 28, 2013 20:46:27 GMT 10
lovely looking VV!!
|
|
|
|
Post by murray on May 30, 2013 17:24:37 GMT 10
Finally could justify doing a bit of work on the van. Most of the gardening done...and a little housework. Waiting for it to rain in Hobart so I can find the leak that lifted the tiles, but its not going to happen. Only had 20 mm this month -a very mild Autumn. 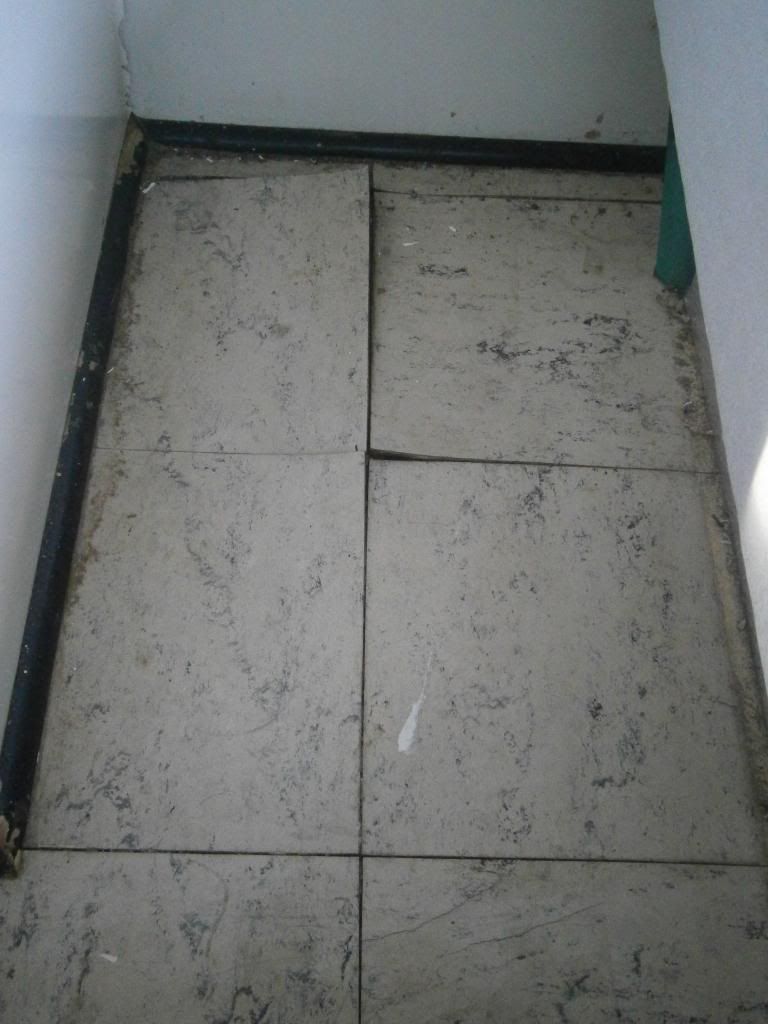 Read up as much I needed and began by using a heat gun (a.k.a wife's hairdryer)to soften tiles which takes less than a minute per tile. Used a scraper underneath and removed a row of tiles. 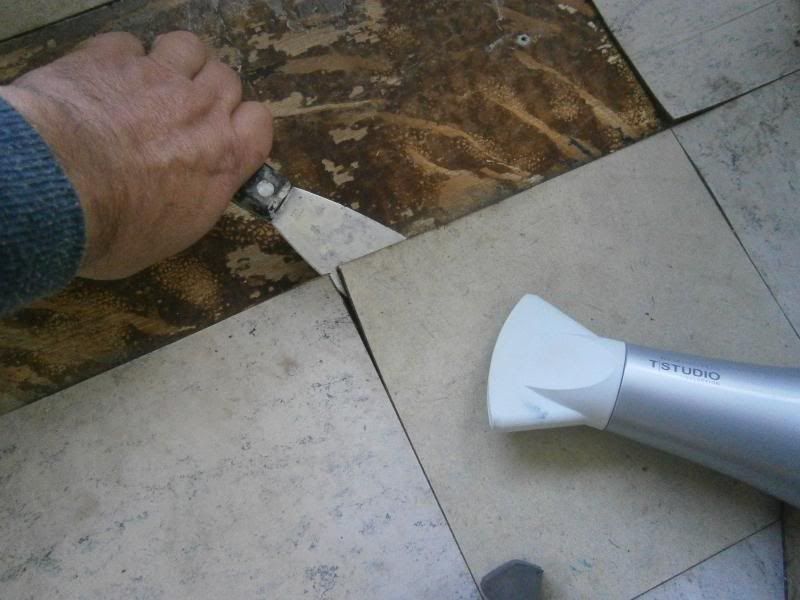 Cleaned the area with scraper and vacuumed to get a clean surface for adhesive. Applied adhesive and spread out as evenly as I could. Placed the tile in place and used the heat again to make tile malleable . Place a paper towel on top (so glue doesn't stick to boards) then a few boards . then the piece de resistance, a truck battery to hold it all down while glue sets. Suppose to be left for 24-48 hours ....can hardly wait Can only do 2-3 tiles at a time as only have one spare battery. Suppose I can take the batteries out of the cars ? Probably not a good idea...or is it 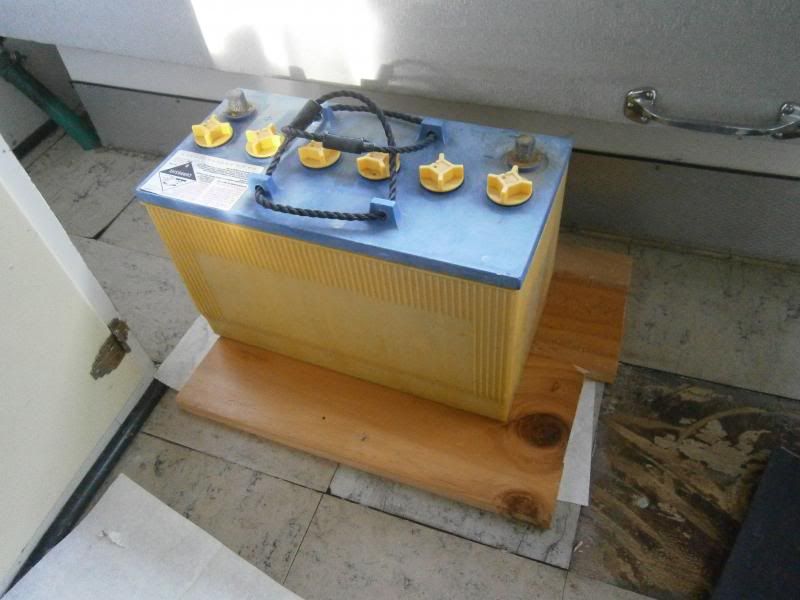 |
|
|
|
Post by isambard on May 31, 2013 10:20:50 GMT 10
nice work! love the truck battery idea  mmmm .... truck batteries, love 'em! they're awesome storage for off grid solar, and can be got second hand at considerably less than the shiny new purpose built units. |
|
|
|
Post by murray on Jun 7, 2013 16:16:19 GMT 10
In between re sticking the lino tiles down (2 at a time) we have been doing small jobs in the van. there was a small candelabra above the fold down dining table which received a royal cleaning  Have yet to find the rest of the piano I presume it must have come from. Even checked behind the couch  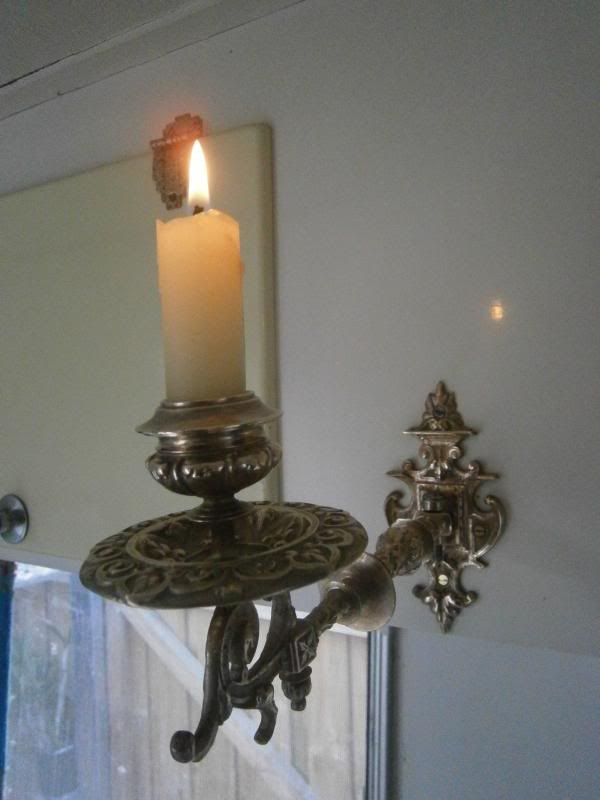 Next on the agenda are the 30 hinges that are slightly tarnished/corroded. From the back I presume they are plated (?) Any ideas on how to rejuvenate them ? Should I sand them back and paint with silver paint ? What alternatives are there? 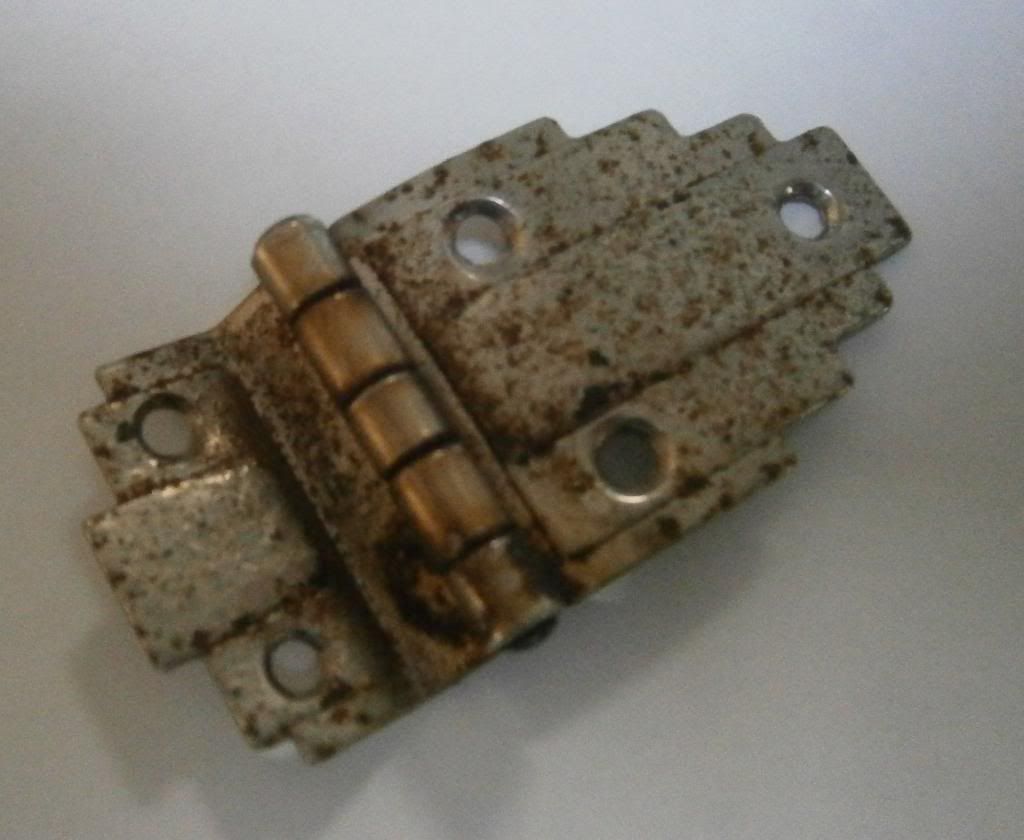 |
|
|
|
Post by akeepsake on Jun 7, 2013 16:30:29 GMT 10
Murray just be aware the tiles and original glue will most likely contain Asbestos ! Take due precautions!! Hinges! Have been cleaning mine with autosol and using a dremel with a soft buffer. ( sAves the fingers). Otherwise check your local chrome plater out may cost less than you think!  BTW be careful what glue you use to stick down the tiles!!! Some will eat them away!! Not sure what to use??? Cheers Andrew ;D |
|
|
|
Post by kaybee on Jun 7, 2013 16:41:01 GMT 10
Hi ,we have the same hinges in our Hawthorn van , took them down to the chrome plater and had them redone ,cost us about $7 each this time last year. Figure it's money well spent and nothing else looks as good as fresh chrome. You can buy new hinges in a similar pattern from places like Bunnings , but they are rubbish and all you'd be doing is throwing money away...... 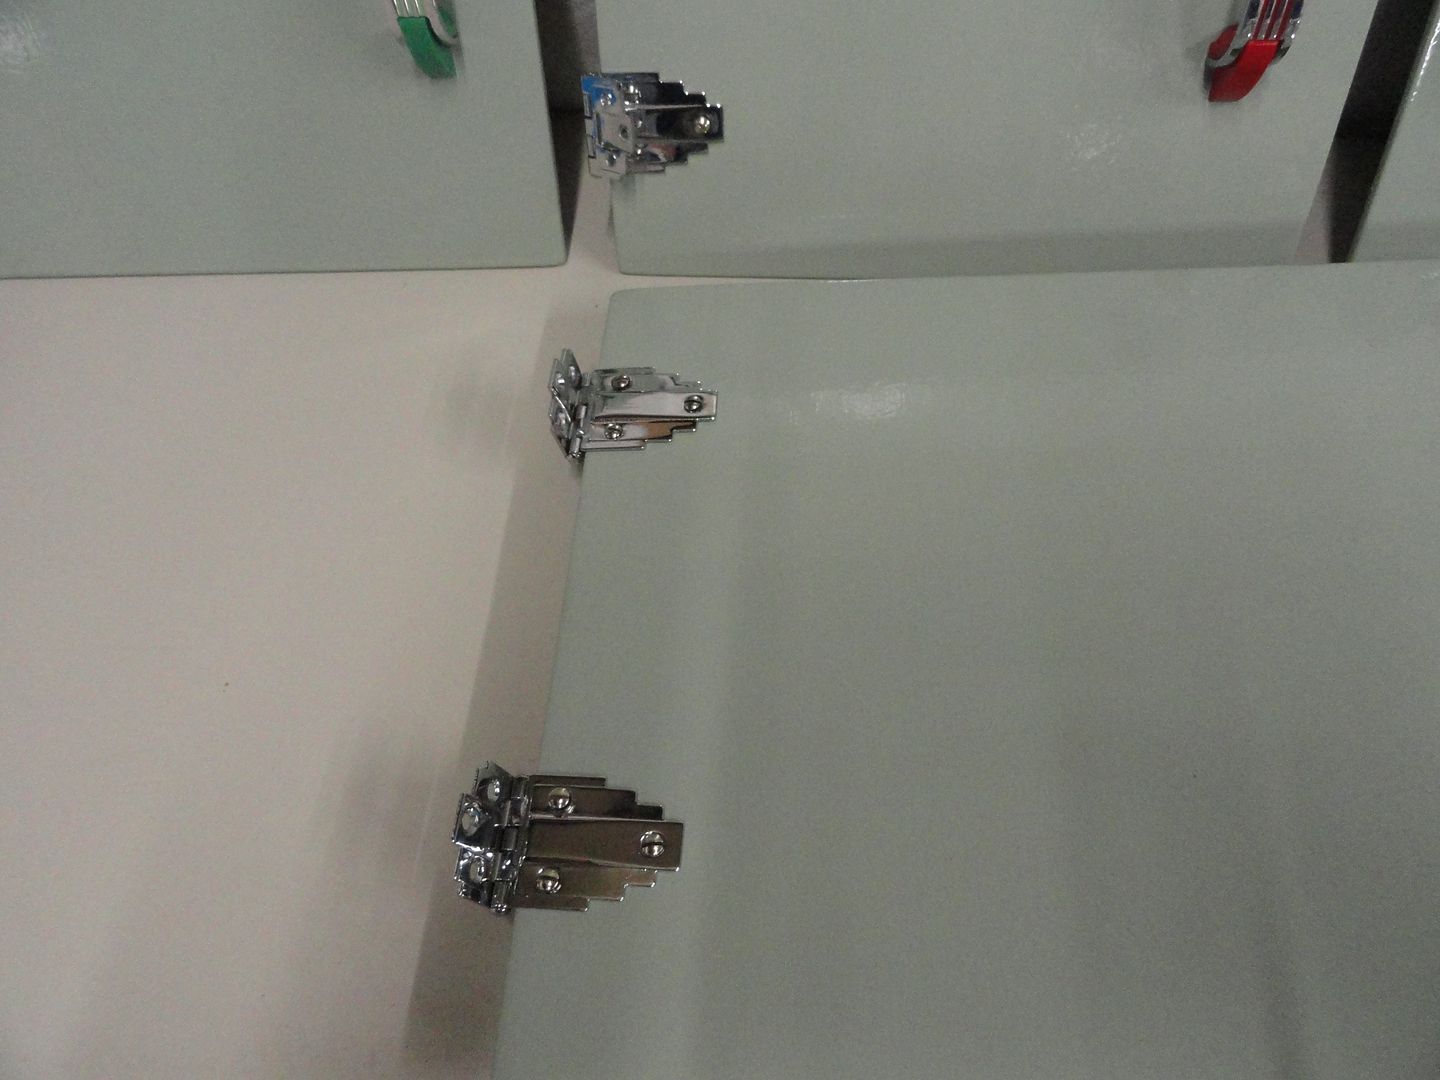 |
|
|
|
Post by Surf Tragic on Jun 7, 2013 17:25:03 GMT 10
You can buy new hinges in a similar pattern from places like Bunnings , but they are rubbish and all you'd be doing is throwing money away...... Exactly right  I see the screw slots line up nicely too. ;D ST |
|
|
|
Post by akeepsake on Jun 7, 2013 17:41:35 GMT 10
Kaybee Love your van and attention to detail! ;D  |
|
aquamum
Full Member
   1968 Viscount Ambassador - Sydney NSW
Posts: 493
|
Post by aquamum on Jun 7, 2013 18:37:27 GMT 10
Murray
let us know how you go with relaying your tiles as I have this job ahead of me ;D
|
|
|
|
Post by akeepsake on Jun 8, 2013 9:00:06 GMT 10
Murray let us know how you go with relaying your tiles as I have this job ahead of me ;D Ditto Murray ;D |
|
|
|
Post by murray on Jun 12, 2013 16:46:42 GMT 10
Waiting for it to rain in Hobart still so I can check for leaks. Thought I should have a scratch around under the seat/near the front door where there was a LITTLE rot !! What a mess Just kept getting bigger. 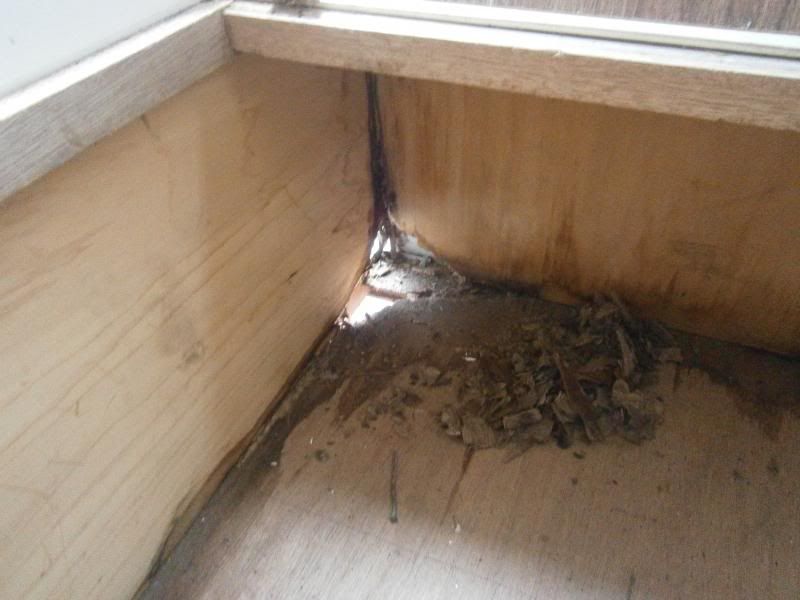 Nothing I can''t handle'. An afternoons job to stretch out over the next week. Makes me appreciate the massive rebuilds some members have to do 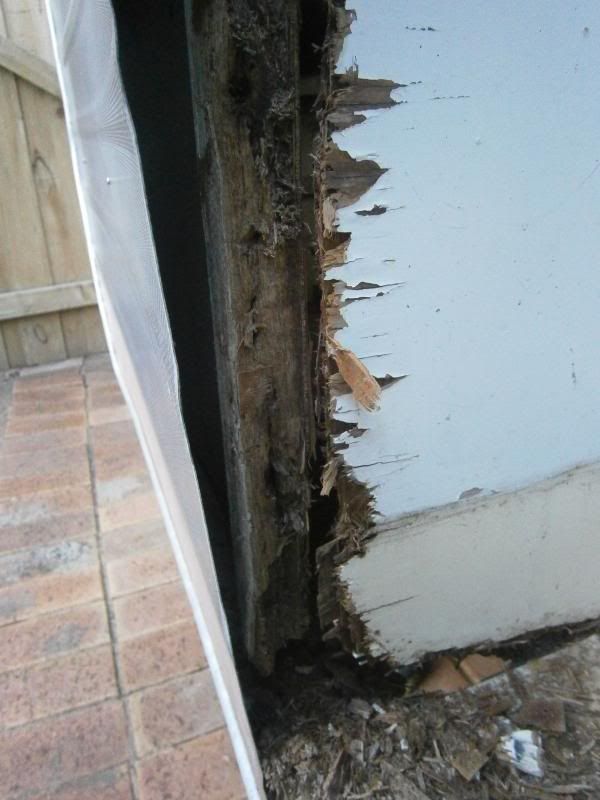 Then the birds settled in to watch. Recognize them from somewhere ........on the tip of my tongue Are they orange bellied parrots or swift parrots? Must get the bird book out.  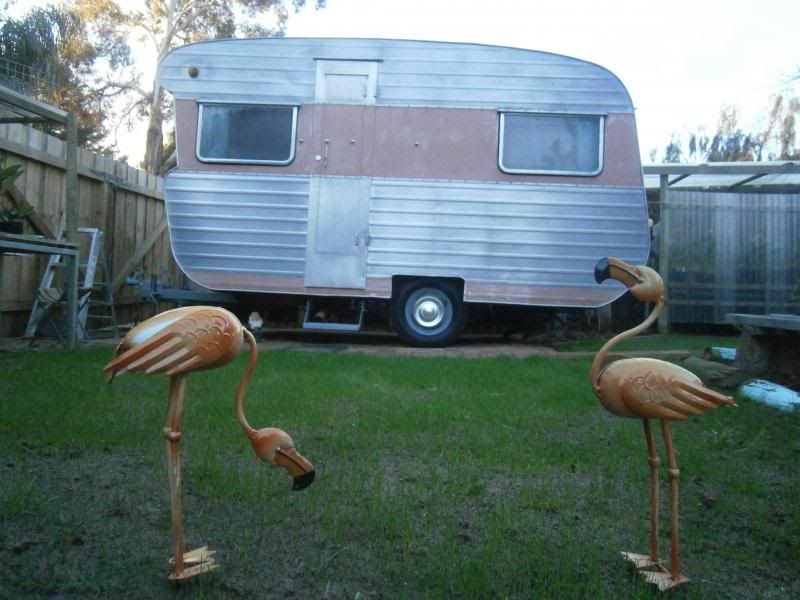 |
|
|
|
Post by shesgotthelook on Jun 12, 2013 16:53:27 GMT 10
That's what happens when you go poking about  |
|
|
|
Post by seeshell on Jun 12, 2013 18:14:01 GMT 10
Hi Murray Did you realise that Murphy also wrote the Laws of Caravan Repair? Law #4: Iceberg RotThe amount of rot you can see is the tip of the iceberg; the remaining 2/3 of the rot will be hidden or "below the waterline", making it harder to access, assess and repair unless you are a contortionist or have unusually tiny hands.  Cheers! Seeshell |
|
|
|
Post by murray on Jun 14, 2013 16:25:07 GMT 10
Spent a part of the day putting sealer / polish on the lino tiles This is after 2 coats - have now added a third Will give it a buff tomorrow 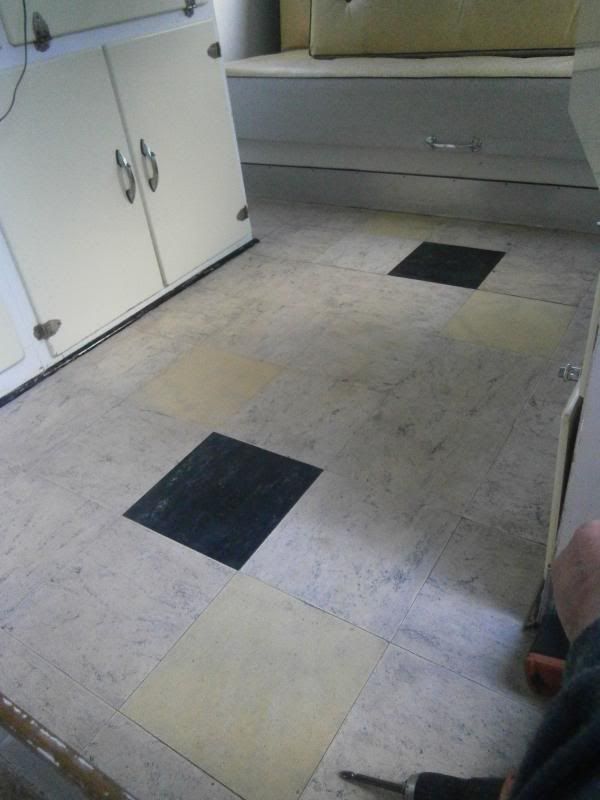 Began replacing some of the rotten timber - certainly sturdier than before Glued it ,then screwed it for good measure 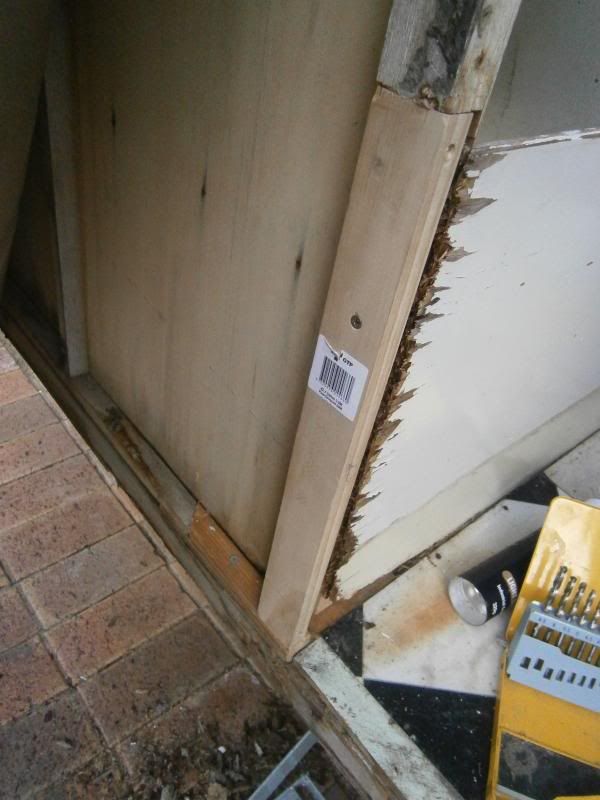 |
|
|
|
Post by seeshell on Jun 15, 2013 17:35:45 GMT 10
Hi Murray Nice work on the tiles - they certainly have come up a treat.  Cheers Seeshell |
|
|
|
Post by akeepsake on Jun 16, 2013 1:08:03 GMT 10
Hey Murray what product did u use for the tiles?
Cheers Andrew
|
|
|
|
Post by murray on Jun 16, 2013 15:24:45 GMT 10
Andrew,
went buy some sealer/polish from the cleaning supply company and they wanted $50 for 4 litres minimum so I spoke to a cleaner friend who gladly gave me a few litres. Only used a few hundred mils maximum.
Just need to give a few coats with a damp rag allowing a half an hour between coats
cheers
|
|
|
|
Post by shesgotthelook on Jun 16, 2013 18:50:09 GMT 10
About 13 years ago when we put vinyl planks down in the kitchen, we sealed it with Tarkett? floor polish. Was about $12 a bottle. I haven't redone it & still looks fine.
|
|