|
|
Post by Franklin1 on Jan 29, 2012 18:55:49 GMT 10
G'day Hilldweller, If you are wanting to have your timberwork look sympathetic to the era of the van, I'd be trying to make it look like it was built the way they did in the old days. Hopefully you can understand my cross-section diagrams. If not, your nearest friendly builder/carpenter will understand what I've drawn. It involves putting another timber lining board around the inside of the hatch frame, and a small diameter piece of quad to cover the ply edge. All four corners of the hatch opening would have mitre joints in both the lining board and the quad timber... 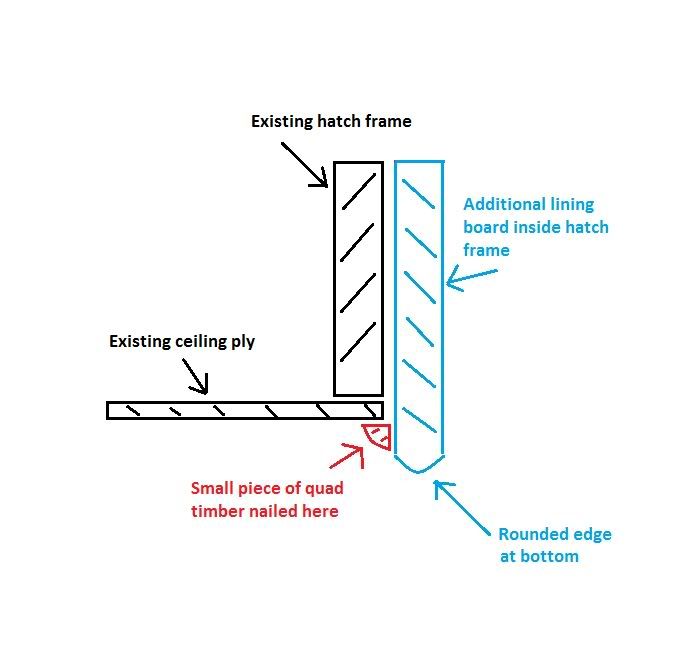 When you get to the stage of making the flyscreen frame for the hatch, that would fit inside the lining board... 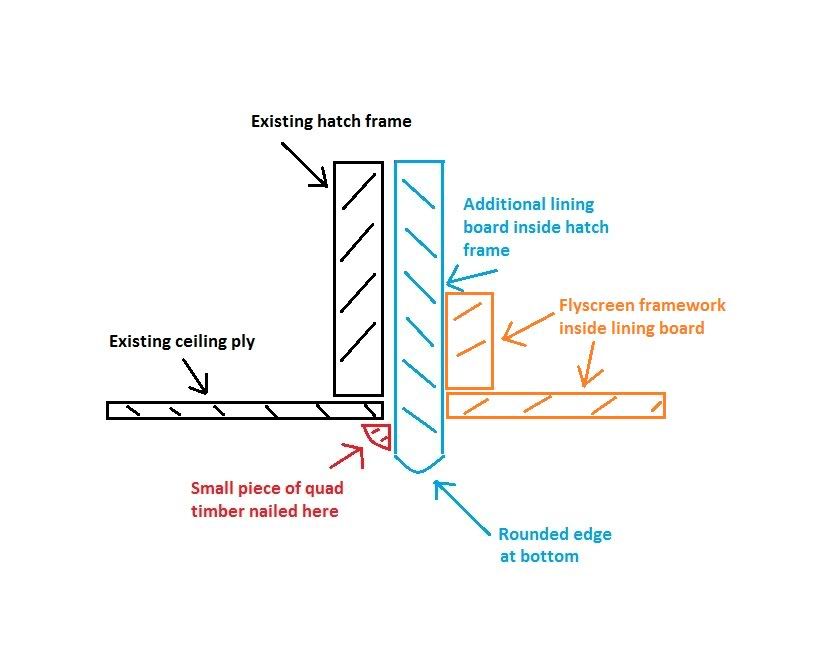 Paint it all up and it would look like it was built in the '60s.  cheers, Al. |
|
|
|
Post by seeshell on Jan 29, 2012 18:58:41 GMT 10
Hi Hilldweller
What a humdinger of a project you have on the hop - I don't think you need advice from anyone - it's looking a treat!
What about some very small profile aluminium? It's consistent with other materials on the van (windows etc) - and should you wish can be polished to a showroom shine or left mill finish.
Depending on the look you want, it could be nail fixed (or screw fixed) or just glued in place.
Not sure how you feel about it, but you could also offset a 10mm wide piece of 3mm thick timber so a slight lip overhangs the edge. You could mount some LED strip lighting behind it - some unobtrusive task lighting?
Keep up the fantastic work!
Seeshell
|
|
|
|
Post by hilldweller on Jan 30, 2012 18:52:25 GMT 10
Hmmm... lots of good ideas there thanks. All much better than that moulding I photographed, which I just don't like! And a brilliant drawing Franklin - many thanks for taking the time to do that. Didn't get anywhere near the van today but I did finally see on Trademe, for a reasonable price, an old formica table that almost exactly matches the one I've already got. So now I have enough old formica to do kitchen bench, dinette table at the front, and a small something-or-other down the other end where there was probably originally a chest of drawers  And eight legs! Actually I have discovered since taking the top off the first table that a good solid table base with no top is a brilliant workbench for cutting sheets of ply with the jigsaw, so it's not being wasted. Thanks for all the interest and feedback  Hoping to make more progress at the weekend and will take pics if there's anything worth looking at. |
|
|
|
Post by hilldweller on Feb 12, 2012 16:55:48 GMT 10
Yay ceiling is all in ;D Bit the bullet and bought some bendy ply. So this is bendy ply, going where no ply has gone before: 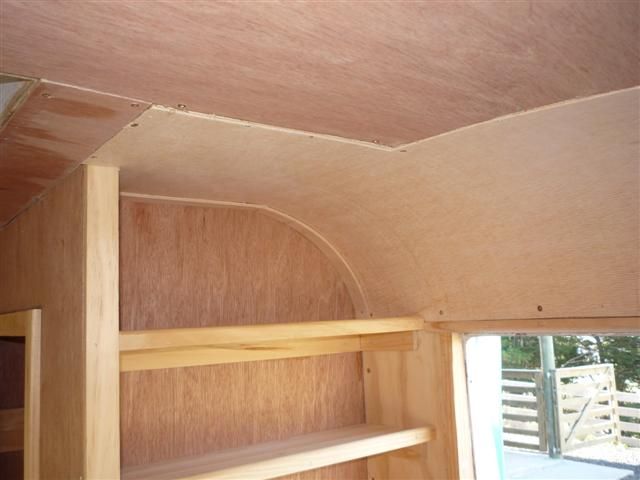 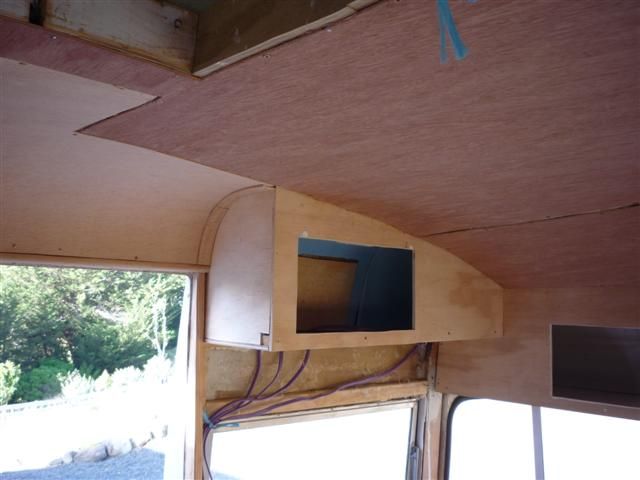 It’s funny stuff. A bit like balsa wood. Or cruskitts biscuits. At a pinch you can cut it with scissors! Made a cardboard template then a bendy ply template and had to leave quite wide gaps at the edges to allow for wrestling it into place. Small procedural error while making the last top cupboard  Fortunately I had some more ply. 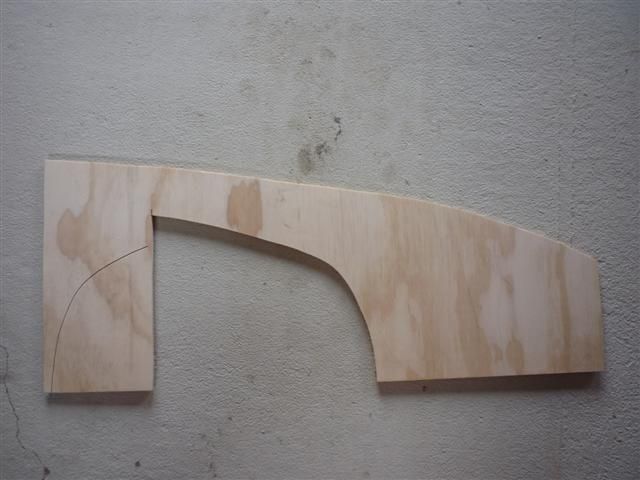 |
|
|
|
Post by hilldweller on Feb 20, 2012 17:47:51 GMT 10
|
|
|
|
Post by hilldweller on Mar 10, 2012 18:26:45 GMT 10
Thanks Iris. I tried some laundry whitening stuff and it helped a little. Probably needs a second treatment. Haven't got any actual bleach - the bugs in the septic tank don't like it! So, been pottering away with mostly not particularly photoworthy tasks in preparation for putting on wall linings. Made a start on that today and will post pics tomorrow if I get time for some more. Also have to get a pic of the Caravelle signwriting which went on yesterday ;D ;D ;D ;D Was so excited I forgot  In the meantime, this is the igloo phase, ready for lining. 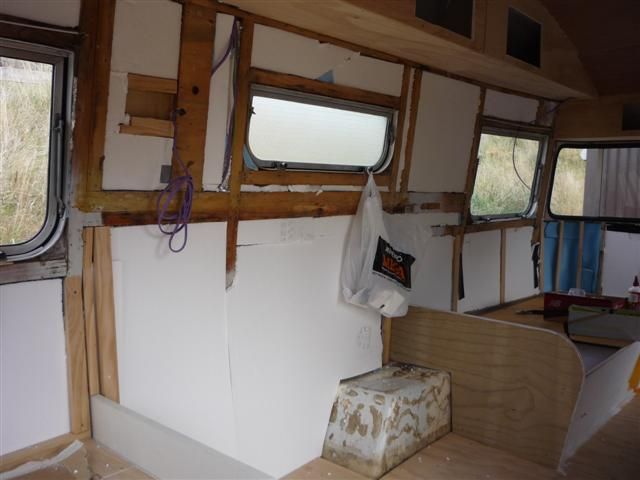 And, thanks to a knowledgeable mechanic and a helpful landrover guy, the door now opens smoothly, fits nicely into the hole in the side of the van, has enough resistance it won't slam back, and should no longer bleed rust over the new paintwork. If your door hinges look like these, the hardware to hold it all together is from Landrover and still available new, and cheap  There's a bolt, then a round marble thing, then a spring, then a washer and a nut. 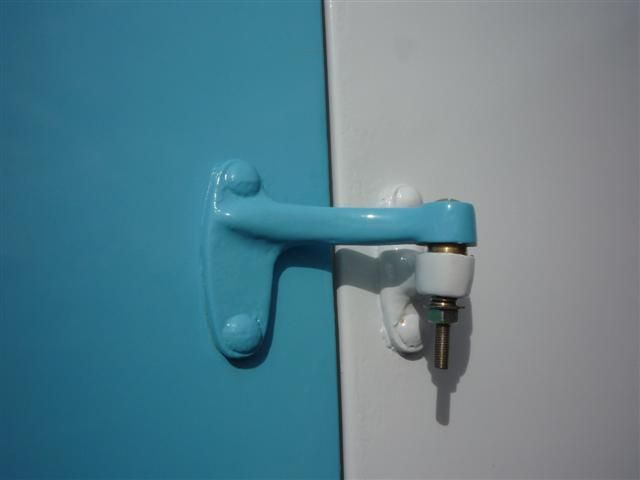 |
|
|
|
Post by hilldweller on Mar 11, 2012 16:54:54 GMT 10
Here’s the logo. It’s a pretty good copy, from photos found online, of the original plastic/metal/bakelite (?) lettering which was riveted rather than painted on. I’m very happy. Finally she’s got her identity back ;D 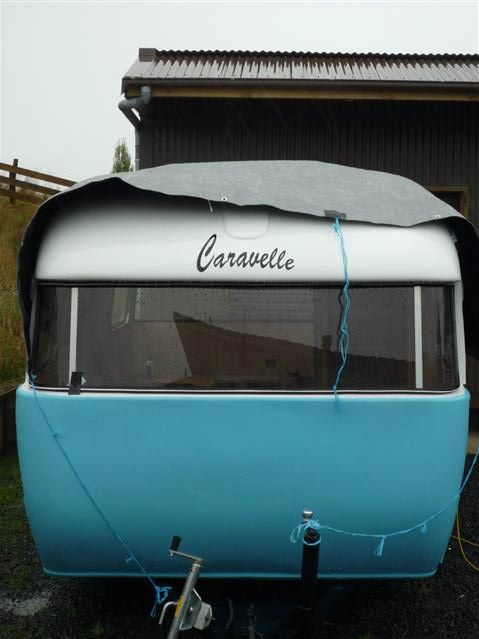 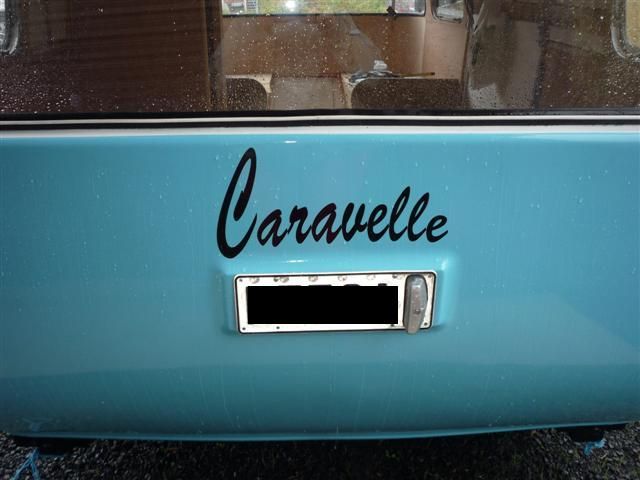 Wall linings are a slow business, but getting there. Curves and nasty shapes like this don’t help. 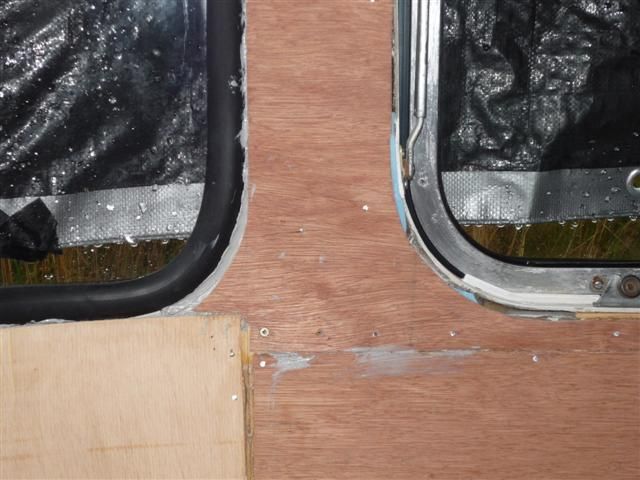 Nor do the cutouts for windows and power points. 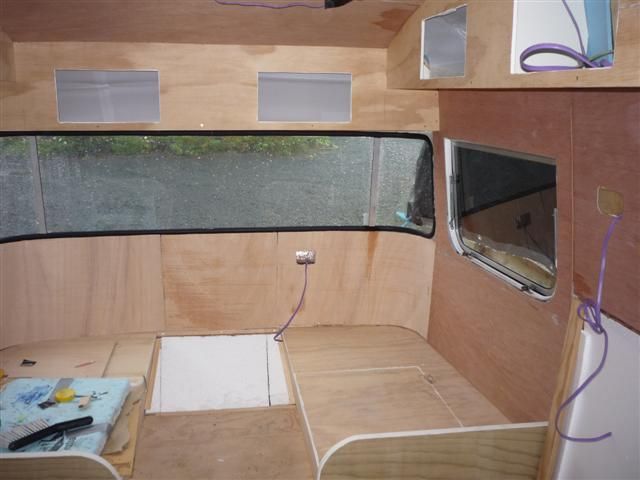 The bendy ply’s doing what it should though. Those corner pieces needed to be sort of fan shaped (as I discovered after measuring only the top edge and cutting the first one as a rectangle!). 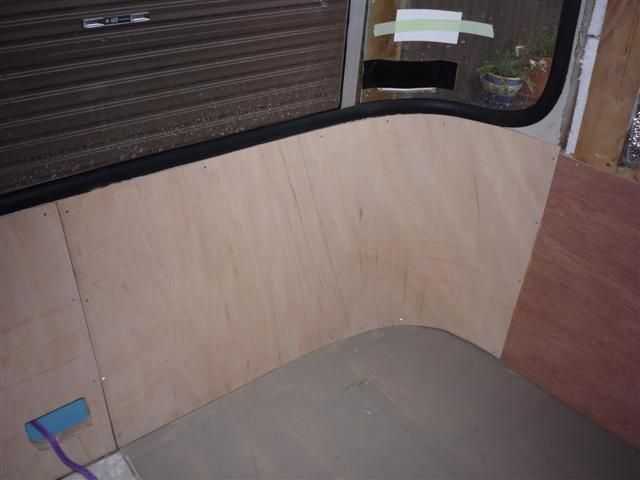 |
|
Jellybean
Full Member
   Any weekend away is a good weekend!!!
Posts: 392
|
Post by Jellybean on Mar 11, 2012 17:49:03 GMT 10
Wow, your van is looking really good, well done.    Progress is a great feeling isn't it??? I know how you feel about getting the vans identity back on. Even though Jellybean is just a Homebuilt van, we didn't like it not having its name. It was like it was naked   Anyway keep up the good work. Cheers Dianne |
|
|
|
Post by Don Ricardo on Mar 11, 2012 21:10:45 GMT 10
Hi Hilldweller,
You're doing a great job on the Caravelle. It's looking fantastic - a real tribute to your skills!
Good to see the Caravelle name back on the van as well. As you say, it gives the van an identity. Or as I think of it, less anonymous and invisible.
Congratulations on what you have achieved.
Don Ricardo
|
|
|
|
Post by hilldweller on Mar 18, 2012 16:57:01 GMT 10
Thanks guys - it's funny how much difference a few letters can make. Dianne your 'jellybean' signwriting is fantastic. On a bit of a mission just now as I’d like to use the van at Easter, and finally the last of the ugly dirty knuckle-scratching reverse side of the fibreglass has gone ;D The panel where the kitchen should be is tacked on as a temporary measure for Easter but the rest of the exposed glass has gone for good – I hope – and I’ve started tidying up the joins. That bit’s fun – instant improvement  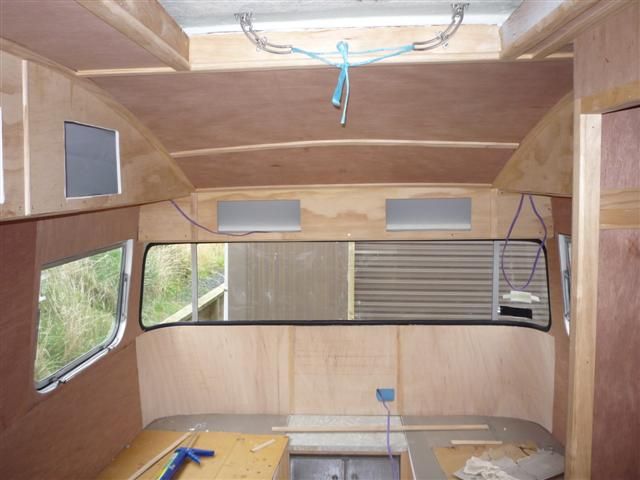 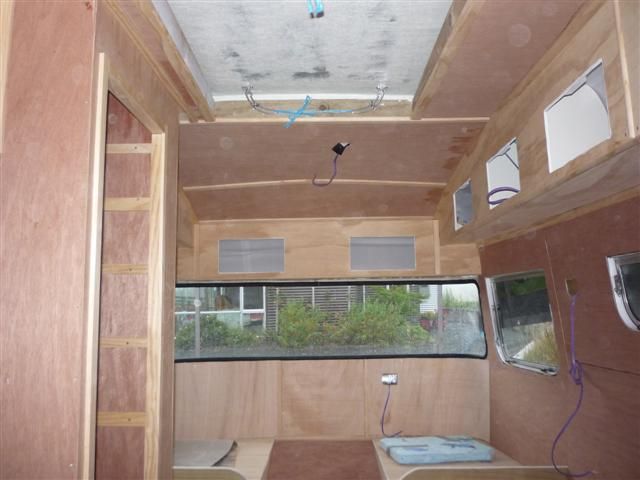 Hatch edges neatened using an adapted version of Franklin’s drawing with a strip of 30x10 and some narrow half-round – adapted because I would have had to move the hinges otherwise, by the thickness of the timber, and for obvious reasons wasn’t keen to drill eight more holes in the hatch! 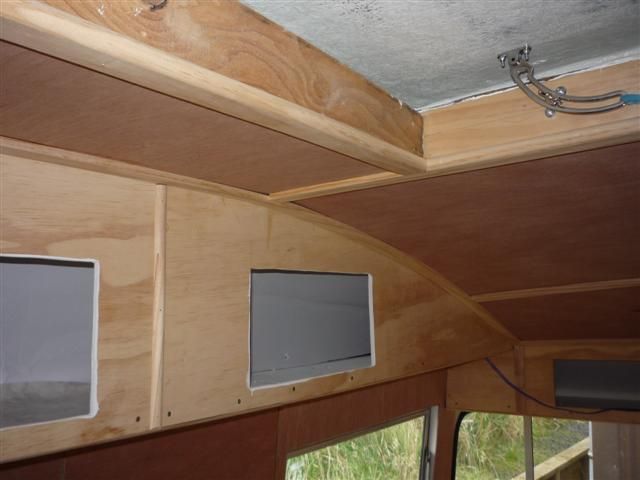 Practising joining half-rounds, in the less conspicuous places. This one will be at knee height under the table. 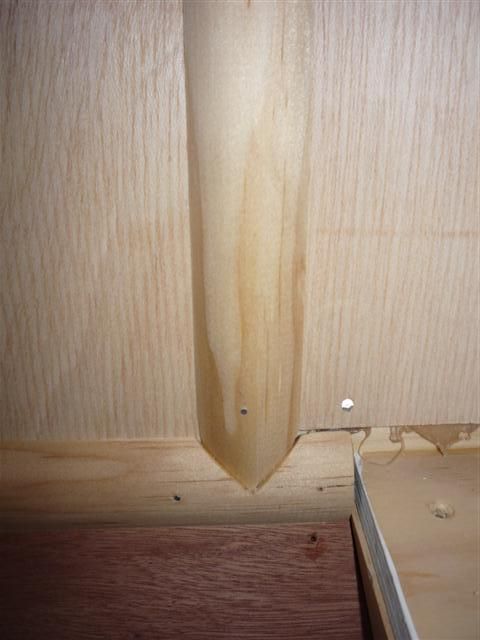 I’m dying to get some undercoat on and see how it looks. Need to do more tidying up and gap filling first, but at least the fiberglass is covered ;D ;D ;D. |
|
|
|
Post by JBJ on Mar 18, 2012 18:21:12 GMT 10
Hi Hilldweller,
Thats pretty well done. Having wrestled with sheets of ply when I rebuilt my vans, I know what you've been thru.
But you will be real happy when you get some primer & joint filler on. Boy does it make a difference. All of a sudden you can see where all the hard work has gone, & be proud of your result.
Good on you for sticking with it to get this far
JBJ
|
|
|
|
Post by Franklin1 on Mar 19, 2012 22:05:40 GMT 10
G'day hilldweller, Gees you're doing some amazing work in this van!   If that effort to join half-rounds was just practice, then I don't think you need to practice anymore. Struth, that's as good a join as you'll ever get!  The hatch timberwork ended up looking pretty neat too, huh? Actually, you've done a bloody marvellous job on the whole van, I reckon. ;D cheers, Al. |
|
|
|
Post by hilldweller on Mar 25, 2012 17:40:53 GMT 10
You guys are such a good support crew  Thanks heaps for the feedback. Been rushing around madly trying to get to a certain point before a much-needed holiday. Everything's taking twice as long as I'd hoped so basically I'm out of time again, after rushing and not doing a good job of anything  However I'm sure all will be well once I get on the road and I will forget all the things left on the 'to do' list and just enjoy my beautiful van. I'm sure I'm not the only person to have spent the evening before they're supposed to leave frantically undercoating in the dark ..... Will try to get some pics and post them en route. |
|
|
|
Post by hilldweller on Apr 14, 2012 19:19:53 GMT 10
Another 3000ks  and a couple of ferry trips  on the Caravelle’s clock and no problems whatsoever ;D Only thing I don’t like is long narrow bridges, of which there are rather a lot, the Rakaia, which some of you may know, being the worst! Predictably, I didn’t get as much done on the van as I’d hoped before the trip but most of it was undercoated… 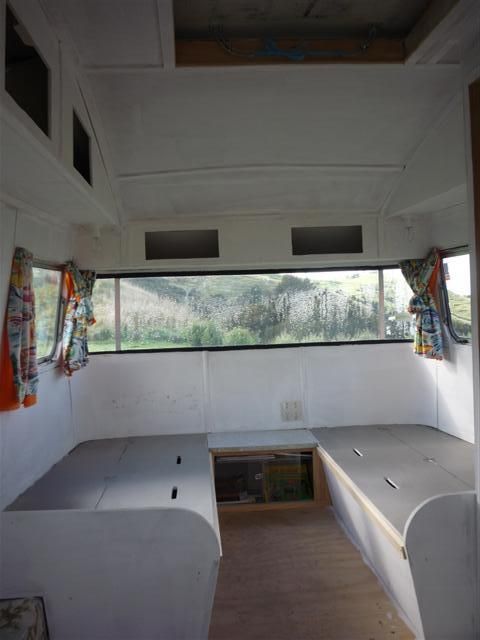 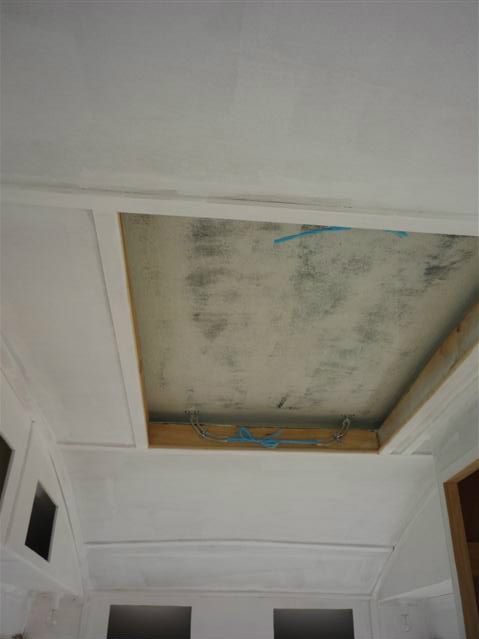 …and it had lights and power (sorry about the screws  I have 12 of the 16 little old plastic ones I need but I’m saving them until everything is screwed down for the final time). 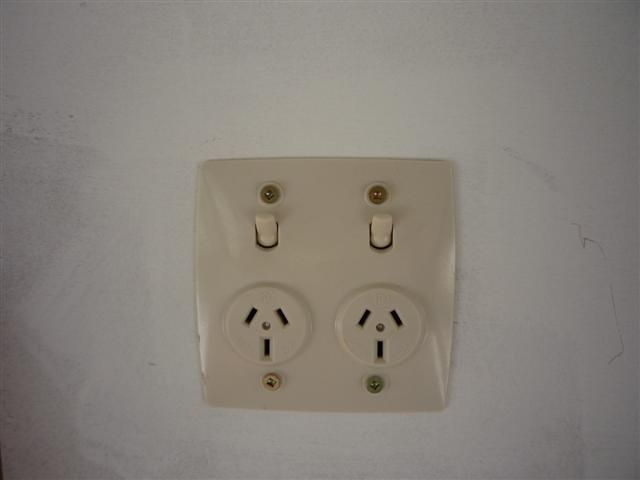 Still a bit of gap filling to do, but only the gaps that were already there – nothing moved while in transit, much to my relief … 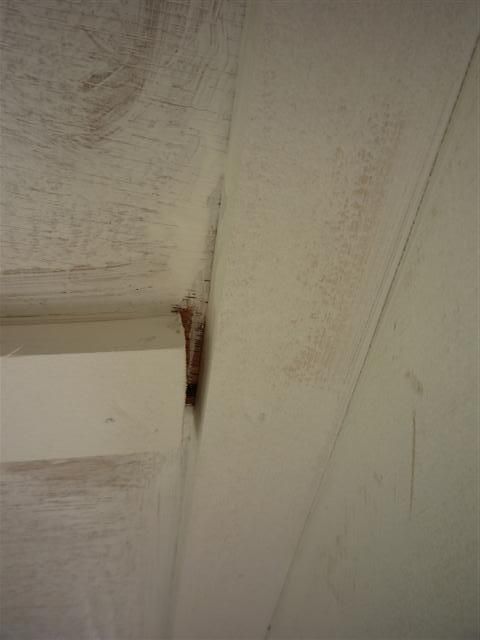 … and the small matter of a kitchen to build! 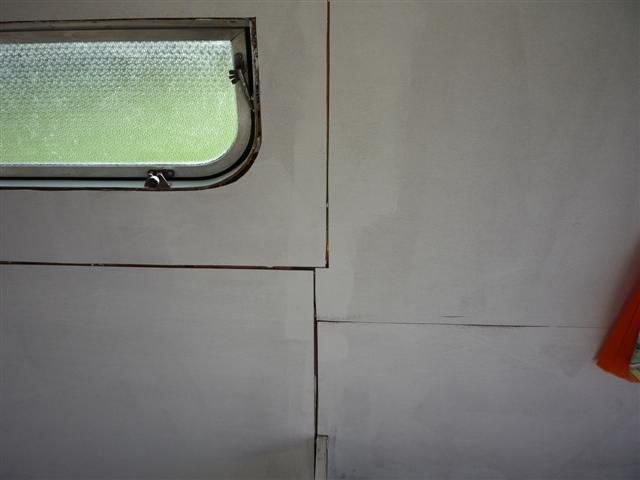 Found these in a little shop en route. They were filthy to the extent the colours were difficult to make out but after a lengthy series of laundry treatments they’ve come up well. They’re a clever design – simple but effective – and deserved a bit of TLC. 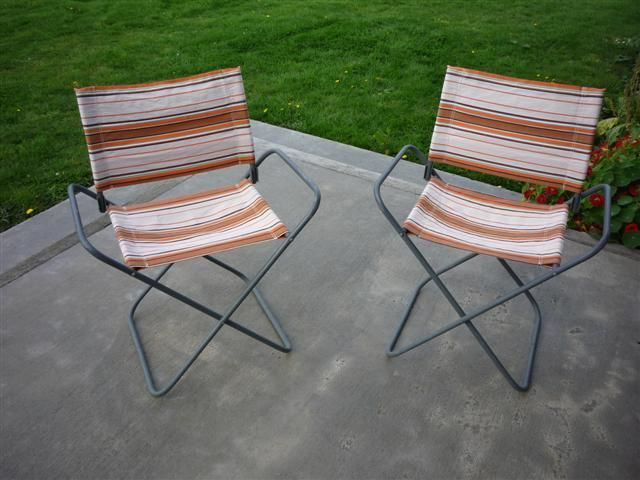 |
|
|
|
Post by barkpaint on Apr 14, 2012 21:18:07 GMT 10
Did I spy curtains made with your sleeping bag lining?  ? Congratulations, everything is looking wonderful...especially if I squint, makes undercoat look like white paint. No more jokes, looks superb, especially those chairs, must be New Zealnd made chairs, never seen any like that over here. Cheers, Heather |
|
|
|
Post by hilldweller on May 6, 2012 16:51:18 GMT 10
Boring boring boring! I’ve been sanding undercoat and filling gaps. Messy and dusty and not fun, even less so because I hadn’t anticipated having to sand after applying the undercoat. Hope I haven’t done anything wrong by sanding but the ply seemed to have absorbed the paint and left a very rough surface. To add to my grumpiness, I am wishing I hadn’t undercoated before it was really ready. Did it in an attempt to tidy things up for the Easter trip but now I’m all out of sequence, with some areas ready for topcoat and others about three steps behind. Which leads to this sort of thing…   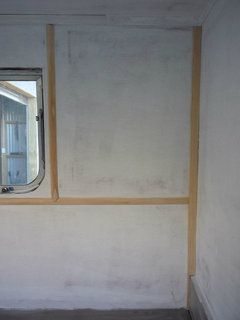 And then there are lots of little unanticipated hiccups like there not being enough room between shell and lining for the wiring behind the lightswitch. So I’m retro-fitting a 10ml board, which is awkward with the switch now attached, and will require more filling and sanding to cover the cuts  . 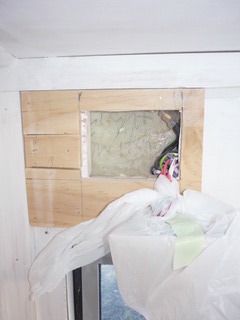 So the current plan is to get everything ready for topcoat, do that (I want colour LOL   , and at least some surfaces FINISHED ;D ;D), then worry about cupboard doors, and then lastly the kitchen which I am sure will take ages. |
|
3dpan
New Member

Posts: 10
|
Post by 3dpan on May 12, 2012 17:25:56 GMT 10
Back to your pic of the door hinge, are top and bottom hinges identical ?
And have you tried Land Rover Series 2 back door hinges as a replacement ?
Cheers,
|
|
|
|
Post by hilldweller on May 13, 2012 15:32:08 GMT 10
Hmmmm…. Well I would have said yes, but on close inspection not quite. Because the side of the van curves from top to bottom, the hinge ‘arms’ are slightly bent in opposite directions. I thought I had them right when I replaced the bolt arrangements, but the locksmith (the second one) pointed out the door still wasn’t quite straight. I had another chat with the landrover man at that point, to see whether the entire hinge arrangement could be replaced and he didn’t think the ‘arms’ were from landrover. Do you think they might be off a series 2? Since then I’ve swapped the marble thing inside the top hinge for the original one which had been worn down a bit and things have improved considerably though it’s still going to need some sort of flexible rubber seal. The bottom hinge had completely lost its marble LOL and has a shiny new one. In hindsight, I should have taken a closer look at the door and hinges before the outside was painted. In the meantime, the poor old girl has caught chicken pox! 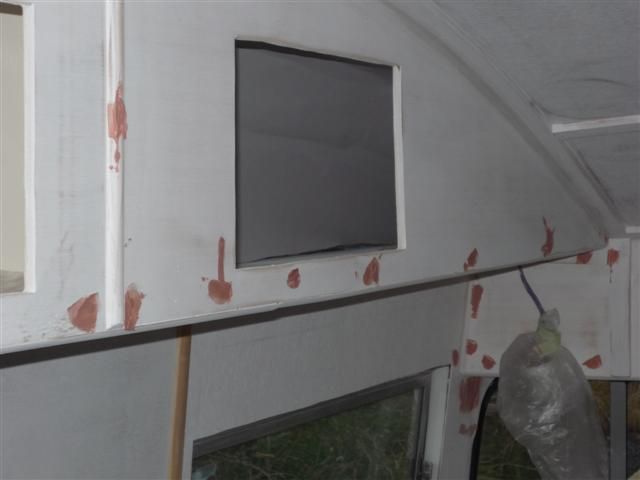 The light switch area has been filled, sanded, filled again and needs a bit more sanding… 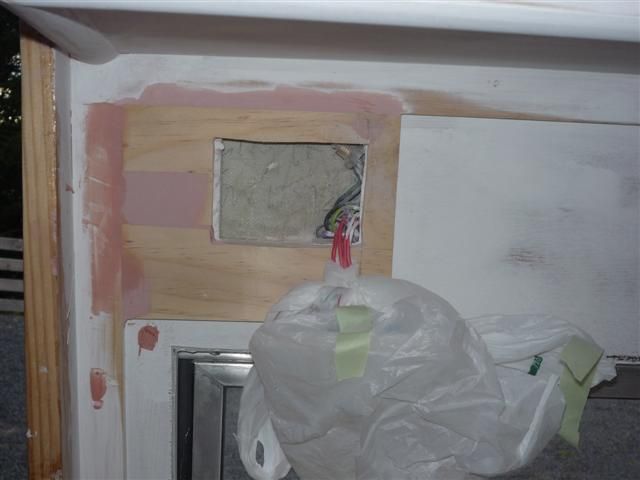 And I’ve plugged the holes where I got carried away with an oversized drill bit. 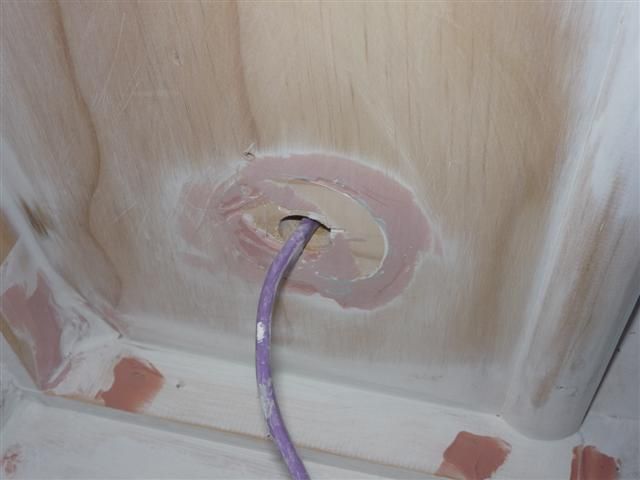 |
|
3dpan
New Member

Posts: 10
|
Post by 3dpan on May 13, 2012 21:12:57 GMT 10
About the door hinges, I thought maybe if the pivot bolt is Land Rover then could be the hinges are too, but so far the Land Rovers I've looked at have different shape hinges. I also looked at pics of different Caravelles and it seems that they don't all have the same hinges anyway. Similar but not identical. The original hinges are missing altogether on mine, except for one arm of one hinge, so I don't have much to go on.
Cheers,
Alec
|
|
|
|
Post by hilldweller on May 27, 2012 18:00:09 GMT 10
More filling, sanding, filling, sanding etc and then today a bit of step forward. Ceiling and top cupboards now have the first top coat and the hatch has had two coats. It’s looking a bit fridge-like at the moment but until I get some colour on the walls – and make some cupboard doors - I’m playing safe with a white ceiling. Can always change it later. 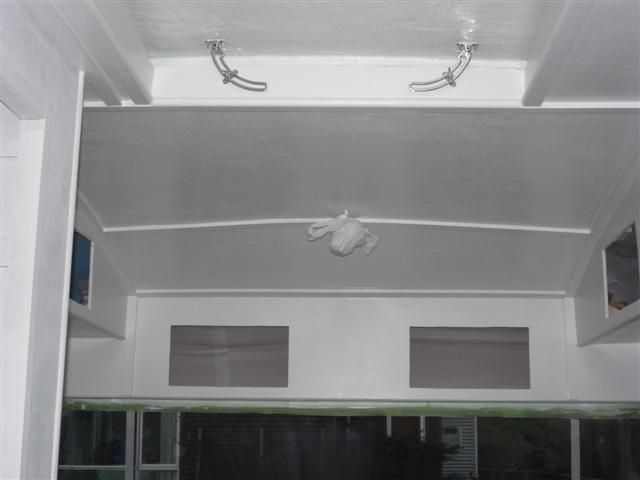 Undercoated the wardrobe and shelves. I hope all those little shelves turn out to be useful because they’re a right pain in the backside to paint! 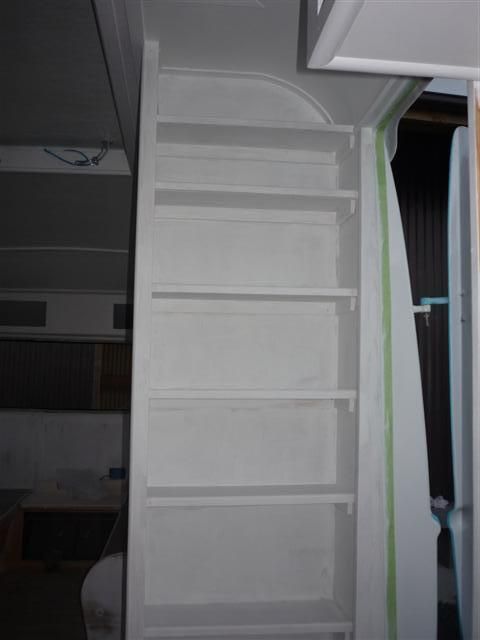 Made a start on the table edging as a bit of light relief. Did the short straight end first to see how difficult it would be and it wasn’t too bad, with masking tape on the good side, and a straight edge clamped to the table top to get the bar to sit where it should. For those interested in such things yes the screws are slot heads and yes they are aligned correctly, but I’m useless with a screwdriver so they look rather less posh than they should as it kept slipping. And they’re huge LOL – could only find 2in slot heads. 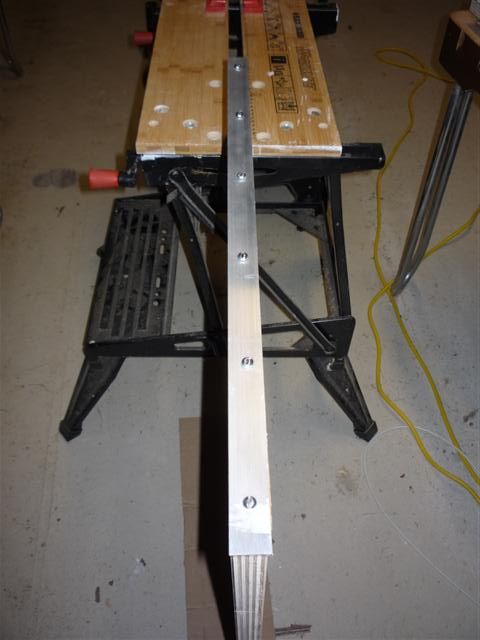 Have now done half of the long bit, working from the centre front around the curve and down the long side. Had to add a couple of extra screws on the curves but I think it’ll look OK. Stopped halfway as (a) my hand hurt from the screwdriver and (b) I was hungry  . Might finish it tomorrow after work if I’m lucky. 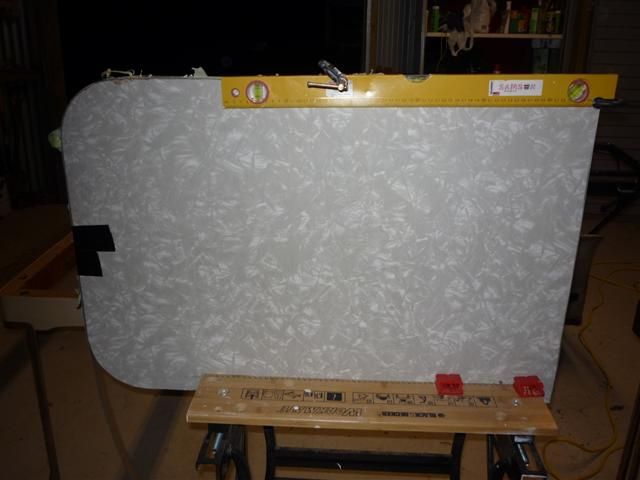 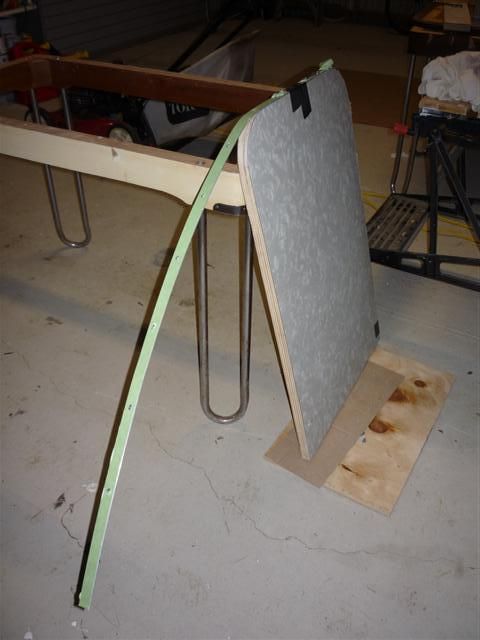 |
|
|
|
Post by Franklin1 on May 27, 2012 19:14:47 GMT 10
G'day hilldweller, The work you are doing is just BRILLIANT!   I like how you come on the forum and show pictures of how you've supposedly "thrown" a few bits of timber together, and then a week or two later you've turned it into a first class set of shelves, or a table, or some wall lining. I think you are doing a fantastic job in this project, considering this sort of work is not something you've done a lot of.  I love it! ;D ;D (and I also love those switch plates you've put in the van as well. Why can't we get stylish power points like those, over here??  ) cheers, Al. |
|
|
|
Post by shesgotthelook on May 27, 2012 19:57:26 GMT 10
|
|
|
|
Post by hilldweller on Jun 10, 2012 15:18:07 GMT 10
Ah yes, the smell – one of the things that put me off old caravans for all those years! Given a choice between ‘parfum de genuine old caravan’ and ‘fresh paint’ I’ll stick with the latter  Al thank you for your encouraging comments  The light switch and power points are old ones bought second hand, very cheaply. They’re legal if an electrician says they are, and I am lucky to have a helpful electrician who was willing to muck around replacing tiny lost screws to get them safe and working. Can you not do the same thing over there? Went to a classic caravan gathering in Geraldine last weekend, my first ever. Lots of friendly helpful people and beautiful vans including another Caravelle, the first I’ve seen in real life  The layout of mine is similar but a lot of the materials and the detailing are different. Geraldine in June though – brrrrrrrrr! Just as well the collection of old sleeping bags has expanded a bit ;D 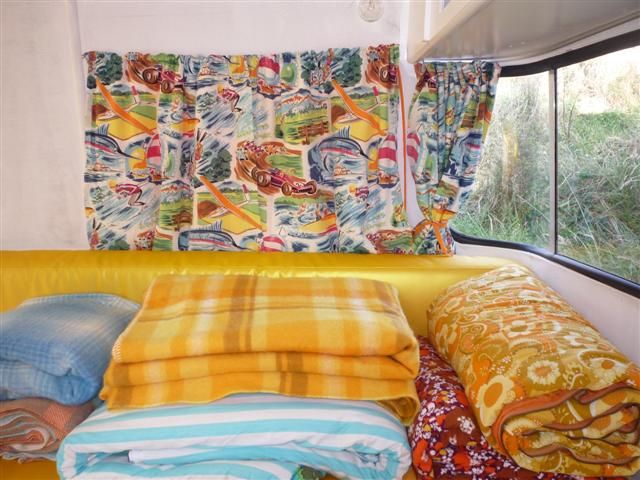 Wasn’t really in the mood for work on the van this weekend so not much to report. The brown glue holding the edging on the table had oozed a bit so I scraped that off (easy enough) and then as I suspected found there was a small gap in places between the dead straight edging and the hand-held-jigsaw-cut table edge. I’ve dribbled some PVA, which will dry clear, into the gap and will work out how to take off the excess once it’s dry. I think it will look OK and if not, that’s probably why table cloths were invented  And I’ve ordered a table leg. I was hoping to use one of the eight that were on the kitchen tables I purchased to get the old formica, but the tubing doesn’t fit standard fittings and a new one for $50 seemed like a much better option. 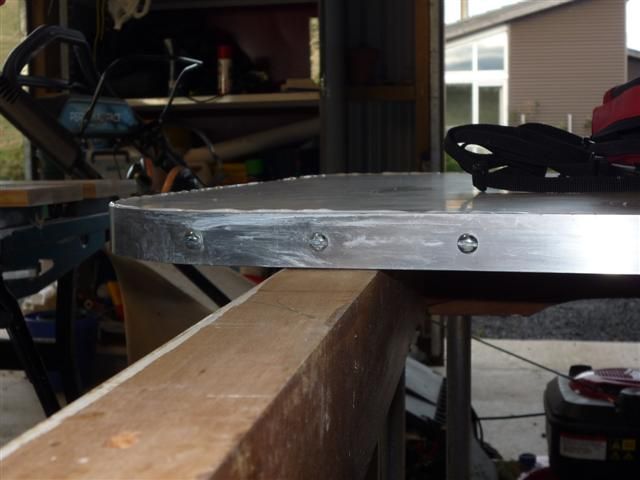 |
|
|
|
Post by hilldweller on Jun 17, 2012 14:57:06 GMT 10
|
|
|
|
Post by Don Ricardo on Jun 17, 2012 15:19:37 GMT 10
Hi Hilldweller,
Your work continues to impress me. The table looks great.
Re the question of the screws - can you replace them with countersunk screws? Then they would be flush with the metal strip. I ask this not knowing whether or not there would be some impediment to using screws of that type, but that's what I would be looking at.
Don Ricardo
|
|