|
|
Post by hilldweller on Jun 19, 2011 17:55:24 GMT 10
OK here goes. This is going to be a slooooow thread. The story so far: saw pic of cute retro caravan, that’s cool, be nice to have one of those as the ground's getting harder each time I sleep in the tent, know nothing about caravans but hey, they’re only little, how hard can it be…. And then there was this, stripped out by previous owners and everything thrown away, hole in roof, hole in floor, no jockey wheel, broken panes, one wheel in need of replacing (and no they’re not Holden rims – Austin A55, as it turns out), no hardware at all, not even a door handle etc. But it’s about the same vintage as me and it’s an awesome shape. Sold! OMG it’s fiberglass! What’s fiberglass? Will it shatter if I tap on it?? 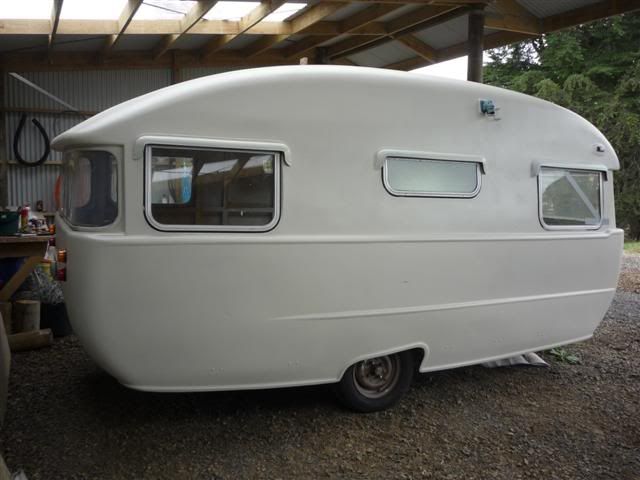 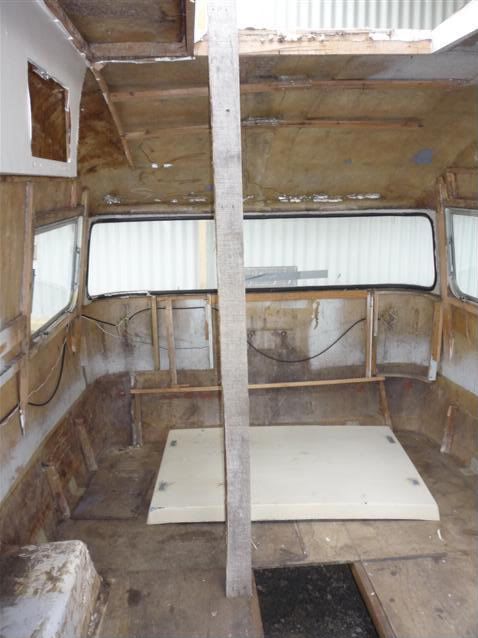 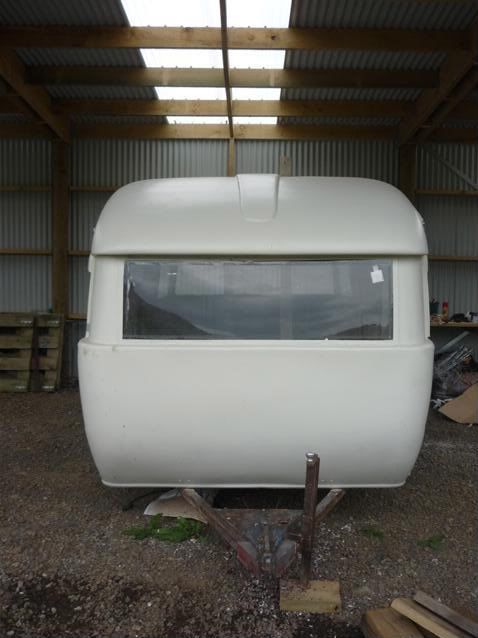 Wirebrushed and rust-treated the chassis, removed a quarter inch of paint from the drawbar after which the brake lever thing moves back and forth, though whether it has any effect on the brakes remains to be seen. 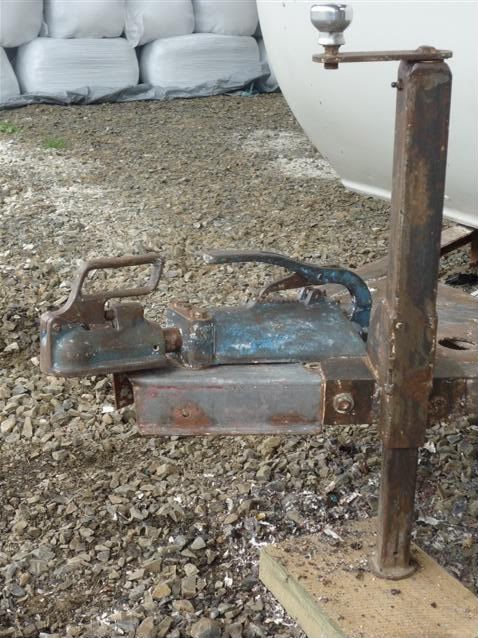 Then new floor ‘cos it’s hard to do anything else with a hole in the floor. And polystyrene underneath. 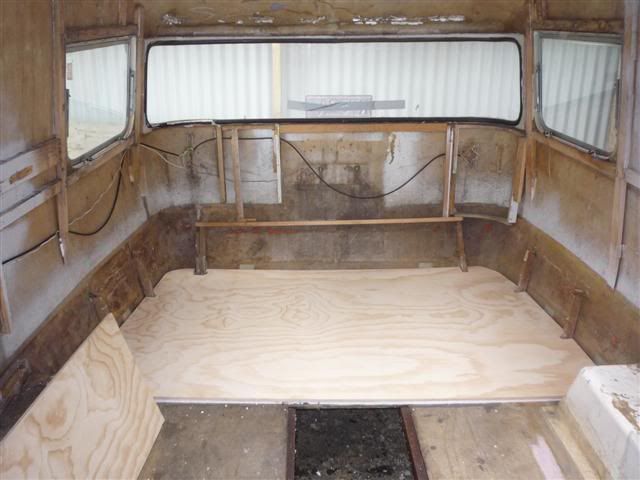 How do you build seats? First and most important, you find a helpful website with friendly people who know what they’re doing ;D and lots of pics. 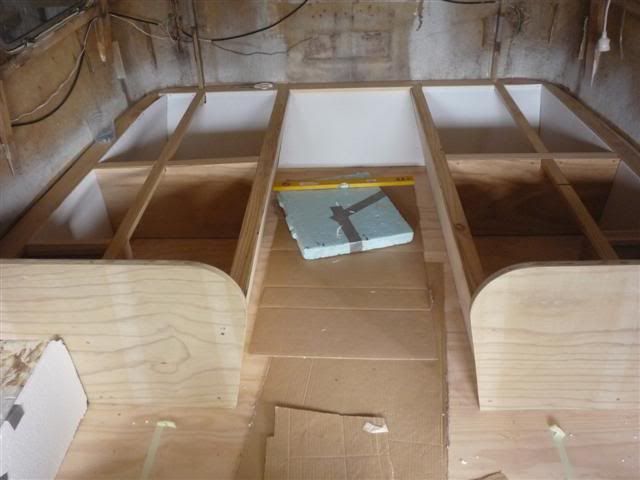 Shouldn’t there be some straight lines around here somewhere, right angles even? Nope, just curves, odd angles and lefts and rights that aren’t quite mirror images. Perhaps the spirit level will help? Nope, though it does confirm something going on underneath that means the whole thing’s inclined to lean just slightly to the right. (Temporarily fixed by letting air out the left tyre). Had to do a bit of fibreglassing – a strange and messy business LOL but boy that stuff sets hard ;D. 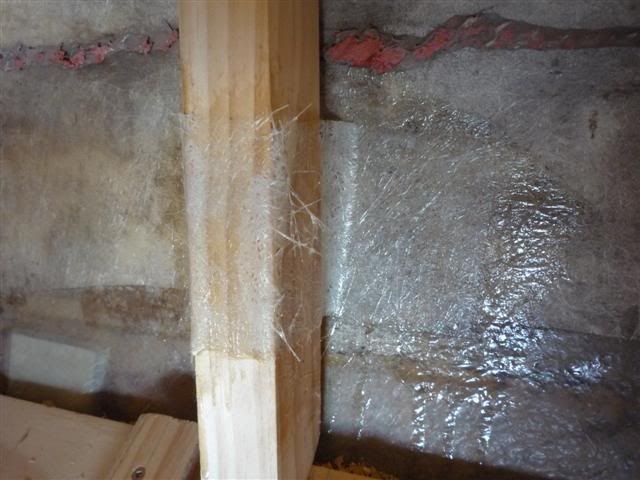 Then I got brave and attacked the framing around the hatch. The timbers running lengthwise are real timber and sound but the cross pieces are delaminating ply. 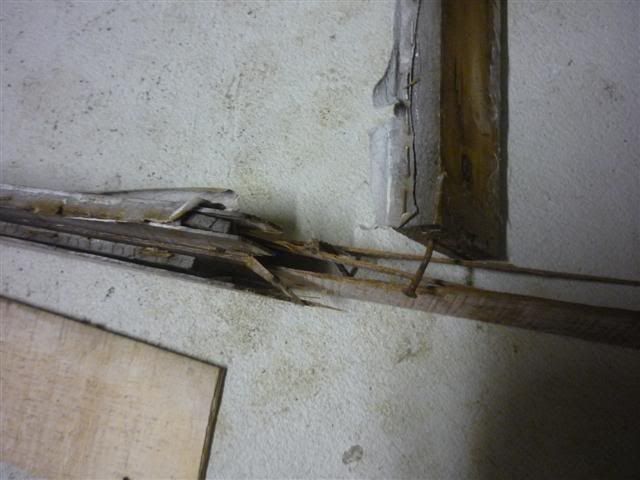 And there’s no way to attach the hatch – the complete absence of hardware on this van is bizarre. Tried to be gentle in the hope of getting a usable template but it just fell to pieces and this is what was left. 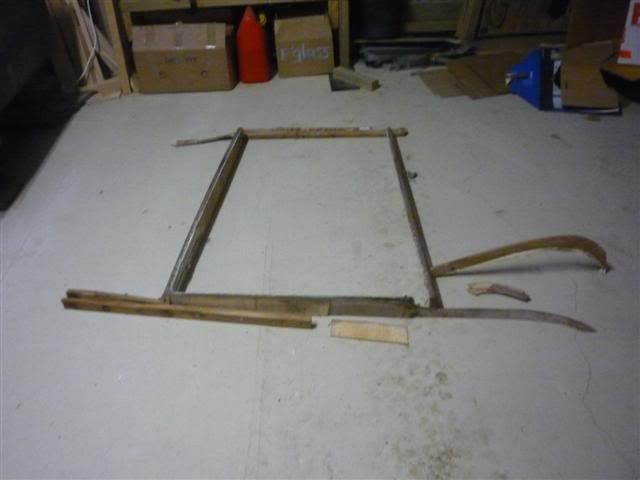 The fiberglass on the other hand is STRONG and looks good, albeit it's rather saggy on one side after years with no support. And that’s about where I’m up to. Want to replace the hatch framing and attach the hatch so I can take the van to a mechanic, sort out whatever’s making it lean, get the brakes investigated and a jockey wheel and stabilisers attached and maybe even a bracket for a gas bottle and one for a spare tyre. But I think the top cupboards need to be in place first as the hatch framing extends across and butts up against them, and that means the wardrobe too, and for that I probably need to fix up the missing framing on that side…. Made a start on replacing framing bits today. Will post more pics when there’s something to show. |
|
Jellybean
Full Member
   Any weekend away is a good weekend!!!
Posts: 392
|
Post by Jellybean on Jun 19, 2011 18:36:03 GMT 10
Wow, what a project. I love that shape van - very cool. I get a kick out of how people (including us) think we can achieve anything, just have to give it a go, and usually    it all works out ok ;D ;D Look forward to following your progress. Thanks for sharing. Dianne |
|
|
|
Post by 1960caravan on Jun 20, 2011 7:54:48 GMT 10
We have a couple of Caravelles in our club if you need any info. Contact details are on member list. Cheers Eamon.
|
|
|
|
Post by jenniewren on Jun 22, 2011 21:05:00 GMT 10
Holy guacamole.....what a mission...I would still be scratching my head as what to do! You have done a fab job so far...send on those pics! J
|
|
|
|
Post by surferh on Jun 29, 2011 22:54:34 GMT 10
very nice looking van, seems like your doing well for progress, youl have to do all the wireing and pipes soon, that will be something to look foward too haha, best of luck, Holland
|
|
|
|
Post by hilldweller on Sept 4, 2011 16:53:55 GMT 10
Hello all. Small amount of progress to report: Replaced broken framing where the wardrobe ought to be, gluing new to old and then fibreglassing the whole lot to the shell. My technique leaves a lot to be desired and it¡¦s still a very messy business! 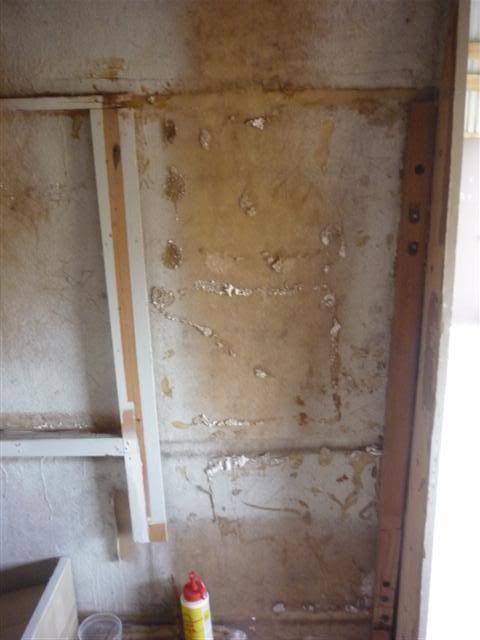 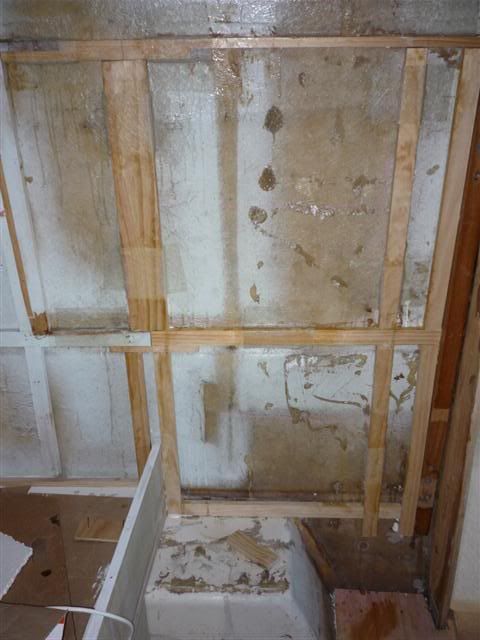 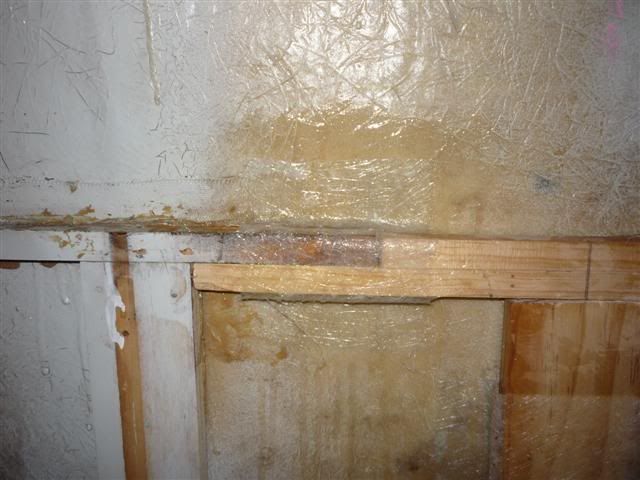 Then one day I had a look at the catch on the left front window and the entire frame fell out. Pulled off all the dodgy bits of frame which led me down to where the seat inside the door should be. The seat needs to be there before the window framing can go back in so started on that. There was more of the original left than on the back ones which made it easier and the uprights were still good and solid except at the top where the old seats had been removed and the nails/staples had ripped the timber. 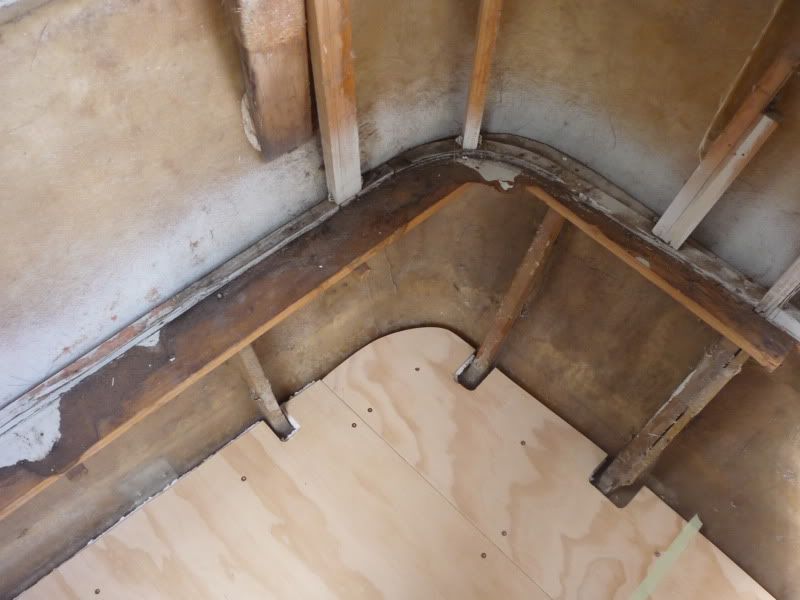 Reinforced them with new timber where necessary and glued, screwed and f¡¦glassed all together. 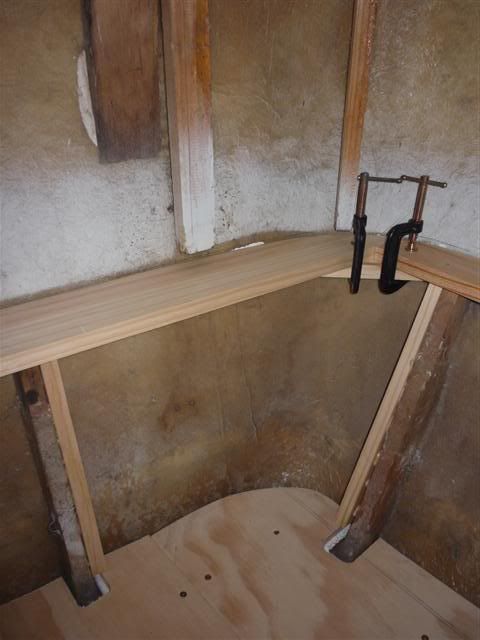 And then the built the two front seats. Can¡¦t insulate and line the right hand seat until I get the wiring done but I¡¦ve made the lid and it¡¦s ready to go on. 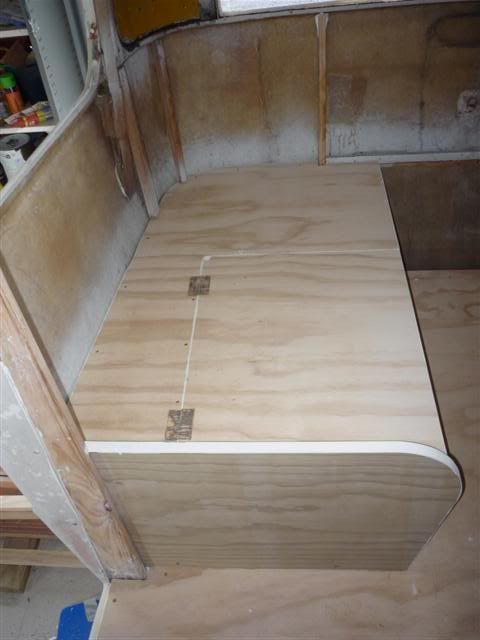 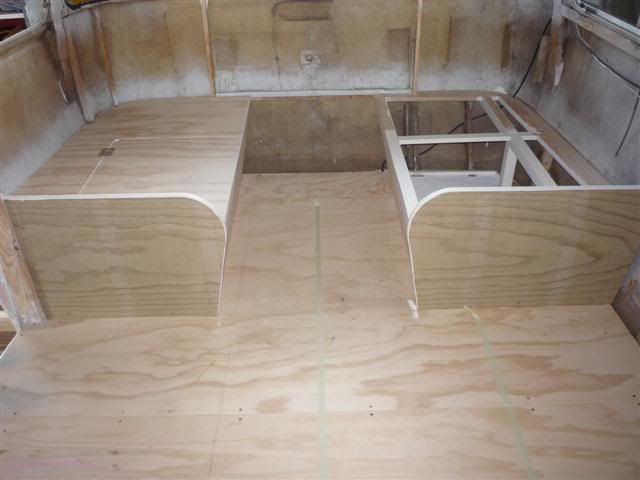 Contemplating a trip to the garage and then the autoelectrician over the next couple of weeks and I need to have a talk with the painter. There¡¦s a possibility I might want caravan accommodation for a couple of nights a week later this year, for work, and I¡¦d much rather it was this caravan than one of those ugly modern things LOL. So I¡¦m keen to get things moving a bit more quickly if I can. I¡¦ve bought a wee stove for it (Falks? brand) and seem to have begun collecting old sleeping bags (the ones that don¡¦t keep you very warm but have lovely colourful covers ƒº). Sooooo glad to have this site for advice and inspiration ƒº ƒº |
|
|
|
Post by seeshell on Sept 4, 2011 18:43:12 GMT 10
Nice work Hilldweller! As the weather is gradually improving here in the south and we're all coming out of hibernation, your shots of fresh fibreglass have got our minds turning.  Thanks for the great shots of your work, and the prod to do the same! Cheers Seeshell |
|
|
|
Post by hilldweller on Oct 16, 2011 17:21:21 GMT 10
Quick progress update: the van's been to the garage and they've poked and prodded in all sorts of unseemly places and pronounced her good to go  Woohoo! And they thought she was lovely and want to see the finished product  Which they will because 'good to go' is subject to things like the broken windows and missing door handle being rectified, but the chassis is good, the brake works (pretty much just a handbrake, but working as its maker intended), the left wheel has had whatever it is they do with bearings done and the stripped wheel nuts replaced (with only four on each wheel it's a bit of a worry when two have no thread), the safety chain is now safe, and the back corners boast stabiliser legs. And I've rung the electrician who's going to do the pre-wiring for lights etc, the absence of which was starting to hold things up. The original plan was finished by Christmas. The revised plan is exterior paint, road legal and sleepable by January. Currently working on the wardrobe. Oh for straight sides (or better skills LOL). Spent more than two hours today making two curved little curved pieces of framing to go across the top! And I keep buying things - little old light shades, a big sun umbrella and more old sleeping bags  Latest aquisition has orange, brown, yellow and purple flowered flannelette lining  They're very cheap and I'm planning to use them as bedding/cushions/picnic rugs etc, which justifies (in my mind anyway) the growing collection. Have also found an old formica table and now need another one in the same grey fleck pattern to give enough for dining table, little low coffee table/bookshelf thing at the other end and the kitchen. Bye for now. hilldweller |
|
|
|
Post by hilldweller on Nov 5, 2011 16:31:19 GMT 10
Bit more progress - wardrobe taking shape now. Actually I'm not sure if it's a wardrobe or a place for a portaloo LOL. I've sacrified the space at the bottom around the wheel arch. 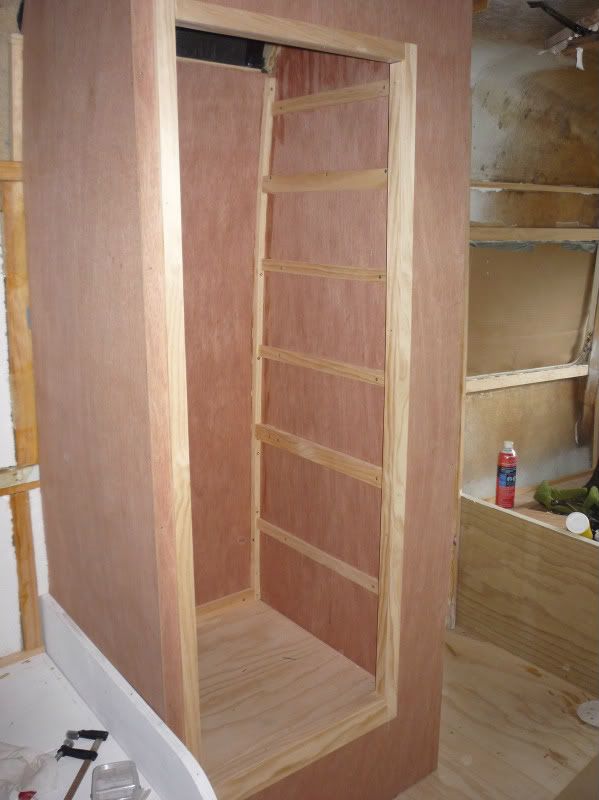 Decided a drawer there was beyond me. Quite pleased with the shelves on the end though ;D My carpentry skills aren't nearly as good as I'd like but I'm happy with the overall effect, when not looking too closely! 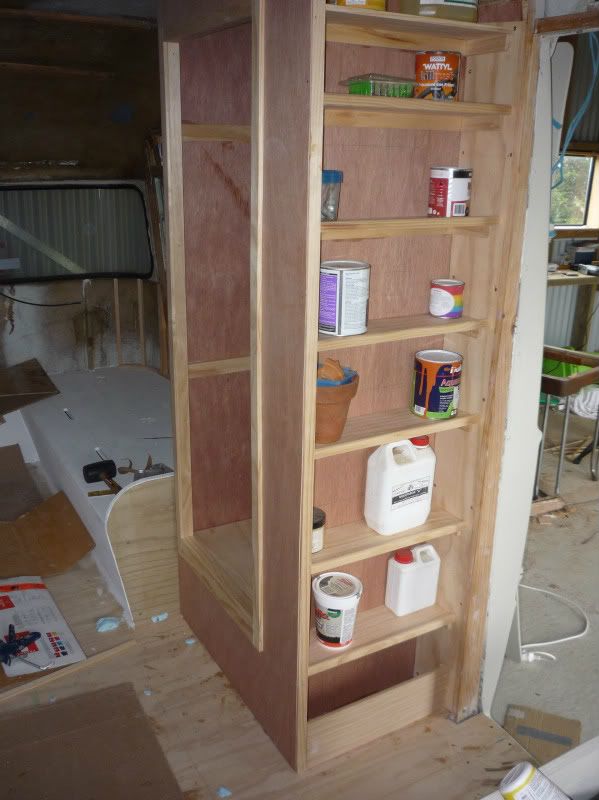 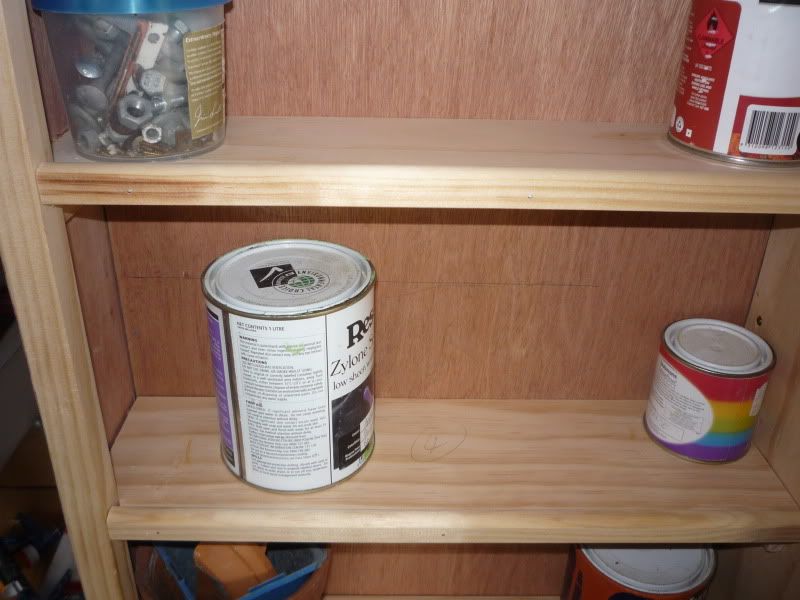 Flamin' curves though!  Each shelf is a slightly different length and the end against the outside wall isn't a square cut. Painter tentatively booked in for the end of the month. Can someone tell me will it be towable with the windows out? Haven't decided on a colour scheme yet. Veering wildly between modern/bright and something more traditional. In yellow. Or maybe orange. Or blue. Or..... Haven't found any more cool sleeping bags since my last post  Haven't found a second formica table to match the one purchased a while ago either. Need grey, in that fleck pattern that looks a bit like snowflakes. Probably like buses - none for ages and then three will come up for auction at the same time. Love this site. I'd be lost without it  |
|
|
|
Post by scootman on Nov 6, 2011 0:35:07 GMT 10
Think your carpentry skills are very good actually
|
|
|
|
Post by atouchofglass on Nov 6, 2011 10:02:36 GMT 10
Hey Hilldweller What happened to the seven photos in your first post? Makes it difficult to see the great progress. Please see if you can find them as it makes the rebuild more interesting. Anyway.... Do try and use the area under the hanging space in your wardrobe. You could cut out a section inside the wardrobe and hinge it, just like under your seating and beds. That way you have a space for shoes or whatever. Remember it is a caravan and space is precious, not to be wasted. ;D ;D Your carpentry skills are just fine. Any area up against the wall won't be seen when you put the lining in. So long as there are only small gaps they can be filled. Lots of gap fillers available.   No one but you will notice and a couple of coats of paint on the internals will cover a multitude of sins.    ;D ;D ;D Fibreglassing the cupboard/wardrobe to the wall is also a great way of sealing it. It also makes the structure of the van more rigid. Keep at it and she will be ready sooner than you think Cheers Atog |
|
|
|
Post by hilldweller on Dec 2, 2011 17:21:29 GMT 10
Thanks Atog and Scootman  No idea where the old pics went. I haven't removed them from p'bucket. No pics today but the next installment will be very exciting - for me anyway LOL - because the van's now at the painters!!!!!! Woohoo  All the windows are out, along with the nasty metal inserts at the front corners and I was very relieved to see that the fibreglass doesn't appear to have been damaged by whoever did that to the poor girl  Spent quite a while this afternoon scraping off old sticky black sealant. The glass place is getting plastic replacements made for front and back and will replace the broken glass in the side windows and tidy up any loose corners on the frames. All going well it will go straight there from the painters and come home all in one much smarter looking piece  Well OK two pieces, as there's still no framing to attach the hatch to - and can't be until I get the top cupboards done as it all has to fit together across the curved roof. Still heaps to do on the inside. I've started on the overhead cupboards and the sparkie has run the wiring for lights and power. Bought another 60s sleeping bag   Might cut this one up for curtains  |
|
|
|
Post by Don Ricardo on Dec 3, 2011 22:35:33 GMT 10
G'day Hilldweller,
Congrats on the progress you've made with your Caravalle. Taking the van to the painters must have given you quite a sense of achievement!
Regarding the missing pics, if you've moved them around in your Photobucket account (eg to a separate sub-folder) that would change their URL address and mean that they show as lost on your forum thread. However, even if that isn't the case, you should be able to fix the problem by pressing 'modify' for the post concerned and then copying and pasting the current Photobucket addresses back into the post.
I noticed in the latest edition of Vintage Caravan Magazine, that somebody in NZ is producing reproduction Caravalles, but I'm sure that yours will get all the attention on the road once it's completed.
Don Ricardo
|
|
|
|
Post by hilldweller on Jan 8, 2012 18:11:23 GMT 10
Woohoo! Lots of progress to report ;D First, the big white egg with rolled-on housepaint and nasty metal bits in the front corners went to the window place, and then the painters, and back to the window place, and returned home looking like this ;D ;D ;D 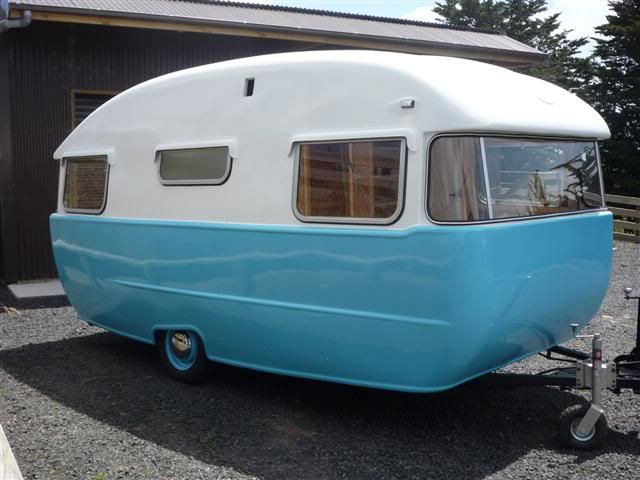 Once she was back the A55 hubcaps went straight on and then work resumed on the top cupboards, insulating that portion of the shell and fitting them into place. All the carcases are there now except the short one to the front of the door, which should be relatively easy. 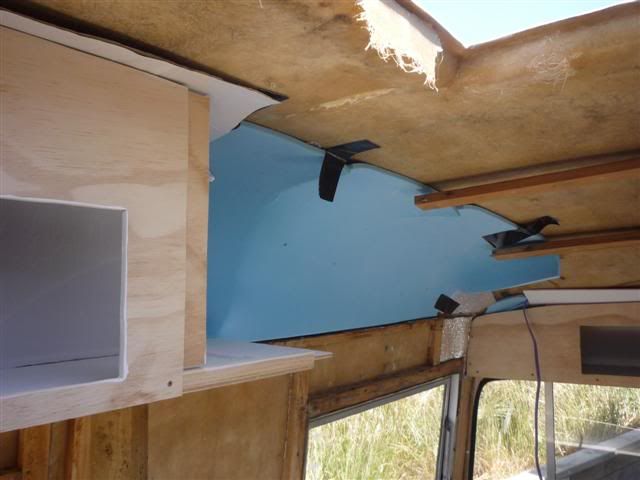 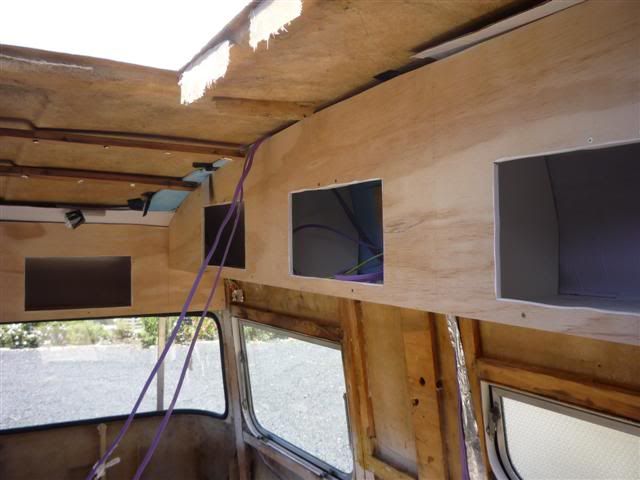 Then off to a motorhome and boat place to get the door handle fitted and they made a complete mess of it which will have to be re-done  . It was, however, enough to get the van road legal once I'd attached the number plate and rear reflectors, and three (!) VTNZ guys had a good look over and under and absolutely loved her and signed off the magic piece of paper  With the possibility of a summer holiday in sight there was a long day's work to make and fit the hatch framing (two nice straight pieces able to be reused, one slightly curved piece cut from a pine board, and one indescribable piece that runs across and down to the top of the door, cut from a sheet of treated ply) followed by the stays the next morning, and a strip of rubber channel around the hatch. 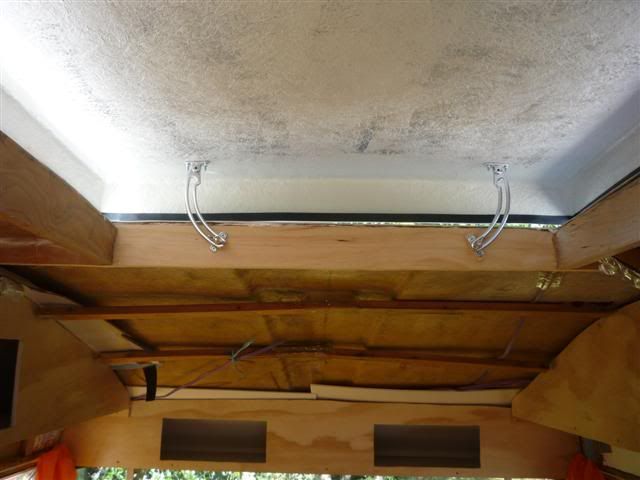 At that point I was really out of time so made some makeshift wall linings... 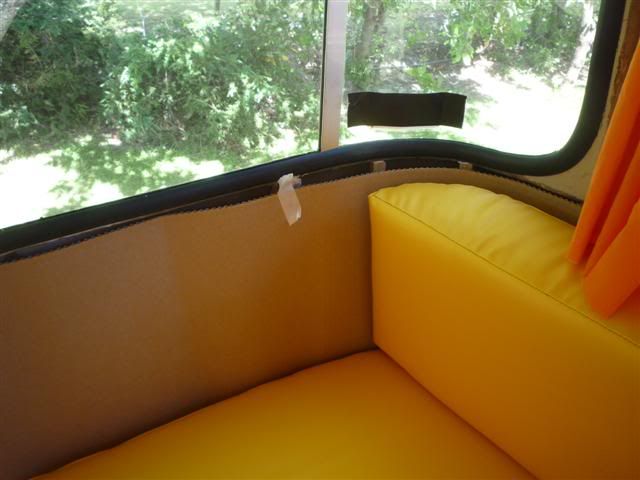 ...threw the squabs in (yay they fit! And no I didn't make them)... 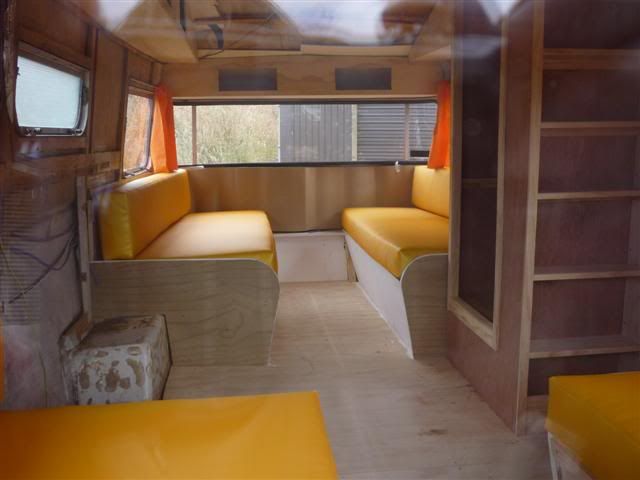 ... whipped up some makeshift curtains... 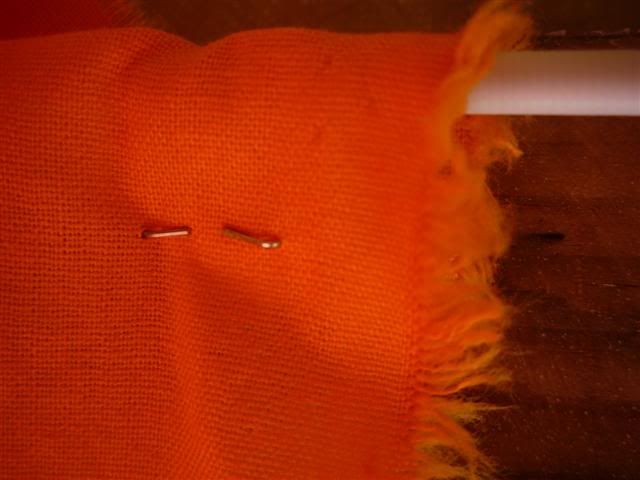 ... and then in went the sleeping bags  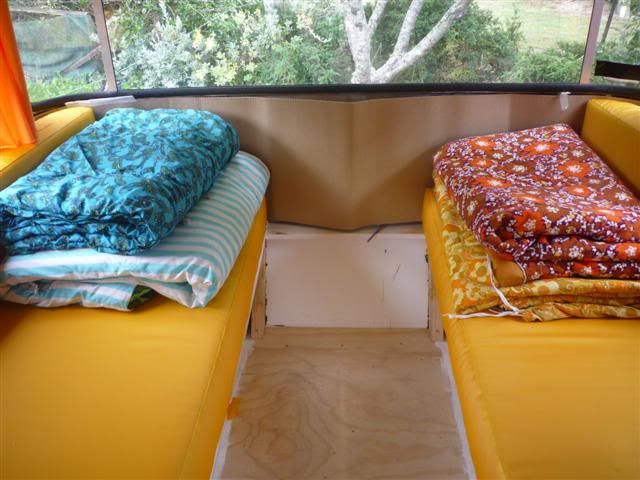 And THEN... ... over 1500ks of trouble-free travel - fast straight roads, slow windy roads, up hill, down dale, one short stretch of gravel, and she just followed along behind ;D Those curves don't just look sexy, they really make for good aerodynamics ;D, AND attracted lots of attention en route. Here she is enjoying her travels, her first 'proper' outing for a couple of decades, I suspect: 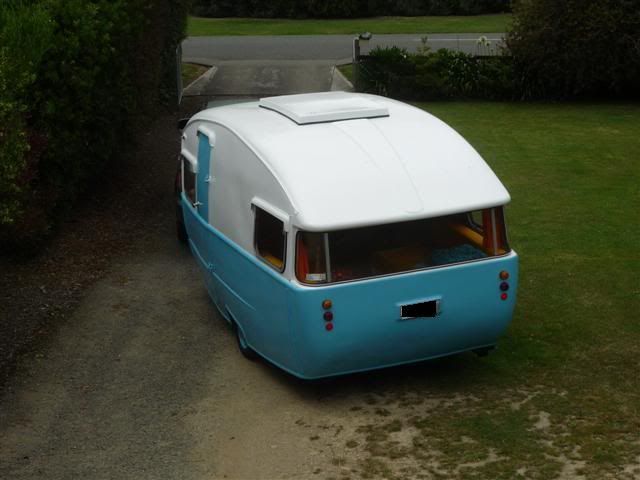 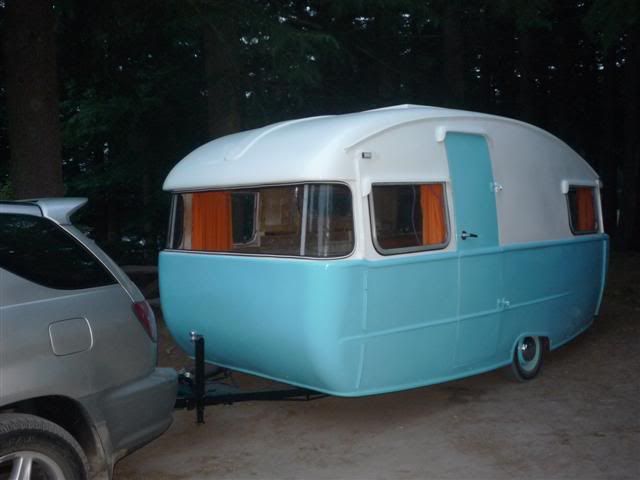 So, still heaps to do obviously but I can see now that it's all going to come together into something really special. Thanks guys (and girls) - I couldn't have done it without this site - and there'll be plenty more questions to come ...  . |
|
Jellybean
Full Member
   Any weekend away is a good weekend!!!
Posts: 392
|
Post by Jellybean on Jan 8, 2012 18:42:21 GMT 10
Hi Hilldweller
Congratulations your van looks amazing. I love your choice of colours - it really suits it. You've done a fantastic job on the inside too - what a huge achievement. I have a girlfriend that's doing up an old van, so I think I'll have to get her to read your thread for some inspiration and encouragement.
Are you North or South Island?
Cheers, Dianne
|
|
|
|
Post by hilldweller on Jan 10, 2012 15:35:03 GMT 10
Thanks for the encouragement Dianne. I'm sure your friend will find lots of inspiration on this site. Sth Island.
|
|
|
|
Post by Roehm3108 on Jan 10, 2012 19:46:54 GMT 10
8-)That is now one really KOOOOOL lookin' van.     Congrats and all the best for the home stretch. Ray |
|
|
|
Post by barkpaint on Jan 10, 2012 21:09:21 GMT 10
Thats the prettiest blue and white egg I have ever seen... the stapled curtains were a brain wave, won't look too close, but they look great. Curtains are my thing. Hope to see more work in pics as you go. Cheers, Heather
|
|
|
|
Post by barkpaint on Jan 10, 2012 21:13:46 GMT 10
p.s. the cardboard was inspirational. We did that with our old first house on the verandah, it lasted for ages and is still easy to remove. Also used the polystyrene packing from fridge packing to line the tin ceiling, most unhealthy these day, but it worked... ha aha
|
|
|
|
Post by hilldweller on Jan 13, 2012 12:33:38 GMT 10
Thanks guys - glad you like it. I don’t know anyone in real life with a vintage van so feedback on here is very much appreciated. My most interested supporter is my 5yo neice who has claimed ownership of the bed behind the wardrobe  LOl at the cardboard verandah! Your climate is certainly a lot drier than ours ;D Heather if curtains are your thing you might like to see the real curtain fabric, salvaged from old sleeping bags.  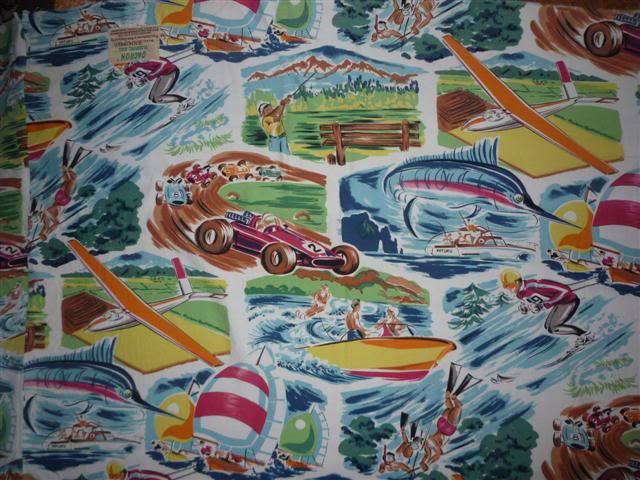 The orange is going to be a lining I think, as the reverse side of the old print would look pretty yuk from the outside. I will sew them, not staple, I promise! I’m wondering whether the curtains on the side walls will need a wire for the bottom as well as the top. Since the walls slope outwards from the ceiling towards the middle of the van, and the curtains hang straight down, they sort of fall away from the wall. What do you reckon? I only realised how much of an angle there was once the stapled ones were in place. I’m pondering colours for the wall and cupboard fronts (not that I have walls or cupboard fronts yet!). I have realised that with squabs and curtains in place, and a kitchen, there isn’t actually much wall that will be visible. When it was just a shell there seemed to be acres of ugly dirty white/grey wall space to cover. |
|
|
|
Post by hilldweller on Jan 28, 2012 18:52:24 GMT 10
Hello all Got back into the caravan today after a break since our little holiday. Decided to have a go at the ceiling for the back part of the van. Poor little jig saw was not happy cutting 20mm board on angles that were neither across nor with the grain and went very slowly indeed, but nothing broke and the end result was these pieces: 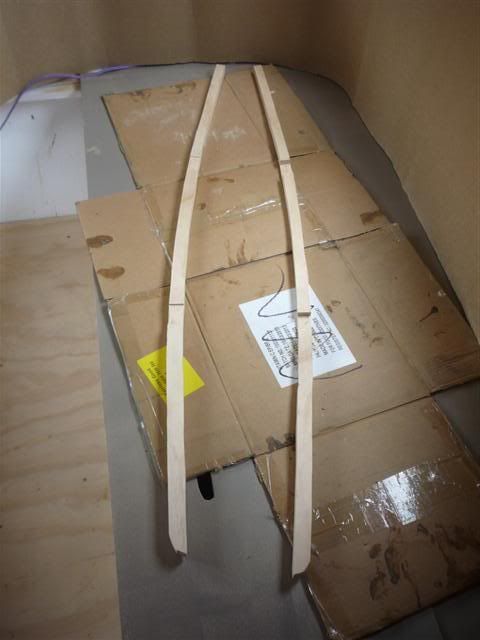 No they’re not the same length. I know now to measure before assuming left and right will be mirror images LOL. There’s about a 30mm difference in distance between the cupboard across the back, which is lined up evenly on both sides with the side windows, and the framing across the back of the hatch, which follows the edge of the hole. That’s just the way it is! Remembered to make the necessary holes for the wiring for the two rear lights while I still have access to it. 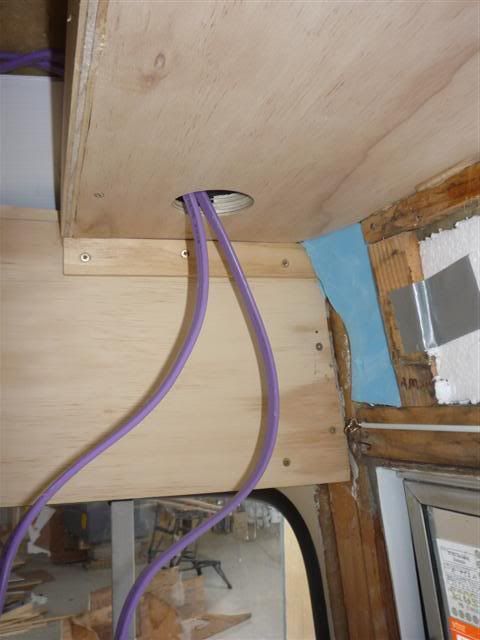 These are the lights. I’ve turned the pic upside down to see how they’ll look. I’ve got three shades like this so that’s two for the rear corners and one for the ceiling over the table. The ceiling’s not level at that point (or anywhere else for that matter) so I’ll have to make some sort of wedge so it sits right. 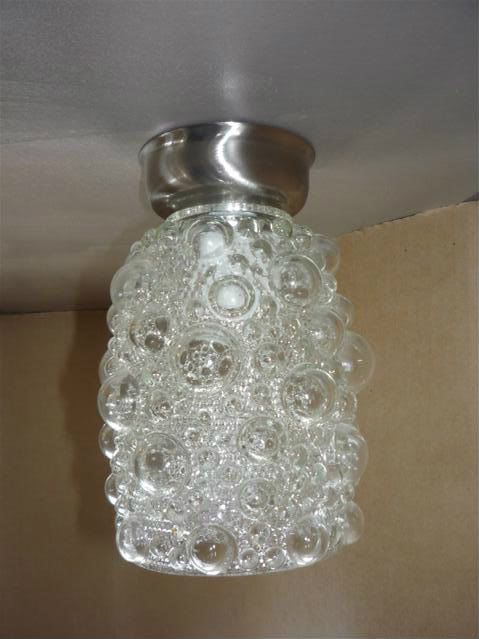 Back to the ceiling. Slotted the new curvy lengthwise bits into the ends of the original cross bits, which are still good, and glued and screwed. Even re-used a couple of the original slot-headed screws, not that anyone will be able to see them. 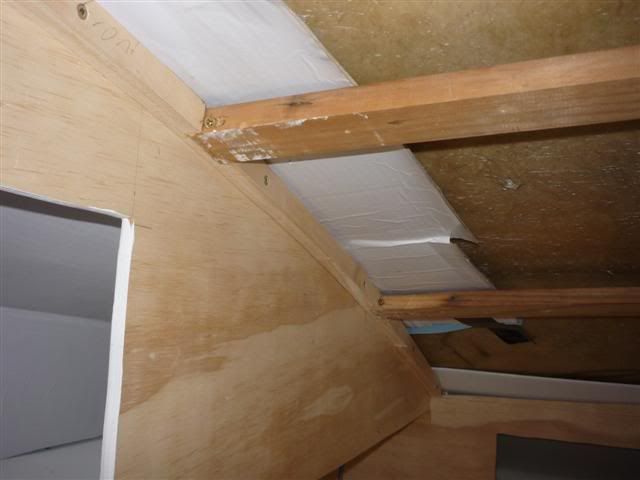 There’s a tiny bit of movement inside the original fiberglass sleeves holding the cross bits so I’ll do a bit of new bandaging before I cover it in, but even without that it feels good and solid and the overhead cupboard fronts are nicely braced. I had been a bit worried about them perched on the tiny strip of curved baton that runs along the side of the van, with no attachment to the ceiling. 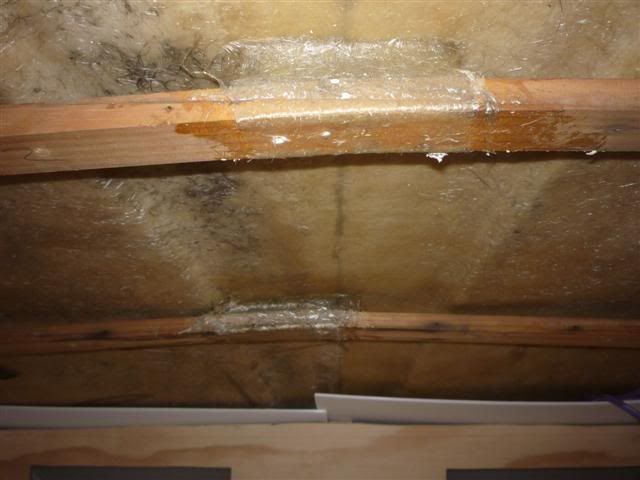 The original ceiling was some sort of fabric held on with about a million drawing pins, and painted at some stage. I know this only because I inherited about half the drawing pins and there are fragments of fabric attached. I’m hoping, but I’m not sure about this, that if I make the new ceiling in sections the 4mm ply will be able to cope with the slight curves, which are in both directions. I’m thinking there will have to be some sort of trim over the joins anyway so any small gaps will be hidden. Planning to test that theory tomorrow! |
|
|
|
Post by Roehm3108 on Jan 28, 2012 20:30:28 GMT 10
Good to see your continuing progress. Taking up your point about the bendy ceiling - have you taken the time to follow swellwilly's resto of his Sunliner? He features an interior of different colour timbers/ply and you could perhaps have a chat with him about how he overcame the multidirectional ceiling. See here: vintagecaravans.proboards.com/index.cgi?board=photo&action=display&thread=4665Your idea of cover strips is good - perhaps you can even make a feature of them, like some other vans. My Rowvan makes a feature of the whole framing (admittedly it's single skinned):  Over here they have something called bendy ply. Don't think it's fully multidirectional, but being only 3mm thick, it could possibly cope with your type of bends. Perhaps you have the same stuff over that ditch ;D  Cheers Ray |
|
|
|
Post by barkpaint on Jan 28, 2012 21:27:24 GMT 10
Hi there, love the mid sixties graphics on the fabric, have a hint for you from another van I saw. They used pieces (rectangular) of fabric showing main print, stitched onto a neutral coloured fabric curtain. It made a vintage fabric go a lot further. I would also put block out liner between layers of fabric in curtains if it doesn't bulk too much.
With the sloping walls, the pic of curtains in Roehms van shows stretchy elastic type wire, held in place by hook and eye type fixtures, avail in curtain stores. Cheers, Heather
|
|
|
|
Post by hilldweller on Jan 29, 2012 17:48:49 GMT 10
Thanks for the pics and the links. Heather – glad you think the pattern is mid 60s. I wasn’t really sure. What is block-out liner? Today’s photos. One of those days it would have been handy to be an octopus. Two arms aren’t nearly enough and some of the edges are pretty rough, but I got three pieces in place and the curve, while not perfect, is OK I think. Those pics of the framing/trimming timber are great thanks. Bendy ply is available here but not locally without a whopping great courier fee so I'm trying to avoid it. 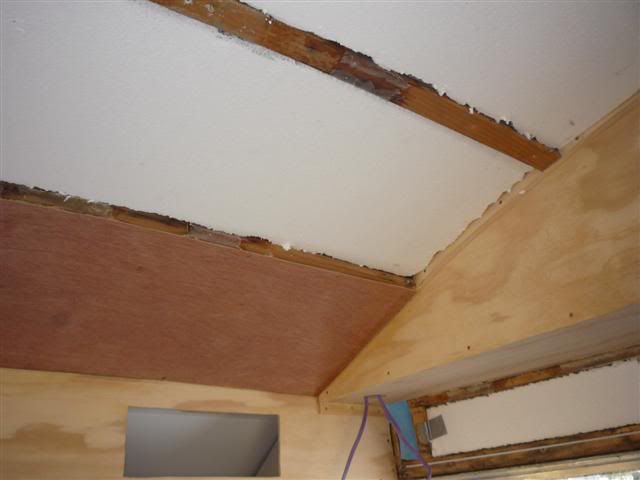 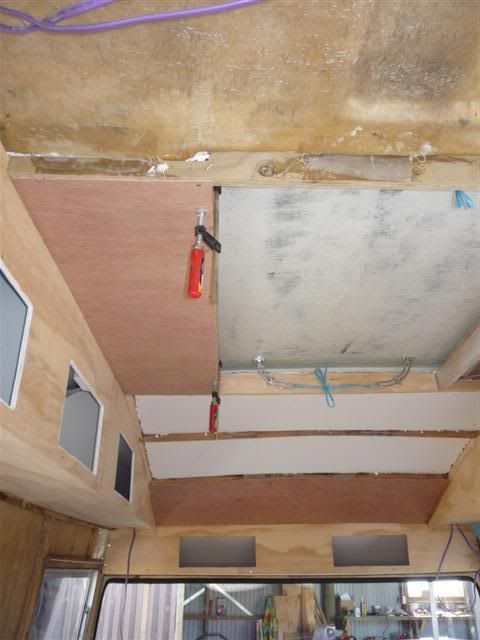 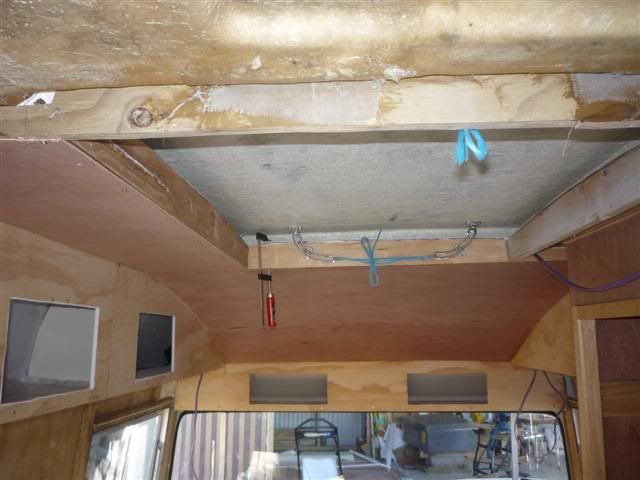 What do I do to neaten outside corners? The big green and orange sheds sell this profile moulding, but don’t think it looks right in the van. 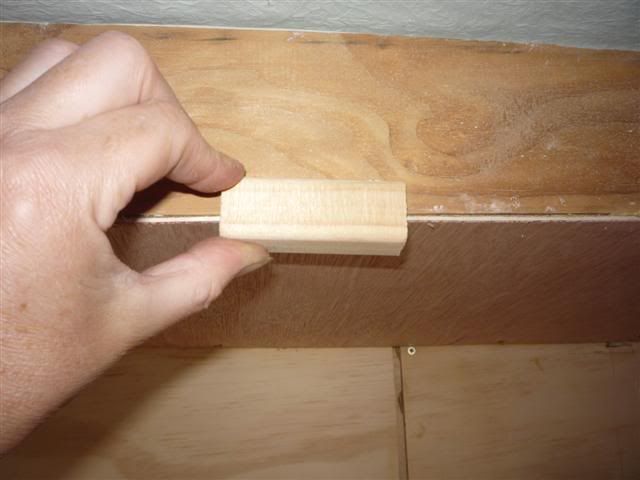 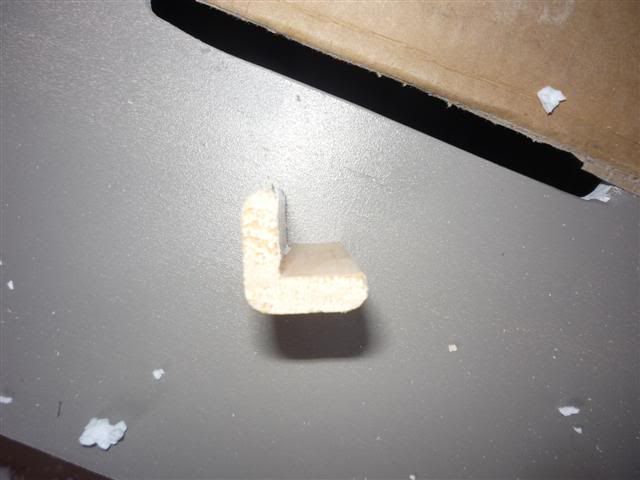 Any other ideas? |
|
|
|
Post by greedy53 on Jan 29, 2012 18:55:41 GMT 10
how about aluminium powder coat colour angle neat and tidy
|
|


 Each shelf is a slightly different length and the end against the outside wall isn't a square cut.
  Haven't found a second formica table to match the one purchased a while ago either. Need grey, in that fleck pattern that looks a bit like snowflakes. Probably like buses - none for ages and then three will come up for auction at the same time.

 ;D ;D ;D


