neilncheryl
Full Member
 Make God laugh, tell Him your plans.
Posts: 324
|
Post by neilncheryl on Feb 10, 2009 22:27:05 GMT 10
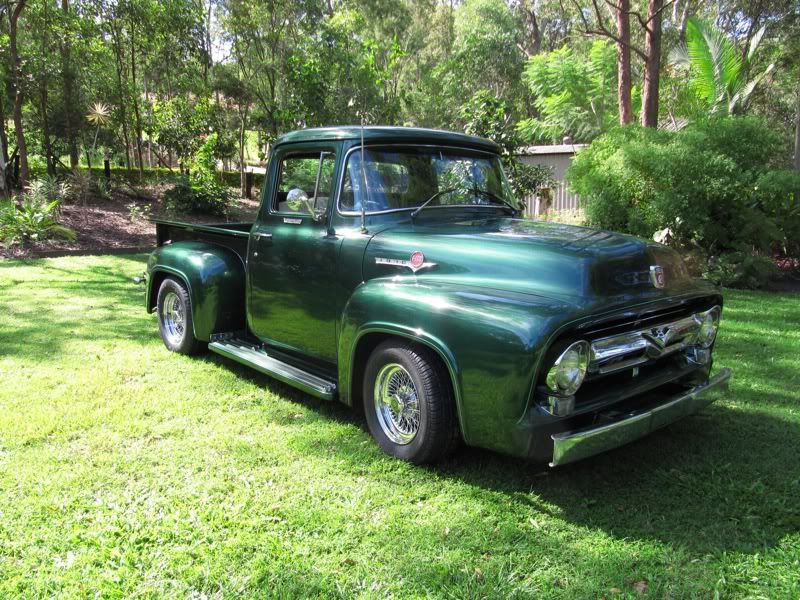
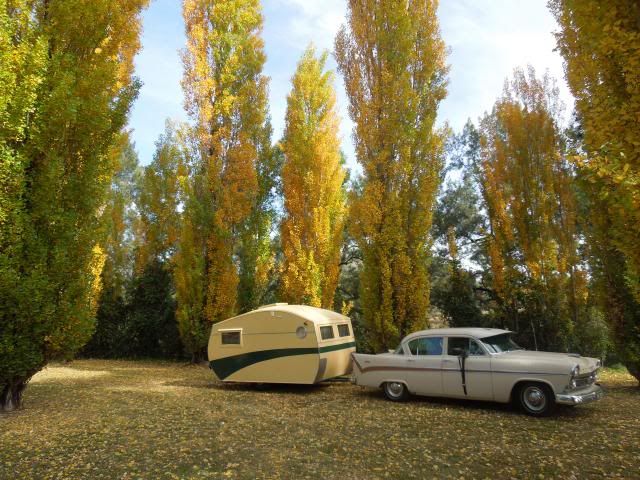
Late last year we purchased a 1962 Roadmaster 15 Deluxe 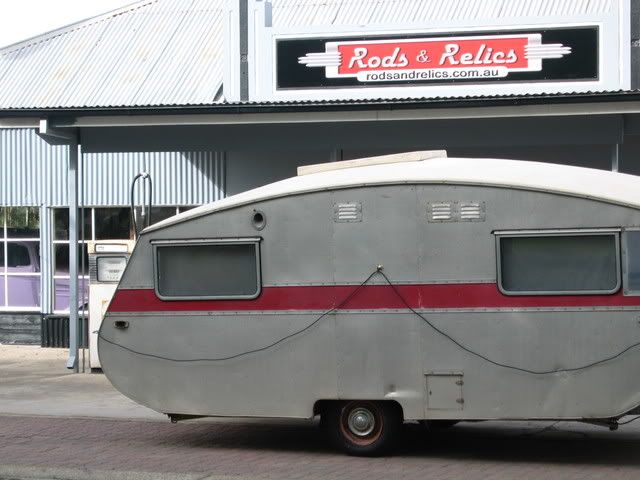 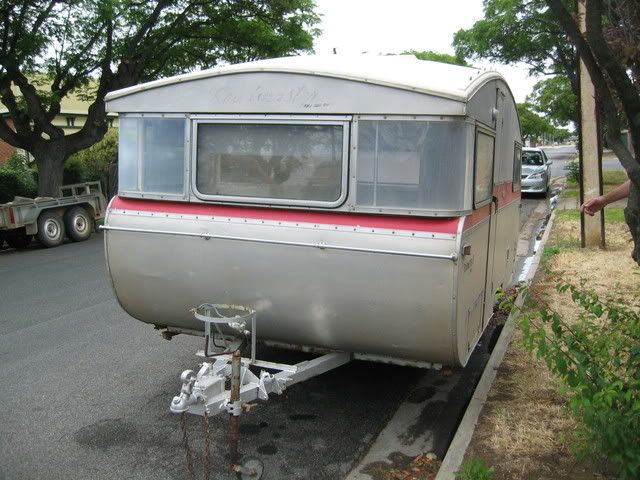 You may notice the styling at the front is similar to Geoff and Jude's but the rear is different. By the history thread it appears to be the same shape as the 1950s Roadmater but clad in Aluminum instead of Bond wood. The roof is Caneite with fibreglass coating the top. 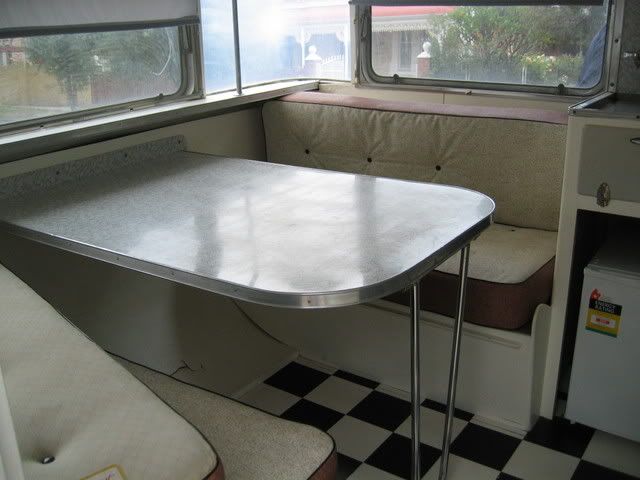 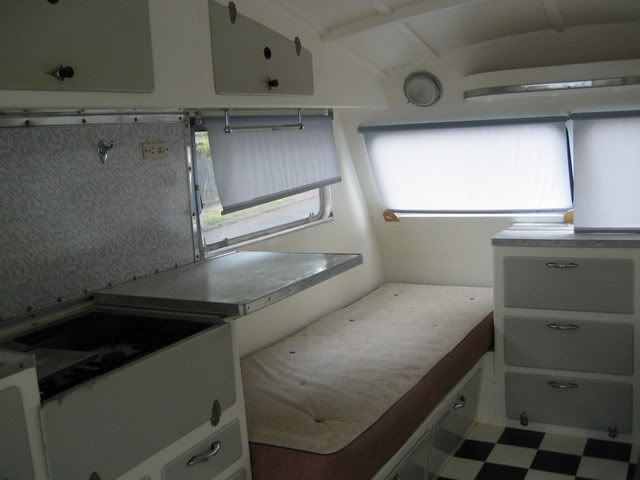 The interior is reasonably tidy. Some water damage inside rear left corner & both front corners but nothing that can't be repaired. 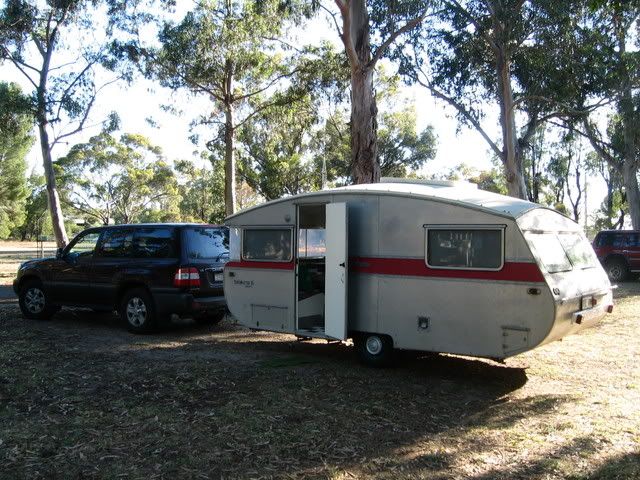 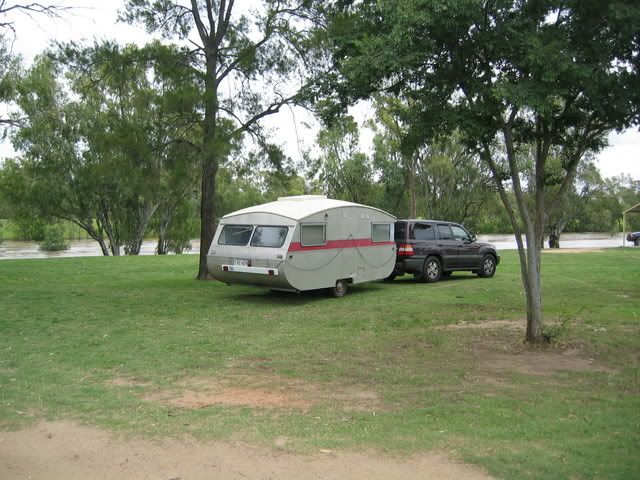 It towed quite well coming home (Adelaide to Brisbane) and no twitches at 100kph. Camped in it coming home and not a fan of single beds - too narrow. 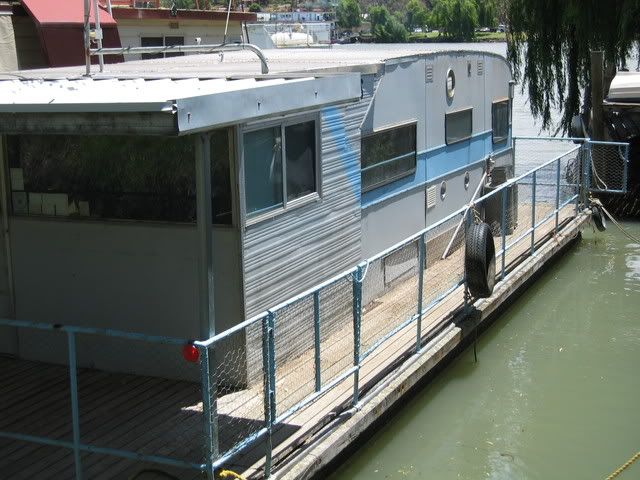 Seen this on the Murray River and still being used. I have replaced the brakes, some shackle bolts & shackle plates and will use it on a few outings to decide where we want power points & lights before taking it off the road for its refurbishment. Have some dents to remove, re-wire (12 volt & 240 volt) water damage repair (and leaks) a re-paint and we should be there. Colours will stay the same which should blend well with our single spinner Ute Have been a bit slack in getting this up on site but with re-conditioning the Vauxhall motor, Christmas, National Vauxhall rally, brakes & suspension in the Roadmaster there wasn't much time for play (although it could be argued that that was all play). Did manage to get time for the Noosa run last weekend though. Shall keep you updated as progress comes but aiming to have it finished this year - Neil |
|
|
|
Post by Geoff & Jude on Feb 11, 2009 8:37:55 GMT 10
hi neil and cheryl
that's a fine looking van you have there, it will look fantastic when you've finished it.
when we were doing up 'the ritz' we contacted larry and judy weepers who are the owners of roadmaster caravans in s.a.
two really nice people who were extremely helpful with information about how to go about the restoration and what materials to use etc.
larry had new stickers made for our van at a really reasonable cost.
the stickers on your van look identical to the ones on the van larry restored, so he can probably help you and cheryl with replacing yours.
a couple of helpful hints:
we replaced the curved corner sections on our van by copying the shape onto a masonite sheet and then laminating the bends using 3mm thick (about 8 laminates) timber to get the right thickness. i think the timber was marbou or something like that. when laminated, the curve was as strong as buggery and was difficult to bend after forming.
also, check out the bolts that hold the body of the van to the chassis. although they looked ok from the top and bottom of the bolts, of the 10 bolts used, about 6 had corroded right through in their stems and the others were reduced to about 2mm dia.
anyhow, larry and judy are members of the forum and go by the name of 'lazza', or their work email address is weepers@internode.on.net
i reckon you should contact them, larry has a good memory of most of the vans he and his father have built, so you might be able to pick up a bit of history about your treasure.
(he told us that our van was reclad in a newer sheet after the owner was towing it through a ditch with a humber super snipe in about 1972. the sad part is that the van rolled over wiping out one side and part of the roof).
hope this is useful info and look forward to seeing the finished project.
geoff 'n jude
|
|
dorian
Full Member
Sundown
Posts: 247
|
Post by dorian on Feb 11, 2009 20:07:49 GMT 10
I like it mate. Looks roomy. Cool and groovy looking van. How much do you reckon it weighs?
|
|
lazza
Junior Member

Posts: 66
|
Post by lazza on Feb 11, 2009 20:38:25 GMT 10
Hi neil and cheryl, great looking '62 you've got there. I am predujice but i think the old Roadmaster caravans are the best there is. I have bought no less than 5 of them now and past all but one onto friends with a similar passion for Roadmasters. Our list includes 1956,1962,1963,1965,1968. 2 of these were one owners and all are in very good condition. As geoff and jude said if you need any help just PM me and I will help where I can. I have had rubber window seal rubber made if you need any. Even if its only advise you require just let me know. Good luck with you new old Roadmaster
Regards Judy and Larry
|
|
neilncheryl
Full Member
Make God laugh, tell Him your plans.
Posts: 324
|
Post by neilncheryl on Feb 11, 2009 21:28:06 GMT 10
Thanks for the advice Geoff and Jude. I think there is a little bit of framework to replace but didn't think of replacing the body to chassis bolts as they looked OK. If you don't see it at Coledale this year it will be there next year. I will get some more interior photos to post.
As soon as Cheryl seen inside the van it was all over red rover - we were getting it.
Not sure on the weight Dorian but my guess is between 800 & 1000kg. Brakes were disconected when I picked it up but couldn't feel it when braking & little resistance under acceleration. Behaved itself perfectly.
Thanks for your kind offer Judy & Larry. I will be replacing all the rubbers & stickers so I will send you a PM in due course.
The interior has me a little concerned. The craftsmanship of the cupboards is beyond my capabilities & I need to find someone who can do the repairs to the water damage to match the original. We will get there though - it won't beat us.
Many nights in the shed ahead of us & looking forward to it.
Neil n Cheryl
|
|
neilncheryl
Full Member
Make God laugh, tell Him your plans.
Posts: 324
|
Post by neilncheryl on Apr 23, 2009 22:05:29 GMT 10
Time for an update Repairs have started on the water damaged timber work 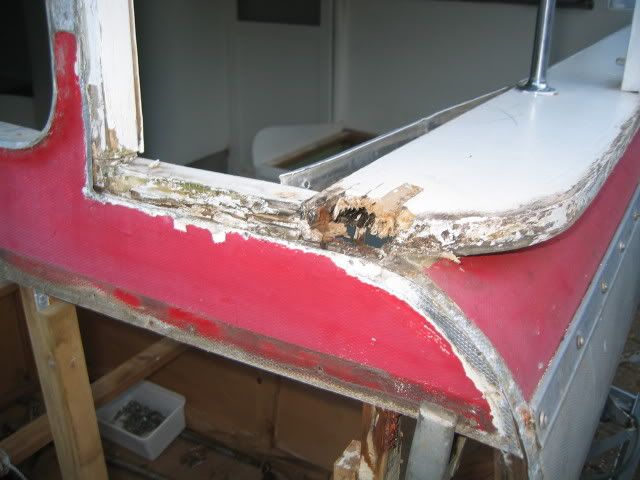 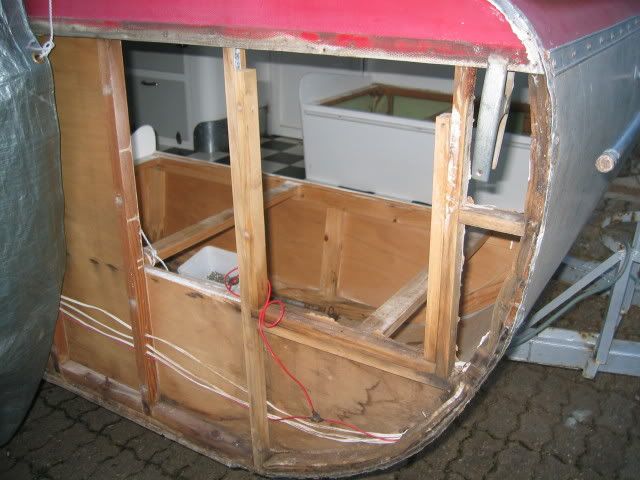 Will be replacing the shelf rather than repairing the end. The front frame that bends is made of layers of Masonite. I assume that it had damage in the corner at some stage and whoever did the repairs replaced the timber with Masonite. It will be replaced with timber. Happy with the frame so far - more photos to follow as we get further advanced Neil & Cheryl |
|
neilncheryl
Full Member
Make God laugh, tell Him your plans.
Posts: 324
|
Post by neilncheryl on Sept 26, 2009 22:20:44 GMT 10
I have been spending a lot of time in the shed and thought I would put some more pics up to bring you up to date. After pulling the external cladding off it was obvious that the frames for all 4 cornewrs needed to be replaced. Some of the corner frames fell off as the cladding was removed. 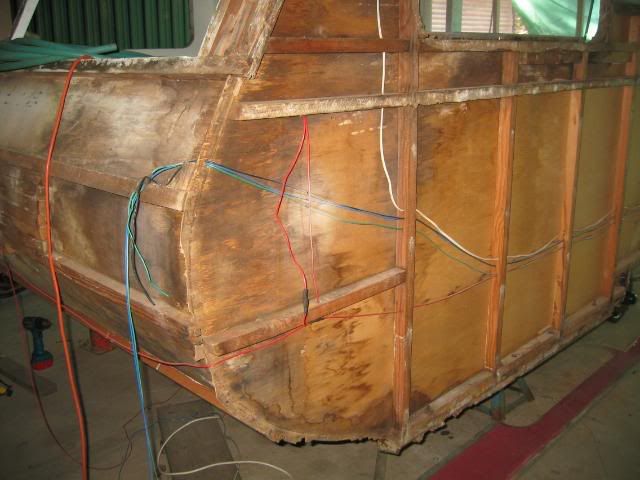 I bought some 4mm marine ply which I cut into strips to make the new curved corner frames. On a sheet of 12mm floor ply I marked out the outline of the curves for the frame using the cladding as a template. Around the edge of the curve I marked on the ply, I srcewed blocks of timber to use as secure clamping points for the frame 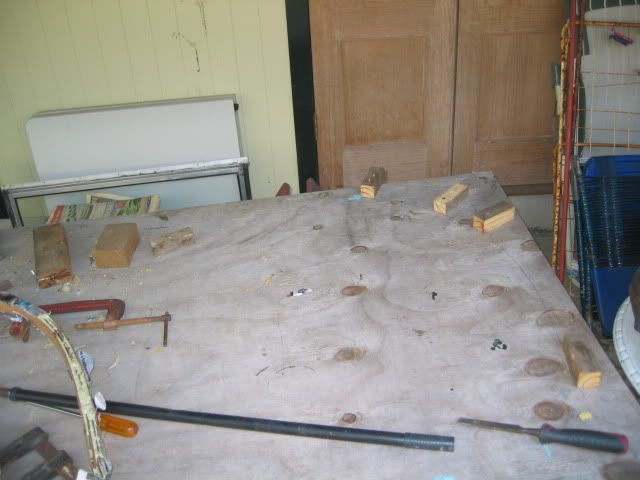 I then glued together 6 strips of the marine ply I cut, wrapped it in newspaper so it wouldn't be glued to the clamps or jig and clamped it in the jig I made. 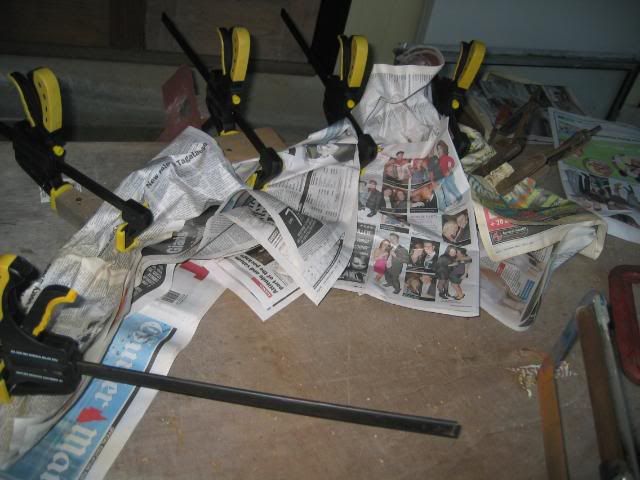 It was left in the jig for two days for the glue to properly set/cure Here is a picture of the frame without the newspaper 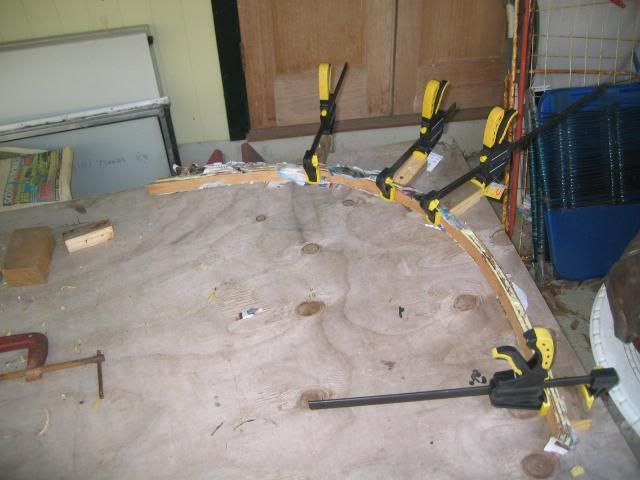 More pics to come |
|
neilncheryl
Full Member
Make God laugh, tell Him your plans.
Posts: 324
|
Post by neilncheryl on Sept 26, 2009 23:04:48 GMT 10
I started repairing the left front side first as it looked the worst and hardest, and it took the longest. The door jams had to be replaced as well as almost half the side frame between the doorway and front of van. The timber I used for the door jam & the "straight" framing was meranti and marine ply to replace the damaged internal sheeting 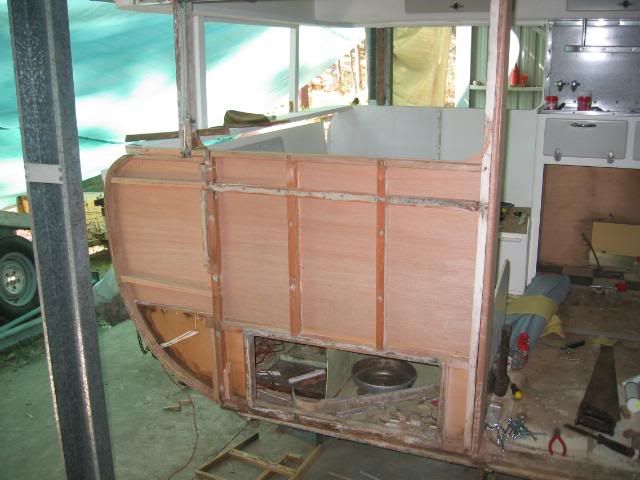 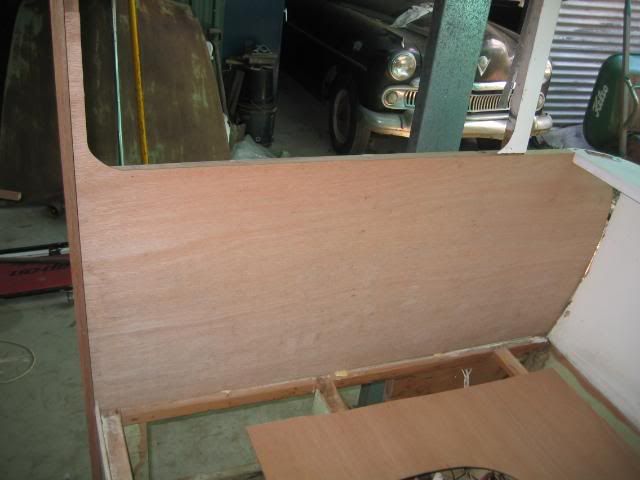 Framework is glued and screwed and the screws were dipped in metal primer before being screwed in. Left rear corner was repaired next  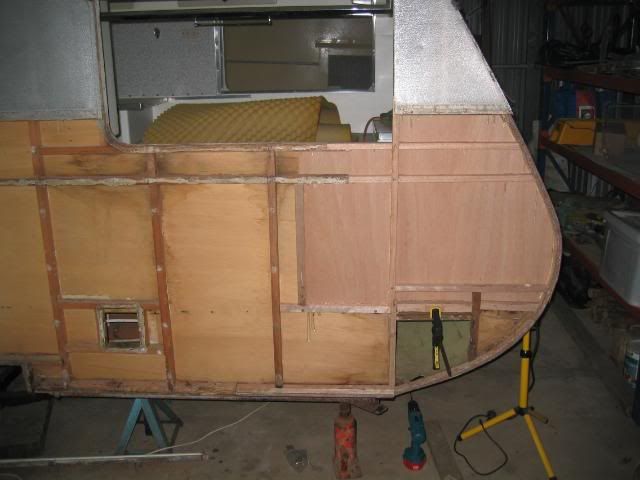 Forgot to mention that before I glued and screwed the framework together I did a trial fit (screwed without the glue) and put the outside sheeting on to check for fit 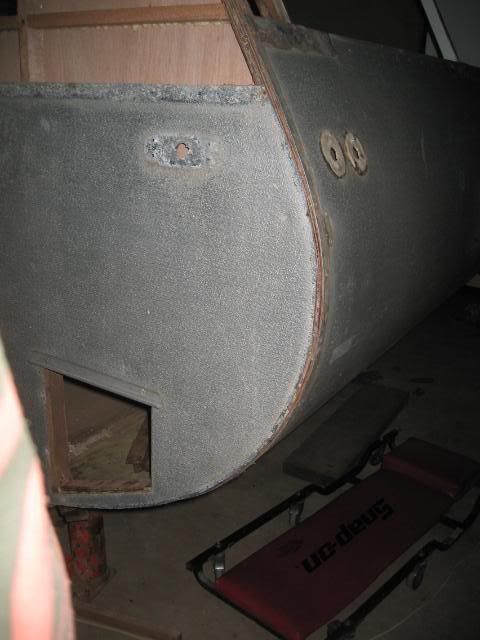 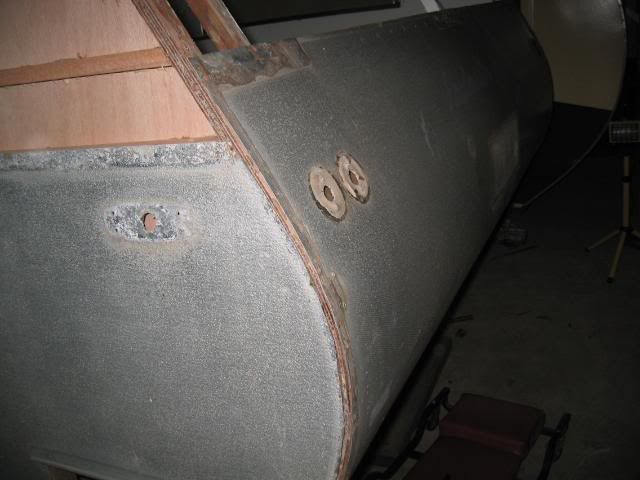 Very happy - didn't need to do any adjustments Should have all the damaged framing replaced this weekend and then I will start on getting the interior ready for painting. That's all the updates I have for now, more in a few weeks Cheers, Neil |
|
|
|
Post by dosse on Sept 27, 2009 6:46:28 GMT 10
G'day Neil & Cheryl. The Roadmaster going to look a treat  you are doing a great job......Hope you read the newspaper before you clamped it  ;D. Regards dosse  |
|
|
|
Post by retro1 on Sept 27, 2009 9:30:51 GMT 10
Hi Guys, You are making it look easy. Well done   ;D Good to see one of these old girls getting fixed up properly. Keep us all up to date. cheers retro1 |
|
|
|
Post by Surf Tragic on Sept 27, 2009 12:03:59 GMT 10
Hi neilncheryl I can appreciate how much effort you are going to with your resto, but in the end it is very satisfying & worthwhile isn't it. Excellent job & very well done Surf Tragic |
|
|
|
Post by Geoff & Jude on Sept 27, 2009 20:55:21 GMT 10
good work 'guys'.
keep at it, roadies are great touring vans, big and comfortable.
you're going to love it when it's finished.
geoff 'n jude
|
|
neilncheryl
Full Member
Make God laugh, tell Him your plans.
Posts: 324
|
Post by neilncheryl on Sept 28, 2009 21:29:51 GMT 10
Thanks Guys
Am enjoying it - as JBJ says 'it's all fun".
Thanks Geoff for the tip on checking the frame bolts. You were right about replacing them.
Top and bottom looked OK but the middle was at least half rusted through and on some not there. New bolts going in and all primed as well so won't be replacing them again in my lifetime.
Treating all the framework with Norglass Wood Treatment before the cladding goes back on
Pre-wire and chassis sanding this weekend so should have more photos and an update in two weeks
Neil
|
|
|
|
Post by humpyboy on Sept 28, 2009 23:10:27 GMT 10
Hey there neilncheryl, the more I see this van the more I fall in love with the shape, God I love it, look forward to more pics and the finished job.
|
|
neilncheryl
Full Member
Make God laugh, tell Him your plans.
Posts: 324
|
Post by neilncheryl on Jan 25, 2010 21:59:17 GMT 10
Well I have been busy building a deck off the side of our house since the last post here so not much action in the shed.
I will be getting ready to insulate and fix the alloy sheeting back on now.
What adhesive/sealant does anyone recommend to use between the sheets and the timber frame as I screw the sheets back on?
Don't want this baby leaking.
Thanks Neil
|
|
halps
Full Member
Get out and enjoy your van man!
Posts: 229
|
Post by halps on Jan 26, 2010 7:23:20 GMT 10
Neil, I can't help you with your question of adhesive...but I would say that it looks like you are doing a great job. You have a great old van there. Well done.
HALPS
Brisbane
|
|
|
|
Post by Franklin1 on Jan 26, 2010 12:34:48 GMT 10
Hi Neil, wonderful, wonderful job you are doing on your van! ;D ;D Congratulations on a very fine effort!! You would have been better to ask what type of paint people recommend, ha ha, because the sealant debate is even more complex. There are more Sika sealants than you can poke a stick at, and more recommendations than there are days in the year. And that doesn't include the Selleys products, the Parbury products, etc, etc. I ended up choosing SikaLastomer 511 to seal all the bits on my aluminium caravan. This product doesn't "cure" and stays soft and pliable with a slightly tacky skin forming after a day or so. What I liked about this product is that if you need to take anything back off the van in the months/years to come, you don't have to undercut the sealant with a sharp knife, like many of the other types that "cure". Comes in a cartridge with its own integrated nozzle, although you can slip one of those other screw type nozzles over it to get a smaller bead... 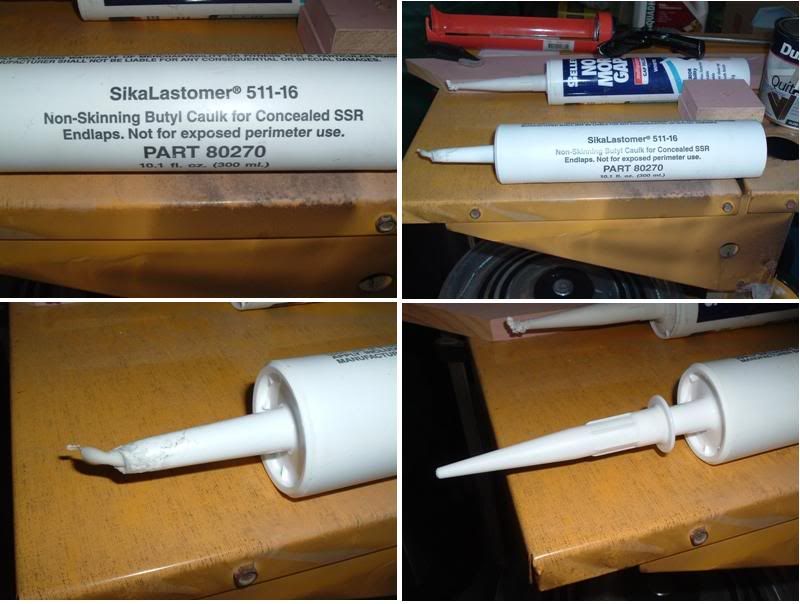 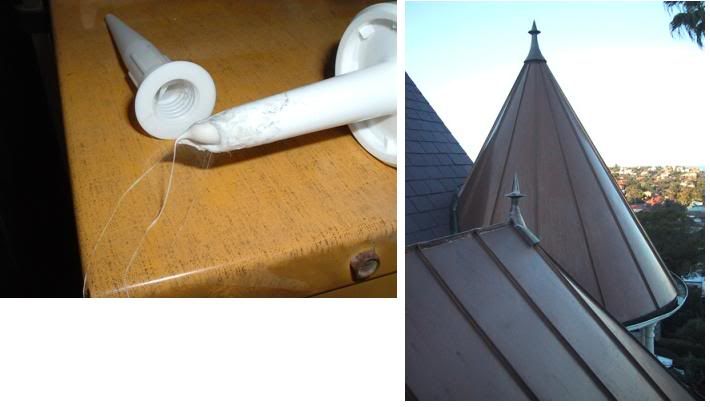 SikaLastomer-511 is designed for sealing the overlap on "standing seam roofs" (last photo above). The Sika Technical Dept recommended I use Sikaflex-295UV and Sikaflex-521UV, which are apparently what caravan manufacturers use these days. (Do a Google search for "Sika caravan sealant" and you'll get some links to Sika bulletins featuring two manufacturers.) The problem for me with the two products recommended, is that they "cure", so I ignored that advice and went with the 511 stuff. It's available from Bunnings as a "special order", $6 per cartridge, no minimum quantity. Each cartridge does a quarter inch diameter bead for about 3 metres in length, so calculate how many needed and order in one go. Sika product sheet for SikaLastomer-511 here. Good luck with your choice...it's a nightmare!! cheers, Al. |
|
|
|
Post by firefighter on Jan 27, 2010 7:44:19 GMT 10
G'day Al your Quote I ended up choosing SikaLastomer 511 to seal all the bits on my aluminium caravan. This product doesn't "cure" and stays soft and pliable with a slightly tacky skin forming after a day or so. Al .....Sika production sheet .....Sika Lastomer 511 SOFTY ,TACKY for up to 6 MONTHS  A..... does it then harden after 6 months I am about to change the front and back windows in the Roadhaven in time for Mildura ...so I am interestered in what members have been using f/f ;D ;D ;D ;D ;D ;D
|
|
|
|
Post by Franklin1 on Jan 27, 2010 9:30:14 GMT 10
Hey f/f, my interpretation of that Product Sheet is that if a manufacturer applies SikaLastomer 511 to a panel in the factory, then the panel can be fixed into position anytime within six months. I think the "tackiness" of the exposed sealant surface must disappear over the six month period, so it wouldn't "stick" to anything. But the sealant itself still remains soft and pliable underneath. If you stick things together with the sealant straight out of the tube, the sealant in the joint that is hidden from the air will always stay "tacky". That's my theory anyway! Come back and ask me in ten year's time if I made the right decision!! It was this thread on this forum from two years ago that originally led me to considering the 511 stuff. See boblor's reply at the bottom. boblor says he had to buy a box of 12, but I've been able to buy just one at a time, if necessary, through the Bunnings "Special Order" desk. For a window 900 x 450mm, I used one and a half cartridges, running two beads of sealant around the frame. The cladding on my van is the 1970s ridges and valleys type, so extra sealant is needed to fill the valleys properly. If you're sticking stuff to flat cladding or plywood, nowhere near as much sealant is needed. The other thread worth reading is this one from the Classic forum. It's where I realised the decision about sealants gives you a big bloody headache! Finally, ignore any Sika requirement to use Sika Cleaner 208 to clean up excess sealant. Mineral turps does it easily and is far cheaper. Use lots of masking tape around the fixture and let the excess sealant go onto the tape. No matter what you do, it's a messy, messy, messy, messy job! And that's speaking from the experience of having used up 26 cartridges of the stuff so far... cheers, Al. |
|
|
|
Post by firefighter on Jan 27, 2010 9:56:37 GMT 10
|
|
|
|
Post by Franklin1 on Jan 27, 2010 20:07:02 GMT 10
Hey f/f, we have a member over on the Classic forum who worked as a maintenance technician for many years in the RAAF. The one and only time I'd ever heard of Hylamar was when he mentioned it in the sealant thread over there. Doing a Google search just now, I see it's actually spelt Hyl omar and if you want a long-winded description about the product then go here and scroll down to the fourth product listed. Seems it was developed for use as a gasket material. Been around for 40 years, so they say. The whole discussion about sealants is probably very much like the discussion about paint types. The bottom line is that it probably doesn't matter what you use, as long as you use something. Perhaps the only differences between all the types will ultimately be: 1) How long before you have to reseal whatever you've done, and 2) How easy or difficult it will be at that time, to pull the van apart and remove the old sealant. We should probably now hand this thread back over to Neil so he can carry on with the good work he's doing. Thanks for the loan of the thread, Neil! f/f, I'm happy to contribute to a specific thread about sealants in the Techo Section if we think it's worthwhile. cheers, Al. |
|
neilncheryl
Full Member
Make God laugh, tell Him your plans.
Posts: 324
|
Post by neilncheryl on Oct 31, 2010 21:19:44 GMT 10
Doesn't time fly. Didn't realize it had been so long since I updated here. Thanks Al for all the great info on sealants. I have been doing a lot of fiddly bits on the van, where you work all weekend on the van but don't see much for it, and taking my time. Love looking at photos so I will post a couple more up to show where I am up to. We have finished insulating the van 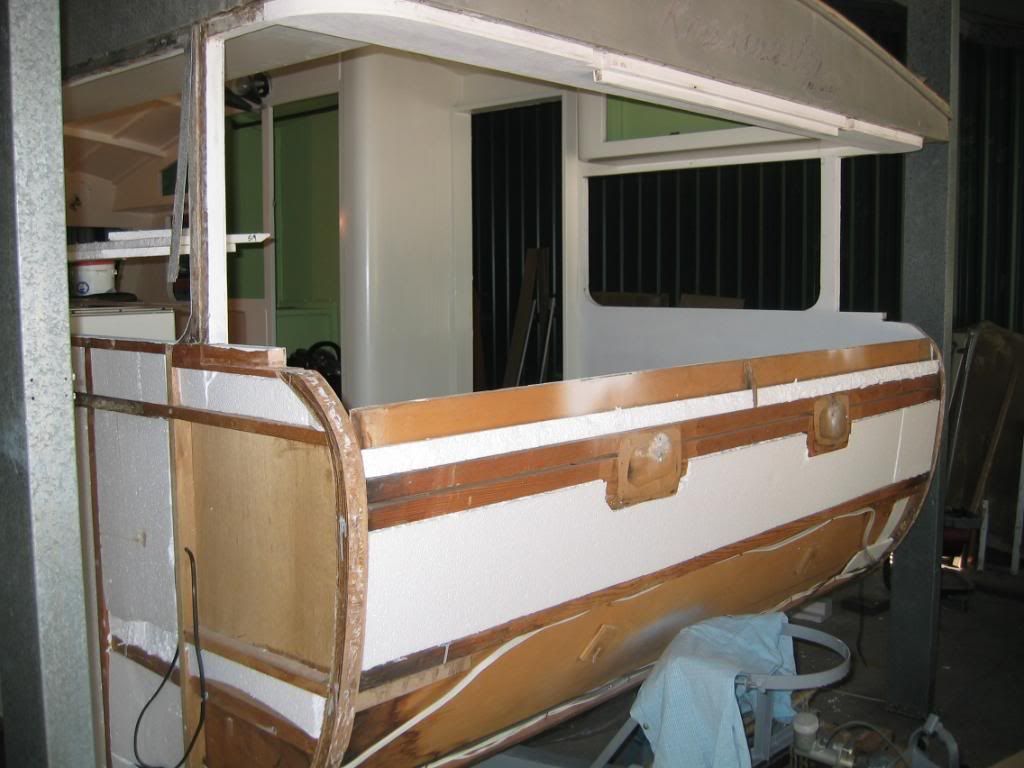 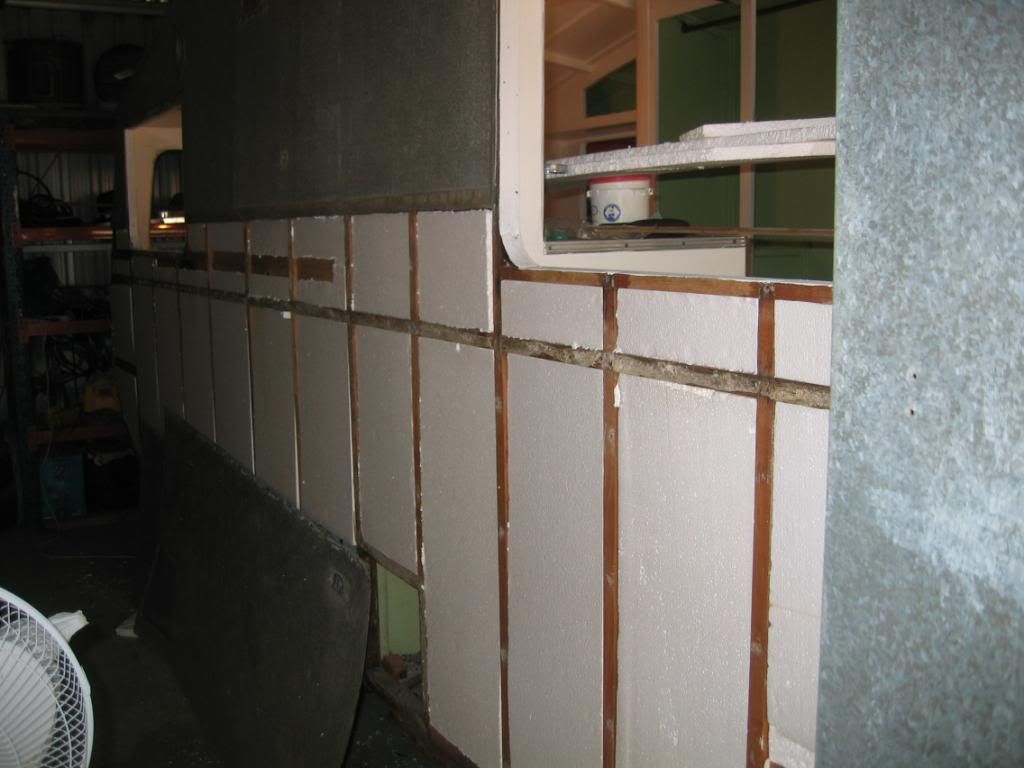 and have now got all the outside cladding back on. The front was the most difficult and I lost count of the number of trial fits before I was happy with it but it is now on and secured. Turned out much better than I feared. If only Lazza lived a bit closer to me. 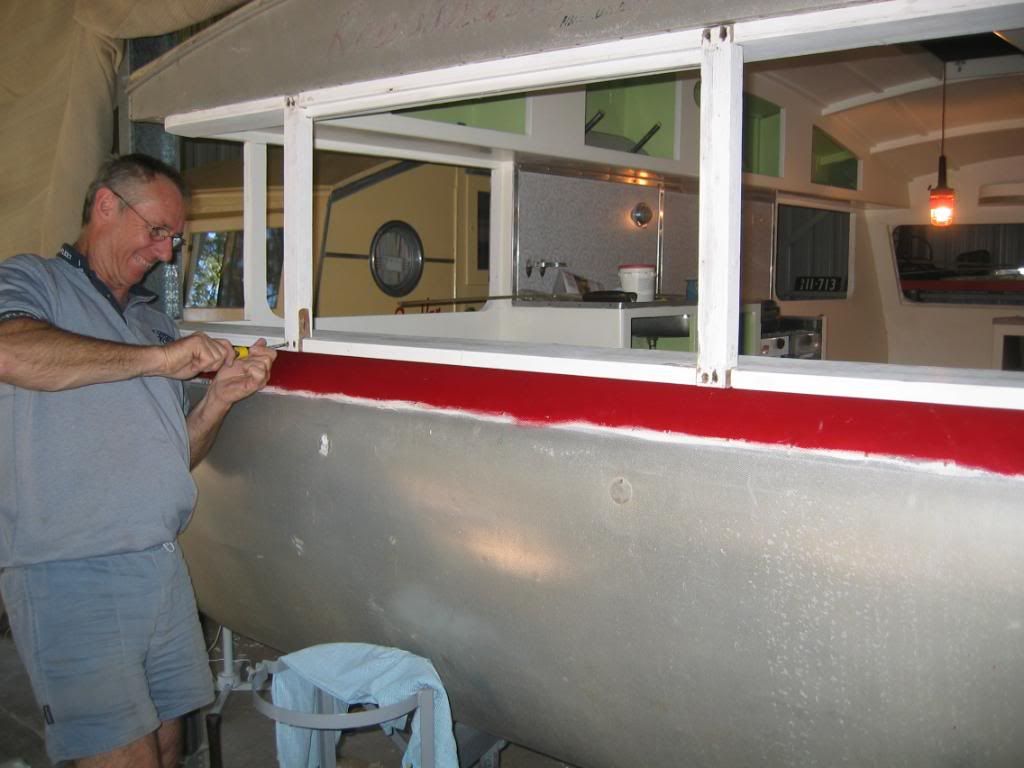 We will be finishing the interior painting next, so will post more photos then. |
|
neilncheryl
Full Member
Make God laugh, tell Him your plans.
Posts: 324
|
Post by neilncheryl on Feb 20, 2011 10:24:25 GMT 10
Quick update Yesterday Cheryl was painting the interior 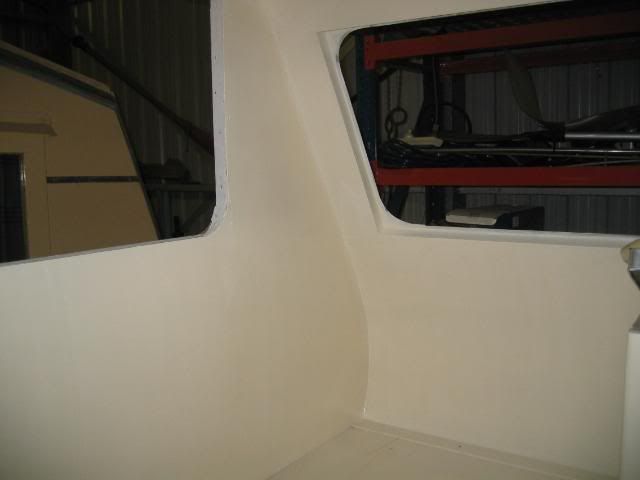 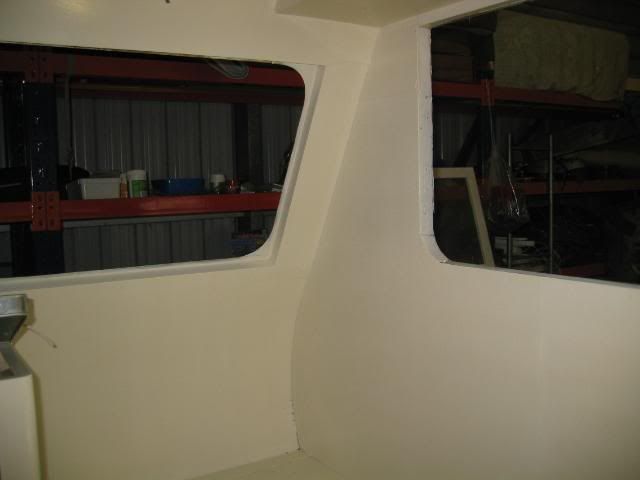 Painting at the back of the van is now finished 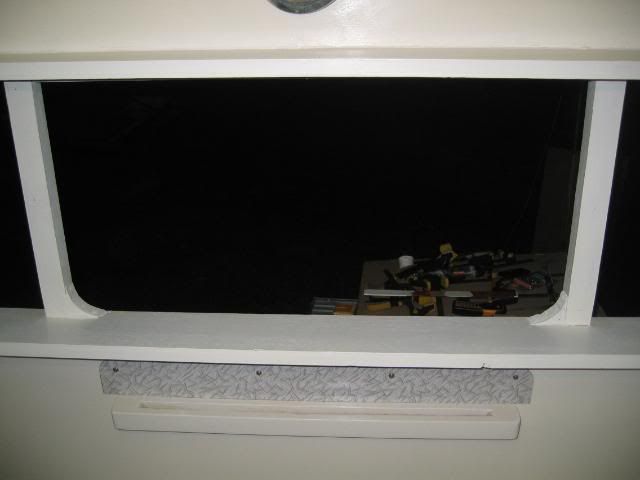 The front will have its final coat this morning We now have one of the rear windows in and the metal trim around the side windows fitted 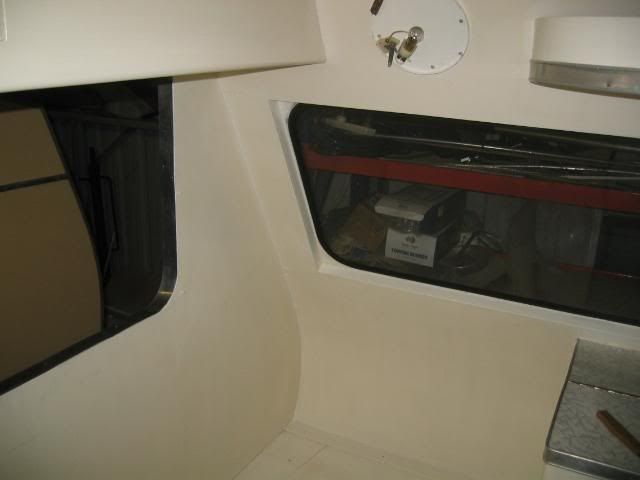 Back to the shed now to finish painting the front inside and put the trim around the front. This is how the front looks now 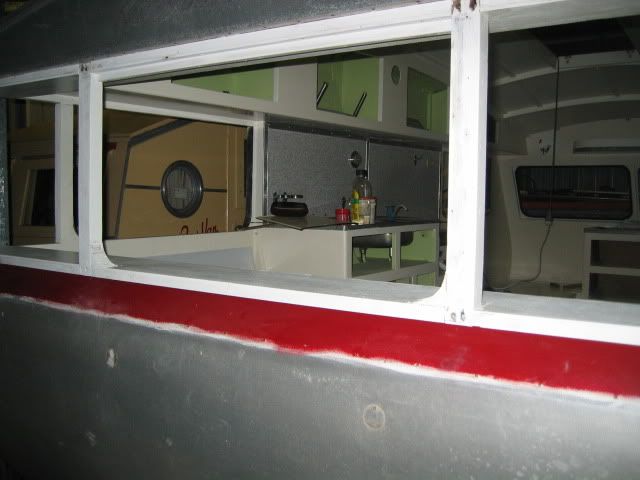 Let's see if it looks better tonight |
|
|
|
Post by 56effy on Feb 20, 2011 19:02:07 GMT 10
G,day mate, boy you put in a big weekend, I'm glad you asked about sealant as I,m about to reseal kennys windows, I might slip down to bunnings tomorrow and order a few tubes want me to order you some to?
catch y'a later,
Lindsay.
|
|
Smiley
Junior Member
Posts: 78 
|
Post by Smiley on Feb 20, 2011 19:09:26 GMT 10
It is great seeing you guys getting into the Roadmaster - I can see it on the beach now. I bet you guys wished it was there today with the heat. Lindsay is biting at the bit to get into Kenny but with 5 night shifts under his belt this week, it has definitely curbed his progress. Hopefully this week is a little lighter.
Smiley
|
|


 ;D
;D