|
|
Post by sherroy on Jun 14, 2019 22:05:59 GMT 10
what axle weight did you go? Is it braked?
|
|
|
|
Post by jp63 on Jun 14, 2019 22:26:34 GMT 10
what axle weight did you go? Is it braked? We replaced the axle like for like with mechanical brakes. I'm not sure on the weight rating but it 45mm square. |
|
|
|
Post by jp63 on Jun 17, 2019 17:35:09 GMT 10
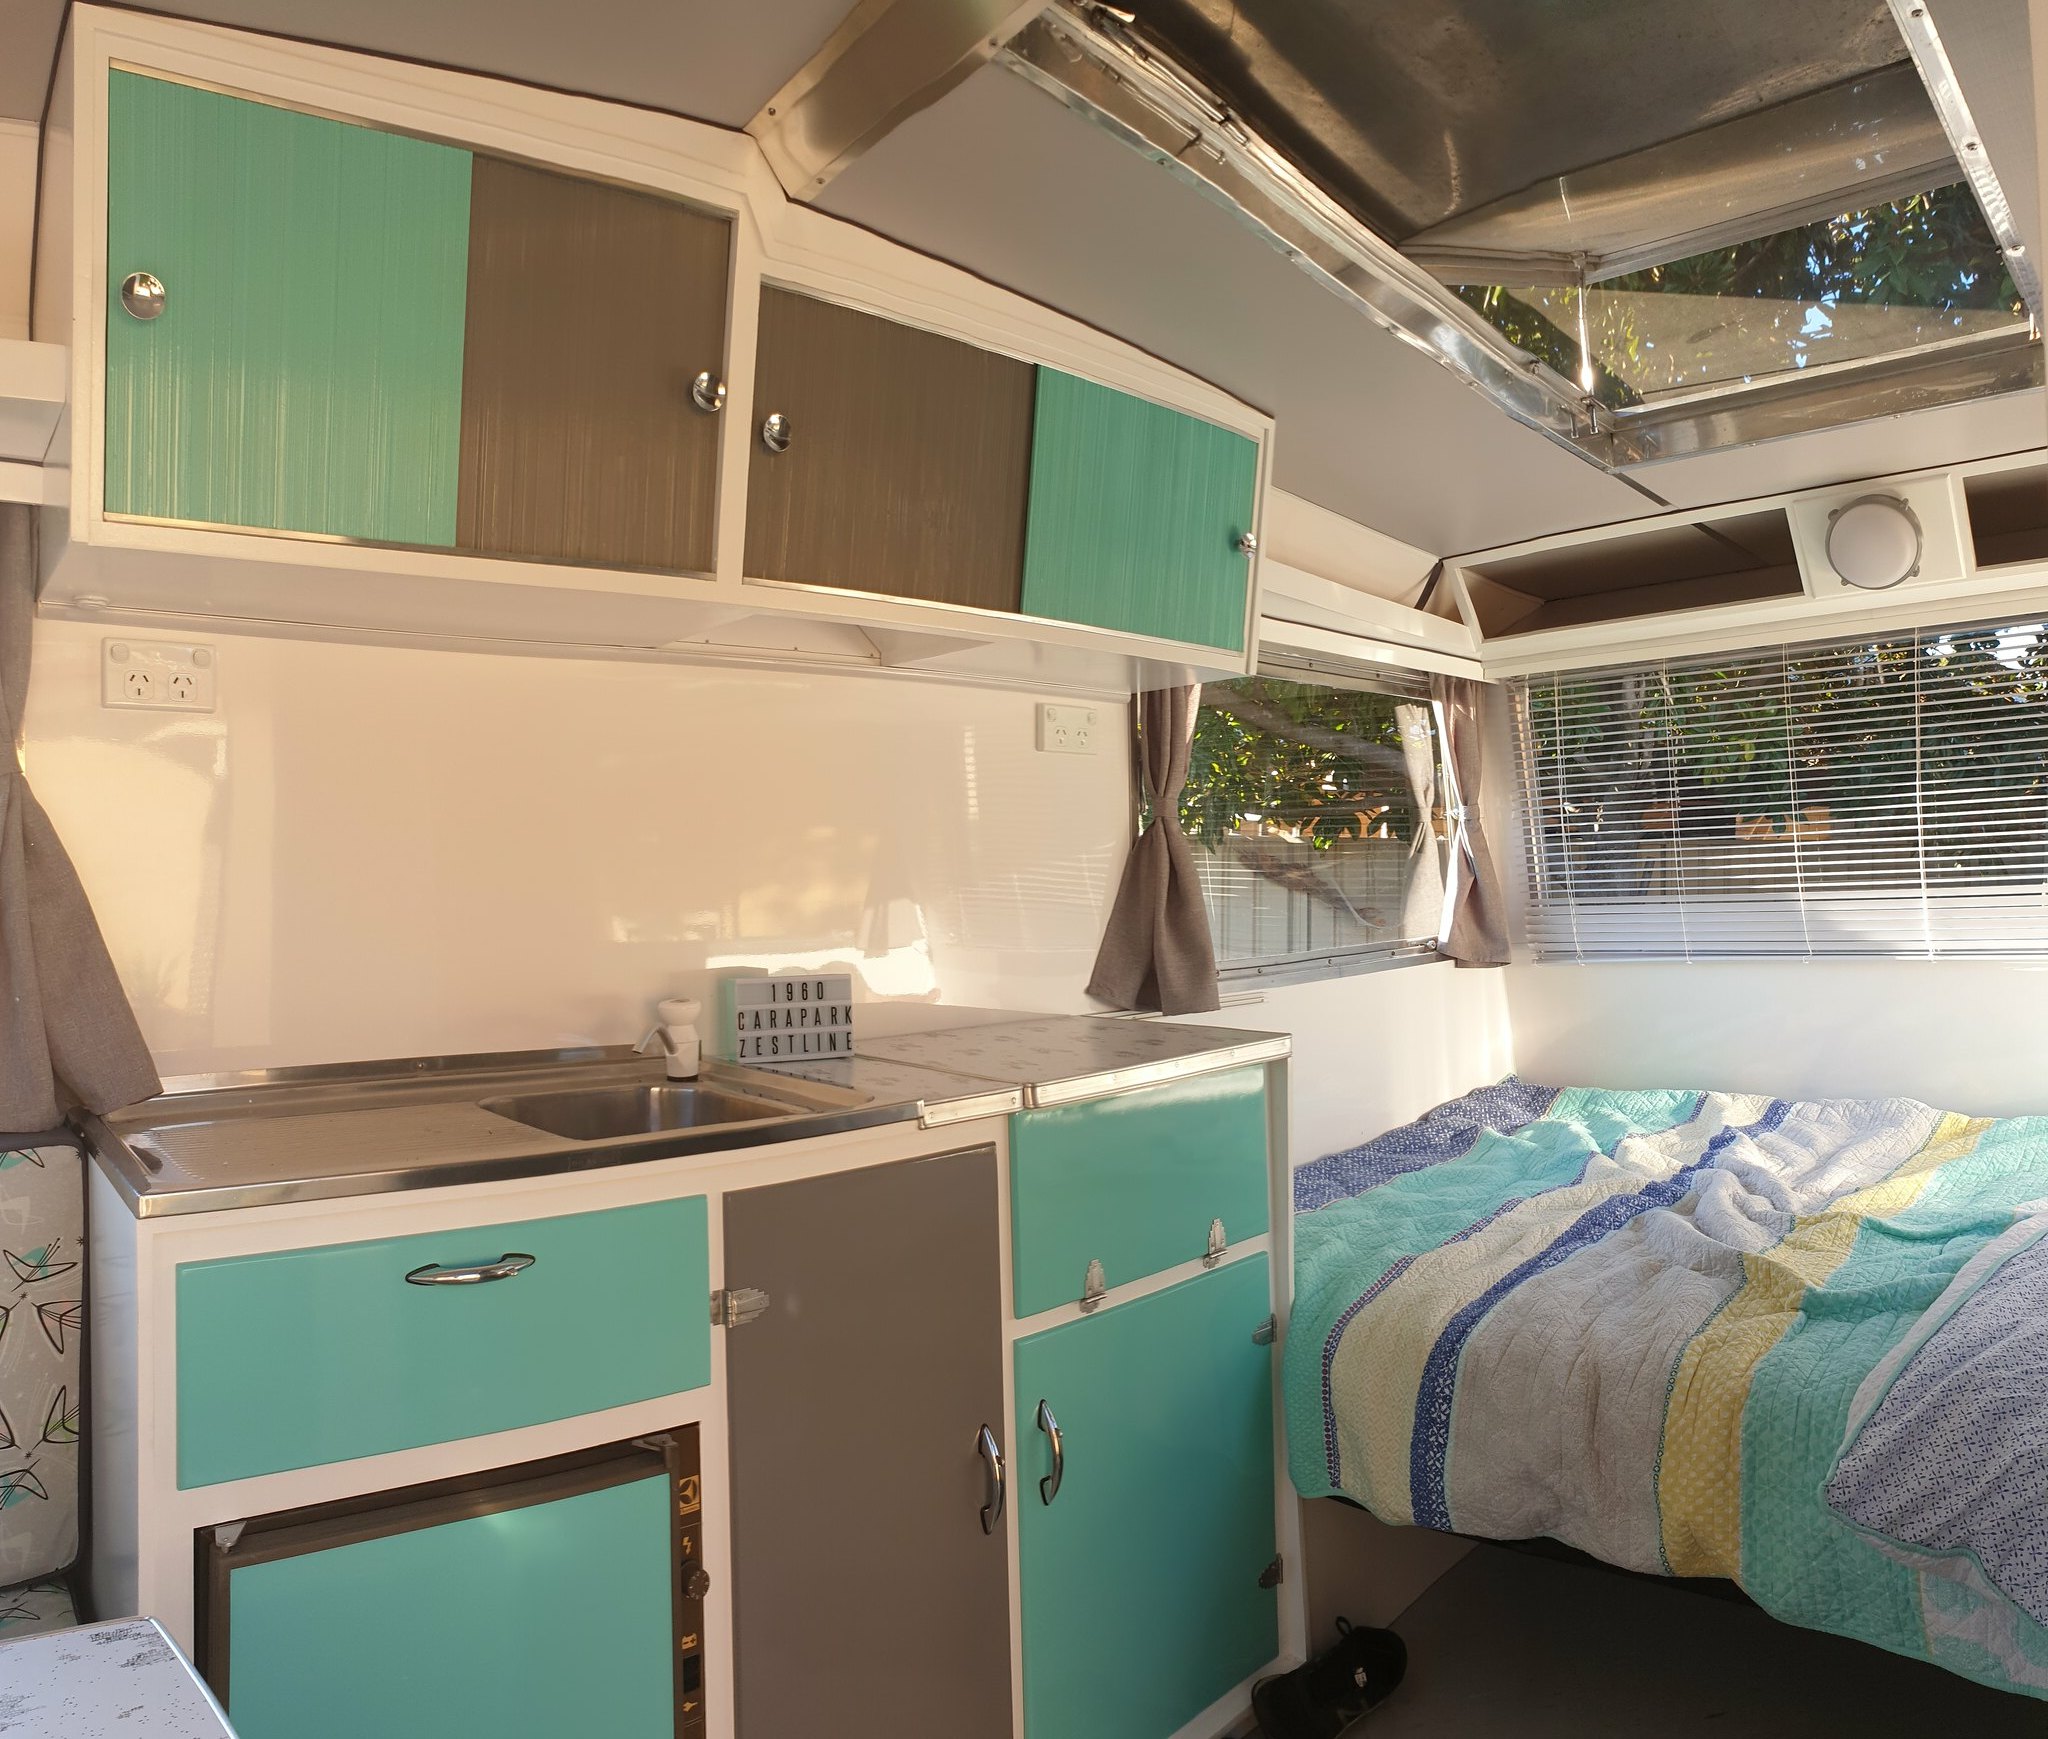
Another month done and we are starting to see the finish line on our little Reno. All the cabinets, dinette and bed base are in and painted. We also decided to modify the window pelmet design a little to incorporate a shelf over the top of the windows that joins all the upper cabinets together and gives us a little more storage space. The shelves are in but the pelmets still need to be made.    All the cupboard doors are primed but I still need to make a final decision on What colour to paint them (nothing like leaving it to the last minute) I spent a day in the sewing room and as a result we have dinette cushions too!  I also found the perfect exterior light for the van, it was LED but it wasn’t 12v so super clever husband to rescue and it now it not only runs of 12v it also has a switch on the body too!  We we are hoping that we can try for rego next week so focus is turning to what needs to be done for that and what can wait until after. Of the things that need to be done the tail and clearance lights are on, and the new hitch is on its way. The husband spent the weekend on the windows. the side windows are in and front and rear are not too far off.    A few more things left before rego but we might just make our weekend in July. |
|
|
|
Post by Franklin1 on Jun 17, 2019 22:06:42 GMT 10
G'day jp63, Congratulations on some very impressive work there! 
It sure has come up quite nicely, with very professional results. Well done!! 
I fitted those dogbone tail lights to a light board across the back of my van, just over two years ago, and they still look as good as new...no fading of the colours in the lens, and no blown diodes yet.
Keep up the good work!
cheers, Al.
|
|
|
|
Post by grandad on Jun 18, 2019 9:48:41 GMT 10
Another month done and we are starting to see the finish line on our little Reno. I'm curious to see what you might consider a large reno.  Top job. Both you and hubby should be very proud. Jim |
|
|
|
Post by Mustang on Jun 21, 2019 18:54:16 GMT 10
Wonderful efforts from both of you, good luck with the deadline.
|
|
|
|
Post by jp63 on Jul 1, 2019 9:37:22 GMT 10
I'm curious to see what you might consider a large reno. Haha, maybe a larger van  that’s how it works doesn’t it. Little van = little Reno and. Big van = big Reno  (if only) |
|
|
|
Post by jp63 on Jul 1, 2019 10:23:09 GMT 10
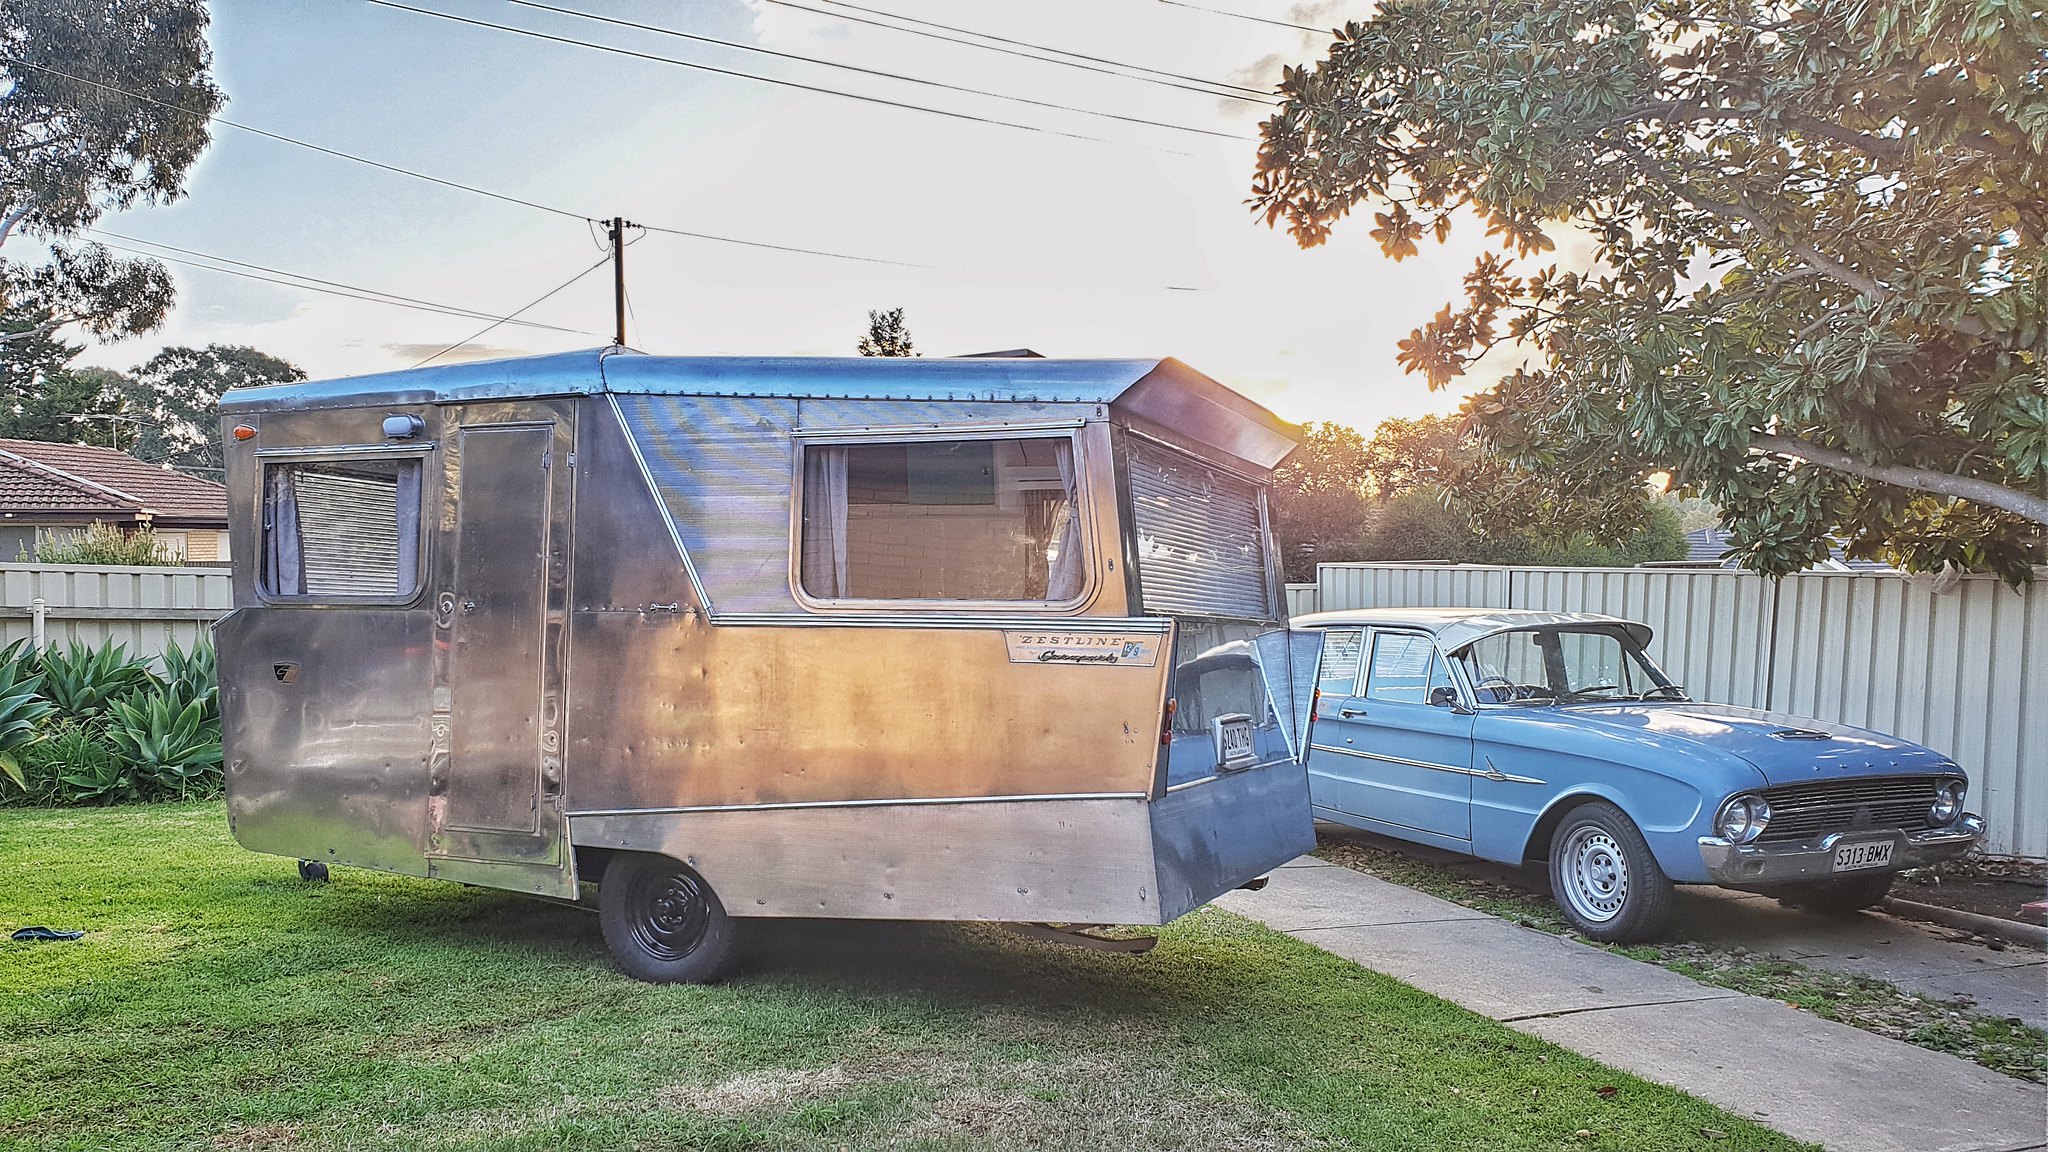
What a busy week we have had on this little van. The husband has some annual leave up his sleeve so he took the week off to get stuck in to the van. And what a difference a week makes. The start of of the week was spent getting ready for rego, the hitch went on and the hatch plus the last of the windows went in and after a bit of a tidy up we where on our way to get her inspected. But not before a quick weigh in. Which saw her come away with a total weight of 860kgs (including an allowance for the things like cupboard doors, mattress and table that where not in the van when we got it weighed) 
next stop was motor reg for a quick identity inspection, and before we knew it she had a shiny new number plate and 3 months rego.  With the registration sorted it was full steam ahead on getting stuff done. Next stop, was the paint shop to get paint for the doors. I have had colours picked out for months, then the husband decides since we where not happy with the ply we used for the doors (it was very grainy and not very well finished) he wants to spray the doors in automotive acrylic for a better finish instead of using a roller and your standard Enamel paint... luckily (for him  ) we where able to find automotive colours that were similar and the paint shop did an amazing job or making them match my paint chips.   I must admit though, now that they are painted and in they came up much better than I thought they could and the colours are pretty close to what I wanted too The pelmets and blinds have also gone in along with the table and all the 12v lighting.    I’ll pick up the 240v lights and the mattress as well as hang the curtains later in the week. the slide out bench for over the cook top is currently under construction and should go in this week too. We have decided not to worry about the cook top itself just yet, But that will more than likely go in after our trip away in a couple of weeks. We also need to figure out something for the fridge door too, the cream colour just doesn’t fit in so we will either paint it or cover it in the same fabric that’s on the cushions, it just depends on how much effort is needed to take it apart.. Then a quick polish and that will be it! I can’t wait! |
|
|
|
Post by tooleyau on Jul 1, 2019 20:26:43 GMT 10
Quick question if I may. You said that the paint was automotive, which the photos show a nice job so the question is, - what preparation to the timber was done before the final coat. Did you painter use primer under the colour coat, or is it colour only.
Thanks
Michael.
|
|
|
|
Post by jp63 on Jul 1, 2019 20:33:21 GMT 10
Quick question if I may. You said that the paint was automotive, which the photos show a nice job so the question is, - what preparation to the timber was done before the final coat. Did you painter use primer under the colour coat, or is it colour only. Thanks Michael. no worries at all. underneath the colour coat there is about 3 coats of filler primer with lots of sanding in between. Lots of work, but well worth the effort. |
|
|
|
Post by Mustang on Jul 2, 2019 10:51:31 GMT 10
With the fridge, usually the top trim unscrews to allow a thin ply to be inserted.
Fantastic job, just love your colours, the same as our Walden. When you look at your first entry you have covered some work.
Congratulations, post some images of your trip.
Cheers
Brent
|
|
|
|
Post by jp63 on Jul 3, 2019 8:09:57 GMT 10
Cheers mustang we sure will share some photos of our weekend away. Also for the tip on the fridge door, we got it apart last night and have given it a coat of paint to match the rest of the cupboards.
|
|
|
|
Post by jp63 on Jul 17, 2019 11:30:12 GMT 10
|
|
|
|
Post by jp63 on Oct 9, 2019 15:29:03 GMT 10
It’s been a couple months since our first trip away in the van and we are starting to get through the to do list. The first thing on the list was to make an awning for the van. I used some of the of canvas we picked up from a local salvage yard earlier in the reno. We decided to use a pull up style fastener to attach it to the van. We looked at a few options but these seem to be the best choice.   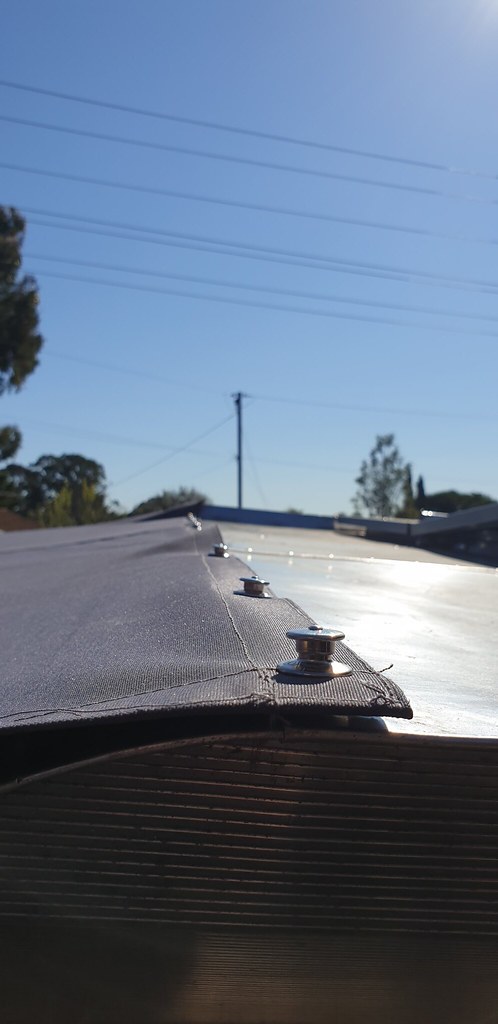 Another job on the list was the tail lights. Like most Zestline, ours was missing the plastic tail light covers when we got it, so the husband has also been trying his hand at a bit of DIY vacuum forming to make a set of his own. He has mainly used photos he has found online and measurements of of the fins on our van to make the moulds, This one is only a Quick test to see if it’s going to work, but the results are promising. Now to order some 3mm plastic to make them for real.    Other jobs being done include finishing of the gas and installing the rear overhead doors that we picked up when we where in Mildura. |
|
|
|
Post by shesgotthelook on Oct 9, 2019 20:33:36 GMT 10
Amazing job & you are very clever to make those tail light moulds. Re your ' corrugated' cupboards, I have the same in my 1958 Globe & there are also some in an early Scenic bondwood that is agisted at our place.
|
|
|
|
Post by jp63 on Oct 10, 2019 21:04:32 GMT 10
Cheers SGTL the cleverness is all the husband I must say (don't tell him I said that though ) That's interesting about the doors, they where originally out of a zestline that was a bit later than ours so its nice to hear that the style was used in vans of a similar age if not older than ours too. |
|
|
|
Post by jp63 on Jan 4, 2020 13:34:34 GMT 10
For prosterity, I thought I’d share the finished product of the tail light covers the husband made.  He made his own vacuum former using a couple of bar heaters and a home made vacuum box. The moulds for the covers he made out of MDF.  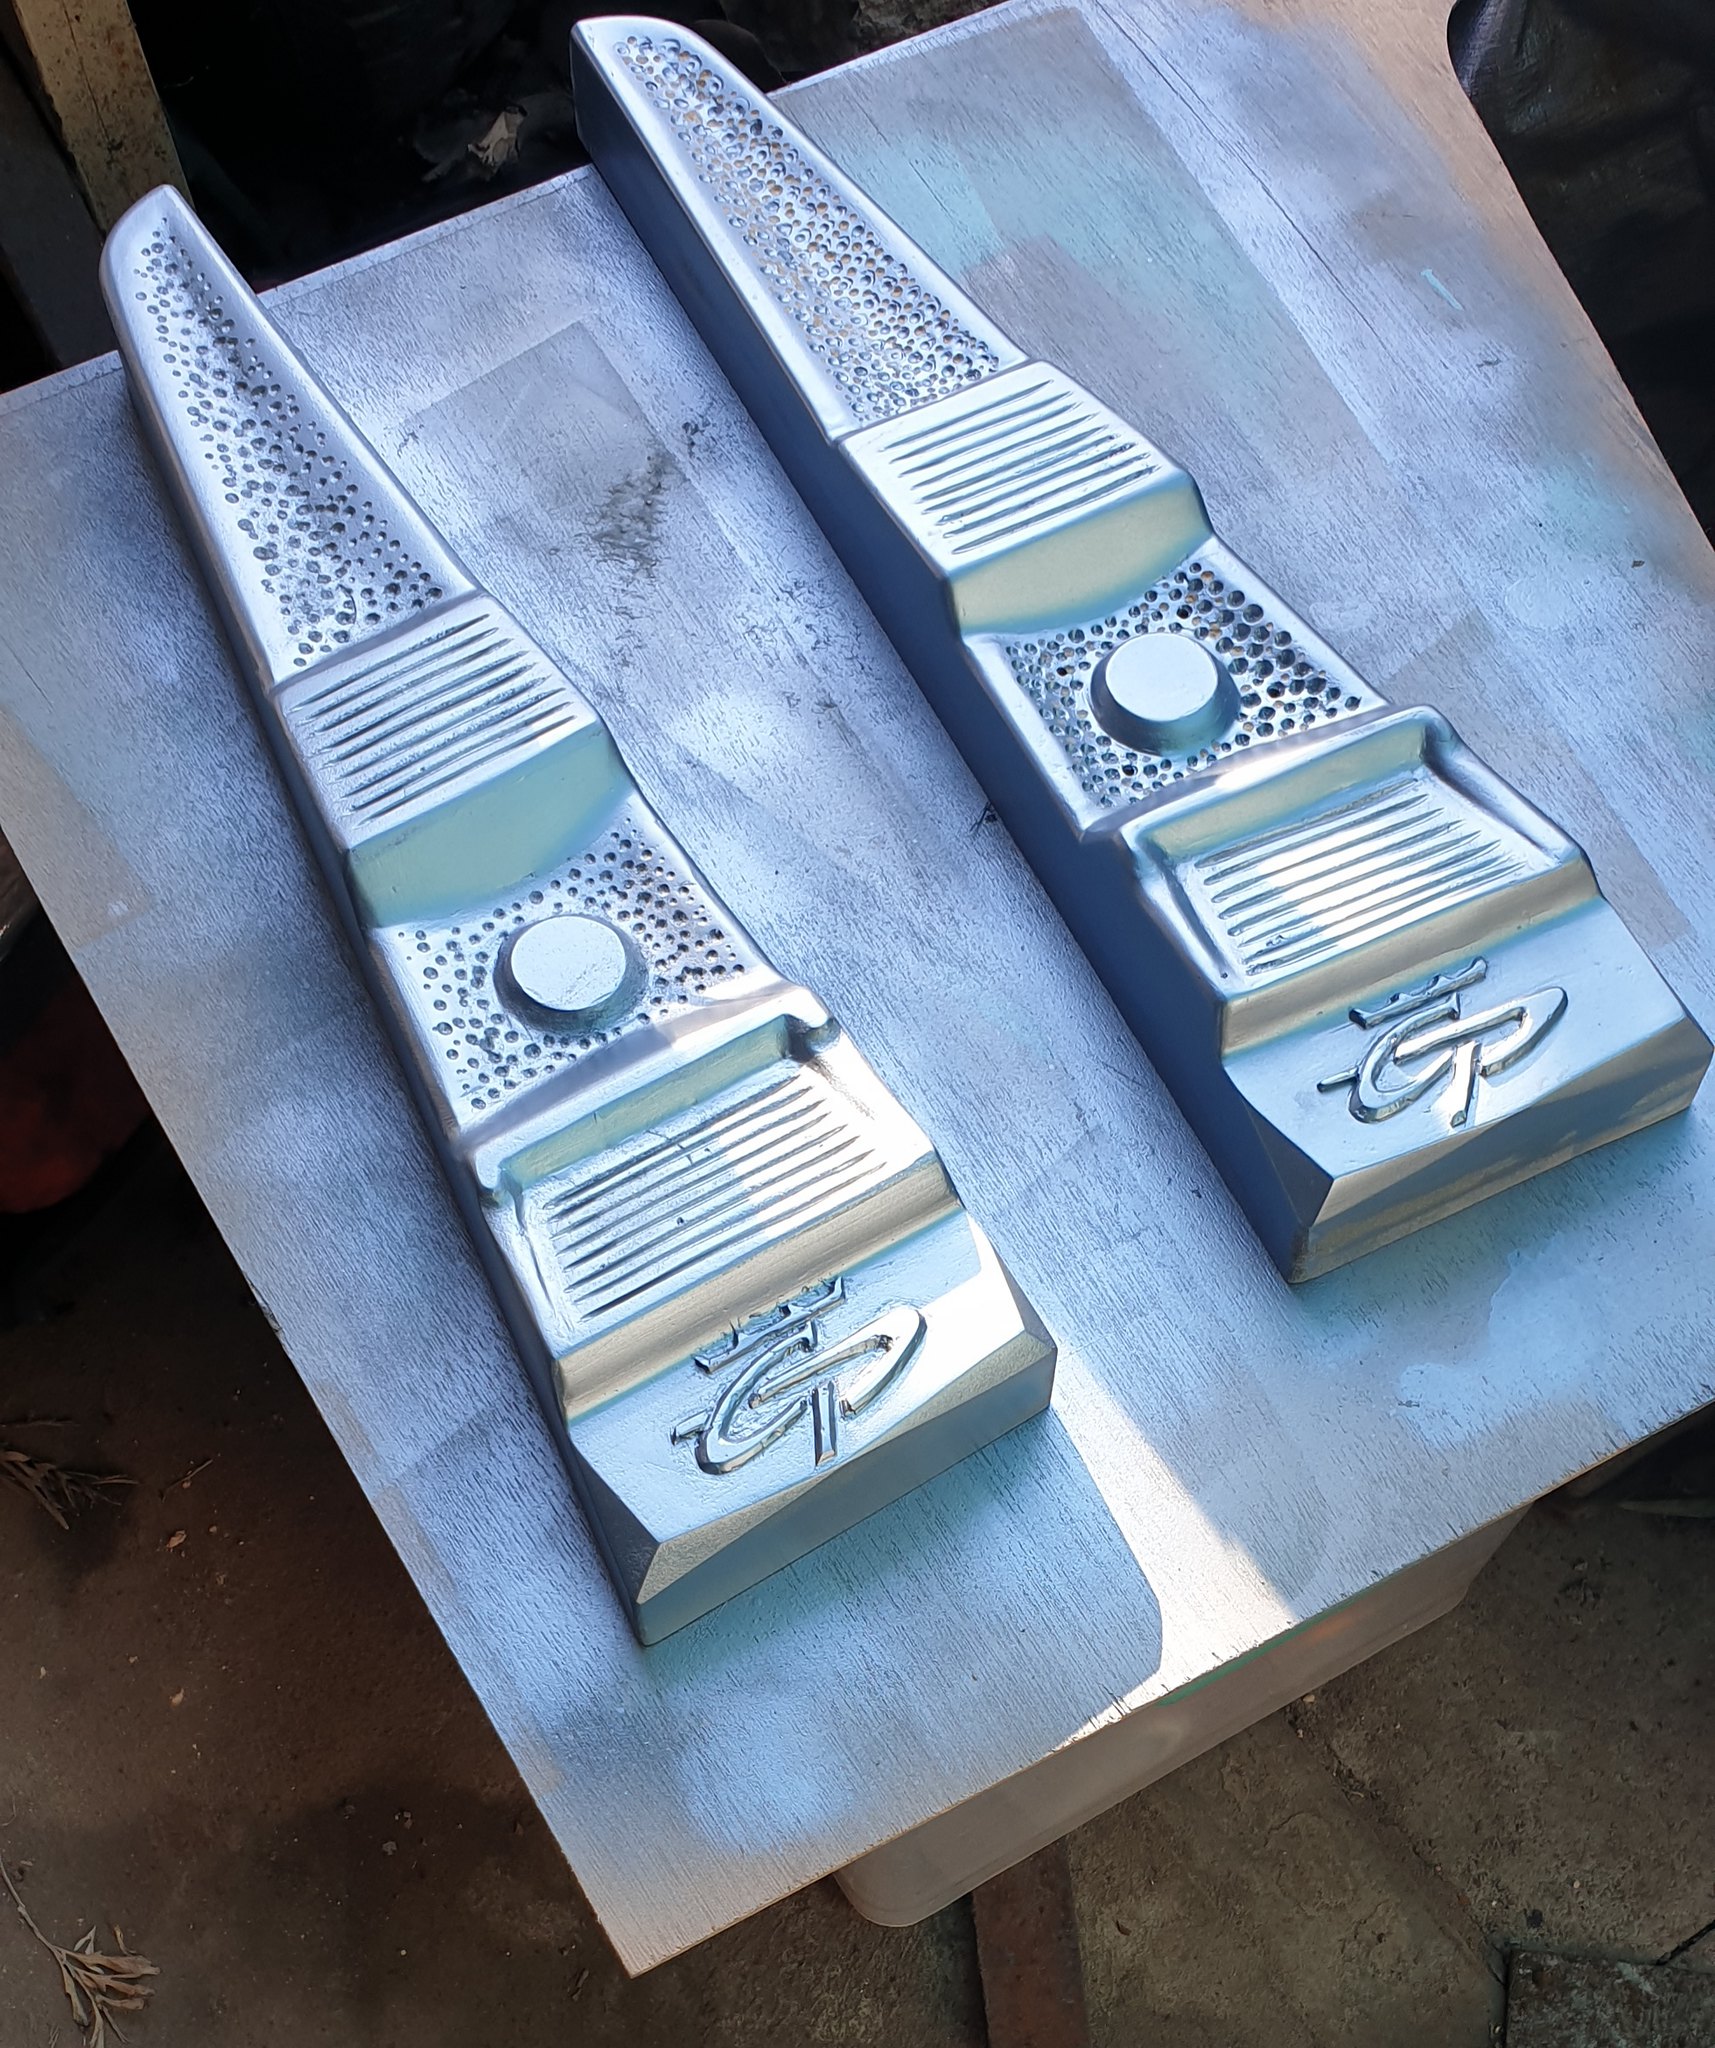 All in all, they came out pretty well and finish the van off nicely, don’t you think? 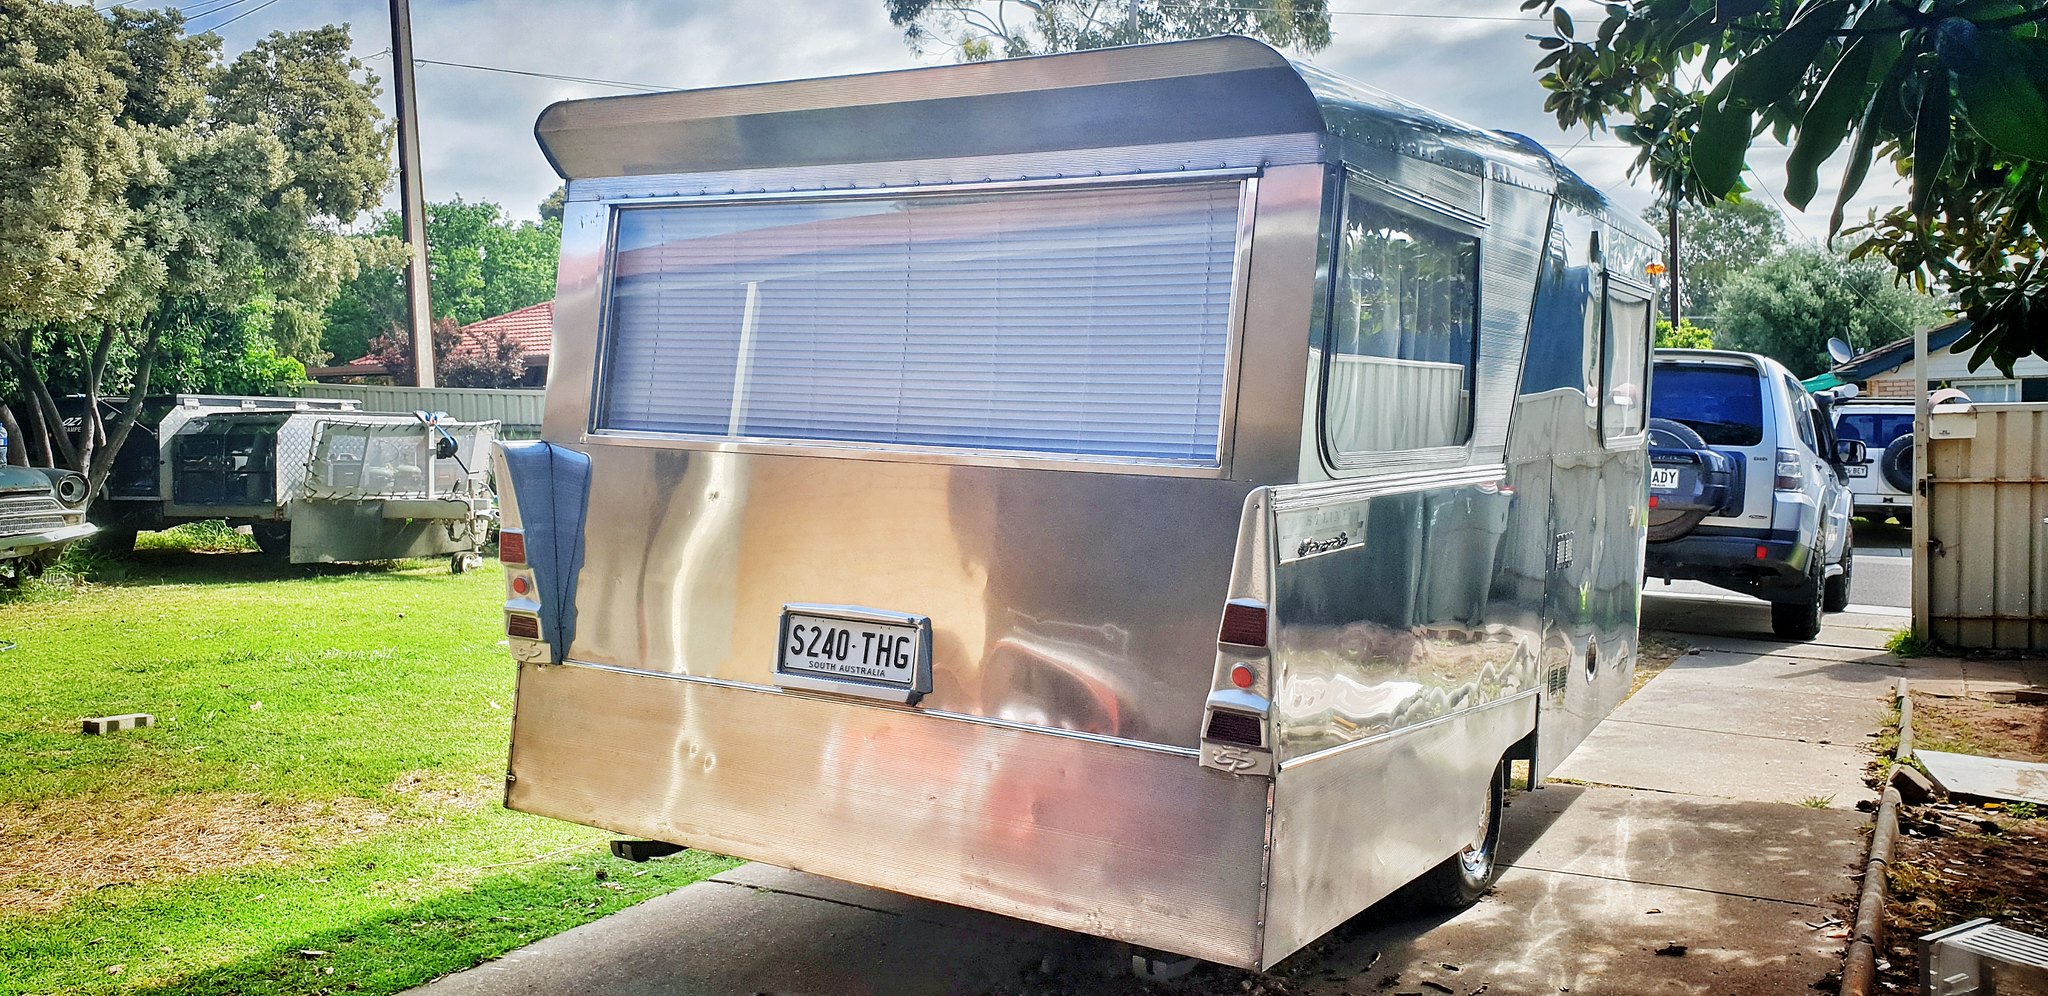 |
|
johno
New Member

Posts: 47
|
Post by johno on Jan 15, 2020 7:06:52 GMT 10
Hi wear did you find your window rubbers I have a 60 Zestline thanks
|
|
|
|
Post by jp63 on Jan 16, 2020 7:26:15 GMT 10
Hi wear did you find your window rubbers I have a 60 Zestline thanks Oh its so nice to see more Zestlines popping up. For the glass we used a normal glazing wedge style rubber thats available from places like Clark rubber etc. But, the outer rubber that seals against the body when the windows closed we just couldn't find anywhere so we have used a P shaped draft seal in its place which has been working well so far. I hope that helps. |
|
johno
New Member
Posts: 47
|
Post by johno on Jan 17, 2020 6:04:04 GMT 10
Hi thanks for your help do you Howe meney zestliner wore made thank you
|
|
|
|
Post by jp63 on Jan 17, 2020 21:12:05 GMT 10
as far I know as they where only in production between approx 1960-1962 then they where superseded by the Astronaut.
as for total number built, who knows?
Ours is a 1960 build and According to the chassis number ours is number 26, we know of another also built in 1960 with a chassis number suggesting it was around the 800th built (but we don't know if those numbers are specific to just zestlines built, or if it's total carapark caravans built in that year)
Unfortunately, like with many vintage vans, there is a lot of unknown about them.
|
|
johno
New Member
Posts: 47
|
Post by johno on Jan 18, 2020 15:33:55 GMT 10
Thanks
|
|
johno
New Member
Posts: 47
|
Post by johno on Jan 23, 2020 17:16:31 GMT 10
Hi I found my zestliner number 60Z19
|
|
|
|
Post by jp63 on Jan 23, 2020 18:08:57 GMT 10
that's great! So yours is also a 1960 build and is a close relative to ours, It would be great to see some pictures of yours to see how they compare.
|
|
johno
New Member
Posts: 47
|
Post by johno on Jan 24, 2020 7:17:40 GMT 10
Hi can’t post photos there to big I can email them or phone Judy.john.hill@gmail.com. or 0417729071
|
|


 (if only)
  ) we where able to find automotive colours that were similar and the paint shop did an amazing job or making them match my paint chips.