|
|
Post by kerri on Jul 9, 2017 11:35:02 GMT 10
Hi bohodreamerA wardrobe is small compared to what others have done. I might try paint stripper with thr hairdryer. Its cold now in Canberra. We are doing ply all the way. Kerri |
|
|
|
Post by kerri on Jul 9, 2017 16:24:08 GMT 10
Ok, I have been blessed by the universe and always go by the motto: If you don't ask, you don't receive. I asked a tradie (who happens to be the boss) on a construction site to supply me with insulation offcuts. They just throw them out. OMG! At least two cases of beer coming up. Anyway. I have been blessed with this product: www.knaufinsulation.com.au/content/earthwool-internal-wall-acoustic-batts#tab_1 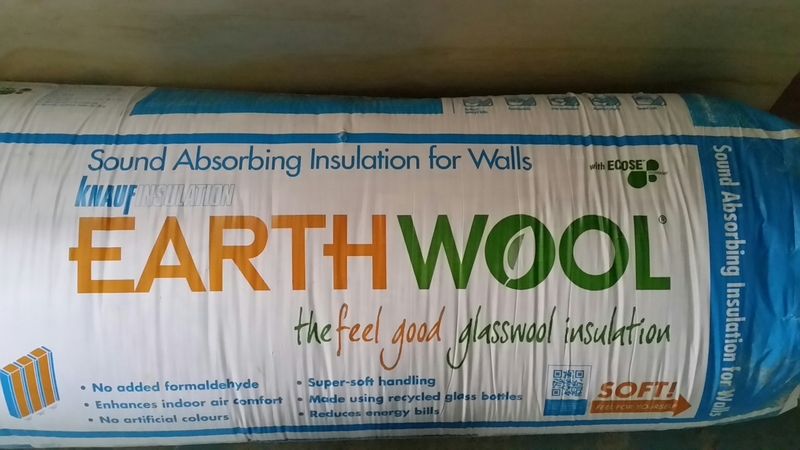 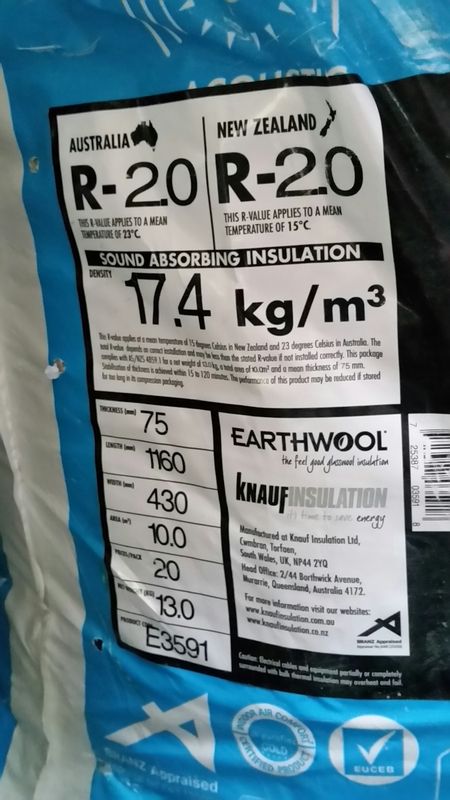 and this product: higginsinsulation.com.au/home-insulation/roof-insulation/100mm-r2-3-fiberglass-roof-blanket-heavy-duty-foil-faced.html - Not sure if it is from Higgins, but bloody great stuff.  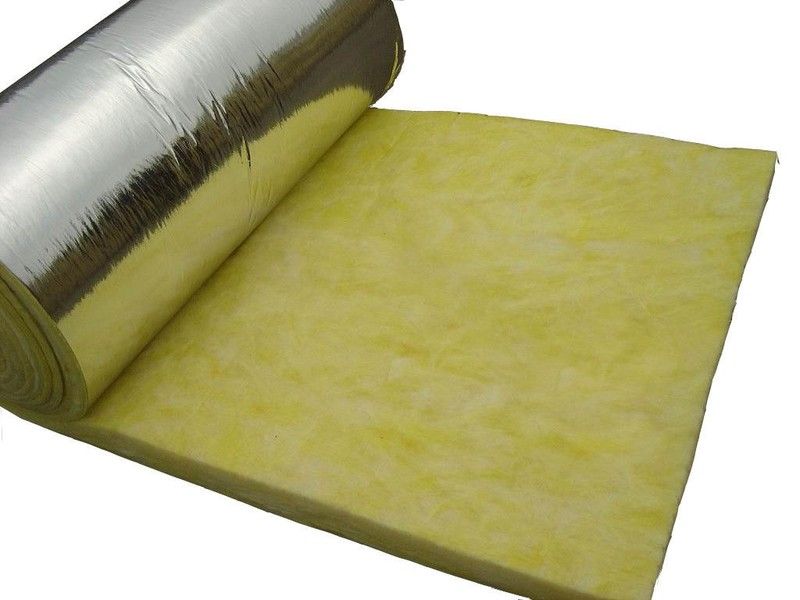 and don't forget sarking. I have rolls of it. I have both blue and green rolls. Not sure on the difference yet. I will ask next week. The question is 1. Do I use only the earthwool for both walls and ceiling as it is acoustic or 2. use the earthwool on the walls and the higgins on the ceiling. Any other suggestions would be great. I will have excess if anyone wants it. I really don't mind, both are going to be warm, fireproof but the benefit of acoustic helps. The problem with all this insulation is that I had to buy a shed. 3m x 3m on Gumtree for $50. Bargain. 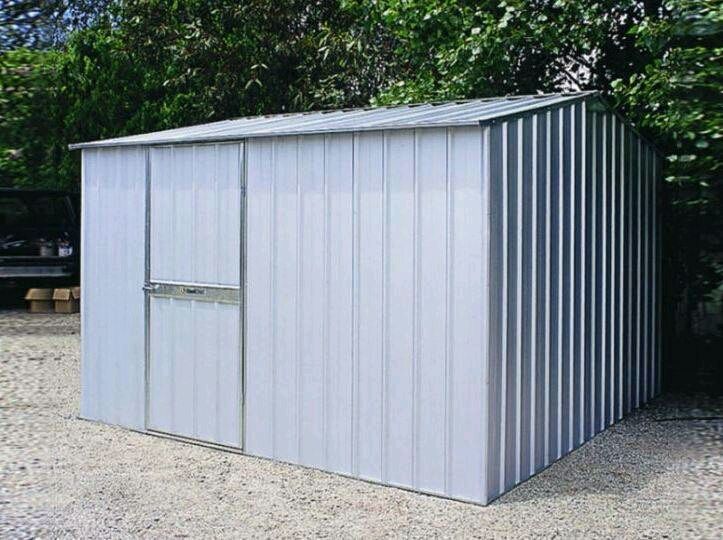 |
|
|
|
Post by kerri on Jul 12, 2017 20:47:50 GMT 10
Is it hard to fix one element out of four, in an electric oven? One element does not seem to be working.
Thoughts??
|
|
|
|
Post by Franklin1 on Jul 12, 2017 22:21:35 GMT 10
G'day kerri,
It's not all that difficult to fix the element if you are fairly familiar with how the stove works, and have a high level of confidence when tinkering with these sorts of appliances. First you have to establish whether it's the element that is 'cactus', or whether it's the wiring that's the problem. If the stove is really old, the wiring is likely to be the old-style rubberised coating stuff, which breaks down over the years (ie. perishes), and can short out easily.
So you would have to check the wiring thoroughly to make sure it is still in servicable condition. If there's any doubt about anything inside the stove, I would recommend you tie a rope around the appliance, and donate it to the local fishing club for use as a boat anchor. If you try to pit yourself against faulty electrical equipment, I can guarantee you will be the loser.
cheers,
Al.
|
|
|
|
Post by kerri on Jul 13, 2017 9:34:02 GMT 10
G'day kerri, It's not all that difficult to fix the element if you are fairly familiar with how the stove works, and have a high level of confidence when tinkering with these sorts of appliances. First you have to establish whether it's the element that is 'cactus', or whether it's the wiring that's the problem. If the stove is really old, the wiring is likely to be the old-style rubberised coating stuff, which breaks down over the years (ie. perishes), and can short out easily. So you would have to check the wiring thoroughly to make sure it is still in servicable condition. If there's any doubt about anything inside the stove, I would recommend you tie a rope around the appliance, and donate it to the local fishing club for use as a boat anchor. If you try to pit yourself against faulty electrical equipment, I can guarantee you will be the loser. cheers, Al. Hi @franklin1 Thanks for the info. If I can rewire a car stereo, I can tinker... I will get more details about the oven. I might have to get that rope. Here is a photo of the oven. I was going to paint it red. 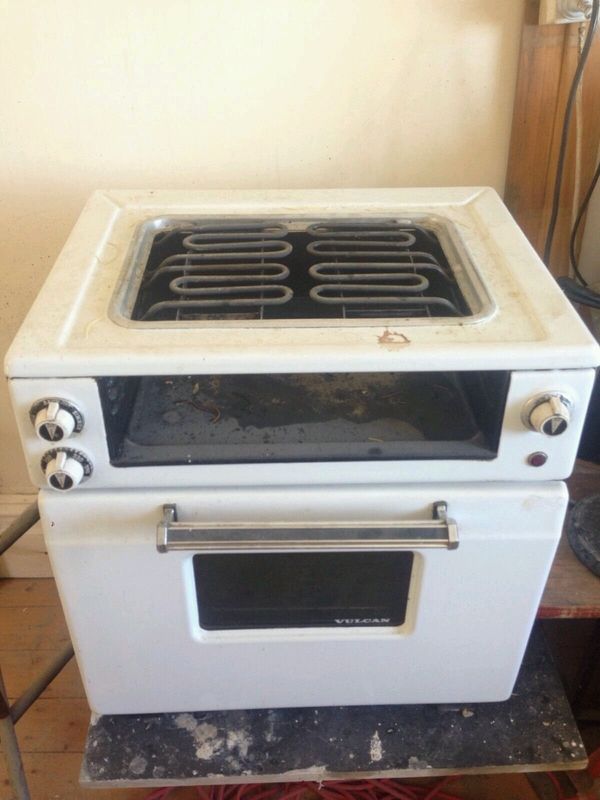 |
|
|
|
Post by kerri on Jul 14, 2017 18:38:36 GMT 10
OMG! I appreciate the love and peace during the 1960's/70's, but what were they thinking when they made lino. No offence to all you lovely, legend and historic vintage caravan owners, but I went into a flooring shop today where they had the polyfloor colours and textures and my body just shivered at the thought of putting that in my van. It may work for some, but after some serious, time warp discussion with hubby, we will be going black/white squares, unless we find the right colour to match cream and blue. Now, I'm not saying 'no' to the historic vinyl but I will revisit it later after the van is painted. So forget this post until then. I just had an experience of the late 60's from a floor perspective and it took me way out of my era. OMG! I guess Im just too young...  |
|
|
|
Post by kerri on Jul 19, 2017 20:16:48 GMT 10
So, last weekend I was blessed with meeting the lovely @koala and tooleyau and both their lovely wives. We talked, talked and talked, well mostly me asking a million questions and them trying to explain everything from gas cookers to the axle and brakes. I can speak for myself and am so grateful for this interaction after only seeing caravans online. I needed to touch a real one... I also slept well as all this new information in my brain was way too much for an old girl like me, but decisions were made from roof to floor and wall to wall for my caravan. Thank you so much for this. Kerri |
|
|
|
Post by kerri on Jul 24, 2017 18:34:54 GMT 10
Ok, officially I am over trying to build a caravan in 10 degrees and a wind chill of minus 50. OMG! I will now do inside work like the windows and sanding. It's just too cold. Winter will be over in about 5 weeks.  |
|
|
|
Post by kerri on Sept 2, 2017 19:33:46 GMT 10
Guess what, WINTER IS OVER!!!!!! YAY!!!
I pulled the cover off the caravan today. Felt so good. I am going to get as much done as possible in the next two months.
I have nearly everything I need. Just need to get busy every weekend and after school, especially the next month as I have more time on my hands.
Look out Nationals 2018. She'll be ready by Christmas. Maybe a trip to Adelaide to see my folks. Wish me luck.
Kerri
|
|
|
|
Post by kerri on Sept 3, 2017 10:56:56 GMT 10
Hi, Does anyone know where I can get cheaper swing latches for the windows? The pictures are the original. Kerri Attachment Deleted |
|
|
|
Post by Koala on Sept 3, 2017 13:46:33 GMT 10
|
|
|
|
Post by Koala on Sept 3, 2017 13:50:47 GMT 10
|
|
|
|
Post by kerri on Sept 3, 2017 14:55:38 GMT 10
Hi.
Thank you. I did see these. I need 14 of them if I am to replace them all. That's $172.
I might try and clean them up and only buy what I need.
Kerri
|
|
|
|
Post by shesgotthelook on Sept 3, 2017 15:37:33 GMT 10
|
|
|
|
Post by kerri on Sept 3, 2017 18:27:30 GMT 10
|
|
|
|
Post by kerri on Sept 10, 2017 9:35:19 GMT 10
Ok, the sun is out, the birds are chirping and I even got a tan line, it was that bright in Canberra yesterday. Yay, the cold is over. So, My mission was to pull another wall down to start rebuilding it over the next week. Yes, that's right. After school every day until it is done. The great wall of 1963... Anyway, here are the pics for your pleasure. 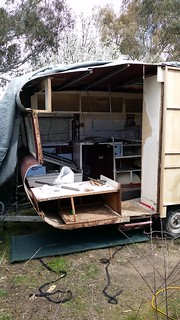 20170909_142347 20170909_142347 by Kerri Insley, on Flickr 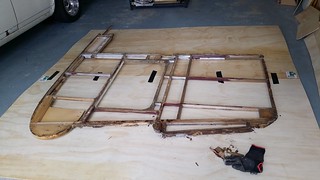 20170909_141207 20170909_141207 by Kerri Insley, on Flickr 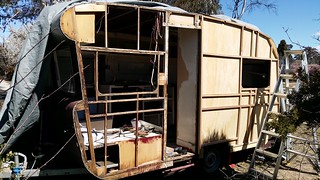 20170909_122858 20170909_122858 by Kerri Insley, on Flickr The grime: 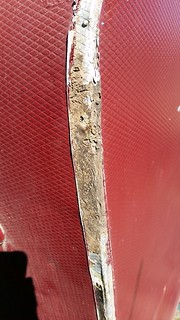 20170909_100227 20170909_100227 by Kerri Insley, on Flickr 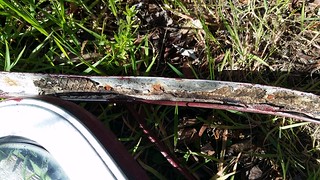 20170909_100248 20170909_100248 by Kerri Insley, on Flickr |
|
|
|
Post by Mustang on Sept 11, 2017 7:18:46 GMT 10
The grime is only mastic, it will come away easily, at least its not the dreaded "silly cone"
|
|
|
|
Post by kerri on Sept 12, 2017 20:14:46 GMT 10
Wow! So, I have had a lovely gentleman around from the Mens Shed to rebuild the wardrobe. We don't need to now, its pretty solid and we are just going to change around the shelving, re-centre the middle and make two doors. Old wardrobe  2017-09-12_07-03-05 2017-09-12_07-03-05 by Kerri Insley, on Flickr So, I am going to need handles. I will take photos when it's daylight and place them in the 'wanted' section. Now for the greatest news ever!!!!! We don't have to pull out the side wall of the van. He thinks it is fine, not toothpicks. We will just add new timber to each side of the existing timer and she will be sweet. That has saved me weeks of rebuilding a wall that is about 6m long and in one piece. What a big job that would have been. I was also able to purchase internal lights. I got two sets in case any break. 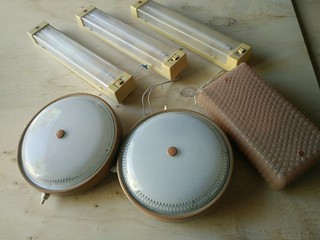 2017-09-12_07-00-17 2017-09-12_07-00-17 by Kerri Insley, on Flickr  internal-lights_36345983684_o internal-lights_36345983684_o by Kerri Insley, on Flickr The kitchen is on it's way. I got it from a chap who is converting his old caravan. It comes with a fridge but not sure if it is working. 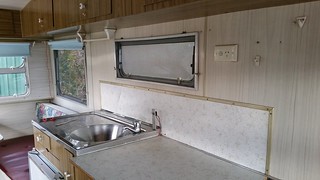 2017-09-12_07-02-23 2017-09-12_07-02-23 by Kerri Insley, on Flickr  2017-09-12_07-01-59 2017-09-12_07-01-59 by Kerri Insley, on Flickr I have a gas cooktop and oven coming. 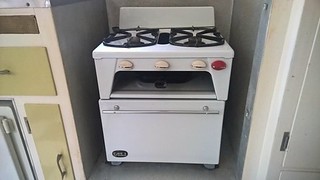 2017-09-12_07-29-36 2017-09-12_07-29-36 by Kerri Insley, on Flickr All I need to do now is build a bed. I will probably do this to make more storage. Depends on how much room from the kitchen to the wall. 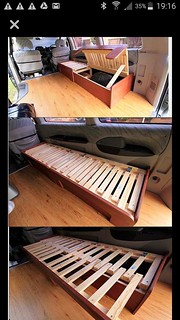 Screenshot_2017-09-12-19-16-34(1) Screenshot_2017-09-12-19-16-34(1) by Kerri Insley, on Flickr This has all happened in the last 72 hours. OMG! The van is coming along sweetly. It will be finished by Christmas. So, how am I doing vintage caravan veterans...  Kerri |
|
|
|
Post by kerri on Sept 14, 2017 21:23:04 GMT 10
So, my post above has a pic of our wardrobe (first photo of last post).
Is it me or were the drawers and doors different sizes.
I am seeing other wardrobes and they all look aligned.
Can someone please confirm with a poc, what a Viscount Valiant wardrobe looked like in 1963.
Much appreciated.
Kerri
|
|
|
|
Post by kerri on Sept 20, 2017 20:21:59 GMT 10
Ok. This was my weekend. 1. Completing the second wall and putting it up. 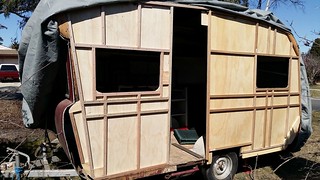 Final wall Final wall by Kerri Insley, on Flickr 2. Removing the wardrobe to get fixed. 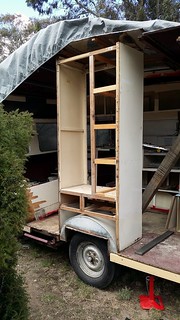 Wardrobe Wardrobe by Kerri Insley, on Flickr 3. Removing the seat to replace old timer 4. Removing the kitchen and second seat together. 5. Removed part of the floor as it was really rotted near the kitchen area. I did 90% of this by myself. My husband is still recovering from surgery. I need to keep pushing myself to get it done by Christmas. I took Monday off to do my tax and thought I would look for window rubber. I found it in Queanbeyan. Yay. It's old stock for the window company so they couldn't sell it to me. I got 20m for free. Yay. I have ordered: a. other window rubber I needed and arrived today. b. more external lights as needed and I should have them all now. c. 4x motion sensors and LED strip lights, as suggested by tooleyau vintagecaravans.proboards.com/post/130977d. I have the interior lights on their way - see above post. I have cut the timber for the floor and seats. This weekend: 1. Add the new floor 2. Straighten the long side wall so I can then adjust the new walls for completion. I love this post from @observatory vintagecaravans.proboards.com/post/111772 I will make the good side level and work on the new side. 3. Remove the windows, clean windows and add the new rubber What I have learned about the window rubber is that it is a Window Channel - Boral 3mm. Made by Boral. 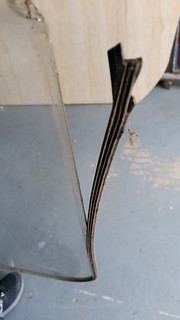 Window rubber Window rubber by Kerri Insley, on Flickr 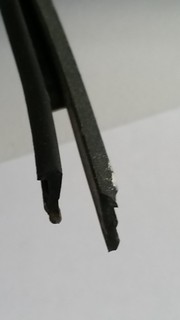 Window rubber Window rubber by Kerri Insley, on Flickr |
|
|
|
Post by kerri on Sept 20, 2017 20:29:18 GMT 10
|
|
|
|
Post by kerri on Sept 26, 2017 17:29:26 GMT 10
Just though I'd download.
The caravan has buckled because there is nothing in it and the two walls are not fully attached yet. It's hard trying to do it all by myself (Peter recovering from surgery).
I'm nearly over it although I have everything I need to put in it, I just can't get it to stand upright. I need 10 hands, not two and an extra few weeks up my sleeve.
Anyway. I will keep my head up and keep going. Just getting me a bit down as I feel the pressure.
Thanks
|
|
|
|
Post by Franklin1 on Sept 26, 2017 22:10:46 GMT 10
G'day kerri, it is very easy to "overdose" when working on these vans, so you do need to take some time out on occasions and recharge your enthusiasm batteries. You have achieved an amazing amount of work on your van so far, and it will be a real credit to you when you have finished. Try switching your train of thought to finishing the van to the standard you want, no matter how long it takes, rather than pushing yourself to meet a deadline. Go spoil yourself for a period of time, and come back to the project when your enthusiasm returns. We'll all still love ya whether you finish it this year or next year.  cheers, Al. |
|
|
|
Post by shesgotthelook on Sept 27, 2017 8:42:13 GMT 10
A similar thing happened to my sons Franklin Caravelle. Went to put the aluminium sheets back on & they wouldn't line up as the frame had sagged. Nearly gave up at that point too. We were going to tek screw & silicone it back together & stick it down the paddock somewhere. Anyway, long story short & my retired builder man jacked it all up & re aligned it. It wasn't factory perfect but it worked.  |
|
|
|
Post by Mustang on Sept 27, 2017 8:54:25 GMT 10
As Al said;
"Forget the finish date"
Once you achieve this process the rest is easier.
|
|