|
|
Post by Mustang on May 17, 2017 19:31:34 GMT 10
Now a lot safer without that ridiculous weight hanging off the back of a light van, well done.
|
|
|
|
Post by kerri on Jun 11, 2017 19:18:46 GMT 10
Hi everyone. So, after talking with two lovely guys about vintage caravans, it was suggested to design the van as an end product, working backwards to continue the project. So, I need to look at buying a fridge, gas top/stove or even an oven. I was reading a post from 'down history lane' vintagecaravans.proboards.com/post/34095/thread and I didn't see much about a specific fridge, oven or gas top. What are people putting in their Viscount vans from the 1960's? Can I buy original or is there some new fandangle retro looking fridges, ovens etc that I could get? Thanks |
|
|
|
Post by kerri on Jun 11, 2017 20:19:40 GMT 10
|
|
|
|
Post by shesgotthelook on Jun 11, 2017 21:36:42 GMT 10
The holy grail of galley pump taps. They come up on eBay from time to time but go for a lot of dollars. They can be very difficult to get working too, but there is a thread on here on how to fix them. The camec one is nothing like the vintage ones but if you want something guaranteed to work, go for it.
|
|
|
|
Post by kerri on Jun 12, 2017 8:57:11 GMT 10
|
|
|
|
Post by Mustang on Jun 12, 2017 18:27:21 GMT 10
I have the Camec chrome. After I fitted a one way valve it was difficult enough to pump so I fitted a Whale 12v pump discretely in the water line. Just $50.00 for the pump & a push button switch & it works a treat. www.caravansplus.com.au/catalog/product_info.php?products_id=5598EDIT: You need a one way valve for these Whale pumps so they do not run dry. |
|
|
|
Post by kerri on Jun 12, 2017 20:31:30 GMT 10
Hi MustangLegend. Thank you for that very important info. I will definately do that. Regarding the tap/pump, did you pay $350 for it? |
|
|
|
Post by Mustang on Jun 13, 2017 19:35:14 GMT 10
Hi Mustang Legend. Thank you for that very important info. I will definately do that. Regarding the tap/pump, did you pay $350 for it? No, I have the Camec Chrome for $46. Finished the Whale pump today, works a treat. Whale pump & one way valve, screwdriver shows size.  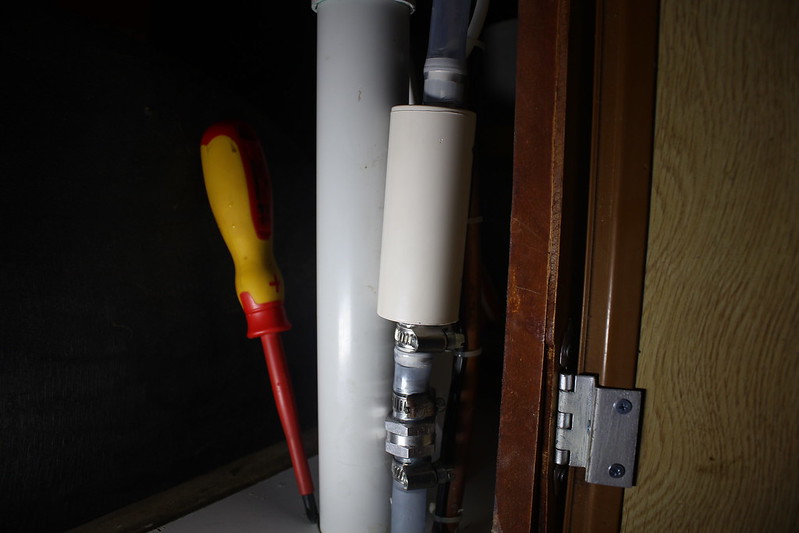 Momentary push switch, must be held on to activate pump....to save water 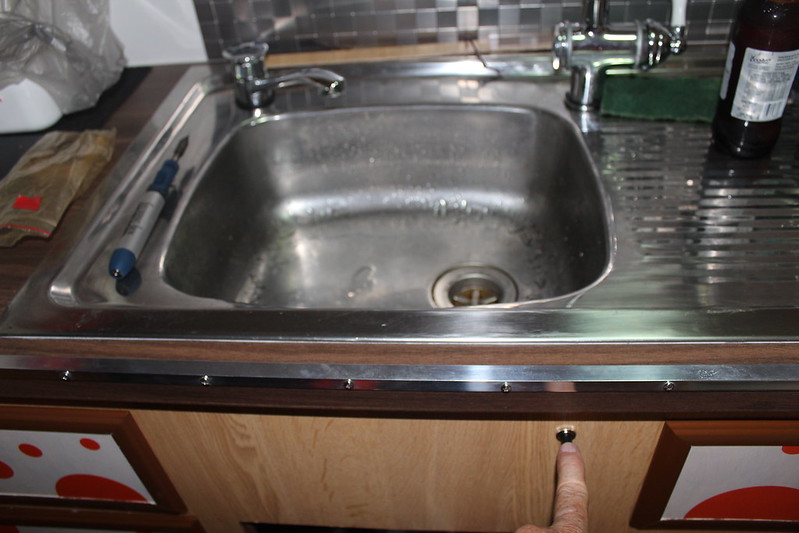 |
|
|
|
Post by kerri on Jun 14, 2017 19:25:40 GMT 10
Hi.
That was the one I was going to get. Thank you so much for the photos.
Kerri
|
|
|
|
Post by kerri on Jun 17, 2017 18:01:54 GMT 10
Hi,
I will add some amazing photos of the progress on our caravan. But for now, what are people using for the inside shell/panels? From what I am reading, people are happy with 3mm from Bunnings. Is this ok?
We have dismantled the outside aluminium.
We have a 1963 Viscount Valiant Royale. 12ft
Kerri
|
|
|
|
Post by kerri on Jun 17, 2017 19:45:37 GMT 10
Hey everyone, This is what myself and husband (Peter) did today. We pulled off the aluminium to reconstruct a new frame. Yay! I feel like I am actually doing something to the van. It wasn't that cold today and no rain. We are coming into winter and needed to play with a small section to see what we could do. I watched these videos first and really helped a lot. We can see potential problems and successes. www.youtube.com/results?search_query=vintage+shasta+camper+trailer+restoration+-+part+1So, here are some photos of the 'trashed' van we bought with the frame off. We not have it under a tarp and will do the frame tomorrow. We removed the window frame and outside bits that hold two aluminium sheets together. Not sure what they are called. 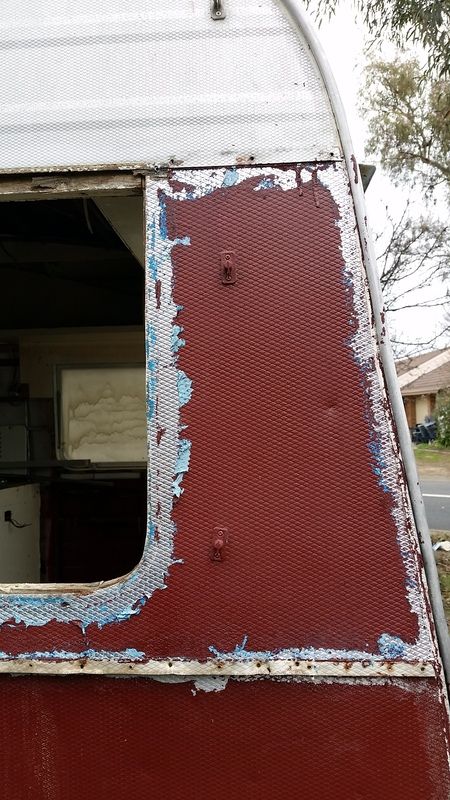
We then removed the old aluminium panelling around the door frame, after we took the door off 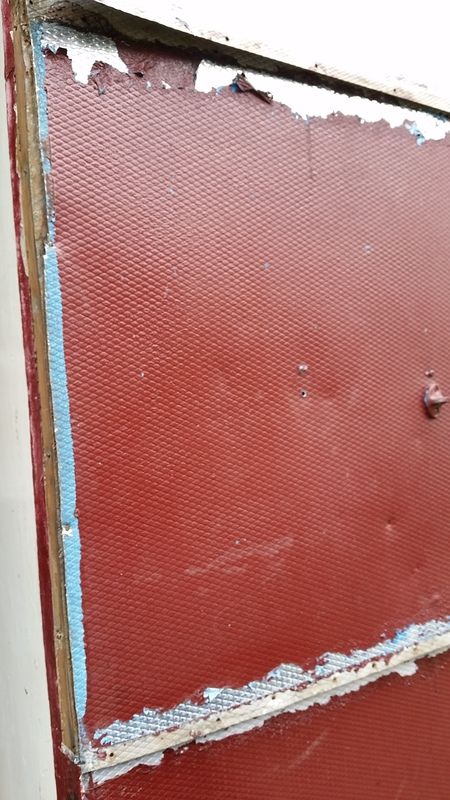 And there you have it. An old, flimsy, disintegrated, 1963 wood frame, painted mission brown...OMG!!! 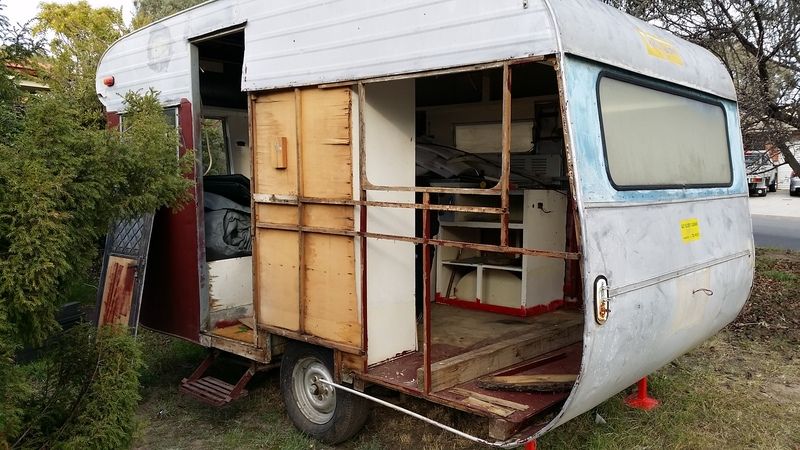 We are doing a small section at a time as we are not ready to seal the top yet. We will place the new frame directly on the inside sheeting, hence the knowledge needed for what thickness in the previous post. We will replace the board underneath the floor and door, pull out the sheeting at the back of the wardrobe and then put the window back. The big pain in the ass is the paint stripping. OMG!!! It is cold now so it won't come off that easy. I will use my hairdryer tomorrow. We will only strip the edges of the aluminium to have it ready for sealing, the body can wait. New screws,nails and the first time I will use liquid nails. Yay. |
|
|
|
Post by kerri on Jun 18, 2017 17:58:32 GMT 10
Hey everyone, Day two. What a big day that just got longer and getting colder. We shut shop about 3.30pm. All good, we did heaps. We took the top panel off and thought we might as well do the whole side from the door to the back. This took a couple of hours for my husband, notice, husband. I went to Bunnings and got the sheeting. So, we placed all the old frame to use as a template on the ground and place the aluminium sheeting next to it, for some crazy reason. 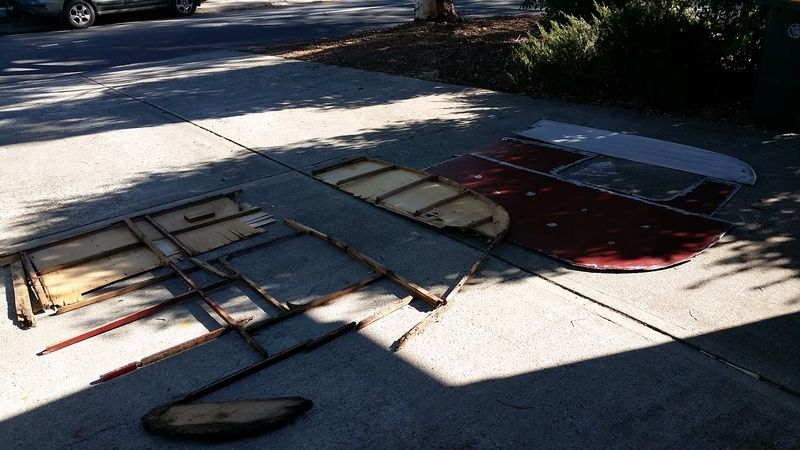 We then laid the ply down (3mm), taped it together, we only needed 2 sheets for this side. So easy! Seriously, we were just following the videos we watched. We drew around the caravan to get the correct size and took everything into consideration, where everything was. We did our 10,000 steps today walking back and forth from caravan to garage. 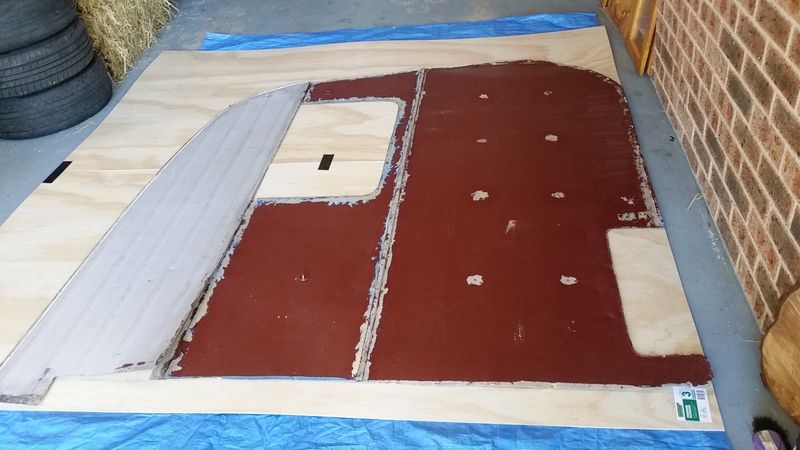 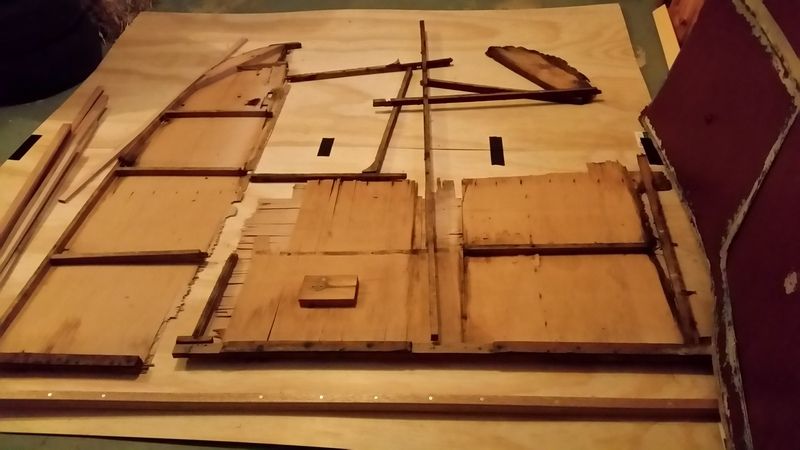 After all this we ended up with new timber around the wheel arch, one side frame of the van which is the door edge and a piece of timber under the floor where it attaches to the chassi. 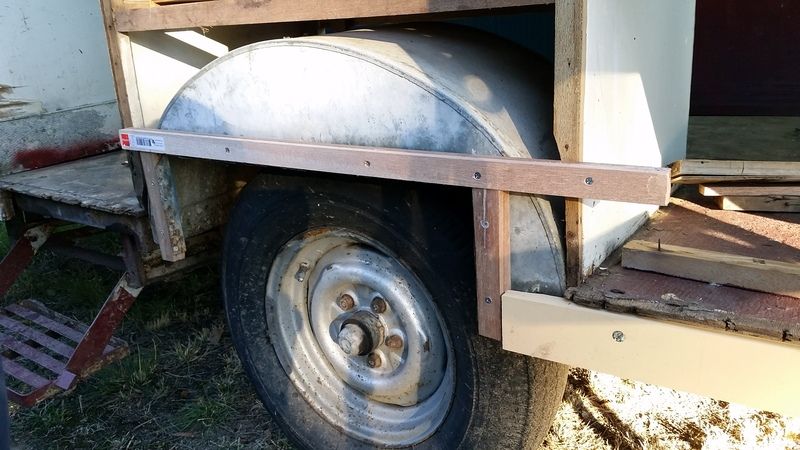 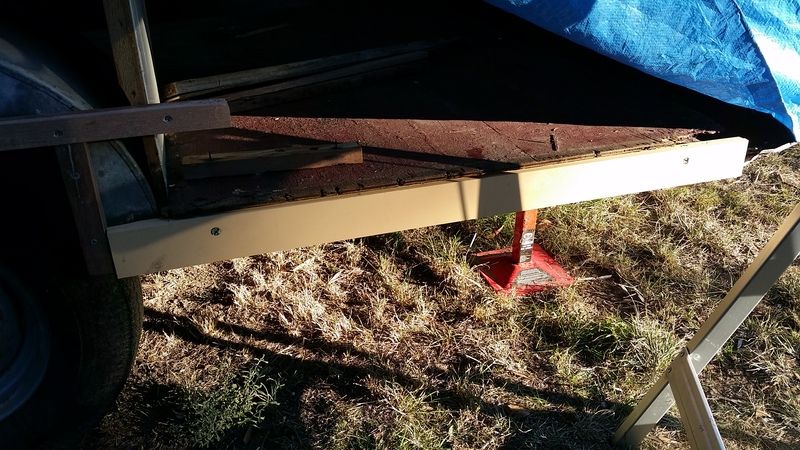 No, before you tell me I have done something wrong, we did. We attached the wheel arch frame to the caravan but forgot it needed the inside sheet, so we will take it off and do the right thing. Silly us. Just a heads up. We removed a million of nails from the van from 1963 and years following. See photo. 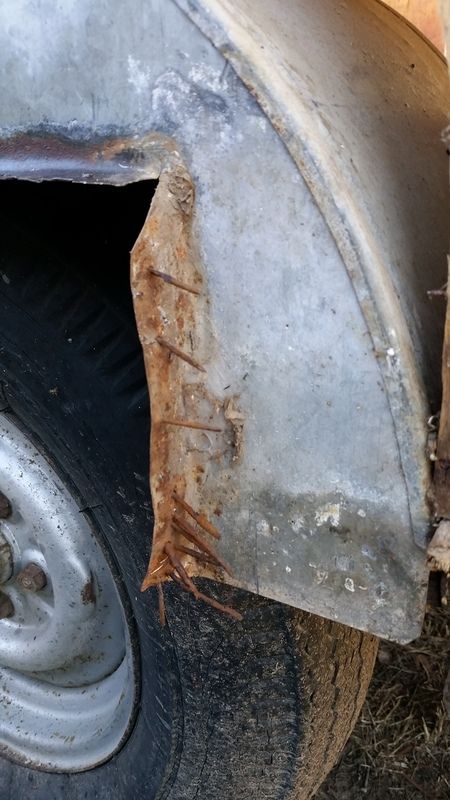 |
|
|
|
Post by kerri on Jun 19, 2017 21:35:55 GMT 10
Ok. Thanks to @franklin1, I read that there are way too many options for different types of insulation. So, a final word from anyone about the best insulation to stay warm and cool whilst in the van.
We have a 1963 Viscount Valiant.
|
|
|
|
Post by kerri on Jun 28, 2017 17:29:54 GMT 10
After a long weekend and cutting timber during the evening, we will finally be putting the first wall back up on the caravan.
|
|
|
|
Post by kerri on Jun 28, 2017 17:35:13 GMT 10
Insulation. After reading many pages of info about insulation and sarking, I was able to take someone's advice on the forum (I can't remember who) and went to shed companies and a construction site for free insulation. YAY! I was able to get some insulation, rating r1.5 from a shed company but I don't think I will be able to get much more. I found some wool insulation on gumtree for $15 and this will go on our roof. But the biggest prize was going to a construction site. OMG, walls of insulation they are putting up for new apartments. I asked the first tradie there, who happens to be a boss on site. He was happy to put aside any leftover insulation and sarking for me. I go there every Wednesday to pick it up. YAY! I will buy him a case of beer, which he is happy to accept. I can go back and get as much as I like. Here is aboot load so far. Rolls of it. 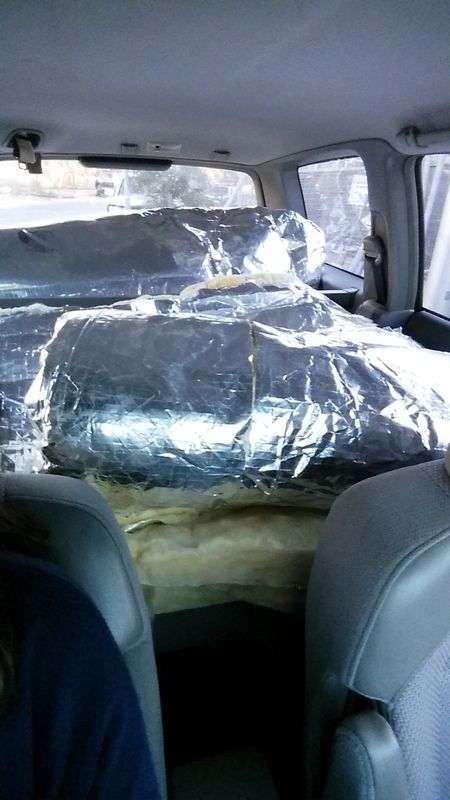 |
|
|
|
Post by kerri on Jun 28, 2017 17:39:09 GMT 10
Insulation Part 2.
So, how do I put it on is the question.
1. Ply (inside sheet), wool, foil, sarking, aluminium (outside sheet) or
2. Ply, foil, wool, sarking, aluminium or
3. Ply, sarking, wool, foil, aluminium or
4. Ply, sarking, foil, wool, aluminium.
These are my only four choices. I understand sarking is for moisture and foil is to reflect heat. Just not sure in which order.
The other thing I will do is place aluminium tape around all sections of the insulation, to hold it down.
Thanks for your help.
Just had a thought...I don't cut the sarking sheets so I guess it can go either two ways.
1. Ply, wool, foil, sarking over the whole timber frame, then aluminium
2. Ply, foil, wool, sarking over the whole timber frame, then aluminium.
Thanks
|
|
|
|
Post by kerri on Jul 1, 2017 17:11:17 GMT 10
We built a wall!!! Yay So after a couple of weekends and a few nights of glueing, screwing and cutting, we finally got our first wall up. It fits just about perfect. Only a mm or two out. I'm going to give my husband a fay off tomorrow. 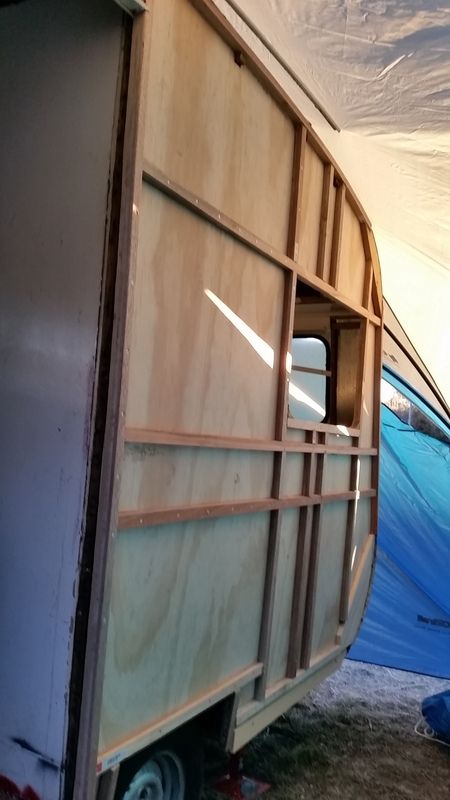 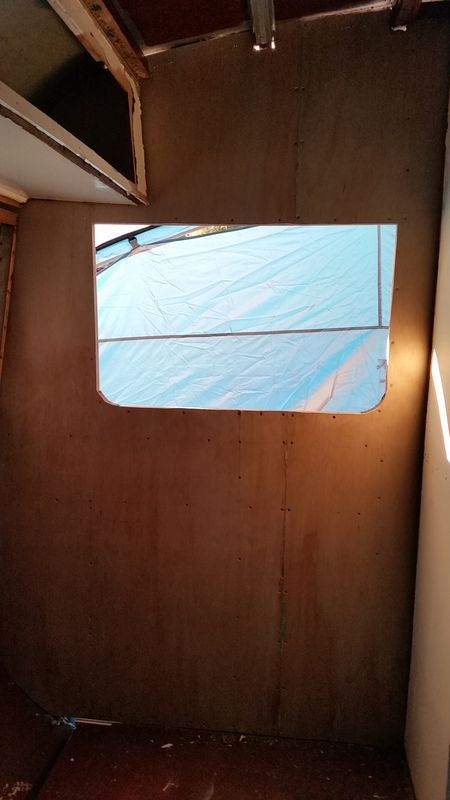 |
|
|
|
Post by kerri on Jul 2, 2017 17:20:19 GMT 10
Just a couple of questions. Hope someone can answer.
1. What was the original paint colour in the 1963 viscount valiant royale? Its the cream colour and is it water based or oil/enamel based? This is for the walls and roof.
2. We have the cupboard door colours and will just colour match it. But was it water based or oil/enamel based.
3. What was the original bed in the van? A pullout couch or an actual bed?
Thanks
|
|
|
|
Post by murray on Jul 2, 2017 21:27:38 GMT 10
Just a couple of questions. Hope someone can answer. 1. What was the original paint colour in the 1963 viscount valiant royale? Its the cream colour and is it water based or oil/enamel based? This is for the walls and roof. 2. We have the cupboard door colours and will just colour match it. But was it water based or oil/enamel based. 3. What was the original bed in the van? A pullout couch or an actual bed? Thanks Kerri B258 valiant owner here These had the click-click couches I did gloss oil/enamel on the doors , tougher and shinier My colour inside was white. I used aquanamel (waterbased) semigloss white because I had some leftover vintagecaravans.proboards.com/thread/11949/galah-63-valiant-van |
|
|
|
Post by kerri on Jul 2, 2017 21:49:01 GMT 10
Hi murraySo glad to hear from you. I want the couch, the cooker and the lights!!!! OMG! You have done a great job. We are starting with a shell and have just built our first wall. We are replacing all framework. So far $235. Its coming into winter no, so probably sanding on the inside. We also have a lot of paint stripping to do. Also, when I was paint stripping, I found blue paint at the bottom of the van. Makes sense now seeing yours. Thank you I must chat to you more. I have a million questions, but can see your thread has answered a lot of them. I have the external lights ready. I have heaps of free, yes free insulation, including sarking and batts. I went a huge construction site. They just throw it out. Im so excited. Never thought I would be doing this in my life. Kerri |
|
|
|
Post by kerri on Jul 5, 2017 10:04:51 GMT 10
Hi Don RicardoI noticed when I was paint stripping the bottom of the van that it also had blue paint. I will add a photo. Does this change the time of year or was it just an added feature? Kerri |
|
|
|
Post by kerri on Jul 5, 2017 10:11:26 GMT 10
|
|
|
|
Post by kerri on Jul 8, 2017 10:41:54 GMT 10
I'm going the brave the 6 degree temperature today and do some sanding. I'll try not to get icicles or frosybite.
|
|
|
|
Post by kerri on Jul 8, 2017 14:48:01 GMT 10
Who needs frost bite when you work up a sweat. Seriously, I never want to be a sander. 4 layers of paint. Primer, dark beige, light beige and then white on top. The wardrobe is hollow so nothing to press against. Taking so long. 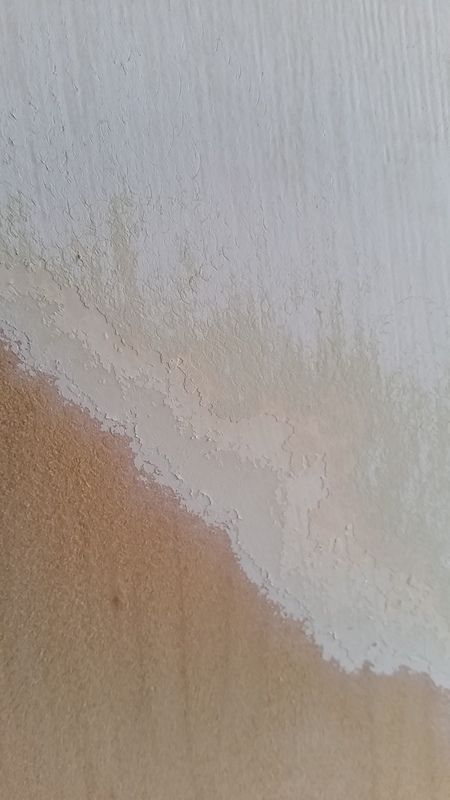 |
|
|
|
Post by bohodreamer on Jul 9, 2017 10:50:46 GMT 10
I feel your pain Kerri & am about to tackle some more painting myself.
Thankfully I just have laminate & don't have any previous paint to strip back so I'm using a product called ESP to prep the surface & then an oil based enamel for the top coat.
So far so good!
I'd attach a pic if I knew how😆
|
|