mikeoz22
Full Member
   Back from hiatus. Looking to finish the Valiant now step son has finished with it.
Posts: 107
|
Post by mikeoz22 on Aug 4, 2013 17:05:45 GMT 10
This weekend saw us remove the old hitch, the front stone guard, panels and window, removal of the interior cupboard doors and the last of the fibre board above the cupboards. Got one of those new multitools recently - absolutely brilliant for removing old nails and getting into fiddly spaces.
|
|
|
|
mikeoz22
Full Member
   Back from hiatus. Looking to finish the Valiant now step son has finished with it.
Posts: 107
|
Post by mikeoz22 on Aug 17, 2013 17:26:09 GMT 10
First real weekend getting stuck into the frame rebuild - making a start is the hardest bit, but after 1 day I've replaced and strengthened the back left hand side: 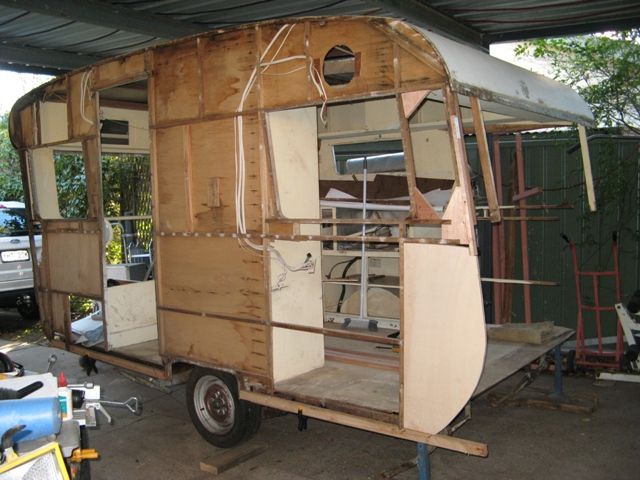 tomorrow I'll do the other side and tie the two sides together with new cross members. All screws used are brass. Alsp managed to score a 'new' 3 way fridge from a friend to replace the old boat anchor that came out and doesn't work. 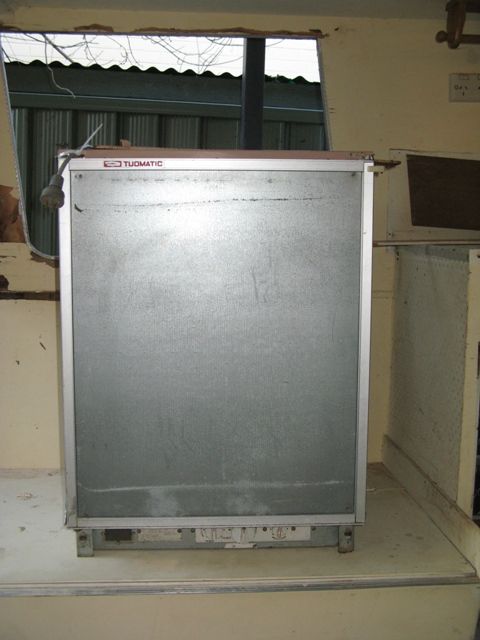 |
|
mikeoz22
Full Member
   Back from hiatus. Looking to finish the Valiant now step son has finished with it.
Posts: 107
|
Post by mikeoz22 on Aug 18, 2013 18:06:01 GMT 10
|
|
mikeoz22
Full Member
   Back from hiatus. Looking to finish the Valiant now step son has finished with it.
Posts: 107
|
Post by mikeoz22 on Aug 18, 2013 18:07:01 GMT 10
Test fit of the skin looked ok - minor adjustments required: 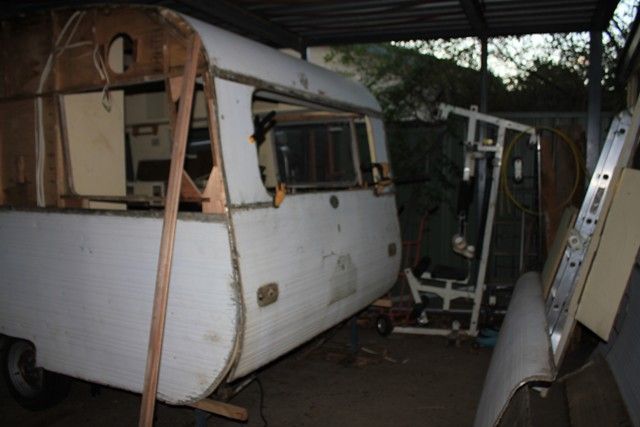 looking ok inside: 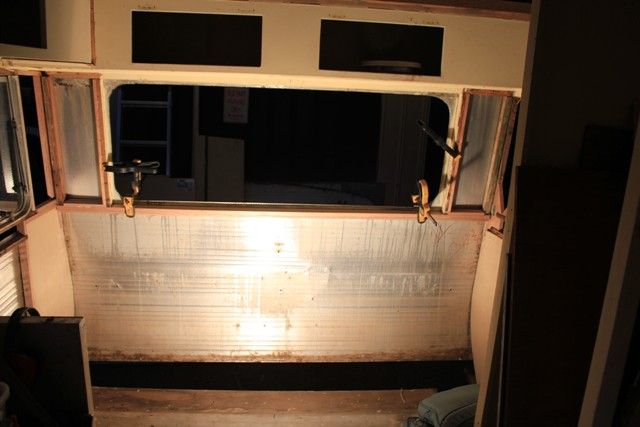 |
|
mikeoz22
Full Member
   Back from hiatus. Looking to finish the Valiant now step son has finished with it.
Posts: 107
|
Post by mikeoz22 on Aug 18, 2013 18:09:43 GMT 10
Next weekend I will look at running the other cross members, and if the money fairy is good to me I might even look at getting the outside rails fabricated as none of this can be completed until the ones made of rusty swiss cheese have been replaced. Then I can tie everything into the chassis.  |
|
mikeoz22
Full Member
   Back from hiatus. Looking to finish the Valiant now step son has finished with it.
Posts: 107
|
Post by mikeoz22 on Aug 24, 2013 17:17:58 GMT 10
|
|
|
|
Post by Franklin1 on Aug 25, 2013 20:06:56 GMT 10
G'day mike, As someone who is also dabbling in a van project at the moment, I can appreciate the dedication and sweat that you are putting into your own van. It can sometimes feel like a long hard slog, and you kind of have to grit your teeth and just keep plugging away. Keep posting updates, even though at times it seems like you're talking to yourself on the forum. People are sometimes a bit shy to post encouragement, but rest assured your thread is being read by a number of we "quiet ones" with interest.   It's a pretty fine effort so far, from where I sit! ;D cheers, Al. |
|
mikeoz22
Full Member
   Back from hiatus. Looking to finish the Valiant now step son has finished with it.
Posts: 107
|
Post by mikeoz22 on Aug 26, 2013 12:33:21 GMT 10
Thanks for the response Al. Turns out that I had to do a litlle bit of modification to the front'cheeks' - the first ones were a little too cheeky and so things didnt fit - it pays to refit panels on the sides to make sure the outline is correct.
I have a question for those other following htis resto though - during th eprocess I've removed almost all of the staples that held the panels to the frames (all badly corroded) - what should these be replaced with?
In the longer term though when it comes to putting it all back together again - I'll be using caravan sikaflex so that all the joins dont leak. Again I spent a pleasant few hours removing silicone from all the joins and panels etc
|
|
mikeoz22
Full Member
   Back from hiatus. Looking to finish the Valiant now step son has finished with it.
Posts: 107
|
Post by mikeoz22 on Aug 26, 2013 12:36:22 GMT 10
Also discovered that 3mm makes a difference! - especially when it comes to lining wall panels up - when the van was put together initially - the walls were built separately and then it was all bolted together - so the interior ply carried through into the corners of the joints - when this is removed - if you arent taking the walls off - you need to put a 3mm packing strip on each side to ensure that you have the correct alignment of the walls and that they line up with the panels....!
|
|
|
|
Post by Franklin1 on Aug 26, 2013 18:09:00 GMT 10
If you click on this link and go down to Reply #11, you'll see the type of nail that I've successfully used for fixing ali cladding back onto vans: Wanted- Stainless nailsThe 25mm length is ok for fixing the edges of the roof cladding because any extra length in the nail is poking through the frame into the wall cavity. It's a different ballgame for fixing the wall cladding onto the frame. You have to find a galvanised nail that's got a flat head and is only 16-18mm in length (20mm at the most when you add the 3mm wall panelling inside the van to the frame thickness). That's going to be the hardest part. Back in 2008 I could buy the 20mm length fibre cement sheet nails, but when I went to buy some more in 2010 they had been discontinued. I've even stopped at hardware stores in little country towns during my travels, to see if they had an old box of them "out the back", but so far I've not had any success. You could look at the galvanised clout nails in Bunnings, but I think you'll find they are too thick in the stem, and the diameter of the flat head is too large for the job you are doing. Ideally what you are looking for are these galvanised nails listed on ebay in the UK: UK Bolt Store . A 15mm length with a 3mm diameter head would be ideal for the side cladding. Blowed if I know where you'd find them in Oz though. cheers, Al. |
|
mikeoz22
Full Member
   Back from hiatus. Looking to finish the Valiant now step son has finished with it.
Posts: 107
|
Post by mikeoz22 on Aug 31, 2013 18:16:59 GMT 10
|
|
mikeoz22
Full Member
   Back from hiatus. Looking to finish the Valiant now step son has finished with it.
Posts: 107
|
Post by mikeoz22 on Sept 5, 2013 17:27:04 GMT 10
Just got back from Sydney this afternoon. Good trip and managed to get the back window rubber for the van from Spectrum Rubber for less than half the price that I would have paid at Clark Rubber here in Canberra. Also picked up 8 sq metres of vinyl flooring from a company in Sydney for $80 - end of roll. So I'm pretty pleased with our little excursion. Gumtree is worth keeping an eye on for things lino.
|
|
mikeoz22
Full Member
   Back from hiatus. Looking to finish the Valiant now step son has finished with it.
Posts: 107
|
Post by mikeoz22 on Sept 8, 2013 18:29:40 GMT 10
Well it was a weekend for getting the chassis sorted, I hear members saying at this point - perhaps you should have done this first...! anyway after drilling out all the aluminium floor rivets and setting to with my high lift jack, after a few tense moments when we thought the whole thing was going to collapse like a house of cards, we finally had the body separated from the chassis,,, "houston we have lift off" 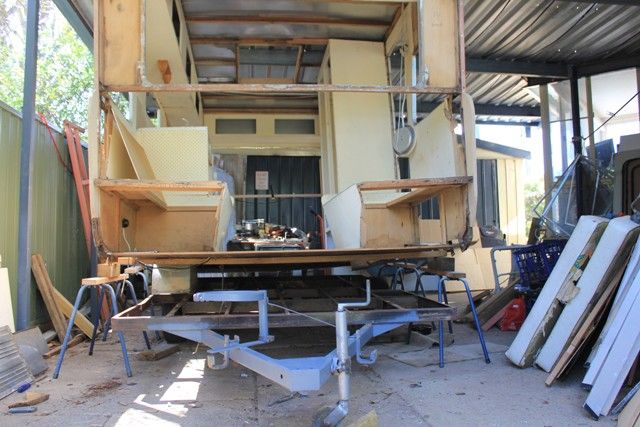 So after supporting this on a few saw horses, we gingerly removed the chassis and set to cutting off the old 'swiss chesse' outer rails to replace them with some nice new shiny gal ones. And I surprised myself by actually doing all the welding myself. - not a pretty job by any stretch of the imagination but a solid one. 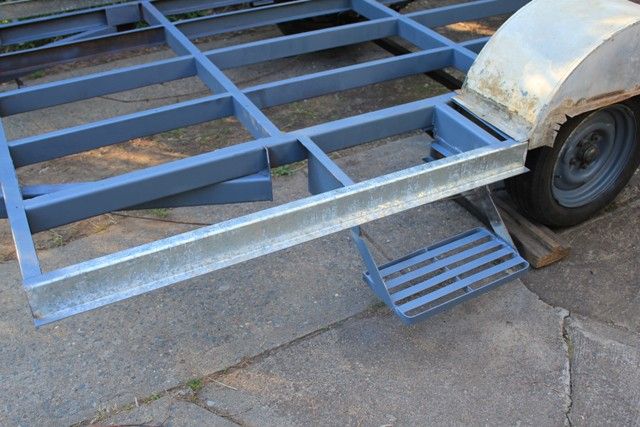  Whilst we had the chassis out we gave it a good wire brushing and a coat of primer. Next weekend I will coat this with a liberal dose of rustkill... red sounds good. 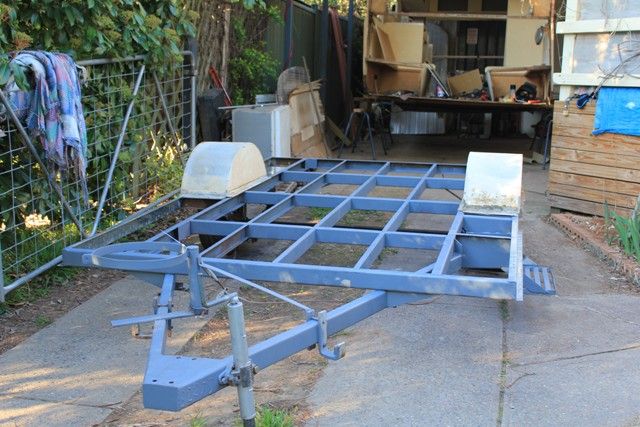 Next weekend I will also refurbish the mudguards and paint them before I put the whole lot back under the body. Busy weekend but so worth it. |
|
mikeoz22
Full Member
   Back from hiatus. Looking to finish the Valiant now step son has finished with it.
Posts: 107
|
Post by mikeoz22 on Sept 10, 2013 15:17:13 GMT 10
|
|
mikeoz22
Full Member
   Back from hiatus. Looking to finish the Valiant now step son has finished with it.
Posts: 107
|
Post by mikeoz22 on Sept 15, 2013 17:38:31 GMT 10
This weekend's work - Chassis painted in bitumen paint (god I hate that stuff, it get's everywhere!!), underside of caravan painted in same, mudguards stripped and repainted. Next weekend body and chassis back together again - then I have a break for two weeks!!! Also had to cut off the LHR stabilizer leg as it had been badly bent sometime in the past, so I will fabricate another later.  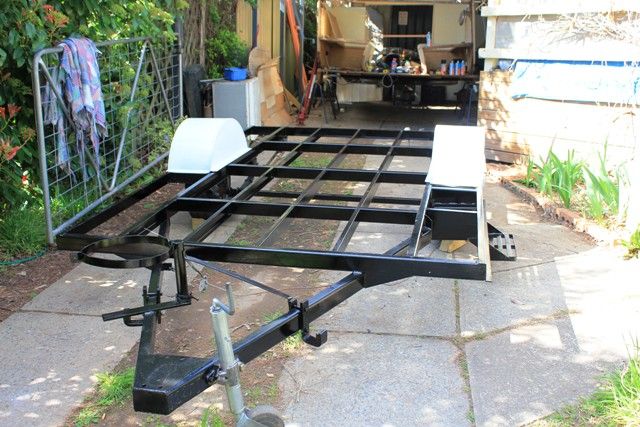 |
|
mikeoz22
Full Member
   Back from hiatus. Looking to finish the Valiant now step son has finished with it.
Posts: 107
|
Post by mikeoz22 on Nov 11, 2013 17:35:50 GMT 10
Been slow going on this project - but finally I think I've got on top of all the repairs needed to the frame. The previous pics posted showed the new metal rails, and now new wooden rails have been bolted to those to which the rest of the frame has been tied in to. It's been a tedious process of attaching the cladding - checking, adjusting and re-fitting. Big drawback is trying to get hold of a licensed sparky to upgrade the wiring. I have all the materials - just need someone licensed to connect it all... so frustrating as until that is done I cant start to button it all up. Cardboard templates have been made for the 3 broken windows and I'll end up replacing those with polycarbonate replacements.
|
|
|
|
Post by relmhayd on Nov 11, 2013 19:46:07 GMT 10
Hi Mikeoz22,
Great job on your restoration. You asked a question earlier re. removing silicon. I have found a good product, available off the shelf in supermarkets in the laundry section, it is a citrus concentrate, around $5.50 for a small container. It turns silicon into a soft jelly like texture and then easily removed.
Bob
|
|
mikeoz22
Full Member
   Back from hiatus. Looking to finish the Valiant now step son has finished with it.
Posts: 107
|
Post by mikeoz22 on Nov 12, 2013 11:51:24 GMT 10
Cool thanks Bob - I'll give it a go. So far it's been a slow tedious process scraping it off with a blade - even then you dont get it all - so thank you.
|
|
mikeoz22
Full Member
   Back from hiatus. Looking to finish the Valiant now step son has finished with it.
Posts: 107
|
Post by mikeoz22 on Nov 18, 2013 19:00:18 GMT 10
|
|
mikeoz22
Full Member
   Back from hiatus. Looking to finish the Valiant now step son has finished with it.
Posts: 107
|
Post by mikeoz22 on Dec 3, 2013 15:02:34 GMT 10
Been a slow few weeks rebuilding and replacing frames, and fitting new interior ply, however progress has been made and I can now call the sparky in and get the wiring upgraded. New interior ply has been fitted to the bed end and around the front left of the van. Also had to completely rebuild the rear window frames as the old ones were rotten and wouldn't have supported the window. I can see progress now and it wont be long before I begin to insulate and seal the outside panels. Here some pics: Front left: 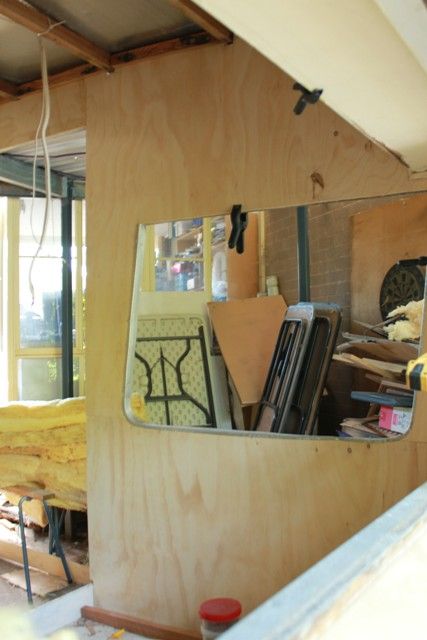 New window frames: 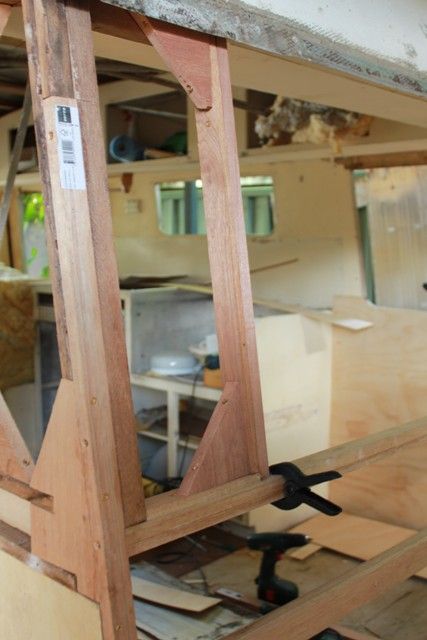 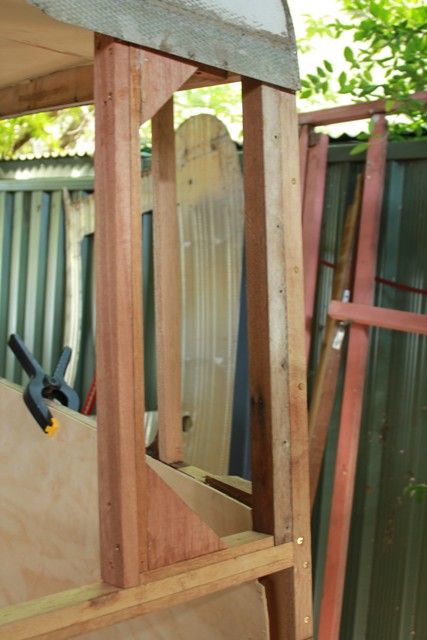 RH Rear: 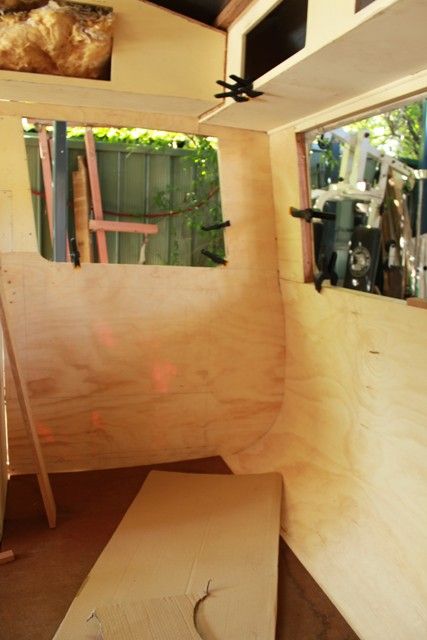 LH Rear: 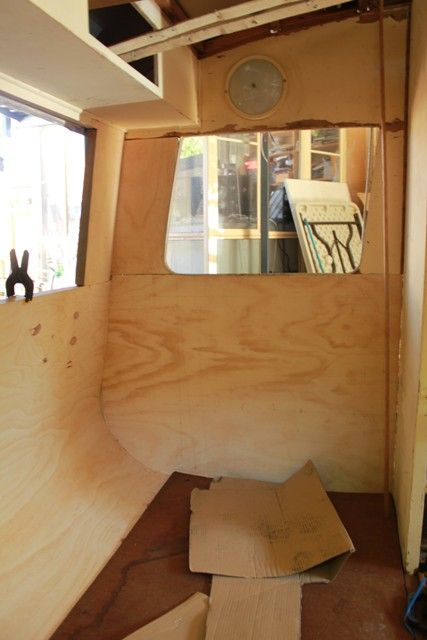 Front table support: 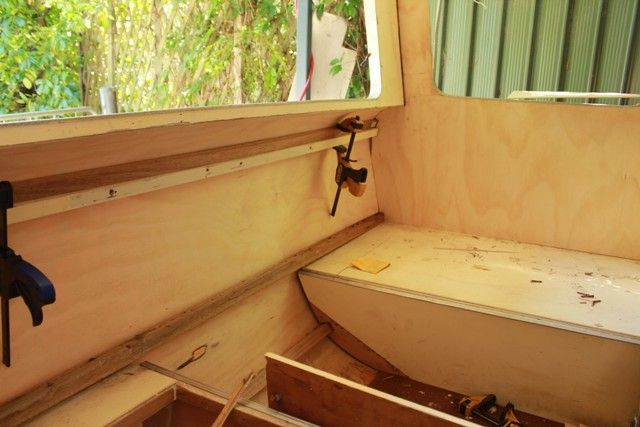 |
|
mikeoz22
Full Member
   Back from hiatus. Looking to finish the Valiant now step son has finished with it.
Posts: 107
|
Post by mikeoz22 on Dec 3, 2013 15:03:38 GMT 10
Oh and thank you for the advice about using concentrated orange cleaner - it removes silicone like nothing else (smells nice too!).
|
|
69ISH
New Member

Posts: 29
|
Post by 69ISH on Dec 3, 2013 18:28:48 GMT 10
This is looking really good but I think you should just pitch a tent for your stepson or put him in the shed and use this yourself when this is completed
|
|
|
|
Post by Franklin1 on Dec 4, 2013 10:21:27 GMT 10
G'day Mike, Nice work on the job so far. Looks to have been quite a bit of detailed work involved, so congratulations for your efforts.  Can you post a photo of this citrus cleaner so I know what I'm looking for, please? Having to remove old silicone sealant is a much more common requirement on the Classic Caravans forum, and I'd like to tell the members over there about this very helpful discovery. cheers, Al. |
|
mikeoz22
Full Member
   Back from hiatus. Looking to finish the Valiant now step son has finished with it.
Posts: 107
|
Post by mikeoz22 on Dec 8, 2013 15:44:08 GMT 10
Here's the orange product that helps dissolve silicon: 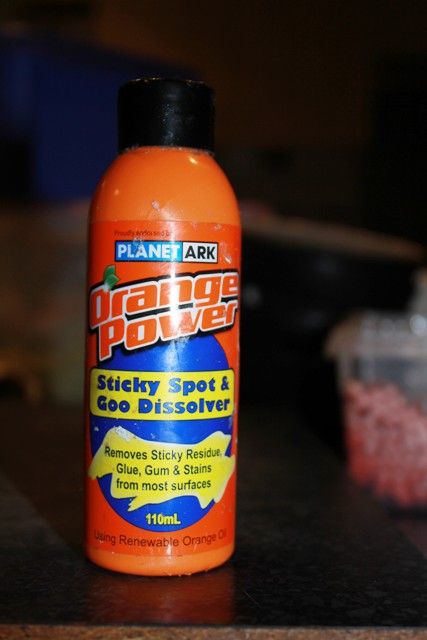 available in Coles in the cleaning isle. |
|