|
|
mikeoz22
Full Member
   Back from hiatus. Looking to finish the Valiant now step son has finished with it.
Posts: 107
|
Post by mikeoz22 on Dec 23, 2013 11:23:09 GMT 10
Just a quick update on the "plywood windtunnel" project - sparky is due to to come and update the electrics next week. And for those of you that are looking at findnig a cheap way of insulating your van - I've been using polystyrene fruit boxes that are usually broken up and thrown out at the fruit markets, they are free and can be cut to fit easily. Happy Christmas everyone - I hope everyone has a safe and happy holiday seasons. best wishes from my wife and I. Cheers Mike
|
|
|
|
Post by craigb on Dec 23, 2013 14:55:24 GMT 10
Just seen this for the first time - lovely to see a job being done properly! Just a couple of comments in case it helps - I know that australian vintage car body builders of 20s and 30s tended to use the hardwood Australian Oak for frames, but some people have successfully used marine ply bonded and clamped and then cut to the same shapes as a cost effective way and I know those cars are still going strong 20yrs down the track. But the person who replied with meranti probably knows better what was used in the 60's etc and with greater demand i expect importing meranti was more cost effective that slow growing aust oak. I think American and english cars tended to use ash but it was interesting when i got my first vintage car a Hupmobile, they were imported with firewall and then rest of the body built at TJ Richards in Adelaide (in later evolution to Chryslers) and after sitting around the american wood was rotted where the australian was still going strong! Regardless your frame is not going to be sitting around rotting anymore so there will be none of those issues.
Great tip on the orange stuff - great for removing remains of sticky labels too and always in my cupboard but never realised it would deal with silicon. I hate silicon on steel in cars where they have started to rust - acetic cure and it just accelerates the problem and makes the job harder.
And this is probably not an issue because you will have a smoke detector and only have to step out the door, but i remember in the UK when i was living there for a while there was this big campaign to remove polystyrene ceiling tiles that had been very popular - if there was a fire, flames went up and the polystyrene greatly accelerated the spread of the fire. Yours is different, sandwiched between the wood etc too but just thought i would mention as food for thought. When i was 'fireproofing' our house in a bushfire risk area i was using insulation materials like sarking and this stuff you put under ridge caps that looked like normal insulation, out of interest i put a lighter to both and neither would catch fire, at worst after a while virtually melted.
Anyway, just some random thoughts - thanks for sharing your project - motivation for myself.
|
|
mikeoz22
Full Member
   Back from hiatus. Looking to finish the Valiant now step son has finished with it.
Posts: 107
|
Post by mikeoz22 on Dec 27, 2013 12:55:34 GMT 10
Thanks Craig, and thanks for your comment about doing a job properly, until I started I had absolutely no idea what I was doing - still don't, I guess I'm making it up as I go. Until you start a job like this you never know what you are capable of, but it has been fun so far. I've been thinking about the next project and I'd love to do up a 60s car to tow the van - I used to have an EK holden and would love to do one of those, but somehow I don't think my wife would appreciate this as she is already asking when she can have the carport back for her car....!!!! oh well.
|
|
mikeoz22
Full Member
   Back from hiatus. Looking to finish the Valiant now step son has finished with it.
Posts: 107
|
Post by mikeoz22 on Dec 30, 2013 17:38:33 GMT 10
Well, thanks to a good Xmas break - we've made a bit of progress on this project. Sparky came today and gave me a nice new fuse box with safety switch and breakers - all to code, new double pole switches and power points. 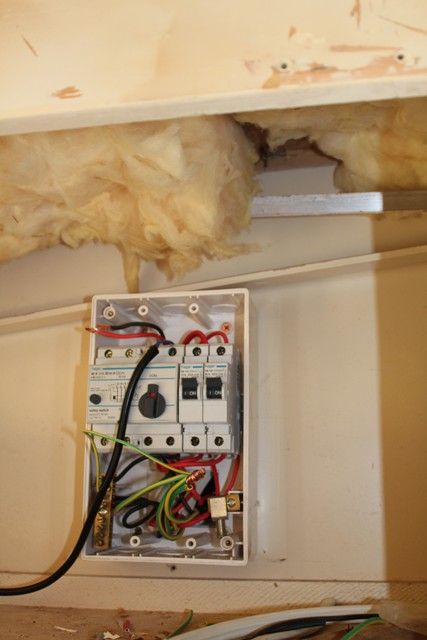 INslation has progressed well with the ceiling now sporting R4.5 batts and the walls filled in with polystyrene - so hopwfully this should see the van quite toasty. 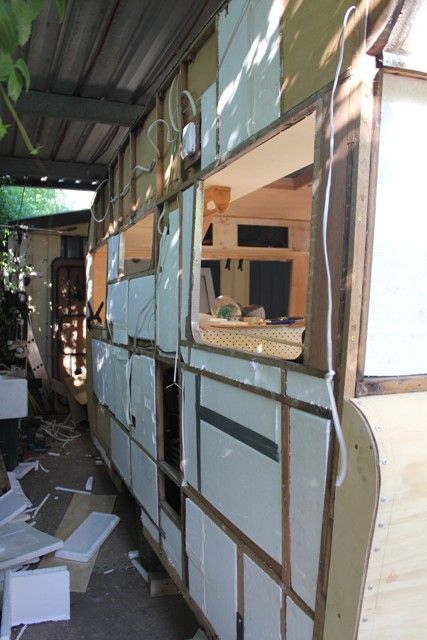 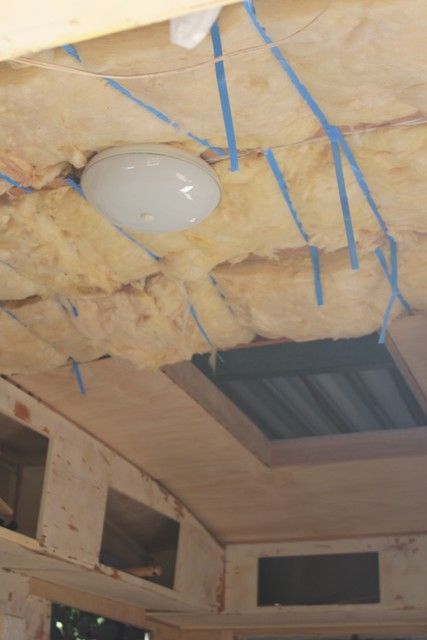 Roof lining will finish going in tomorrow. Also spent yesterday stripping the old paint out of the van.. with a heat gun - seems strange working with a heat gun in an all wood van!!!! |
|
|
|
Post by Franklin1 on Dec 30, 2013 21:01:36 GMT 10
Coming along nicely, Mike!   Those R4.5 batts must be really compressed to fit into the roof cavity. How do you make sure the fibreglass doesn't spread out onto the roof beams when you go to glue the ceiling ply into position? I've been toying with the idea of using some leftover insulation blanket that's 50mm thick (bonded to aluminium foil on one surface). I have to compress the 50mm into a 30mm gap, which is no big deal, but I wondered about making sure the edges didn't creep sideways onto the surface of the timber beams, and interfere with the glueing process. Don't forget to take plenty of photographs showing the routing of all the electrical cables in the wall. Nothing worse than trying to remember later where all the cables went. ("Can I put a screw here??"  ) Good on you for plugging away at it. I reckon you can definitely see some light at the end of the tunnel now. ;D cheers, Al. |
|
mikeoz22
Full Member
   Back from hiatus. Looking to finish the Valiant now step son has finished with it.
Posts: 107
|
Post by mikeoz22 on Dec 31, 2013 10:09:42 GMT 10
Hi Al, I'm not going to glue the ceiling ply directly to the roof beams. I've used small galvanised nails to hold the panels into position but I will end up using cover strips between the ply which will be glued to the ply then screwed into the roof beams using brass screws. The strips around the edge should also hold the ply in position. One thing I have realised though is that there isn't enough 'meat' at the top of the walls of the van to screw into so I'm going to put in another strip of wood to allow me something to screw the edge strips to.
|
|
|
|
mikeoz22
Full Member
   Back from hiatus. Looking to finish the Valiant now step son has finished with it.
Posts: 107
|
Post by mikeoz22 on Jan 19, 2014 18:22:24 GMT 10
On holiday in Port Stephens recently and found these two old ladies just ripe for restoration: 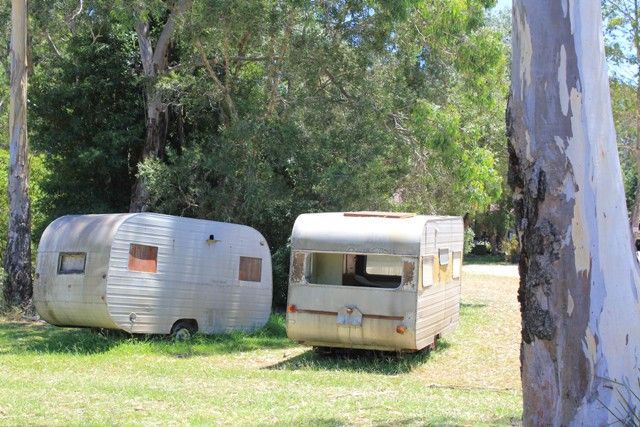 They are located on lemontree passage, and I spoke with the property owner. They belong to her sister who wanted to do them up for her sons as spare rooms (usual story), but they have been sitting on her property for about 3 years and nothing has happened with them. So perhaps it might be an opportunity for some enterprising board member might to think about contacting the sister and seeing if she can be persuaded to part with these two old ladies. On initial inspection they aren't too bad - all the bits are there - but they would require a fair bit done structurally, otherwise these two old ladies are going to disintegrate. I couldn't find chassis numbers or get underneath to look at the condition of the chassis'. I will also post some photos of the interiors shortly. |
|
mikeoz22
Full Member
   Back from hiatus. Looking to finish the Valiant now step son has finished with it.
Posts: 107
|
Post by mikeoz22 on Jan 19, 2014 18:31:07 GMT 10
Interior of the van on the right: 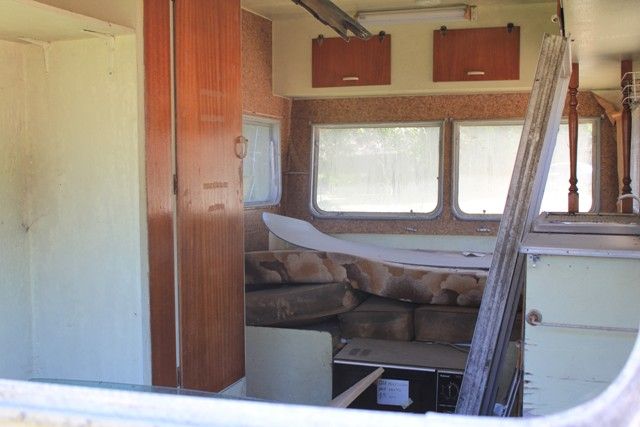 Interior of the van on the left: 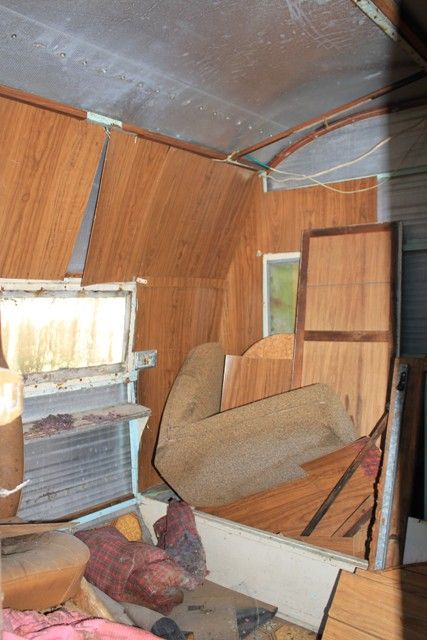 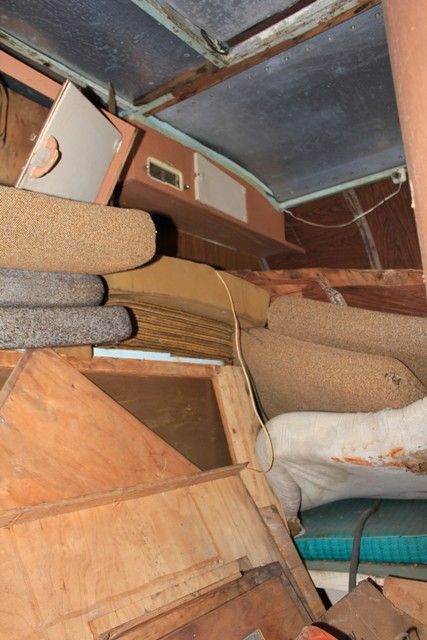 The van on the right has extensive water damage around the rear where the window is missing and would need a frame rebuilt at that end. |
|
mikeoz22
Full Member
   Back from hiatus. Looking to finish the Valiant now step son has finished with it.
Posts: 107
|
Post by mikeoz22 on Mar 11, 2014 9:59:29 GMT 10
Just an update on this project. 6 weeks ago I had surgery to correct the alignment of my leg through a high tibial osteotomy - basically a wedge is cut in the leg bone and the leg is straightened. So for the last 6 weeks I havent been able to progress the project further. You don't realise how much you rely on being able to walk to do things. Hopefully after physio in the next few weeks I'll be back on the project. Best wishes to everyone attending the nationals in April.
Mike & Michelle.
|
|
mikeoz22
Full Member
   Back from hiatus. Looking to finish the Valiant now step son has finished with it.
Posts: 107
|
Post by mikeoz22 on Mar 11, 2014 10:04:41 GMT 10
Oh just a couple of other things - while I haven't been able to do construction - I have managed to get a couple of minor things done. A quote to do 2 replacement windows in 4.5mm polycarbonate - $45-48 each, and I've had the hatch hardware (hinges/catches etc) zinc plated at a cost of about $80 - these should be ready in about a week.
|
|
gregw
New Member

Posts: 43
|
Post by gregw on Mar 11, 2014 16:33:09 GMT 10
Keep up the great work Mike, you are making excellent progress and giving others some great tips. Good luck getting back on your feet
Greg
|
|
mikeoz22
Full Member
   Back from hiatus. Looking to finish the Valiant now step son has finished with it.
Posts: 107
|
Post by mikeoz22 on Mar 18, 2014 12:37:44 GMT 10
|
|
|
|
Post by firefighter on Mar 18, 2014 14:02:59 GMT 10
Think you will find Dave is our forum member.....Fireball V8 from Canberra cheers f/f  |
|
|
|
Post by Jennison on Mar 18, 2014 22:07:37 GMT 10
yes it is fireball indeed, it was a shame I couldn't make it to wheels this weekend but glad to see Dave there waving the flag.
jenno
|
|
mikeoz22
Full Member
   Back from hiatus. Looking to finish the Valiant now step son has finished with it.
Posts: 107
|
Post by mikeoz22 on Mar 21, 2014 12:44:49 GMT 10
Just wondering if anyone can help with a technical question please? In the main entry door there's usually a smaller door that has a flyscreen or mesh. Having looked at the door that I have, how does the mesh get attached as it's a different set up to the usual flyscreens, it doesn't seem to rely on the usual spline method - any hints/suggestions gratefully accepted.
|
|
Deleted
Deleted Member
Posts: 0
|
Post by Deleted on Mar 21, 2014 17:51:44 GMT 10
Hi Mike,
You should find a pop riveted frame around your fly wire,remove the rivets and the fly wire fixing method will be exposed.
Buy some heavy flywire(not the fibreglass stuff) and affix it to the door frame and re attach the strips you took off with pop rivets.
Hope this is of help to you
Cheers
Hughdeani
|
|
Deleted
Deleted Member
Posts: 0
|
Post by Deleted on Mar 21, 2014 18:38:16 GMT 10
...it doesn't seem to rely on the usual spline method - any hints/suggestions gratefully accepted. Looking at my Viscount I'll take a guess and say that the mesh is first stapled to the door frame and then the aluminium beading is overlayed and secured with pop rivets. Nice job! Cheers, Helen. |
|
mikeoz22
Full Member
   Back from hiatus. Looking to finish the Valiant now step son has finished with it.
Posts: 107
|
Post by mikeoz22 on Mar 25, 2014 11:18:48 GMT 10
Thanks for the advice Helen, I removed the rivets and can now see how the wire is attached to the door. There's only a few minor bits left now to do on the inside before it gets painted, seems like its taken forever to get here, but I've decided that in order to get the van sealed correctly I'm going to take the roof panels off, remove the old butyl sealer and replace it so that I know that the job has been done properly.
|
|
mikeoz22
Full Member
   Back from hiatus. Looking to finish the Valiant now step son has finished with it.
Posts: 107
|
Post by mikeoz22 on Apr 3, 2014 6:57:21 GMT 10
|
|
|
|
Post by murray on Apr 3, 2014 8:04:57 GMT 10
Looking really good Mike. All that hard work is paying off  Cheers Murray |
|
mikeoz22
Full Member
   Back from hiatus. Looking to finish the Valiant now step son has finished with it.
Posts: 107
|
Post by mikeoz22 on Apr 15, 2014 19:48:49 GMT 10
Been a busy few days - I can actually say that I have had every panel off of the van now as my step son and I took the roof panels off yesterday to prepare them for painting and removing the old sealant. 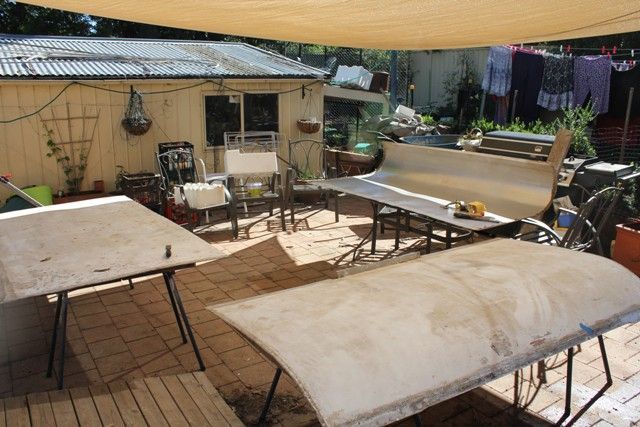 While these were off I've also undercoated the interior ready for top coating, and the doors will receive their new gloss coats of paint tomorrow. 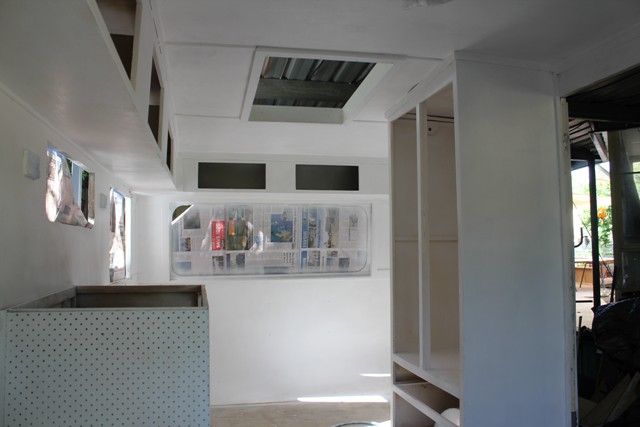 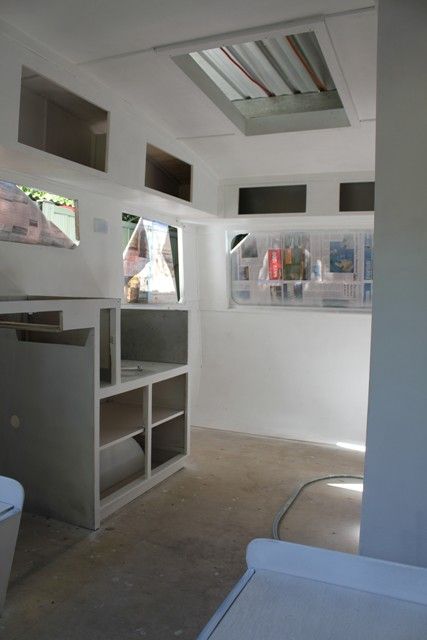 We managed to pick up some nice laminate from the Handyman's Trading post in Fyshwick, so this will get added to the new benchtop and table top as soon as I can afford the adhesive. Next week the windows will be ordered and these should be ready in about 2 weeks time. Not long now before it starts to come together. It's been a long rebuild but I think it will be worth it in the end. |
|
|
|
|
|
Post by Don Ricardo on Apr 15, 2014 21:01:54 GMT 10
G'day Mikeoz22, Great job you're doing on rebuilding the Valiant there. It's coming along very nicely indeed. Regarding the logo, I'm not sure if you've had a look at the vans shown on the Valiant thread in the 'Down History Lane' section, but I've looked at the various logos. The most similar to my eye is the logo on FireballV8's van here. It has the same horizontal lines behind Valiant, as well as the little scroll at the bottom of the right hand end, etc. No mention of 'alumvan', so I assume it's not and that yours isn't either. A bit of a coincidence that it's FireballV8's van we are referring to, given that it was his van in the Canberra Times article you wrote about. You did say that his van was similar to yours...    Don Ricardo |
|