|
|
Rambler
Feb 27, 2013 12:05:17 GMT 10
Post by Franklin1 on Feb 27, 2013 12:05:17 GMT 10
Fair dinkum, jenniewren!...Since when does "Rambler" sound like "Franklin"!!?  Hopefully you only bought this van so you could trade it IN on a Franklin.  Our understanding is that Rambler was a distributor for different brands of vans,a form of "badge engineering" [info copied from a hughdeani post on the Classic forum]. I suspect your chassis number is a Newlands number, and I'm thinking your van must be pretty close to the end of the 1960s before they changed to the acrylic painted cladding, and before they changed the cabin design to remove the front bulkhead (nose). You can check out this thread and this thread on the Classic forum for vans with chassis numbers not too far after yours. Go buy a Franklin, jenniewren, and stop all this nonsense... ;D ;D cheers, Al. |
|
|
|
Post by Franklin1 on Feb 26, 2013 11:32:11 GMT 10
|
|
|
|
Post by Franklin1 on Feb 25, 2013 13:21:20 GMT 10
G'day Ray, So do I! But it's not a new idea - I found it while searching through 'vintage lamp images' to get some ideas. There's probably already one like it sitting in reddo's shed of invention.  And yes, Hilldweller is a hard taskmistress, but she's probably exactly what I need at the moment - a cyberspace kick up the bum.  I had a look at the proposed backing board this morning. It's the side of this box... 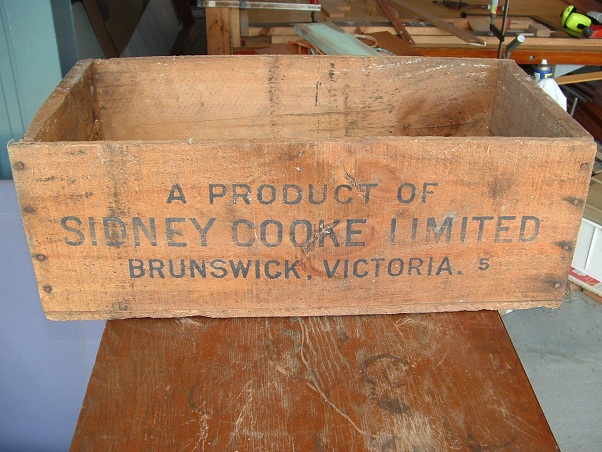 Riddled with borer holes, it is, but fortunately there doesn't seem to be any active holes now. I don't know the age of the box, but it 'looks' old. This is sort of how I'm thinking it will look when completed...   And then hanging off the bottom of the board will be this... 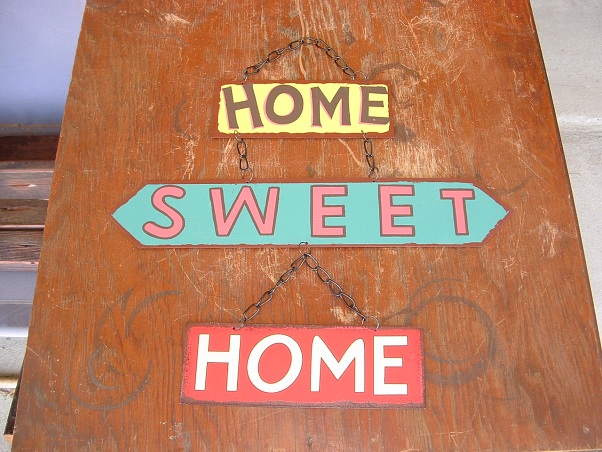 If any forum ladies want more bling for their van, the Home-Sweet-Home sign came from this ebay seller in the UK. It's not for blokey blokes, but I'm exempt because my birthday is on International Womens Day.  We did a bit of landscaping in the front garden last week, using treated pine sleepers for the borders... 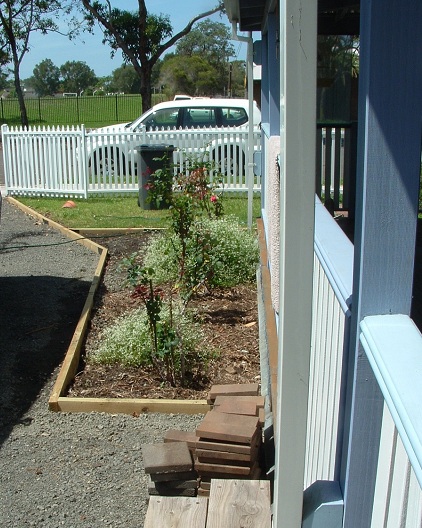 The timber offcuts were put to good use. There are no rear stabiliser jacks on the van, so I'll have to use stacka-jacks instead. I made some timber bases for the jacks out of the offcuts... 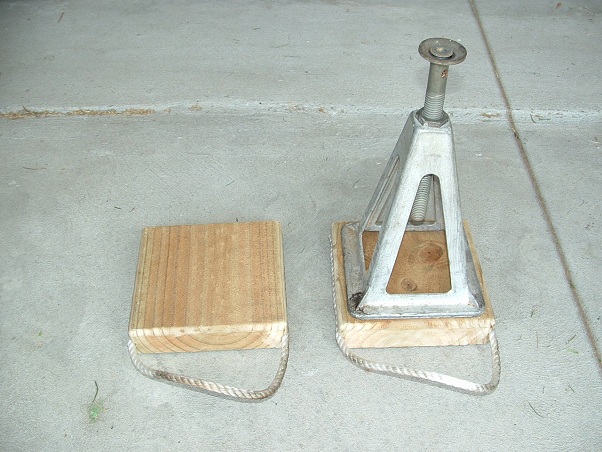 Just proves I haven't been totally ignoring the project... cheers, Al. |
|
|
|
Post by Franklin1 on Feb 25, 2013 12:47:51 GMT 10
G'day bayllie,
I think the largest plywood sheet size these days is 3000 x 1200. For the water resistant marine ply or the exterior grade, I think the max sheet size is 2400 x 1200 (but could be wrong). You'll have to plan how you are going to make the sheet joints when you reclad the van.
Check out the parts suppliers thread in the Technical Stuff section if you haven't already done that. The plywood links are down the list.
cheers,
Al.
|
|
|
|
Post by Franklin1 on Feb 24, 2013 16:41:39 GMT 10
Ok, here we are 10 months later, and stuff-all has happened with this van. Time to psyche myself up and get back into it. Thought I might just "fluff around the edges" for a bit, until the mojo tank is full and raring to go. Dug a rusty old "Kwang Hwa" kero lantern out of the shed. Made in China in the 1960s or '70s. Got it from a mate's ol' man who has retired from camping. Thought I might as well spend a lazy Sunday converting it to 12V operation. This is the lantern, with the hook that will hold it up in the foreground (...a genuine brass hook, cobber!  )... 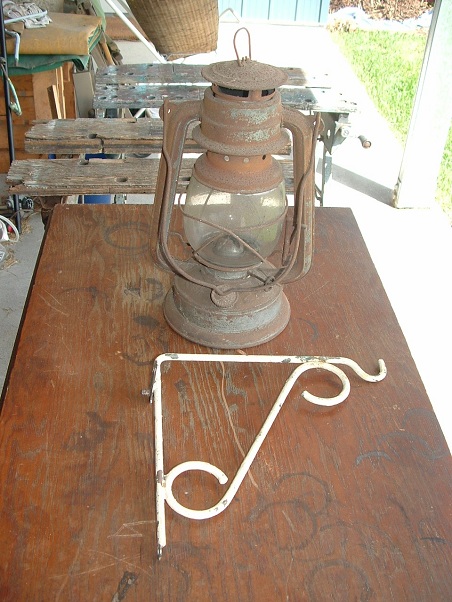 I took the wick out of the lantern, and pop-rivetted a BA15D globe socket onto the wick guard... 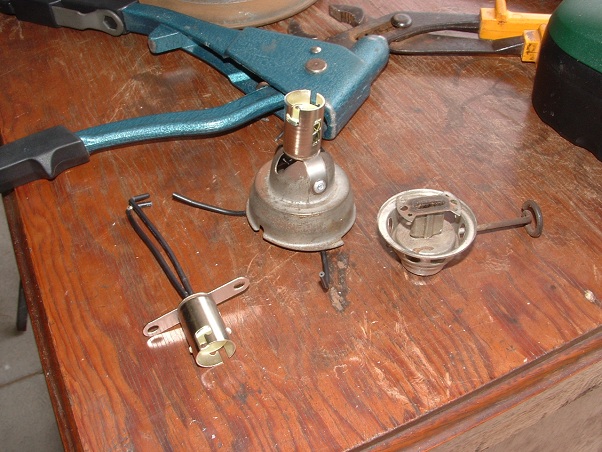 Drilled a couple of holes around the base. One for the push-button switch, and one for the 12V power cable... 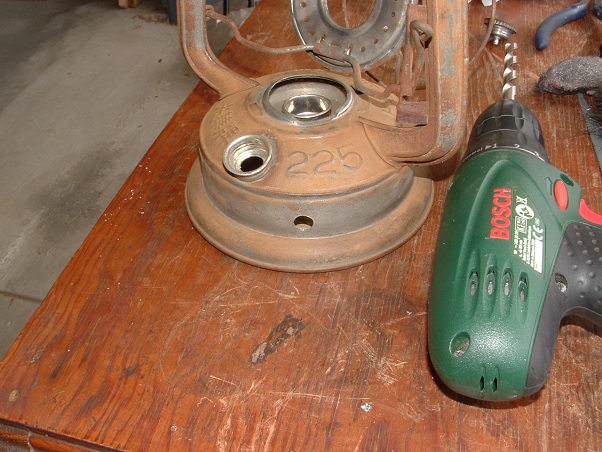 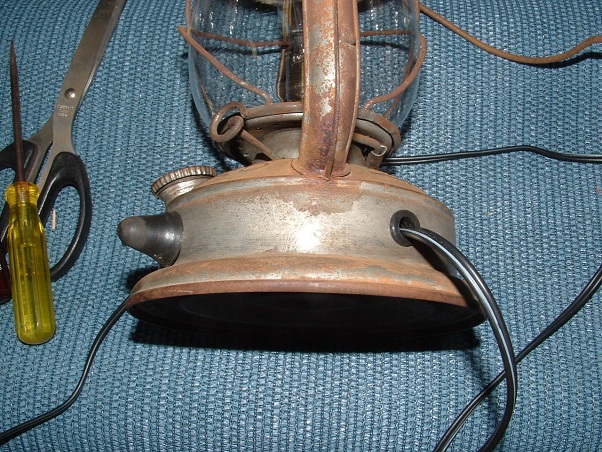 Hooked all the wiring up and connected it to a battery... 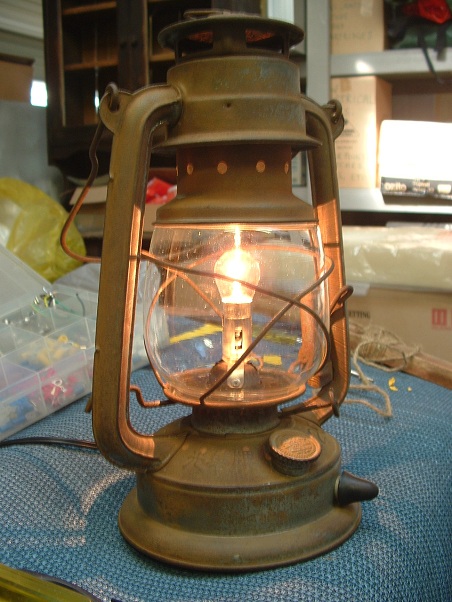 It'll be the annexe light, if'n I ever get this van finished. I need to make a backing board for the bracket so the whole kit and kaboodle can be taken off the van for travel. "One small step for man..." cheers, Al. |
|
|
|
Post by Franklin1 on Feb 23, 2013 18:51:52 GMT 10
Pretty sure it's a Crusader. The logo is on the door, and although it's not clear in the picture, it has the appearance of the Crusader logo. The van overall looks Crusader-like. From NZ.
cheers,
Al.
|
|
|
|
Post by Franklin1 on Feb 23, 2013 12:26:48 GMT 10
G'day Teresa, These letters are seen on a number of old vans, and you'd think in this day and age there would be something that would be a pretty reasonable substitute. It's not a subject I've researched to any degree, but a quick Google search just now for "plastic letters" threw up this website: Plastic letters and Numbers. They say their products are "guaranteed for life against fading, chipping and cracking." Maybe these letters are not the right size/colour/font for your requirements, but I reckon there would be other websites around that cover the same subject. Do a Google search for plastic letter images or something similar (eg. nylon letter images, etc), and when you see an image that looks promising, click on it and it will take you to the website the image came from. It's a good searching method, I've found, for trying to locate stuff. cheers, Al. |
|
|
|
Post by Franklin1 on Feb 22, 2013 18:53:53 GMT 10
Obviously it depends on how bad the damage is on the cladding, as to how good it will look when bashed back into shape. Be aware that any damage means the metal has actually stretched in size, so you'll never get it back to looking exactly how it was originally.
Take for example the project I've got in the shed at the moment. It had a full-width sheet of aluminium covering the lower front half below the windows. A full sheet, not just those splashguards you see on vans. Anyway, when I carted it home on a car trailer after buying it, I didn't realise until I got home that the towball on a trailer dolly I took with me had actually pressed against that sheeting during the trip home. Now I've got a tennis ball impression in the sheeting, and no amount of panelbeating is going to make it flat the way it was originally. The best I can hope for is a flattened surface with stretch marks around the depression area.
I guess the bigger the depression in the cladding, the harder it will be to get it nice and flat again. Whether it's a deal-breaker or not can sometimes depend on where it's located. Down low might mean it's mostly out of sight. Up high might smack you in the face every time you look at it.
cheers,
Al.
|
|
|
|
Post by Franklin1 on Feb 22, 2013 16:58:26 GMT 10
G'day jenniewren, I did a fair bit of panelbeating on the cladding of a van I worked on a few years ago. The lower front section was the worst - I think the van had travelled quite a few miles over unsealed roads during its life. These first two photos will give you a bit of an idea of how pockmarked the cladding was... 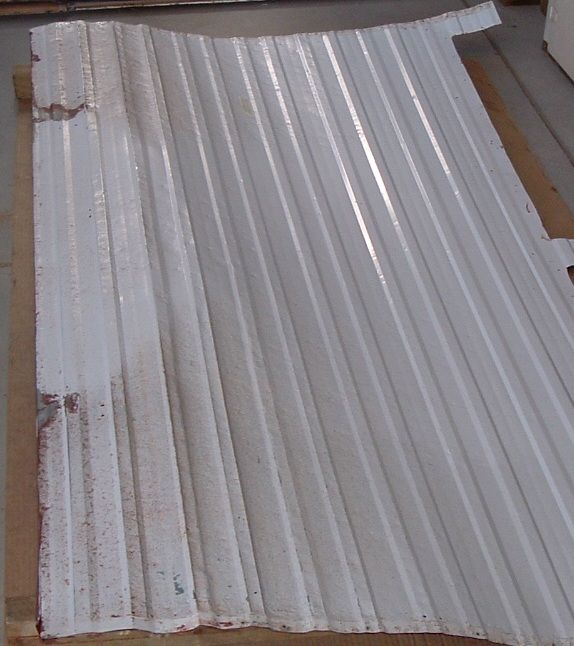 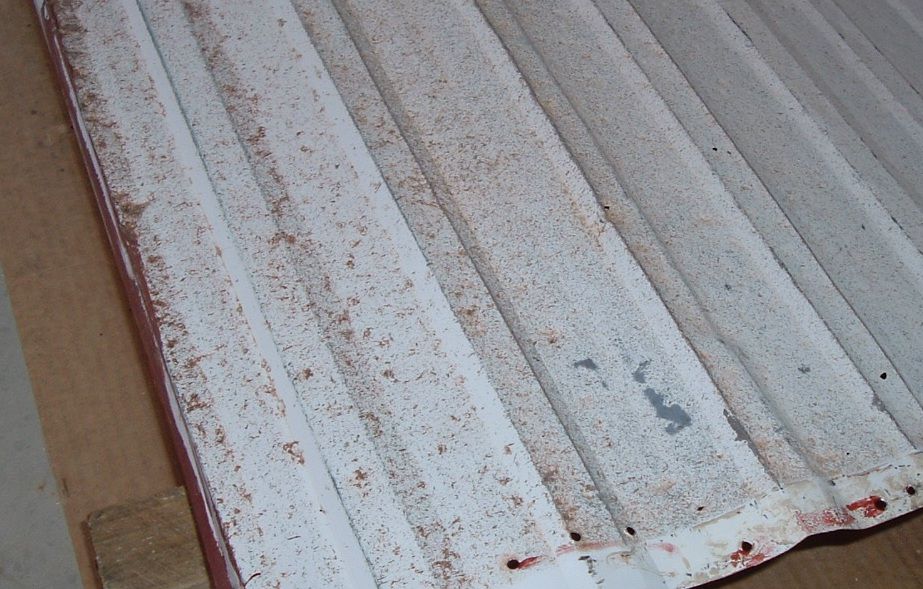 I used the same sort of techniques as Gordon has described, although I used a timber "punch" with a rubber hammer to flatten out the pockmarks. Some of the ribs in the cladding were pretty buckled, so they needed some special attention to get them back to their original shape. This photo shows how pockmarked the cladding was after the panelbeating effort... 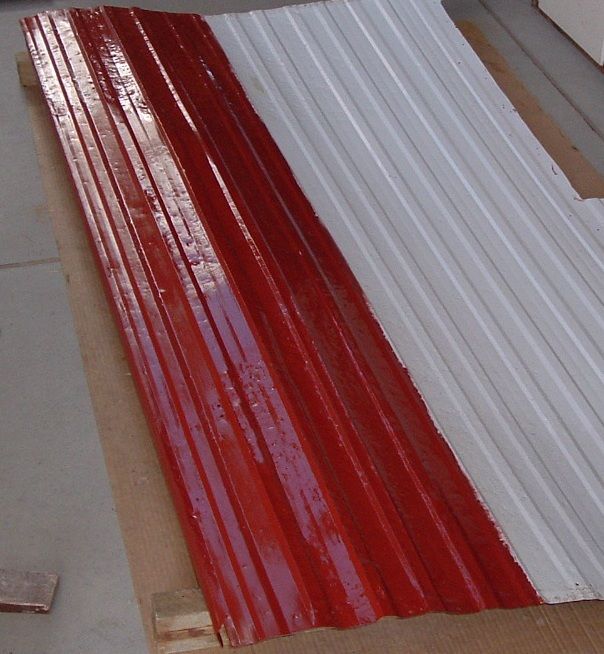 You may be saying quietly to yourself, "Hmmm, doesn't look much better...", but I can assure you it ended up heaps better than what it looked originally. This photo shows the cladding after the final paint coats were applied... 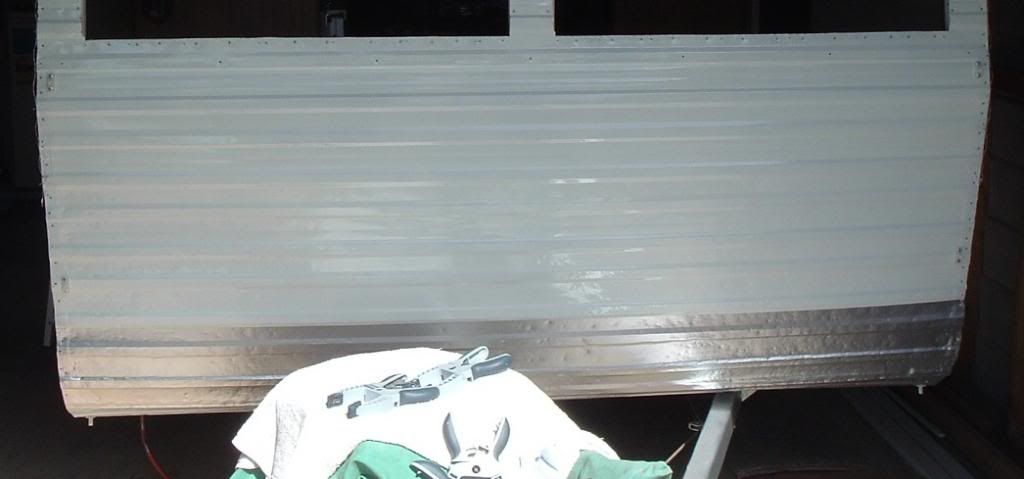 I would have no hesitation in bashing aluminium cladding back into shape if I had to do it again. You can use smooth timber under the cladding as a base, or those dense foam exercise mats are pretty handy as well. Just start softly-softly to begin with, and then once you get the hang of it you can show no mercy. cheers, Al. |
|
|
|
Post by Franklin1 on Feb 22, 2013 9:00:24 GMT 10
Ah-ha! Now that I see the van as Lyle had it, I can see what they did to it. Couldn't quite make out how the front driving section matched with the original van, but I see now how the front was extended by a few feet. Clever! I'm guessing the original van would have been the 12ft 6ins model, and it is now about 15 or 16ft? Your wagon reminds me of a couple of other caravans I've come across during our travels, where people have put a van on a flat bed truck...sort of like making a home-made "motorhome"... 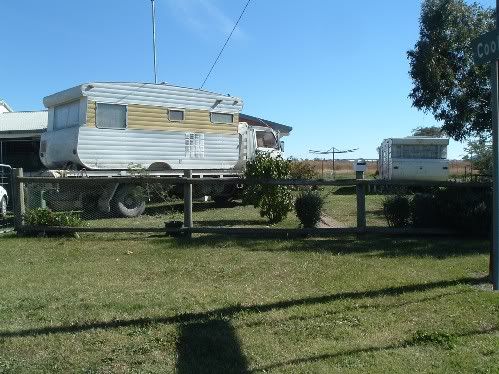 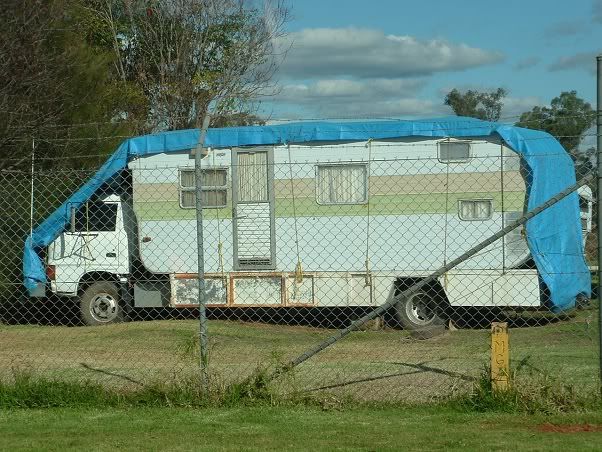 Looks like you can do all sorts of creative things with old caravans. cheers, Al. |
|
|
|
Post by Franklin1 on Feb 21, 2013 15:45:53 GMT 10
Not sure why someone would bother putting another layer of aluminium over the original aluminium cladding. You would certainly have to be suspicious of what may be lying underneath. Do you think the whole van has been reclad, or just parts of it?
cheers,
Al.
|
|
|
|
Post by Franklin1 on Feb 21, 2013 11:03:31 GMT 10
G'day Seeshell, There's a van on ebay at the moment with the remains of the Jones Dolly wheel on it. I swung by the van this morning to check the tyre size for you (had already looked at the van last week and decided -> erk! ): Goodyear 4.50 - 8; 4 ply rating. cheers, Al. |
|
|
|
Post by Franklin1 on Feb 21, 2013 10:56:01 GMT 10
Looks like it's an early Viscount, maybe from 1955-57 (depends on how long it took them to build 485 vans). I think it's safe to say the van has had a paint job along the way...should be plain aluminium by the looks of the others around that chassis number. If you ever decide to remove the paint, you'll probably find the original Viscount name underneath.
cheers,
Al.
|
|
|
|
Post by Franklin1 on Feb 20, 2013 22:53:19 GMT 10
enidb, you can look through the Franklin history thread in our DHL section and see what the Premier and Safari models looked like. For example, in Reply #29 you'll see a Safari model, and in Reply #31 a Premier model. Notice how the Premier model had the wrap-around windows at the front. cheers, Al. |
|
|
|
Post by Franklin1 on Feb 20, 2013 18:24:02 GMT 10
G'day enidb, What an amazing van! Way back when I joined this forum and started to research the history of Franklin caravans, I scoured the internet for anything and everything I could find that related to the Franklins. Funnily enough, I came across a news story about a couple of fellas doing what you're doing, and with a Franklin to boot... 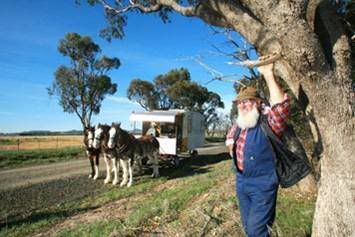 And forgive me for being "nit-picky", but the 'Supreme' tag is not historically correct. The van would have been either a 'Premier' if it had wrap-around front windows, or a 'Safari' if it didn't. Hope you don't carry any horse feed in the van, otherwise it could technically be labelled a "food van", which can lead to apoplexy in certain quarters of this forum. Clippity-clop! "Git along there, Dobbin'!"cheers, Al. |
|
|
|
Post by Franklin1 on Feb 20, 2013 9:03:45 GMT 10
G'day sgtl,
There's something about that 12v globe base in your light fitting that makes me think it's been added to the original light fitting. It's the sort of thing I would do if I wanted to convert a 240v light to make it 12v/240v.
I remember fitting these styles of oyster light fittings to a house extension I did in the mid-1980s, so I wonder whether yours are really vintage or not.
If Seeshell's lights aren't what you're looking for, do a Google search for oyster light images or clipper light images, and you'll see similar light styles to what you've got.
I pick up old versions of these lights on occasions in the Op Shops, but trying to pick up a pair of them would be a challenge. Nobody seems to like them in houses anymore, so you can sometimes see them listed on ebay if somebody's doing a house makeover.
cheers,
Al.
|
|
|
|
Post by Franklin1 on Feb 19, 2013 12:29:33 GMT 10
G'day finickyone, and welcome to the forum! ;D At first glance, I'm thinking "Viscount" for your van, and likely from the early 1960s. You can help with the identification by searching for a chassis number that might be welded on the front drawbar, just near the jockey wheel somewhere. It may be a letter followed by numbers, or it may be just numbers. Have a good look all over the drawbar and tell us if you can see anything there. You can also look through the Viscount thread in our Down History Lane section, and see whether you think your van resembles some of the early Viscounts there. Compare both the cabin shape and the internal layouts. cheers, Al. |
|
|
|
Post by Franklin1 on Feb 18, 2013 12:16:35 GMT 10
I had a feeling I'd seen this van before, on this forum, and I'm pleased to know my memory is not completely gone ... Van for sale |
|
|
|
Post by Franklin1 on Feb 15, 2013 19:40:33 GMT 10
I went to both of the Newsagents up on the main road and neither of them had it on display. I asked the second shop to check if it's listed on their computer and it ain't. Might be a similar situation to when the VC magazine first started and some of the shops weren't aware of it. Considering I'm only 90k from Sydney, you'd think we'd be one of the first areas to get deliveries. I'll have to hunt a copy down. cheers, Al. |
|
|
|
Post by Franklin1 on Feb 14, 2013 23:15:28 GMT 10
I think you secretly want a Franklin, so you can have that "special" shelf! ;D ;D
|
|
|
|
Post by Franklin1 on Feb 14, 2013 19:59:16 GMT 10
Hey, cobber Where's a photo of the 15th century cast iron hook I gave you to go with Ol' 36? |
|
|
|
Post by Franklin1 on Feb 11, 2013 14:17:49 GMT 10
G'day F/f,
jrod had a Franklin Regent, which doesn't have the eyebrow. The Regent model was launched near the end of 1968, so chassis numbers ending in -8 will have a high number before the hyphen. The Regent model continued into the early 1970s so there'll be some from 1969 still kicking around if you're looking for "vintage". Don't forget there was a fibreglass version of the Regent produced in small numbers in 1969 if there's a preference for fabuglass.
cheers,
Al.
|
|
|
|
Post by Franklin1 on Feb 10, 2013 13:30:01 GMT 10
Well, I stand corrected (sort of)... After doing some searching, I found the white nylon door roller to be fairly readily available in the UK caravan market. It is sold over there as an Omnistor door roller (see last product at the bottom), and also here. It can also be listed as Omnistor e depending on who's doing the spelling. Still can't find any results for it being sold here in Australia. --------------------------------------------------------- Just by the by...what do our fabuglass members use for a door roller? cheers, Al. |
|
|
|
Post by Franklin1 on Feb 10, 2013 12:12:03 GMT 10
Yep, door rollers (also known as 'annexe protectors') are found on many vans. Bondwood vans would have typically got a door roller that was home-made using a wooden cotton reel. Later plastic cotton reel versions would have also been used, but not on dinky-di true blue vintage bondwood caravans (ay, cobber ) Aluminium caravans from the 1970s got a roller fitted that looks like this one...  There's no reason why these can't be used on the earlier aluminium caravans. They are still available from caravan spares sellers, eg. CaravansPlus Another version is this one with a nylon wheel... 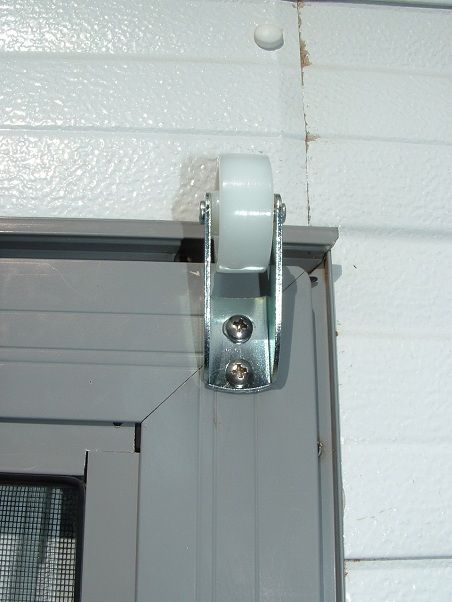 I bought half a dozen of these when a local caravan repairer closed down and had a clearance sale a couple of years ago. I think this version was used on caravans from the 1990s, but I'm not certain of that. The nylon wheel is 40mm diameter, so it's a larger wheel than the other black roller above. I haven't seen this nylon version listed in the parts suppliers lists, so I might have the last six in captivity. cheers, Al. |
|
|
|
Post by Franklin1 on Feb 9, 2013 23:03:06 GMT 10
The issue of what happens to photos after they've been uploaded is one that Photobucket is grappling with. In the old version, photos were added to albums in the order that they were uploaded. The most recent photos were added to the latest page. In the new version, the photos are added and sorted according to the information embedded in the photo itself. I don't want to go into the mumbo-jumbo of it all, but each photo you take has the date and other info included in the photo file, even though you didn't put it there (but, your camera did). If you are like me and never reset the date in your camera when you change batteries, every photo you take will have the original camera date attached to the file, as well as other gobble-de-gook file names such as DSC001-0048. Photobucket is now sorting your photos according to that background information, which means they can end up anywhere in your album(s), as some people have found. How do you fix this? Go to the User Settings option again (see post above) and click on it, and wait for the new window to open up. Click on the heading Albums, and you'll see the first heading underneath Thumbnail Settings. Make sure the option box shows Newest First, and then put a tick in the box for 'Sort all existing albums the same way'. Click the [Save] button down the bottom of the page. Go back to your library and you should see the most recently uploaded photos on your latest album page. (If you don't, then shoot your computer ) cheers, Al. |
|


 )...
)...