|
|
Post by JBJ on Aug 12, 2013 20:05:52 GMT 10
Hi All, Finally got a bit of final colour on the outside. I'm using the "mid green" from Norglass, which is pretty much the Brunswick Green everyone else calls it. I decided to paint the strip first, then mask over it when I paint the remainder 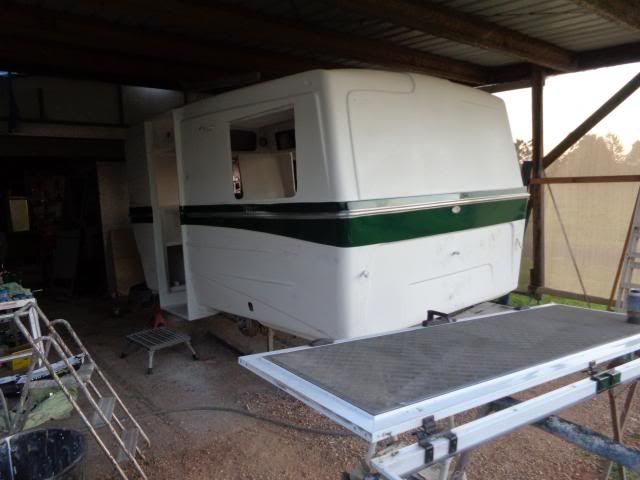 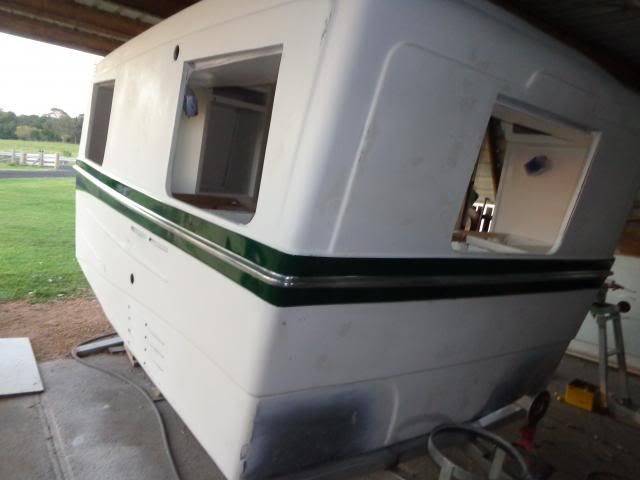 Had a lot of time masking up, & then sprayed it OK. Then a big windstorm hit, made a bit of a mess. But one of the great things with Norglass is that it is a self levelling paint. So my touch ups with a brush to fix the mess ended up pretty fair, & I'm not going to rub it back & repaint it. Its only a caravan after all, not a show car. Its a lot of work masking & painting the door to suit the colour flash, but it has to be done to try to fit in [img src="![]() img.photobucket.com/albums/v309/jailbarjuice/ethel12aug005.jpg img.photobucket.com/albums/v309/jailbarjuice/ethel12aug005.jpg"] So after all the time I've been working on it, I finally got to put an Olympic ID back on it. 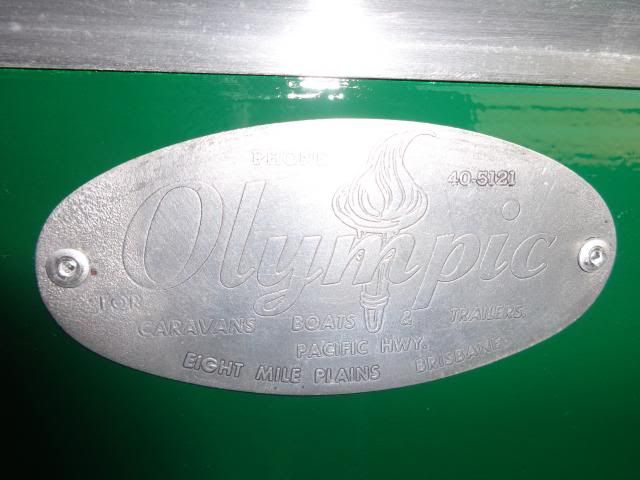 I'm happy with how its working out , even with my problems that arise. Its all fun JBJ |
|
|
|
Post by JBJ on Aug 17, 2013 8:48:07 GMT 10
hi All, Well I finally got the painting done, with exception of a few small bits of internal timber panels need another coat & a sand. The Norglass 2 pack is a very good paint on the fibreglass van, pretty easy to use & dries to a great finish. 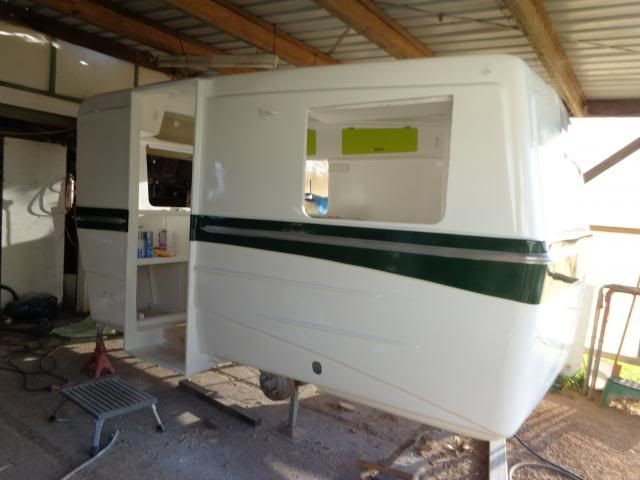  Now its full steam putting her back together. I started reassembling upper cupboards, & fitted carpet to the base of each.I'll post more as it progresses. 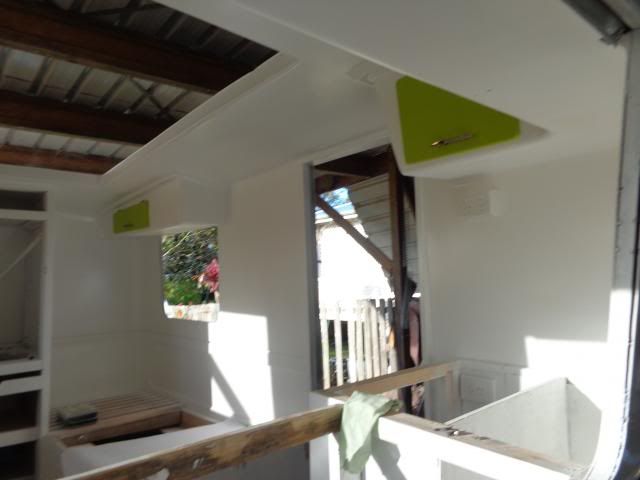 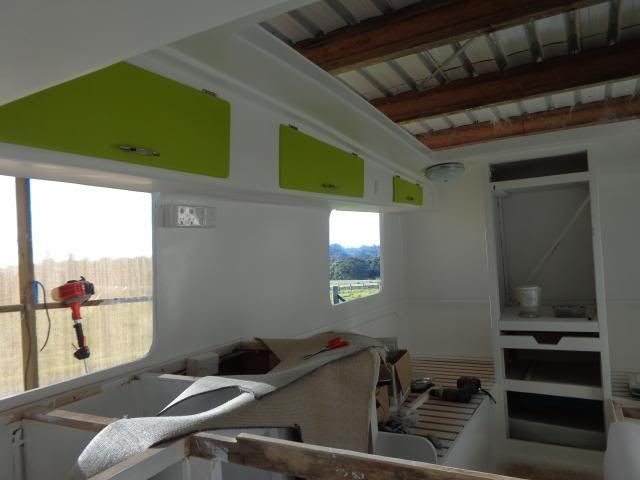 Its all fun. JBJ |
|
|
|
Post by Geoff & Jude on Aug 17, 2013 9:13:04 GMT 10
she's looking pretty special dennis.
won't be long before it's on the road again.
keep up the good work.
geoff 'n jude
|
|
|
|
Post by bobandjacqui on Aug 17, 2013 9:18:35 GMT 10
G'day Dennis, Looks like your on the home stretch now  We look forward to seeing you out and about in her  Love the colour scheme. Cheers Bob and Jacqui. |
|
Deleted
Deleted Member
Posts: 0
|
Post by Deleted on Aug 17, 2013 11:51:21 GMT 10
awesome paint job JBJ  ......fibreglass is bloody hard to get right (so I've heard  ), but that finish looks great! .....nice n shiny .. Is the green flash to match the stato tow car, or the jailbar? I like those little Olympics, .....but they're few and far between Mark |
|
|
|
Post by JBJ on Aug 17, 2013 20:09:46 GMT 10
Hi Mark, We just decided to do this van different colours than our previous rebuilds, but I guess deep down the colour scheme is based on the Statesman towcar dark green as an accent. I cant believe how good the Norglass paint is. When I put it on, I managed to do the exterior of the van using 2 litres. I ended up only needing 2 coats , & 1 coat in a lot of areas. The white covers background variations real well. Ended up with orange peel off the gun, but within 24 hours that had all levelled out to a finish I cant believe I actually achieved. Its going back together real easy. I guess the way I rebuilt it , then dissambled it to paint & finish it, made it easy. I'm having so much fun, I just have to have a drink( or 3, or 4,  ) at the end of each day to appreciate what I am achieving. I'm going to stick to that excuse. JBJ |
|
|
|
Post by gregh on Aug 18, 2013 18:59:58 GMT 10
Hi JBJ, It's good to see another Olympic making a comeback; many start restorations, but so few seem to finish. You've achieved a lot in the 8mths you've had her and the finish is so close - bet you can't wait!! There's nothing like standing back and looking at the finished product. Great job so far.  Cheers Oz. |
|
|
|
Post by JBJ on Aug 19, 2013 19:07:13 GMT 10
Hi All, Its going together well. I started putting the lights back on. The ones removed went in wheelie. I have a basic understanding of electricity, & automotive electrical is very forgiving, as it doesnt kill you if you get it wrong. So armed with my basic gear, I put a couple of wires from a battery to the trailer plug. First thing I found was that the guy that wired it couldnt read the Utilux plug wiring diagram, or was colour blind. So I decided to try & sort it out as was. I started with the upper clearance lights. They only had a red & black wire. In the interest of common sense happening in the past, I hoped black was eath & red power. So I fitted my new lights, & hey they worked after a bit of new wiring was installed here & there. So I progressed to the back, & by using my home made test lamp( A 12 volt globe with 2 wires soldered on, with alligator clips at the ends) I managed to determine what most of the wires were supposed to do. This van had only brake light in the middle. with number plate light. Side lights were tail & indicator only. So I cut a hole in the body behind the number plate, & that allowed me to extend brake lights to both sides, as well as fix a few wires that had fallen apart at there connections. I decided to use LED side lamps, as in todays travelling conditions you could be excused for thinking a big percentage of following drivers are blind or asleep. So the brighter the lights they have to notice, the less chance of them hitting you. I went back to the old style number plate light, as they appeal to my eye. So a couple of days , while also working on other ares, I have all my lights working as required. 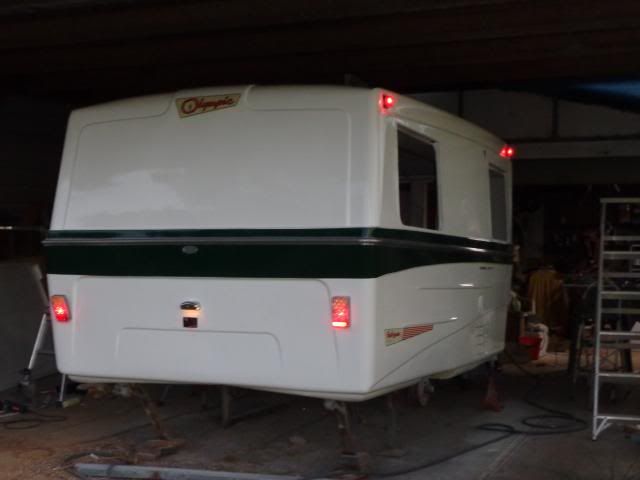 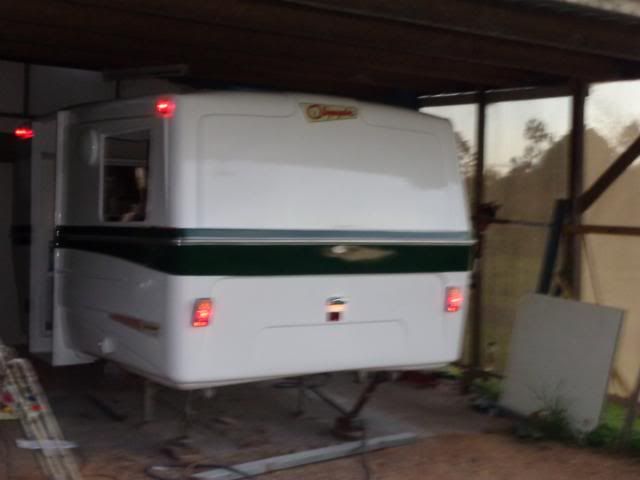 I'm trying to decide on the colour to edge stripe my green flash, to hide the wavy lines I masked up. At this stage the red is in favour. I'm getting the tape stripes proffessionly installed, (as my eyes are dim & I cannot see straight anymore) 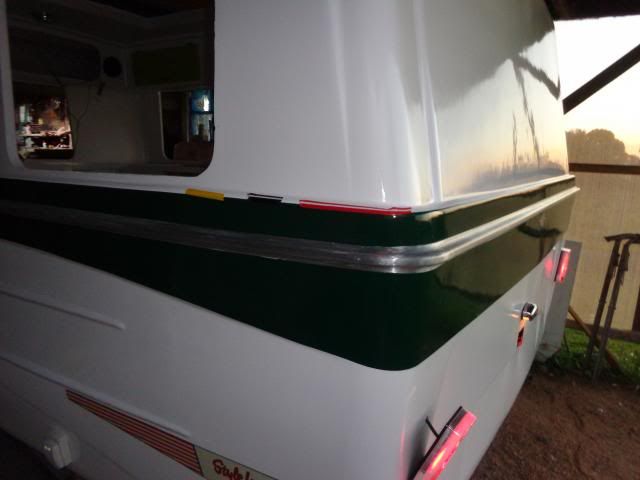 I post this amount of detail to show that nothing is rocket science on vans, & most can do as well as I can or better. Just plan ahead & think before attacking.' Its all fun JBJ |
|
Deleted
Deleted Member
Posts: 0
|
Post by Deleted on Aug 20, 2013 12:22:10 GMT 10
Hi JBJ
I would have thought Gold pinstriping about 12mm top and bottom edge of the green stripe would have looked cool...
Or .. is it just me being a patriotic Australian???
No matter what you decide on the end result is going to look great...
Keep at it.... That light at the end of the tunnel is getting bigger and brighter each day.
Regards
Reddo
|
|
|
|
Post by JBJ on Aug 20, 2013 13:49:27 GMT 10
Hi Reddo,
The only yellow tape I can get from the guy thats going to put them on is not opaque enough to screen out the background colours. That sorta defeats the purpose of hiding edge irregularities.
Boots prefers the red, which is totally opaque. Probably going to put a 6mm or 9mm top & bottom. The red also goes with the colours in the Olympic stickers, so it looks OK to me.
I guess if I dont like the red in time I can redo it another colour
JBJ
|
|
|
|
Post by Roehm3108 on Aug 20, 2013 15:27:06 GMT 10
|
|
|
|
Post by JBJ on Aug 27, 2013 19:21:32 GMT 10
Hi, Making slow progress, but every day is a day closer. I worked on getting the hatch finished & fitted. I installed a pinchweld rubber with a large round section to bottom edge. reconstructed a few other bits, & put hatch in place, 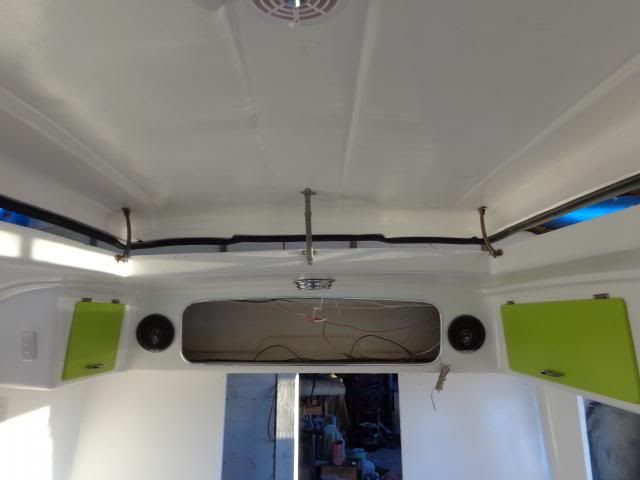 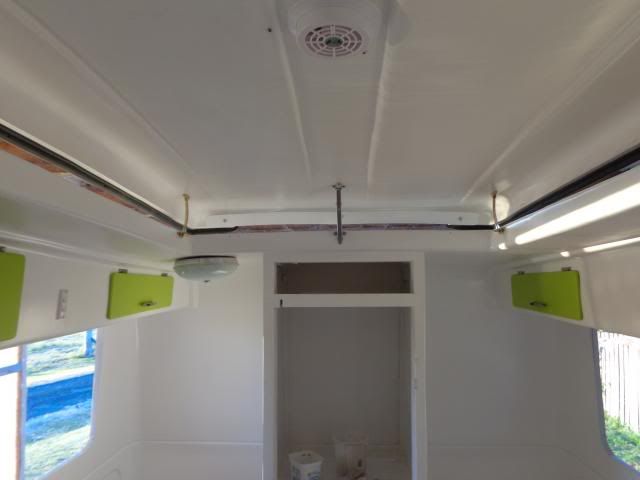 Then fitted hinges, struts & catches. It works OK so far, but most of what I am doing is "suck it & see" engineering, so I may have to reconstruct & alter it as I go. I finished tidying up the drawbar area, fitted the annex pole carrier tube, rewired electrical connection, etc.  Next job is to finish sanding inside & around cupboard door framing & shelves. JBJ |
|
|
|
Post by humpyboy on Aug 27, 2013 20:08:06 GMT 10
Was going to say good job Dennis but then most of them have been looks totally different to what you started with, give yourself a pat on the back (but don't hurt yourself doing it ;D) |
|
|
|
Post by Franklin1 on Aug 27, 2013 21:25:00 GMT 10
Lucky you've got a decent sized hatch, JBJ... Looks like those speakers would blast a smaller hatch clean off the van when you've got your old Johnny O'keefe albums going full bore!! ;D ;D Very impressive job on the van so far. cheers, Al. |
|
|
|
Post by robbo3 on Aug 28, 2013 8:04:25 GMT 10
Your van looks fantastic, funny how it started out as a tidy up, turned into a full blown rebuild.
|
|
|
|
Post by sutcac on Aug 28, 2013 11:50:22 GMT 10
Looking good JB.........like all your builds..........attention to detail and functionality result in great restos.....really like the practicality of the single beds/front kitchen layout in a smallish van........looking forward to seeing this one in the flesh.
Agree with Boots on the pin stripe colour ....red is perfect!
Cheers, Sutcac
|
|
|
|
Post by King Woody on Aug 28, 2013 18:08:23 GMT 10
Hi Dennis, beautiful job! I'd vote for the same limy green as your internal cupboard doors for your external stripe edging. That would look very fresh!
Regards
Mark
|
|
|
|
Post by JBJ on Aug 28, 2013 18:57:19 GMT 10
Hi Mark, The van has 3 different green shades in its colour scheme. The external dark green is close to the greens on my hotrod & Statesman. The interior greens are the lime green on the overhead cupboard doors, with a lighter pastel green on lower level cupboard doors. As its a pure white paint overall, the variations in trim colours seem to work. Boots decides detail colours most of the time, & shes much better at colour selection than I am. Just had the red stripes put on the outside today, & they look great. I'm glad I listened to her with the colour used. It highlights the red in the new Olympic stickers. 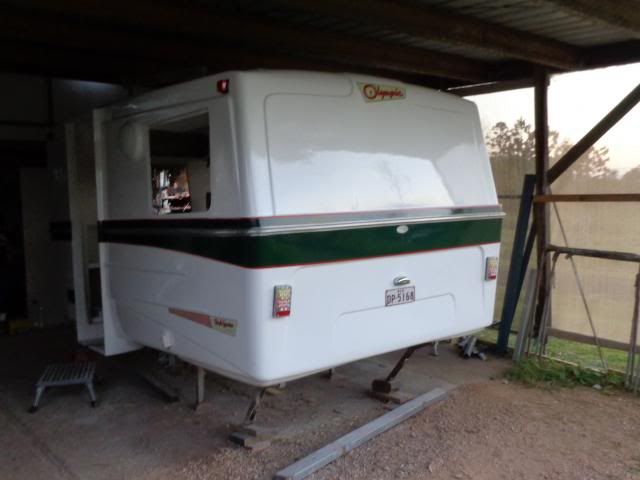 Thanks to all of you for the comments. JBJ |
|
|
|
Post by First Glass - Tory on Sept 1, 2013 1:34:00 GMT 10
Enjoying the read & progress of your van...great work...Learning all the tips is fabulous too for when it comes time for me to do up my van...Cheers Tory
|
|
Deleted
Deleted Member
Posts: 0
|
Post by Deleted on Sept 1, 2013 7:06:02 GMT 10
H Dennis and Sue Without actually seeing your van in "The Flesh" I would have to say that's the straightest fiberglass van I have ever seen... Probably harder to get a smooth surface on a large flat areas than it is on curved surfaces like the sunliners etc.... especially when the surface has such a gloss finish The finish looks great .....Good prep +.Good paint + Good selection of colours = Great finish.. Yup,,, Boots has got the colour selections right. As Sutcac has already mentioned .... Front kitchens are the way to go. It frees up the rest of the area inside of the van down either side and allows for 2 bunks or a double bed running "North South" at the rear. No back window means you can also create over bed shelving or a centre cupboard floor to ceiling like you have .  Table and seating can be a bit of a squeeze but that's easily cured with a folding table and chairs outside . Looking good guys... not far off hitting the road now !!! Regards Reddo |
|
|
|
Post by JBJ on Sept 1, 2013 17:15:36 GMT 10
Hi All, Got a good couple of days progress. Fitted towel rail & pull handles at rear. 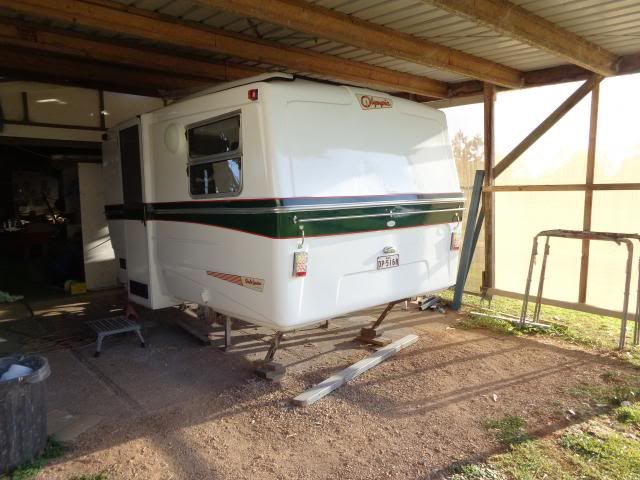 Refitted the windows, & fitted the door.   Fitted most of the cupboard doors. 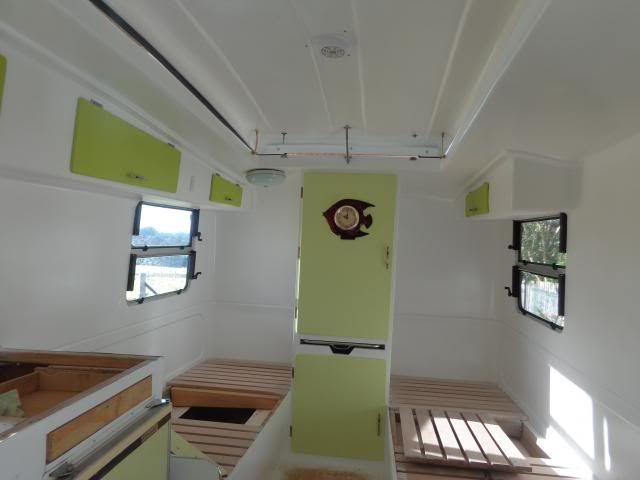 Installed fridge. 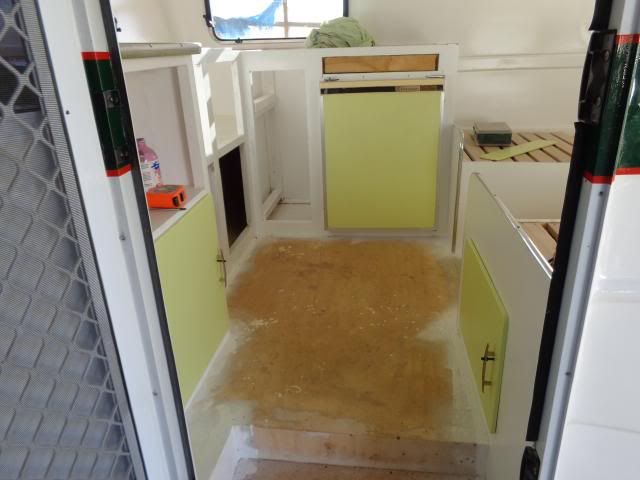 Finished the painting to as good as it will get. Not perfect, but OK from a couple of feet. Hopefully first trip out in about 3 weekends time, I desperately need 3 of theses drawer/door pushrods, colour doesnt matter.  I'll pay whatever you want within reason, as they are no longer available. Let me know by PM if you have anything available. JBJ |
|
|
|
Post by bobandjacqui on Sept 1, 2013 17:48:47 GMT 10
G'day Dennis and Sue, AMAZING ;D ;D ;D ;D Great transformation from what you started with. Love the colour Cheers Bob and Jacqui. |
|
Deleted
Deleted Member
Posts: 0
|
Post by Deleted on Sept 1, 2013 18:01:02 GMT 10
Hi JBJ Do these look like the right pushrods..  Reddo
|
|
|
|
Post by Geoff & Jude on Sept 1, 2013 18:14:10 GMT 10
hi dennis
they look like they're made from solid brass or bronze in the photo, so if all else fails, if you send me the dimensions or a sample, i'd be happy to turn up new ones for you.
by the way, the resto is looking spectacular.
geoff 'n jude
|
|
|
|
Post by JBJ on Sept 1, 2013 19:56:43 GMT 10
Hi Geoff & Reddo,
The rods are black plastic, but the material really doesnt matter.
I can paint them black easy enough.
I think the ones Reddo has could do the job, so I might try them first.
If they dont work, I will mail a sample down to you Geoff, then you can make some from whatever.
So if you could send them to my PO box please Reddo.
PO box 438 Alstonville.
Thanks to both of you.
JBJ
|
|


 ......fibreglass is bloody hard to get right (so I've heard
  ), but that finish looks great! .....nice n shiny ..
 ) at the end of each day to appreciate what I am achieving. I'm going to stick to that excuse.


