|
|
Post by JBJ on Nov 20, 2012 7:51:56 GMT 10
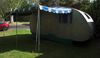
Hi All, This is Boots' van, and it was bought at Canungra as a freshly re registered van, in good mechanical & towable condition. We will be making a few repairs, & giving it a cosmetic clean up & repaint as part of part of the process of making it ours. It has 13" 4 stud wheels, which look to be early Cortina to me. They were built with a box tube chassis, which pretty well stops at the rear of the leaf springs. It weighs 570, with a gross weight of 780. Pretty light. It has a large front kitchen, with working 12v & 240v fridge, gas stove, water tank & pump connected to sink,a single bed each side & wardrobe between, with slide out table between beds. Does anyone know where to buy replacement pieces for the original hatch winders??. I think I can get window bits still from Camec. Its pretty well useable as is, so hopefully we'll be using it soon, after the Christmas rush is over. Some pix 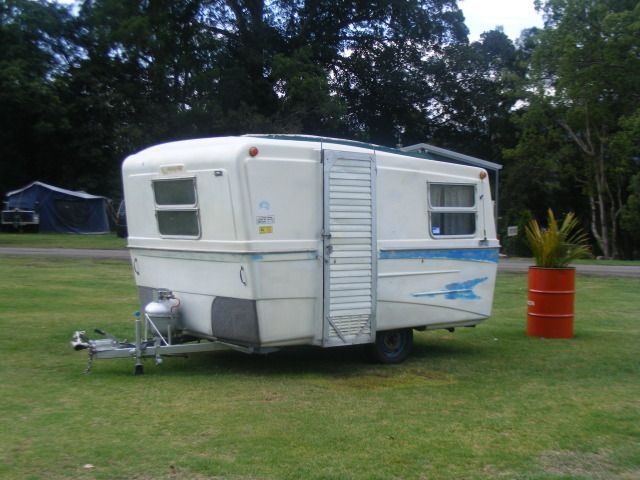 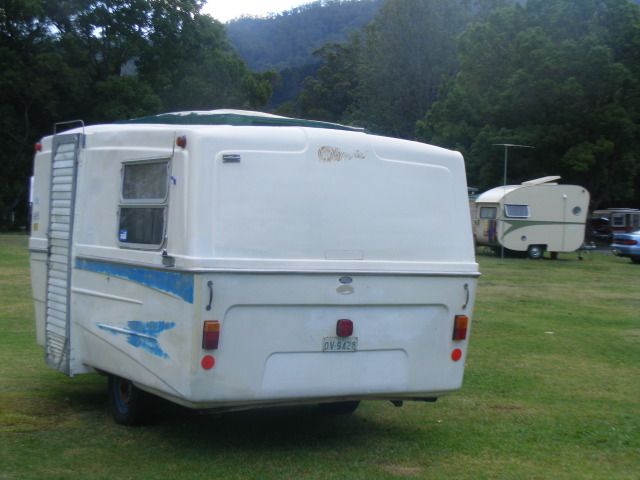 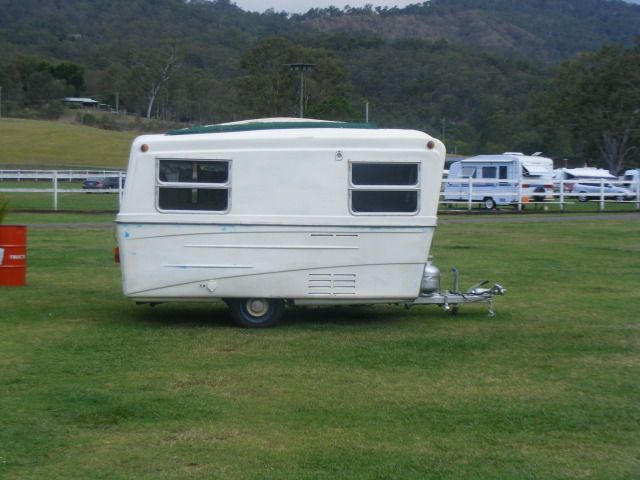   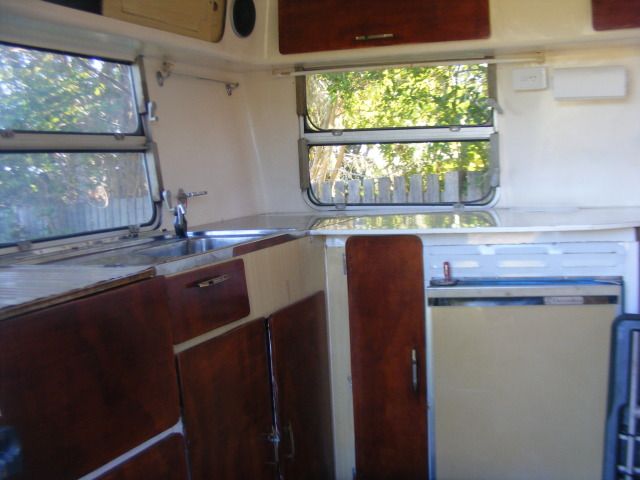 One area needing repair is the door & frame. Its been damaged in the past, & I think a rebuild & maybe new door & frame would be wise. This lump of ply has been bolted thru the wall for a stiffener.  We are looking forward to being able to work on it while we use it. It still should be all fun JBJ |
|
|
|
Post by Roehm3108 on Nov 20, 2012 16:31:16 GMT 10
And you don't even need to store it under cover, Dennis ;D ;D It looks like it's not an Olympic door?  Would that be right? BTW, we expect LOTS of pics showing Boots working on this van  ;D ;D Good pickup Den! Ray |
|
|
|
Post by humpty2 on Nov 20, 2012 18:52:19 GMT 10
Denis, If you are talking about the worm drive type to wind the hatch up you will have to make one. Itried to find one with no luck.
|
|
|
|
Post by DC3Td on Nov 20, 2012 19:01:48 GMT 10
Gday Dennis. Very nice. Now if this is Boots van who`s flipping the coin for the Dodge as a tow car? gordon
|
|
boots
Full Member
 scootin' along the highway of life
Posts: 139
|
Post by boots on Nov 20, 2012 20:19:37 GMT 10
Gordon I shall be fair and toss the coin. ;D ;D Heads I win tails he looses. Boots  |
|
|
|
Post by JBJ on Nov 21, 2012 19:42:45 GMT 10
Hi all, well we started on fixing up a few bits, & found a few areas that need a fair bit of work. Not that much more than I expected, but the front left hand corner & door are pretty sad. So I bought a length of 65x65x3 galv. RHS to fit across the front of van, and fit neatly into the body moulding shape. I removed the gas bottle & assorted brackets, & will remount the bottle, the spare wheel, & the awning poles tube at the front later. 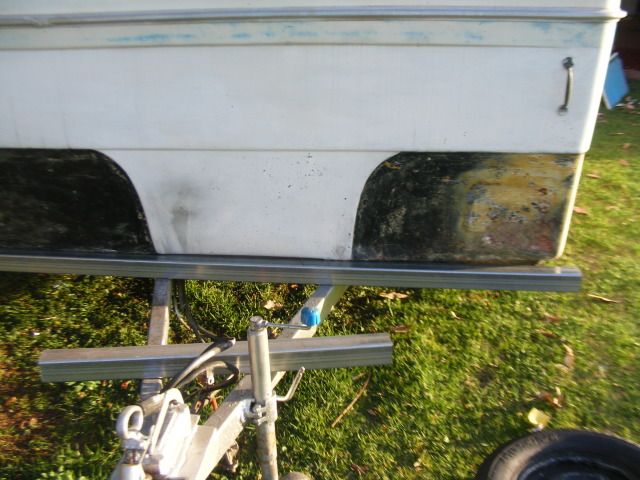 This shows how the corner has dropped 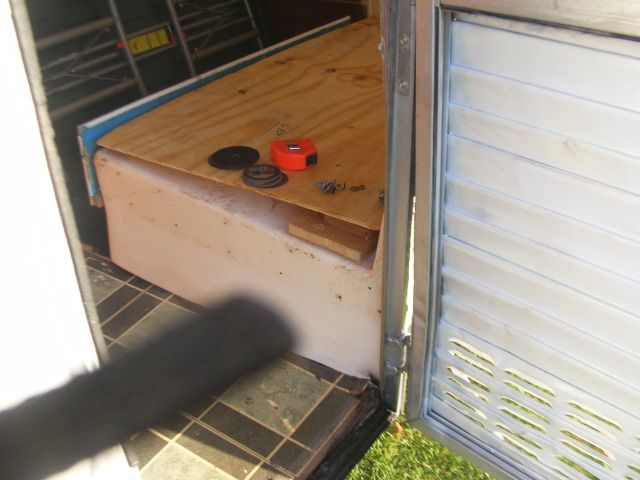 The original fibreglass doesnt seem affected 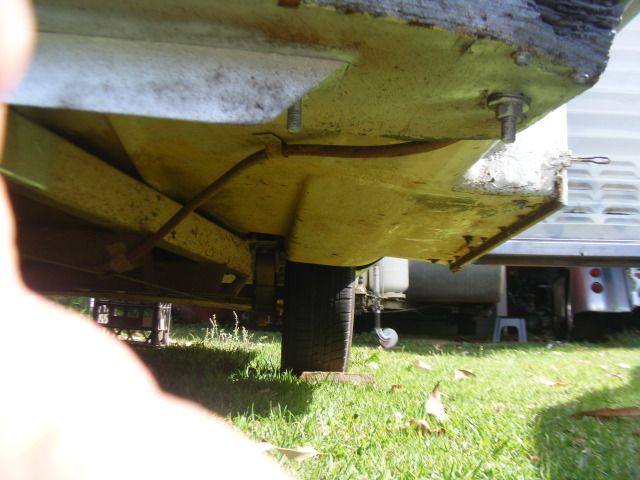 My theory is to create a strong & level steel frame, then try to jack the sunken bits back up into place. Amazingly not one of the body moulding lines is out of shape, just the floor in the front corner & the front part of the left hand bed have dropped. I believe the door frame damage is probably related to this. We will see what happens with another day or so work. Also removed the shade cloth that was fitted as an external flyscreen.  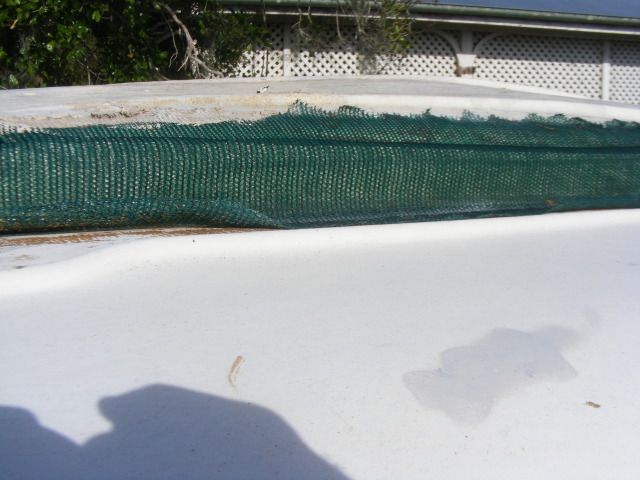 When I sort out the hatch hinges I will refit flyscreen in the factory style. I've mentally worked out the hinges, so hopefully it will be easy. Still looks like a neat van. JBJ |
|
|
|
Post by JBJ on Dec 14, 2012 7:41:36 GMT 10
Hi, Well the further I go the more work it is. this was going to be a tidy up & use?? But I sort of expected it to be a bigger job than at first sight. So far I've ripped out the kitchen.I'm reusing the bench top, fridge & sink. Put in a complete new floor over part of the original ply, & partly over the glass. Cut tapered strips at about250 centres in both directions to make a level base. Glued & screwed them down, then put a 9mm ply floor over the lot, glued & screwed. That gave a level base to work on. 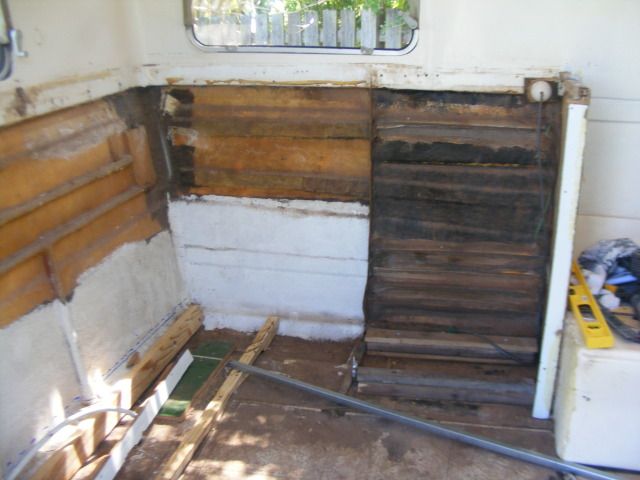   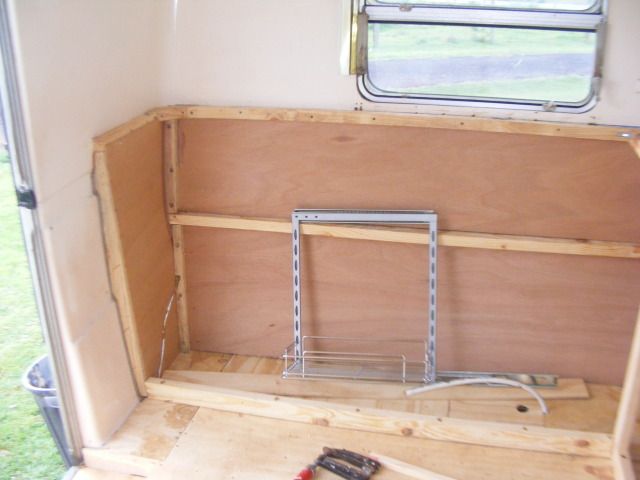 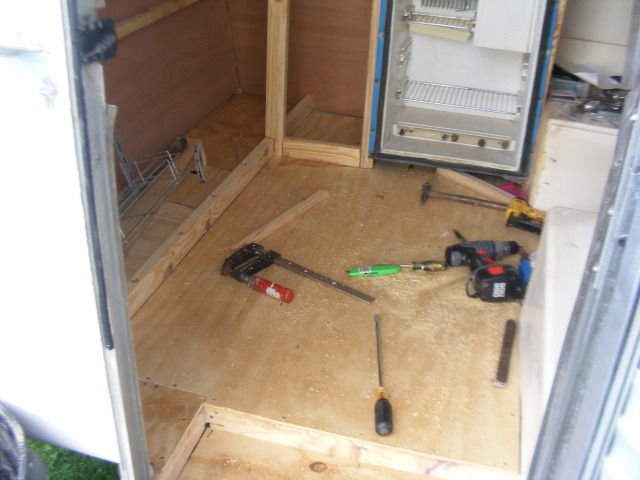 Refitted fridge & levelled up the bench top & sink. Made new frames as required. I lined the front of the van cupboards with 3mm ply to tidy everything. Fitted a slide out pantry from Camec. Cleaned up & re used the bulk of the overhead cupboards & doors. Internal & external trim colours will be green & cream 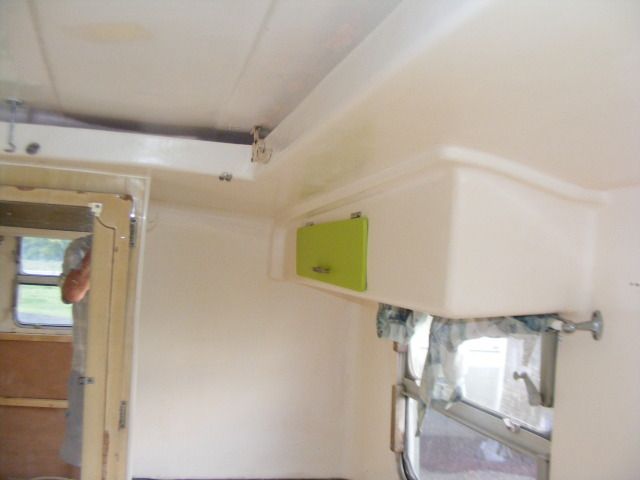 In the process of rewiring as required to fit all new 240 volt fittings. Then 12 volt gets redone, with battery & inverter in a different location. Then rebuild bed framing, rear cupboard, then the replacement door assembly I picked up second hand will go in with a new steel tube frame to be glassed in tho hold everything in shape. I've also made & fitted a spare wheel carrier, & new aluminium stone guards at the front, Rewelded a couple of cracks in the chassis where brackets attach. (This was just inspected for rego transfer & registered for 12 months, but that is not the fault of the seller, just the inspector)  I'm sure theres more, but I'll find out as I go. Luckily I dont have much work to do at present, & that lets me get a fair bit of time on the van. So I need a few handles like the following. They are push button ones, made by Prestige, probably in the sixties. Does anyone have about 6 I can buy?? They are 3 inch centres to the bolts. If not the same something similar would probably do. I think I can buy the push buttons new from Camec still. 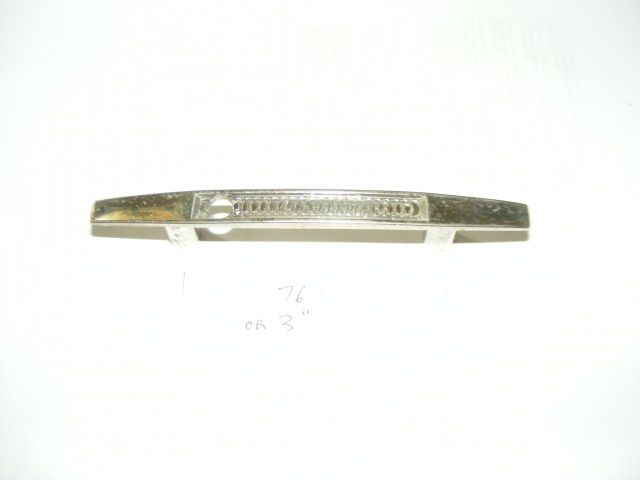 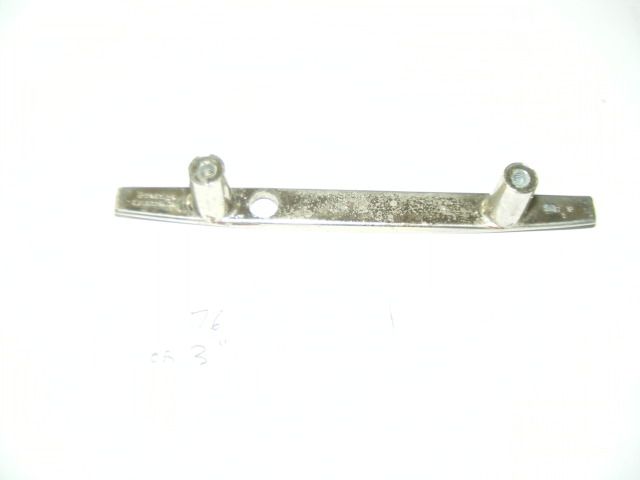  I have working gas stove I removed for sale, appears to just need a clean. every time I walk past my Dodge in the carport, I think I hear it sobbing for lack of attention. But you can only do one thing at a time, & I will not work on two projects at once ever again. Neither gets finished if you try that I have found. I'm still having fun JBJ |
|
|
|
Post by atouchofglass on Dec 15, 2012 6:20:33 GMT 10
Hey JBJ
Well it seems you are keeping up to your high standards as usual.
It's sad that Ethel needed a lot of work done, but she is in good hands.
Keep the photos coming.
Inspiration for all those would be Olympic, Kennedy and Sunliner fixer upperers. ;D ;D ;D
Cheers
Atog
|
|
|
|
Post by hilldweller on Dec 15, 2012 7:42:29 GMT 10
Love the colours and those little handles. Hope you manage to find the extras you're after.
|
|
|
|
Post by dosse on Dec 15, 2012 16:20:20 GMT 10
G'day Dennis & Sue Looks like the baby Olympic will come up great  I have seen your handy work before . Regards dosse. |
|
|
|
Post by humpyboy on Dec 16, 2012 10:57:23 GMT 10
Looking good Dennis, amazing how a few sticks of timber can change the look of an empty space coming along real nice
|
|
willow5075
Full Member
Willow & the MOTH
Posts: 355
|
Post by willow5075 on Dec 16, 2012 19:56:15 GMT 10
|
|
|
|
Post by JBJ on Aug 1, 2013 18:46:48 GMT 10
Hi All, I've been working away on this van since we bought it, & today finally got first coat of 2 pack undercoat on the interior. As I havent posted progress pix for a while, this update will be in several parts. 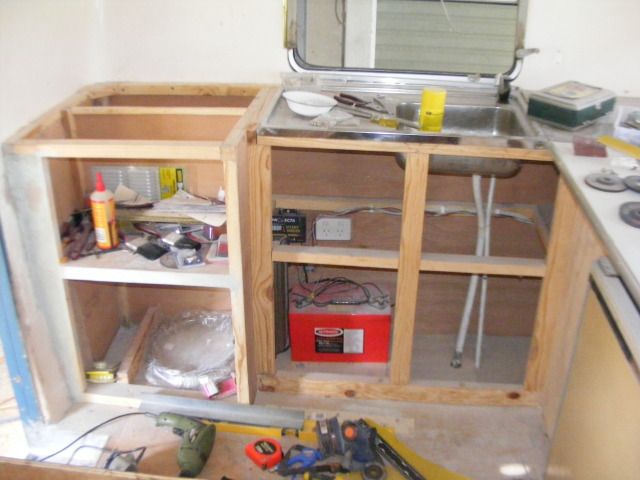 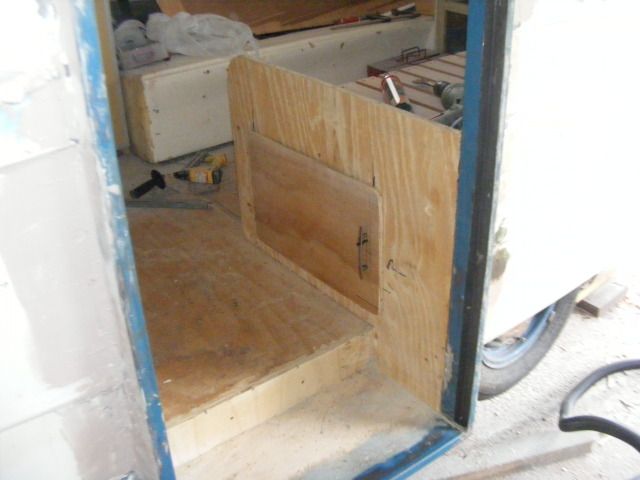 I've replaced the floor & everything inside except the fibreglass interior lining, & overhead cupboards. Its been completely rewired in 240 volt with current standard fittings & new wiring. 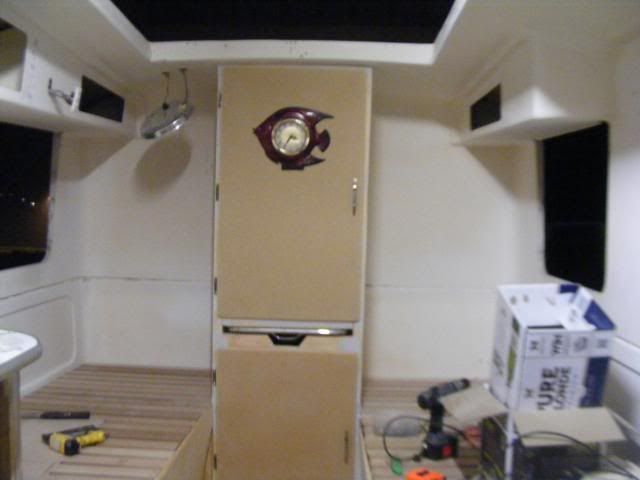 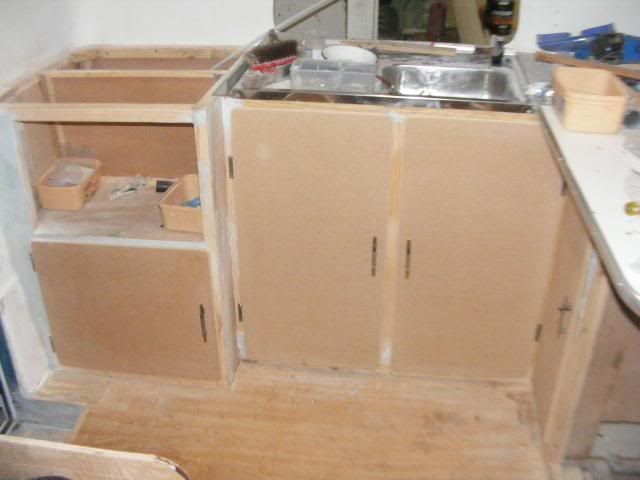 All the cupboard doors are now MDF. I remade the original slide out table 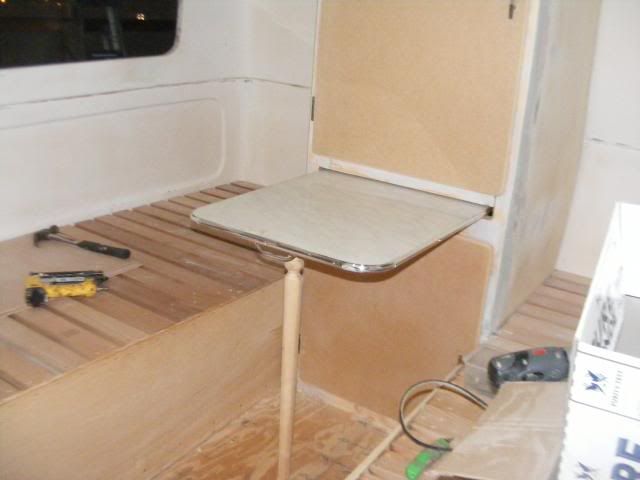 I repainted the fridge interior & got a new door seal fitted, cost $270. 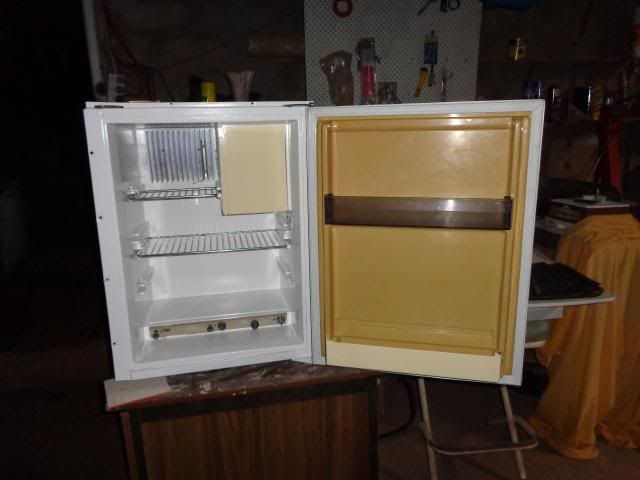 Then painted the exterior panel to match new cupboard colour, reworked hinges to fit better, made a new shelf for door from sheetmetal. 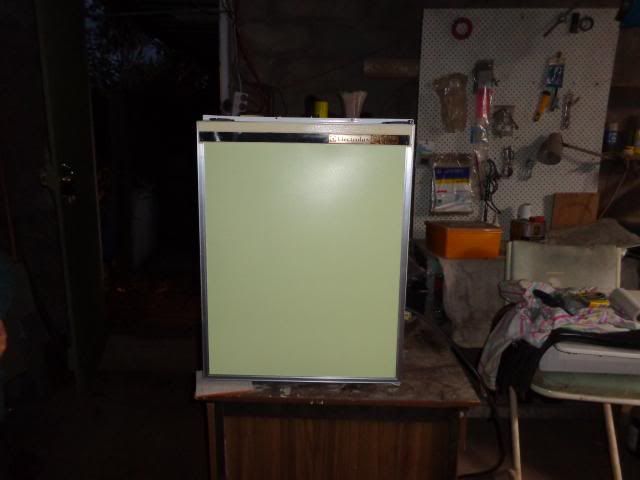 I've kept the basic layout, but upgraded a few areas to suit what we want in a van, but everything has been done in the style I used in my other rebuilds. I've pulled the windows back to basic components, replaced broken glass, & installed all new winders, catches & rubbers. So I'll post a few pix of how the interior was reworked first, then as painted. These pix are after first sprayed coat using Norglass Ship Shape Primer. It doesnt cover much area , especially if it is over bare timber. My first 4 litres gave 2 coats to the hatch, & i coat to the interior. Not much for $175 paint. But I just bought a second lot, because I think it is very good quality finish. This is left front corner. Painted cupboard houses microwave, 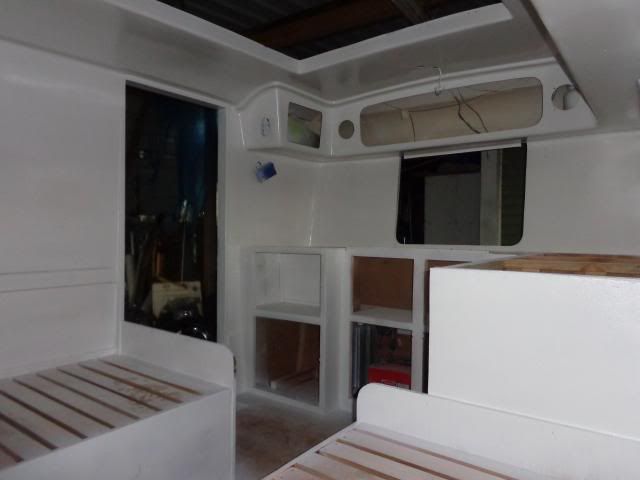 This is left rear corner 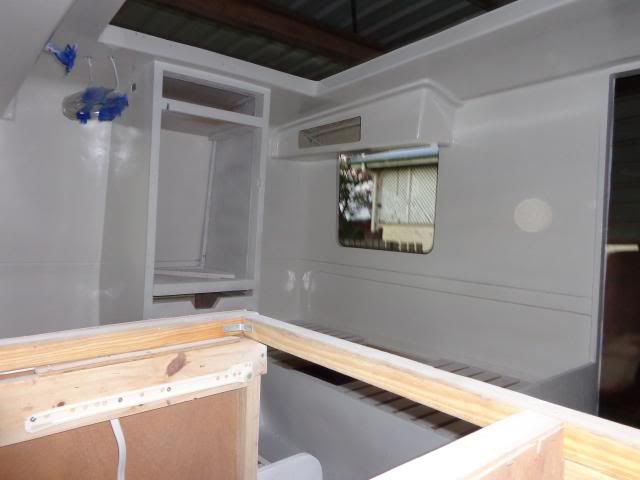 This is rear showing centre cupboard 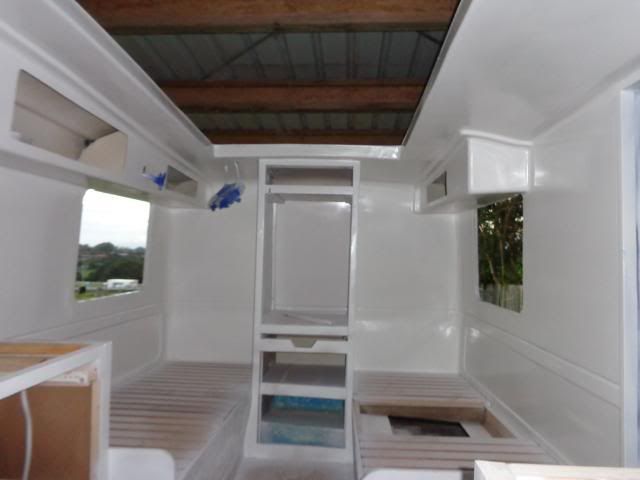 This is right front corner 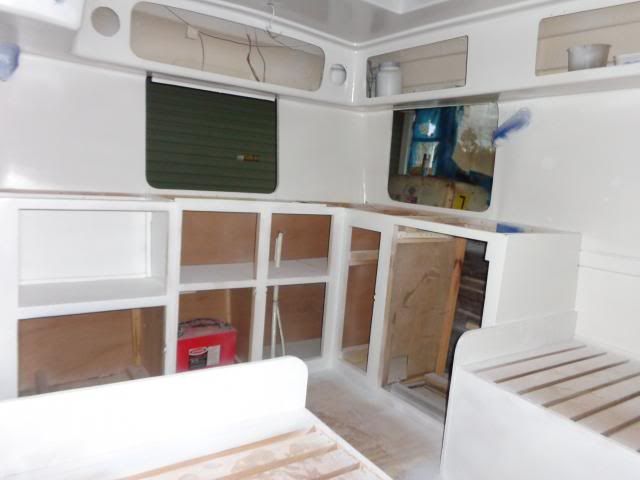 I'm not a real good painter, especially spraying white over white. My glasses get covered with paint, so I get a few dry spots & runs. So now I give it a light sand, then another coat in a few days, but I'm pretty happy with how its coming along. Hopefully a couple of months it will be being used & finished. Its still all fun JBJ |
|
|
|
Post by bobandjacqui on Aug 2, 2013 5:21:52 GMT 10
G'day Dennis, Looking good ;D  Cheers Bob and Jacqui |
|
|
|
Post by 56effy on Aug 2, 2013 7:47:17 GMT 10
G'day, what a top job, you blokes will be out and about like kings and queens.
Effy.
|
|
|
|
Post by Geoff & Jude on Aug 2, 2013 11:39:18 GMT 10
good to see the pics here dennis.
as always, you're doing a top job.
geoff 'n jude
|
|
|
|
Post by JBJ on Aug 4, 2013 15:29:10 GMT 10
Hi, Had a lovely day here today, cool but sunny, so I got stuck into putting a primer coat on the outside. A couple of spots have showed that I need to do a bit more work on them, but thats pretty well as I expected. But its always nice to get primer on. It makes you realise that most of the effort that was put in has been worth it.    Every day gets closer to completion & using it JBJ |
|
|
|
Post by seeshell on Aug 5, 2013 13:36:01 GMT 10
Hi JBJ
That paint sure is looking good, with a really nice gloss look almost like the original finish of the gel coat.
Glad the Norglass stuff is working out for you - we like it as well. We've had the same issue on the outside - despite a lot of patching, we still noticed some fix up areas after the first sacrificial coat of the final colour. A little more patch and sand for us as well before we continue on - all hanging on when the nice weather makes it down here.
And I have to say I like how the fridge spruced up as well - what product did you use to paint it?
Keep up the great work - she's going to be lovely when complete!
Cheers
Seeshell
|
|
|
|
Post by JBJ on Aug 5, 2013 14:17:13 GMT 10
Hi Seeshell,
I used Ship Shape in the inside of the fridge.
My only problem with the Norglass primer is that I am using so much, that it is working out quite expensive. I have used other hi fills that work out much cheaper in the past, but the Norglass seems very good quality so thats important I guess. I'm going to switch to roller application over the remaining bits of painting over some timber bits instead of spraying, to see if it will cover better in difficult spots.
Also I wont be changing paints halfway thru the job.
JBJ
|
|
|
|
Post by seeshell on Aug 5, 2013 14:33:06 GMT 10
Hi JBJ We sprayed the Ship Shape primer to start with, cut with their thinners as suggested (33%), and like you we found it was a bit too thin - we practically sanded it all off! The next round we thinned less (25%) and did it with a roller and that worked much better. That coat gave a thick enough cover for a good sand, though it was a bit more work - I highly recommend a lower nap roller to save your arms. We did the last coats of primer sprayed, but thinned a bit less and that worked out well for a final finish before paint (but of course we still noticed a few bits later on - rrr!). You're right it is dear. They say it covers 10sqm per litre, but I think we ended up much lower than that - maybe more like 7-8? What coverage did you get? Since our application is on the exterior on wood, we had pre-treated it with wood preserver, and based on what you say we may have had a bit less absorbtion into the wood since that had been applied...not sure. Yes, can't change part way through for sure - I guess though, one good job is a heap better than a lot of effort to be repeated later because of poor materials. I'll be painting the windows on our house this year for that reason - previous owner "freshened" them up for sale with something cheap, which is now flat, dull and peeling! Let's hope it lasts like it says, and maybe the jobs will see us both out. Now that would be good value, hey?  Cheers Seeshell |
|
|
|
Post by JBJ on Aug 5, 2013 17:51:27 GMT 10
Hi Seeshell,
I just put the Ship Shape over some timber panels that had already had a coat sprayed. I didnt thin it at all, & used a small foam roller. I'm real happy with the heavy coat it put on, it filled most of the woodwork surface nicely. Foam rollers didnt last long before self destructing.
I've also used their real expensive filler on the flaws in the glass shell, & found it easy to use. Its pretty good to sand, along with the primer. It sands very easily.
Only problem I now have is that as a spray painter I would make a good chef. I dont have the confidence to trust my ability to get a final coat on without any runs or dry spots ( at this stage). Maybe my confidence will return before it becomes time for final outside coat, or maybe I can find a local spray painter that will come to me & paint it using my gear.
Boots finished painting the cupboard doors today, so its now all waiting for me to get painted & then its put back together time.
Its all fun
JBJ
|
|
|
|
Post by seeshell on Aug 5, 2013 19:52:37 GMT 10
Hi JBJ I think you might be talking down your skills on the gun - looks pretty good from here! Aaron's been on the spray gun for the first time while painting the Flyer. He reckons its pretty forgiving so long as you have a go-fer moving the ladders, keeping the paint mixed etc. Means you can finish a side, or even more, and not end up with any dry edges. We're not done yet but so far so good - have a crack I reckon. If it doesn't work out, or you don't feel up to it, do you have a TAFE nearby where you might find some trainees could do the final coat? A friend had a car painted by some students, and they really did a fantastic job on the prep and the finish.  Well done to the better half on the doors. It's good to be in the home stretch. Can't wait to see it all together - do love those Olympics. Keep it up! Seeshell |
|
Deleted
Deleted Member
Posts: 0
|
Post by Deleted on Aug 6, 2013 5:51:52 GMT 10
Hi Dennis When I bump into you and boots on trips away I quite often hear you say you are slowing up and not moving as easily as you use to ... but your deeds and actions on your van restos are telling us quite a different story . Ethels make over is coming along nicely.. keep at it mate... Reddo |
|
|
|
Post by JBJ on Aug 10, 2013 19:59:43 GMT 10
Hi, Been sanding back for final paint. the Norglass Ship Shape is a good primer to sand, it finishes well with 180 grit paper, & comes off like talcum powder. I got a set of new stickers a while back from Boblor. I guessed they fitted wherever previous pix have shown, but couldnt find any definitive pix for the "style Leader" stickers. I guess thats because there never were many of them made. So I tried lots of options on the side, & found only one place where they really seem to be made for.  I will be painting the "belt line" both sides of the aluminium trim in dark green, & this sticker will sit pretty right. I intend to finish the green/white edge in a red pinstripe tape. Does anyone have a pix showing another location for the side sticker from the factory?? JBJ |
|
|
|
Post by boblor on Aug 12, 2013 13:07:54 GMT 10
Hi JBJ
You should know by now Olympic H'Q,s for that sort of information. I will check my files and find you the correct position for your stickers. If my memory is correct it is normally near the first horizontal flute from the bottom, and slightly towards the rear. I will check, but it will look ok where you have taped it.
cheers boblor
|
|


 I have seen your handy work before