|
|
Post by sportsman 1 on Nov 9, 2008 11:03:55 GMT 10
I am proud to introduce the newest member of the Whitfield caravan family. Hilda A Clipper was born in 1955 in Edwardstown S.A. to the special order of Mr Allan H. Cook of Minlaton. She is 11ft long and according to a 1967 registration paper she weighs 12 cwt (600 kg). Some electrical work was done in 1965 when I suspect the 240 volt system was fitted Judging by the fittings and fixtures in this van it appears that Clipper were a high quality manufacturer. Note things like the aluminium windows, interior fittings, inside light and floor treatment, kitchen fittings and fixtures, etc. 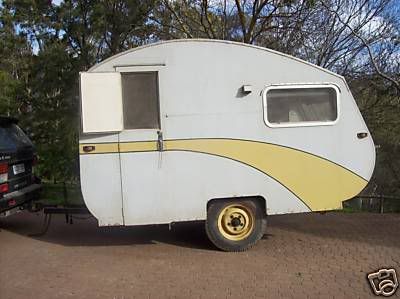 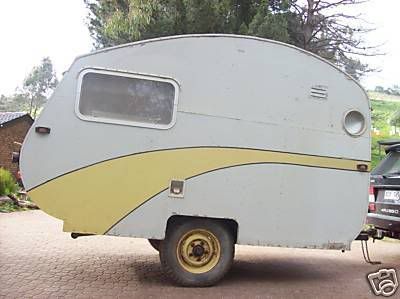 It was originally fitted with 16" Landrover wheels shod with 700-16 truck tyres hence its high stance. Apparently it was made to go behind Allen's new 1955 Landrover for his retirement trip. Safety and comfort reasons have decreed that I will be fitting an electric brake axle and smaller wheels. (I am short and just getting in it was a struggle.) I suppose the originals could be refitted if required but I cant really see that happening. 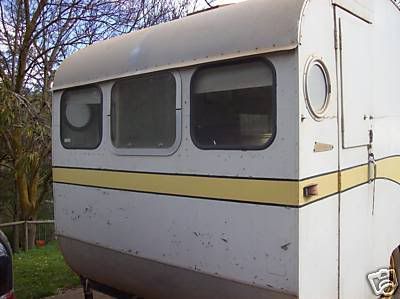 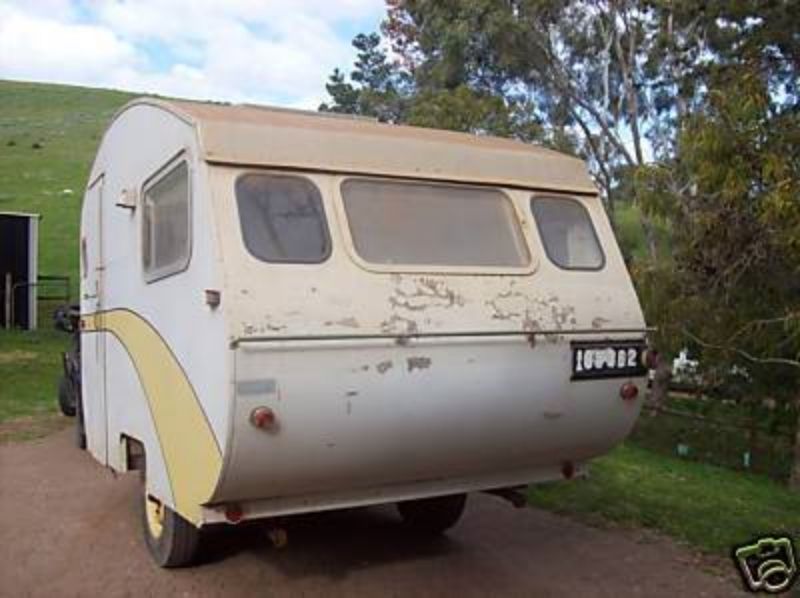 The interior is in very good order with just a few things to fix. The original blinds have lost most of their rings so these need to be replaced. 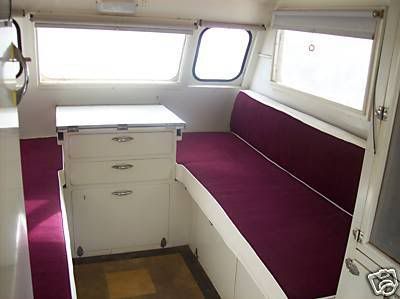 The table is a 3 piece affair that folds out off the top of the centre chest of drawers. It has 2 sets of supports which are used depending if you wish to seat 2 or 4 people. This table is damaged, does anyone have any yellow ice laminex that is surplus to requirements? 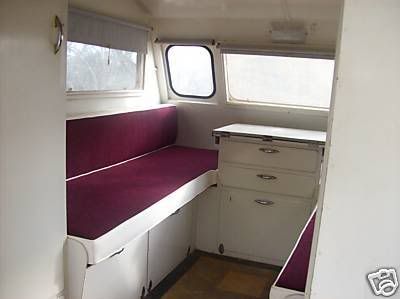 Plenty of cupboards in the kitchen. The small cupboard in the centre is fully lined, vegetable or bread keeper? 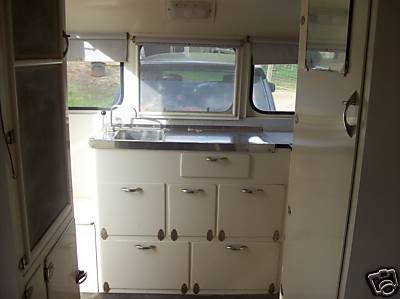 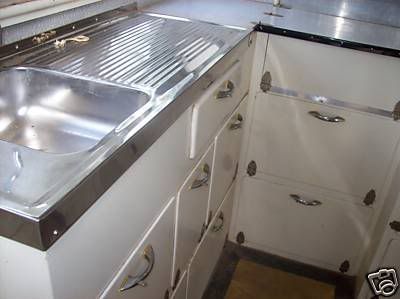 An ice box is fitted on the left hand side under a meatsafe. Does anyone else have a meatsafe? I guess as Mr Cook lived on a farm in outback S. A. and he probably did not have electricity he was used to using a meatsafe at home. I suspect that this area has been played with over the years as the shelves are nowhere near the quality of the rest of the van. It seems to be a large area which is really not very useable so I am thinking of fitting a period fridge as we intend using the van. (I have bought a 1950's President fridge which I am contemplating fitting.) 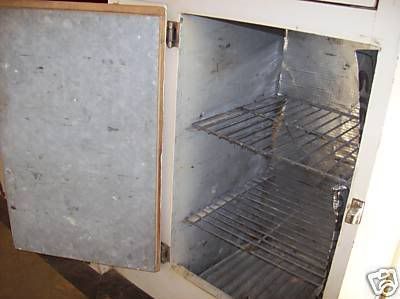 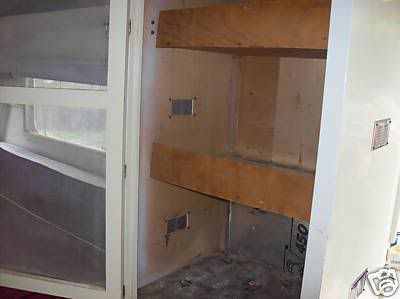 What did I see when the door was first opened? The Clipper logo is staring back up at you from the floor, this has been inlaid in the floor covering. I avoid walking on it and I am going to see what can be done to preserve the whole floor area. 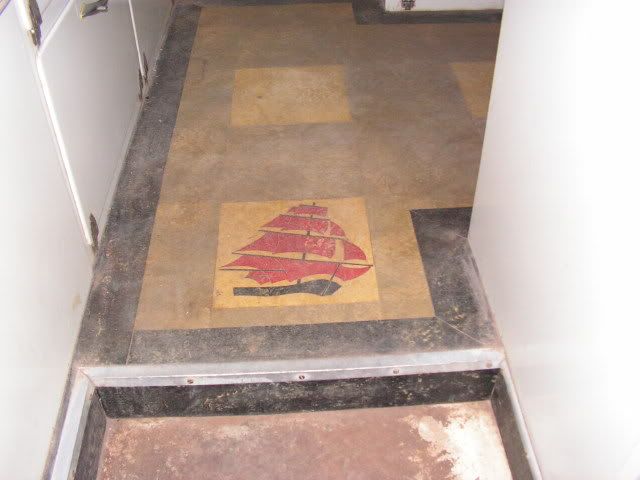 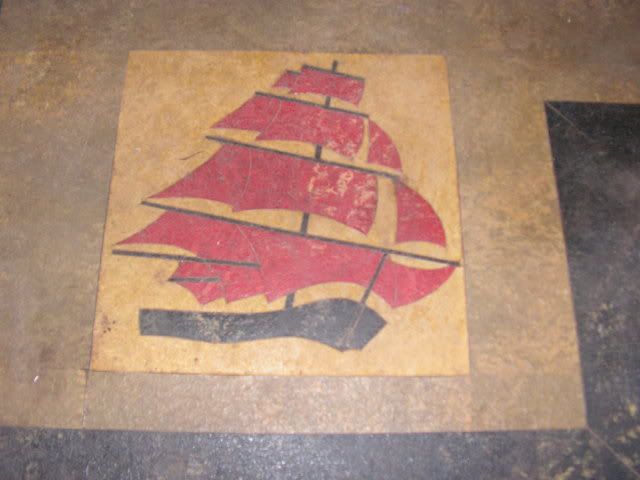 It has 2 portholes, the one on the right hand side over the cooking area is fixed, the one on the left hand side in front of the door opens! This confuses me a little as I would have thought the one over the stove would open for ventilation while cooking.  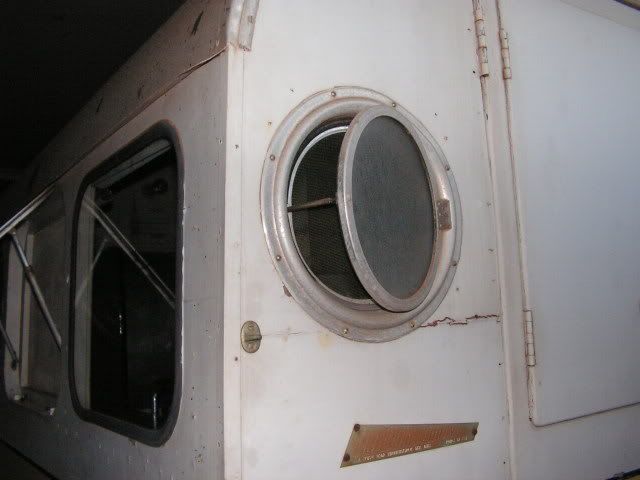 The interior light covers have the Clipper logo moulded into them. 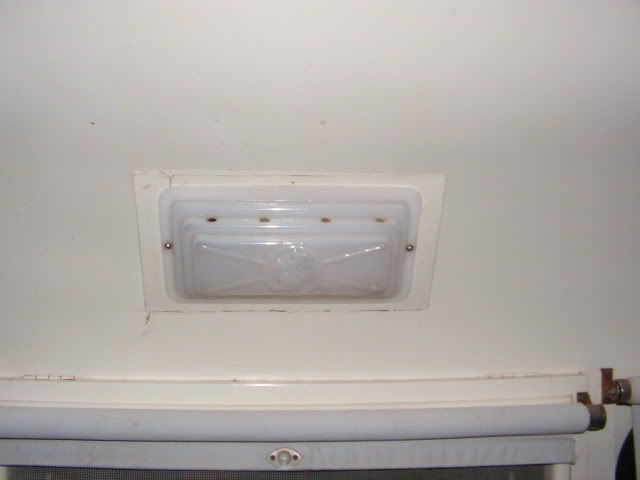 All loaded up and ready for the trip East. 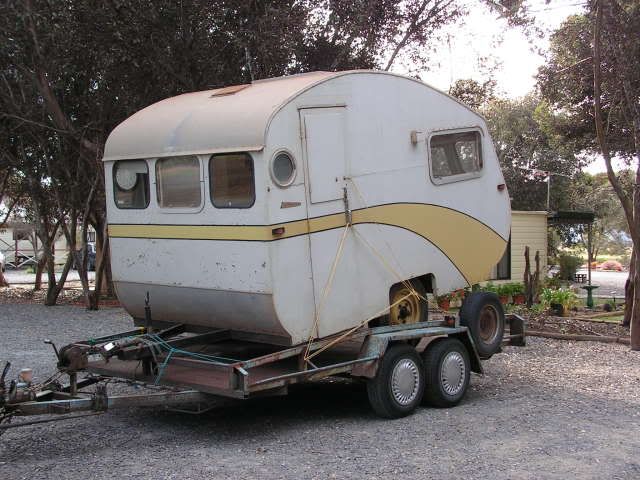 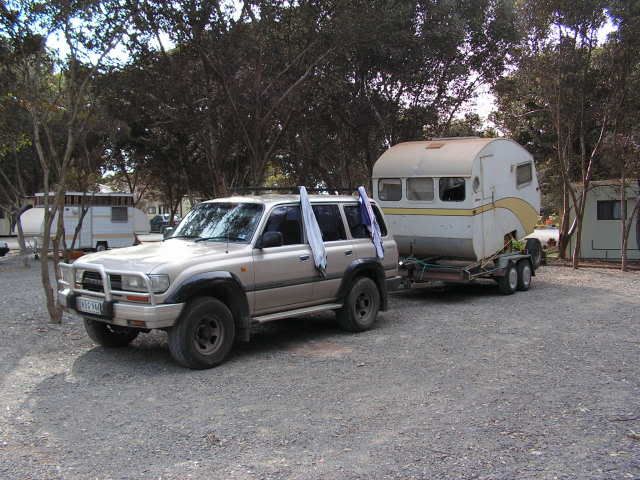 Plenty to be done, outside repairs and paint, rewiring, window surrounds and rubbers, general tidying up, etc. Thats all for now, more as the work begins, cheers, Leigh. |
|
|
|
Post by rfw on Nov 9, 2008 11:49:14 GMT 10
Hi Leigh. Very nice looking van. As to the logo preservation - awkwardly placed that it is - plexiglass (bullet-proof perspex) panel overlaid across that area.(Bevel the leading edges). Appropriately placed non-slip strips then fitted. Just an idea. cheers gordon
|
|
|
|
Post by Cruz on Nov 9, 2008 15:47:49 GMT 10
Hi .
Nice little van have fun with the resto. look forward to seeing it on the road.
cruz
|
|
|
|
Post by cobber on Nov 9, 2008 15:49:34 GMT 10
G'day Leigh,
As you say Hilda sure does look like a classy little bit of fluff.
Those wheel arches look as though they should have spats on them but none of the advertisements in DHL show her as having any.
I like barn style doors..... especially ones that are hinged on the correct side.
Good luck with the restoration.
Cobber.
|
|
|
|
Post by Don Ricardo on Nov 9, 2008 17:08:15 GMT 10
G'day Leigh, Thanks for the photos of Hilda. She's a great little van - sort of like a grown up teardrop.  I'm fascinated by the Clipper logo in the lino (not to mention the light shades). Various manufacturers have built their logo in somewhere, for example the castle etched into the glass of Castle windows, but your lino is something else again. Well worth preserving in whatever way is going to be practical. I think 'hover shoes' are the go! ;D ;D ;D Looking forward to seeing Hilda out and about, Don Ricardo |
|
|
|
Post by firefighter on Nov 9, 2008 21:45:36 GMT 10
  Hi Leigh you have tried hard in looking and chassing a small van to tow behind the vauxhall,well worth the wait and to still have the clipper logo in the floor & lights looks like "HILDA" was a good " PICK" up ;D ;D ;D f/f ;D ;D ;D ;D ;D ;D ;D
|
|
Deleted
Deleted Member
Posts: 0
|
Post by Deleted on Nov 9, 2008 22:54:09 GMT 10
Great pick up Leigh congrats on finally finding a suitable van  , cheers Mark |
|
Deleted
Deleted Member
Posts: 0
|
Post by Deleted on Nov 10, 2008 9:56:36 GMT 10
Hey sportsman, you didn't pick this van up from Adelaide did you? I saw a van near identical to this one going down Main north road a couple of weeks ago on a trailer. I love your little van, after I finish the resto on mine I would love to get one as close to this one as I can. I'm not greedy, 2 vintage vans would suit me fine!
|
|
|
|
Post by sportsman 1 on Nov 10, 2008 12:55:20 GMT 10
Hey Andrew, yeah, that was me. Picked it up out near Gawler and then headed down to Aldinga beach to spend some quality V V time with Olfarts. This is of course unless there was another one on the same road on the same day?  Leigh. |
|
|
|
Post by harriet on Nov 10, 2008 16:30:38 GMT 10
hi harriet here . i wish you b''''''''''/y VICS, would stay in mexico and not pintch our vans i live not far from the place you found hilda . not fair .not fair at all .realy realy not fair . what a beaut little van . please look after her after all she is from sth aust.
|
|
|
|
Post by andrew on Nov 11, 2008 21:06:35 GMT 10
G'day sportsman
What a pearla of a clippa
Love the front kitchen set up
Hilda certainly has a nice set of shiny handles
She will look really swish when you have finished
Good on ya
Regards Andrew
|
|
|
|
Post by sportsman 1 on Jan 31, 2009 17:30:03 GMT 10
Hi peeples, sorry for the delay in posting progress reports on Hilda but my computor died before Christmas and we only just got it back. This, however, has allowed some time to be allocated to restoration instead of sitting in front of the computor! First item of business was to organise a new braked axle and some more user friendly wheels and tyres fitted. This has lowered the van around 4 1/2 inches and should now tow fairly flat. I am considering going down to 13 inch wheels and tyres so am on the lookout for some good FC Holden wheels and caps. 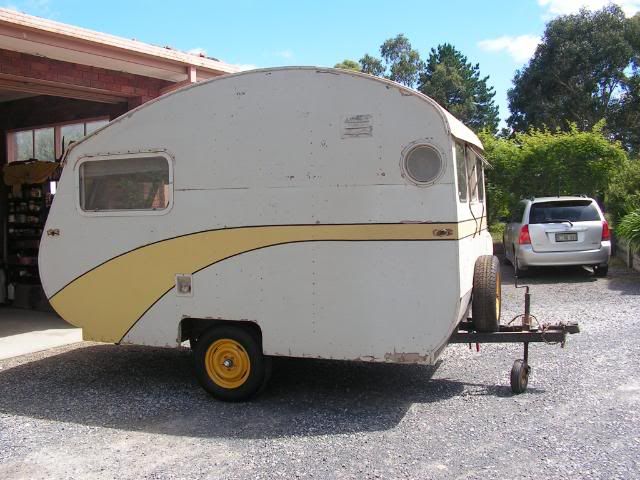 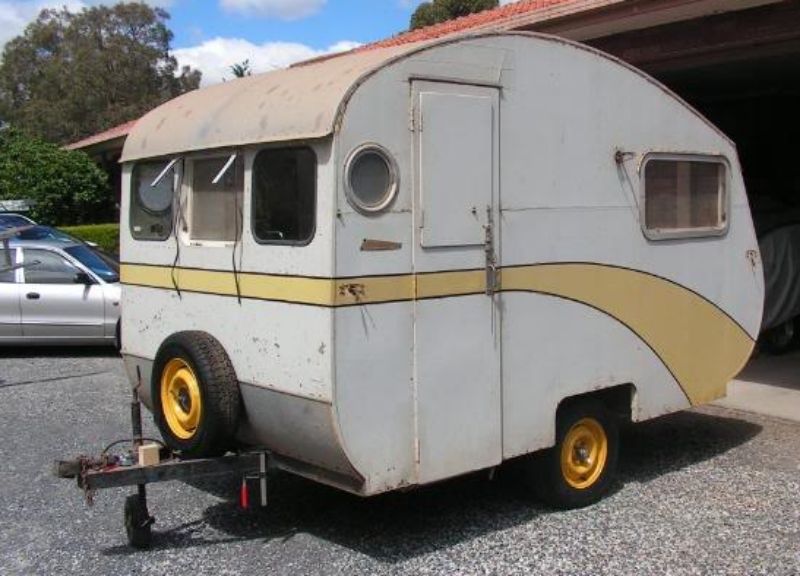 Might have to look at putting some spats on her, little wheels in big arches is not a good look! Note also spare mounted on front (no spare fitted when purchased) and original jockey wheel restored. 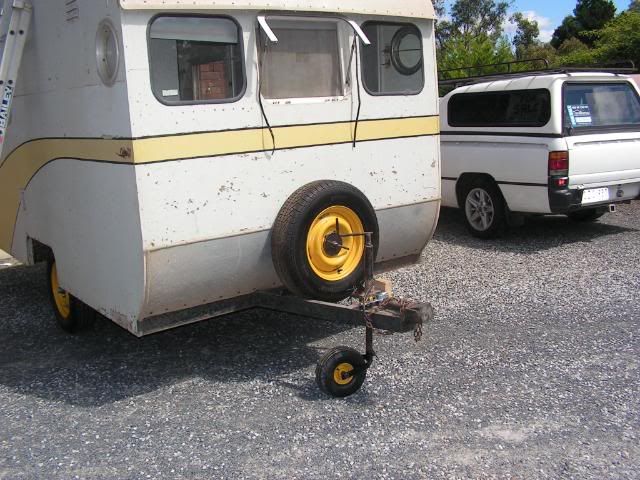 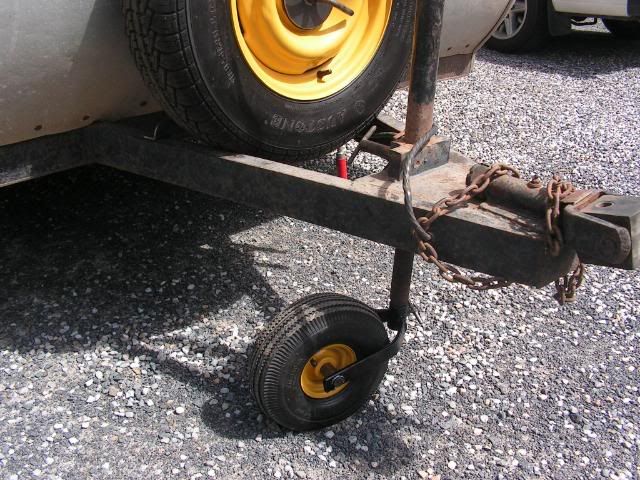 Now for a check around the body to see what is needed. When purchased it was a "no dear, there is not much to do on it!" Found this nasty hole under a large piece of tape that was painted over. 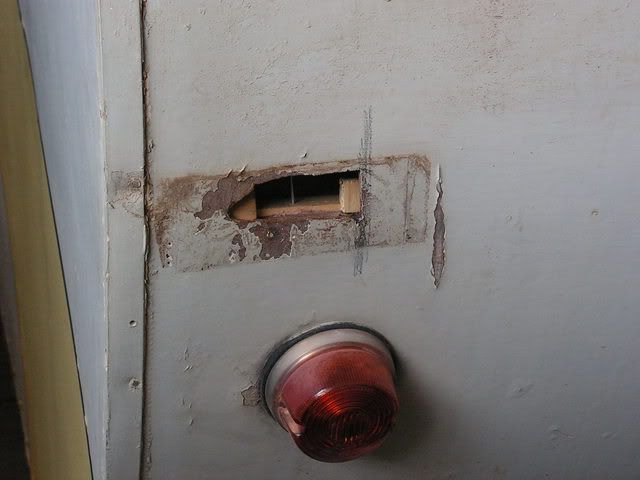 As Hilda is fully lined inside repairs were a bit tricky but I managed to do a very satisfactory patch. 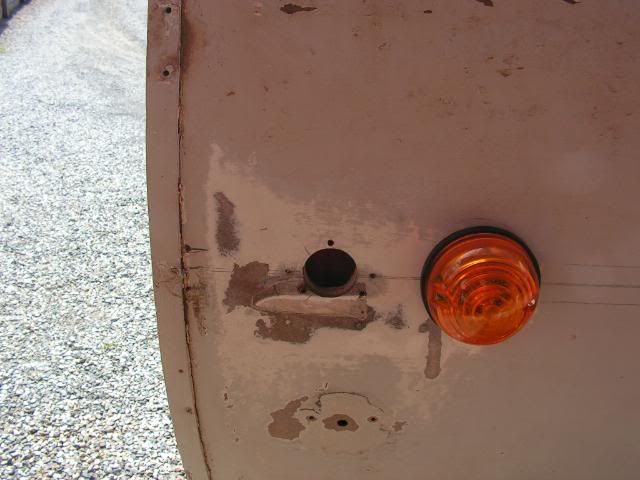 Which will be mostly covered when the new (Landrover) taillights are fitted. 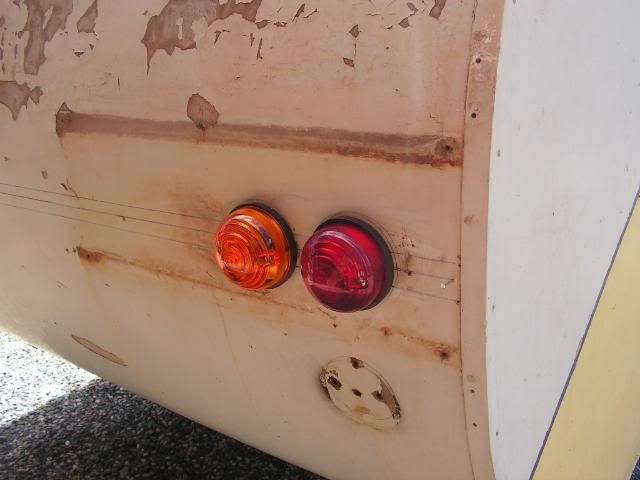 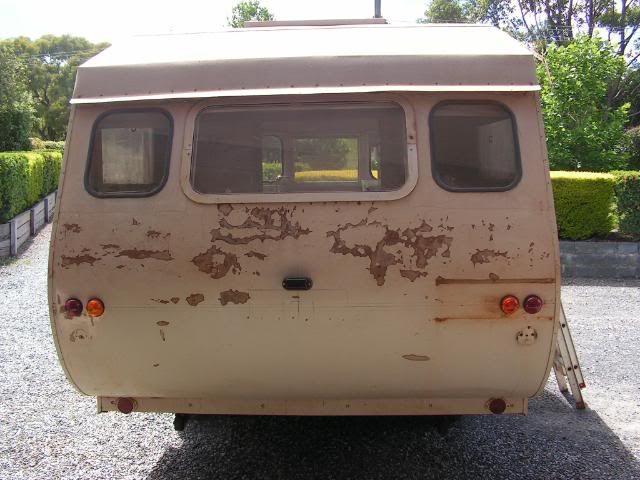 At this stage brother in law arrived, who happens to be an electrician. "What ya gunna do "bout the wiring? Apon reflection it was decided that the old 1955 12 volt wiring and the 1965 240 volt wiring had to be replaced. "How are we going to get the old wiring out? says I. More checking and we came to the conclusion that the ROOF had to be removed. So much for not doing much work! Off with the hatches, off with the mouldings, off with 648 aluminium screws, etc. Well, I always said I wanted A VAN I COULD STAND UP IN! 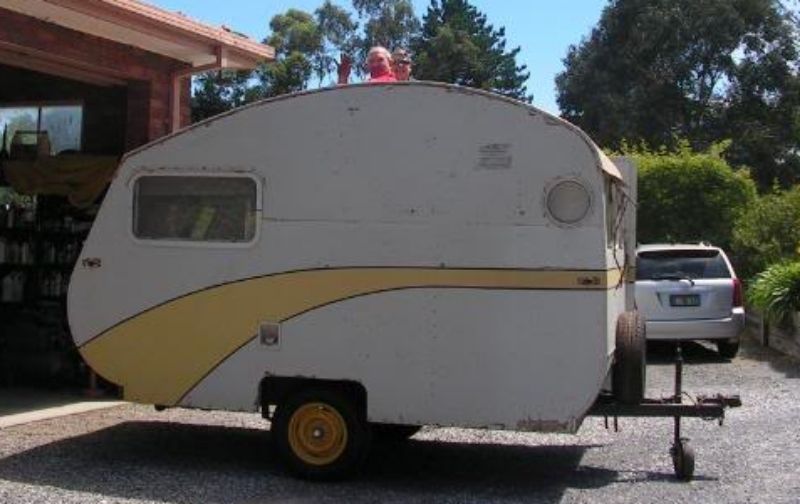 With the roof off I found the frame to be in PERFECT condition. 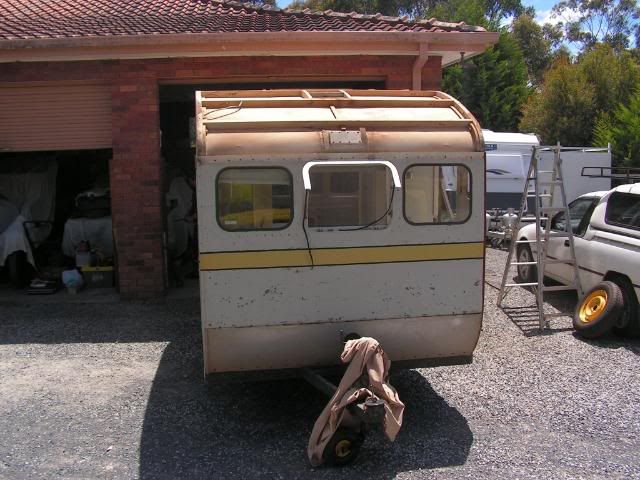 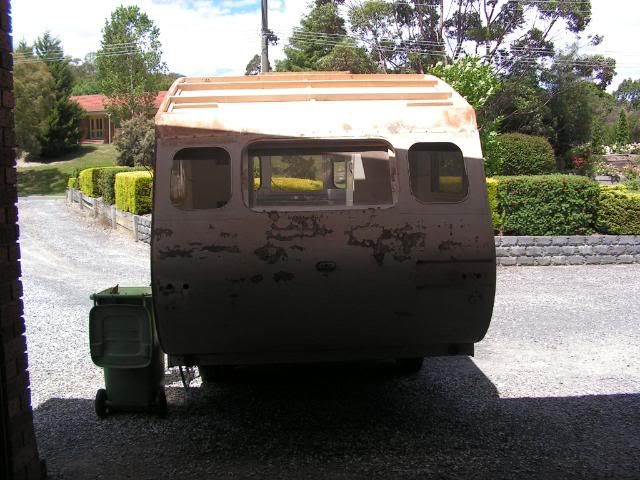 Now that the roof is off why dont we replace that top side panel. The 240 volt inlet plug was fitted to the left hand side of the van. As we are rewiring it we will fit the plug on the right hand side away from the door. This left a large hole in the top side panel that would need to be filled, also there was a large crack in the sheet above the back corner of the door. Best way to fix these was to replace the sheet, so. 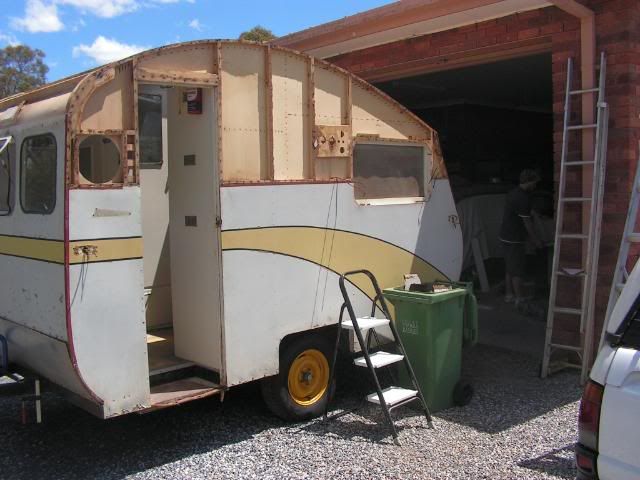 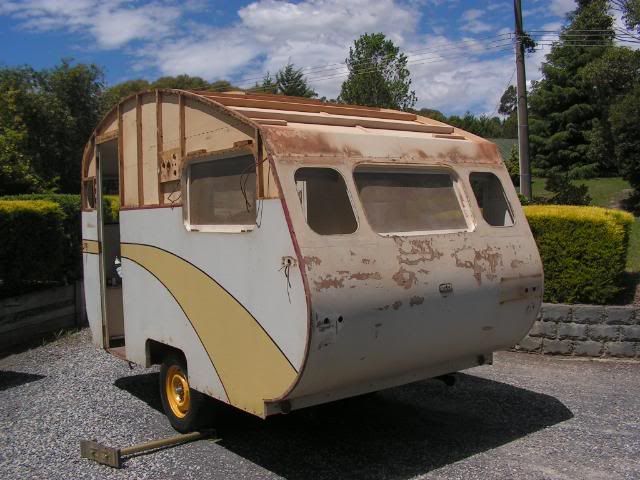 Now we are this far it seems prudent to replace both panels on both sides. Easy to do now and it will be far easier to replace the sides rather than try to repair the wavy and damaged original masonite. Brother in law knows a guy who makes plywood and it seems I will be able to get 5mm sheets that will cover the whole side in one piece rather than having to do them in 2 pieces. I am waiting for the ply guy to get back from his christmas break to see what he can do, some work has progressed on the interior but I will leave that for the next installment. Sorry dear, yes, I am getting off the computor right now! cheers, Leigh. |
|
|
|
Post by cobber on Jan 31, 2009 18:34:21 GMT 10
Good on ya Leigh, you're doing it right but it has turned out to be a bigger job than first thought eh?
I wonder how many of us have wives who think we spend to much time on the computor.... might be worth putting up a pole on the subject.
Cobber.
|
|
Deleted
Deleted Member
Posts: 0
|
Post by Deleted on Jan 31, 2009 20:50:58 GMT 10
great project Leigh .....well worth the trouble to do it properly .....you won't regret it. Cool  lookin' lil van the Clipper ......keep up the good work, and looking forward to updated progress shots, no matter how long you're on the poot Are we going to catch up at the Ballarat swap in a coupla weeks |
|
|
|
Post by sportsman 1 on Sept 1, 2010 15:01:19 GMT 10
Gee, have not updated this since January, had not done much up until the last few weeks so not much to report and since then I have been so busy I have not had time to! I had made an addition to the kitchen area where there was an unused corner (I hate wasted space) so made up an area for a gas stove up the top and storage under. This is seen just inside the door on the left. Used a piece of the broken table top to make a new lift up bench top over the gas cooker area to match the original kitchen bench. Made a couple of matching doors with handles the same as the originals and then painted all the internal doors yellow as per the original color scheme. 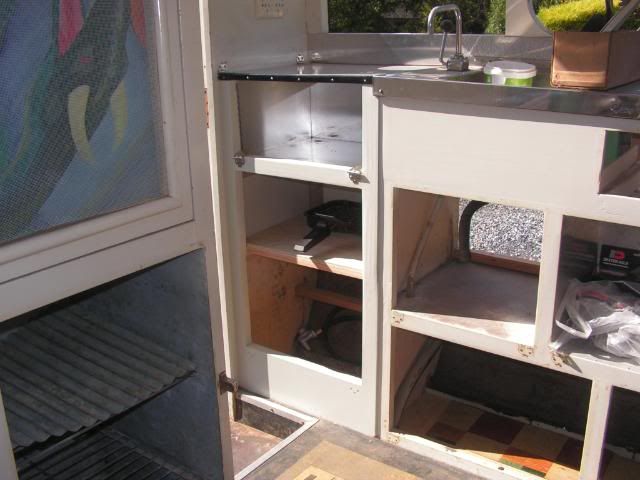 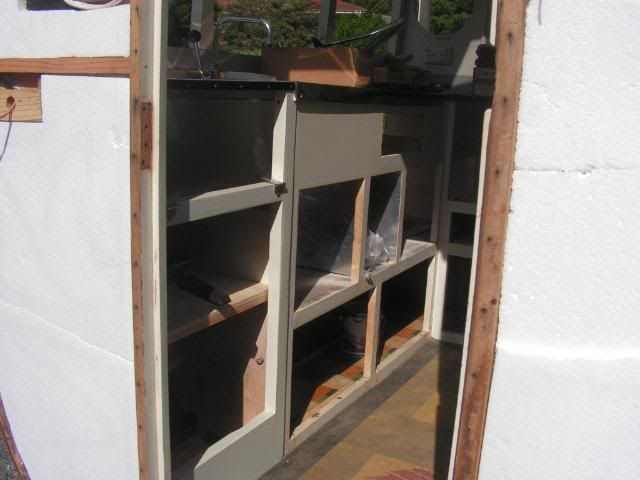 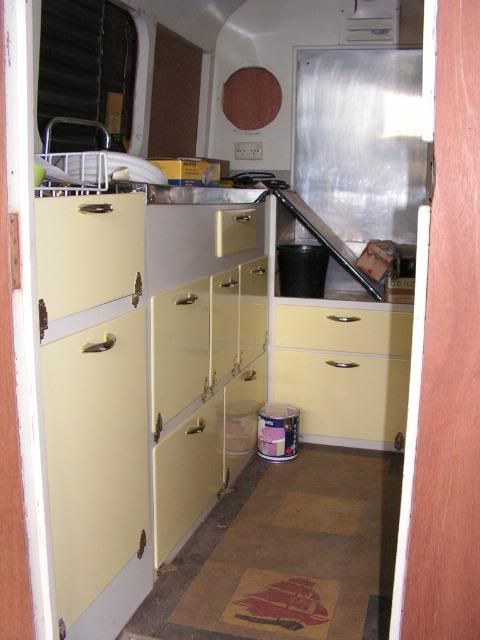 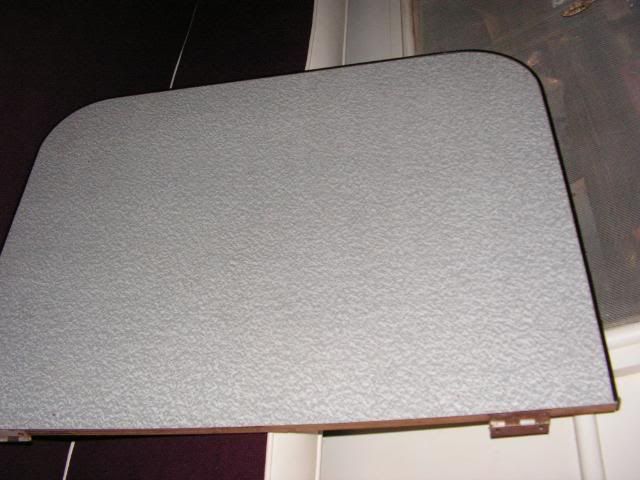 Organised a couple of pieces of Marine Ply for the sides - 13 foot long and 7 foot high should do it nicely. Sat these to one side while we ran the 12 and 240 volt wiring. As discussed elsewhere I found a supply of polystyrene for insulation so before the sides went on the van's frame was filled. 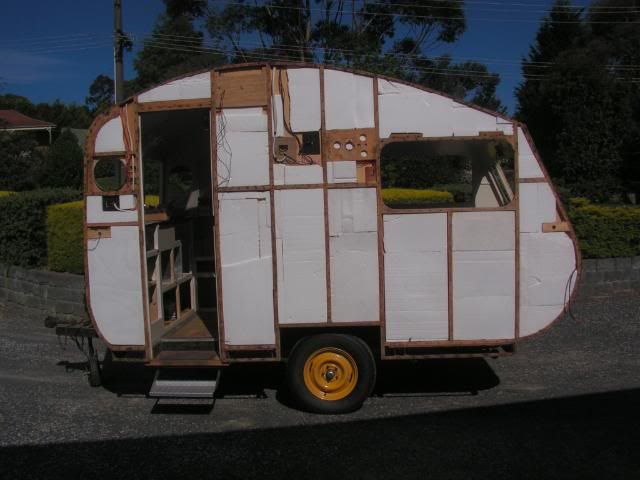 When the insulation was done and wiring all run it was time to fit the side panels. 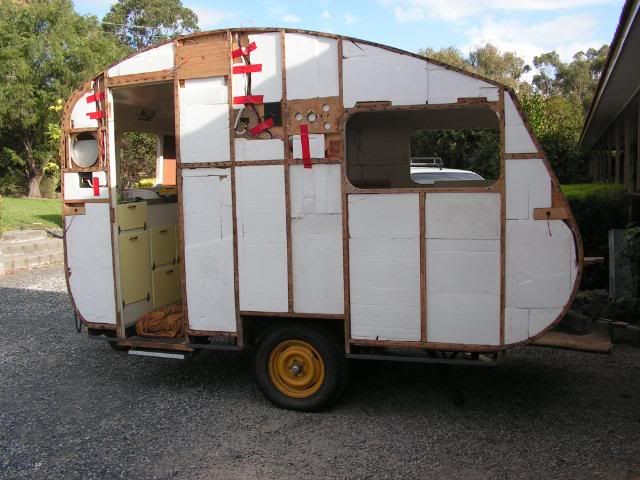  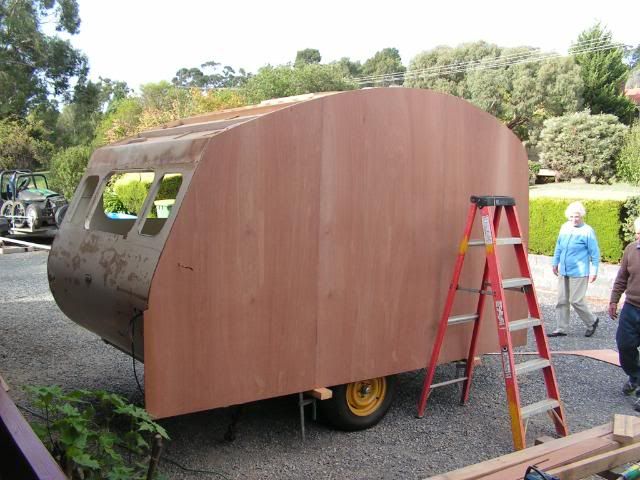 We applied glue to the frame on one side, sat the sheet on a couple of supports at the bottom and simply pushed it onto the side of the van. A few nails and a quick run around with a router had the sides on and trimmed. 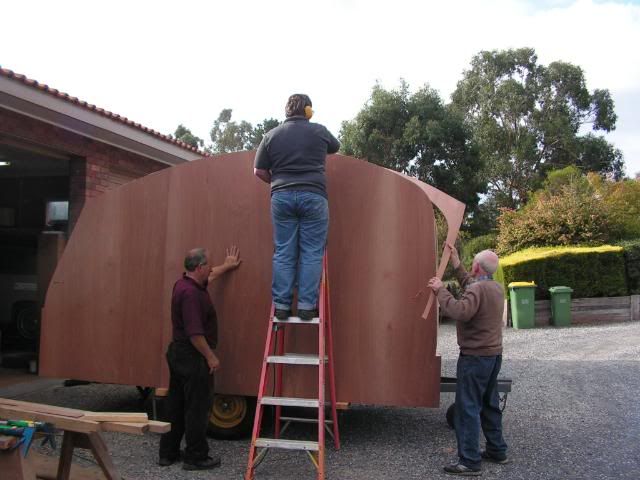 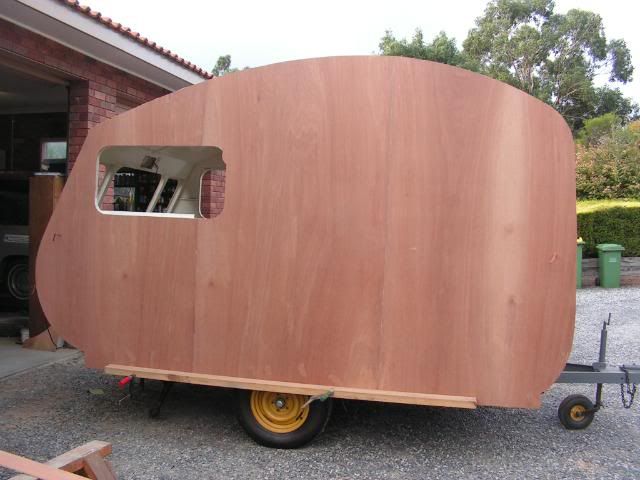 Repeat the foregoing directions on the other side and the front and Hey Presto! 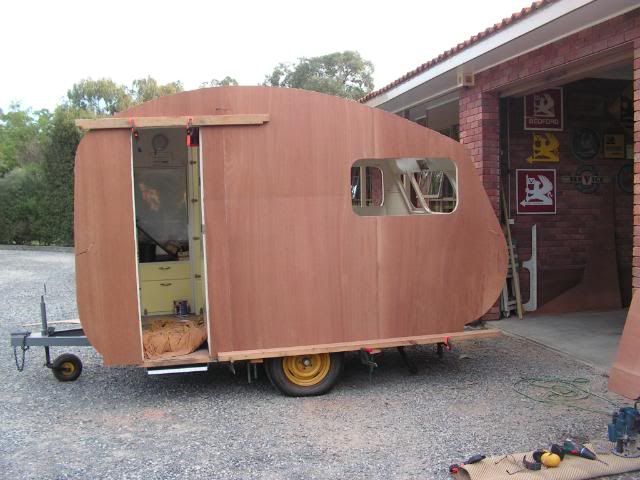 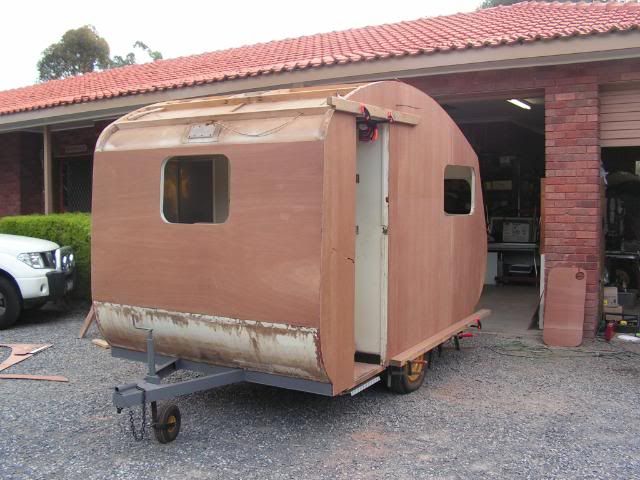 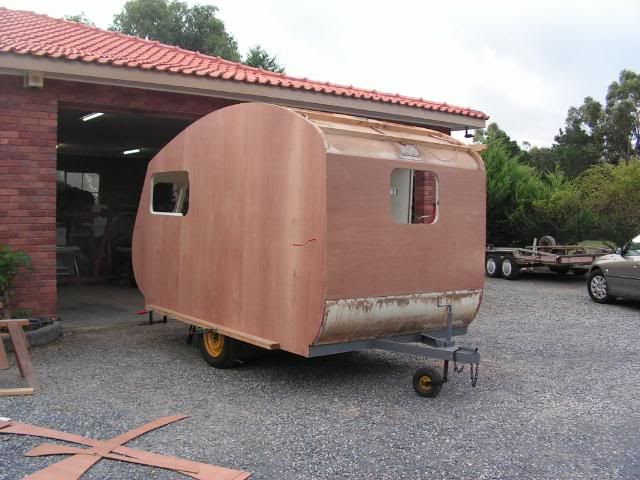 I had previously cleaned and painted the drawbar area when I found the original Chassis no welded underneath. I have finally found a suitable donor for the tow hitch but need to do some machining to get it to fit. Lots to do yet, such as paint, rebuild windows, refit roof, finish off wiring, etc, etc but I am hoping to get it to Cora Lynn in 5 weeks. Cheers, Leigh. |
|
|
|
Post by curtis on Sept 1, 2010 15:26:29 GMT 10
This is great progress Leigh, I am very jealous that your frame was in perfect condition.  Keep up the good work and stay focused. Noting like a tight deadline to make you get it done!! Dave |
|
|
|
Post by Franklin1 on Sept 1, 2010 18:25:20 GMT 10
G'day Leigh, Very impressive job! ;D ;D Are you saying you were able to get 13ft x 7ft in one sheet?? Can I please have the details of how you were able to do that? (Who; where; how much, etc?) And if you actually used narrow sheets joined together on site, what did you do to make the joints watertight? (Asks he who will eventually have the same job. ) Thanks for any help. cheers, Al. |
|
|
|
Post by sportsman 1 on Sept 1, 2010 18:47:24 GMT 10
Hi Al,
there is a place in Bayswater, (Vic) called Worthington Industries. They make up sides for truck bodies, floors for train carriages, etc. I will get the details and give them to Cobber for the suppliers list. (or just google it.)
They supplied the 3mm marine ply and scarfed the sheets together for me. This involved 3 1/2 sheets per side (ie 3 joins per side). The sheets are accurately machined on a fine angle along the edges to be joined and these edges are then overlapped and glued under heat and pressure in the same way the ply is made originally. They claim the join is stronger than the original material and it will break on the sheet before the join lets go. I tried it on an offcut and it indeed broke the sheet and not the join.
The cost for 8 sheets of A grade marine ply (3 1/2 each side and 1 for the front) plus scarfing was around $700. Not the cheapest alternative but I only want to do it once and I know it ain't gunna leak!
I thought fitting the huge sheets would be difficult to handle but it ended up being really easy. I suppose time will tell how it lasts.
Cheers, Leigh.
|
|
|
|
Post by firefighter on Sept 1, 2010 20:06:23 GMT 10
G'day Leigh Wish I had couple mates to come around and work .....Dave 01 called in last night......all he wanted to do was talk ;D ;D ;D ;D Worthingtons is now in PARTS SUPPLIERS VINTAGE RESTORATION & INFORMATION f/f ;D ;D ;D ;D ;D
|
|
|
|
Post by cobber on Sept 2, 2010 7:08:59 GMT 10
G'day Leigh,
That is looking real good mate.... was it as easy to route around the edges as your making it sound..... was there much sanding to do after ?
Scarfing the sheets to make oversize panels will provide a nice clean surface, should look good . Do you know how much the actual scarfing cost.... I expect it's so much per metre.
I was going to let F/F know the details about that Worthington Industries for the suppliers list.. but I was trying to find out if there are firms in other states who do the oversize panels thingo..... it will take a few phone calls.
Cobber.
|
|
|
|
Post by sportsman 1 on Sept 2, 2010 8:20:36 GMT 10
Hey Cobber,
we had a router with an attachment that followed the timber frame and cut the ply virtually level with the frame. Took all of about 1 hour to clad and trim the whole van and only a few minutes to run around the edges with a belt sander the next day to finish it off. But then again I am lazy, if there is an easy way I will always try to find it!
Cheers, leigh.
|
|
|
|
Post by sportsman 1 on Sept 2, 2010 22:00:17 GMT 10
The only original panel left on the van was the rear one. It was somewhat weatherbeaten and misshapen but I thought I could at least save one. Started sanding the several layers of paint off back to something I could fill and undercoat. It was originally painted white and had been painted over with a light grey. That's funny I thought as the more I sanded the more different colors started to appear. I stood back and focused on the centre of the panel and saw a faint outline of something. More detailed sanding revealed this ;- 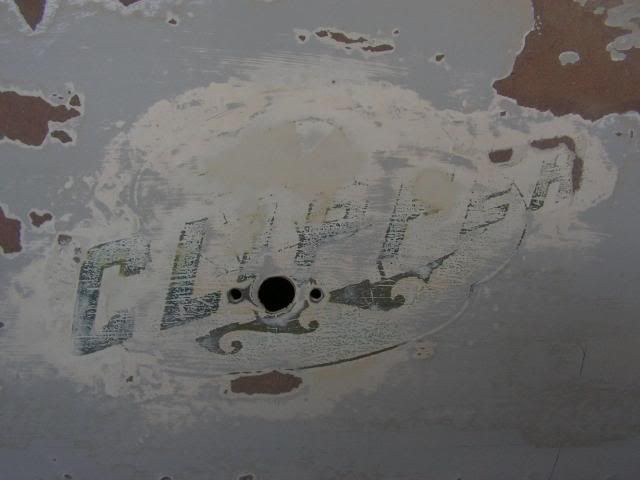 Well you could have knocked me over with a feather. I saw this logo for the first time only a couple of days earlier on the Clipper that was for sale in S.A. I did not have a clue it was even there. I hope to be able to get a good picture from the S.A. van to enable me to reproduce it. Managed to get several coats of pink primer and the base color coats on over the last couple of weeks. Many hours spent out in the garage with the little electric fan heater on during what must be the coldest and wettest period we have had in Melbourne for years. At least I have a garage to work in. 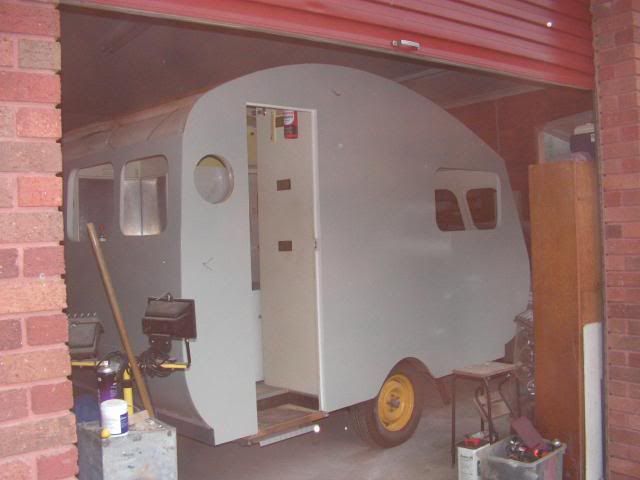 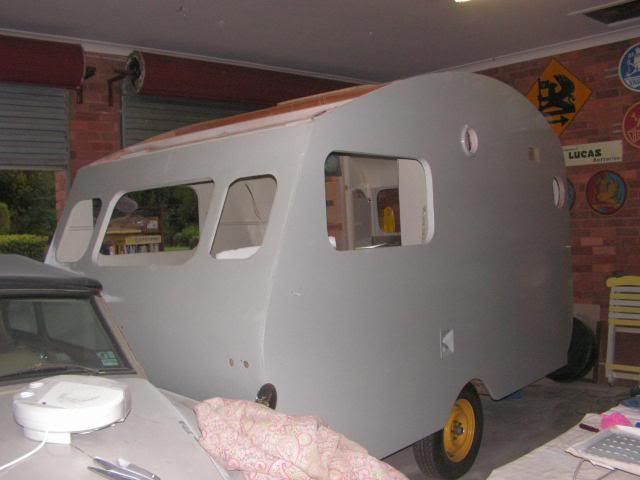 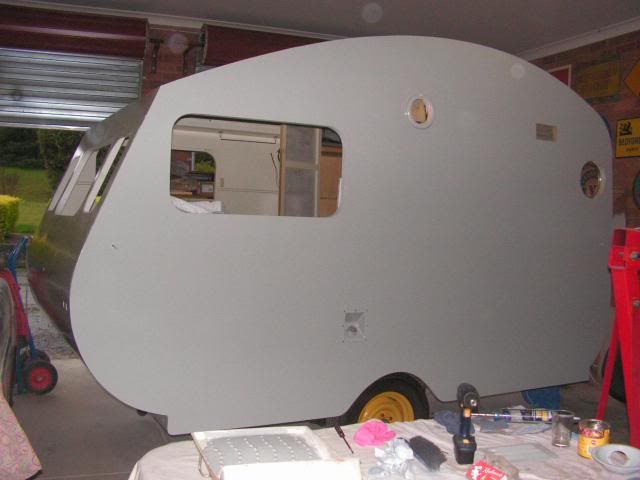 Here is a teaser for Cobber, what do you make of this coupling Bob. 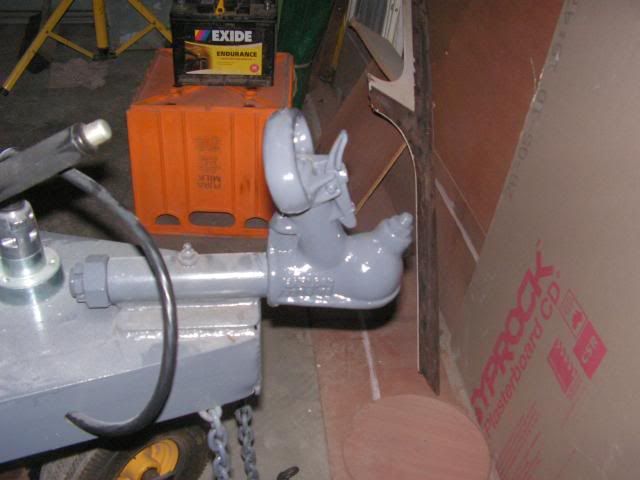 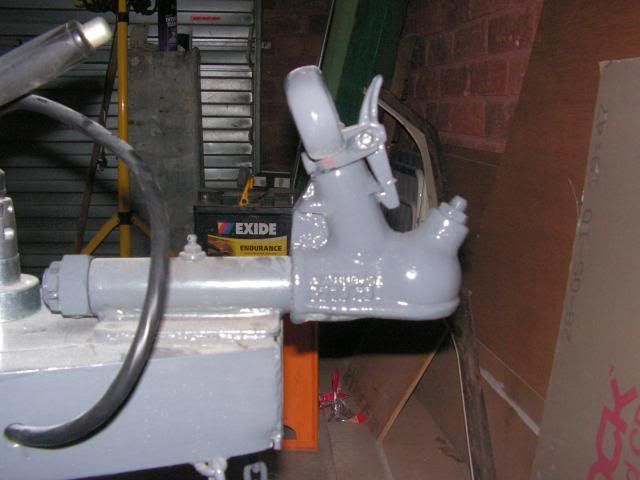 All guesses should be written in pencil on a $100 bill and sent to me asap. Got a suitable piece of Laminex for the repairs to the table tops. 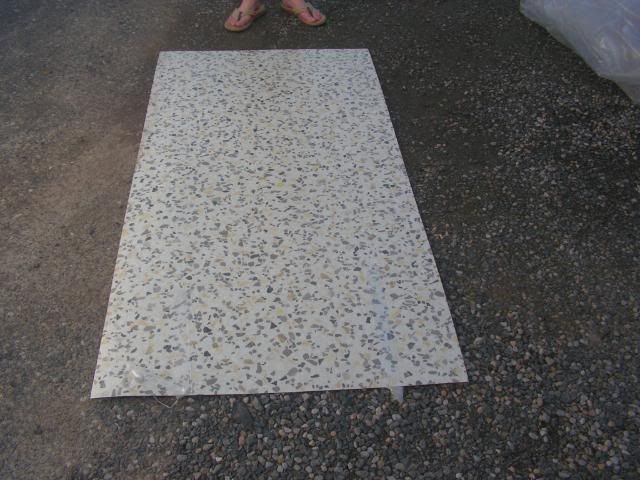 Starting to go back together now, more pics soon. Cheers, Leigh. |
|
|
|
Post by cobber on Sept 3, 2010 10:30:15 GMT 10
G'day Leigh, Thanks for the coupling picture Leigh.. the variety of these things is endless aye? The sideways handle and locking catch is different.... not to mention the mounting tube..... where did you get it ?..... and please don't tell me it's brand new and you got it from the local caravan accessory shop . I liked the original one better  Cobber. |
|
|
|
Post by sportsman 1 on Sept 3, 2010 13:16:12 GMT 10
Cobber,
if you have a look at the pics of the original Treg type coupling it showed the tube part welded to the drawbar and the coupling through it.
I have several possible tow cars and the thought of having to put on and take off the other part of the Treg to each car every time I wanted to go somewhere seemed a lot of trouble as well as the fact they are notoriously hard to put the two halves together.
Some time ago I advertised for a 50mm override coupling to do a conversion. Seeing as the override coupling has the same diameter shaft as the Treg I figured if I take the ball coupling off the override and shorten it to suit I could fit it into the original tube. This gives me a ball coupling for multi use without destroying any of the original bits. If I want to I can just take the nut off the end of the ball coupling, remove it and replace the original.
I did cut the handbrake bits off the ball mount as they were not required. I know it is not original but hey, it works for me!
Cheers, Leigh.
|
|
|
|
Post by sportsman 1 on Sept 22, 2010 8:22:32 GMT 10
Hi all, managed to get a few minutes to update the progress on Hilda A Clipper. Things have been moving along at a reasonable pace and Cora Lynn looks like it might still be possible. Have dismantled, cleaned, rebuilt and fitted all the windows. For those of you who have Alfab aluminium windows Alfab are still in business and were able to supply the correct rubbers from thier storage area in "the loft". They have about 300 metres left. 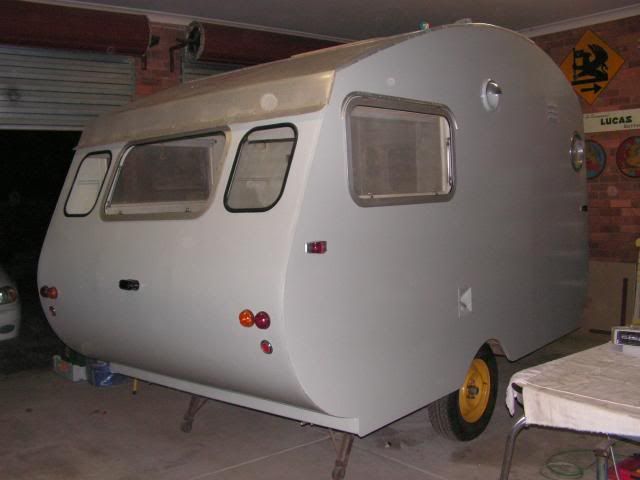 All of the external lighting has been wired up and fitted, as has the wiring to the vehicle plug and the electric brakes. The internal wiring still has to be done but I have a torch on charge in case this isn't finished before C L. 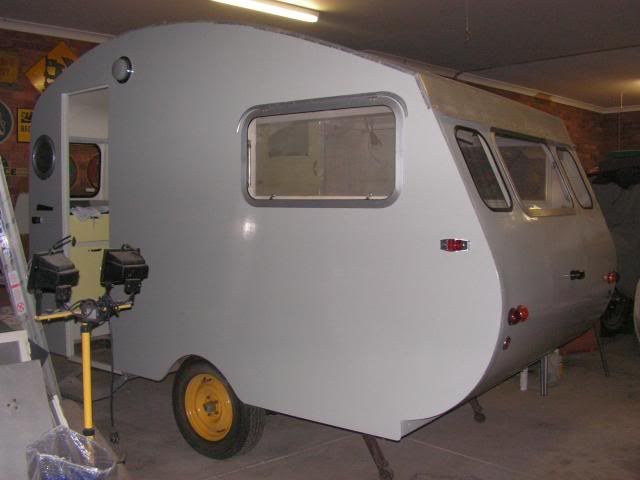 After the windows were fitted up the flyscreens were cleaned and fitted along with the associated catches, blinds, etc. Also fitted up a new mirror to the wardrobe door and started fitting up the three table top sections using the new laminex sheet as pictured earlier. This leaves just the water tank to be repaired and fitted, new hose run to the sink, pump tap to be rebuilt, the last of the cupboard doors fitted, fridge and oven refitted, internal hatch flyscreens cleaned and refitted, etc, etc. 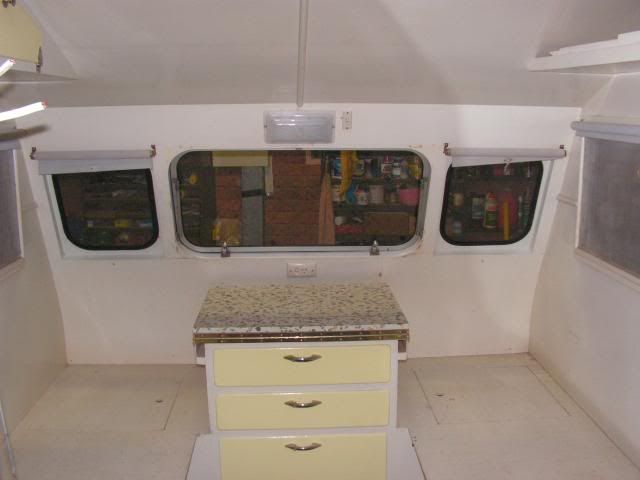 Even dug out the original Clipper badge which has been refitted after a thorough cleaning.  After a long session cleaning up all the original roof panels and associated parts and filling the roof cavity with more polystyrene (anyone worked with polystyrene before? Had about 4,000,000,000 little bits floating around the garage by the time I finished cutting it up to fit.) I have started fitting and sealing them as required. Fitted up the first five working from the back so the joins all face the rear. (originally the front joins faced the front but I figure it has to be better the other way around) Just the main sheet on the front to go then the hatch surrounds and hatches can be cleaned fitted and sealed. Apart from that there is just the edge moulds to be stripped, repaired, fitted and sealed. new matching moulds to be made for the bottom edges, hubcaps to be prepared and painted, front panel to be bought and fitted, paint the yellow strip and edging, paint the roof? Oh I suppose I should also fit a door to it as well, and then I can think about getting it registered. When is Cora Lynn again? Better get back to it I suppose. Cheers, Leigh. |
|


 ,
,


 lookin' lil van the Clipper ......keep up the good work, and looking forward to updated progress shots, no matter how long you're on the poot
