tom
New Member

Posts: 9 
|
Post by tom on Apr 25, 2017 22:18:46 GMT 10
Hi All, We just purchased a Franklin. We are planning a year trip around Australia to start in 12-18 months time. So I have a bit of time to get the van looking as it did 40 years ago. It is dated on the register papers as 1987 but I think it may be an earlier model. There are a few water leaks and rot in the frame (I havnt pulled off all the cladding yet so not sure how much work I have ahead of me). I started on the chassis today. Got under there with a wire brush (on a grinder and driver) to get off the rust, it is a horrible job! I treated it with killrust and going to paint with cold galv tomorrow. Next will be repairs to the rot in the frame. Any advice on what lies ahead of me is welcome  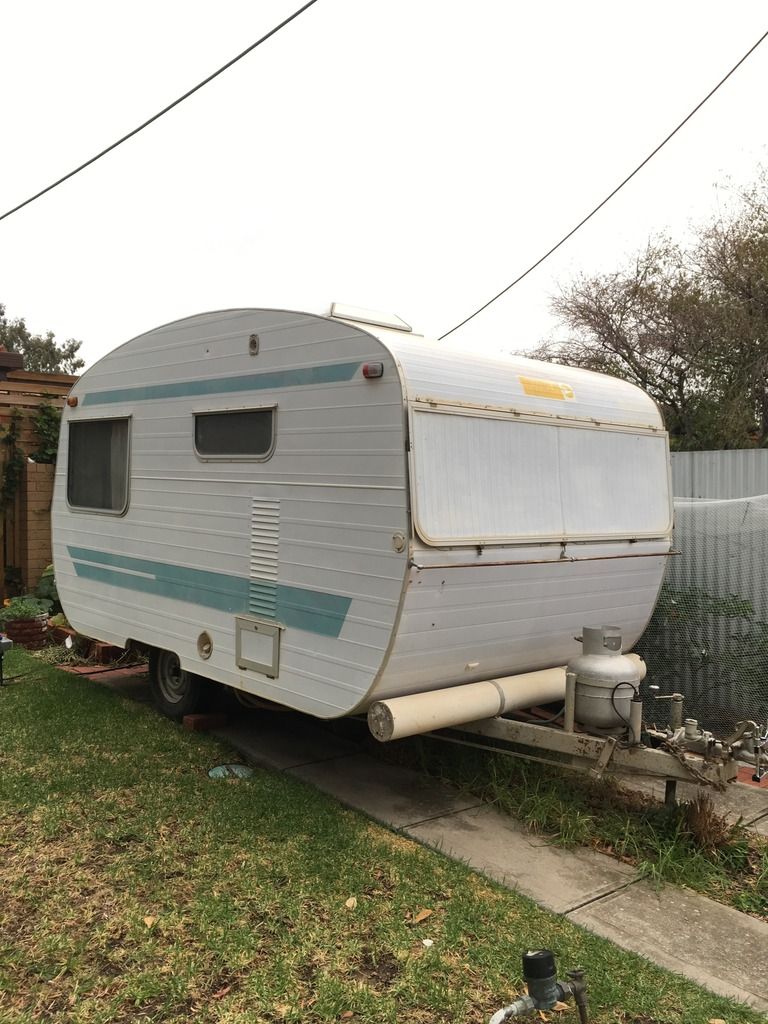 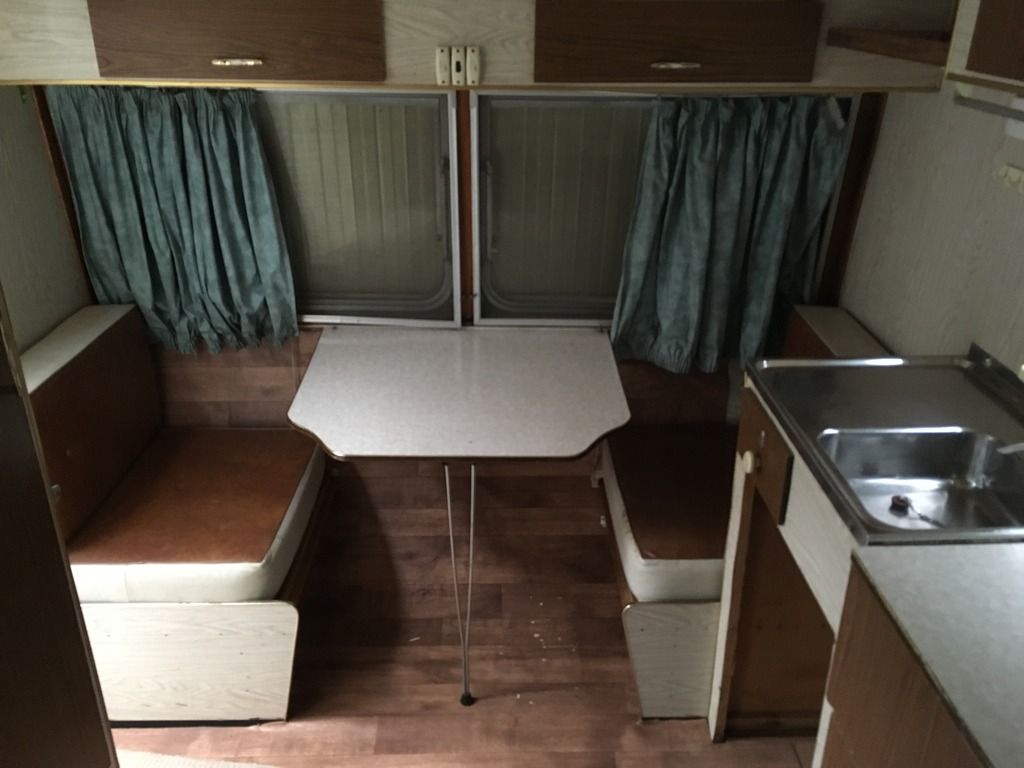 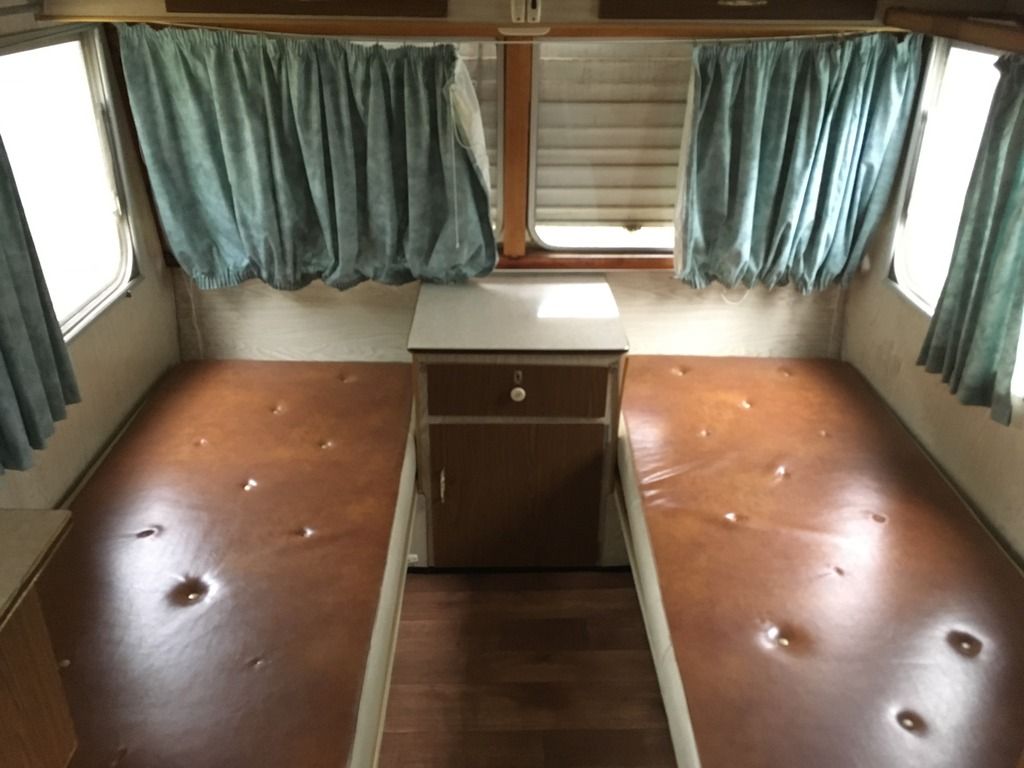 |
|
Deleted
Deleted Member
Posts: 0
|
Post by Deleted on Apr 26, 2017 7:47:10 GMT 10
Hi Tom,
Your van looks like a 1972 model to me,going by the stripe and interior fittings.
I see you windup hatch has been replaced by a 4 seasons at some later stage,interior looks to be in good original condition.
These vans were made with sandwich panel walls,which means there is only a very minimal frame,so care needs to be taken!
A common problem with Franklins is that water comes in through the top then sits right at the bottom of the walls and causes rust and rot,including the inside lower walls.
Hope this helps
Cheers
hughdeani
|
|
tom
New Member
Posts: 9
|
Post by tom on Apr 26, 2017 12:04:40 GMT 10
Thanks hughdeani,
I have since found some leaks from the hatch so I think I'm going to find quite a bit of rot in the frame when I start removing the panelling. Do you have any advice of how to keep it structurally sound when repairing the rot in the frame?
I was planning on starting with the hatch/roof then doing one corner at a time. Do you know if any of the cupboards seats and beds are structure and need to stay?
Thanks again,
Tom
|
|
|
|
Post by vangough on Apr 27, 2017 16:23:57 GMT 10
Hi Tom
Our '69 Franklin was a sandwich construction re the walls and roof. the only timber framework in the walls was around the windows. The timber rot in our was all the end window frames (yours look great from your pics) and as hughdeani said, water gets in around the windows at the ends, runs down to the 2" x 2" floor frame 'cross members. We had to remove the all cladding from both ends and rebuild the floor framing which was rotten as well as replace some rusting steel. We didn't need to remove any cupboards, additional waterproofing was ensured by removing the complete edging strips and replacing with high quality sealant. Cupboards by the way are all structural strengtheners, I reckon best left intact. I can send you some of WIP pics if you like Tom ..... this job not for the faint hearted! By the way, your looks in much better nick than ours when we started.
Cheers
Elgar
|
|
tom
New Member
Posts: 9
|
Post by tom on Apr 27, 2017 18:37:01 GMT 10
Thanks Elgar,
When working on the chassis I noticed that many of the bolts on both ends of the van are loose. I imagine this is from the timber rot from the leaks in the windows. The steel looks like it's ok though. I am going to remove the cladding in both ends to re seal and replace those timbers. Im hoping to be able to save the window frames but I'm not sure about the rot. It would be great to see some pictures of your progress. Do you know how the ceiling is constructed? Is these beams with a cavity?
Thanks again,
Tom
|
|
|
|
Post by vangough on Apr 28, 2017 9:27:44 GMT 10
Tom
I think you're on the right track with removing both ends to have a look at the 'floor joists'. Good chance they'll need replacing.
My window frames were rotten both ends, so I had to completely rebuild them. I was able to get some 2"x2" finished, finger jointed treated pine which were straight and true. Easy to take out all windows and replace with silicone under the frames for a perfect seal.
My email is sikrats at yahoo dot com dot au. Send me an email and I'll send you some WIP pics which might be helpful for you.
I didn't have to do a thing to my roof (ie top between the top of front and back window frames). Ours has the original roof hatch which was leak free. There were leaks along both top edges. That meant taking off both brass edging strips completely (cleaning up old sealant) and replacing with good sealant ie marine grade Sikaflex.
Hope that helps!
Elgar
|
|
tom
New Member
Posts: 9
|
Post by tom on May 7, 2017 18:45:40 GMT 10
|
|
tom
New Member
Posts: 9
|
Post by tom on Jul 2, 2017 22:33:16 GMT 10
Made a little bit of progress over the past few weeks. Built a new windowframe out of meranti. Made and installed a frame about of 30mm ply (2x15mmm glued together). I hope to have some insulation in and end sealed up next weekend  Before 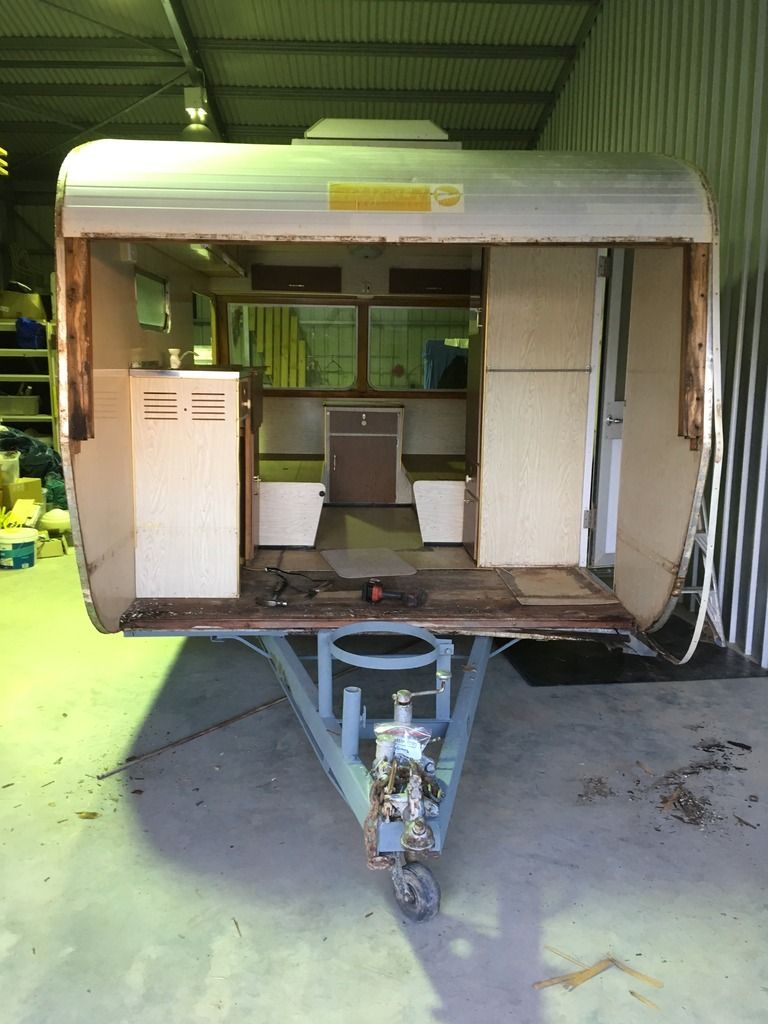 Window frame 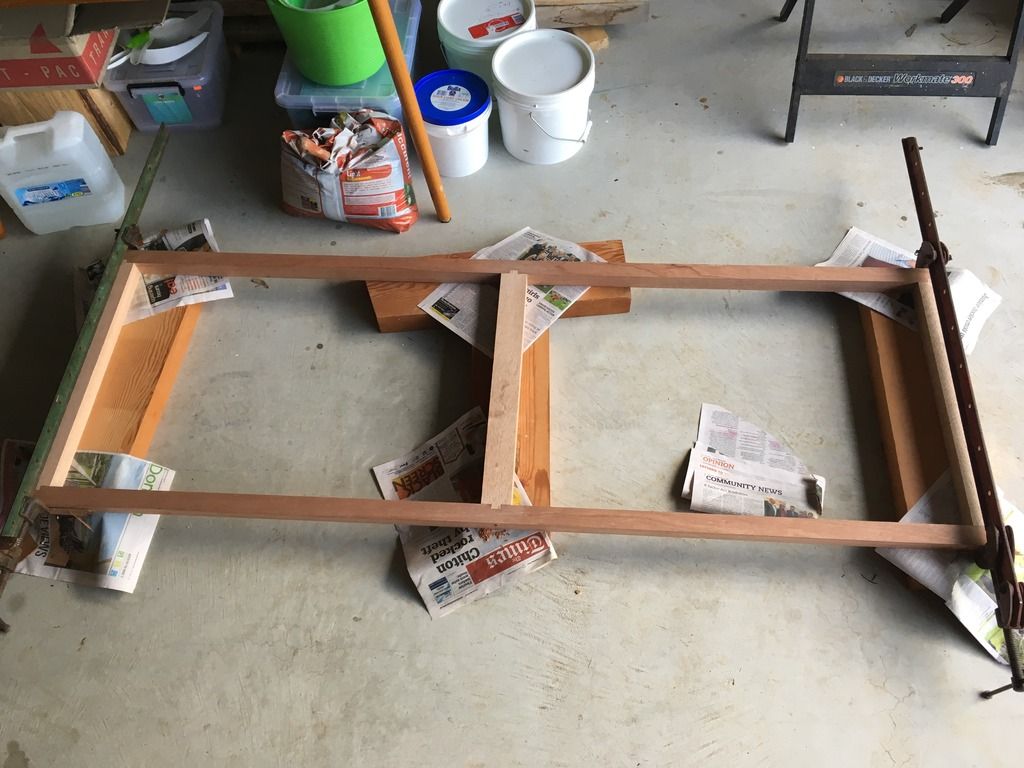 After  |
|
|
|
Post by Mustang on Jul 6, 2017 7:43:26 GMT 10
Nice "jointing" with your framework.
|
|
tom
New Member
Posts: 9
|
Post by tom on Jul 6, 2017 18:21:22 GMT 10
Nice "jointing" with your framework. Thanks mate! Trying to keep it original |
|
tom
New Member
Posts: 9
|
Post by tom on Jul 12, 2017 21:25:50 GMT 10
I have had a few free days so made some more progress on the van. The front end now has new ply above and below the curved supports. This has made the front end much stronger than in the original design. It has also left me a space to put some insulation. I am planning on using air cell technology (same as what is used for shed roof insulation). This won't hold water if any is to get into the van. Anyone have any advice on this? 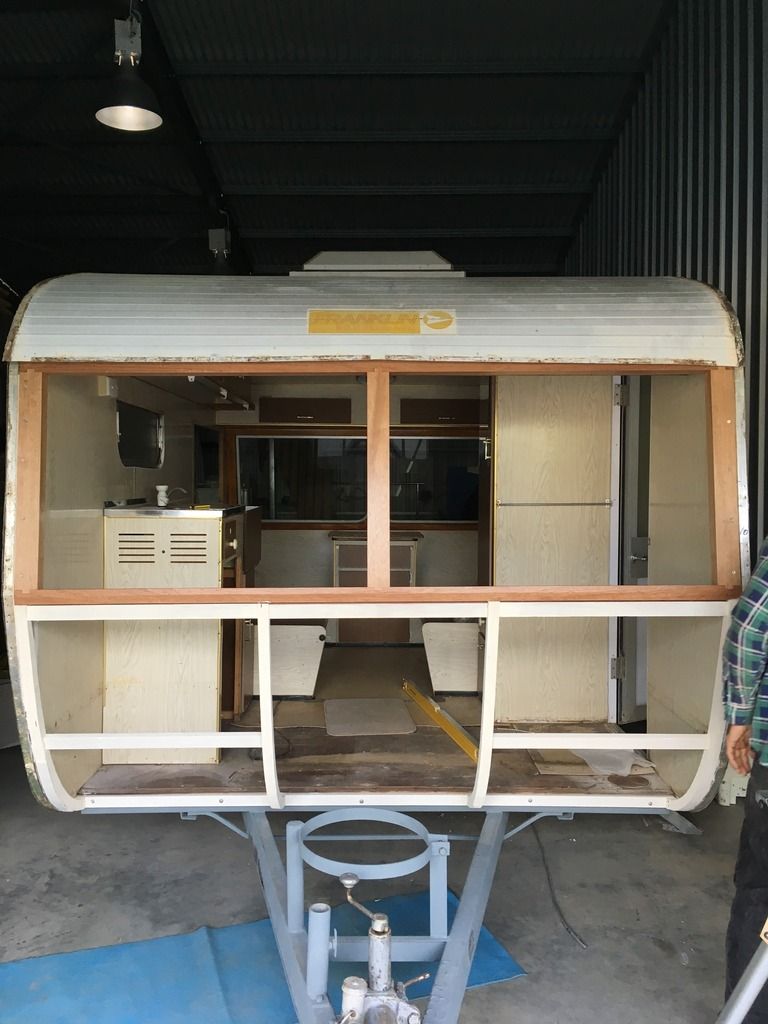 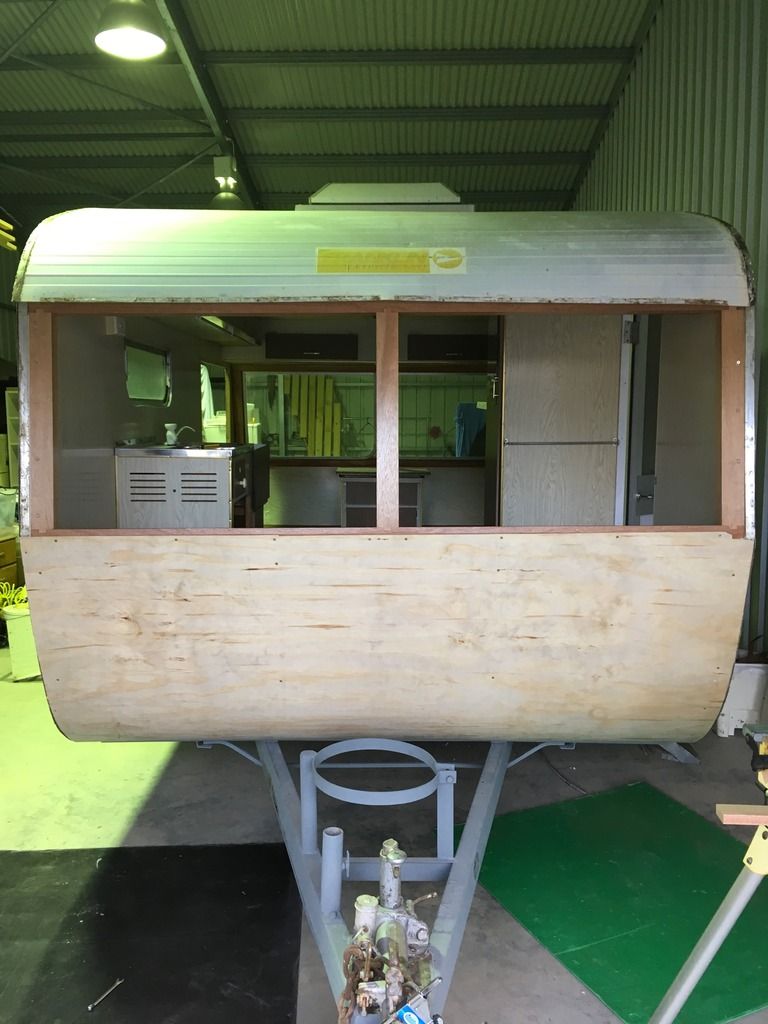 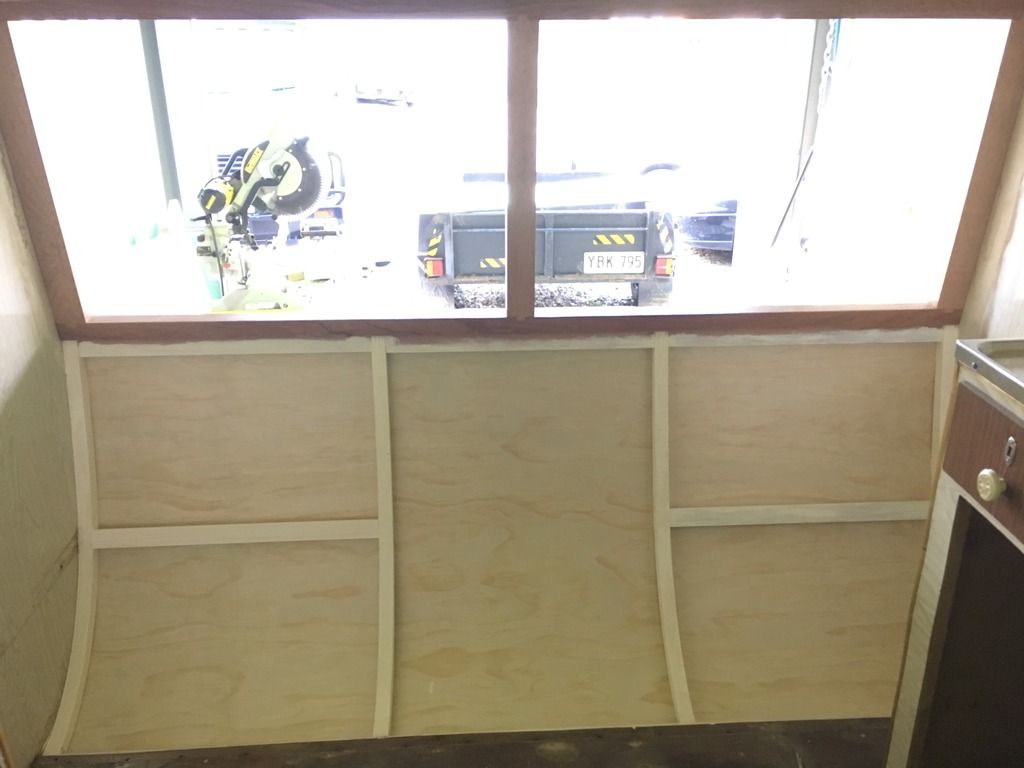 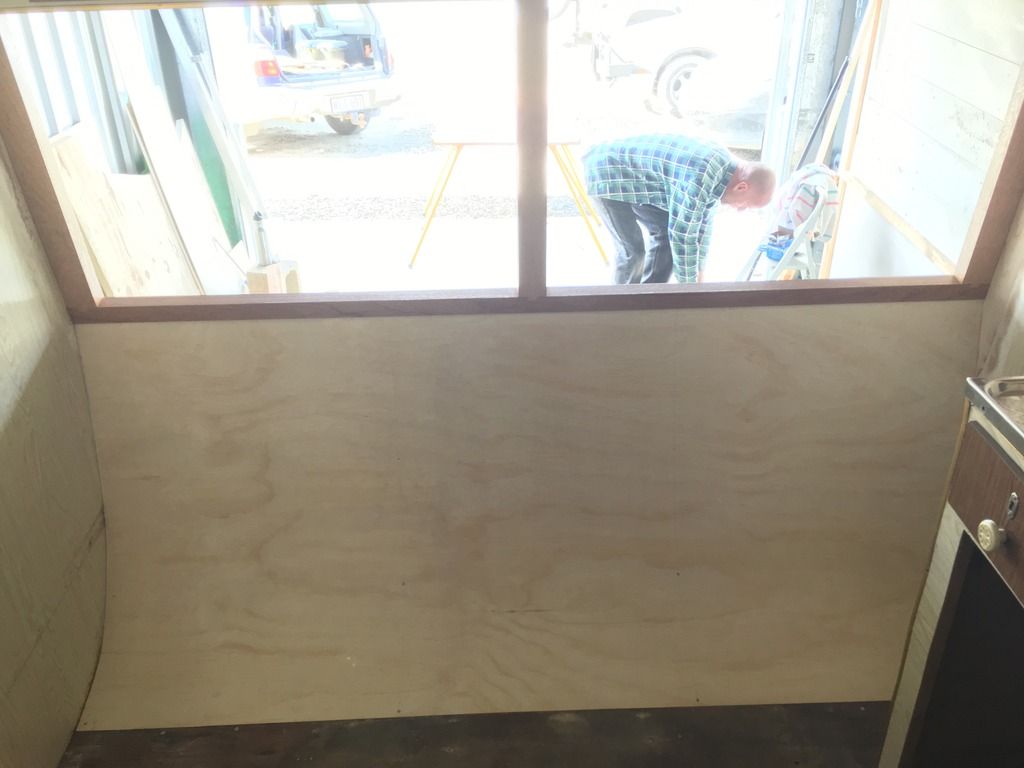 I have put the aluminium back on the front and am a bit worried that the window flashing isn't going to completely cover the top of the alloy sheet and may leak. I am trying to decide if I make a larger flashing to cover the gap or to buy some new sheets... 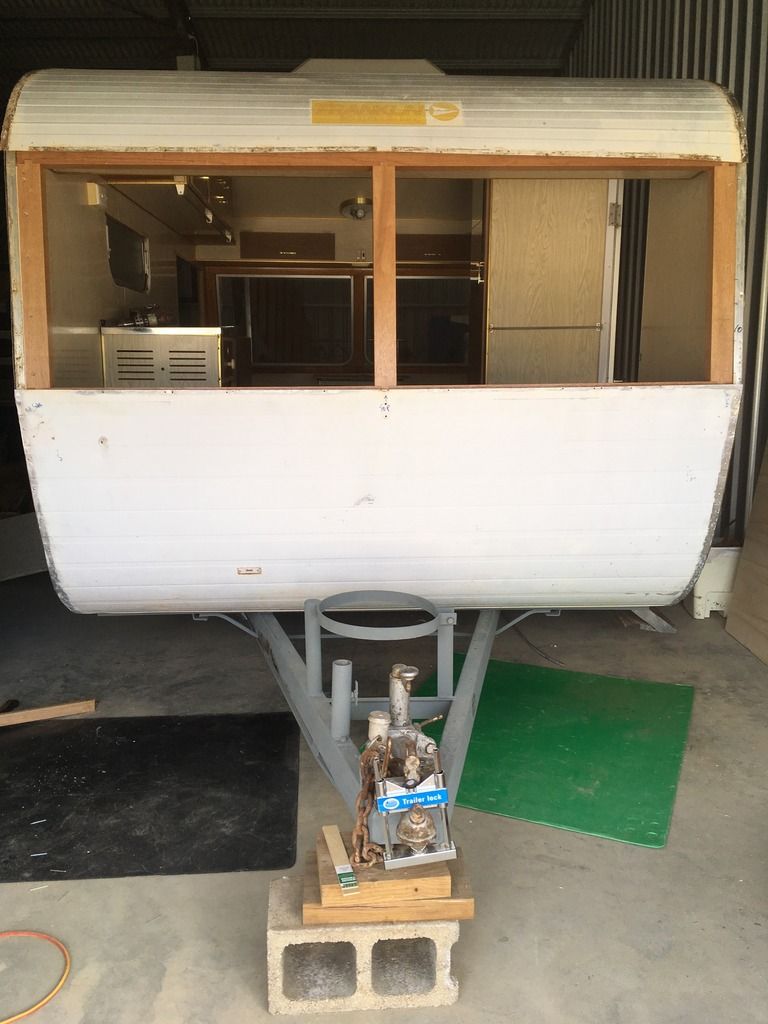 I have now started on the back. I removed the two single beds and bedside table. This made the walls very flimsey so I build a temporary frame to hold them until I build a queen bed in the space which will support them. The window frame has a lot of rot just like the front so I am building another one. Before 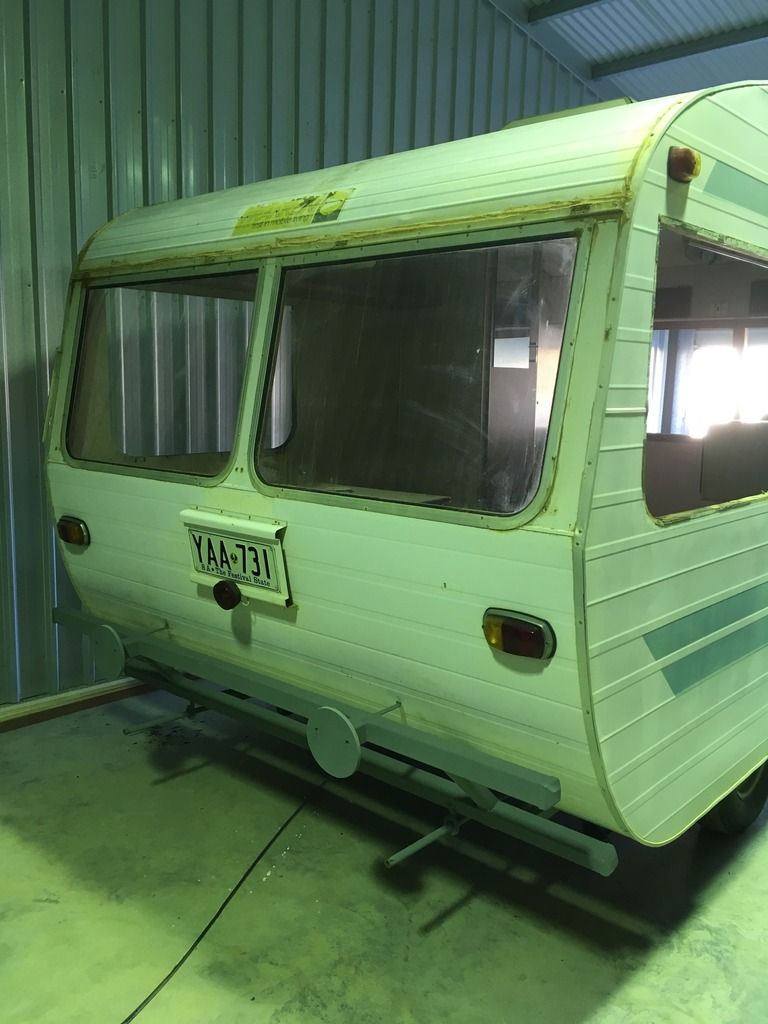 Now 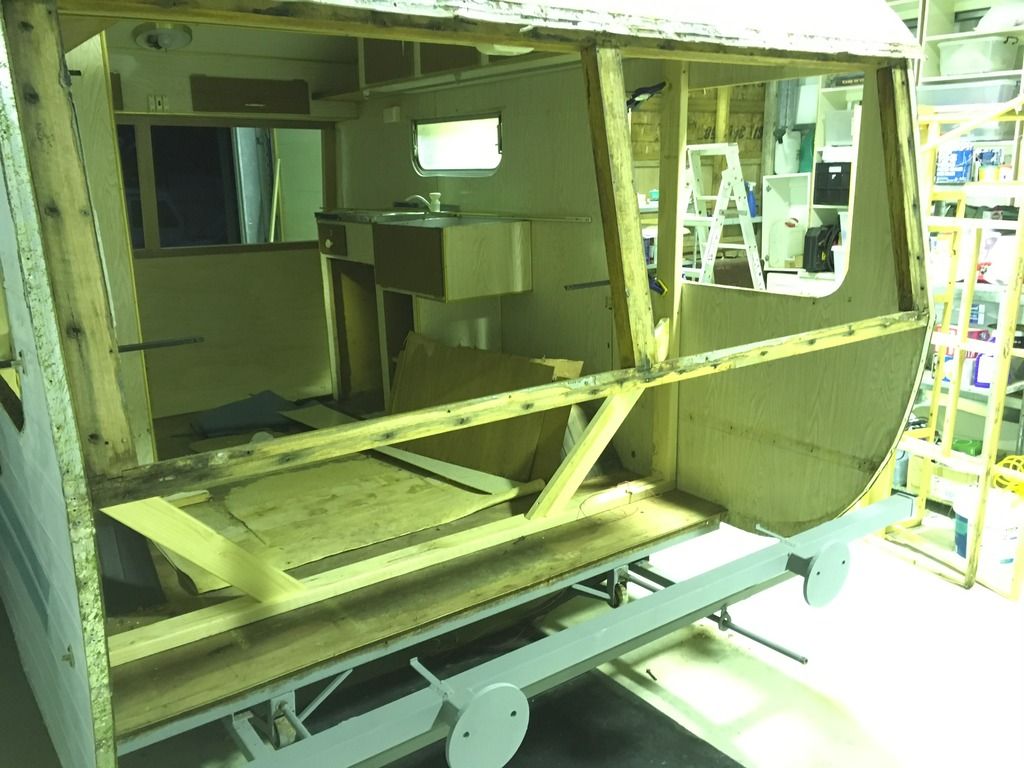 I also removed the four seasons hatch today and noticed that it has been patched up many times with silicone. It looks like I should just get a new one as there are so many parts and possible areas that could leak. I'm hoping to have the back end on in the next 2 days so more pics to come |
|
|
|
Post by Franklin1 on Jul 12, 2017 22:06:44 GMT 10
G'day Tom, You are certainly doing some great work in getting your van sorted out.  Don't give up on the four seasons hatch. The aluminium versions are no longer made, but they are reasonably easily fixed up by someone such as yourself who obviously has quite good handyperson skills. Your van was built some time between mid-1970 and mid-1972 based on the Franklin stickers showing on the van. Your chassis number on the drawbar will be some numbers, followed by a hyphen, followed by one number, eg 1234-1. The number after the hyphen is the year of build, so -0 will be 1970; -1 is '71 and -2 is '72. The numbers before the hyphen represent the consecutive number of chassis built by the time yours was built, so 1234 is the 1,234th chassis built in that year. Our sister forum for caravans built between 1970 and 1979 has some useful info about the four seasons hatches, although with the recent changes to the Photobucket hosting system, most if not all of the photos in the threads will no longer be showing. However, if you'd like to at least read some thoughts about these hatches, click on this link and you'll see a list of threads from the Classic Caravans forum relating to the hatches. cheers, Al. |
|
|
|
Post by kerri on Jul 13, 2017 9:29:34 GMT 10
Hi tomGreat job on the van. |
|
tom
New Member
Posts: 9
|
Post by tom on Jul 18, 2017 20:51:42 GMT 10
G'day Tom, You are certainly doing some great work in getting your van sorted out. Don't give up on the four seasons hatch. The aluminium versions are no longer made, but they are reasonably easily fixed up by someone such as yourself who obviously has quite good handyperson skills. Your van was built some time between mid-1970 and mid-1972 based on the Franklin stickers showing on the van. Your chassis number on the drawbar will be some numbers, followed by a hyphen, followed by one number, eg 1234-1. The number after the hyphen is the year of build, so -0 will be 1970; -1 is '71 and -2 is '72. The numbers before the hyphen represent the consecutive number of chassis built by the time yours was built, so 1234 is the 1,234th chassis built in that year. Our sister forum for caravans built between 1970 and 1979 has some useful info about the four seasons hatches, although with the recent changes to the Photobucket hosting system, most if not all of the photos in the threads will no longer be showing. However, if you'd like to at least read some thoughts about these hatches, click on this link and you'll see a list of threads from the Classic Caravans forum relating to the hatches. cheers, Al. Thanks for the info Al. I will definately look into repairing/resealing the hatch! It's a shame there is issues with the photos on the forums... Thanks again Tom |
|
tom
New Member
Posts: 9
|
Post by tom on Jul 18, 2017 21:13:43 GMT 10
Have managed to get a bit more done over the last few days. I put together another window frame out of meranti. I have dismantled and rebuilt the other end of the van the same way as the front with curved supports for the window frame, leaving a cavity for insulation. This has also increased the strength of the ends allowing me to use the ends to support the furniture to be built next. Back end before pulling it apart. End taken off and van cleaned out. Good view of the old rotten window frame. 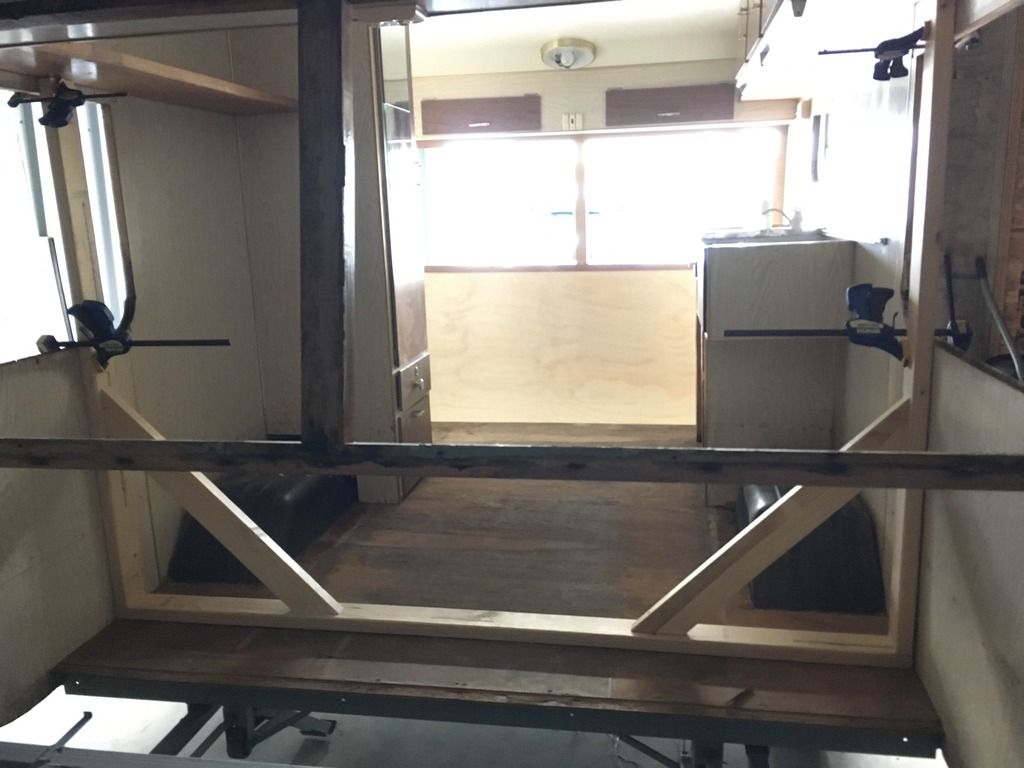 New window frame in and framing. The window frame is finished with a clear coat and the framing painted to protect against possible future water damage. 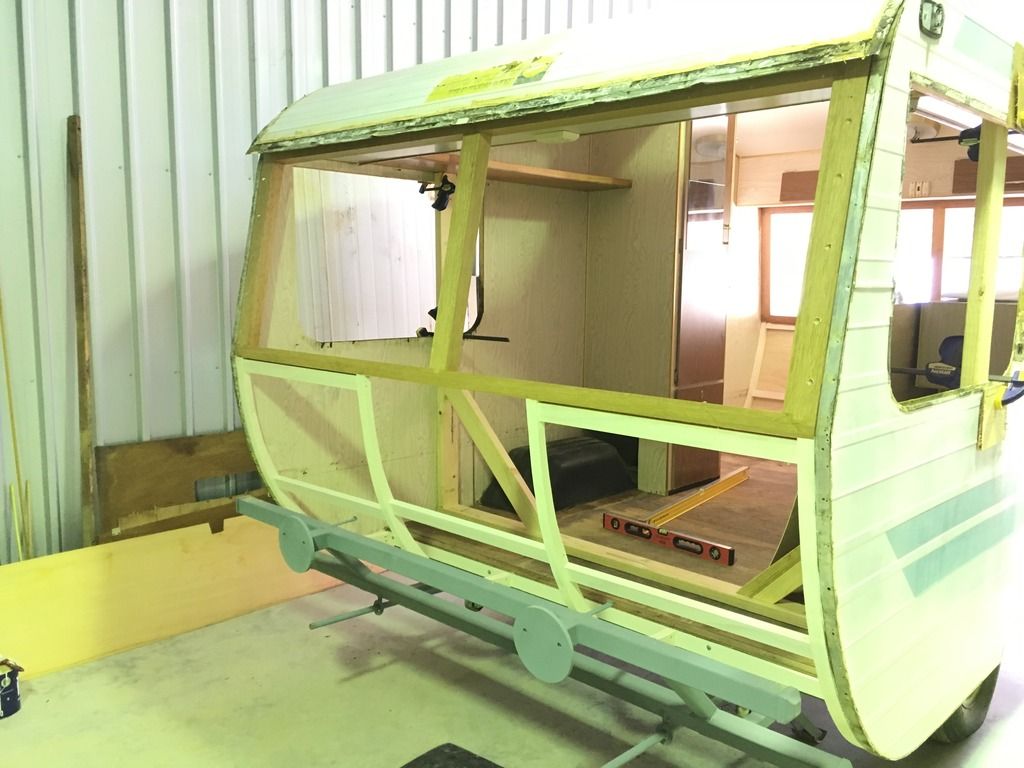 Another angle 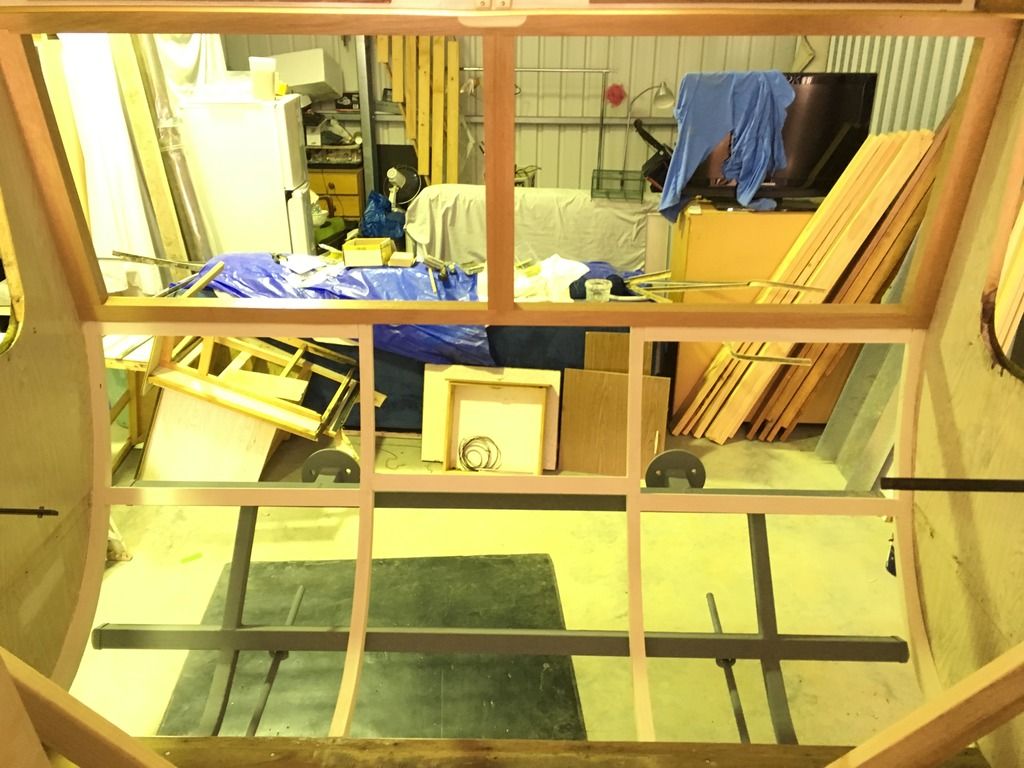 2.7 mm Ply put on the outside before the alloy goes back on. 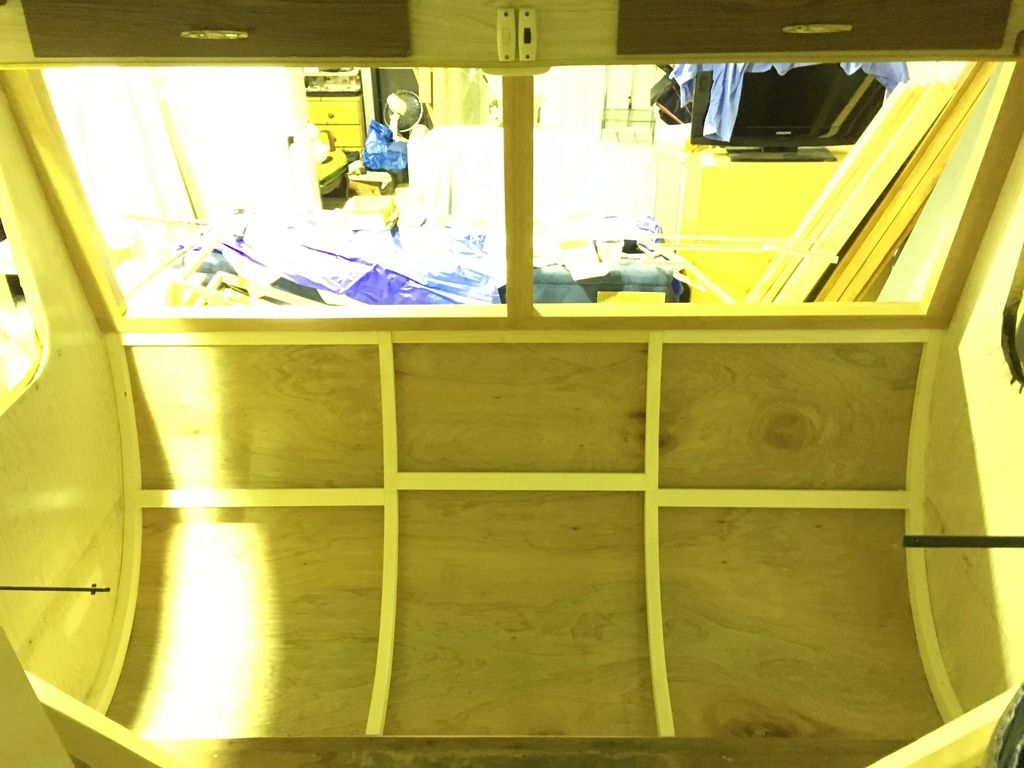 Alloy riveted back on 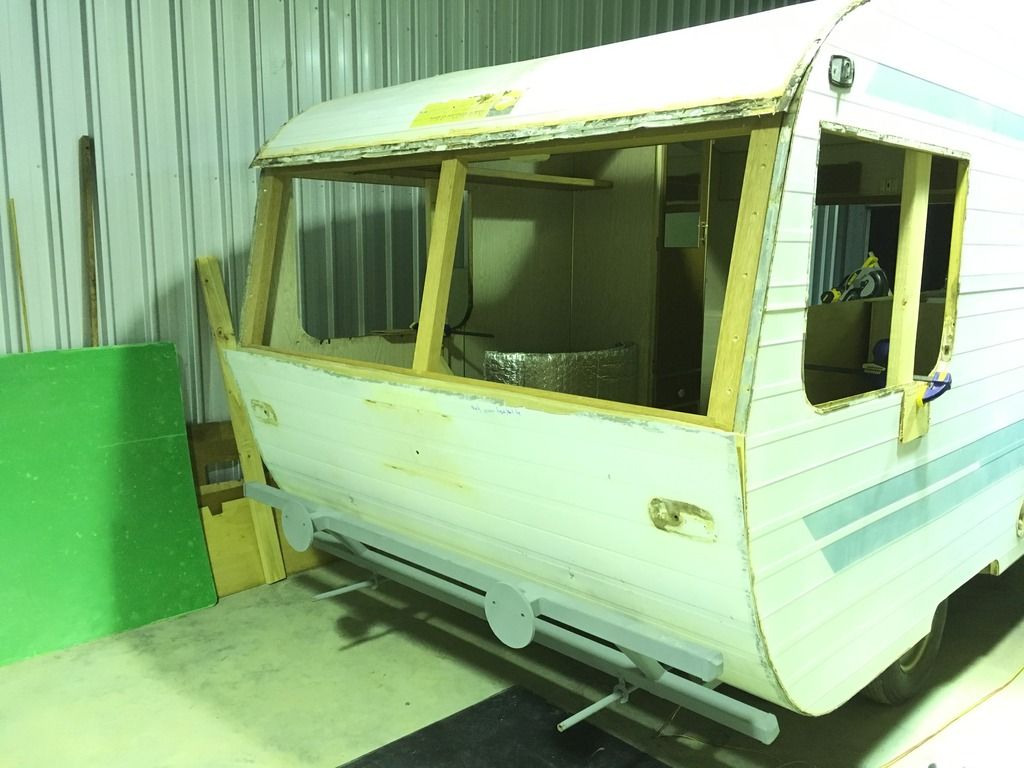 |
|
|
|
Post by kerri on Jul 19, 2017 19:11:06 GMT 10
Hi,
Great work on your van. You have more time than me right now...
Can you please let me know what brand of Galvanised spray paint you used for the chassis?
Thanks
Kerri
|
|
|
|
Post by Mustang on Jul 20, 2017 8:18:03 GMT 10
Hi, Great work on your van. You have more time than me right now... Can you please let me know what brand of Galvanised spray paint you used for the chassis? Thanks Kerri If you want a rattle can? "Rustoleum" is a USA made spray paint (Bunnings), brilliant Feel the weight of a full can compared to others. |
|
|
|
Post by kerri on Jul 22, 2017 13:21:13 GMT 10
Funny Mustang, I was thinking abut calling the caravan, 'Shake, Rattle & Roll' as I believe it may do that when I finish... Thank you for the suggestion of the spray. Kerri |
|


