|
|
Post by Franklin1 on Feb 23, 2014 10:31:15 GMT 10
I've been working on the cutlery drawer for the kitchen cupboard. The following photo shows how the width of the cutlery drawer was the same as the ice chest door in the original kitchen cupboards... 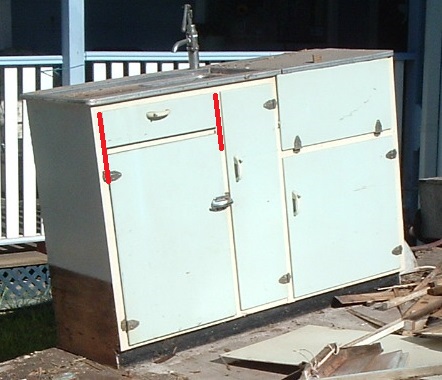 But when the drawer was pulled out, it looked like this... 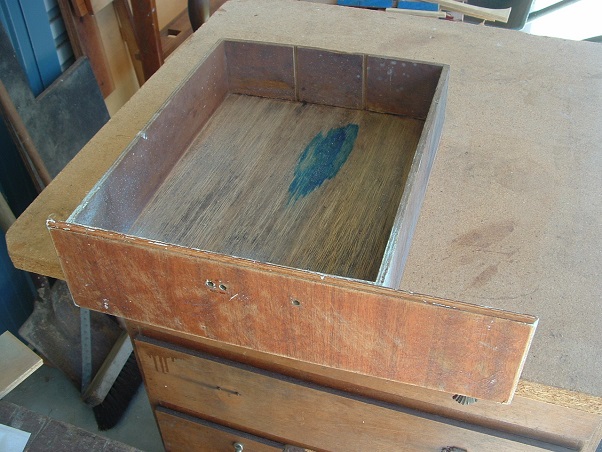 So, even in 1960, caravan builders were doing sneaky things in their vans (so I'm not the only one who's doing it  ). The reason the drawer was narrow was because of the sink bowl... 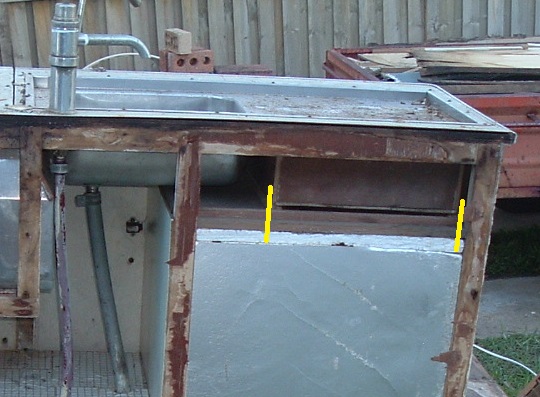 In the rebuild, I can use the full width of the drawer, and I was going to just add an extra bit on the side of the original drawer. But when I thought about it, I figured I might as well build a new drawer with different compartments, and whack the original faceplate back on it. The old drawer was demolished... 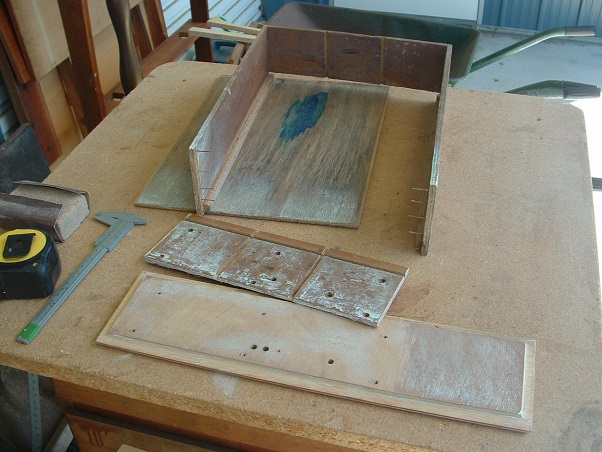 ...and a replacement one built... 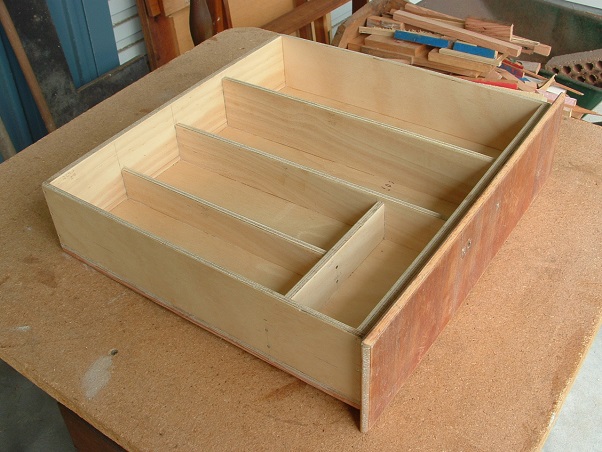 But I've stuffed up in my calculations, and the pushbutton rod in the handle is not long enough to go through the plywood properly. If anybody has a spare pushrod sitting around doing nothing, I'd be interested. It has to have a minimum of 47mm length in the rod...  If I can't find a longer rod, I'll see if my brother can make something for me on his metal lathe. cheers, Al. |
|
gregw
New Member

Posts: 43
|
Post by gregw on Mar 3, 2014 18:42:07 GMT 10
A fantastic effort with this rebuild Al, I have really enjoyed catching up with your progress after not having much time to keep up lately, encourages me to get back to my job. Keep up the great work
Greg
|
|
|
|
Post by Franklin1 on Mar 6, 2014 11:13:53 GMT 10
Thanks for your comments, Greg.  Kitchen cupboard: Kitchen cupboard: I've continued to plod along with this job. Crikey!, it would have to be the most fussiest, complicated part of the whole project! (or maybe I've just selectively forgotten some of the previous complicated bits  ). I got the push-button catch sorted out with my brother. In a couple of minutes he had the old rod out of the cap, and a replacement longer brass rod hammered back in, so the catch is now working fine... 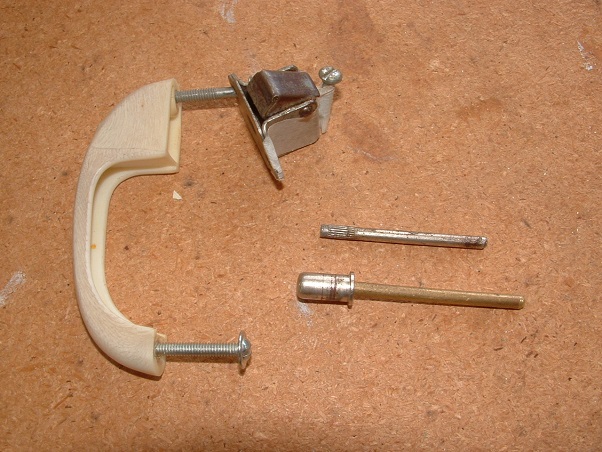 I got the cutlery drawer framework finished in the cupboard...  I used the cardboard template method to measure and cut the plywood for the face of the cupboard... 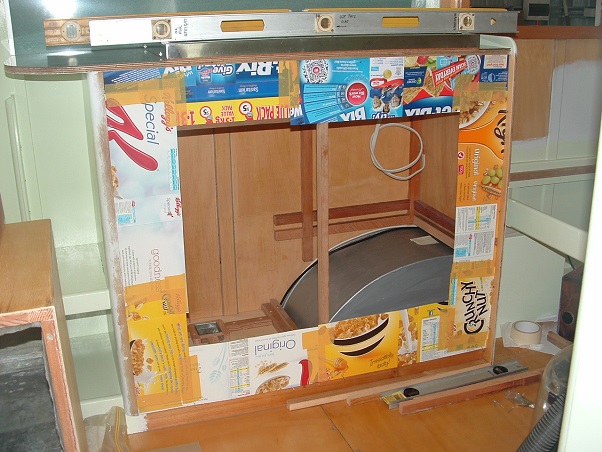 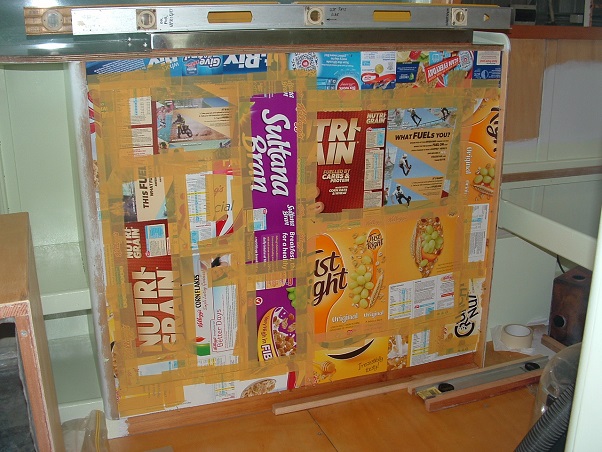 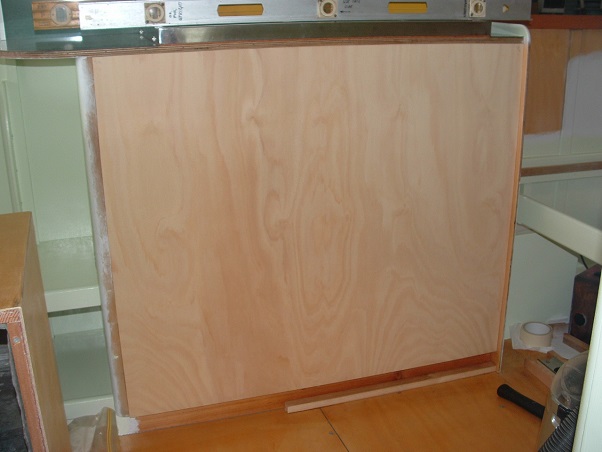 I think it's a great method to use when you have to cut something to fit fairly accurately inside a border (like, say if you wanted to add a shelf in your wardrobe in the van). I also used that method to cut the shelf for inside the cupboard...  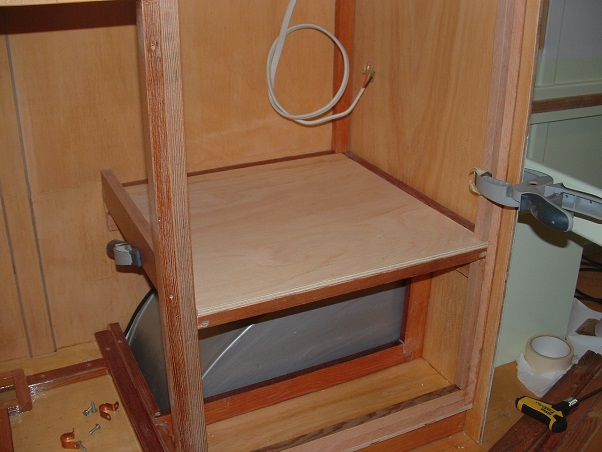 I had to do some hard thinking about the drain hose for the sink. I needed it to be somehow kept clear of the shelf underneath the sink. After destroying a fair few brain cells in the process, I came up with the idea of making a drain hose out of second hand copper pipe, plus some pieces of water hose... 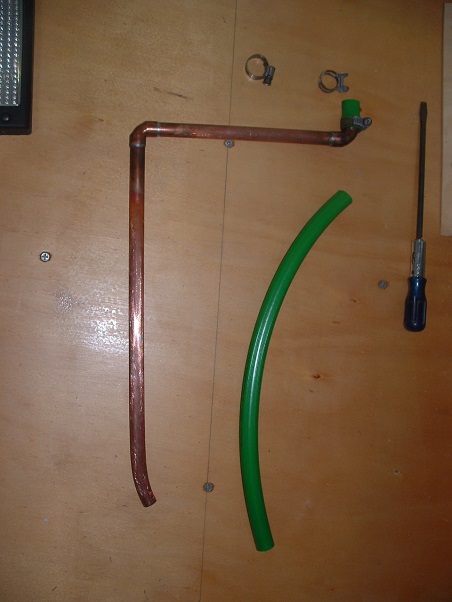 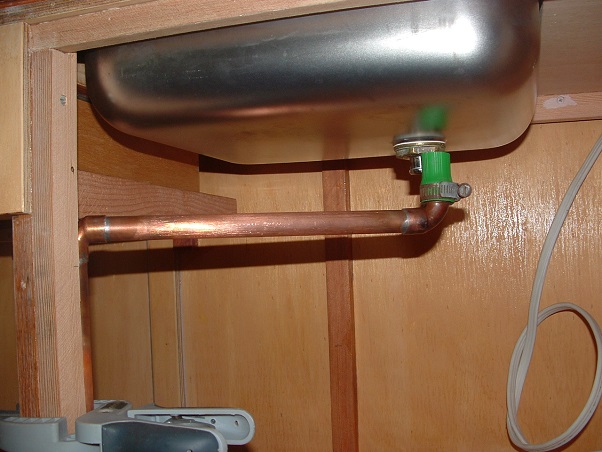 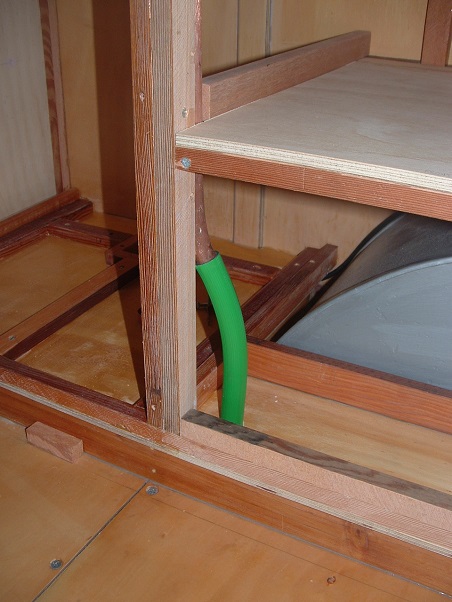 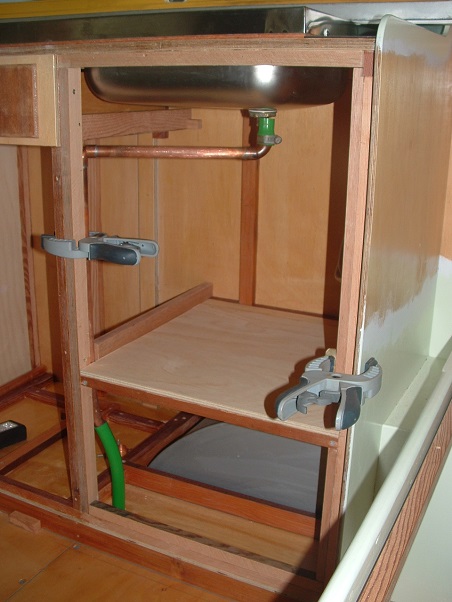 It feels like I've been working on this part of the project, like, forever! I'm probably about half-way through this bit, but I thought I'd post an update while I wait for some glue to dry. cheers, Al. |
|
|
|
Post by akeepsake on Mar 6, 2014 12:06:55 GMT 10
Love your precision work Al ! You must eat a lot of breakfast cereal at your place ! Seriously the cardboard stencil idea is a great idea for all types of applications!!! For what it's worth I would probably consider putting a slight angle on the horizontal section of the drainpipe to stop a fat/ sediment buildup ofer time?? Look forward to more !! |
|
|
|
Post by hilldweller on Mar 7, 2014 19:44:06 GMT 10
That looks awesome -it's all so beautifully neat Will there be a delay in proceedings now while you munch your way through some more boxes of cereal before the next phase of work? Must remember to start saving some. |
|
|
|
Post by penguin on Mar 7, 2014 20:11:35 GMT 10
This is going to sound Corny but I'm really enjoying this serial. Your van looks Just Right, better than Bran new
|
|
|
|
Post by Franklin1 on Mar 7, 2014 20:39:39 GMT 10
Struth! All this talk about cereal is making me hungry...and brekky is still 10 hours away! If you're a fair dinkum caravan restorer, you'll start collecting bits and pieces for the restoration from the very minute you start to think about getting a van. Well, that's my theory anyway. I knew I'd be needing the cereal boxes a while back, so I started collecting them back then. Eventually I will use them to make a template for the vinyl flooring when I get to that stage. All the smaller templates I've made so far will be recycled and used in the larger flooring template. Ya can't have too many cereal boxes, I say!! You'll notice we have quite a varied diet of breakfast cereals, which I confess is governed solely by what's on special each week, rather than particular favourites. Money saved on cereals goes to a very worthwhile cause...which is in the shed...and which I'm working on...and which I need my strength for...which is why I eat a healthy breakfast.  Enough said?  Gees I could go a bowl of iron man Nutri-grain at the moment... cheers, Al. |
|
Deleted
Deleted Member
Posts: 0
|
Post by Deleted on Mar 7, 2014 20:54:53 GMT 10
This is going to sound Corny but I'm really enjoying this serial. Your van looks Just Right, better than Bran new G'Day Penguin.. very clever.. love your work.  Oh yeah.. Als' not doin too bad either. Reddo |
|
|
|
Post by penguin on Mar 7, 2014 22:05:56 GMT 10
Thanks Reddo. I knew you were a man of good taste when I spotted that fastback in your shed. I've had a couple of commandos an triumphs and into old Holden's too! Maybe you could adopt me?
|
|
|
|
Post by akeepsake on Mar 8, 2014 8:39:35 GMT 10
This is going to sound Corny but I'm really enjoying this serial. Your van looks Just Right, better than Bran new Penguin. Some of your best work  Al I get the originality thing $100 percent! But if your not going to fit a hatch may I suggest fitting a window mount air conditioner  |
|
|
|
Post by cobber on Mar 8, 2014 18:26:45 GMT 10
|
|
|
|
Post by Franklin1 on Mar 8, 2014 19:34:19 GMT 10
Ha ha ha, cobber Nah, that's a sheet of newsprint, which isn't rigid enough for these types of templates. Oh, and if I ever remember where I stored that advert safely, I'll include it in the van somewhere (it was almost 7 years ago that I got that ). A couple of weeks ago in the Coles catalogue, they had a picture of a Corn Flakes box with a retro design on it. Limited edition, it was (although they did a similar thing in July last year with Corn Flakes and a few other of their cereal boxes). Anyhoo, off I trots to the supermarket to look at this limited edition box, to see if it was worthwhile getting for display. Pfffft...they put the metric weight on the box!... 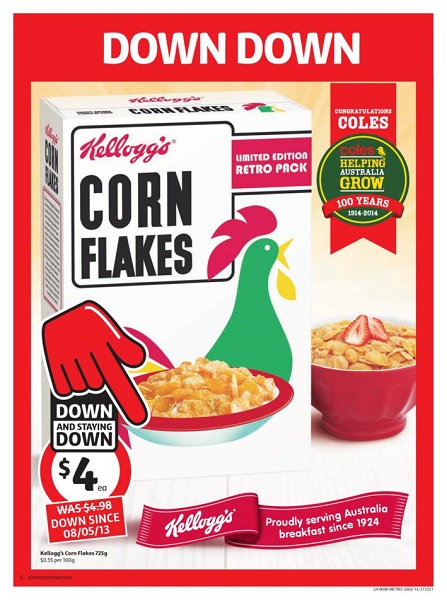 I can guarantee this retro box would be very suitable for templates. But definitely not suitable for display in a van.  cheers, Al. |
|
|
|
Post by Franklin1 on Mar 29, 2014 9:38:04 GMT 10
I think I'm getting somewhere with this kitchen This is the "before"...  ...and this is the "after"... 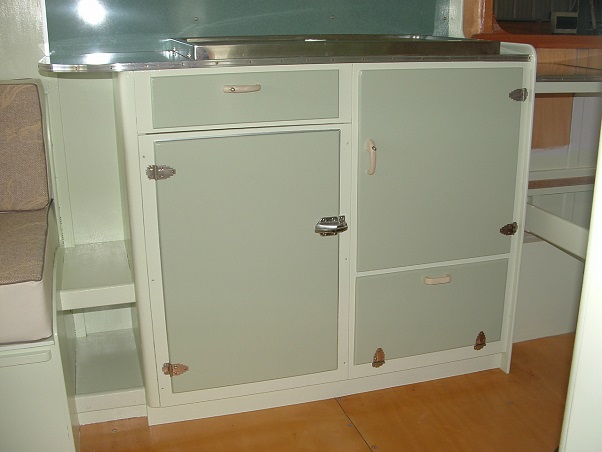 Along the way I had to do a few things to make it all happen... The galvanised sheeting in the ice chest was originally roughly tack-nailed around the front of the chest...  The edge looked pretty unsightly in the new cabinet, so I cut and fitted some aluminium angle to make it look neater... 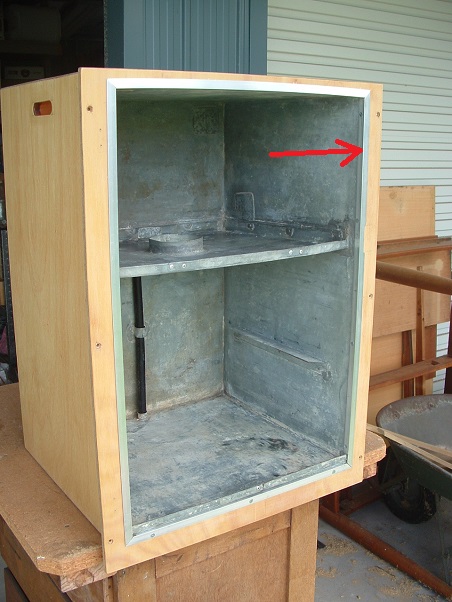 New paint was put on the insulation frame inside the door, as well as new 3mm closed-cell foam for the door seal... 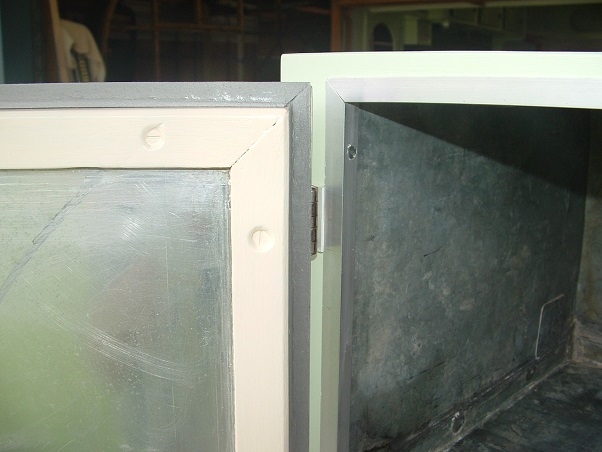 Elsewhere, I had to cut one of the larger cupboard doors down a bit narrower, and router the cut edge to match the rest of the door...  ...and I had to make a small door from scratch for the bottom opening. I ran out of push-button handles for this door, so I've used a similar colour handle and one of those roller catches. Maybe one day I'll find a replacement push-button handle...  A small detachable extension bench was made for the end of the kitchen. This gives us back the bench space that was lost in the kitchen redesign due to the shorter length and the larger sink... 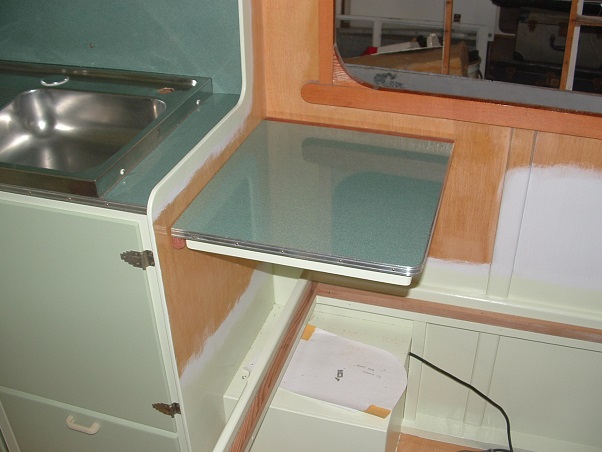 The bench fits onto a small length of marconi track screwed to a frame on the wall...  ...and a couple of marconi clips were screwed into a trench routered into the timber frame of the bench... 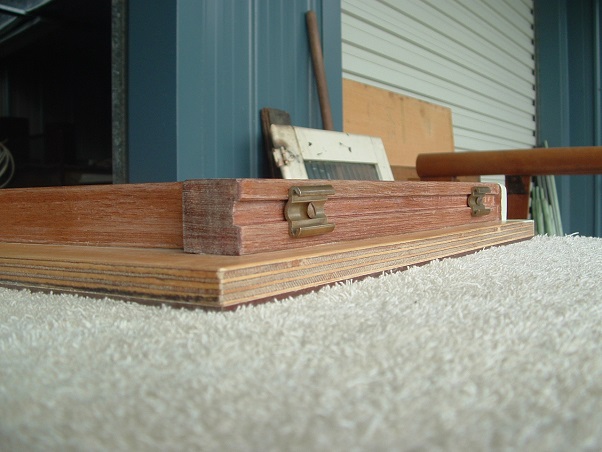 ...along with an elbow catch on the adjacent side...  Because the bench extension is only supported on two sides, it can't stay in position while travelling, so a bloke I've known all my life made me a canvas carry bag to store the bench in...  ...and the bench gets stored in the wardrobe... 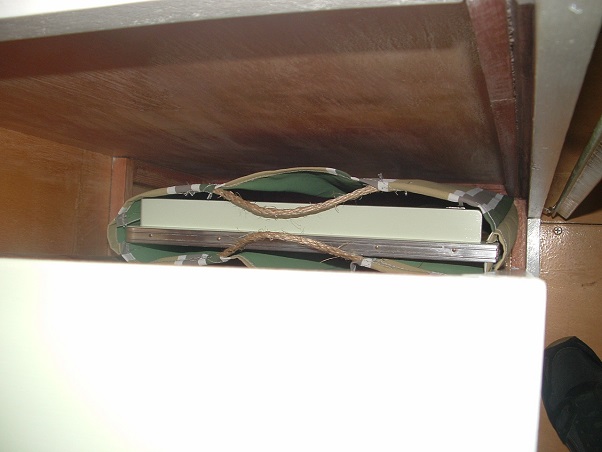 I was hoping to have the tap and water tank fitted by now, but we've got some issues with getting the tap to work properly, so that's being attended to. cheers, Al. |
|
|
|
Post by cobber on Mar 29, 2014 10:19:26 GMT 10
G'day Al
Amongst all the good things you've done with this van saving that old ice box, and making it look beautiful, deserves a 10/10 I reckon
And then to find another use for Marconi track  .... ah mate, wot can I say ? .... ah mate, wot can I say ?
The bloke you've known since you were born did a good job on the shelf bag too 
You are an inspiration .......... fair dinkum.
Cobber.
|
|
|
|
Post by claireandruth on Mar 29, 2014 11:34:37 GMT 10
wow Al - love this work, what an amazing job!
|
|
|
|
Post by hilldweller on Mar 29, 2014 13:15:02 GMT 10
That's just lovely and it looks entirely original, not to mention your usual superb attention to detail Love the colours too Even better I've realised that at the rate you're going, and the (very slow) rate I'm going, you'll be finished just in time to pop across the ditch and sort out Mabel's cabinetry . I shall start saving the cereal boxes immediately . |
|
|
|
Post by shesgotthelook on Mar 29, 2014 19:09:41 GMT 10
I'm stealing him first Hilly! Al, what did you strip the paint off your doors with, heat gun, sander or nasty stripper? I'm terrified of what I'm going to find under the paint & it's going to be all soaked into the wood  No going back once I start. |
|
|
|
Post by akeepsake on Mar 29, 2014 19:35:20 GMT 10
Fantastic work Al and not a cereal box in sight ! Are you eating toast now for breakfast ? Seriously I love seeing clever ways to do things and you have achieved it with this Reno ! Well done! |
|
|
|
Post by Franklin1 on Mar 29, 2014 21:20:49 GMT 10
Thankyou all for your great comments. It's been a hard slog getting to this point with the kitchen (seems like it had gone on forever), so it's nice to sit back and cast an approving eye over the result. Glad you all like what's been done. sgtl, I have to confess I'm a chemical stripper (I wanted to be a burlesque stripper, but they said the ladies in the retirement village mightn't be able to cope - or maybe they meant that I mightn't be able to cope ). My doors had a coating of varnish on the ply surface, and then the varnish was painted over with enamel. The paint stripper took the paint off fairly easily, but the varnish was a bit more stubborn and took another coating or two of stripper to get rid of it completely. The paint came off in layers, but the varnish ended up being turned to sludge... 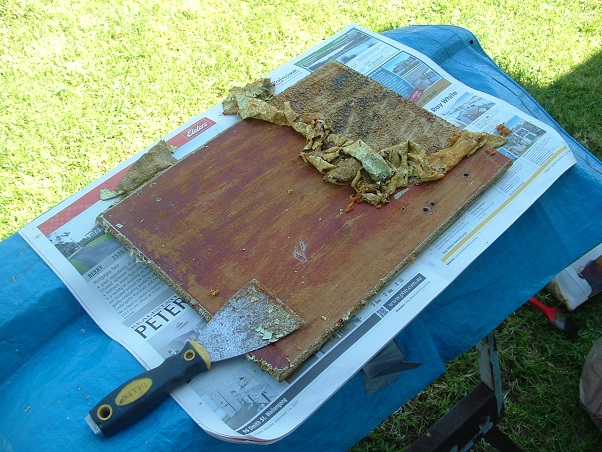 I honestly don't know whether a heat gun would work on varnish?? Never tried it myself. cheers, Al. |
|
|
|
Post by Franklin1 on Apr 1, 2014 16:02:56 GMT 10
Copper water tank:
Apologies for this long-winded post, but I thought it was worthwhile... Last year my younger brother donated a copper water tank to use in this project. I thought I'd taken some photos of it when I brought it home, but I'm blowed if I can find them on my computer. It is a small tank from one of those instant hot water heaters that are fitted above a sink, usually seen in workers' amenities cabins or suchlike. It has a capacity of 7.5 litres, which is enough water to visit the Simpson Desert in summer for all of 48 seconds before getting the heck out of there for a refill. Now that the kitchen in the van has essentially been completed, the water tank needed to be modified to suit the van requirements. The tank looked like a smaller version of this one in akeepsake's van, and was the same tarnished colour...  There were three flanges crimped to outlets on the tank, one for the heater element and two for the inlet/outlet water pipes. These flanges were removed... 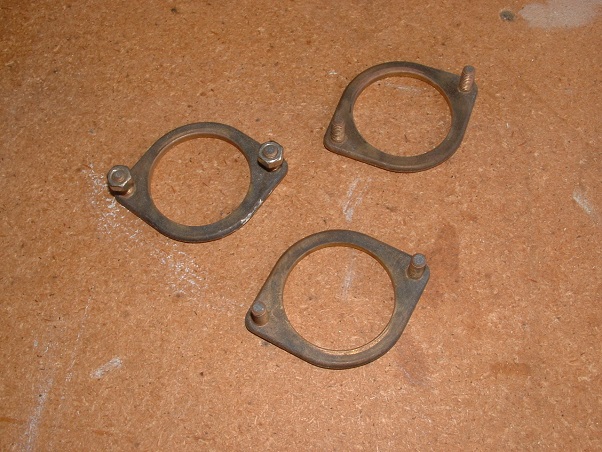 It was then up to my brother to weave some magic on the tank itself, and full credit to him for what's been achieved. One of the outlets was blanked off with a piece of copper sheet and some silver solder... 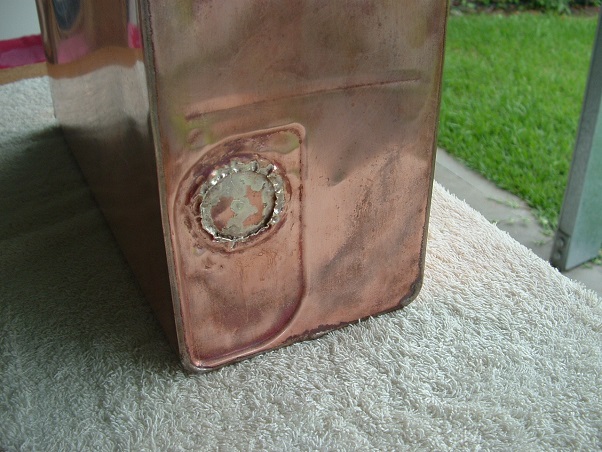 The second outlet had a brass hose tap fitting soldered into position... 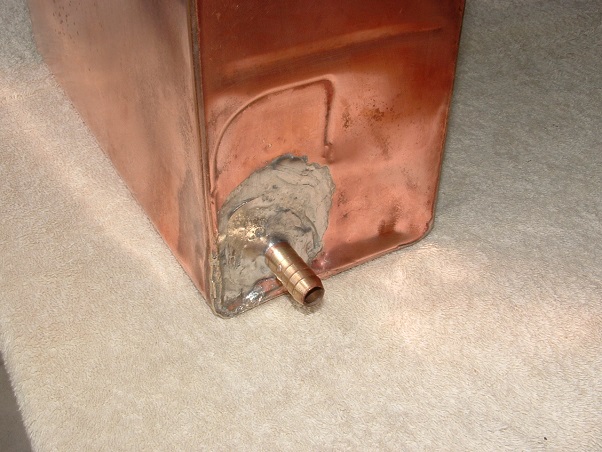 ...and the third outlet became the filler cap. He found some old tap fittings in amongst his junk and cut them up and machined a screw-in thread and a cap. A handle for the tank was fashioned out of some copper pipe, and soldered into position... 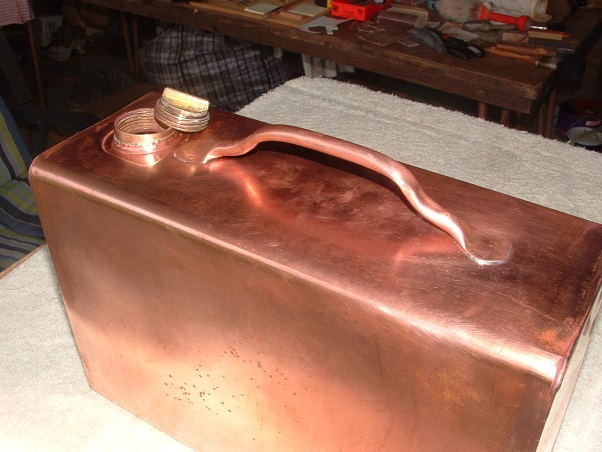  I happened to notice a nickel/chrome-plated brass nozzle in amongst his junk, and claimed that for the water tank...  It fits neatly into the inlet for use as a filler pipe... 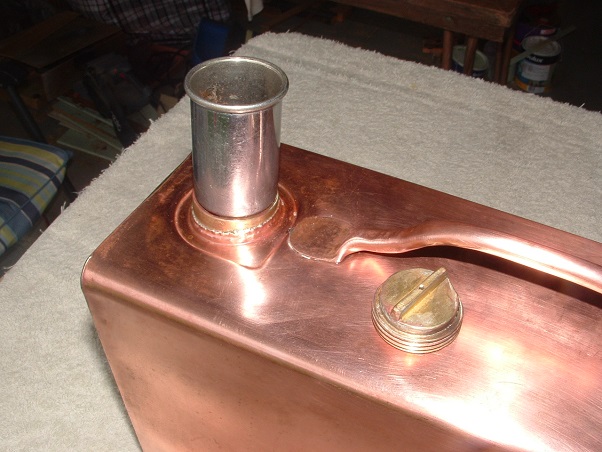 I got him to make up a copper holding bracket and solder it to the end of the tank. The filler nozzle is now stored in that bracket... 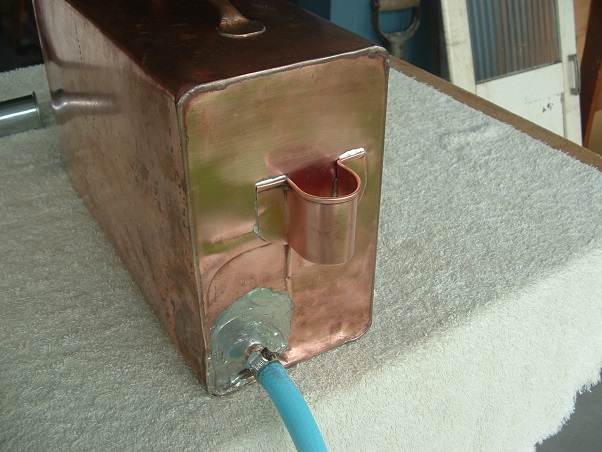 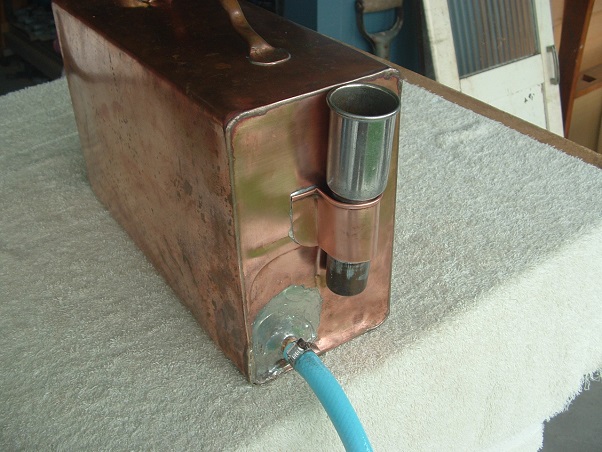 The completed tank fits into the section of the kitchen cupboards down next to the mudguard...  Needless to say, I'm very happy with how the whole job turned out, even though a tank as small as this one is really just a token effort at water storage. It allows the pump tap to be operated to show that it works, rather than being a tank that will provide sufficient water for us to survive. The next instalment of this story tomorrow will show how the pump tap was refurbished... cheers, Al.
|
|
|
|
Post by Don Ricardo on Apr 1, 2014 22:14:23 GMT 10
|
|
|
|
Post by Franklin1 on Apr 4, 2014 15:47:26 GMT 10
Fynspray pump tap refurbishment:The first issue to be addressed with this pump was that one of the original brass bolts in the handle had disappeared, and a crappy steel bolt had been used as a replacement... 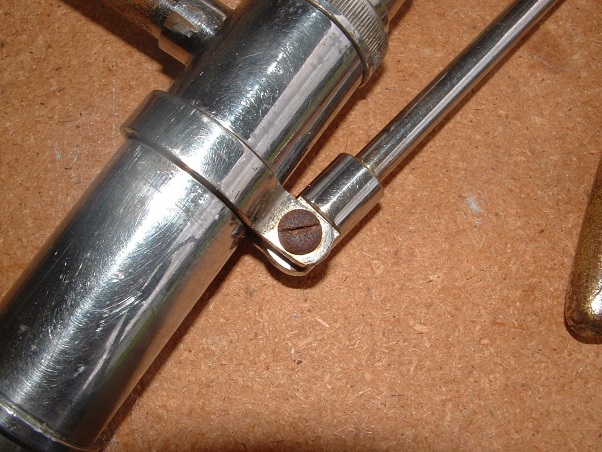 My brother found a brass bolt in his junk pile, and added a short length of brass tubing, plus a bit more brass got silver soldered onto the head of the bolt, and a reasonable likeness of the original bolt was achieved... 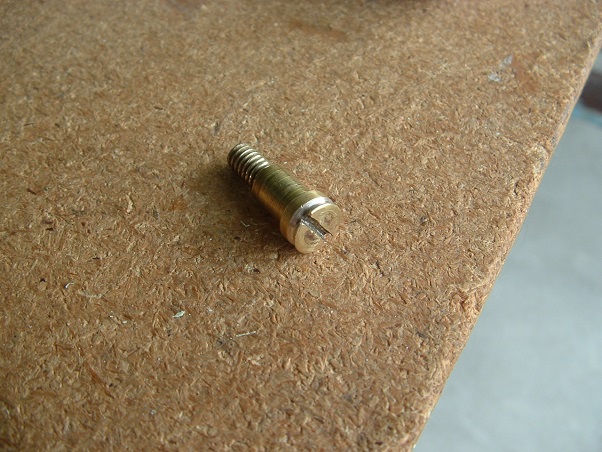 This picture shows the new bolt fitted, with one of those chrome-plated caps on the other side... 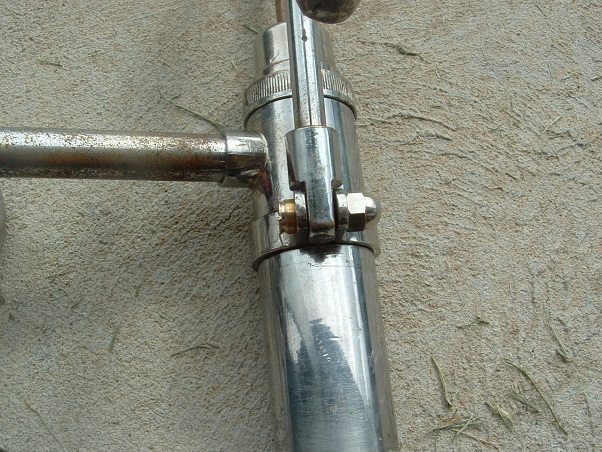 The second issue was the plunger washer, which was pretty-well cactus... 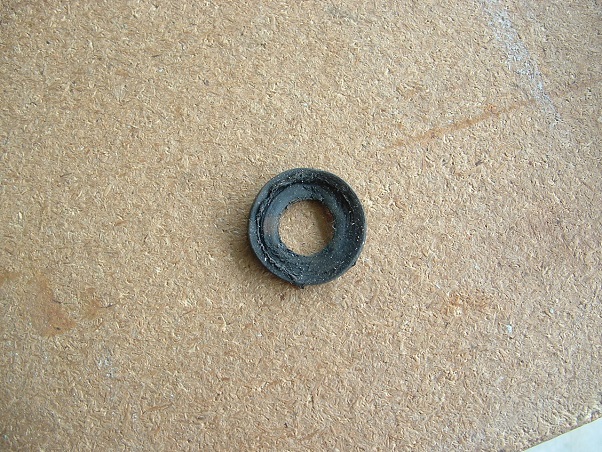 My brother machined up a new washer out of a product known as "Delrin"... 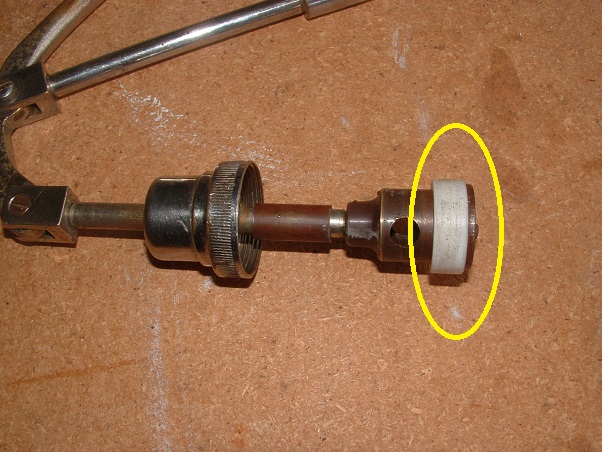 You can read all about Delrin here, but your eyes will glaze over very quickly. It's probably best to just accept that it's a high-tech plastic. The bore of the pump housing was also "honed out" and made nice and smooth... 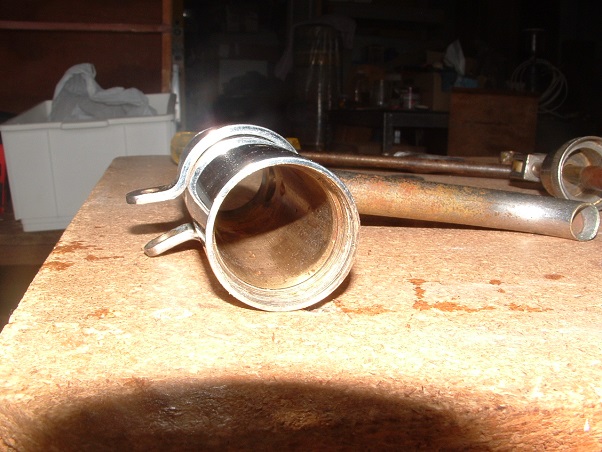 The tap was reassembled, and tested sitting in a sink full of water, and everything worked beautifully. I packed it all up and took it home and installed the tank and tap into the van. Pumped the handle, and pumped the handle...and pumped the handle some more... Nothing... Zip - nix - zilch... Not even a drop showing... I took it all back out of the van and set it up outside the workshop for testing. The pump had to be lowered to within 18 inches of the ground before it would suck up enough water to work properly. Any higher than that and it was a definite no-go... 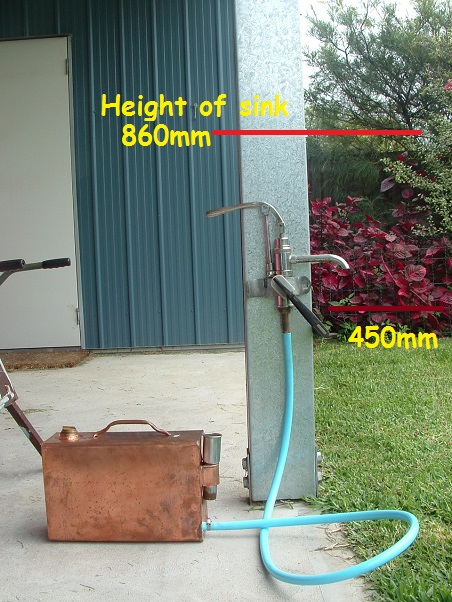 I got in touch with my brother and discussed the problem further. He recommended I bring it back to him for a "warranty claim" (which was good because I was just inside the 5-day warranty he gives on any work he does ). When we looked into the pump design a bit further, we realised there needed to be a pretty good seal in both the top and bottom valves when they are in the 'closed' position. It meant polishing the valve and valve seat where they make contact, to remove the build-up of tarnish... 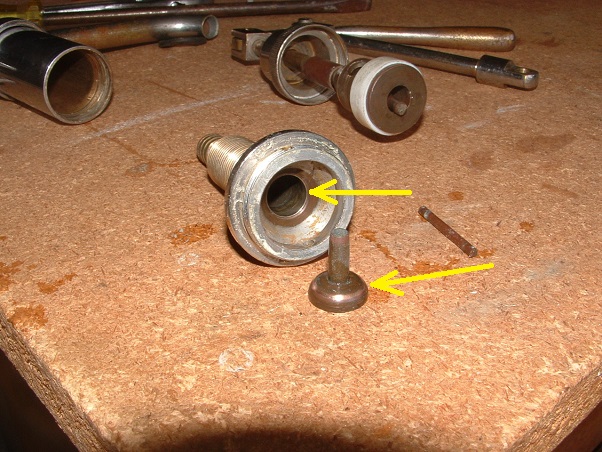 A smear of Loktite thread sealant was placed on the pump housing thread at both the bottom and top, to further help with creating a vacuum for the water sucking process... 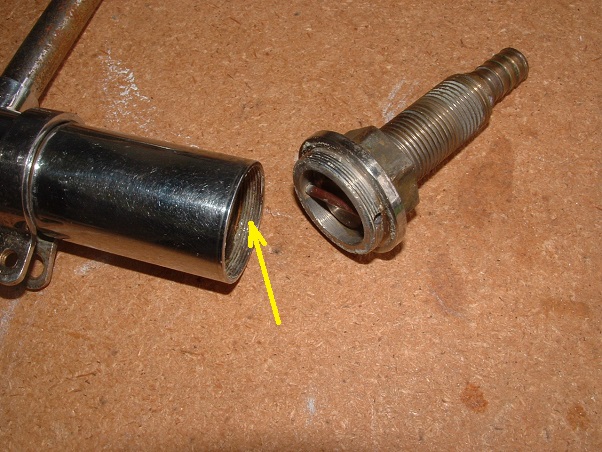 A preliminary test in his workshop showed the pump to work a lot better at higher heights, and a confirmation test outside my own workshop showed it will work well up to a height of 1150mm above ground... 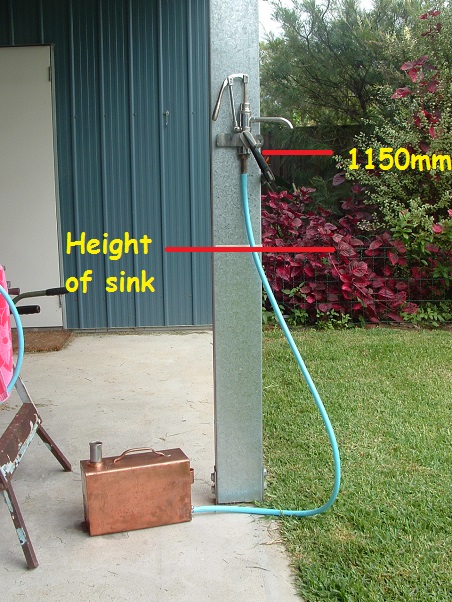 It's a bit hard to hold a camera steady and pump the tap at the same time, but here's proof of it working at 1150mm above ground... 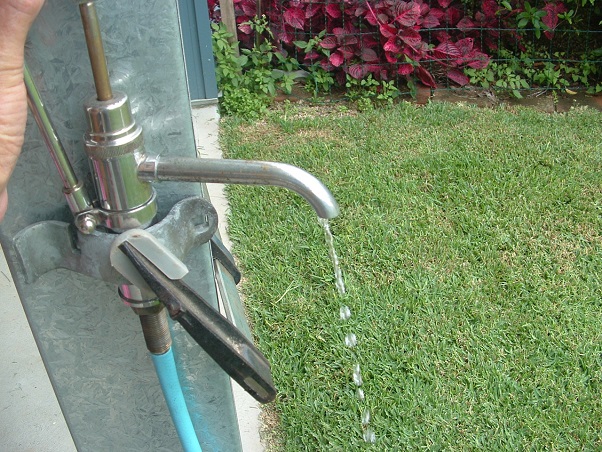 It takes 12 pump cycles (one cycle is pumping the handle up and back down again) to get the water up to the 1150mm height. The moral of this story is that if your pump is not working all that crash hot, just putting a new washer kit in the pump may not solve all your problems. You may have to explore polishing the top and bottom valve stoppers to improve the seal in them (doesn't matter whether you've got a ball stopper arrangement, or a tap valve stopper arrangement like mine. The principle is the same.) Hope this helps, cheers, Al.
|
|
|
|
Post by cobber on Apr 5, 2014 13:48:14 GMT 10
Hey Al mate,
why don't you add this post to that other thread on galley pumps then....we might prevail on the highly paid moderators to make it a sticky in the tech section.
Cobber.
|
|
|
|
Post by Franklin1 on Apr 5, 2014 19:04:58 GMT 10
For you, cobber, anything... I've selectively edited the copy to make it read a bit more sensible as a stand-alone post, rather than the version above. cheers, Al. |
|
|
|
Post by sportsman 1 on Jun 4, 2014 13:22:40 GMT 10
|
|


 ). The reason the drawer was narrow was because of the sink bowl...

 ).
).


 No going back once I start.
