|
|
Post by akeepsake on Feb 26, 2014 21:37:24 GMT 10
SGTL your flying ! Love the lyrebird porthole! Have you picked your colours yet  Keep up the good work ! Cheers |
|
|
|
Post by sportsman 1 on Feb 27, 2014 7:12:04 GMT 10
The rubber should go around a radius that tight.
Get a scrap piece with the same radius and try putting slits in the rubber on the outside of the curve in the section that is hidden. (bit hard to explain without seeing the actual section you are using) This will help the outside of the rubber to "stretch" around the curve as well as reducing the possibility of the inside of the curve bunching up.
Also try putting the rubber around a piece of ply the same size as the window and heating it with a heat gun to make it more pliant, then leaving it in position to allow it to form to the basic shape.
A section that has a small channel depth is much more forgiving than a section with a deep channel.
Cheers,
Leigh.
|
|
|
|
Post by shesgotthelook on Mar 6, 2014 13:01:56 GMT 10
|
|
|
|
Post by shesgotthelook on Mar 6, 2014 13:07:18 GMT 10
|
|
|
|
Post by Franklin1 on Mar 6, 2014 18:31:44 GMT 10
Very nice, sgtl!  That upholsterer doesn't seem very customer-focussed, huh?! I hope you slapped him with one of the cushions when you picked them up.  You don't need an industrial machine to do the sort of upholstery required in a van. I replaced the fabric facings on the cushions in the poptop I restored, using a Singer domestic machine that we bought in the 1980s... 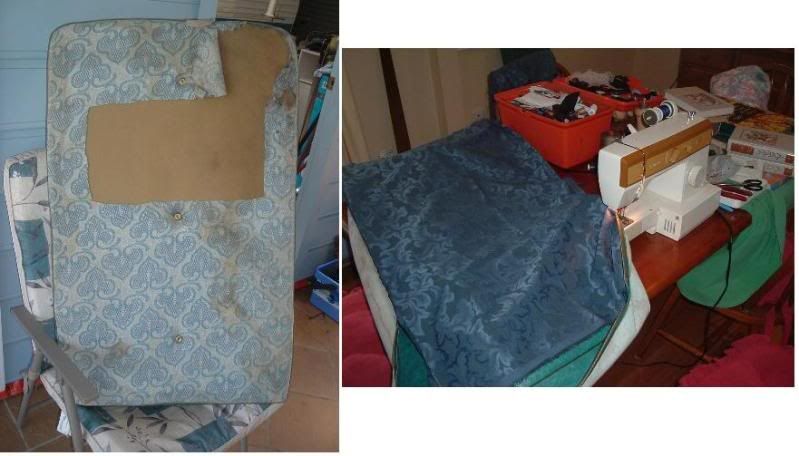 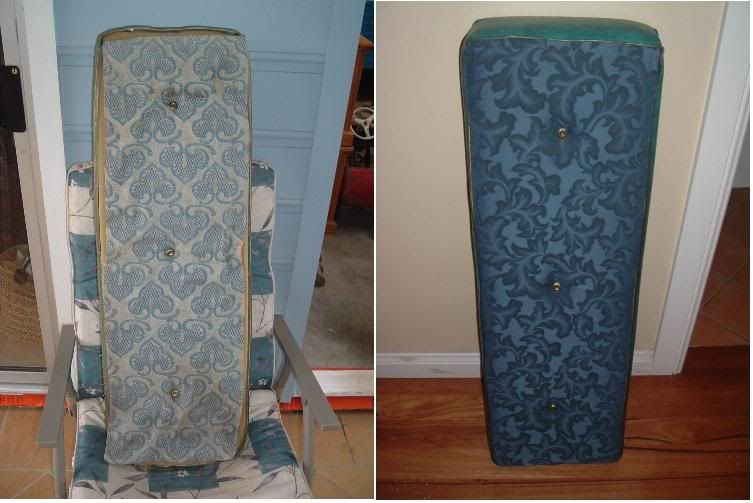 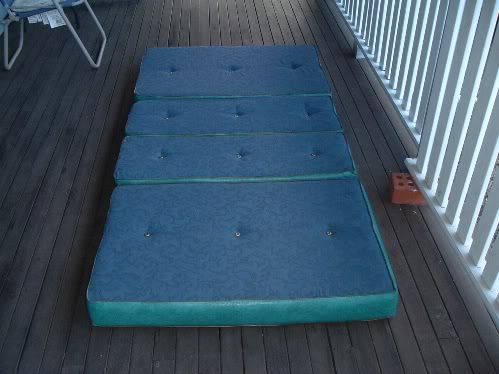 You just need a machine with enough grunt to pierce through 4 layers usually - 3 of vinyl plus 1 of fabric. I use a size 16 needle, and buy upholstery thread from Spotlight in 100 metre reels. That's more than enough for a set of dining cushions. Sometimes when you sew through more than 4 layers (for joins, overlaps, etc), you have to turn the wheel through that section to help the needle go through, but mostly it's fairly plain sailing. Grab a few layers of vinyl and a piece of fabric, and see what your machine is capable of. Good quality old domestic machines sell for around $40 in our Op Shops, whereas the industrial/professional machines are now priced up around $275 (I was lucky enough to get mine 5 years ago at the Salvo's for $60). Once you get the hang of it, there'll be no stopping you.  cheers, Al. |
|
|
|
Post by shesgotthelook on Mar 6, 2014 20:46:16 GMT 10
I don't think I'll ever be as talented as you Al. My machine is from an op-shop though  It does struggle with thick layers of barkcloth & can't do anything stretchy. Maybe I should fire up the the old Singer treadle for real  It's good to know that I don't need an industrial machine though, had a quick look & they are a bit pricey but then so are upholsterers! My latest upholsterer had a sample book from a co. called Vyfab in Moorabbin & it had some great bits of vinyl in it but I cannot find it on their website  I should have asked him if I could borrow it. |
|
|
|
Post by Franklin1 on Mar 6, 2014 22:38:25 GMT 10
Fiddle-faddle!  Three years ago you had never painted a vintage van, and now you can do it! Same with upholstery.  When I remade the canvas poptop skirt for that van I had, I had no idea how to sew the zippers around the curve. My first attempt was a shocker... 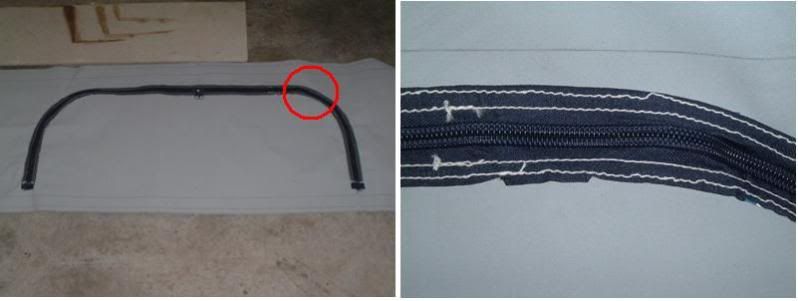 So I got on the internet and searched for the right way to do it. I found out it is known as "easing a zipper around a curve", and there is a proper way to do it. With all that new knowledge, I had another go... 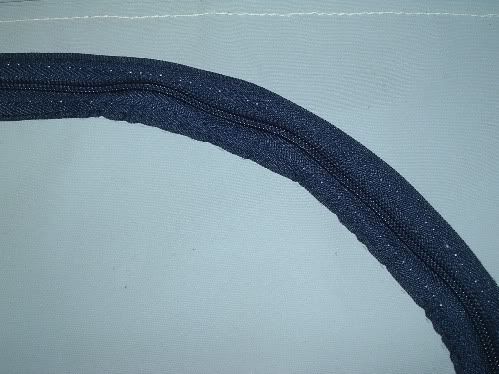 That ended up being good enough for this mug sewer, so I carried on and finished the whole skirt... 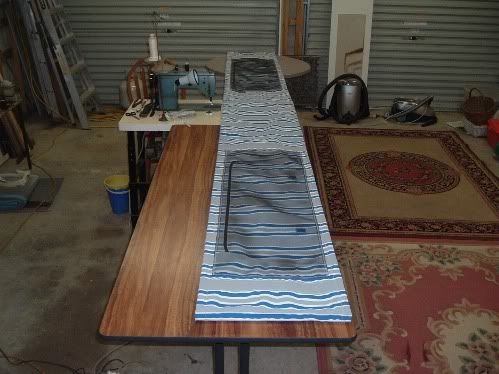  Took me 16 days to get it finished, but hey, people have spent that much time sanding back a caravan! I'd been quoted $820 to have the skirt made by a caravan repairer, and I ended up doing it for $150 worth of parts and material. All ya gotta do is have a go.  cheers, Al. |
|
|
|
Post by shesgotthelook on Mar 8, 2014 9:39:20 GMT 10
I swear I'm going to kidnap you Al & put you to work  I really am one of those people who have good ideas but not very successful at putting into practice. Latest Phoenix achievements; Aluminium crescent moulding going on.   Just a quick query re the tank filler cap & surrounds. What should I put behind it as a seal before re-instating? |
|
|
|
Post by akeepsake on Mar 8, 2014 10:53:43 GMT 10
SGTL It's looking fantastic ! You must be pleased   A little mastic will do it . It doesn't go hard an unlike silicone you can paint it ! Speaking of paint what did you use?? |
|
|
|
Post by shesgotthelook on Mar 8, 2014 11:09:14 GMT 10
Paint is Dulux undercoat, I asked for best quality they had & it is really good  Top coat is Haymes from a specialist paint shop. I had to take a piece of my EJ Holden in to get that blue stripe exactly the same  I'm unhappy with how my spats have turned out so might re-do them with some of the green & see how they look. I painted the lift out bits from the seats & left them on the end of the trestles to dry, went to town & a random thunderstorm roared in & rained on them  They appear ok, will just keep an eye on them for warpaing. |
|
|
|
Post by hilldweller on Mar 8, 2014 14:08:41 GMT 10
Gosh that all looks so nice and smooth and shiny - well done  Love that floral curtain too - is it barkcloth? Looks fab. Looking forward to more pics. |
|
|
|
Post by shesgotthelook on Mar 14, 2014 13:04:02 GMT 10
Yes, curtains are barkcloth. Very lucky to pick up complete set of long curtains that weren't too difficult to alter. I know I should wait for windows before putting in! But pretty pleased with how they look  Sewing the final one  Test run of back ones   |
|
|
|
Post by shesgotthelook on Mar 14, 2014 13:15:06 GMT 10
New cedar fly screens  Few more bits  |
|
|
|
Post by shesgotthelook on Mar 16, 2014 13:05:06 GMT 10
New clearance lights installed & they work!  Stove in situ;  I don't like the look of the copper gas pipe that is there. Considering stainless flexible hose, is this okay? |
|
|
|
Post by hilldweller on Mar 16, 2014 15:15:26 GMT 10
It's coming together beautifully and those curtains really are gorgeous  |
|
|
|
Post by Don Ricardo on Mar 16, 2014 17:20:34 GMT 10
Hi SGTL, You are going great guns with the Phoenix.    I really like the colour scheme, and the chrome strips along the flash blend in with the other chrome/aluminium items on the van. Don Ricardo |
|
|
|
Post by Franklin1 on Mar 16, 2014 17:54:44 GMT 10
G'day sgtl, What is it about the copper pipe that you don't like the look of? Braided stainless steel gas houses are commonly used from the bottle to the copper pipework at the front of the van, but I don't know whether the regulations allow you to have them inside the van for fixed appliances. You'd probably have to check with a knowledgeable gasfitter (knowledgeable about caravans, that is  ). A company known as James Shields has a lot of braided stainless steel hoses listed on their website, and a heap of stockists in regional Victoria. Maybe your nearest stockist can advise whether they are legal for inside vans?? cheers, Al. |
|
|
|
Post by akeepsake on Mar 16, 2014 19:32:24 GMT 10
G'day sgtl, What is it about the copper pipe that you don't like the look of? Braided stainless steel gas houses are commonly used from the bottle to the copper pipework at the front of the van, but I don't know whether the regulations allow you to have them inside the van for fixed appliances. You'd probably have to check with a knowledgeable gasfitter (knowledgeable about caravans, that is  ). A company known as James Shields has a lot of braided stainless steel hoses listed on their website, and a heap of stockists in regional Victoria. Maybe your nearest stockist can advise whether they are legal for inside vans?? cheers, Al. SGTL I thinly that your gas pipes have to be a continuous run to the externals of the van??? Btw it's coming along very nicely  |
|
|
|
Post by humpyboy on Mar 16, 2014 20:49:37 GMT 10
Hello SGTL, so the copper pipe don't look to good hey? go to an Auto parts/accessory supplier and ask about the Stainless braiding they have that Hot rodders use to cover radiator hoses ect, I'm pretty sure you will find a size small enough to put over the copper pipe (before the fitting is put in place) and then you will have the best of both worlds.
|
|
|
|
Post by shesgotthelook on Mar 16, 2014 20:57:46 GMT 10
The copper pipe is stuffed. Cut at drawbar end, has a secondary pipe coming off it which is sealed & in the stove cavity it is taped over. Re the flexible hose, I would connect it to the stove & right back to regulator or gas bottle. I can't see what the problem would be as it is no different to hooking up a BBQ, but i will check with a plumber. To my mind, the hose is less likely to split or rupture, particularly in a moving, jarring vehicle. We got the water connected today, works perfectly except the sink doesn't quite drain out  Hopefully electrician is coming later in the week to do the scary bits. I'm not sure he's hearing me when I say 'in keeping with the age of the van'! Will have to supervise closely  Biggest dilemma today- where to put the triple tea towel rail!  Unresolved |
|
|
|
Post by griffin on Mar 16, 2014 21:45:06 GMT 10
I have exactly the same problem with a FALKS stove in the bondwood. I want to fit a flexible line onto the copper pipe and use a small bottle which I want to connect through the battery box door. However, the stove has a male fitting with a flared female connection on the pipe, which I want to keep, but all the flexs with regulators I've found have a female connection that goes onto a straight male thread and you don't seem to be able to buy a male fitting for the other end of the pipe. And, of course, the shoe box full of old brass pipe fittings I've kept for years doesn't have anything suitable either, it's always the way. I think I'll be calling a gas fitter soon!
George
|
|
|
|
Post by shesgotthelook on Mar 17, 2014 10:20:08 GMT 10
|
|
|
|
Post by Franklin1 on Mar 17, 2014 12:09:51 GMT 10
sgtl, I would encourage you to be cautious about the accuracy of information published in 2004 (ten years ago). The info you've linked related to the Australian Standard that was relevant in 2004, that is, AS 5601 - 2004. That Standard was reviewed in 2010, and again in 2013, and the relevant Standard today is AS/NZS 5601.2:2013 ["Gas installations - LP Gas installations in caravans and boats for non-propulsive purposes"]. It is quite possible that the info you've found from 2004 is still relevant in the current version of the Standard, however you should clarify that before you go ahead and spend any money on parts and equipment. For NSW readers, the Gas Regulations appear to have been changed in September 2012, if this linked info is the latest: New gas Regulations from 1 September.[2012]. cheers, Al. |
|
|
|
Post by shesgotthelook on Mar 17, 2014 13:31:40 GMT 10
|
|
|
|
Post by shesgotthelook on Mar 27, 2014 20:03:04 GMT 10
Little bits   Electrician did make a start today but I wasn't here to supervise. Hope he comes back soon! Put in a second power point,  Is going to put 2 downlights which I will cover with traditional shades. |
|