|
|
Post by will on Oct 11, 2004 8:18:54 GMT 10
 ;)fantastic workmanship keep up he good work you can become the official advisor on complete restorations looks really terrific Im sure every one would agree Will
|
|
|
|
Post by retro1 on Oct 12, 2004 20:10:56 GMT 10
Thanks for that Will I would be happy to help anyone I can, so please don't be afraid to ask and that is what this whole forum was set-up for. Here is the rear end of "My Castle" all the rear wiring is done. There is a few more bits to go either side of the windows.I have also put in a water tank under-neath the van as the original one was rusted out and was under the rear bed taking up space. The new one is plastic. Although you can't see them clearly I have also replaced the rear support legs with modern wind-up ones. The old ones were wingnuts on a rod and to access them you had to climb under the van and undo the leather straps this took to long. ![]() 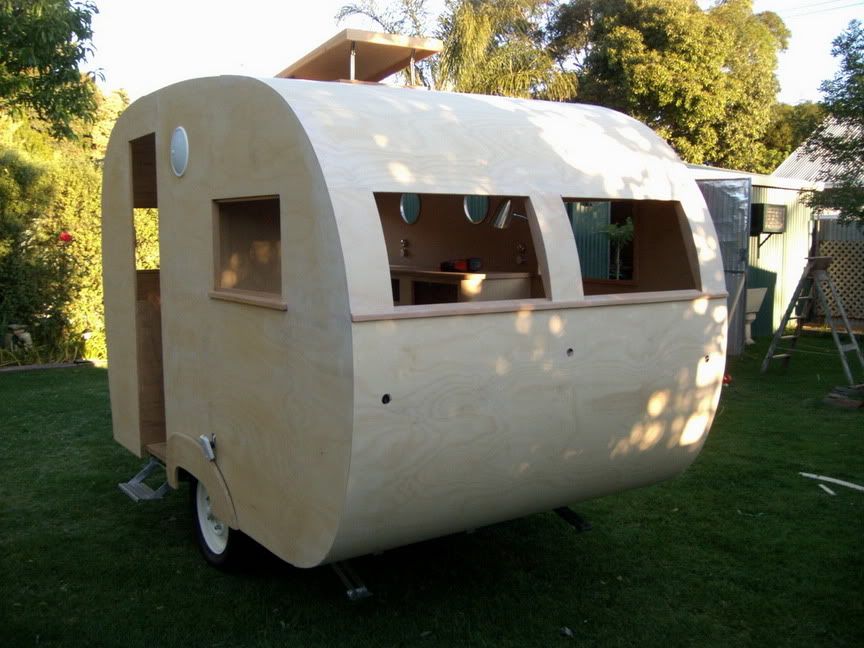 |
|
|
|
Post by cuz on Oct 12, 2004 22:09:39 GMT 10
Hi Retro1, nice job on the van, did you say you were doing a resto? looks more like a rebuild  . What was the condition of the wall framework?. Gives me a renewed intrest in replacing the floor in my '59 Wayfarer. Should look really nice when you finish it,what are you going to pull it with? Regards Bill  |
|
|
|
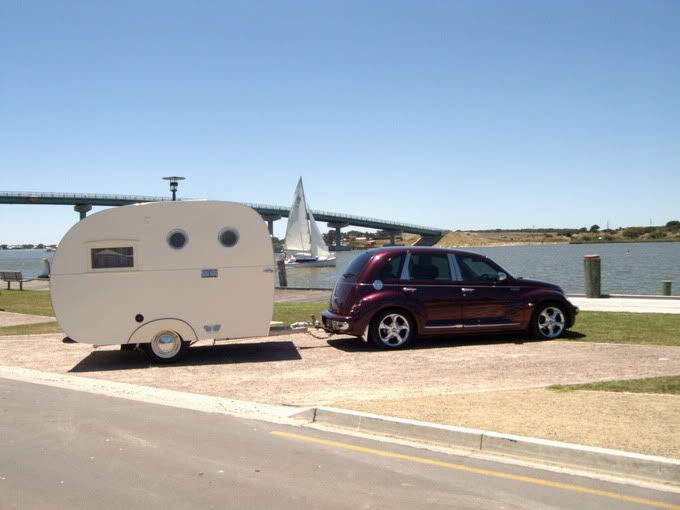
Post by retro1 on Oct 12, 2004 22:36:04 GMT 10
I was waiting for someone to ask me this as I don't have a vintage car to pull it with. As I'm known as "retro1" I thought this might be an appropriate car. I'm still looking for an older car to tow with but for now this will have to do......................................  Part of the reason for the re build is to reduce weight as my PT has a low tow weight capacity. ![]() 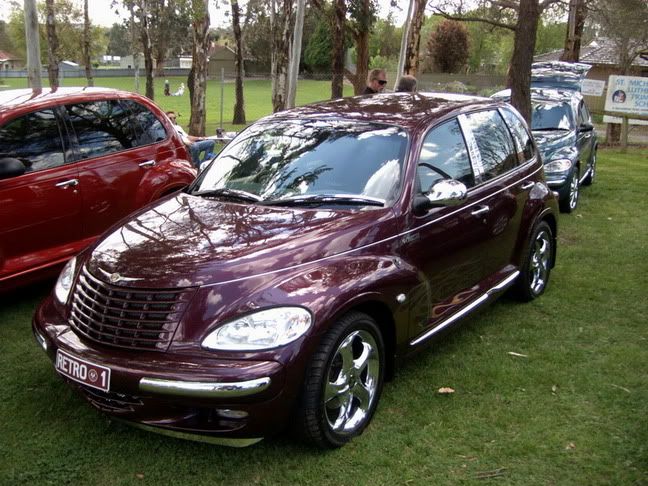 |
|
|
|
Post by retro1 on Oct 21, 2004 23:03:42 GMT 10
Have been really busy lately have not done to much to the van. I have been sourcing old laminate samlpes for the tables and benches and I'm find this very time comsuming. I have found the aluminum edge for the table (exactly the same as the old stuff). Find old vans is becoming easier and easier but find old caravan parts is hard. I hope to do a bit of work on the weekend and should have some pics soon. Thank you all for watching "My Castle Caravan" so much as it is good to keep in contact with other vanners. Please contact me if you have any questions on my van. |
|
will
New Member

Posts: 0
|
Post by will on Oct 22, 2004 0:14:46 GMT 10
:ogreat stuff retro 1 looking forward to the finished product keep up the good work if you happen to see a bubble type van around ten ft in reasonable condition please let me know I am prepared to ship one from the east bondwood is my preference or early patterned aluminium regards Will
|
|
|
|
Post by retro1 on Oct 22, 2004 0:33:27 GMT 10
Cheers Will
Don't forget to check out ebay for vans as I see them come up now and again
|
|
|
|
Post by retro1 on Oct 24, 2004 22:49:24 GMT 10
Had a busy weekend went and did all the "Trash and treasure markets" found my hub caps. Four in total They don't fit perfectly but with a few modification they did Around the door frame I have put an aluminium strip to protect the ply edge and also to polish up. You can see the vents on the other side of the van to help the fridge breathe, these are stainless steel. The cupboards are in and I'll make the doors soon. We have chosen the laminate colours after many days of deliberating. The sashes and screens are also underway. It's the little bits and pieces that take time! ![]() 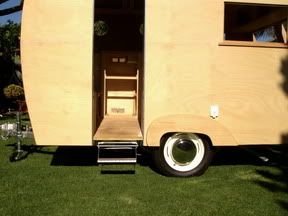 Will Will if you want the hub caps please contact me? All I want is the postage costs, the caps are in okay but dented condition |
|
|
|
Post by caraparker on Oct 28, 2004 20:07:04 GMT 10
those hubcaps look like they are from a 4 cylinder ford capri, the sixties one not that convertible thing they built!
cheers Greggy
|
|
|
|
Post by retro1 on Oct 29, 2004 23:50:27 GMT 10
Did the sashes tonight could not wait to put them in. They are made of Western Red Cedar which is light weight with the glass siliconed in for extra strength. The stay on the sash is the same as the original but in chrome. The glass in the rear is in now.Bead holds this in which I have made to match the old stuff and with the compound angles is quite a challenge to fit. All the internal doors are drying and should go on soon. The external door is made with the lock/handle being a modern screen security set and soon will be fitted.I have also order my lino floor which I should get next week. I think I'll be very busy over the next few weeks and it looks like I'll be on track to go away at X-mas. A final sand then a coating of water-proofing membranewith a UV screen will help protect the marine ply wil be the next thing I will do. ![]() 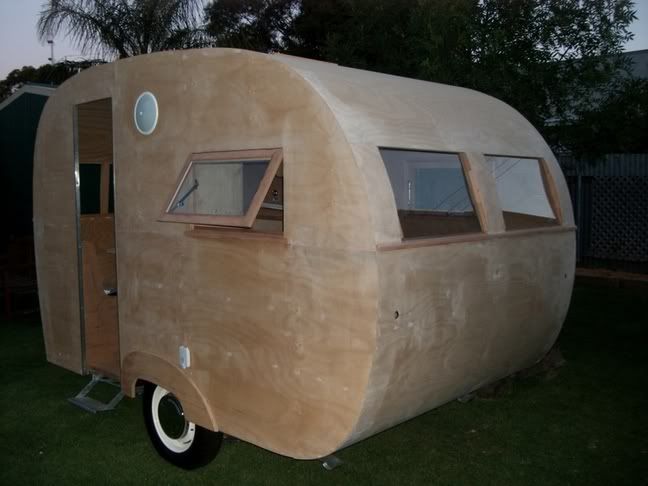 I hope you are enjoying watching my progress and if you have any question/input to "My Castle Caravan" please contact me. |
|
|
|
Post by trev n carrots on Oct 30, 2004 1:02:46 GMT 10
bill . the vans looking great & coming together very quickly...a credit to you. keep the pics coming. cheers trev |
|
|
|
Post by bradngem on Oct 30, 2004 1:10:52 GMT 10
I'm with you Trev, this little van looks great.....Retro1, the pics you've posted have really inspired us to get into our project (so has the looming deadline.....haha)... but it's always easier to launch into it when you can see where someone has "gone before".....thanks.....
Brad
|
|
|
|
Post by retro1 on Oct 30, 2004 1:18:19 GMT 10
Thanks for the comments A project like this is a lot of work One of the hardest things is getting old hardware items and colour in laminates but I soon over come this with research. Modern materials/glues/paints are excellent to finish it with. I would not recomend a project of this size unless you are very confident of your abilities or you have a fat wallet to pay someone |
|
|
|
Post by retro1 on Oct 31, 2004 19:38:40 GMT 10
Had a busy weekend got plenty done. All the 12 volt wiring is done and working fine. Door is on windows are in and will be painting soon.................. ;D Just another picture for you to look at ![]() 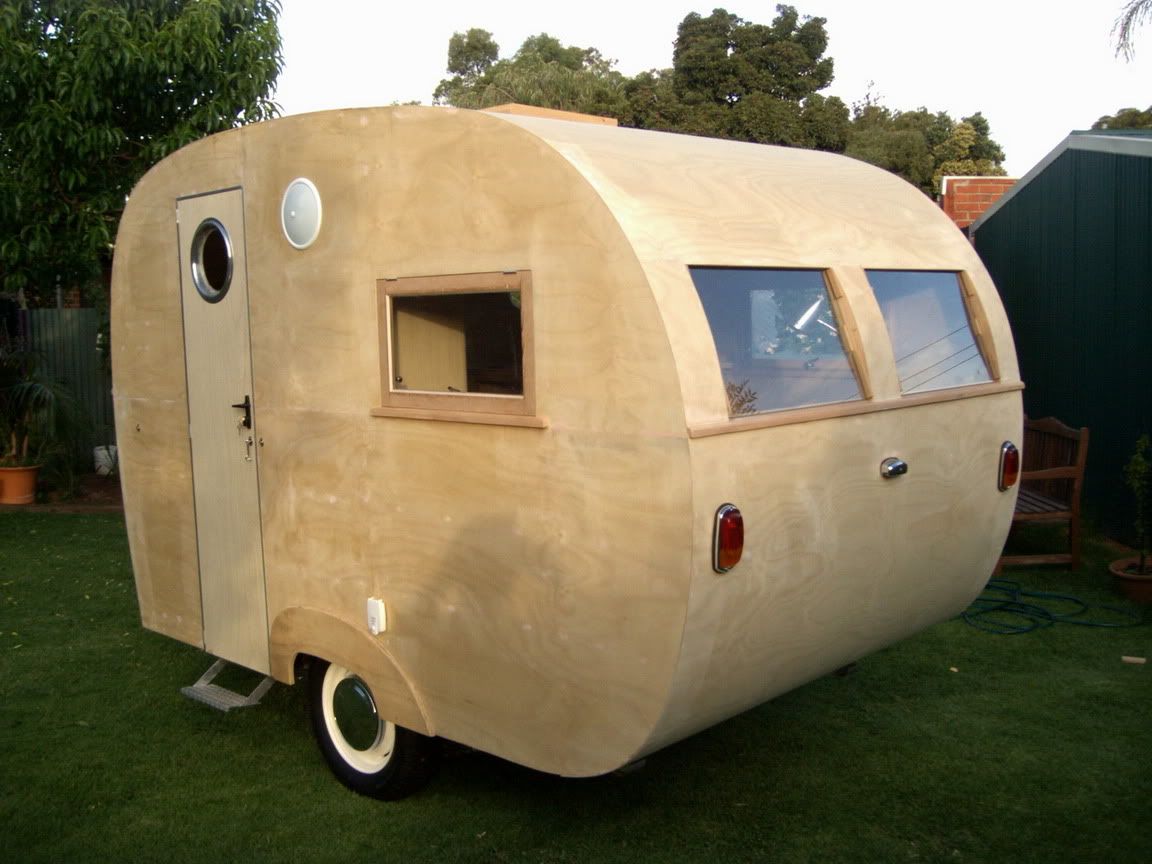 |
|
will
New Member
Posts: 0
|
Post by will on Nov 2, 2004 7:57:24 GMT 10
;D the new old van is a credit to you retro keep up the fantastic work Will and Lyn
|
|
|
|
Post by retro1 on Nov 4, 2004 23:23:23 GMT 10
The next picture is just after the first coat of a waterproofing membrane. This product I thought was the best to use as after you prime the van you apply this thick paint-like colour. The manufacture's say it will waterproof ply and also has UV protection. I applied it with a roller and once dry it was fairly easy to rub back. I removed all the bits to seal all the joints and ends of exposed ply ( for extra protection). To do the van I used approx 2 litres per coat. In the past bitumum paint was used with a layer of canvas over the top. When I got the product I made a ply box and painted it inside and filled it with water. That was three days ago and it still has not leaked so I think it will do for my van. Thought I would post a little picture so it downloads quicker. ![]()  |
|
|
|
Post by retro1 on Nov 23, 2004 20:10:33 GMT 10
It has been a little while since I posted some pictures. Have been very busy on the van. Painting it has taken longer than I thought. All the windows were fitted and then removed for painting. The doors are all fitted as you can see and are undercoated. The tables are made like a hollow core door with extra ribs as it drops down for the bed. The edging is the same as the original and has been polished to a mirror finish. The inside theme is going to be very retro . I have a lot of little surprises as I finish the fit out. The external side of the van is very near completion and I will post pictures as soon as I can.All the seats are being covered and should be in soon. I have approx 25 days till Christmas and I should get close to being finished. Hope you are enjoying the pictures and thank you for taking the time to view my pages on "My Castle Caravan" ![]() 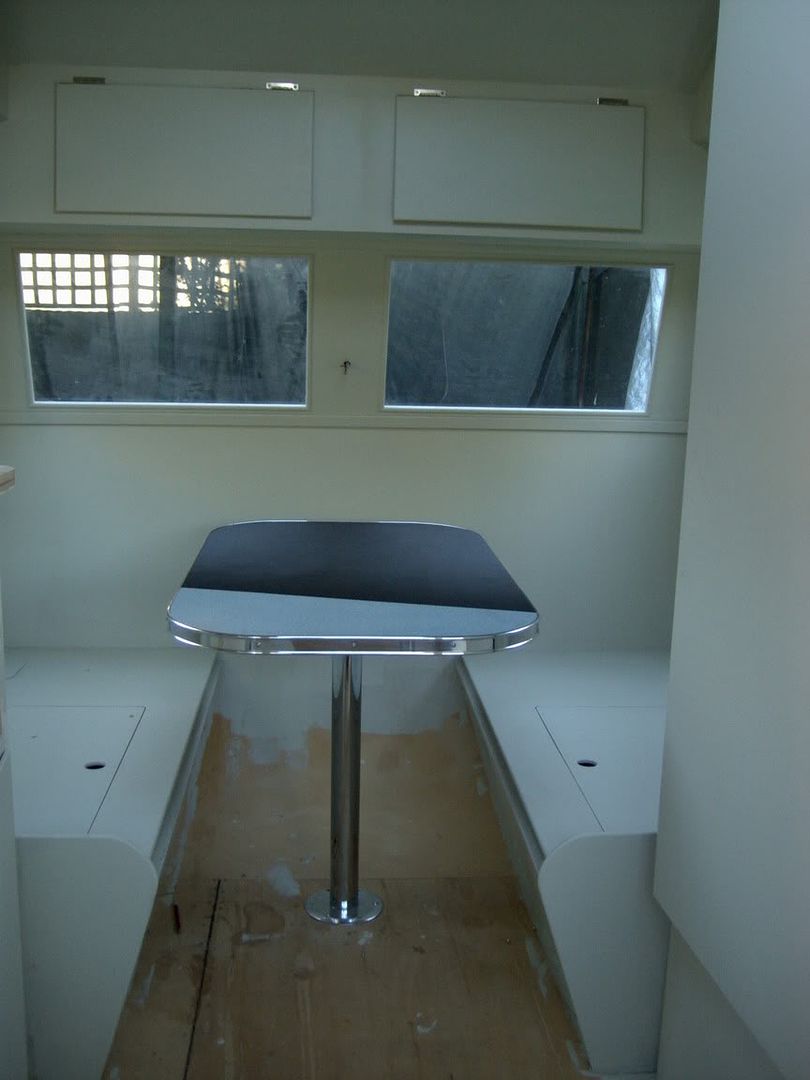 |
|
|
|
Post by Will and Lyn on Nov 24, 2004 20:16:00 GMT 10
doing a fantastic job retro are you a carpenter or a cabinetmaker ? that little humdinger will probaly be around in 50 years all the best and keep up the terrific work Will |
|
|
|
Post by retro1 on Nov 24, 2004 21:04:33 GMT 10
I did my apprenticeship as a Wood-machinist then when I finished I did 8 years as a Carpenter and Joiner. Today and for the past 10 years I've been Cabinet-making. I love to work with wood and love difficult jobs such as curved work. I hope the van is around for many years to come as well.
|
|
|
|
Post by fjboys on Nov 24, 2004 21:24:07 GMT 10
Maybe a sideline in building wooden vans for those of us tha don't have the skills (without alcohol) or time to do so?  hehe Matt ;D |
|
|
|
Post by surferboy on Nov 26, 2004 6:48:56 GMT 10
Great pictures and information Retro. Keep it coming.As a person with no skill I enjoy seeing what others are capable of. Mark ( Global Moderator Highness) I can build you a curvy caravan...just give me some straight pieces of wood !!! |
|
|
|
Post by fjboys on Nov 26, 2004 13:30:43 GMT 10
I'm with you Surferboy, curvy is fine straight lines are the most problematic! hehe
Matt
|
|
|
|
Post by earlie on Nov 28, 2004 20:50:17 GMT 10
hey - do ya wanna sell it? - I reckon I can save myself a couple of years sweat and tears for the cost of some dollars? You have done a great job -
I take my hat off to you!
Earlee
|
|
|
|
Post by retro1 on Nov 30, 2004 20:40:39 GMT 10
|
|
|
|
Post by retro1 on Dec 1, 2004 21:57:47 GMT 10
This next picture is of the van with two top coats on it. The bows above the windows and door are not original items but i thought they would add character to the van. I also thought they would help to channel the water to the sides of the windows and not directly down the face of the window and thus keeping the sashes drier during rain. Other than final coats all I have to do is add the aluminium edging, the guards and the exterior should soon be complete. ![]()  |
|

 ;)fantastic workmanship keep up he good work you can become the official advisor on complete restorations looks really terrific Im sure every one would agree
 . What was the condition of the wall framework?. Gives me a renewed intrest in replacing the floor in my '59 Wayfarer.


