|
|
Post by humpynvan on Feb 8, 2012 6:35:53 GMT 10
Well, Its finally here,
Our first Vintage Van, circa 1940's teardrop,
looks a bit like an early sportsman, but i beleive it to be home made.
It cant be in to bad a shape, It has just made the trip by road from adelaide to Brisbane, Was towed the whole way. original wheel bearings, Original wooden chassis, and even original tyres for 3/4 of the trip
A huge thanks to Dave ( ole fart) who so kindly towed the Van to the middle of NSW, where thanks to the wonders of Gumtree a fellow Brisbanite collected it and towed it back to here.
It will need a reskin, and some new framework for the rear hatch.
still has original floor board in perfect nick, even original lino and cushions. the inside cupboards will need sorting out as well. but overall i think its in briliant condition for a 60+ year old van.
The Grand Plan..............
As some of you may know, the plan is to have it ready my next Xmas, when it will be put behind the Humpy, and taken to the FX FJ nationals in Bathurst, and then after that continue on down to Victoria to see the Relo's
|
|
|
|
Post by humpynvan on Feb 8, 2012 6:36:36 GMT 10
Seem to be able to only load one pic at a time.....
|
|
|
|
Post by humpynvan on Feb 8, 2012 6:37:04 GMT 10
the kitchen
|
|
|
|
Post by humpynvan on Feb 8, 2012 6:37:31 GMT 10
dont make em like this anymore
|
|
|
|
Post by humpynvan on Feb 8, 2012 6:38:08 GMT 10
inside
|
|
|
|
Post by humpynvan on Feb 8, 2012 6:39:26 GMT 10
love the notch for extra travel
|
|
|
|
Post by humpynvan on Feb 8, 2012 6:40:58 GMT 10
the worst of it. a substantial hole through the outside, and at least one rib inside to be replaced
|
|
|
|
Post by humpyboy on Feb 8, 2012 20:50:04 GMT 10
You have a good base to work with there humpynvan, keep the pics rolling in as you work please.
|
|
|
|
Post by humpynvan on Feb 9, 2012 20:09:03 GMT 10
Hey Dave,
The Mrs here!
Thinking it has to be a mere male's name.lol...
Something in the way of
Fat B*stards Bed lol
|
|
|
|
Post by Roehm3108 on Feb 9, 2012 20:25:47 GMT 10
A name  must thing of one. Why do all the Vans get girls names. Cheers Iris Caravans are like women - you're always spending money on them ;D ;D ;D  |
|
|
|
Post by humpynvan on Feb 10, 2012 17:54:55 GMT 10
first of all thanks for the well wishes, and my darling wife for her input ... ;D ;D ;D ;D
had a score today, have been clearing out the old Parattline as its sold and going to its new home tomorrow, and i found a canvas bag full of old tent pegs and old guy ropes, you know when rope was rope and plastic wasnt invented, complete with wooden adjusters and the old spring tensioners. so that was cool as i needed them for the annexe on the Teardrop.
second score was an old brass bell, tucked away in a corner under the front bunks, no markings , but its quite heavy , looks like an old ships bell or something like that..
Will take some pics over the weekend and post them up
|
|
|
|
Post by humpynvan on Feb 11, 2012 16:45:48 GMT 10
Ok heres the first of what i am sure will be many questions
Whats the best way to treat the wooden chassis? its all in near perfect condition, my first thought was bituman paint, but i thought that might trap water..
This pic is of the hole in the side, not as scary as it looks, new upright new outer skin lick of paint, or as is a favourite quote on another forum i frequent, .....It'll buff out ;D ;D ;D
|
|
|
|
Post by humpynvan on Feb 11, 2012 16:47:36 GMT 10
some of the loot i scored yesterday.....
|
|
|
|
Post by humpynvan on Feb 11, 2012 16:48:12 GMT 10
ring a ding ding
|
|
|
|
Post by humpynvan on Feb 11, 2012 16:49:48 GMT 10
To late by the time you read these
|
|
|
|
Post by humpyboy on Feb 11, 2012 18:24:54 GMT 10
G'day humpynvan, when I started rebuilding my TD I found that all the bolts holding the spring hangers and draw bar to the chassis were very very rusty and a consequence of this was that all the surrounding timber had rotted away  therefore I had no choice but to build a complete chassis, once I had the floor down I tipped it over and gave the whole thing a good coat or two of a product called Gripset 51 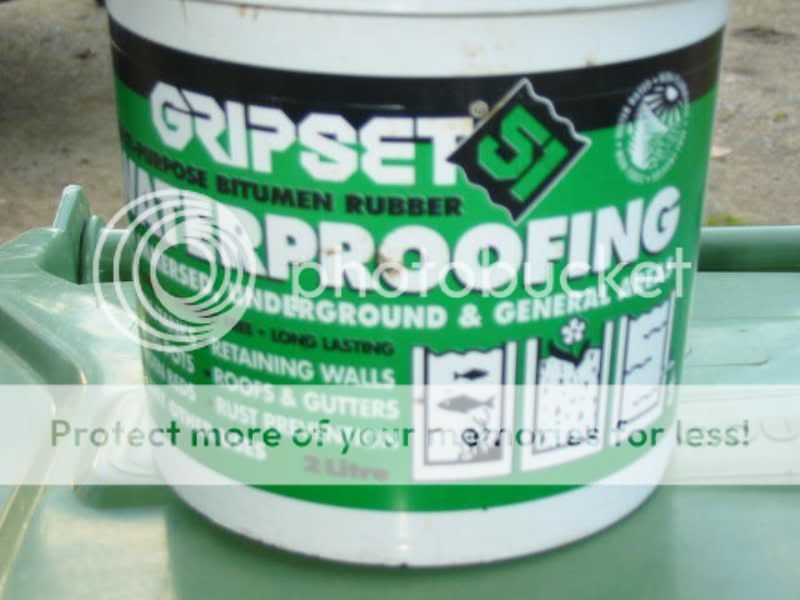 It dries flexible and can be painted over with water based paints if you so desire, I figure if your chassis is good and dry before you start then you won't have any water/moisture to trap  but I would be checking all the bolts before I went to far. |
|
|
|
Post by humpynvan on Feb 11, 2012 21:11:03 GMT 10
i will replace the spring hanger bolts, simply for safety reasons, but all the other bolts etc look to be ok, all joints are strengthened with metal angle brackets,
|
|
|
|
Post by humpynvan on Feb 12, 2012 18:30:21 GMT 10
Heres some pics of todays progress, Out with the Old 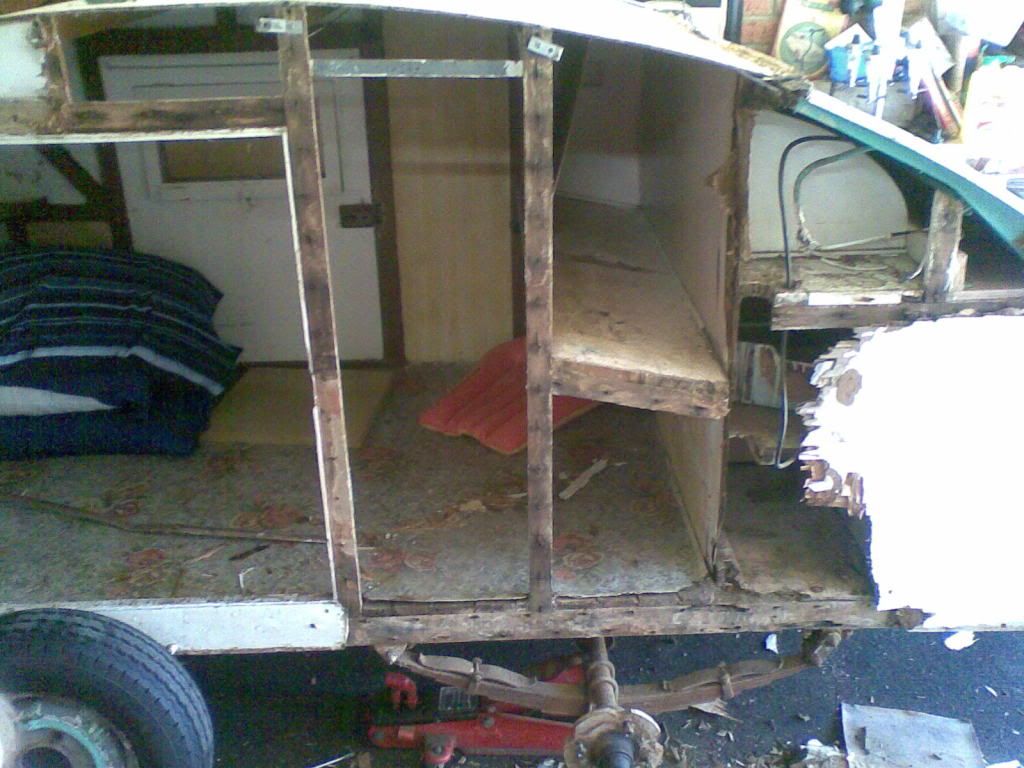 Not so Flash 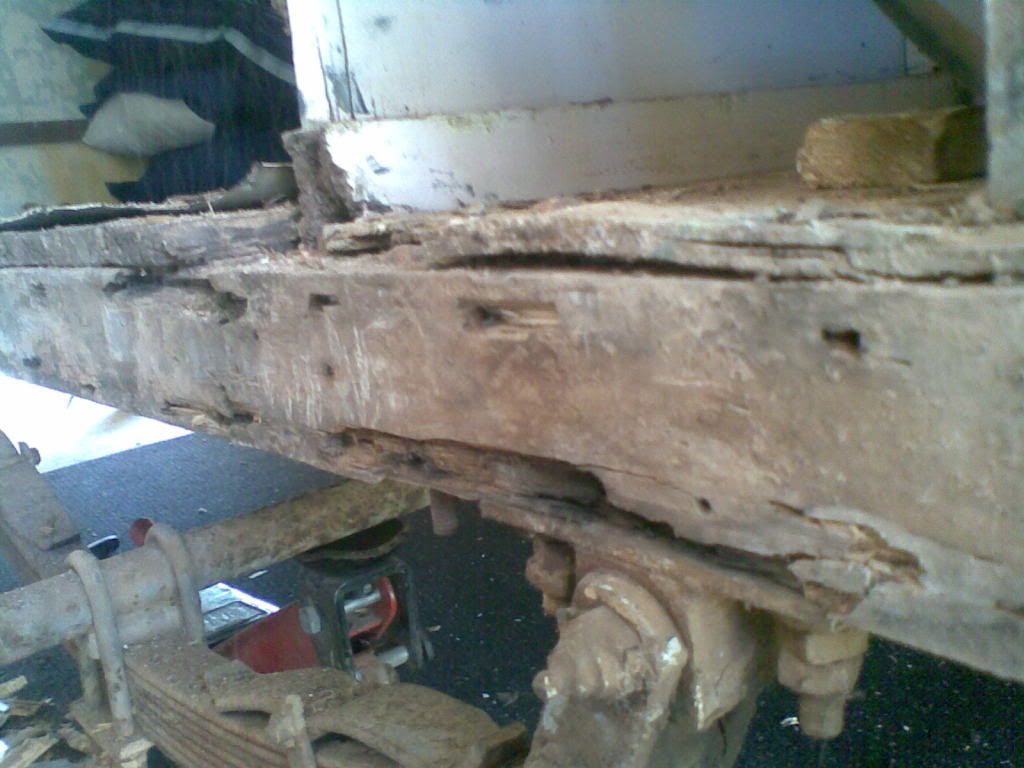 Thats Better 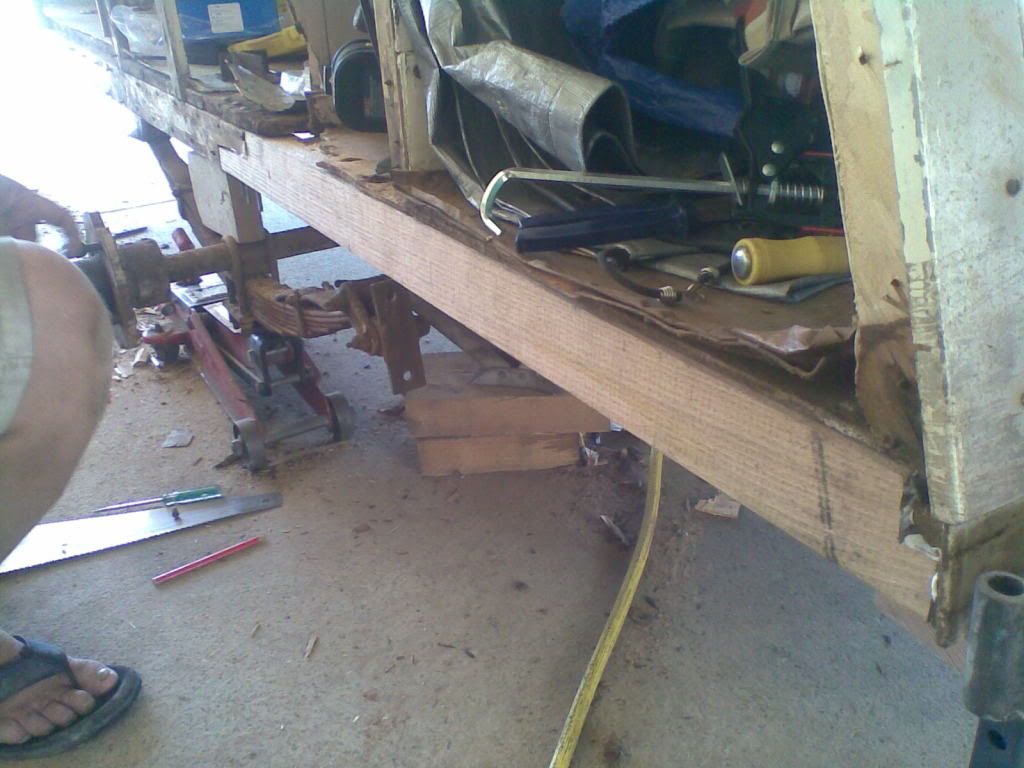 Lots of Industrial strength Glue 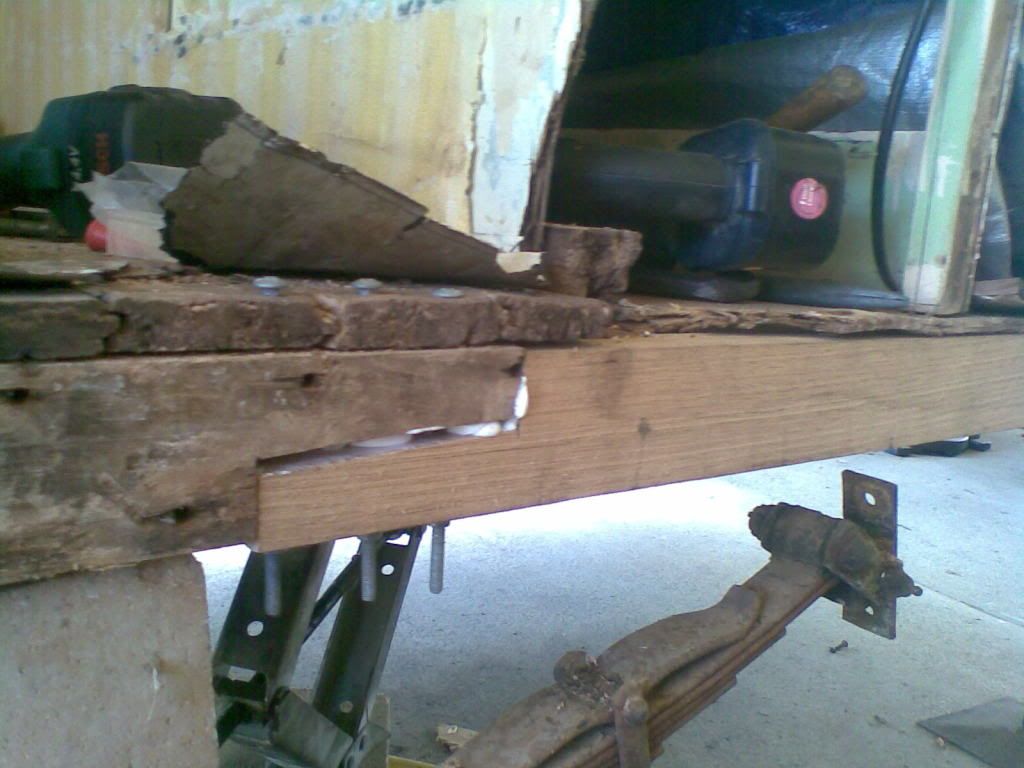 Now we getting there 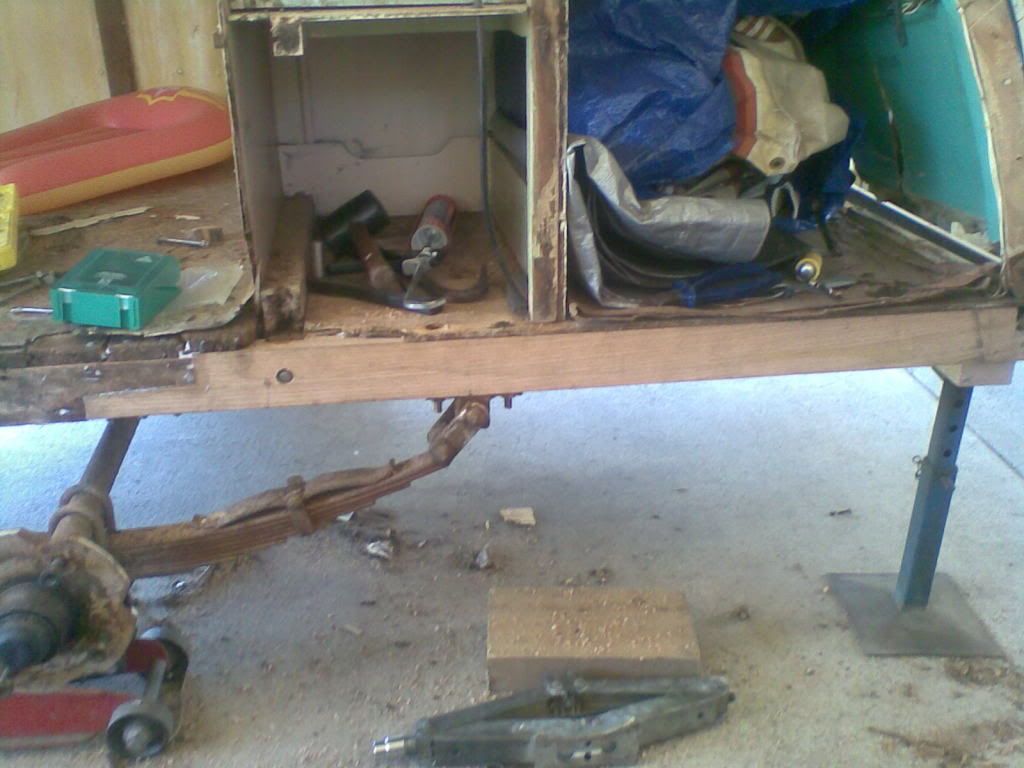 Taking Shape 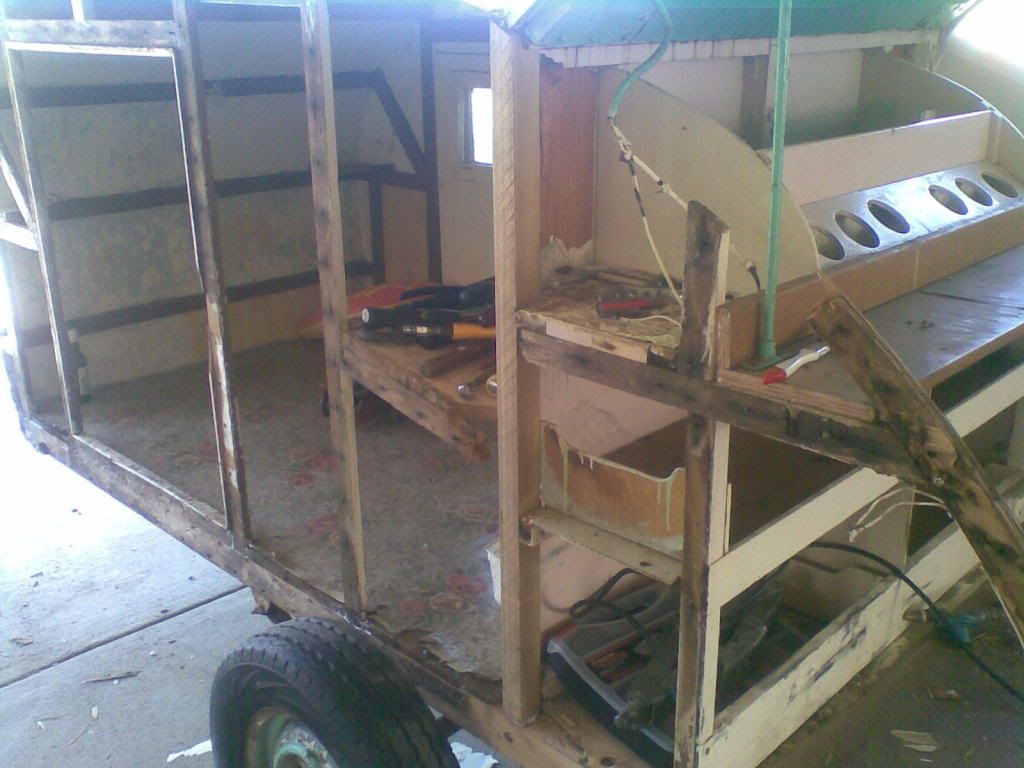 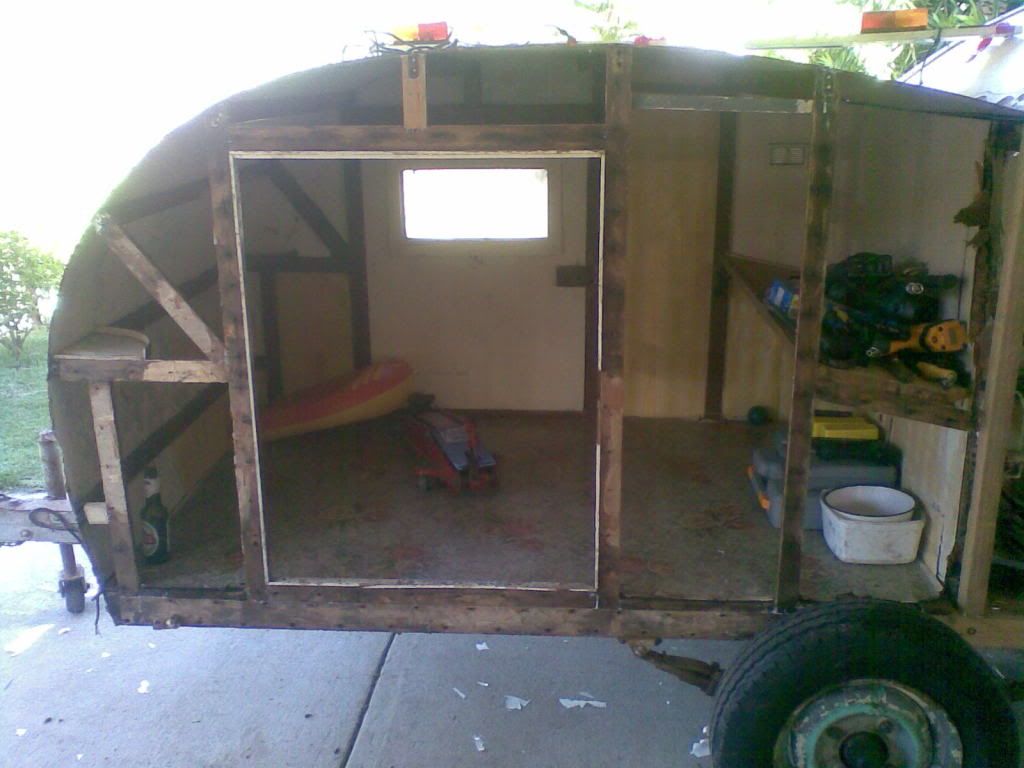 Still a bit more sanding etc on the ribs, most if the old rotton ribs replaced. Bulkhead between sleeping area and Kitchen is the next bit to be done The good news, is that the Drivers side outer skin is in really good shape, The better half scraped a lot of the flaking paint off today, and there one soft spot the size of a 50c piece, other than that its all good. so i only have to reskin one side... And i finally figured out to post pics using Photo Bucket |
|
|
|
Post by humpynvan on Feb 15, 2012 19:29:20 GMT 10
No Pics tonight im Afraid, Havent acheived all that much, ribs around door frame sanded and done in primer/sealer/undercoat
will update the pics once i get the frame all primed
|
|
|
|
Post by humpynvan on Feb 16, 2012 17:46:15 GMT 10
Its all good dave, last night was the first time i had touched it since sunday, and it most likely wont get touched again now till next sunday, althoygh there is a aswap meet on sunday, so the humpy may have to get taken for a run
|
|
|
|
Post by beetlesbailey on Feb 16, 2012 18:36:42 GMT 10
Hi Les
you certainly have made a good start.
I sealed all the under side of my teardrop with BoteCote 2 pack epoxy from Duck Flat Wooden Boats in Mt Barker (sa).
I guess any 2 pack boat glue might do.
I would have replaced the chassis rail in one peice but with your glue and those bolts it should hold , especially if you add a metal plate above and below the join so the bolts don't pull into the floor timbers.
Keep plugging away at it.
Cheers Beetles
|
|
|
|
Post by humpynvan on Feb 16, 2012 20:41:40 GMT 10
Graham,
The main reason i didnt replace the whole chassis rail, is that the whole of the inside floor would have to be removed, as well as the whole wall frame,
Im trying to retain as much of the original van as possible, so i chose to go the way i did, hopefully it wont come back and bite me on the butt
|
|
|
|
Post by humpynvan on Feb 19, 2012 17:34:04 GMT 10
Got a bit more done this weekend. Got rid of the bulkhead and a few more of the bad bits, 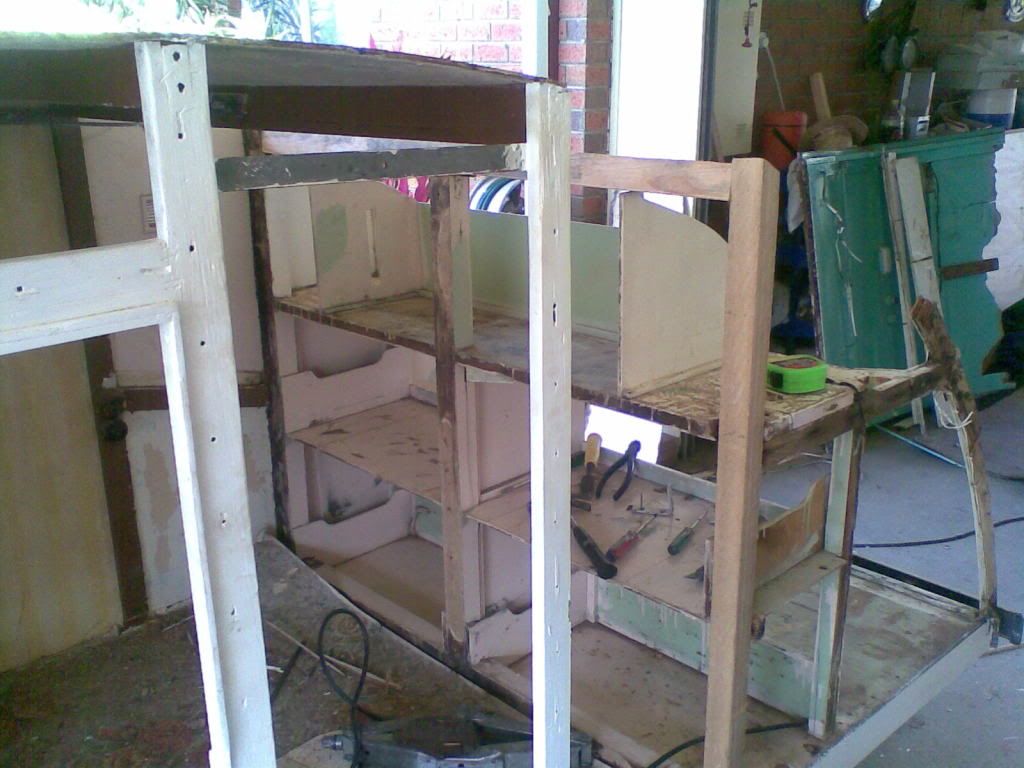 started replacing the top Rib 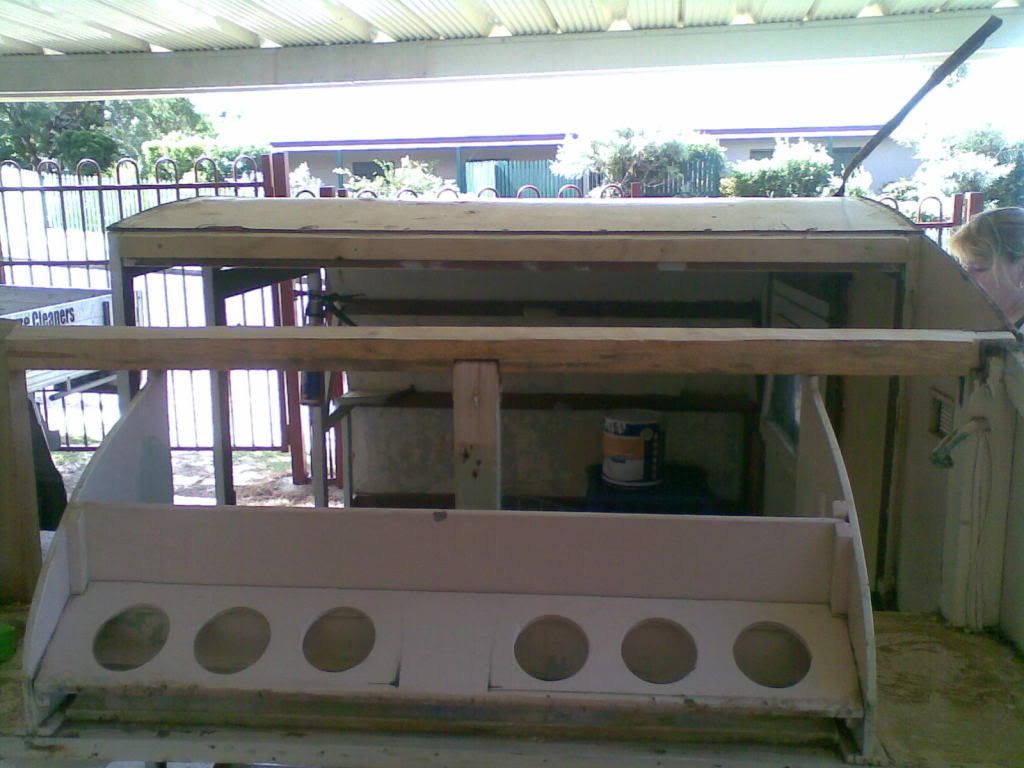 Made up a laminated rib to cut the replacement curved section from 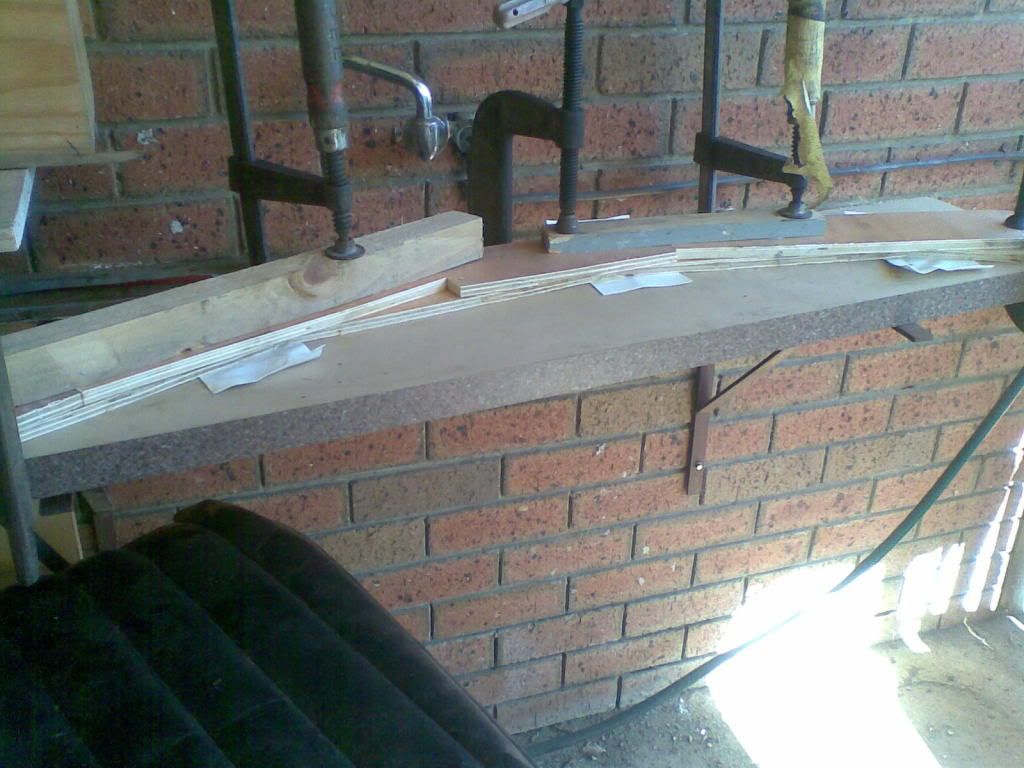 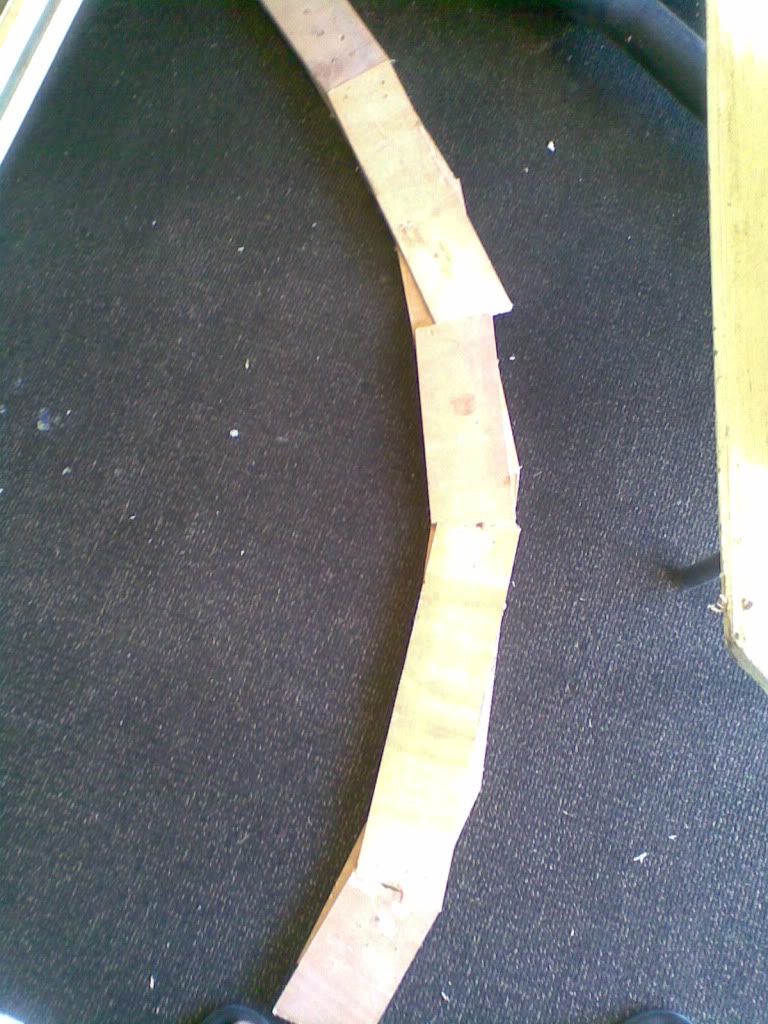 Also took out the back section of the roof where it was a bit dodgy 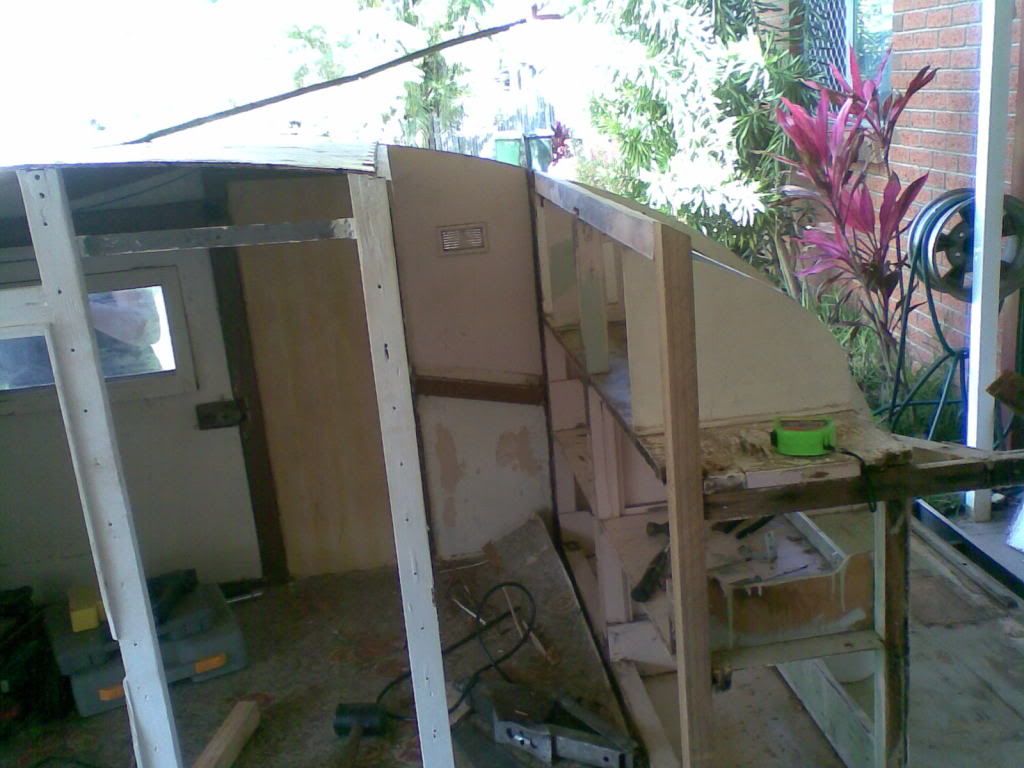 Dont know how much i will get done this week, or next weekend, as i have to go and check my floating toy to see if it is still floating and hasnt gone walkabout on me. |
|
|
|
Post by humpynvan on Mar 10, 2012 20:37:21 GMT 10
Have been doin a few bits and pieces over the last week or so, Spent a good day today and have gotton to the next stage. Have most of the framework replaced now and the shelf for the cupboard back in 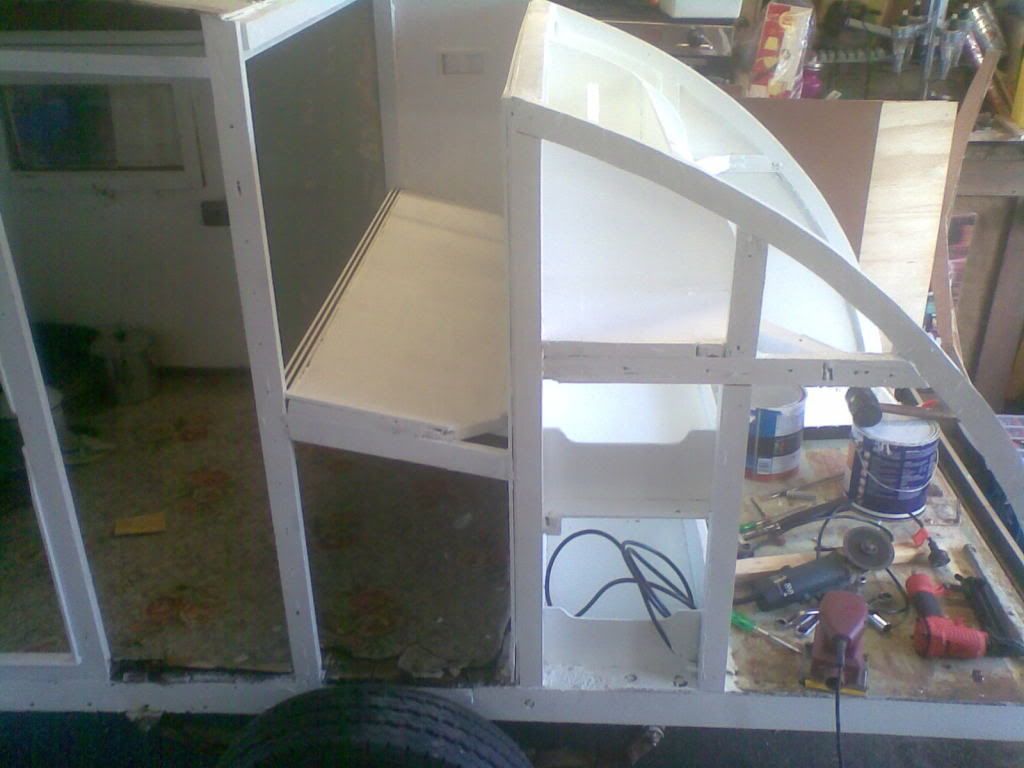 Have done some painting , Undercoated and one coat of gloss at this stage 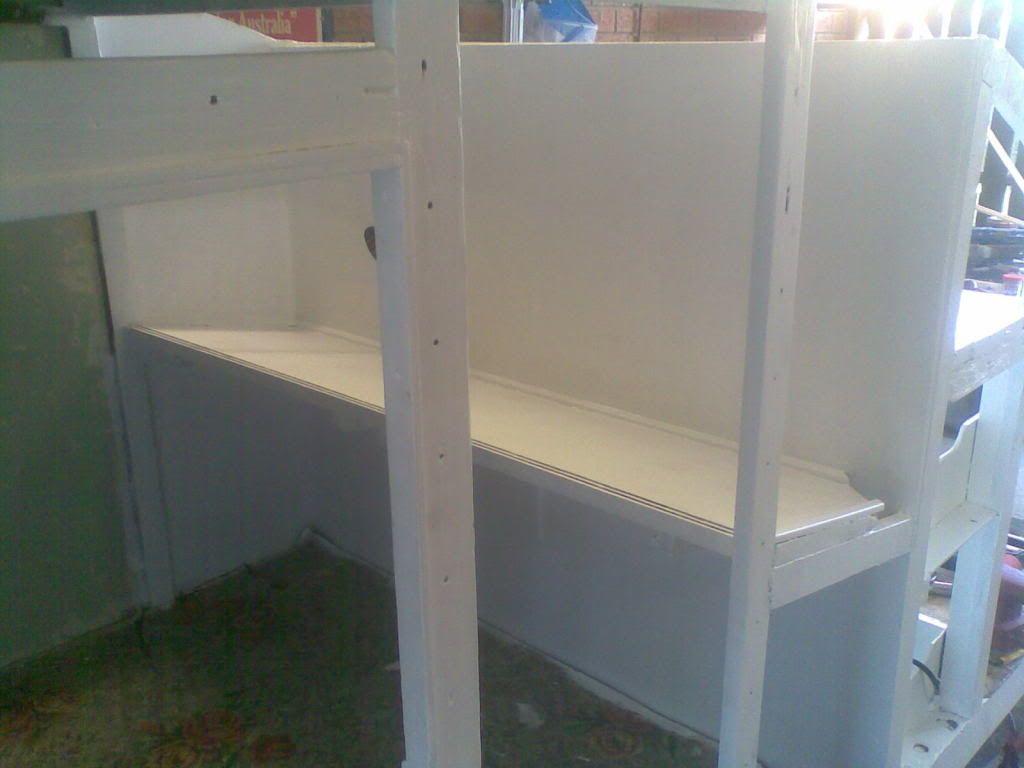 Original Kitchen repaired and painted, 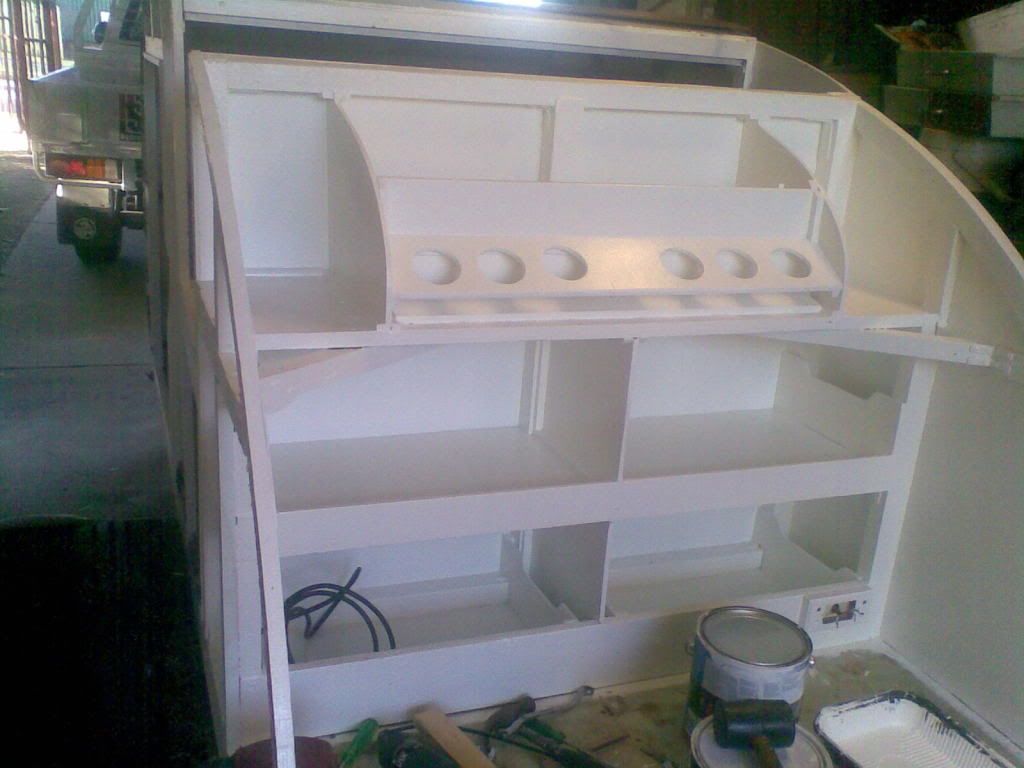 The paint is not super glossy, and i have used a roller, the texture and gloss level are almost perfect, for that Fresh but old vintage look. Of course the reason the paint has come out so well, is because of the expert help i have been getting. 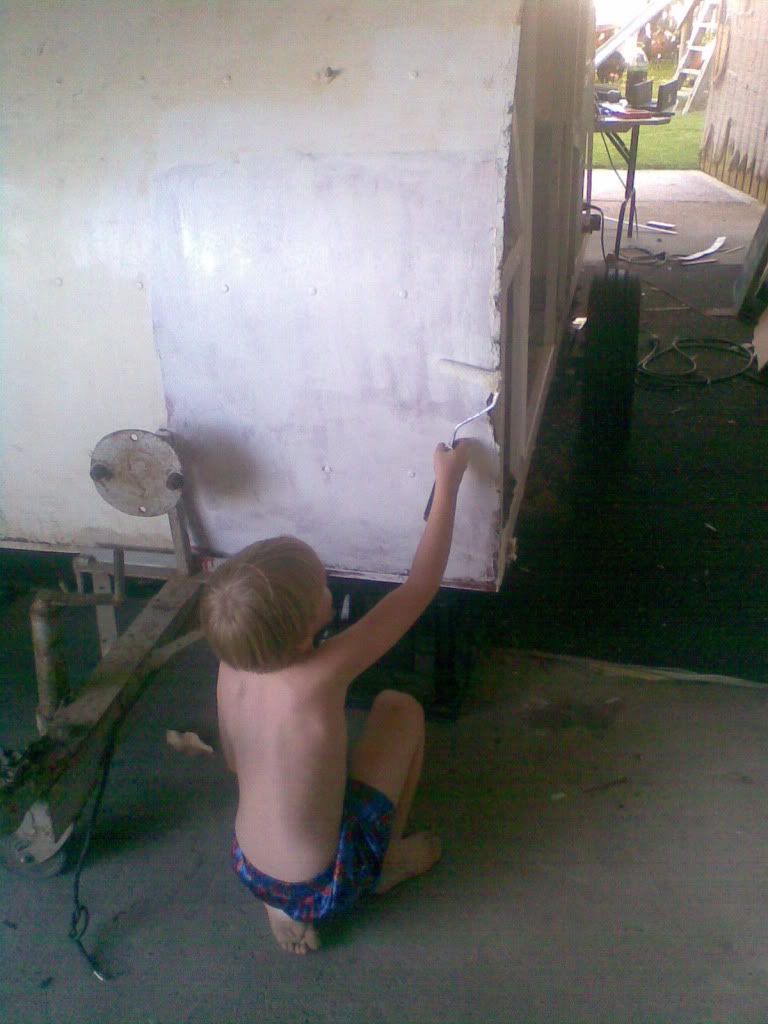 |
|
|
|
Post by humpynvan on Mar 19, 2012 21:03:52 GMT 10
Havent got any more pics at this stage,
But the left hand wall is now back on, and almost ready for paint,
I have got the rear roof repair section, ready to go back on, but im stuck on the hinge area.
Originally there was a zinc coated flashing folded up, and fitted under the rear edge of the roof, to redirect water off the sides, rather than onto the hatch, It is still on good cond, and i have cleaned it up, cold gal'd it, ready to refit, Now the tricky part,
under that flashing bridging the piano hinge was originaly a strip of canvas or someting, its long gone,
What would be the best material to fit in its place?
it i'm guessing acts as a waterproofing barrier for the hinge. Am i best to get a hold of some canvas, or would some upholstry vinyl do the job, or perhaps a rubber strip?
Any thoughts appreciated, as i need to get this sorted before i can finish roof
|
|


 must thing of one.
 therefore I had no choice but to build a complete chassis, once I had the floor down I tipped it over and gave the whole thing a good coat or two of a product called Gripset 51
 but I would be checking all the bolts before I went to far.