|
|
Post by curtis on Apr 22, 2010 17:36:27 GMT 10
Greetings Fellow V'Vaners. Well the long week end is coming up an so I thinks to myself maybe a good time to get the windows refitted into the Freeway, little did I know that the extrusions are a rare as rocking horse poo.   I need to get glazing bead and also the outer seal and I have tried every link in Cobber's list of parts suppliers, I have been to Scott's Old Auto Rubber, Clarke Rubber and have had a good hunt on the net. No luck so far. One guy suggested that the old caravan manufactures tended to have their own profiles rather than anything standard and I might be outa luck...... Hope not  Any of the other Franklin owners replaced seals and can point me in the right direction??    Thanks guys Dave |
|
|
|
Post by hwyman on Apr 22, 2010 19:57:26 GMT 10
Hi curtis if you cannot obtain the original or another that will fit you could mask up the window frame and the glass neatly and apply a bead of a quality sealant then remove the tape while it's still wet for a neat finish. I have seen the glaziers do this i think because it's so much cheaper for them.
hwyman.
|
|
|
|
Post by frankidownunder on Apr 26, 2010 21:43:18 GMT 10
Hi, if you are in the Melbourne area take a sample of each seal to Award RV, 1809 - 1811 Ferntree Gully Road,Ferntree Gully, I obtained suitable glazing rubber from them and I believe they also have the outer seal rubber you need. The windows were made by Alfab as far as I can tell and the rubbers are still available for them.
Frankidownunder.
|
|
|
|
Post by curtis on Apr 28, 2010 23:01:53 GMT 10
Hi Frankiedownunder,
Yep I have been to Award RV but have not asked them about window seals. I will pay them a visit this week end and ask the question. Thanks for the tip!! ;D
Dave
|
|
|
|
Post by Franklin1 on Apr 29, 2010 8:08:12 GMT 10
Hi Dave, if you end up getting desperate, have a look at the Moroday range of weather seals at your local Bunnings store (or maybe any local hardware store). They have a profile similar to yours but only available in white or brown. It's made out of epdm rubber (whatever that means) and costs about $8.50 for a 5 metre pack, or you can buy off the bulk roll. Look for them in the aisle that stocks sliding door tracks and window fittings. Click here, and scroll down to the second "Special-Seal" product MWS 11. If you can't find suitable rubber, you might have to think about going to a flat foam weather strip. Cheapest is on the CaravansPlus website, but you have to buy a 20 metre roll, and their minimum postage is a killer. Good luck. cheers, Al. |
|
|
|
Post by firefighter on Apr 29, 2010 8:39:31 GMT 10
    Called in to Award R V in Fern Tree Gully yesterday looking at T V antennaes and asked the sales man about seals for alfab windows ......he showed me the book that has 1 alfab window seal still available Then told me Hume Caravan & Camping Accessories 14 Production Dr Campbellfield Vic bought out Alfab windows back out in the 90s and this is where they get their seals from (I think ) and you just don't know what they still have around in there store www.humecaravans.com.au/index.php?pr=Home_Page&=SIDf/f ;D ;D ;D ;D ;D ;D ;D ;D
|
|
|
|
Post by curtis on Apr 29, 2010 9:16:27 GMT 10
Wow    Thanks guys, lots of options to follow up on!! ;D ;D ;D This is what I love about this site, plenty of assistance for the novice V'Vaner. I will let you know how I go. |
|
|
|
Post by curtis on May 4, 2010 16:31:21 GMT 10
Hi All, I rang Hume today and they tell me that they are unable to assist me with seals. I asked about both Alfab and Franklin.     The lady I spoke to checked with someone there and said they can't help me. So I have a couple of leads on the seal between the window and the van. TonyH has sent me a sample and it looks really good. Also Award RV showed me a profile from their book that looked about right too. ;D ;D ;D As for the glazing wedge, Award RV and O'Briens glass said they couldn't help so still on the hunt. I have another lead or two for this one but not holding my breath at the moment......    I did check out the seal suggested by Franklin1, but it is sticky on the flat side which is the exposed side when the seal is fitted, nice try but still no luck for me.... Althought I might use this one for sealing the hatch on the roof.    Will keep looking and update the post if I find something. Thanks again for all the assistance.   Dave |
|
|
|
Post by frankidownunder on May 8, 2010 17:11:47 GMT 10
Hi Curtis, I changed the two seals in my Franklin windows, the outer seal I was lucky to get from a Clark rubber outlet. (it was similar, but not the same, fitted ok). The glazing wedge i could not get so I got another type from Award RV, checked the old invoice today, no part number on it. So looked up CAMEC catalogue on the web, it seems the wedge I used is Part No 010219 for CAMEC wind out type windows, It is a different cross section but when fitted it forms a great seal. Have not had any leaks etc. When installing, I cut the seals about 10MM too long and forced them in, this eliminated any shrink back, worth a try.
Hope this is some help to you,
Frankidownunder.
|
|
|
|
Post by curtis on May 8, 2010 21:12:54 GMT 10
Hi all, Back again with another update. Thanks for your advice Frankiedownunder, I think I have done similar to what you have suggested but with a part from Caravans Plus. I think we are sorted now for seals.......at least we hope so. ;D ;D ;D I have had a sample of window seal (between the frame and the side of the van) sent to me from TonyH on this site. I believe that he had it made for his Olympic, but it is a perfect match for the Franklin window - thanks TonyH.   I also have a sample of the glazing wedge from Caravans Plus. It is a bit different to the original......  Not only is the colour different, but the face of the wedge is much larger and the "wedge" bit is very different. But I pushed it into the window and the fit was pretty good. It just covers a bit more of the glass than the original....  The change in colour we can live with as I will change every window, and the fit seems pretty good. (I will add the extra 10mm to prevent shrinkback - thanks Frankidownunder for the tip. So looks like I am all set to go with the windows now, just got to get the order in with TonyH and Caravans Plus!!   ;D Regards Dave |
|
|
|
Post by marray on May 13, 2010 20:49:12 GMT 10
Hi to all... I am also still in the hunt for the Franklin rubbers....  I have followed up some leads....  I went to Hume Caravan & Camping Accessories 14 Production Dr Campbellfield Vic - They appeared to still be in the process of setting up...but I was lucky to find someone that tried to help. I showed him the glazing bead (as per Curtis' post on Apr 22, 2010, 3:36pm) and he had no idea...  He gave me a different looking piece of rubber and suggested I try and see if it does the job...otherwise use silicone...did not like that suggestion....  I have not had time to try it, been a bit busy...but it don't look right... I went to Alfab themselves in Heidelberg - 130 Bamfield Road. Heidelberg West Victoria. 3081. Australia Tel: (61)03 9459 1333 Fax: (61)03 9457 5292 info.vic@alfab.com.au ...again met a man who was very helpful...he is of the opinion that Franklin made their own windows early on and would have had their own extrusion...  He did give me a piece of rubber to try. It is exactly the same as Curtis' picture (Reply #9 on May 8, 2010, 7:12pm). He did suggest to use Windex on the rubber to help it fit in easier. I hope this helps....  Found this whilst checking out sites - How to repair old windows... www.caravansplus.com.au/detail-pages/window/window_repair.htmRay |
|
|
|
Post by curtis on May 13, 2010 21:31:45 GMT 10
Hi All, A couple of people have asked what the outer seal looks like - the one between the frame and the body of the van. In the repair guide link posted by Marray is it refered to as a "dust seal". Here is a profile picture - the rubber is about 22mm across. The section that fits into the channel in the frame is roughly 5mm.  Dave |
|
|
|
Post by kegglar on Jun 5, 2010 8:03:37 GMT 10
Hi all, Have had the same problem.I used a window rubber from Clark Rubber. The seal I am talking about is the one that seals between the outer edge of the window to the Van body. It is just about the same section except for the "T" section that fits into the groove on the window is larger. I used a good pair of sissors and trimmed the "T" section making the top of the "T" shorter on both sides then using a wide blade screwdriver tucking it into the groove. Works very well and looks identical to the original only problem the price per metre was $19.95 per metre. It is rubber so I suppose it will last another 40 plus years. Have just taken my 68 ? Franklin on holidays and travelled through all the bad weather in May and not a drop of rain came in. Hope this might help.
Cheers Bryon
|
|
|
|
Post by curtis on Jul 12, 2010 22:25:25 GMT 10
OK fellow V Vaners - especially you Franklin Lovers. Finally after refitting a few windows I have worked out a way that seems to work quite well, so to complete the Franklin Window Seal saga, I thought I would share the process with you all. Start off by removing the window from the van - this is the easy bit!! Once it is removed then you can drill the rivets on the stay and latches. I actually got new stays and latches from Caravans Plus, as you can see mine are kinda rusty, and Mrs Curtis likes the shiny new ones     OK now you have a flat frame to work with.  Then to remove the old outer seal you must ease off the crimps that hold it in place. Be sure to keep your free hand well away from the pointy end of the screwdriver just in case you slip     The cut the corners of the seal away. These seals were so hard that they would have never slid out in one piece.  I then cut the remainder of the seal inside the channel ts I could slide out smaller pieces.  Then remove the glazing wedge that holds the glass into the frame.  Once all the rubber seals are gone you can loosen the screws that hold the top of the frame in place and dissemble the window. Make sure you put the screws somewhere safe.   OK now that the window is apart you can clean up the aluminium and glass. On these windows there were some small timber blocks that supported the glass. I was careful not to dislodge them. Our frames had a light scrub with a scouring pad. The surface of the aluminium was quite corroded and so was never going to look new again, but is is a lot better!!    So now you should have nice clean window parts ready for assembly. The first thing to do is to fit the outer seal. Experience shows that if you do this one last you might crack the glass as you push it in to place causing you to swear and curse loudly. It is very easy to put some twist on the frame....    To make fitting the seal a bit easier (a lot easier actually) I put a small amount of olive oil into the groove around the entire frame.  Then lay the seal flat on the groove so that the inside of the seal is face down.  Then - very carefully - run the blade of a flat head screwdriver along the outside of the seal pushing it down into the groove.  DO NOT STAB THE SEAL - just run the driver along pushing the seal gently in to place.....  I also found that working back wards towards the already fitted section of seal prevented me from stretching the rubber too much. nevertheless the rounded corners at the bottom of the frame are a bit of a bugger to get in.... Also check regularly that the inside of the seal has stayed in the groove properly. If not then pull the seal back out until you reach the offending section and work again from there. It took me a few trys to get good at getting the seal to fit properly first time. Once you have fitted the seal right the way around you are ready to refit the stays and catches. Once this is done it is time to fit the glass to the frame. I put a bead of window and glass silicone around the inside of the frame for the glass to sit on. There wasn't one originally, but having spoken to a glassier, I decided to do it. (Note the outer seal is not yet fitted in this photo - had to clean off the silicone, fit the seal and the put the silicone back. After 6 windows I still got the process mixed up.....) Then put the glass in place and refit the top of the frame with the 2 screws you carefully saved when you took them out    Now here is a really important bit. In these windows the glass is a fair bit smaller than the full size of the frame, this is to allow space for the rivets that hold the stays and catches. Now is the time to move the glass around so that it is very central in the frame. Don't leave the glass against one of the rivets as it will crack when you are fitting the glazing wedge, causing you to swear and curse loudly - again.....    OK so now the glass is in place you can put a small amount of olive oil on the inside of the frame to help you fit the glassing wedge.  The wedge I used came from Caravans Plus. They do not have black unfortunately, so I had to use gray. I think it looks OK. There are some comparative pictures between the old and new wedges earlier in this post. Now cut a nice 45 degree angle on the end of the glazing wedge and start to lay it into place between the glass and the frame. I found that I had to give the wedge a bit of a "push" into place with a blunt flat head screwdriver to make sure it fitted home well. Not much of a push but easier to use the screwdriver then get RSI in my thumb...... ;D  One you have fitted the wedge all the way around then just go back and make sure you have not disturbed the outer seal. If all looks good then give the original crimps - that held the seal from slipping - a bit of a squeeze with some multigrpis. Then, by gee by jingo by crikey, you are finished and can re-fit the window to your van!!   I hope all of this is of use to some one out there. I wish I had know all of this before I started. Would have meant less band aids and saved me $60 for the glass I broke.    |
|
|
|
Post by atouchofglass on Jul 13, 2010 6:01:20 GMT 10
Thumbs up Curtis
Great tutorial
I'm sure that there are plenty of people out there that will benefit from the information
You can also clean up the ali frames to a good shine by using steel wool and jiff, followed by a polish with whatever polishing paste you choose.
You'll be amazed at how new looking even an old set of frames will come up.
We also used soapy water to fit our glass. Slightly different method ....
But we didn't use any silicone
Each method has it's benefits
Cheers
Atog
|
|
|
|
Post by cobber on Jul 13, 2010 8:01:05 GMT 10
G'day Curtis,
Thanks for keeping us updated on this seal replacement project.... there are a few clues in there for others about getting the seals to do the job..... not necessarily the exact same ones you wanted but a bit of improvisation achieves the desired end result, well done.
Cobber.
|
|
|
|
Post by Franklin1 on Jul 16, 2010 21:09:11 GMT 10
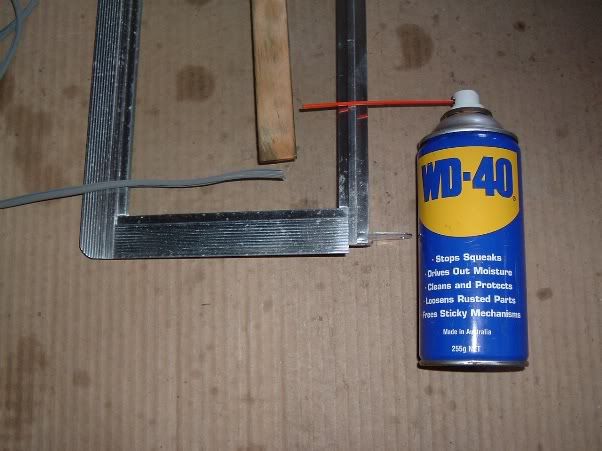
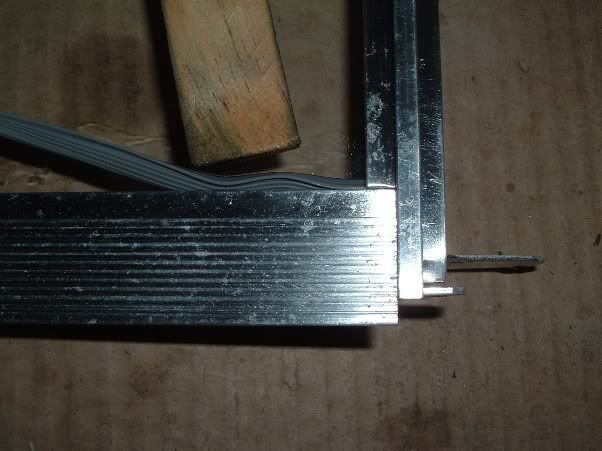
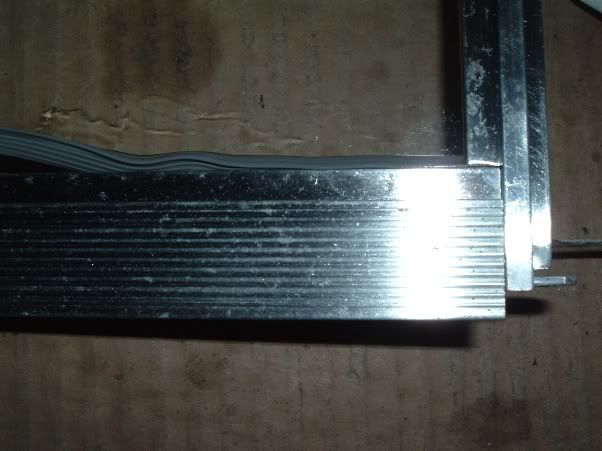
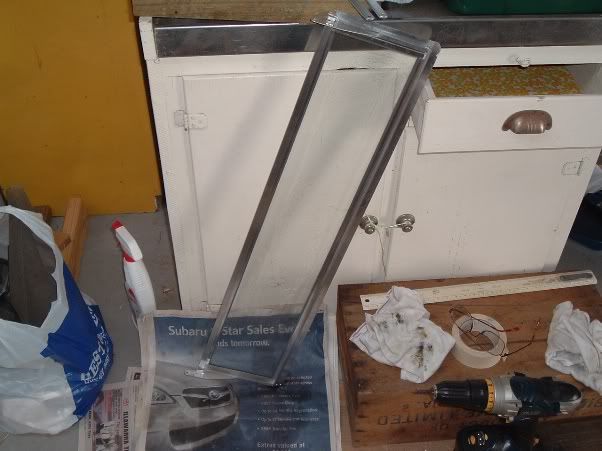
G'day Curtis, Real handy information there!  ;D ;D I hadn't considered the olive oil option (does it matter if it's "extra virgin" or not??   ), but it shows there's more than one way to get the required outcome. I agree with you about pushing the window rubber in in such a way so you are not stretching it. Some of the old window rubbers I've noticed on old vans are pulling out of the frame due to shrinkage, so anything we can do to minimise that, will help. If you don't mind me adding my own experiences, so readers can know of different options? Lubricating the window rubbers before trying to fit them in position is crucial, I think. I used WD40 to spray a line of lubricant along the frame channel...  Then, using a 3mm thick flat stick, I went along the rubber in half inch increments, pushing it into position with the stick, and then "backfilling" the rubber into the channel behind...  Continue to do that all the way around the frame...  Because of the amount of WD40 used as the lubricant, a fair amount of excess ends up in the channel. I had to stand the frames up on newspaper for a few hours to allow the WD40 to drain out...  I reckon your olive oil option might have prevented me having to do that bit.  Anyhow, a couple of different options for people to consider. cheers, Al. |
|
|
|
Post by barbarab on Sept 20, 2010 20:01:22 GMT 10
Hi,
has anyone tried Carac in Frankston Road, Dandenong for rubber extrusions? They have rolls of different ones.
Barbara B
|
|
curly
New Member

Posts: 9
|
Post by curly on May 31, 2012 17:13:13 GMT 10
Hi,I phoned 'Basis .co.nz' yesterday for rubbers as pictured in answer #11 and they said they had them for $6.60 NZ per mtr.Agreat site for resto stuff and rubbers.I'll update the product # as soon as.Cheers Wayne
|
|
curly
New Member

Posts: 9
|
Post by curly on May 31, 2012 17:16:10 GMT 10
Google this one too 'caravan and motorhome world.co.nz' they actually show rubbers on their site that look the same.
|
|
curly
New Member

Posts: 9
|
Post by curly on Jun 1, 2012 18:53:54 GMT 10
Heres the part number for the 'Basis.co.nz' caravan window seals although it's not shown on their web site.#218.055k (caravan seal)
|
|