neilncheryl
Full Member
 Make God laugh, tell Him your plans.
Posts: 324
|
Post by neilncheryl on Mar 24, 2008 0:22:58 GMT 10
Well I have talked about it for years but seeing some V Vers holidaying at Mooloolabah recently inspired me into action - I bought an old van to go with my cars. 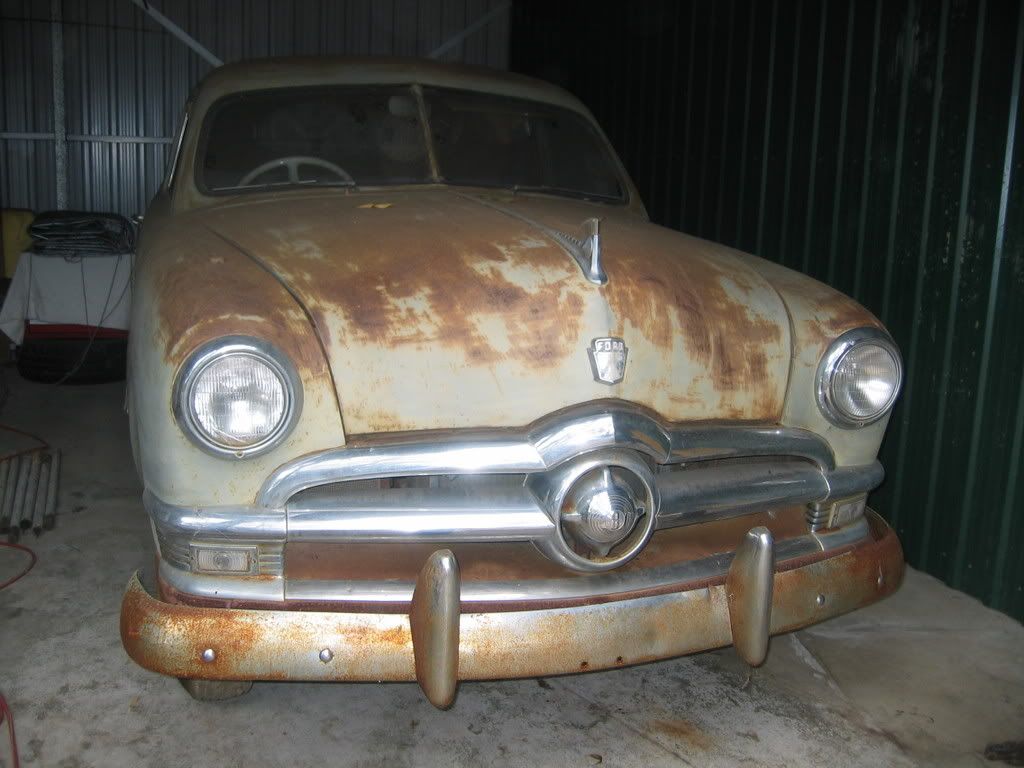  It is a Row Van so it would appear I have joined the "wood brigade". The people I purchased it from were told by the previous owner that it was bought second hand in 1954 by their father however it has 13 inch Holden wheels so I would tend to think it would be between 1956 & 1958. (unless they changed wheels) The original South Australian registration plates were 46-700 so hopefully this will help confirm a year.  As I see it I have 5 external sheets to replace (borers or rot at the bottom), external roof to fit (has none), re-wire (its a mess), re-do the mattresses, build an internal water tank with tap, paint, tidy up chassis & register. The van seems quite sturdy so I am hoping that the frame work is good (not much of a carpenter). Will check it out when sheets are removed and before putting the new sheets back on I will be rewiring & insulating.    Roof has me puzzled. According to some other threads my van should have a caneite ceiling with canvas roof. Mine appears to have had a canvas/fabric roof but caneite has been removed (or not fitted?) and the ceiling is ply which has been painted? with what looks like shillack (guessed on the spelling) which matches the cupboard doors. The roof is covered with silver tar type paper which I am guessing is later added insulation - does appear to have been there a while though.       Interior doesn't need much work I think. Fresh coat of paint, curtains, respring the mattresses (hope this can be done as covers are original and very good condition) and it will look very tidy. Looks like the original Annex as well Do have some questions if anyone knows answers/help Looks like a round headed nail (not steel as hasn't rusted) has been used to attach the aluminium external corner strips. Is there a particular way to remove these without damage & can they be re-used. If not, are they still available (what are they called) or what do I use as a substitute. The external cladding I assume was masonite. Do I reskin with masonite or go to ply - advantages/disadvantages? Once painted I guess the material would be irrelivant. Would I need to reskin the whole side so sheet thickness is uniform (imperial to metric) There is an external three pin plug & switch at the front of the van above the draw bar - what is it for (looks like it plugs into the wiring to the tow vehicle) The van doesn't have brakes (assume it weighs less than 750kg) but does it need them? The roof - what to do.Does caneite sit on top of the roof framing with canvas/cloth over that . Sorry if this thread is a bit messy - haven't got my wings yet but I will get better - great Forum G Past my bedtime - gotta go now Thanks Neil |
|
|
|
Post by atouchofglass on Mar 24, 2008 7:52:56 GMT 10
Greetings Neilncheryl
I too would be interested in the replies you get as I have just removed a kitchen that had nails in the fireproofing aluminium.
The nails didn't look like stainless and hadn't rusted.
Could they possibly be aluminium?
Removing them was not that difficult by using a set of end cutters and a thin piece of timber to save the ally. In my case they came out clean with no real damage to the nails.
Have a go in a place you can't see any damage..... Just incase it doesn't work
Atog
|
|
lazza
Junior Member

Posts: 66
|
Post by lazza on Mar 24, 2008 9:46:52 GMT 10
Howdy Neilncheryl , the round headed nails are called escutcheon pins and are brass. They used to be nickel plated but are impossible to find . I located brass pins from a place called Watkins Brass in WA. They have these plus a large assortment of brass hinges/fittings etc.
|
|
neilncheryl
Full Member
Make God laugh, tell Him your plans.
Posts: 324
|
Post by neilncheryl on Mar 24, 2008 11:12:54 GMT 10
Thanks Atog
I've been cleaning the shed this morning so I will give it a go after lunch
Thanks lazza
I see what I can find on the net (now I have a name)
Sorry about the photos being so wide - can't work out how to reduce their size
Neil
|
|
|
|
Post by Roehm3108 on Mar 24, 2008 21:48:04 GMT 10
Congrats on your first van - probably won't be your last, I'm sure. Just love those Rowvans - something about their style. Still kicking myslef for not buying the one that went to auction about three years ago in Mt Gambier - ended up selling for $750, with nothing needing to be done repair wise. Just a paint job was needed, as it had been shedded all its life!!!!
I'm sure Trodler will give as much advice as he can, as he progresses with his.
All te best with the resto
Ray
|
|
|
|
Post by minicamper on Mar 25, 2008 8:19:49 GMT 10
Hi Neil,
My $2 worth would be:
Keep it original and use original materials where possible. Although probably a bit fiddly, I'd use the caneite. It'd have great insulation properties, just gotta make sure its all set up nice n water tight.
Shellack is easy to check. In an inconspicuous place, get a clean rag/cotton wool, dip it in metho and gently rub. If its shellack, it will come off on the rag. Pro's, easy to use and clean up, relatively cheap, particularly if you mix up your own from the flakes, easy to make "repairs" without having to redo the whole area. Cons, not very durable, estapol type products are harder wearing.
Masonite, like most board products these days comes in standard board sizes, but is heavier than ply of the same dimensions and probably not quite as flexible...
P.s Where do you live, you don't have it in your profile?
Cheers
Chris
|
|
neilncheryl
Full Member
Make God laugh, tell Him your plans.
Posts: 324
|
Post by neilncheryl on Mar 25, 2008 19:28:27 GMT 10
Thanks Chris
The external sheets had rotted (some sections had borer holes) at approx. 60mm from the bottom.
My guess was that as the lower edge wasn't sealed it may have started the problem therefore marine ply may be the solution.
After checking suppliers it seems that only masonite has the sheet size I require.
Should have all the external cladding removed this week and new cladding on over the next two - all going well.
Is there a sealant I can use on the edge to help protect it
And I read further down & found where to put in my profile - now done
Thanks, Neil
|
|
|
|
Post by earlee on Mar 29, 2008 18:31:46 GMT 10
|
|
neilncheryl
Full Member
Make God laugh, tell Him your plans.
Posts: 324
|
Post by neilncheryl on Mar 29, 2008 20:17:43 GMT 10
Hi earlee
We do intend to be at Neuram Creek with the van.
Got the exterior cladding off during the week (nights) and have been sanding the chassis today.
Plann to have the chassis painted tomorrow, re-wire during the week and new cladding on in two weeks.
Look forward to meeting you all at the Creek
Thanks
Neil
|
|
|
|
Post by tinnie on Apr 3, 2008 21:56:17 GMT 10
Hi Neil,
Nice Rowvan, will look great when you get all the work done.
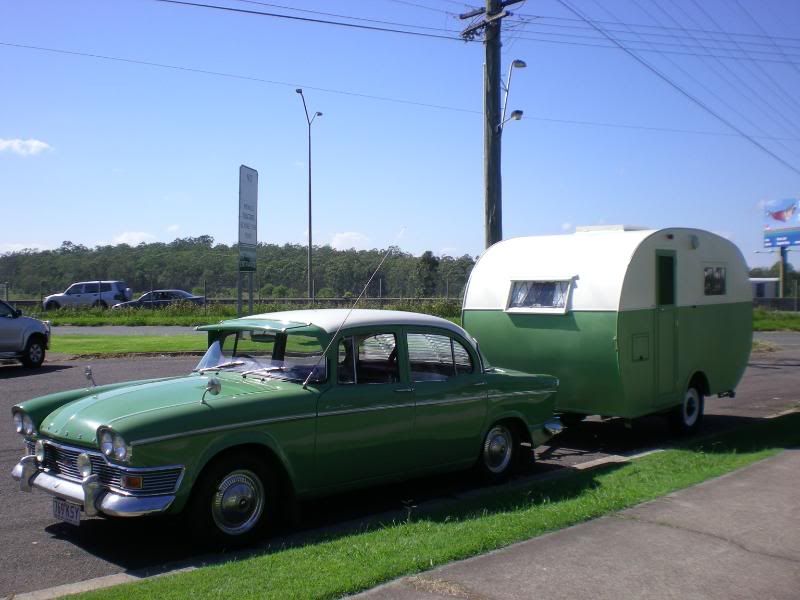
Equally nice is that single spinner - it looks very original.
Cheers,
gristy
|
|
neilncheryl
Full Member
Make God laugh, tell Him your plans.
Posts: 324
|
Post by neilncheryl on Apr 25, 2008 21:35:57 GMT 10
Hi Gristy
Cheryl's Uncle bought the single spinner new in 1951 and we have had it for about four years.
It has 140,000 miles on the clock, all original, dash is like new, original tonneau cover and the owner's manual & handbook are like new - been in a bag in his house for safe keeping.
We intend to bring it on the Coledale run with the Row Van in tow.
Hope to see you there
Neil
|
|
|
|
Post by willyn on Apr 25, 2008 21:49:36 GMT 10
 Just love the shape of the single and twin spinners hope you are going to coledale luv to have a closer look at it it was a bold step from Ford to the wider lower look car regards to you Both Will and Lyn
|
|
neilncheryl
Full Member
Make God laugh, tell Him your plans.
Posts: 324
|
Post by neilncheryl on Apr 25, 2008 22:39:51 GMT 10
Well I have removed all the external cladding & was relieved to find the frame work was OK.   Got busy cutting the new sheets of masonite for the external cladding and Cheryl showed her handywork with the paint brush sealing all the edges  We have now started putting the sheets back on the van   and with a bit of luck should have all the cladding on this weekend and primer sealer. More photos later All good fun Neil & Cheryl |
|
|
|
Post by willyn on Apr 26, 2008 1:24:03 GMT 10
neilncheryl hey there guys you both look lke your having fun top shape van the Row van should match the single spinner to a tee keep up the great work will and Lyn
|
|
neilncheryl
Full Member
Make God laugh, tell Him your plans.
Posts: 324
|
Post by neilncheryl on Jun 8, 2008 23:06:57 GMT 10
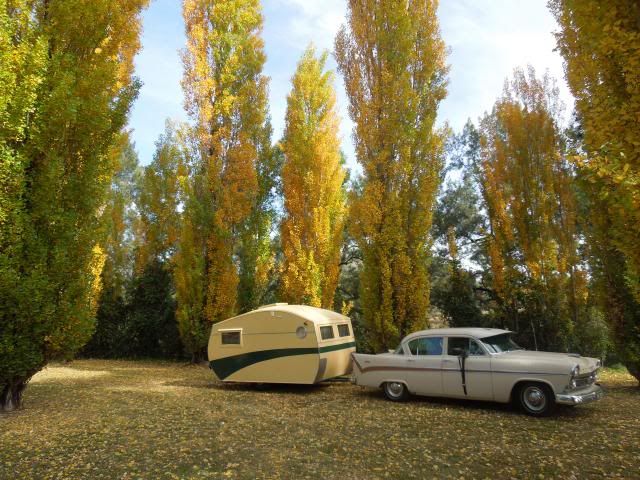
Well I thought I would give you all an update. I finished putting the Masonite cladding on the sides & Caneite sheets on the roof. Hunted around but couldn't get the length of Masonite I was after so ended up with more joins than I wanted. Used nails & sikaflex to affix the sheets so hope I don't have to take them off. Filled all gaps with sikaflex to minimise risk of water leaks. The Canite roof prooved to be very trying but I only destroyed one sheet so not too bad - pleased we persevered.    Then on with the enamel primer sealer  then the calico over the caneite (hope I didn't make too many mistakes Trodler)   Bit of trimming, more undercoat then on with the enamel top coat    Haven't had it out of the shed since painting the top coat on due to the weather but I will over the next few weeks so I can take some better photos to post.. Few little bits & pieces to do but all downhill from here Cheers for now Neil & Cheryl |
|
|
|
Post by willyn on Jun 8, 2008 23:42:28 GMT 10
 ;D  Fantastic work Neil n cheryl the rig looks beautiful I bet your both feelin good after acheiving your first restoration the internal is a lot of fun looking for material for seats and curtains floor lino   Go for it and have some fun your right it is all downhill from now looking forward to meeting you both and checking out your great vin Van Will and Lyn
|
|
|
|
Post by kingy on Jun 9, 2008 7:14:58 GMT 10
Looks great Neil & Cheryl, like you say, all down hill from here, now that all the outside is nearing an end bet ya bust'in to get stuck into the interior - an area which should be a lot less stressfull to work on.
Keep the photo's coming
PS - Just one question, is the van sitting at it's original height or has it been lowered ?
Cheers Kingy
|
|
|
|
Post by dosse on Jun 9, 2008 18:47:51 GMT 10
G'day Neil
Look's like you and Cheryl are doing a great job on the van, well done to you both.
Regards dosse.
|
|
|
|
Post by Franklin1 on Jun 9, 2008 19:20:00 GMT 10
Wow!! What an amazing job you've done! Congratulations on achieving what you probably thought was "the impossible" when you first started. Fantastic effort.
cheers,
Al.
|
|
neilncheryl
Full Member
Make God laugh, tell Him your plans.
Posts: 324
|
Post by neilncheryl on Jun 9, 2008 22:07:33 GMT 10
Thanks for the encouragement.
It has been a lot of fun and just this weekend I was looking at how I can put another couple of bays on my shed ready for the next V V ;D ;D
Cheryl has made the curtains & is shopping for curtain wire & hooks to fit them - photos to come later
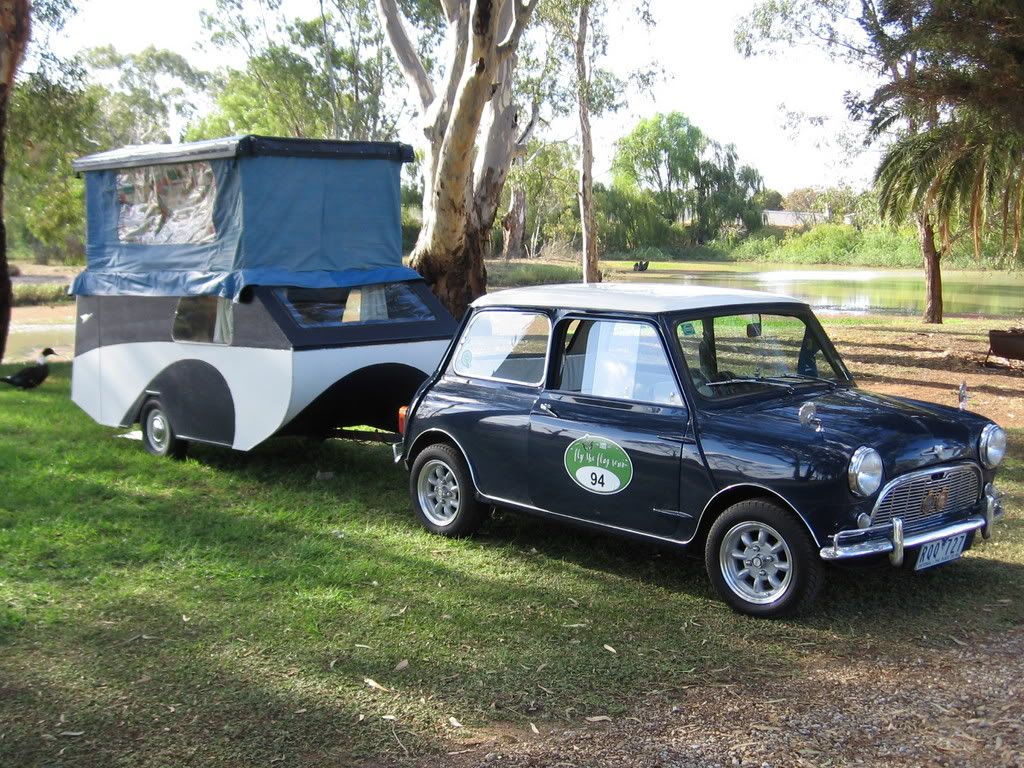
Kingy - I thought the van was low also. It has a drop axle with 13" Holden wheels & is 330mm from ground to towbar. I thought it should have been around 410mm?
The original towbar on my FB is 330mm so they match well but my Single Spinner Ford will be about 390mm (not fitted yet) Told Cheryl that we will have to get another V V for the Ford & the FB will be for the Row Van ;D ;D
Cheers
Neil
|
|
Deleted
Deleted Member
Posts: 0
|
Post by Deleted on Jun 10, 2008 7:14:03 GMT 10
Hi Neil and cheryl I have been away since last friday morning.... only just catchin up on all the Vintage van gossip.. What a great job you 2 have done on the old rowvan. When i seen the condition of that roof in an earlier post i thought that you would be in for a major rebuild due to water getting in and rotting the framework. As it turns out you where lucky. It will look great no matter what car you decide to tow it with. Love the FB /EKs and also have a soft spot for the single and twin spinner utes I am sure the van can be made to sit at the right level behind either car by fiddling with gooseneck( tongue) shapes/hieghts or changing wheel diameters /tyre profiles. Keep the resto pixs coming and see ya's at Nambucca in October for the tour down to Coledale.  ;D Reddo |
|


 ;D
;D