|
|
Post by Don Ricardo on Jun 30, 2008 22:20:19 GMT 10
G'day JBJ, Great work on the rear stabiliser legs. Another very neat job on a very neat van. Don't worry about offending people with your detailed posts. I don't think anyone is going to be offended, and as far as I am concerned the detail and the thought processes you are documenting make your posts amongst the most interesting on the forum because we can see exactly what you're doing and why. I reckon you should set yourself up as an on-line training institute, and we can all get our Certificate 3 in V V Restoration Reconstruction and Fabrication sitting around the computer screen!  Certificates could be issued by the Reddotel Institute! Nah, forget that last idea, just go with the first. ;D ;D ;D Like the sound of the colour scheme you're proposing. Lucille will be a very distintive and unique van. Don Ricardo |
|
|
|
Post by JBJ on Jun 30, 2008 22:35:26 GMT 10
Hi Don, Thanks for the compliments. If you look at the profile of the Carapark Hunter Minor, I believe its about as sweet a shape as you would find in a caravan.   Lucille is pretty close to a bigger version of the same shape. A lot larger, but still a smooth shape. Theres still a few hiccups in the lines, but they are slowly being blended out. Jailbarjuice. |
|
|
|
Post by JBJ on Jul 1, 2008 20:54:29 GMT 10
hi all, An extension to last nights postings. I put a D mould on the side tonight, & like the line for colour separation.  as there was only 30mm offcut from the 4 metre length, I wonder if this was the van they based the lenght of the D mould extrusion on?  jailbarjuice |
|
|
|
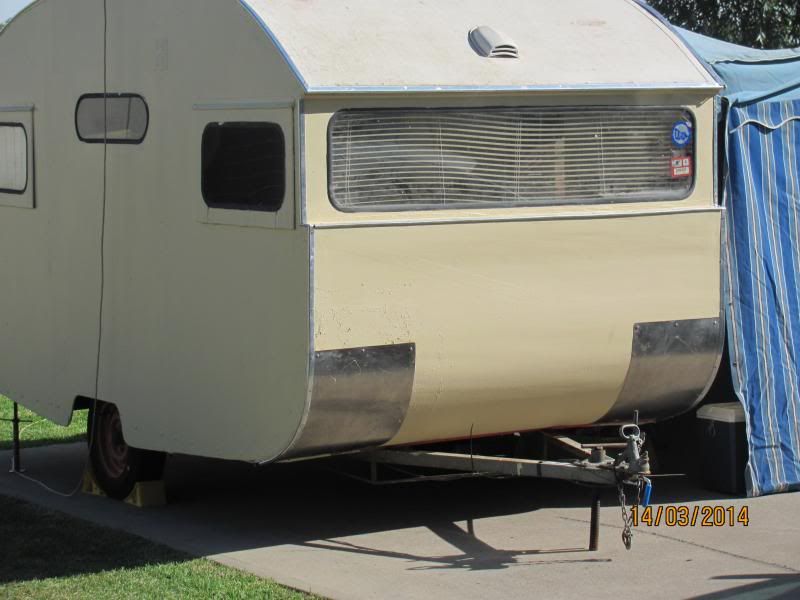
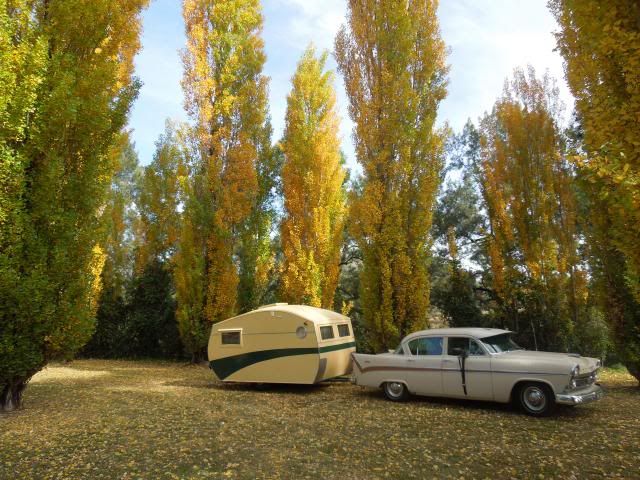
Post by JBJ on Jul 5, 2008 20:20:36 GMT 10
Hi All' Dragged the van out & had a look at how it sits with new drawbar. I didnt realise how big it is, at 14" body length, until I got a clear shot at it. It certainly sits better with the rebuilt drawbar. No one else has one of these. 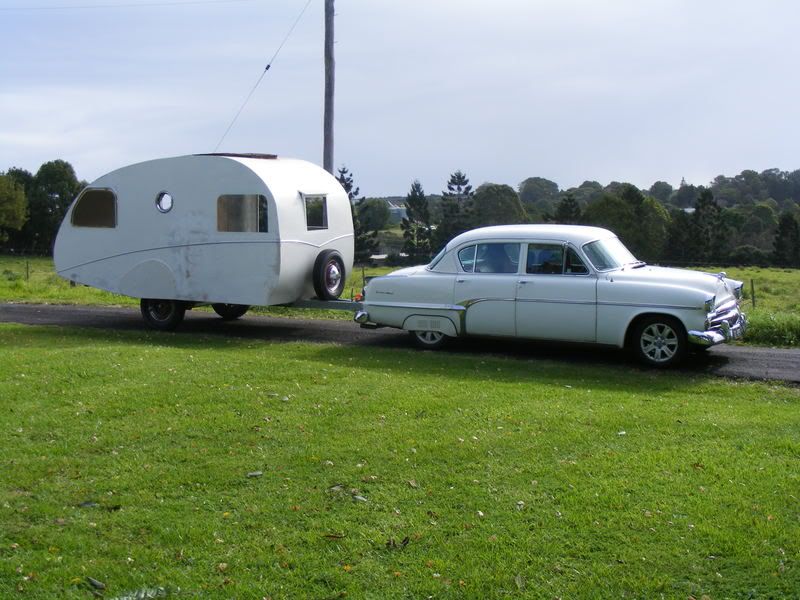 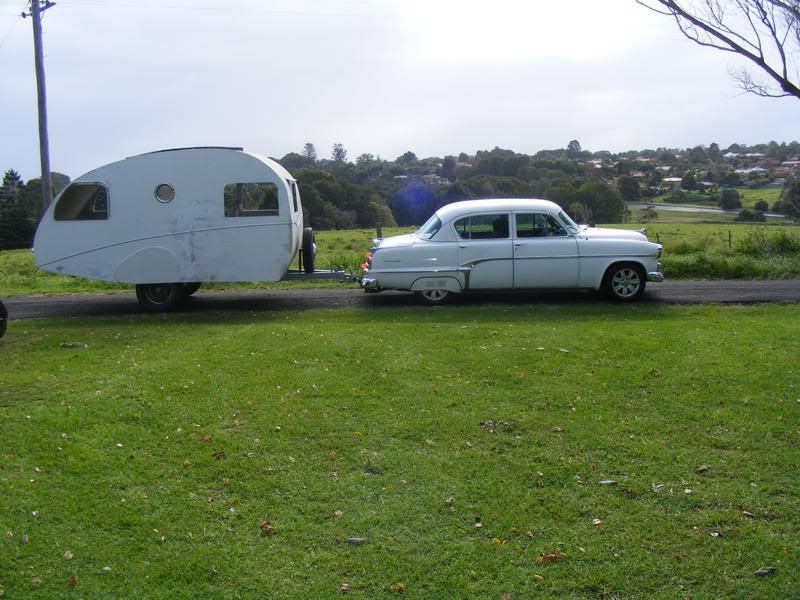 I think its pretty well going to be level, albeit a tad high. 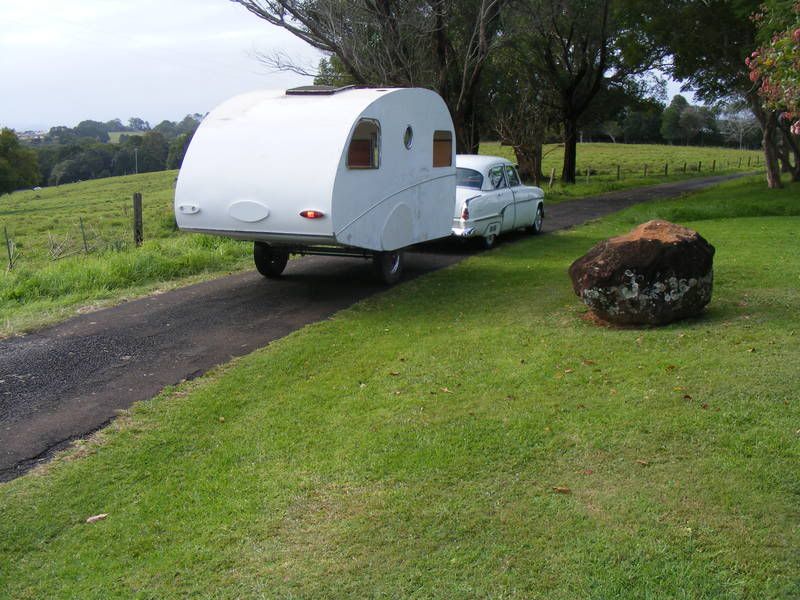 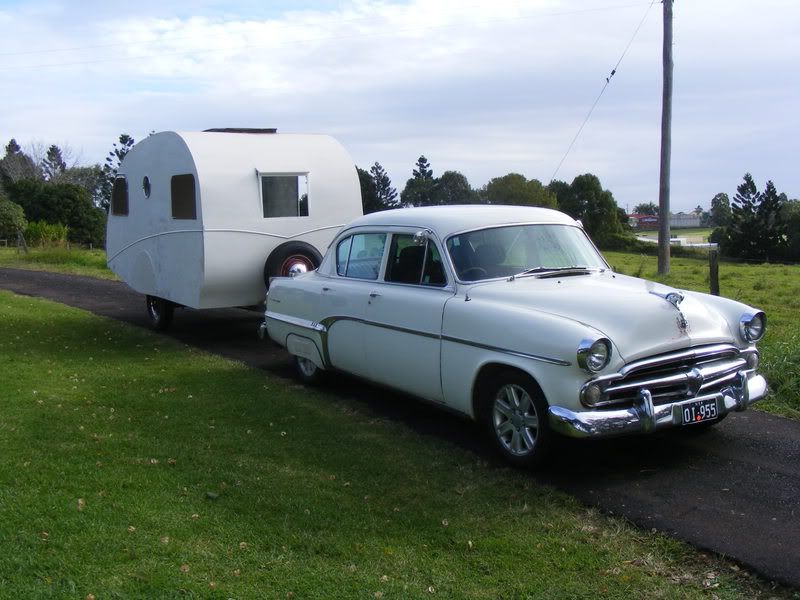 The towbar is the one I use towing the Sunliner. Jailbarjuice |
|
neilncheryl
Full Member
 Make God laugh, tell Him your plans.
Posts: 324
|
Post by neilncheryl on Jul 5, 2008 21:05:18 GMT 10
Hi JBJ
Van looks great & so does the Dodge
Can't wait to see it painted
Nice work
Neil
|
|
|
|
Post by andrew on Jul 5, 2008 22:36:16 GMT 10
G'day Jailbar
Lucille looks swweeett as! The moulding set off the shape really nice.
Looks grouse behind the Dodge to.
You are doing a great job mate. Keep up the good work.
Regards Andrew
|
|
|
|
Post by Don Ricardo on Jul 5, 2008 23:57:59 GMT 10
G'day JBJ, The van is looking good. I like the way you've got it set up now. There's a whole fascinating mix of styling cues in there, but it certainly has a look all of its own. As you said "Noone else has one of these".  Like Andrew, I love the line you've taken with the moulding on the side. I think you've managed to plot very close to, if not the perfect line for the colour change. The two tone paint scheme will look stunning I reckon. Don Ricardo |
|
|
|
Post by tinnie on Jul 6, 2008 2:14:03 GMT 10
Gidday JBJ, Another magic job there. The extrusion makes a nice line on the van. I like the "V" in the front piece, very classy. I am surpruised at the body being 14' (not challenging you, your there with the 'ol stanler taoe measure ). It just looks short compared to my van which is 14'6". Keep up the awesome work Dennis, keen to see the painted result. Cheers, Gristy |
|
|
|
Post by atouchofglass on Jul 6, 2008 7:27:27 GMT 10
Hey JBJ Very nice lines indeed Gristy, perhaps the upsweep at the back makes the van look shorter? Soooo JBJ the colour scheme ......colours the same as the Sunliner? Atog See I can say nice things about Bondwood vans when reddo's not around  |
|
|
|
Post by JBJ on Jul 6, 2008 8:08:04 GMT 10
Hi All,
gristy I checked with my metric calculator. The vans just over 4 mertres body lenth, correctly converted thats 13' 3", not 14' like I said.
Initial undercoats will be white top & dark grey bottom, with final colours a light cream on top with Blaze Red bottom & hatch,
& black underneath to hide the rough bits.
Jailbarjuice
|
|
|
|
Post by JBJ on Jul 8, 2008 20:41:14 GMT 10
hi All, More progress. Seeing as the steel wheel wells in this van were made to accomodate the home made independent suspension ( that I replaced with a new axle) as well as the wheel, I decided to create a bit more interior space by cutting 200mm out of the inner side of the wheel well, & putting a new ply panel in. This allows more cupboards & storage. the wheel wells were big enough for a pro stock drag racing car 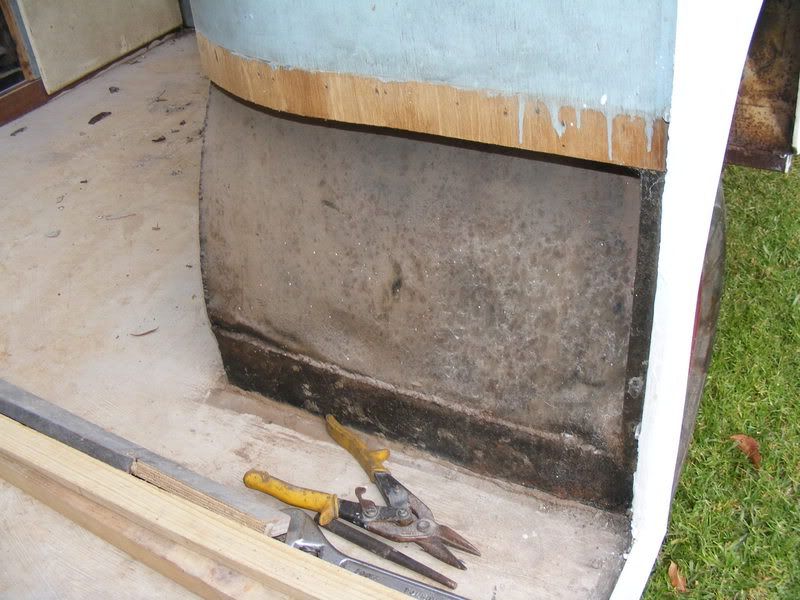 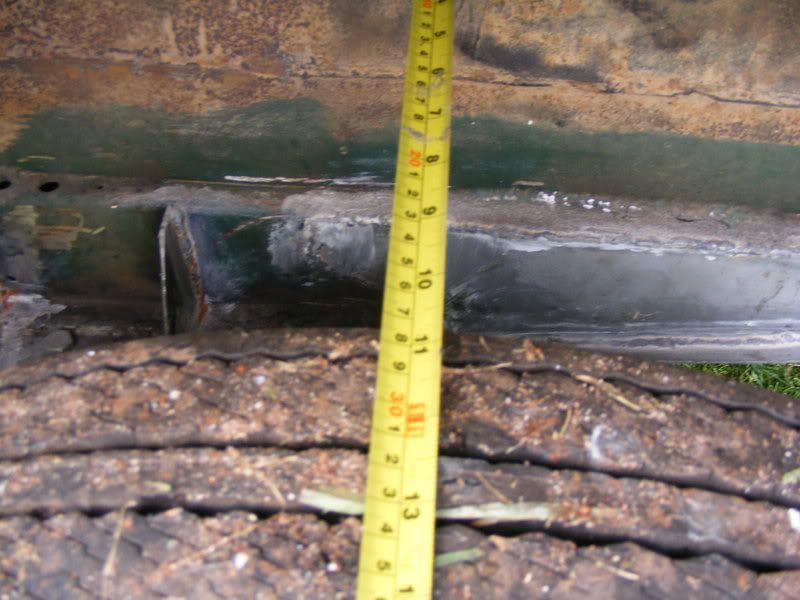  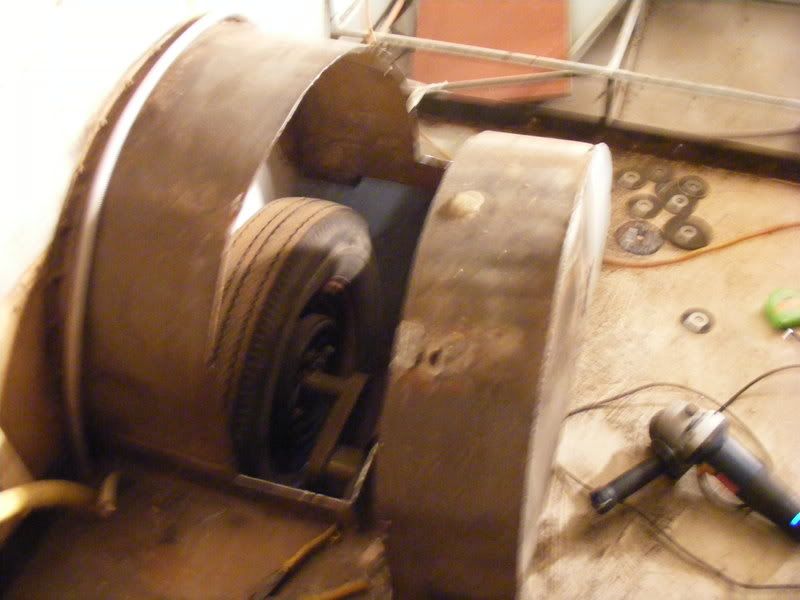 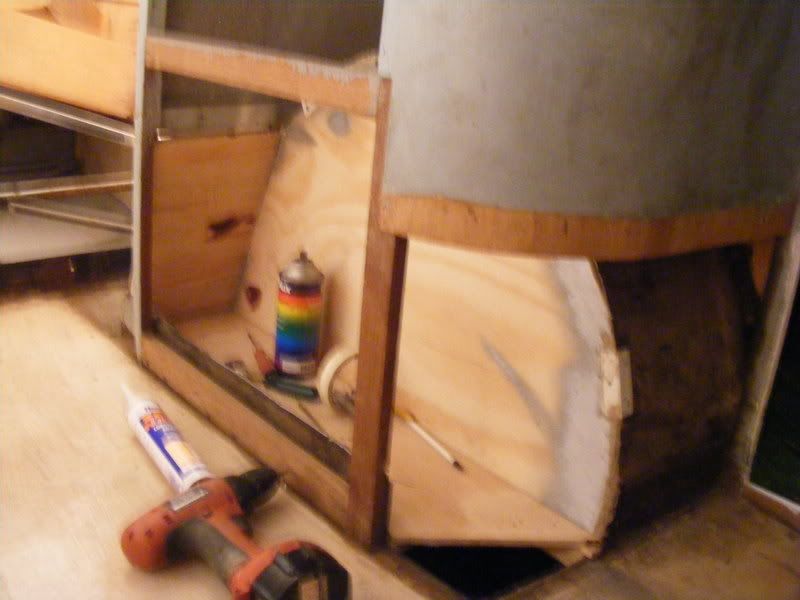 ![]() img.photobucket.com/albums/v309/jailbarjuice/lucillewheelwells007.jpg[/IMG] img.photobucket.com/albums/v309/jailbarjuice/lucillewheelwells007.jpg[/IMG] Cut some 9mm external ply & glued & screwed into place. Now that I've removed the unwanted cupboard, I can start on the bed base, then instal a new 17mm ply floor over the 5mm one, & remake new cupboards & seating. Jailbarjuice |
|
|
|
Post by tinnie on Jul 8, 2008 23:09:19 GMT 10
Gidday JBJ, big gain on space there, those arches were huge. Not to mention you now have a spare set of inner guards for the next project ;D. Hey, I didn't mean for you to get out the tape measure again....commenting really on how different style vans give a different appearance to size. Strangely, my van feels like it is about 17 or 18 feet inside and looks bigger than 14ft on the outside. Cheers, gristy |
|
|
|
Post by JBJ on Jul 27, 2008 19:12:21 GMT 10
Hi All, Well I’ve tried to keep busy without the Forum to amuse me. In the last couple of weeks I’ve got a bit more done on Lucille. Firstly I finished painting the underside in gloss black, & managed to get the rear lights rebuilt with new lenses from Hillman spares in Melbourne. All working. Notice in the photo how crooked the roof vent framing is. That’s a pretty soon rebuild & reshape to do. 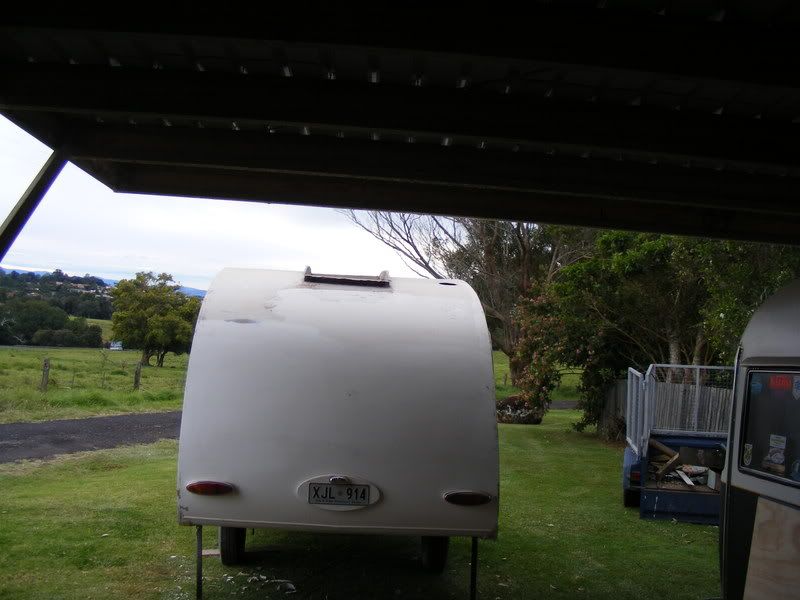 One big problem with using car lights is that they need to be fixed & removed from the rear of the mounting panel. Started the bed framing, & realised that I have a lot of space below the (what will be ) finished double bed framing. Enough to fit a full width annex pole storage, & enough space for an annex plus barbeque, etc. It really is surprising, theres an enormous amount of space. So as I fitted the LHS stabiliser leg, & the trimmer I’ve used to tidy up the shape of the lower rear panel, I found that when the van frame was oxy welded together, it had distorted a fair bit So .I cut it away, & constructed a timber frame & door to make a storage cupboard. 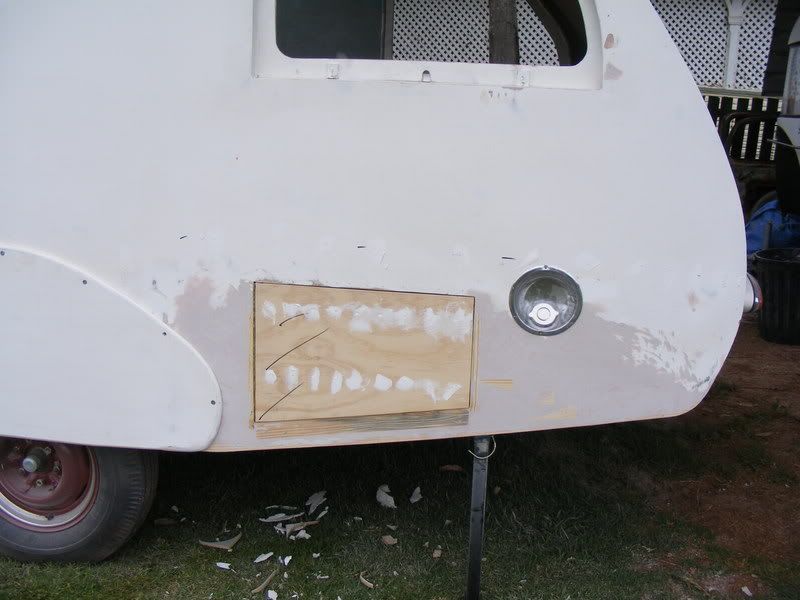 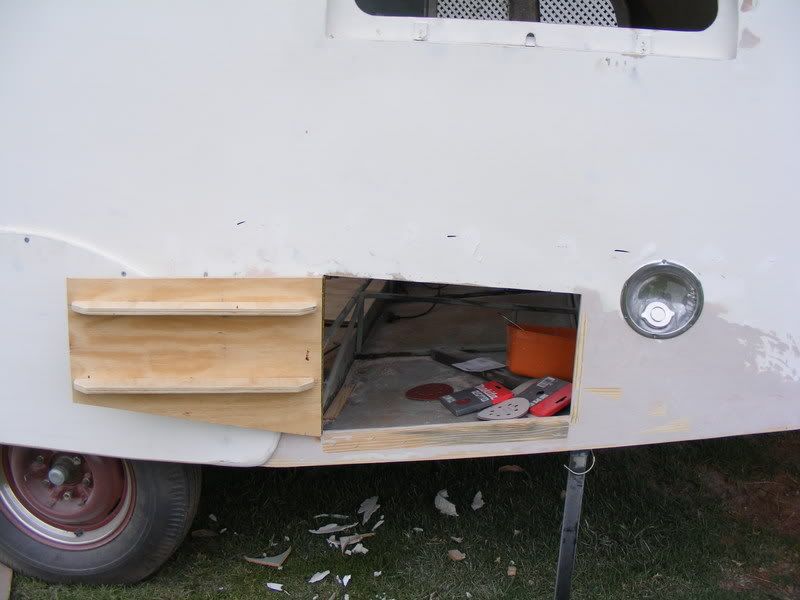 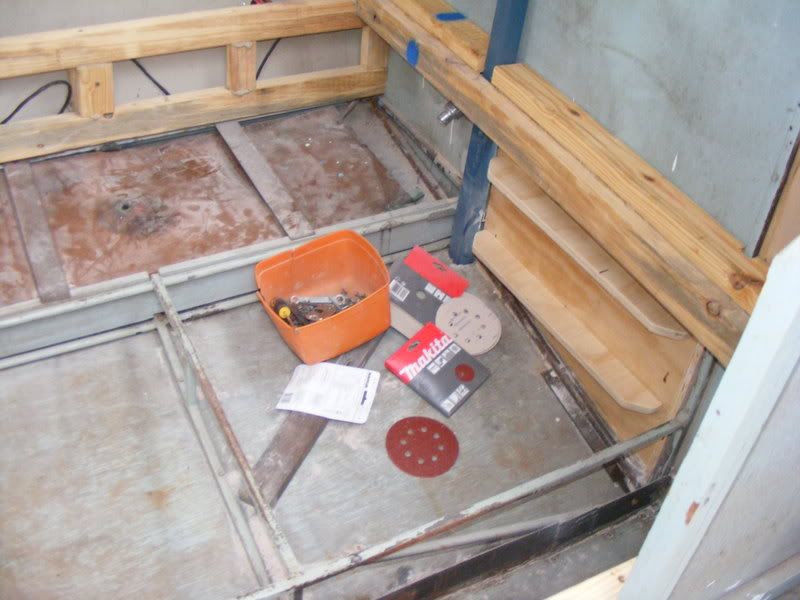 I’m pretty happy with the space I’ll get. I’ve fitted parts of the bed framing, & half of the new 15mm floor over the existing 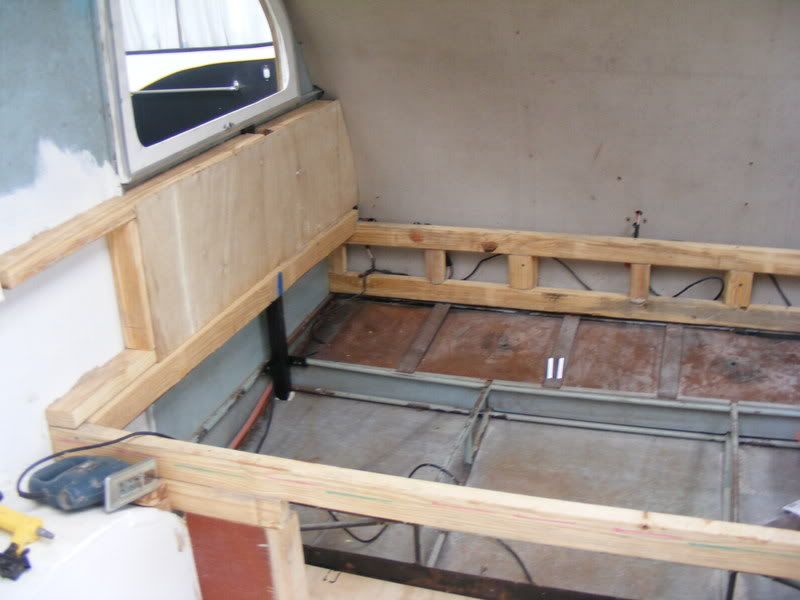 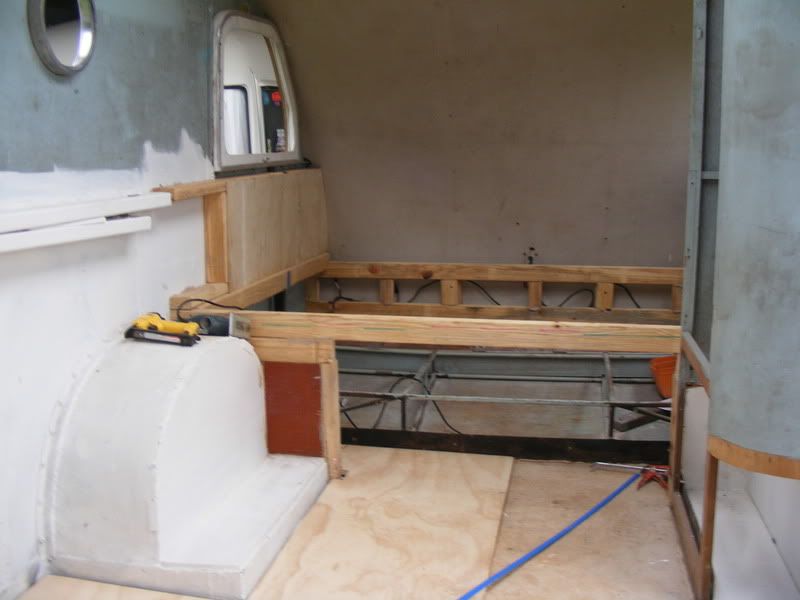 . As I finish it, I’m going to line all of the walls with a second ply sheet, packed out from existing. That should prevent condensation running down wall like single ply skin allows. Wont make Coledale this year. But should be finished around Easter next year I hope. JBJ |
|
|
|
Post by earlee on Jul 27, 2008 21:13:51 GMT 10
lookin' good dynamite juice.  ;D don't forget the insulation (polystyrene) in the wall cavity while you have access. have you used an alloy strip screwed on the side? - looks great . were you as lucky as me in finding a newspaper when you cut the access panel in the side of the van? (what year do you want)  will it make it to pottsville? regards earlee. |
|
|
|
Post by JBJ on Jul 27, 2008 21:34:32 GMT 10
hi Earlee,
I've used an aluminium D mould throughout the van. Its the side moulds, & replaces all of the timber moulds on the flyscreens. I've used over 24 metres so far, & still waiting on another 16 to arrive. There's a hell of a lot of flyscreens. I found the mould can be bent horizontally into reasonably tight radii, if you look at the pix of the flyscreens fixed internally you should be able to see how tight it will bend.
,
Hadn't thought about insulating the walls beyond using air space, because most of the cold comes thru the roof, & its already double skinned. I dont want to disturb the roof panels any more than neccessary.
Havent found any newspapers, but I have found the builders Bank of NSW cheque book, with the last cheque written January 1959, several 1958 coins, half a dozen live 22 bullets, a comb, a nail file, & a lot of pretty badly executed real good design ideas.
Its always fun rebuilding something someone else put together, as you have to try to think what & why they did what they did.
For example the water tank & plumbing has more bits than I can understand. I've been pretty handy mechanically in my day, & I cannot decipher why this was done like it was. But the builder was a farmer, & they have a way of making things work differently than others, but they always seem to work pretty well.
I've changed to a simple system, using some of his bits & the handmade light guage copper water tank at the back.
But I'm glad I saved this van. Like yours ,Reddo's, Kingy's, Cobber's, & all of the other unique handmade vans, they are a very important part of Australias caravan history.
I keep thinking back to the old saying " You cant make a silk purse out of a sow's ear", well I'm giving it a damn good try.
We'll see what the final result looks like.
But at least it will be SAVED, not rotting away in a paddock somewhere.
Thats what its all about to me at this time.
JBJ
|
|
|
|
Post by JBJ on Aug 18, 2008 16:12:48 GMT 10
Hi All, Well my motivation & progress has slowed down a lot. I dunno if its because of the kerfuffle with the Forum, the bit of flak I've received from an exmember, or the cold weather, or I've hit the wall , but I'm still plugging on & trying to achieve progress. Whatever the cause, I'll get wound up again & make progress. Since my last pix, I've installed a new layer of 17mm ply over the existing 7mm floor. That took most of the movement out of the flooring.  I havent been able to do any finishing off in the main roof area, because of the horrible mess the roof hatch opening frame was in. It was 18 guage steel, oxy welded to the main hoops of the caravan frame (which is 1/2" square steel tube) The hatch frame sat up about 70mm, then had been bent over by what I suspect was a big pair of pliers. As a consequence it was not very neat or effective. Add to this the fact that the hatch itself had rotted & fallen apart. So I bit the bullet & cut off the top of the welded frame. I needed to keep most of it to hold the roof shape. I then decided to create a sandwiched construction on both sides of the steel as a new surround structure. 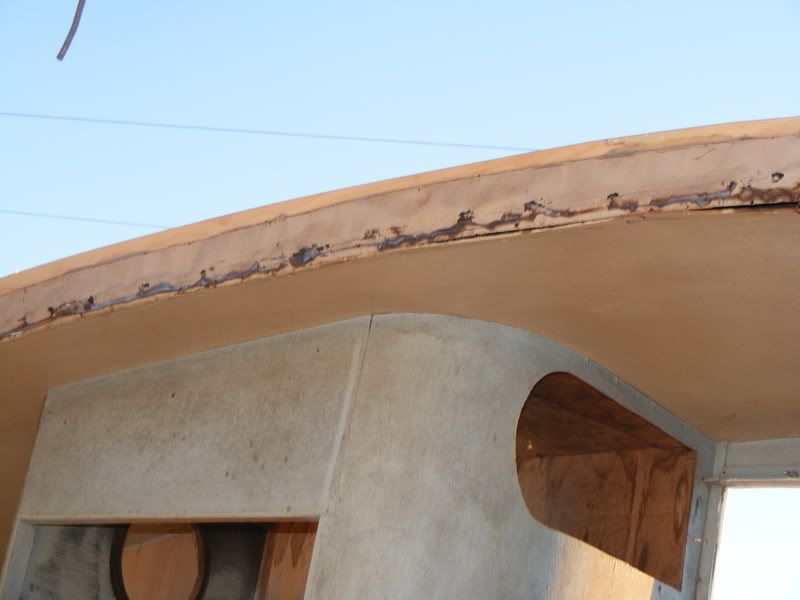 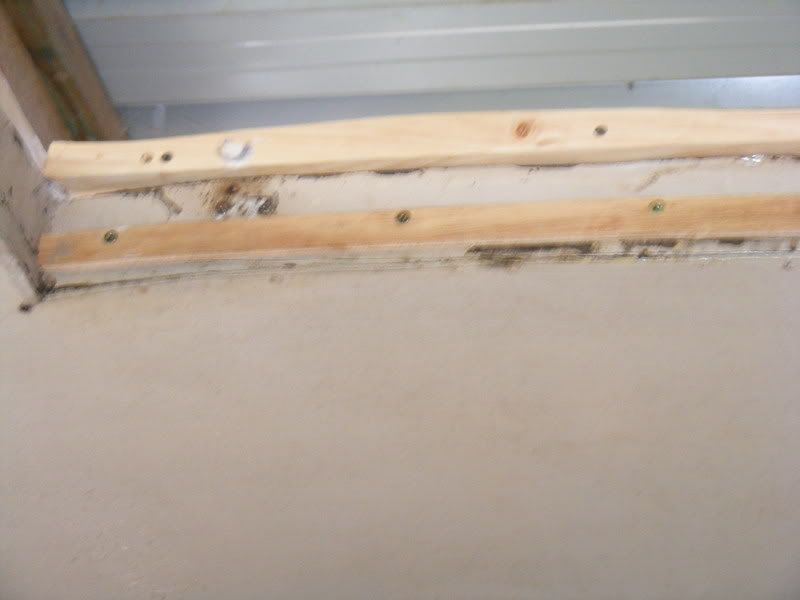 The hatch proper is over 1800 long X 750 wide. So its big. All of the hinges & flyscreens are in good nick, so I'm keeping the original size & style, but I think I'll put a moonroof panel in the middle , about 900X500 in polycarbonate sheet. I cut remnants off the 17mm floor ply sheet into shape , & glued & screwed to the outside edges of the trimmed steel. I then started cutting strips of ply to fix on the inside of those strips, to allow me to hide the buckled steel. It will get a cover strip of 3mm ply as a finish, so it will not be noticeable that it was very homemade. 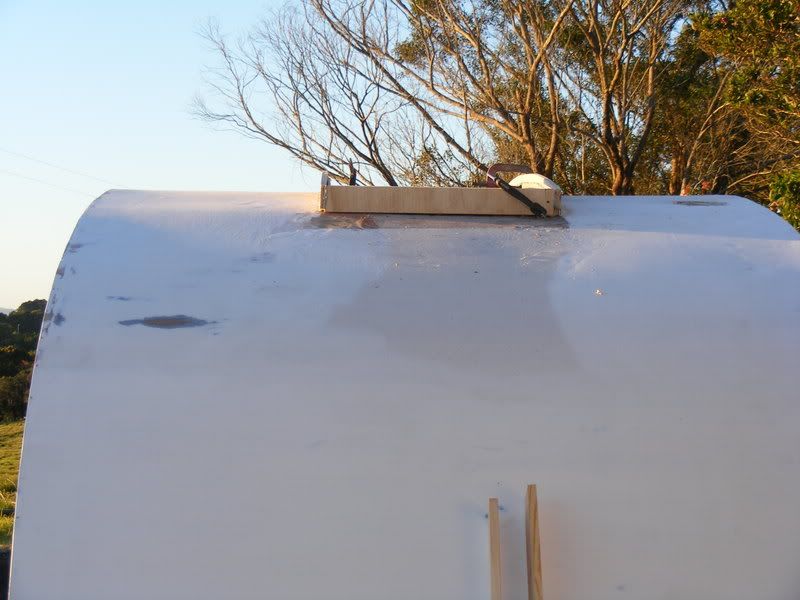  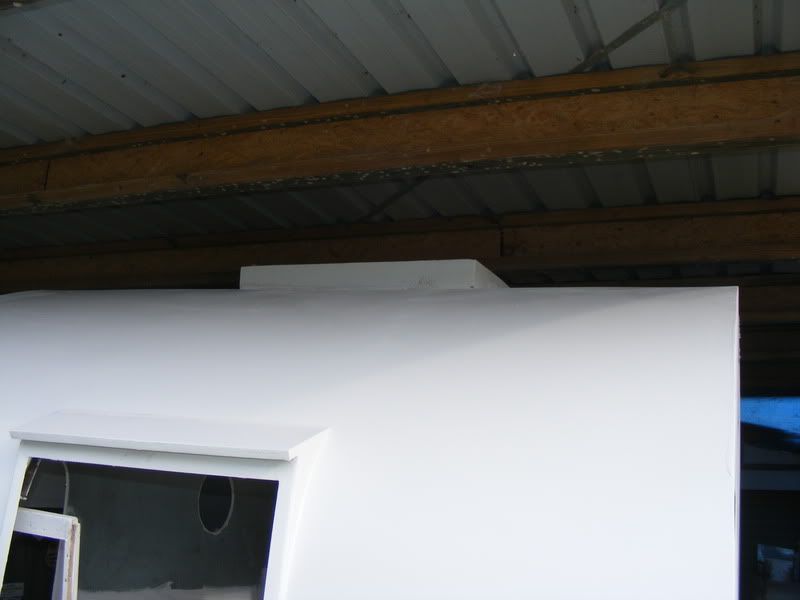 A bonus to way I'm doing it is that I should be able to secure the flyscreen much better than it had been. The flyscreen has a hinged drop down panel each end. I've cut the outer edges of the new hatch panel from 19mm pine, & will cover the top with 7mm ply. lots of coats of primer & gloss paintshould weatherproof that OK. So hopefully it will all work. JBJ |
|
whippy
Full Member
"Twiggy" the Globetrotter
Posts: 462
|
Post by whippy on Aug 19, 2008 3:42:14 GMT 10
If you fit a "mmon roof" make sure you insulate it as it will be a heat "magnet " in summer.
I love the way the back of the van has a similar curve as your rear guards. They will look great together.
|
|
|
|
Post by JBJ on Aug 19, 2008 8:08:59 GMT 10
Hi Whippy,
Early stages of thinking only about moon roof. But double glazing is used extensively to stop heat loss/gain thru normal glass windows. Generally a 6 to 10mm air space is all they use.
I'm thinking a fixed & sealed exterior sheet of polycarbonate/lexan, with about 15mm air then a removeable inner sheet of same material. It would be fixed similar to outer sheet, but the screws could be removed from the interior for cleaning of the inevitable fine dust that caravans are magnets for.
JBJ
|
|
Deleted
Deleted Member
Posts: 0
|
Post by Deleted on Aug 19, 2008 9:18:13 GMT 10
Hi JBJ Speaking from experience.. as you witnessed at Wintersun 2007 when my TD sprung several leaks through the hinge open "aluminium window /sunroof" in torrential rain...did i say WINTERSUN . You will want to make sure everything is as watertight as a ducks bum. Anything that is cut into a horizontal surface on top of a flat roof needs to be well sealed. Ok .. i know you dont plan on hinging open the skylight/moonroof section of the hatch but bear in mind there will be movement while travelling.Hence cracking of sealants and opening of joints Probably best to seal it with something flexible like Butyl Mastic. May also be wise to "Dome" the exterior layer of lexan slightly so that water cant "pool up" on a flat surface  Reddo. |
|
|
|
Post by tinnie on Aug 21, 2008 21:09:14 GMT 10
Moon roof in the van - very cool. Having inner screen removable, very smart, would be handy also on a sunny summer arvo to let the heat in. One word of though, you will be wide awake when the sun comes up (which can be ugly after a biiig night). Take it from someone who had a thin plastic roof vent on a camper, boy did that let in some light, and it wasn't clear. Great work, that will be a very cool van in summer with such a big roof hatch. Cheers, Gristy |
|
|
|
Post by JBJ on Sept 28, 2008 21:22:16 GMT 10
Hi All, Been a long time since I posted on Lucille, probably cause with enjoyable visitors you end up drinking at night rather than working on your project van. Like today, another beautiful day in paradise. So we went on a picnic into the Whian Whian National Park , 25 or so km north of Lismore, & went thru the areas where daggsey's mum & family grew up. I'm sure some of his pix will turn up here when he isn't busy relaxing. So this was todays tourist pix.  Back to Lucille, I've nearly finished the rebuild of the hatch framing.  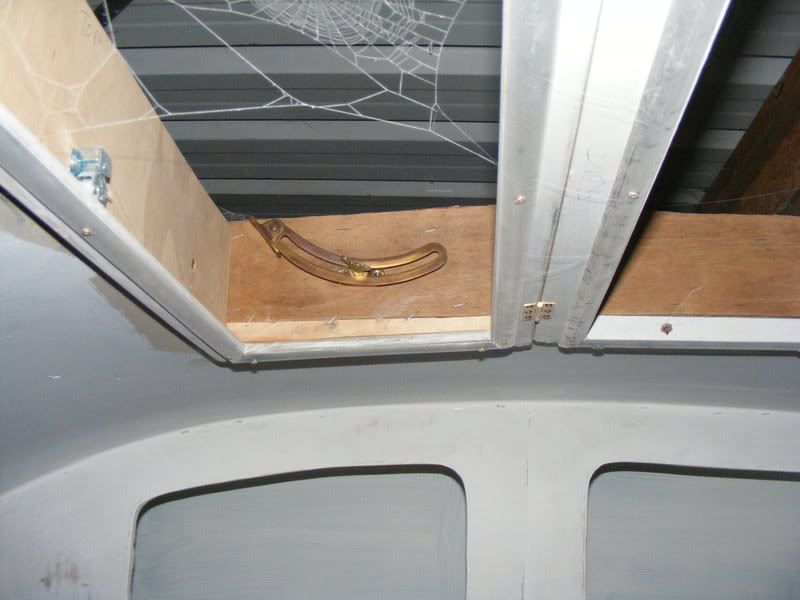 The original flyscreen assembly has been tidied up, with all the original bits reused or replaced in similar style. 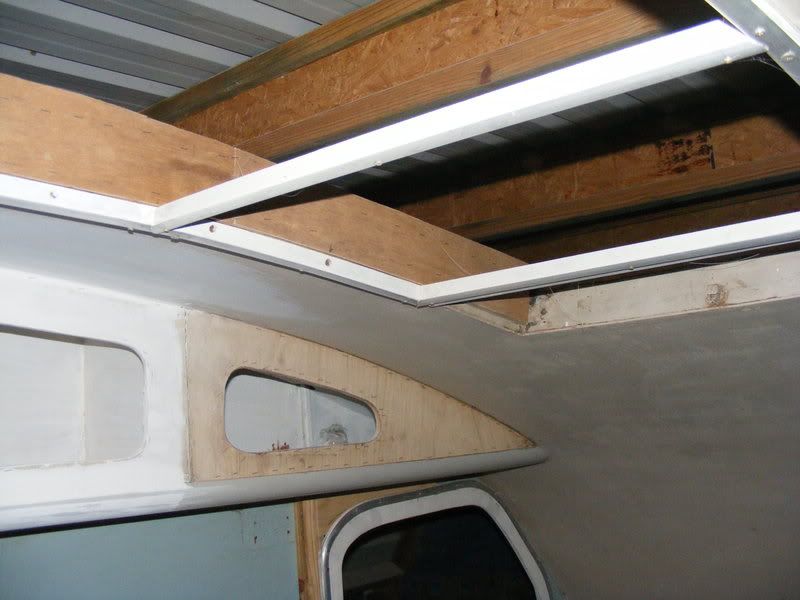 I fitted overhead cupboards to the right hand side.    The bottom edge curved bit is a quarter of a 65mm PVC pipe glued to the ply framing. I've started panelling the wall out from the outer skin, & making it work around the rebuilt original side window flyscreens. The screens are totally different front & rear, both in shape & thickness 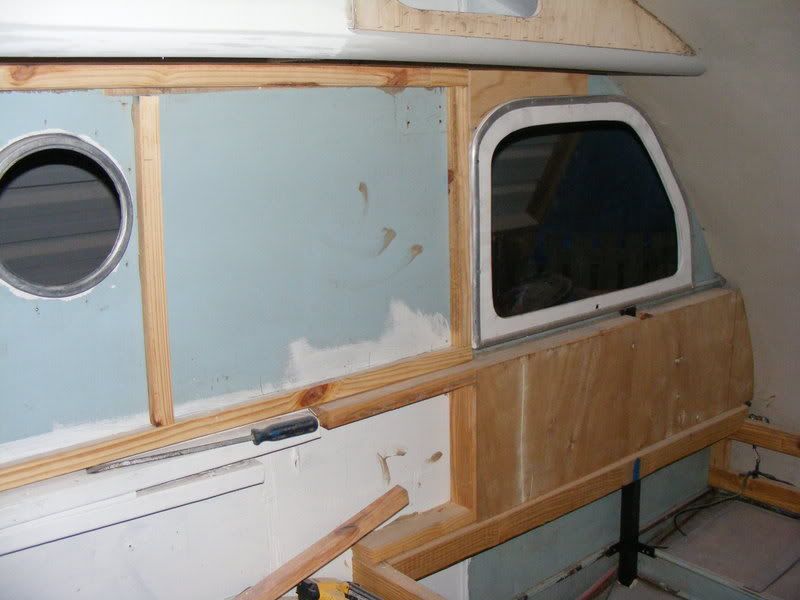  hopefully it will all look Ok when painted. After seeing Kingys paint problems, I looked at some of the bits I've made, & found the U beaut ply has cracks in the surface, coming thru the primer. I'm going to pour the primer on, sand it when dry, then throw it out in the sun for a while. Hopefully the surface will stabilise. If not I will remake the bits in different ply. I've decided I'mm going to cut & lift up the chassis to rebuild the axle mounts about 200 mm higher, to drop the van down a tad. I will end up with a step up in the floor just in front of the bed framing, but that should work out good. Its all fun. JBJ |
|
Deleted
Deleted Member
Posts: 0
|
Post by Deleted on Sept 29, 2008 7:27:19 GMT 10
Hi JBJ.. Lookin good. I have got to ask the question..... ... why are you toiling away with making a flyscreen for the hatch when ya have spiders that can spin a web the size of "that" living on the roof. ;D Cheers Reddo
|
|
|
|
Post by JBJ on Oct 6, 2008 18:26:20 GMT 10
Hi All, Got a bit sick of the height Lucille was sitting at 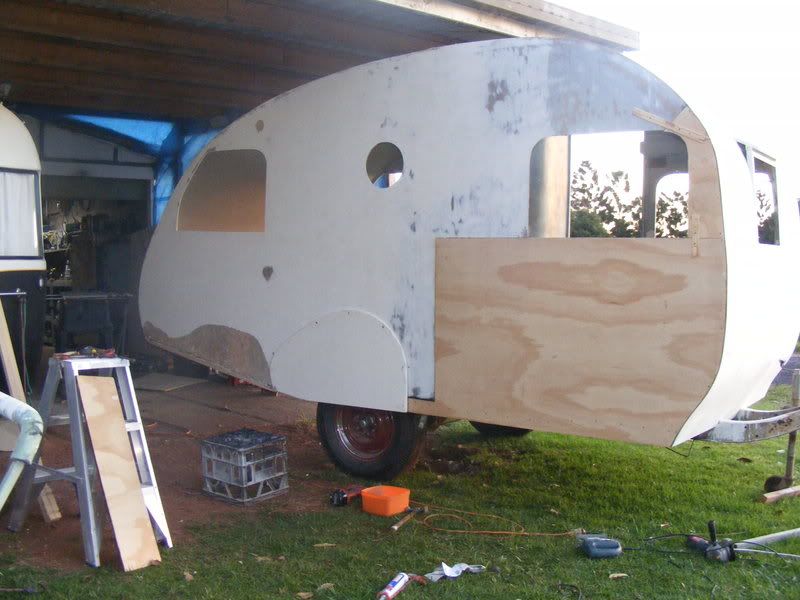 So I decided to lower her. I tried getting a lower riding axle assembly than the one I bought from AlKo, but they reckon this as low as they can build. They suggested smaller wheels & tyres, but as I want to run the 16" early Chev 6 stud wheels & 6.00x16" tyres, I decided I had to do what I thought all along. So I have to live with that. So I thought, what would I do if I was building a hot rod? So I decided to cut a notch in the chassis, & allow the axle to rise up into the chassis.  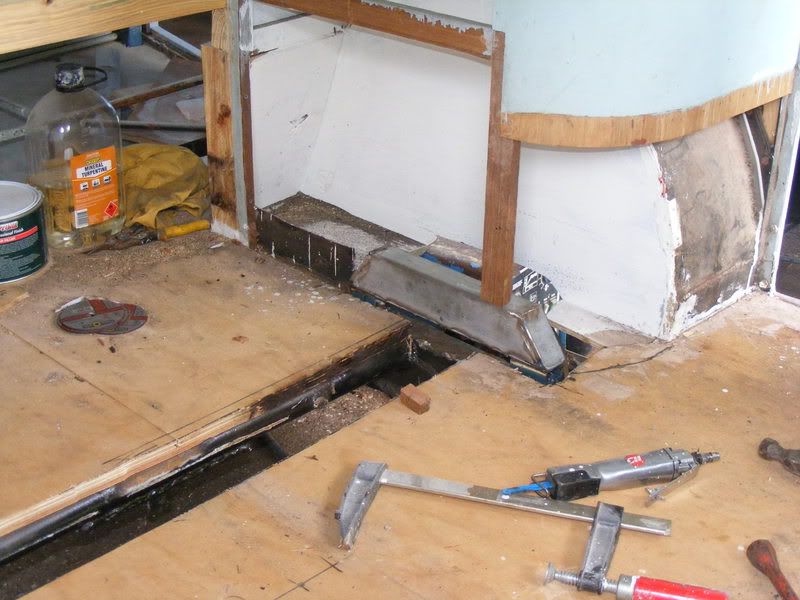 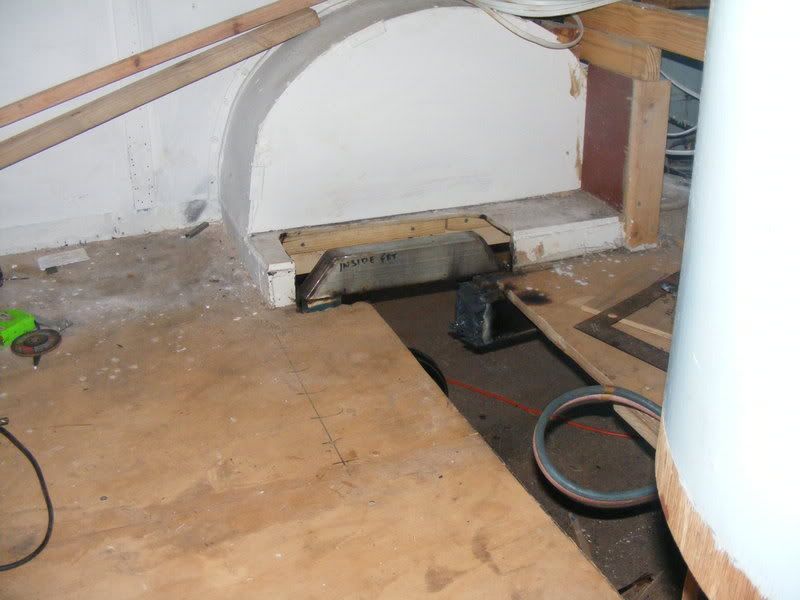 I madly cut everything out of the way, & fabricated a couple of brackets out my scrap pile of steel bits . I then welded them to the top of the original chassis. Luckily the chassis rails are inside the line of the outer edge of the cupboards.  I was aiming at getting the axle assembly neatly under the flooring, but decided to lower it a bit past that. I’ll put another sheet of ply over the top of the one I just recently fitted. I like to have weight down low in a van. They ride better, so a bit more ply wont go astray, especially after I cut out a tube from the chassis that weighed about 30 Kg. The tube is steel, about 60mm od & 12mm wall 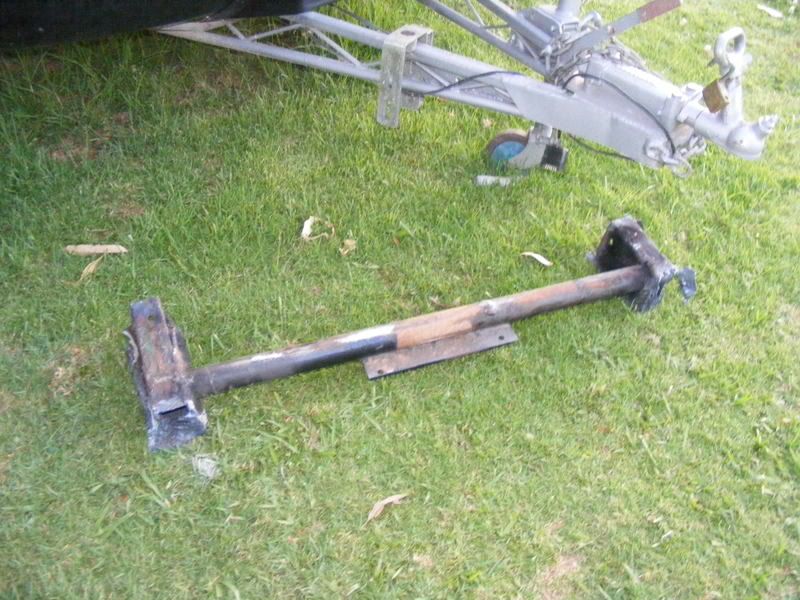 So after I got the new bits welded in, I crawled under & cut away the chassis rails. I will pull the axle out after I get back from Coledale, & fully plate reinforce this area.. An added bonus is that I have clearance to fit a tie bar along the bottom of the chassis rails after the axle assembly is fitted. This will add a lot of strength back into this area. I dont have any concern about weakening the chassis, as what I put back in later in reinforcement will be more than adequate.  So Daggsy & his brother helped me refit the axle, & “Hey Presto” its 165 mm lower. 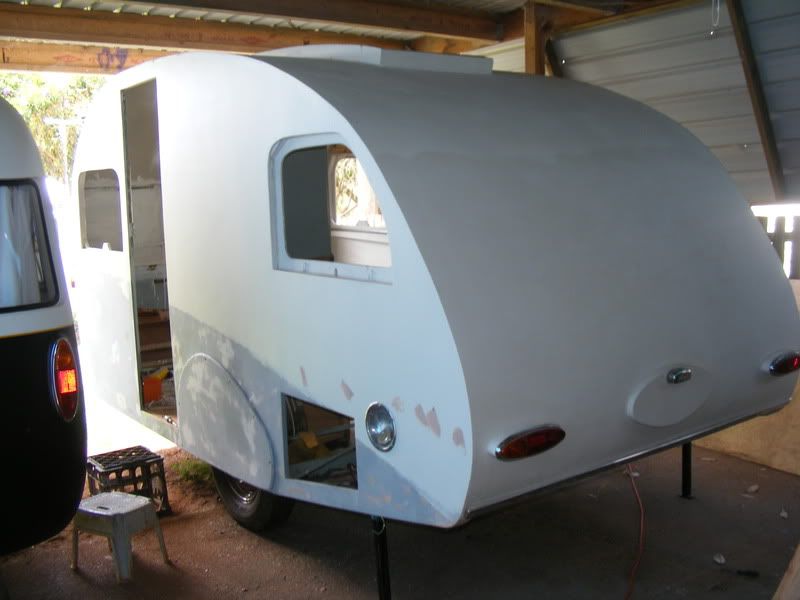 I like it. The bottom of the hubcap is just below the bottom of the wheel spats, which is where I like to see it sit. Also now the axle assembly is not visible from the rear or front of the van. I think it really tidies it up. Hopefully more progress after Coledale. Its all fun. JBJ |
|
Deleted
Deleted Member
Posts: 0
|
Post by Deleted on Oct 6, 2008 18:53:38 GMT 10
|
|
|
|
Post by JBJ on Dec 4, 2008 20:08:02 GMT 10
Hi All, Slowly getting motivated again. I’ve booked a site for Lucille at Kirra for next Wintersun, as sleeping quarters for our Daughters family from Melbourne. So I’ve got to have it registered & at least a bed inside by June. I reckon I’ll make it OK at this stage. The original flyscreens sat out from the wall, & look messy. So I panelled out using battens, & filled between with cut up foam vegetable boxes.  Finished installing basic wiring layout & wall insulation on the RHS, then fitted a layer of ply covering the lot.  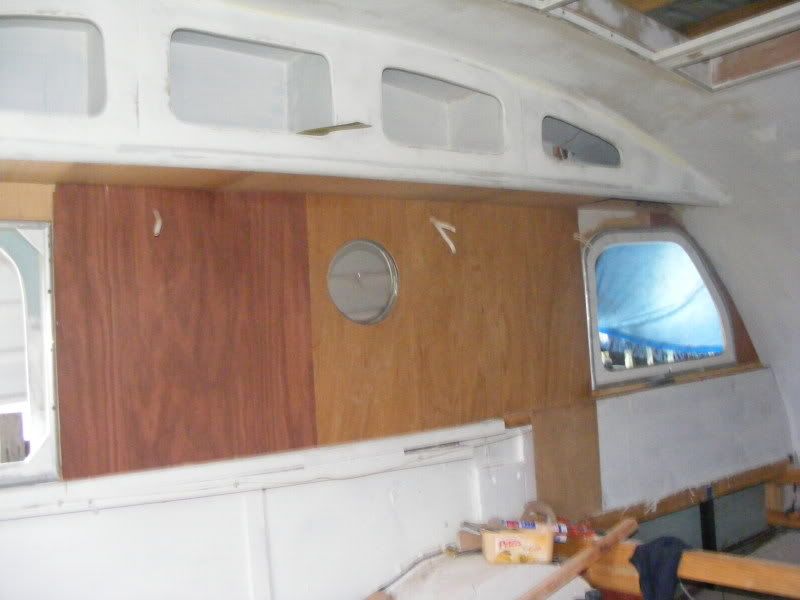 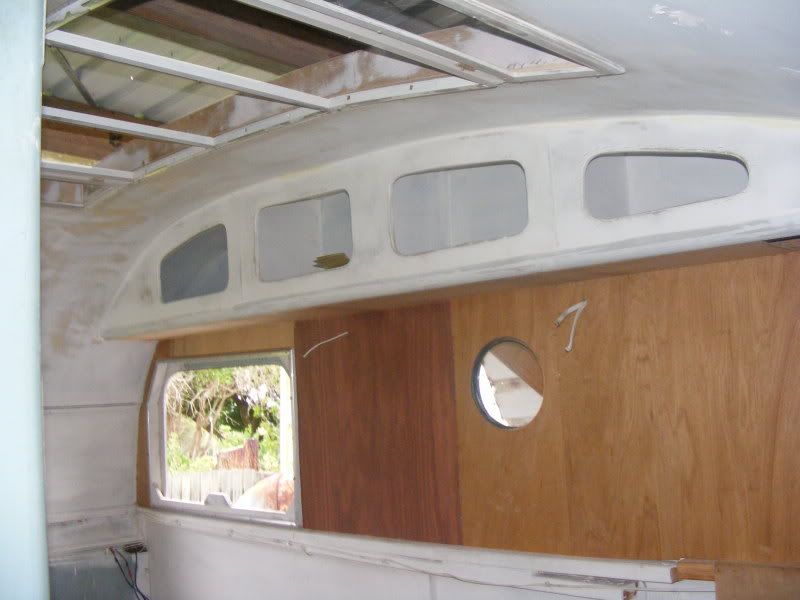  Overhead cupboards are basically completed. Roof hatch framing is pretty well finished, flyscreen frame for hatch fits & works, & most of the top roof , front & rear ply has enough coats of primer & sanding to be nearly ready for final paint. This saw bench is the greatest tool I’ve bought for rebuilding Lucille. Kindly disregard the slightly disorganised & dirty shed. It sometimes gets a little bit of a tidy up, but not too often.  All go, just need a bit more motivation. JBJ |
|


 ;D
;D