Deleted
Deleted Member
Posts: 0
|
Post by Deleted on Jul 6, 2006 14:54:06 GMT 10
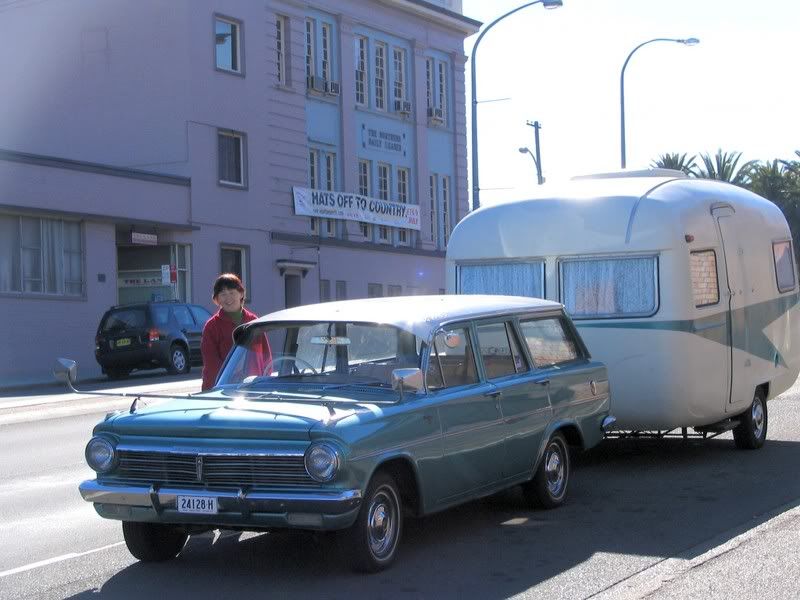
Hi All Thought i would start a thread ta keep yas tuned up on my half backed efforts at Building a teardrop. Being a tight arse miser i am forever on the look out for cheap alternatives to walking into a metal shop or a hardware store and shelling out the hard earned $$$ on bits and pieces. So with this as my van building philosophy i set out to scrounge up some bits and pieces. First up i needed a decent rolling chassis , so i bought this 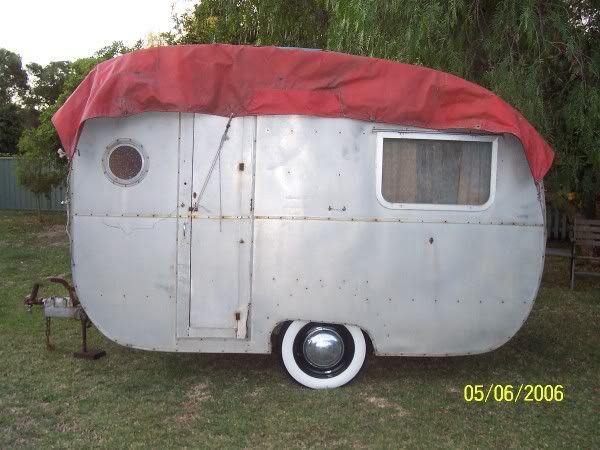 For $150 off a bloke just down the road. Looky, looky its got a Porthole  Not being one to enjoy sweat and hard work i called in the RAAF to do a bombing raid on the poor old van. Range ... 1 mile, speed 200mph...... ready when you are Biggles!!1... Roger that Smiffy....... Have target in bomb sight.... Bombs away........ 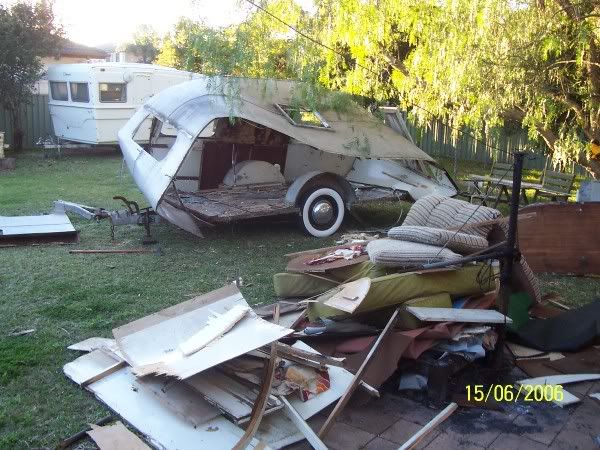 Oh i say biggles , Bingo.......direct hit...... 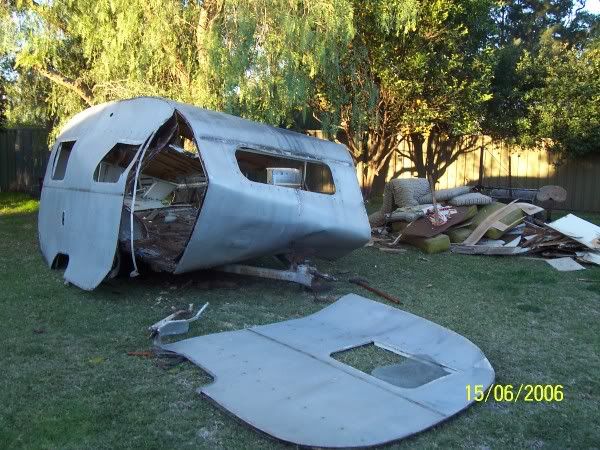 Lets head back to the Airfield!! ...Hey captain, hows about we circle around and wipe out that fibreglass van over the back!!! Is that what it is... Geez i didnt think anyone kept those monstrosities ... poor soul must be terribly embarassed about having that in his yard. ( sorry humpty and the F/G brigade I just had to have a shot  ) . Roger that captain... bomb doors are closed!!!! So with a little help from the armed serices i saved myself hours of hard work. Luckily i had managed to save the ice chest, water pump and tank, porthole, light fittings before the fly guys "Newked" my van. the drone of the lancasters engines where all but gone when i started to sort through the wreckage lookin for survivors. Eventually i got down to the metal bit i was chasing... chassis axle and wheels... 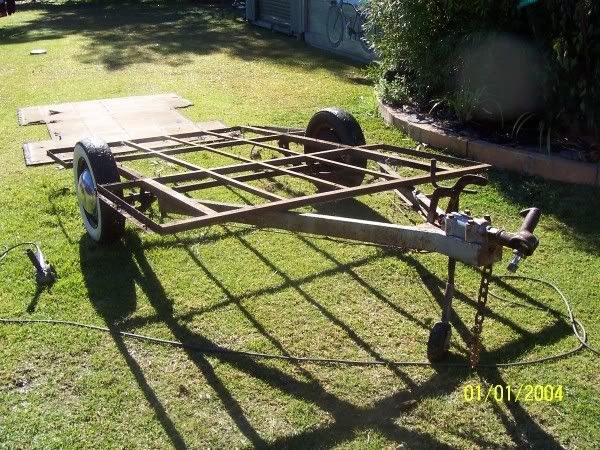 A bit of rust in the back rail so i raised a sweat and cut it out ,then welded in a new 45mm x 45mm section. That outta the way i cut the dangly bits that stick out level with the outside of the wheels on a "Normal" van. Took the whole shootin match inta the "Reddo shed of invention" and ...... again not wanting to sweat out any of that precious alcohol i downed the night before. I employed child labour to remove the running gear. We came to an arrangement. He is on school holidays and needs money  . I am at work and need the chassis stripped , so a deal was struck ;D. I paid Joel 1938 pay rates.. 2 shillings and threepence for a 12 hour day  .... Told ya i am a miser and we are cutting costs here where possible  Here is a picture of the chassis naked.  and about to be shot... weeeelllll not actually shot but sandblasted. 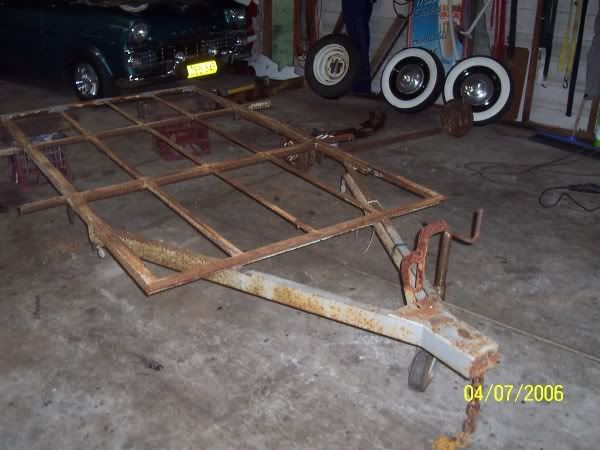 frame measures 2500mm X 1380mmm  oooo bugger!!! just a bit wider and longer than a standard 2400 X 1200 sheet of CD Ply. i have found i can buy 2700 X 1200 sheets of 12mm and i have a plan . Plan is to worry about that when i get to the plywood stage. should be able to cut sheets and lay 'em crossways and still end up with a rigid floor. Hmmmm I didnt make too much of a mess of the original floor. might get away with refixing it . Here is a close up of the dropped axle with brakes and FJ Holden stud pattern stubs. 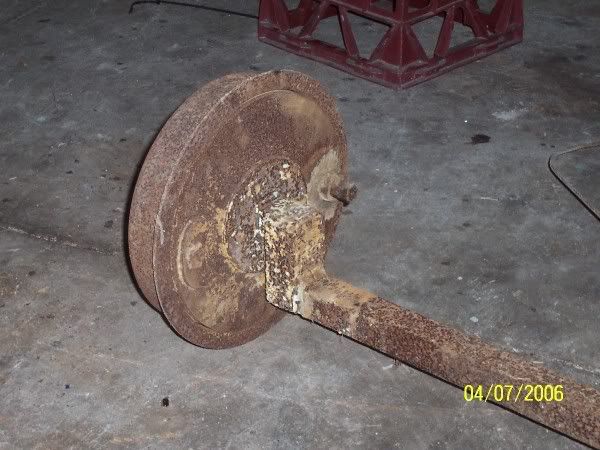 I am at a point where i will soon have to decide weather to run the van with brakes and FJ wheels or toss all that and run no brakes with a set of early Holden hubs. The dropped axle with brakes and brake drums weighs heaps . I was flat out picking it up to move it. Cast iron brake drums with massive backing plates about 1/4" thick. so it wont take much body weight to bring it up to a level where it would need brakes to comply and to make it stop.  The "no brakes " option would be at least 20kg lighter, but the brakes would definitley be a big safety "Plus" especially when the van will be towed with the drum braked EK Ute. I have bought these 2 wheels to run on the van. 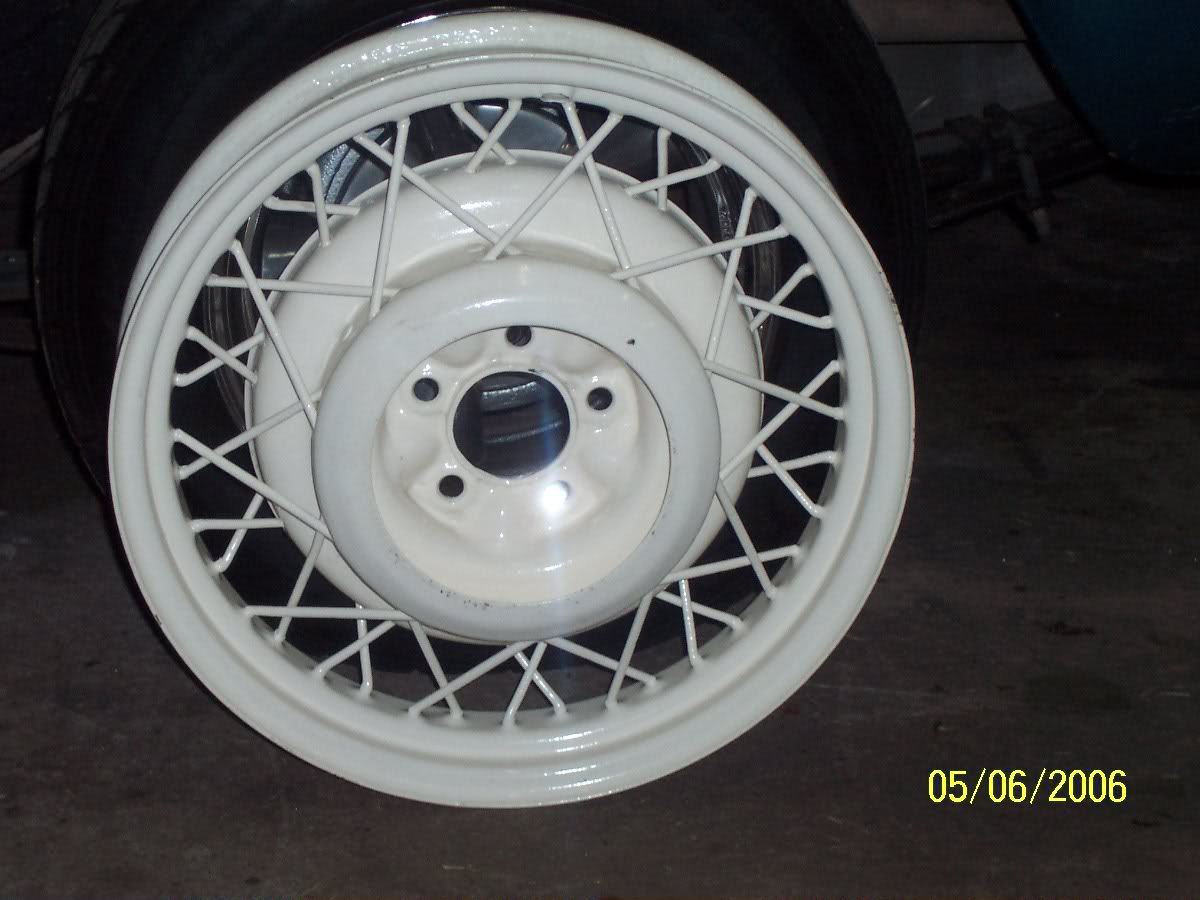 They are 17" X 4" 1934 Chev but have exactly the same stud pattern as EH, HR holden. Would look cool on the TD . Tyres are around $200 ea. So not gunna be cheap to convert from the FJ running gear over to the old chev / no brakes option.. I am aware that the axle should sit back further and i run the risk of being a bit light in the front with towball weight .However that can be cured by running the water tank just in front of the axle ( freeing up extra space in the rear kitchen area) and maybe the spare wheel on the front. have a look at the size of the two draw bar rails they alone weigh a fair bit so i think all will be sweet in the end. Anywho thats where i am at so far. All wrecking done and time to start on doing something constructive  ....Yep... I'm off to the fridge ..... hey i did say it was gunna be a 20 year plan... didnt ya read the title More later... probably around 2010 . cheers Redlayabouteardropper |
|
|
|
Post by trodler on Jul 6, 2006 16:52:15 GMT 10
Hi Reddo
Keep in mind that with your frame width of 1380, when you line the roof of your TD you will have to run 2 sheets from front to back and have a join through the centre of the roof line.
Did you get any bargains at the swap after we left?
Cheers.
Trodler.
|
|
|
|
Post by paulc1952 on Jul 6, 2006 19:06:13 GMT 10
Hi Reddo, Thought I'd drop some numbers past you to give you an idea on weights. My TD is 2.7mx1.5m and set for offroading. It hits the scales at 595kg empty. My chassis is 50x50x3mm tube and the draw bar is 75x75x3mm. Four cross members are 50x50x3mm. Yeah, I know, overbuilt to the max. External Walls are 15mm ply clad with 1.6mm fibreglass sheet and internals are 5mm. External roof is 6mm ply clad with 1.6mm fibreglass sheet and internal is 5mm. All the framework is 42x19mm Tassie oak.
Hope this helps with your calculations.
Cheers
Paul
|
|
Deleted
Deleted Member
Posts: 0
|
Post by Deleted on Jul 6, 2006 20:02:52 GMT 10
Hi All Col: if i'm gunna go with '56 onwards hubs etc. i will have to throw away the FJ style backing plates with mechanical braking pivots etc , brake shoes and brake drums . There is a hellava lotta weight just in this set up alone. As i said earlier. I like the idea of brakes but, half the reason for considering running brakes is because of the weight of the axle and brakes ... without all that cast iron. things are gunna be much lighter and easier to pull up behind a drum braked car... does this make sense??? Trodler Ply is non directional. i can run sheets "east west" for 1380 mm and have a join every 1200mm across the van. does not necessarily have to be joined down the middle..... Just a novice drunk teardrop builders perspective. Paulc I realise that bombing raids are a common occurence in my home town but... ...i wont be building and armoured car- avan as per your specs given. Although , having said that your TD construction details are much appreciated. Sounds like a good solid off road camper and very waterproof with "glass over" skin. I plan on using 17mm flooring. 12 mm walls and divider between sleeping quarters and kitchen , 4.5mm roof using 25mm x 40mm ribs across the inside of the roof at about 450mm intervals to support it. All sealed with copiuos ammonts of oil based paint on the exterior. Did i say earlier i havent given the timber construction any consideration Mister plywood website gives cost and approx weight of each size sheet. i havent sat down and done the sums yet but i have the cost per sheet as well as the kilo per sheet data stashed for later reference. I am sitting here typing this with sand running out of every cavity of my body. I have been sandblasting springs, axle etc this arvo with beany, full face sheild, earmuffs and face mask. still managed to cop a heap where i shouldnt have. driveway looks like a beach scene in Honolulu. but hey... progress is being made... stay tuned.... now if you will excuse me i have a stubby waiting and 2010 is getting closer every minute thanks all reddownonthecornerouthereinthestreetwillyandthepoorboysareplayinbringanickelstampyourfeet ;D |
|
Deleted
Deleted Member
Posts: 0
|
Post by Deleted on Jul 12, 2006 12:15:59 GMT 10
Hi all The dust has settled in the "reddo shed of invention". i managed a few happy snaps. Chassis took about three arvos/nights of sandblasting 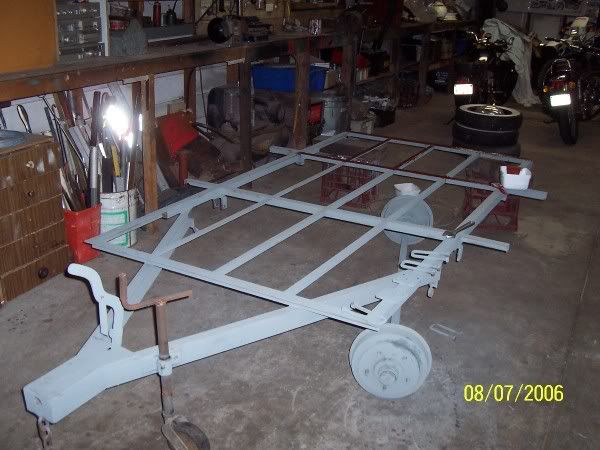 I allowed enough time at the end of each night to get a coat of Zinc phos/ Cold Galv on the bare metal to prevent overnight rusting in the cool night air. slow process but probably saved a few hundred bucks on sending it to the sandblasters. DIY snadblasters are available for around $30. They work well providing the sand is dry and filtered of any shell grit etc . 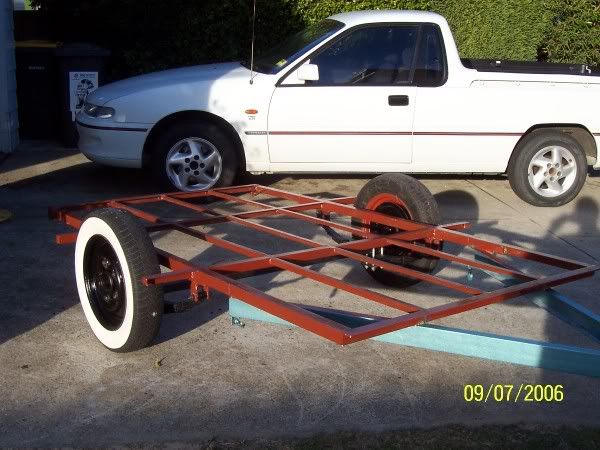 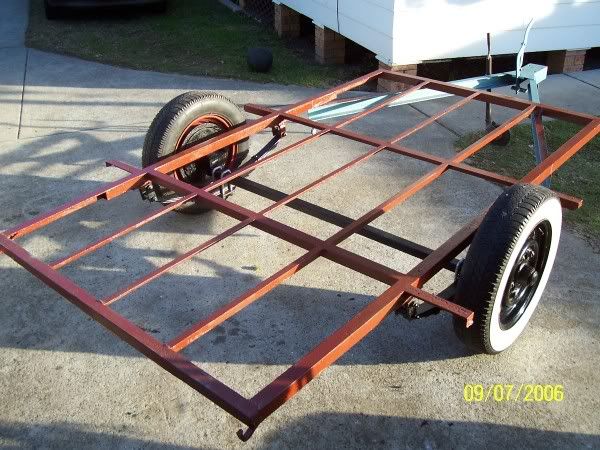 After everything including the axle and springs got a thorough blasting and a good coat of cold galv spray. I hand brushed a coat of Kill rust over the chassis. How many times have you seen chassis that that have been undercoated or zinc phos coated go rusty after a very short period of time.?? I allowed a day in the sun for the kill rust to harden then i reassembled the rolling chassis. hey Humpty .... recognise the draw bar colour... EH premier portsea blue. I knew i would find a use for the 1/2 litre i had left overmate. I gave it a quick coat early in the morning and it flattened out badly. Will try again in the mid day sun when things are a bit warmer. 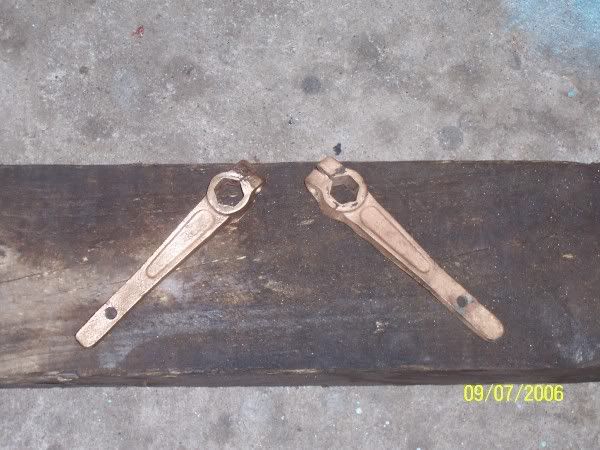 I have decided to run brakes on the teardrop no matter what wheels end up on her. I figure if they are already there i may aswell rum=n with them. definitely will be an advantage when towing with Eddie the EK and his drum brake stoppers. The photo above is of the two brake arms that are fitted facing forward on the leading side of the brake drums. they are about 200mm long X 15mm thick. What i find unusual is they are made of brass??. There is a bit of work still to do in the brakes department. New cables, turnbuckle etc. The old van was fitted with a 2" Newcastle safety hitch . I done away with that and bought a new 50mm mechanical overide coupling which has a different bolt pattern to the old coupling. i will install the new coupling with four crush tubes between the chassis "C " section and plate across the lower side of the chassis where the four fixing bolts come through.. As usual i am always on the scout for bits and pieces that might be used later on in the project. I called at the hot rodding mates place and borrowed one of two gaurds he had hangin on the wall. 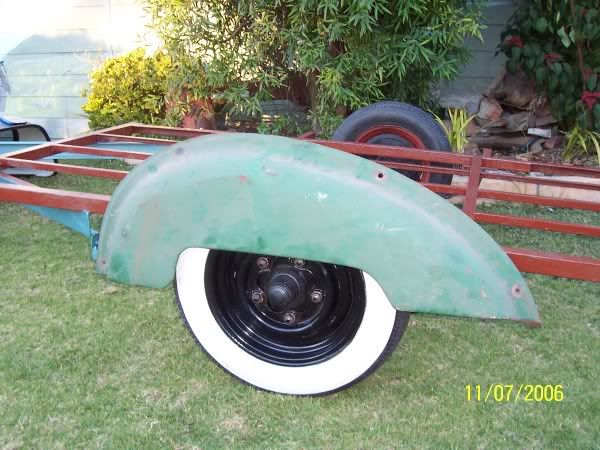 Austin A30 ute!!! certainly look the part .... but 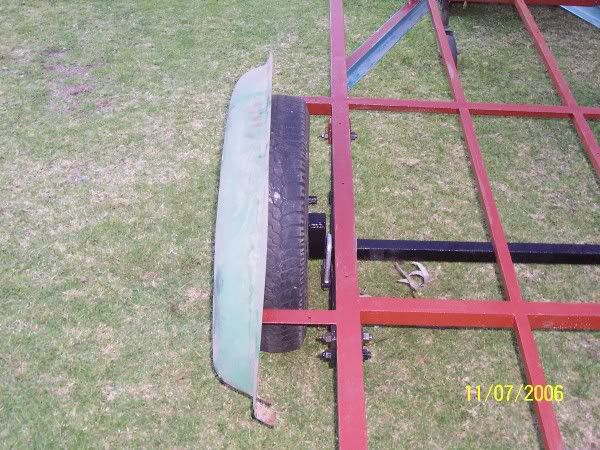 They would need about 8" added into them to clear the tyre and bolt to the side of the van. ahhh well , it was worth a try. So. There you have it. I have bought a few bits and pieces so i will try and itemise them as i update the photos so you have an idea of the costs involved. Obviously someone will say that they can get the bits cheaper but i suppose that will always be the case. Depends on where you live, work and what you already have laying around. initial outlay for the van =$150 50mm mechanical overide coupling = $100 8" turnbuckle for brakes $4 4 litres of oil based primer for plywood =$52 4 sheets of 12mmx2400x1200 non structural CD Plywood ($50 @sheet) for walls and floor 3 sheets of 4.5mmx2400x1200 CD plywood@ $33@sheet.Roof total =$299. ( seems like a lot of ply for the roof but bear with me folks you will see why later in the project ) I will use what i can of the 19mm original floor that i removed . Will cut internal spars/ and curved supports out of it. 50 stainless steel 15mm X 8G woodscrews $5.30. I am going to use these to secure the 12mm ply to the floor and the bottoms of the side walls (12mm) to the side of the chassis . i have drilled holes in the chassis cross members so that the screws come up from underneath through the chassis and into the ply. This way there is no screw heads showing on the van floor or lower parts of the side walls. Stainless means they are there for ever and no chance of rust stains leaching through paintwork later on!! Kill rust ... already had some. Zinc Phos... mate gave me all i needed. sand ... from the beach and sieved. Black enamel.... I have plenty of that. So a bit still to do on the chassis and brakes then i hang up the metal manglers tools and get out the wood butchering implements. The best part about this project: I am actually enjoying working on it even though i am still picking sand out of my nose, ears etc. The worst part: The time wasted uploading and downloading photos to do the updates via photobucket...... it cuts into valuable "Down the shed time" More later. Reddo |
|
Deleted
Deleted Member
Posts: 0
|
Post by Deleted on Jul 17, 2006 9:34:50 GMT 10
Hi All Wheel bearings checked and repacked. These are the big old style ball bearings, not the adjustable tapered rollers that are used on cars etc. wheel studs are pressed through the heavy brake drum which is part of the hub. So the only way i will be able to run the old chev wheels wil be to knock out the studs and redrill the drum with the 13" holden pattern. The centre of the hub is fairly big and i might not have enough room to do this. Try again later. New coupling and cable fitted , brakes work great although the left side is binding a bit ( slow to release) ,hopefully it will free up with use. 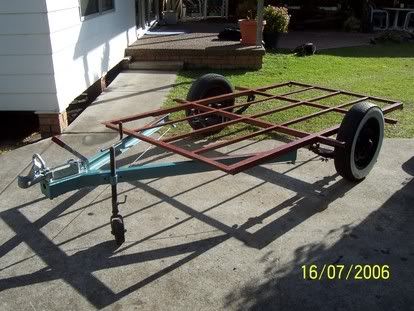 Joel had given the rough side of the 12mm ply a good coat of oil based primer during the week so when Trish and i got home sunday arvo after a run on the old BSAs and a counter lunch at the local we got the wood butcher tools out. Seeing as though the chassis is 1380mm wide i cut a 690mm length ways out of 2 sheets, this gave me a join down the middle of the trailer. The frame is 2500mm long so i had to cut a 100mm wide strip for the back end. I thought about cutting the frame down to 2400 when i was welding a new back rail in it, but i figure the extra 100mm would be usefull in a teardrop. No big deal about joins in the floor. The 2 long sheets are supported by the 25mm angle running down the middle of the frame and the back strip will be inside the kitchen / cupboard area which i plan on lining the floor with either stainless steel , aluminium sheet ( old roadwork signs are good) or lino. 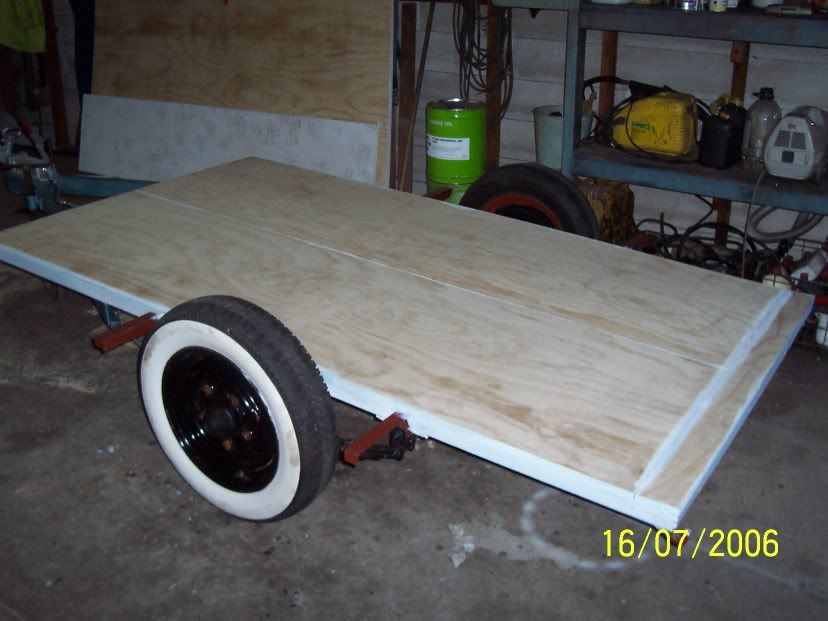 I drilled holes every 450mm in the chassis and fixed the flooring from underneath with 20mm stainless steel self tappers. end result is a smooth floor with no screw heads showing. 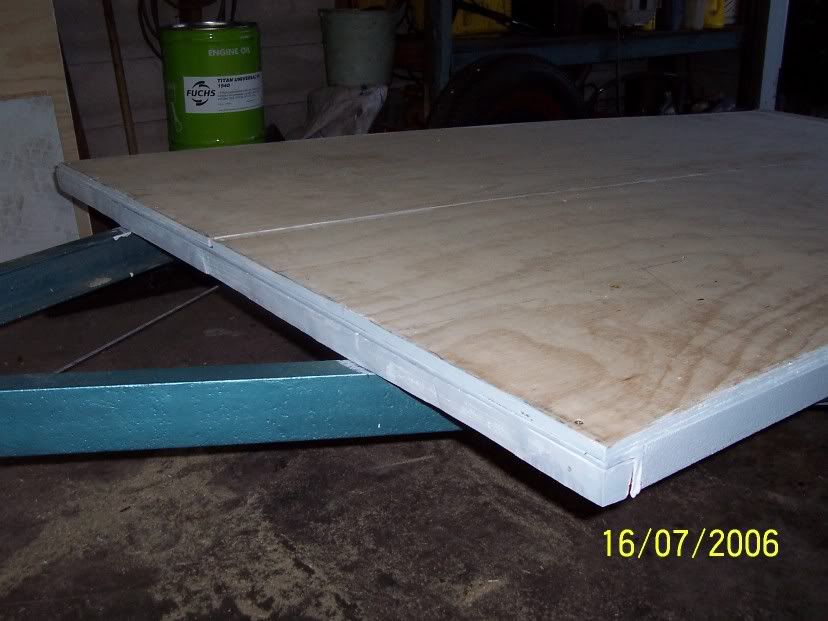 This is a shot of the front rail. I cut the 45mm x 45mm timber at an angle of about 10 degrees ( although the photo looks like it has been cut square)so that I can shape the front of the van into a radius out front similar to a normal van rather than a vertical flat front. I am aware that because i am using a chassis from a normal caravan the axle doesnt sit as far back as it would on a teardrop trailer. By designing the front like this i am hoping to get a more "Teardropped" appearance . When i pulled the old van apart it had a 100mm piece of timber cut on an angle to suit the curved front.. This is how your average 8 ft van chassis grows a foot at either end at bunk hieght to become a 10 foot van. Hopefully by the end of the week i might have found enough time to have a template marked out for the walls. If "Her indoors" doesnt come up with any evil plans for me like gardening, mowing etc i might even get enough time in the shed of invention to get the walls on the van next weekend. Hmmm .....Might get up early and barracade myself in the shed. Naaaaa...... last time i done that she threatend to set fire to it and burn me and the contents. Even came to the window with a box of matches and a tin of petrol just to let me know she was fair dinkum........ It was at this point that i reminded her that her vintage BSA was in there with me. ........ she laid down her weapons of mass destruction and a truce was negotiated. Told ya they can be evil thing fellas. Cheers All Reddo |
|
|
|
Post by will and Lyn on Jul 17, 2006 19:29:43 GMT 10
;D Reddo my man You have excelled yourself with this kind of carpentry knowledge you and the Mrs could come for a nice holiday to W.A.and help me convert Elvis into the new chassis for my teardrop (TIA) You sure starteds something Col my teardrop has the same problem as yours had that rocking motion so the old chassis will become the new chassis for the tear drop lucky no one wanted it when I put it on the net I hope Tia doesnt mind elvis driving her around I was over at Ditz and pooh bahs house yesterday and they have already done an outside tow job with the new tow truck Duh I got dis chainsaw as well as dis base ball bat if ya need to borrow it Mark its competitive out dere ya know Will P.S congrats on the magnificent Viscount van Mark its a Gem
|
|
Deleted
Deleted Member
Posts: 0
|
Post by Deleted on Jul 21, 2006 10:20:43 GMT 10
Hi All Its the friday update. East coast has been copping a lot of rain and that means no domestic yard duties ... bloody bewdy mate ;D. So with unlimited time allowed in the "shed of invention" i dressed myself in my blue and white stripey "Wood butchers apron " and head off into the sawdust. I spent hours with protractors, compass and rule working out the shape i wanted for the sides. eventually happy with my radius scribblings i cut the ply with a jigsaw and stood the finished product up on the side of the TD. It looked bloody terrible.. total toilet, crap, Vomit. Sorta like a "whale with no tail" The front had been left with a 600mm flat area as i was planning on fitting one of the alloy windows from the old wreck into the front wall. So i tossed all the geometry equipment in the bin, took a big swig on the Tooheys Draught (Hmmm just realised Tooheys Draught .. TD ... Teardrop .. TD Coincidence ) and freehanded the curves to a shape that was more pleasing to the eye.... well at least to my bloodshot eyes. On second fitting i was happy with the shape so i marked out a 600mm wide door. Again it was decision time... do i have a square door or a door with a slightly rounded top? . This decision alone took half a dozen stubbies to solve. Everything becomes much clearer when you have a stubby in ya hand to balance the Ying and yang. So... driven by drunken stupidity i fired up the buzz saw and carved out the door. Bloody hard to cut a straight line when ya hiccupping every 10 seconds and balancing a stubby in the left hand. Only time the saw was ( oooo look a word spelt opposite side by side "saw.. was" ) on the black pencil line was when it was crossing it in a zig zag fashion. 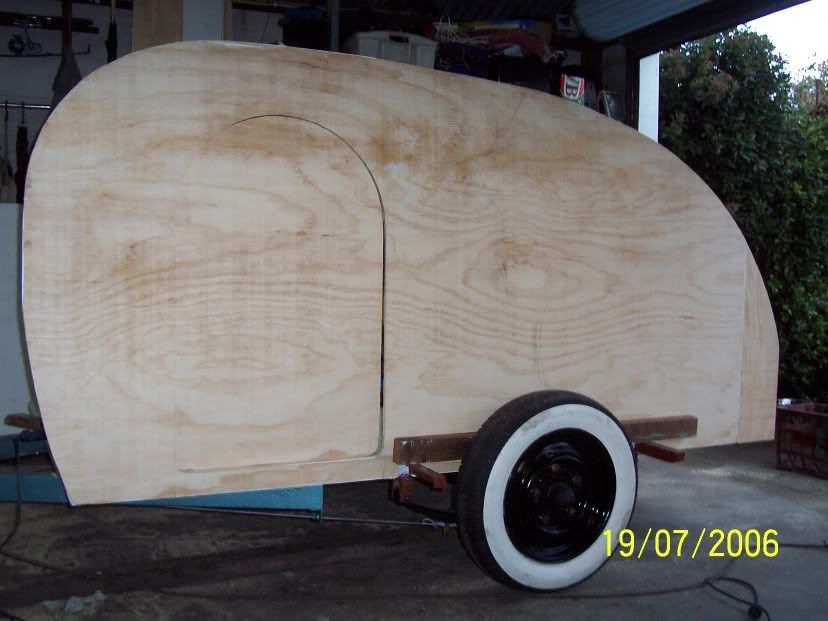 End result is as per above. The add on bit at the back is 200mm long to make up for the2400mm sheet being set forward 100mm in front of the 2500 frame base . The vertical flat section at the back is around 400mm high . looks a bit odd but there is a reason for this 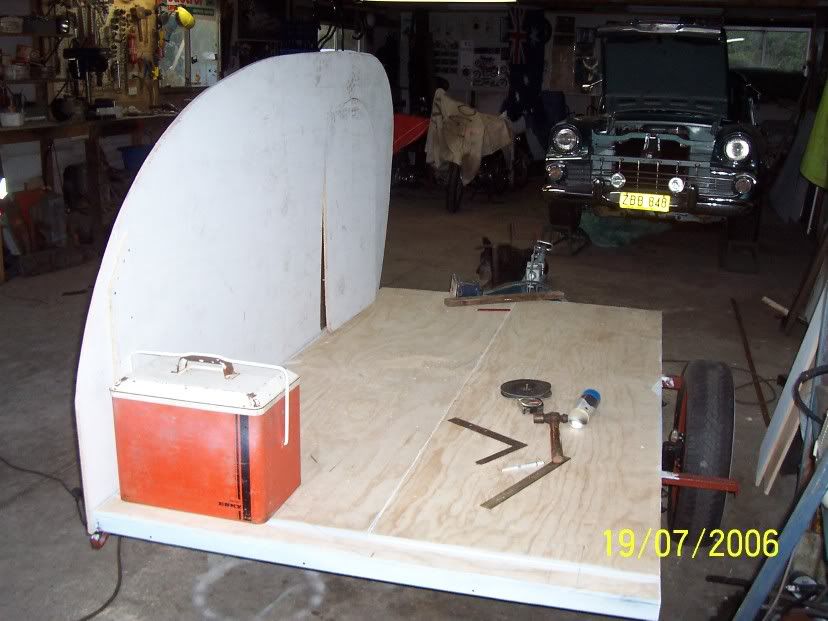 it had to be high enough to clear the malleys esky handle ;D . I plan on fitting 4 of these little suckers in there when i go camping 3 1/2 will be full of beer. other half esky will contain crap like water and milk... yyyuuuukkk!!! The advantage of working while intoxicated is the brain often works in reverse. This is an advantage when it comes to cutting out the opposite side of the van. Lay the left side wall on the right side sheet and trace out a mirror image for the other wall.... too easy. Just need to remember which side is the smooth side of the CD ply. This is why i got joel to paint all the rough sides with white Primer. If i Goof off and dont check the sheets i still cant make a mistake......I'll have yas know us drunken van builders do a lot of planning when we aint inebriat... ???umm ...intoxi. ...ummmm ... pis  .....ummm .......sloshed. So with sharpened pencil ( i was on crayons untill second year at high school ) i marked out the other side and hacked out a replica of the first side creation. 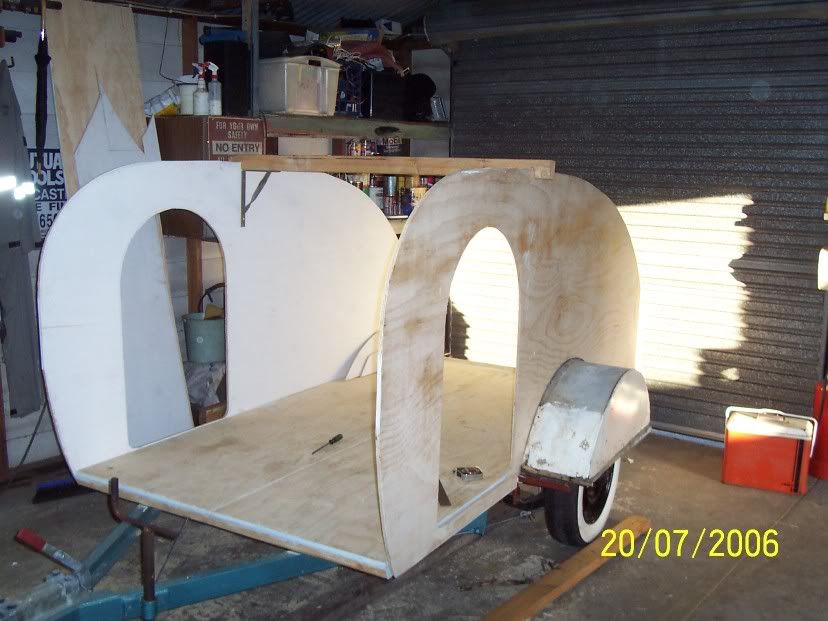 2 walls up and a cross brace to hold 'em where i want 'em. Mr Smithers my Woodbutcha teacha in rehab back in '68 would be proud of me. I still have all my fingers too Mr Smithers. I bet he wanted call me a "knuckle Draggin Pleb" nowadays folks . Dodgey lookin mudgaurd is the original from the van. They ( with a bit of style modification are still an option if nothing better comes to hand by the time i get to that department. 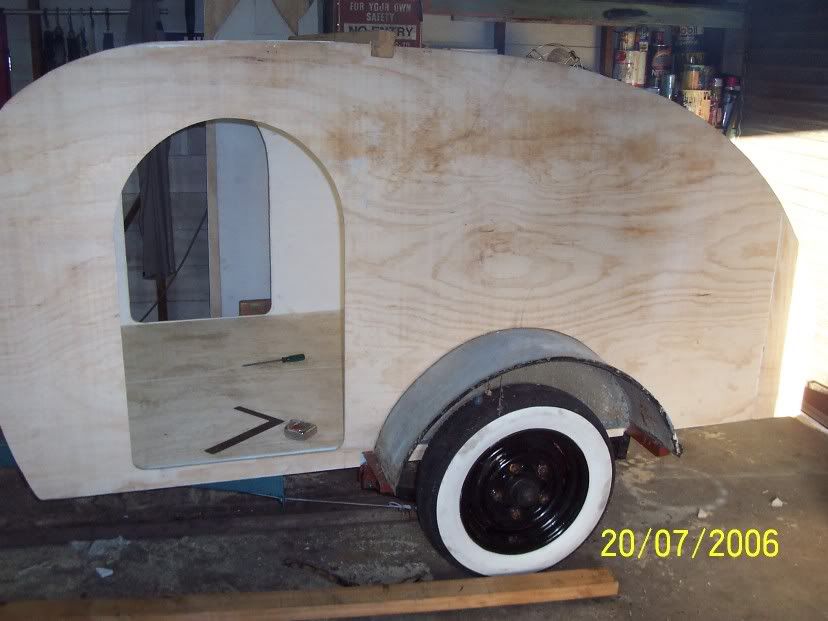 Another shot with the gaurd sitting on the opposite way around to the way it was originally fitted on the old van. room here for a bit of imaginative styling i suppose My Mexican friend in EL Paso has sent me a price list for gaurds manufactured by some Griengo in Wodonga. This outlaw wants around $77 on the black market for rolled steel gaurds. Might mail him a carton of Tequila and a box of havanna long pantellas. These southerners are easily bribed. Lotta stubbies , sawing and nailing under the bridge between now and then. Thats it for now. Even found time during the week to fit a new slave cylinder on Eddie EK. He tells me he has stopped peeing clutch fluid on the floor. Lets all pray it keeps raining so that more progress can be made in "Reddos Shed of invention" Reddo..... 2 fish swimming up a river bang their heads on a concrete wall. One turns to the other and says "Dam" |
|
|
|
Post by cobber on Jul 21, 2006 20:46:04 GMT 10
Hey Reddo,
Have you ever thought about writing a book?
I have a couple written by Spike Milligan..and
although there is a similarity in style you
leave him for dead.
Going great guns on the TD mate, can’t see how
you can stretch it out for twenty years.
Cobber.
|
|
veedubnut
Full Member
 The Compact Camper
Posts: 272
|
Post by veedubnut on Jul 21, 2006 21:55:37 GMT 10
G'day Reddo, Some great progress there mate. Maybe I should try building my TD whilst inebriated I made a few good blues along the way and I was sober  Local Home Hardware in Katoomba must love me The shape of your TD is looking great too... Just like you said it has to look right. I've seen some awful examples where the curves just look wrong. I've added a couple of progress pics of my TD to the forum almost completed now. Cheers mate Greg |
|
veedubnut
Full Member
The Compact Camper
Posts: 272
|
Post by veedubnut on Jul 21, 2006 21:58:46 GMT 10
Oh I forgot to tell you Reddo,
Those guards "suck" I'm sorry mate... Find some nice round ones... Picked up mine at Carasel in Pendle Hill, Sydney $120 the pair... Took'em a week to get them for me but worth the wait.
Cheers
Greg
|
|
|
|
Post by will and Lyn on Jul 22, 2006 0:25:18 GMT 10
  ;D  ;D :(wuehie  :-*2uyelijlds Bet you thought the the loonie tune was back no not at all he hasnt left That is "Reddo" the mighty Reddo can make this site a lot of money if we collect every posting Reddo has made and turned it into a book it would be a best seller if you want a laugh this can be classed as therapy or comedy or even the every mans guide to complete teadrop construction d struction ....obstruction oh yoo no wot i meen jesus even im starting to talk like him now Reddo ive said this many times YOUR A FUNNY MAN get into the book business mate I will be first to buy one they say there is a book in every one What are you waiting for go for it Will proof reader from the west
|
|
Deleted
Deleted Member
Posts: 0
|
Post by Deleted on Jul 22, 2006 17:44:13 GMT 10
Howdy All Greg .......I am gunna havta send ya a PM and get that mobs address or contact details for the gaurds. If they are as good as you say i might be up for a pair at that price. Kaybee bumped into a bloke at wagga swap thats sellin em for $77 ea plus postage and Gummint Sux Tax. If i can score some for $120 a pair i will organise to pick em up on All Holden weekend. Thanks for the encouragement about writing a book Cobber and Will. I have been putting out a ten page bike club mag about 6 times a year for the past 4 years. Some of my accounts of bike club runs have bought the odd tear to the clubbys eyes. Might sit down when i retire and jot down my thoughts on life.... if there is any cells left to remember anything. Cant remember what happened yesterday so it would be a bloody short book. Hmmmmmm might have to stop callin Cobber Fossil. Any way back to ........."The Shed of invention" chapter ..... ummm i forgot what installment i am up to..... Hhhhhmmmmmppphh ... Who cares . Noe where was i.... Oh yes.....teardrop progress. Had a coupla false starts today. Got out of bed full of enthusiasm ...and farts . Got a call from a bloke who carts caravans up from VIC to a CV salesyard near here. I had organised him to collect the Olympic and take it with him back to Melbourne for a lucky ebayer. So I ran around and delivered that. By the time i got a power saw in my hand it was 11.00am. I set my sights on getting the walls glued and screwed to the TD. I have been toying with the idea of a lantern roof and a window in the front so once i screwed the walls in place i started to feel my way around at the front. I have three alloy windows plus one i bought at Gosford swap. Ended up deciding on the smaller silver alloy window. I had earlier left a flat section on the front in the design so it would be easy to fit a window but i didnt like the style of ythings so i eventually rounded it off. So trying to sort curves and radiuses out to suit a window design became a headache ... and i hate headaches. 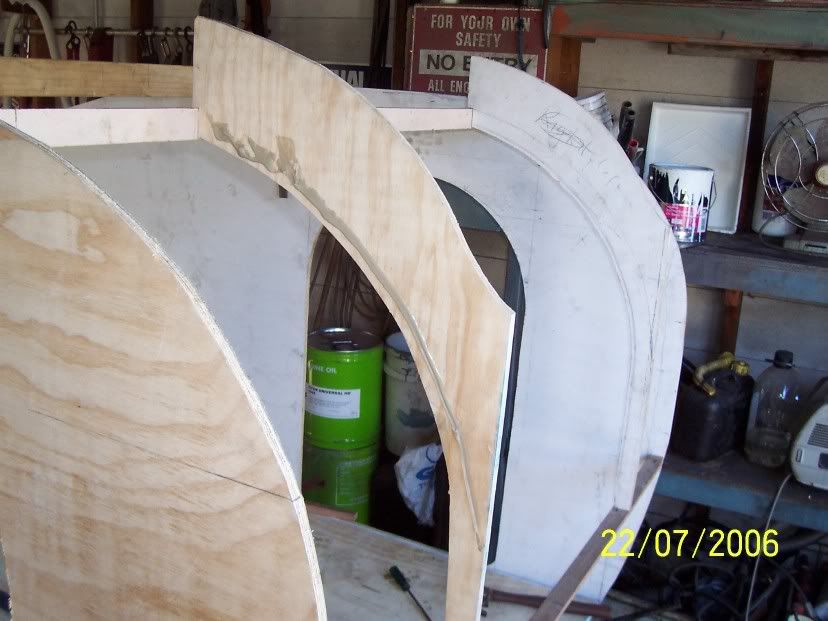 eventually got it sorted . had the jigsaw on valvebounce most of the day. The brown poop on the wood is liquid nails. I have glued and screwed everything so hopefully she'll hang together. Idea is to have a bay window leading into the raised section of about 100mm in the roof tappering down to nothing just before the tailgate hinge.... sorta like a wooden firemans helmet . this will give me enough room for a few vents and some nifty little lights. I know i still wont be able to stand up in there but when you are working with a blank canvas ( and mind) ya can let your imagination run riot..... it almost ended up a pop top but there was the issue of canvas and water leaks so that idea got canned. 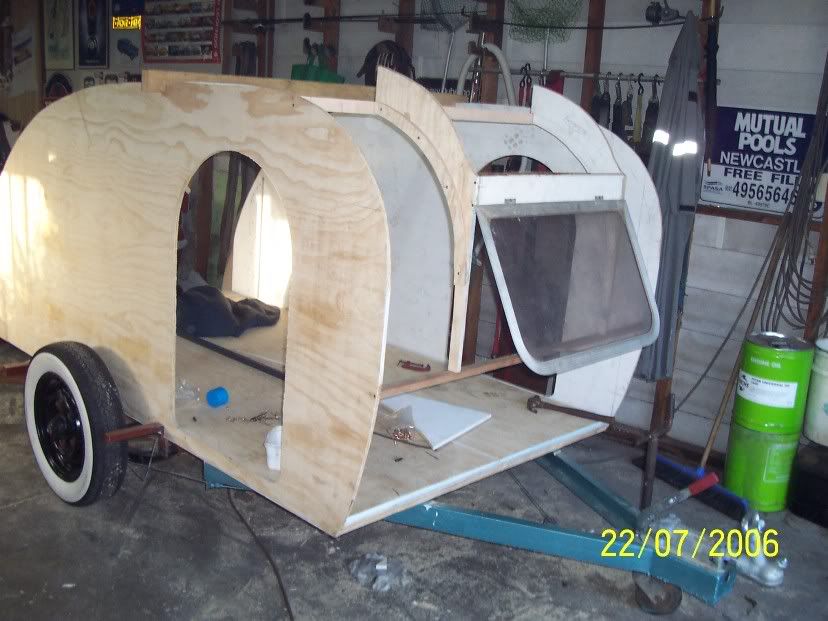 I ended up with the front three parts done. Gotta put three curved sections in below the window to the floor. window has 2mm clearance either side and about 5mm on the bottom edge ... allow for swelling etc. Anywho Folks i can hear the cork comin out of the plonk bottle .. . I am off to toast another productive day in "Reddos..... Shed of invention" .... Gotta keep at it ,2010 is closing in fast... Cheers all Reddoldwoodbutchafromwayback !!!! |
|
|
|
Post by earlee on Jul 24, 2006 8:12:45 GMT 10
hey Reddo It looks like a great job you are doing - will you graft some EK tailights onto it to match the ute? earlee |
|
Deleted
Deleted Member
Posts: 0
|
Post by Deleted on Jul 24, 2006 12:16:58 GMT 10
Hi Earlee Thought had crossed my mind. But ... no EK lights in this one. I would like to use a couple of those replica caddy lights i see a bloke pedalling on ebay for around $80 each. problem is that the lenses would stick ot too far and with all the activity that goes on around the back of a teardrop they would soon get "wiped out' I could protect them a bit by fitting the EK back bumper bar to the TD to ward off any shortcutting around the back corner of the van . Dunno what i am going to use. I have asked Veedub nut Greg if his TD passed OK with one centre mounted brake tail light. i will probably run a brake, tail , indicator light either side with a tail/number plate light mounted on the teardropp hatch/bootlid similar to the FJ Holden . Plenty of sawdust to be swept up around the shed before i get to that stage. A few swapmeets coming up next month including a big one at Cessnock. Plenty to shop for as well. Looks like plenty happening up your way as well. Shultzys Airfield show and santas underlights show sound like great events. Cheers Reddo |
|
|
|
Post by Roehm3108 on Jul 24, 2006 20:29:20 GMT 10
Lookin good Reddo!! I like this planning on the run!! What made you put in the window in the front? Do you REALLY need that much ventillation Some of the American TD's use that front area for hanging cupboard space. Would love somebody out there to actually build a TD WITH a poptop, even one that's hinged at the front and has the back pop up - WOuld look pretty snazzy I reckon. The lantern roof idea sounds good too! Ray |
|
Deleted
Deleted Member
Posts: 0
|
Post by Deleted on Jul 25, 2006 14:47:43 GMT 10
Hi Ray and Mr Jack Bartholenew Russell. Hinged at one end is called a "Caravanette". I Have seen plans and ads posted on this "forum for 'em before" Graham and his wife with the nice willys ute and ornamental flamingos that seem to follow them everywhere had a very nice caravanette at Morgan. complete with striped annexe. Very practical and folds down to pop top hieght for travelling. Check the last few pages of the Morgan posts for piccies!!! I am OK with wood working tools but my canvas work and dressmaking skills are up ta Sh#t so i will stick to hard top TD's and designer label skirts. Progress has slowed in the shed of invention. taking extra time to ensure things are staying square while i work my way towards the boot. Was hoping to fit two ice chests in there but a full sized ice chest takes up to much room. I may still install one laying horizontal al la "top loading tucker box freezer style". Lid/door can serve as part of the benchtop. Just another half baked and ill concieved idea from "The Shed of Invention". If i dont use them on my non vintage unclassified teardrop ( see Cob ... ummm...".Fossils" earlier damaging and hurtful comments on historic rego thread re my TD ) project i might take them and a few leftover goodies like windows etc along to Coledale and have a second hand sale!!! Costs 1 window = 1 large bottle. 1 ice chest including door....hmmmm.... now these can be bloody expensive . Hows about a carton!!! Wait a minute... If i exchange the ice chest for a carton what am i gunna put the carton in to get the coolies cold Reddrink |
|
|
|
Post by Roehm3108 on Jul 25, 2006 22:07:00 GMT 10
Hey Reddo I exploded another female myth yesterday. If ya can use a dropsaw ya can use a sewing machine. Had some sewing to do on the curtains of my new place, so I got out the Brothers and hey presto, job done!!! Another thing ya don't need a woman for ;D Now if only I can find some pliers to get these needles out of my fingers!!!! Speaking about ice boxes. Was in a country township on the w/end and saw what I have been searching for since I bought the Superb - an icebox fridge. Handspan measurements said it wasn't too wide as I only have limited space. Went to the owner, bargained him down from $300 to $240, struck deal. As an afterthought I asked him for tape measure - darn thing was 5cm too wide. My hands must have grown from all that sewing Ray |
|
Deleted
Deleted Member
Posts: 0
|
Post by Deleted on Aug 1, 2006 7:50:24 GMT 10
Hi All Been busy down the shed of invention. Had plenty of interuptions, the usual domestic ho hum that gets in the way of progress. Life threatening things like the constipated cattledog that had to go the vets to ... Free things up . WELL I WASNT GUNNA GIVE HIM A SUPOSITORY!!!! I promised myself i wasnt gunna waffle on this update. So no dribble . Just pictures. 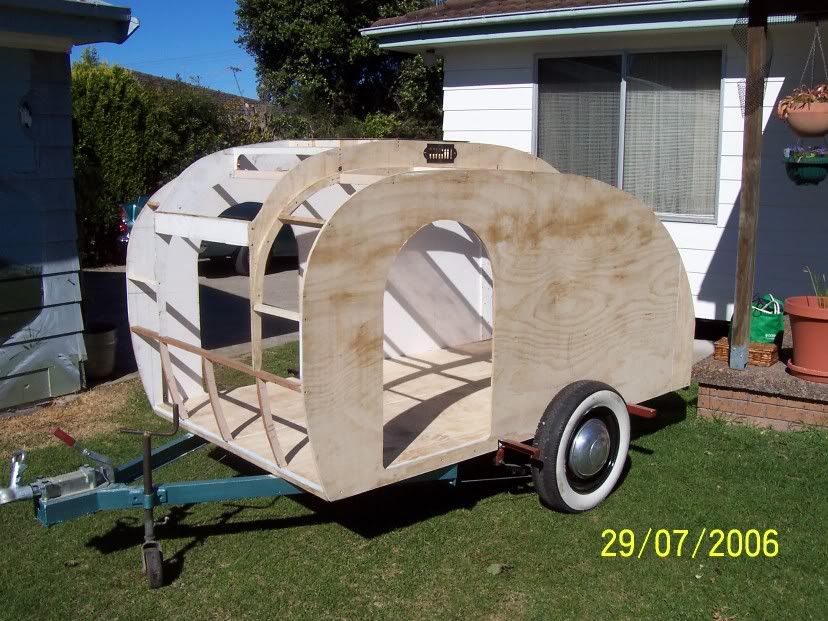 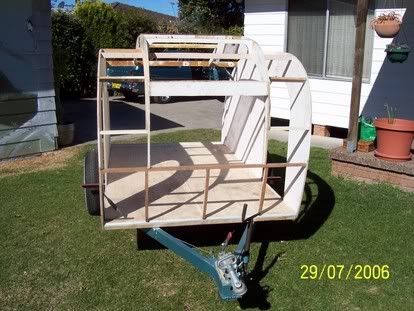 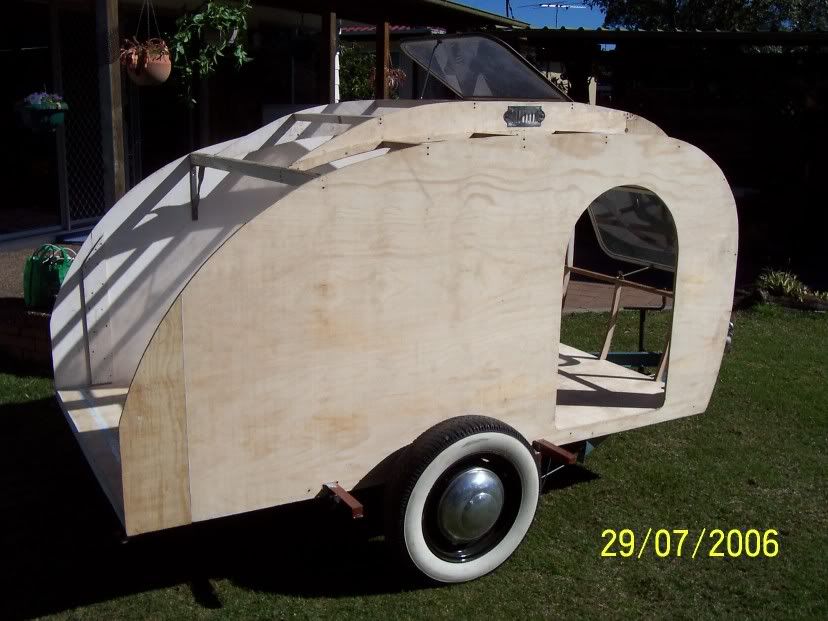 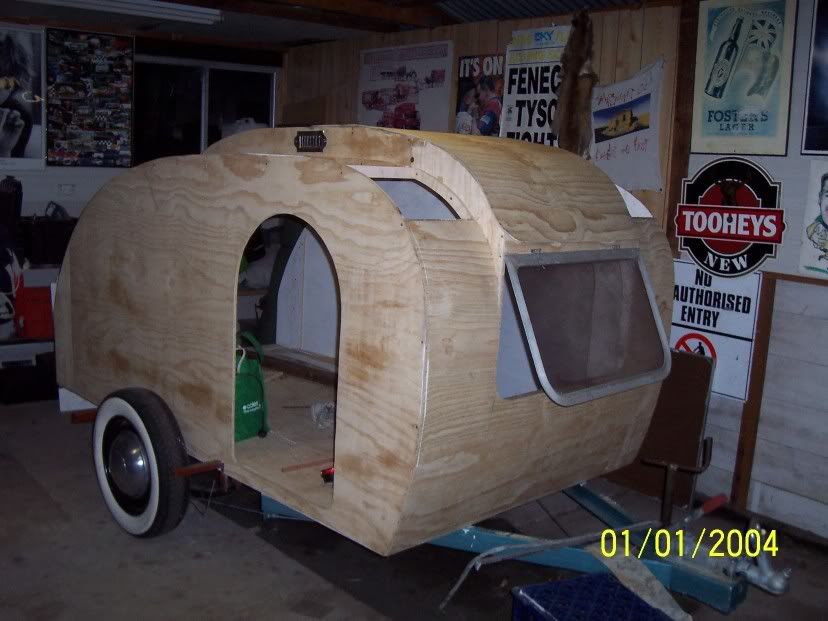  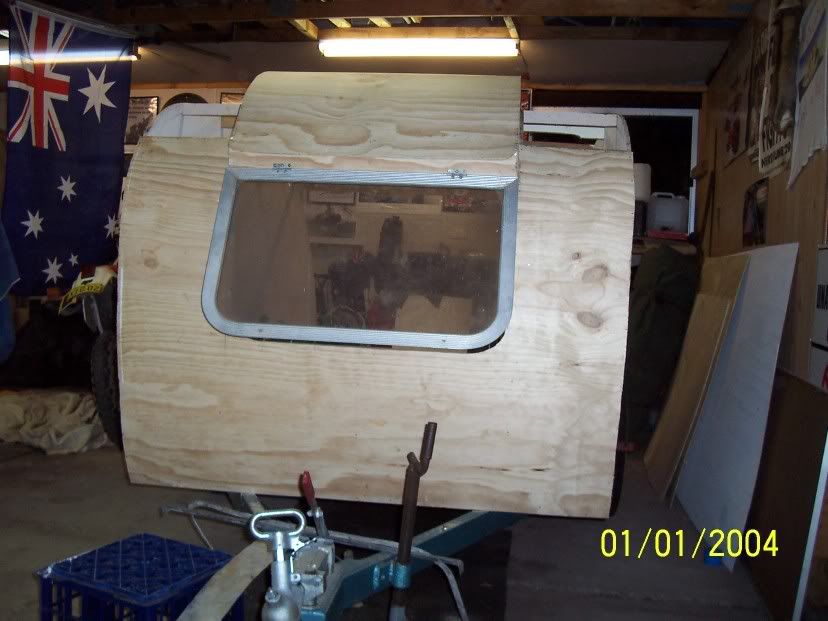 I might hold off sheeting the rest of the roof on the back half until i get the inside cupboard /wardrobe built. That way i will have plenty of natural light while i am working inside. I went garage sailing the other saturday morning and bought ten - 12 volt down lights for $10 with transformers. I figure i can use 2 or 3 wired via the 240v/12v transformers for when i am on a powered site and a couple straight from the 12 volt battery supply to light up the inside and the kitchen area when roughing it. These little globes give out plenty of light. The whole project might get mothballed for a while shortly. I have just bought a 5 speed VK commodore gearbox for the EK and would like to have it reconditioned and fitted / sorted ready for the spring tour. Maybe .. maybe not. If i dont go down that path i will keep on with the TD and hopefully have that finished for the spring tour.... did i say 2010?? In the mean time i will set a trap .... and catch ya's all later. Reddo |
|
veedubnut
Full Member
The Compact Camper
Posts: 272
|
Post by veedubnut on Aug 1, 2006 21:13:58 GMT 10
Wow Reddo That is going to be one very unique looking TD! The way you're going you'll have it ready for Coledale. Cheers Greg |
|
|
|
Post by Roehm3108 on Aug 1, 2006 22:32:44 GMT 10
Lookin good Reddo!!! Still reckon it would look even better with a skylight in the lantern section of your roof (perhaps a dark perspex?). WHat's the vent for up there? Worried about your constipated dog? ? Just wonder if it wouldn't be a dust trap when you are driving, unless it can be closed. Or are you intending to put in a lower vent as well on the floor level so that you get a "sucking out" effect like in caravans? Keep on keepin on with it, you should be proud of yourself!!! Cheers Ray |
|
Deleted
Deleted Member
Posts: 0
|
Post by Deleted on Aug 2, 2006 7:13:55 GMT 10
Hi Ray Managed to get the left and right sheets on the lower section of the roof on last night. Still have the back half of the raised section and the roof hatch to complete once i get the kitchen wall in place. The vents in the top section had a previous life as vents in the side of an old bathtub surround. Idea is that if it is raining and i cant have the roof hatch open ( yes it will have a roof hatch/skylight) i can still open the front window a little and have air circulating in from the front then up out through the vents. I plan on putting little slide open doors behind the vents as well as brass gauze to keep the bugs out when the vents are open. I went to a demolition yard yesterday arvo looking for tilt open louver windows (like the ones you see in old laundrys or those big old queenslander houses ) to put in the two doors in stead of portholes. They had a couple of tracks there but where bent and twisted so i gave them a miss. I bought a domed skylight about 450 mm round with a clear dome which sticks up about 150mm for $5.00. I tried it on the TD roof . It looks like something from "Lost in space" .. sputnik style. Sorta like a Lancaster bombers gun turret . Would be good for sticking your head up in of a morning and doing a reconnaisance of the surrounding camp before deciding to get out of bed or not . Dunno wether to use it or not. certainly different, but it might be just a bit too weird.......hmmmmmmm.... Yep fits in perfect with the rest of the project. Reddo |
|
|
|
Post by cobber on Aug 2, 2006 8:16:51 GMT 10
That really is looking good Reddo, I knew you were a smart fella but that “lantern roof” is a stroke of genius. I’d stick the “dome skylight” in if I were you...would enable you to stand up straight to put your pants on in the morning Cobber. |
|
Deleted
Deleted Member
Posts: 0
|
Post by Deleted on Aug 3, 2006 20:12:09 GMT 10
"Warning some viewers may find this story disturbing. It is rated PG " and woz ridten by Reddo after his usual half dozen schooners at the local on Thursday night. Scene one...... MAVIS...MAVIS.... come and look ....sssssssSSeeeeeee.. I told you that bloke next door was up to no good. I have heard all these wierd languages bein' spoken in his shed ... sorta weird stuff like Martian talk. OOOOooooo .....your right Cedric.... he is up to no good. I knew it, I knew ... all along i have said he was building something to destroy the world. We shoulda known... What with all those weird bits and pieces bein dragged inta the shed......... Waddya reckon it is Mavis.... Well Sh#t Cedric ...... I hate ta say it but i swear its... its... its.... ZZZzzzzzzzzzaaaaapppppp .. . (insert a brilliant flash of white light and a few strange alien type spacecraft humming noises about here folks) 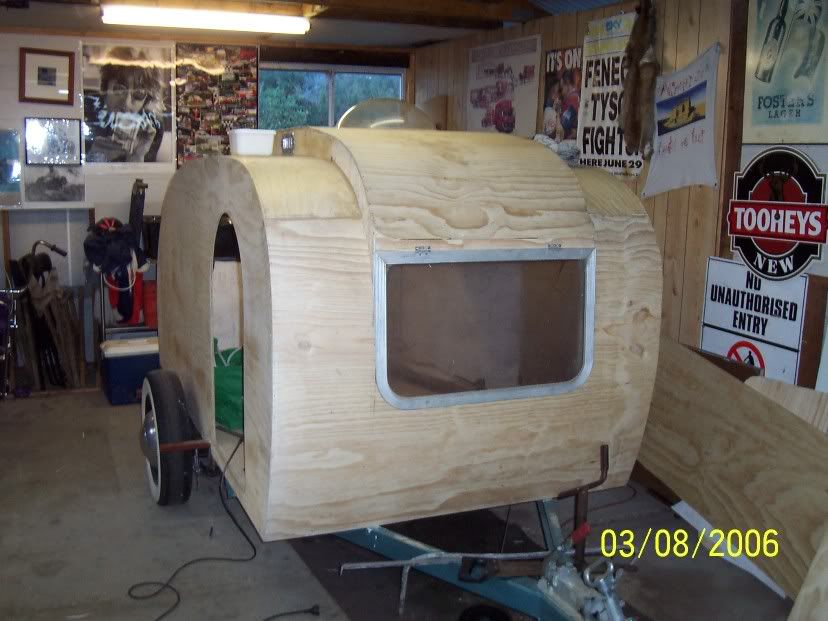 Mavis , Mavis ... speak to me Mavis. Bloody hell i better ring the airforce.... Hello airforce i would like to report........ Zzzzzaaaaappppppp ( insert another ray gun like flash of light and some 1950s horror movie background noises about here. readers)... 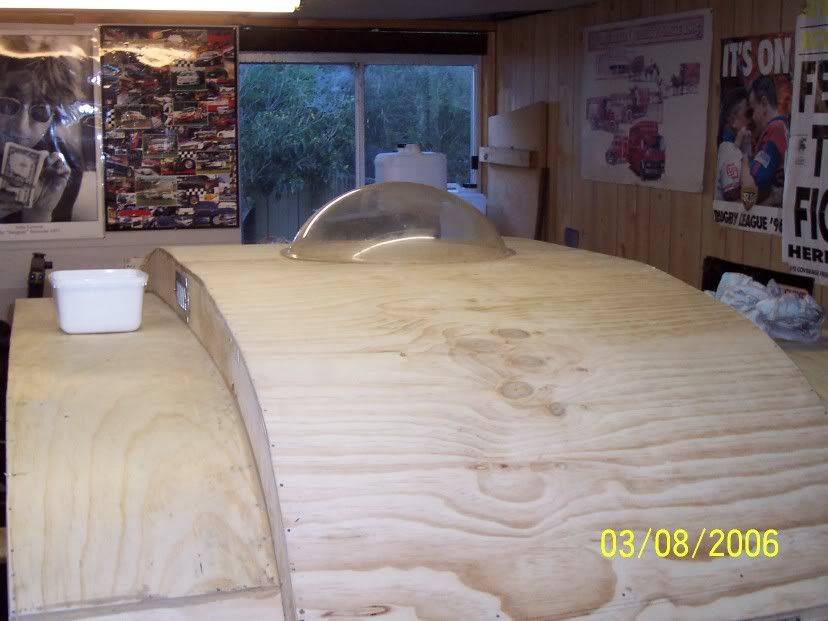 OOoooohhhh my gawd ... its a space ship!!!!!!. ...... Run for your lives... we're all gunna die....Hummmmm .... GET THAT EARTH CREATURE... Zap.. zap... zappity ... zappo...dodododooo.. dooododdooodo. Weeeeeelllll listeners ... what evil interglactic forces have been let loose in Reddos "Shed of invention"... Where is Reddo???... Have the aliens stolen him and plan on doin a brain transplant and hooked him up to a hoover vac to suck out his brilliant mind. yeah ......sure ......rrrrriiiiiggghhtt.. as if. Will the shed of invention become the "Shed of Destruction" Stay tuned for another exciting episode of " The reds invade reds shed." The author of this episode does not accept any responsibility for nightmares and bedwetting or heart attacks suffered by elderly readers. We now cross to the news... "Good evening ... strange lights have been seen hovering over"..... Zzzzzzzzzzzzzaaaaaappppppp......................................................................................................... |
|
|
|
Post by humpty2 on Aug 4, 2006 19:45:11 GMT 10
All weekend Reddo RAIN RAIN RAIN!! stay home and keep on that TD...........you are doing a great job.........in between the b s.
Newcastle (Cessnock) swap in 1 week.
|
|


 ) .
) . . I am at work and need the chassis stripped
  .... Told ya i am a miser and we are cutting costs here where possible

 oooo bugger!!! just a bit wider and longer than a standard 2400 X 1200 sheet of CD Ply.
 ....Yep... I'm off to the fridge
  .....ummm .......sloshed.


 Local Home Hardware in Katoomba must love me