Deleted
Deleted Member
Posts: 0
|
Post by Deleted on Jul 30, 2011 7:03:41 GMT 10
Hi Cobber.. Thanks for the words of encouragement...... I made a point of checking the awning screws before i removed them. 1. To see if the slot ran horizontal or vertical . 2... to check if they had ever been removed since leaving the Supalite factory Answer 1. all screws where lined up perfectly vertical. Reason ?? i was told by more than one old painter is that the when painting the paint doesnt clog up the slot as much as if they where set up horizontal Answer2. It appeared that the awning had never been removed. It had a couple of coats of paint on it. I removed all the screws and it took some effort to remove the awning. it had a canvas type tar paper tape seal to the canvas on the roof. I tried to carefully seperate the tape from the canvas but couldnt. After removal i cleaned both surfaces as best i could . The metal cleaned up easily. I left a few "divetts" in the canvas trying to remove the build up of tar goop etc....and once the awning was painted i replaced it on the van using 20mm wide X 10mm thick medium density foam rubber tape which had a peel off backing on one side. I stuck the sticky side to the awning. It tighted up beaut giving a good water tight seal and filled any hills and hollows left in the canvas from when i removed the tar paper tape. So yeah.... Definitely had the screw slots vertical from the Supalite factory. My only regret is i didnt take a photo before i removed the awning to confirm what i am saying here. Ya just have to believe me  Havent read the link you provided .. will do... but it wont change the direction my vans slot heads where facing when it left the factory........ WAIT A MINUTE.. HOLD YOUR HORSES...BREAKING NEWS... Go back to reply #48 and have a look at my second photo... If i cant use that as evidence i ...... have further info i can produce....The defence has Just realised there is a back awning i havent touched yet.. Lemme know if ya would like photographic evidence of that item too... ;D ;D ;D Gentlemen and ladies of the jury i ask that you consider my new evidence in you deliberations.. I plead .. Not Guilty. I rest my case your honour......     Regards Reddo |
|
|
|
Post by firefighter on Jul 31, 2011 10:39:03 GMT 10
    G'day Dave In the tea towell rail thread Ray M also said what you posted "screws should follow the grain " so it looks like thats the way its done Joined: May 2006 Gender: Male Posts: 90 Location: Adelaide / Salisbury Re: Tea towel rail « Reply #29 on Feb 16, 2011, 21:43 » -------------------------------------------------------------------------------- HI All As I am a carpenter and Joiner, when I did my apprenticeship I was taught that slots in screws should follow the grain of the timber. Regardless whether the timber is horizontal or vertical. On hardware (metal items) slots should be vertical on vertical shapes and horizontal on horizontal shapes i.e the slots follow longest side of the hardware plate. Regarding round items e.g portholes the slots should follow around the circle. raym f/f ;D ;D ;D ;D ;D
|
|
Deleted
Deleted Member
Posts: 0
|
Post by Deleted on Jul 31, 2011 17:45:20 GMT 10
|
|
|
|
Post by Jennison on Jul 31, 2011 18:07:11 GMT 10
Hey rejjecto, in case you did not realize it you already are the most non conforming non conformist, slot headed, vintage caravan buyer, seller, builder and restorer there is! By the way can you confirm whether are you considering kendalls this year or does it not conform with your plans for the future. ;D ;D ;D ;D ;D ;D  jenno |
|
Deleted
Deleted Member
Posts: 0
|
Post by Deleted on Jul 31, 2011 18:27:57 GMT 10
Hi Jeff Naa..... cant make Kendalls this year.  Trying to get the Supalite sorted ready for the Tour.... With so many local swapmeets happening over the next few months i am running out of weekends to work on it. Hope everyone has a great time at Kendalls and the weather is kind to you all. Regards Reddo |
|
|
|
Post by Geoff & Jude on Jul 31, 2011 18:36:09 GMT 10
hi reddo
sorry you can't make it - won't be the same without you.
good luck with "ethel" the superlite, she's a beauty and starting to look the part (he/she said jealously).
geoff 'n jude
ps you could give kingy the superlite sign and get one made up as ethel.
|
|
|
|
Post by cobber on Jul 31, 2011 19:14:25 GMT 10
G'day mate................... Reddo, I hope you noticed I did not jump in to screw up this thread of your's and comment on firefighter's reluctance to read the third sentence in Raym's post, but you did....7/10 brownie points. And you are struggling with the choice of doing it right, or keeping it “original”... 9/10 brownie points. Don't worry about having to sit in the back row of the “100% original vintage caravan restorers guild”.... you're there already ;D, and don't worry about being somebody.... you're there already  , and don't worry about being laughted at where ever you go... you're there already (for all the good reasons  )..... and as for alcohol, you're there already  . Now mate... if you just swing those slots 45° in either direction you will see how good they look and................... 10/10 brownie points, but I'll need to see the evidence at Kendall's beach... Cobber. |
|
|
|
Post by Geoff & Jude on Jul 31, 2011 19:30:42 GMT 10
Now mate... if you just swing those slots 45° in either direction you will see how good they look and................... hello cobber how did you do in geometry at school - not too well i suspect (     ) - or are you really suggesting that the screw heads should be "v"'ed to create some sort of punsie/artie effect.    0/10 for your assignment cobber - tutorial maths 3 nights/week. 0/10 for your assignment cobber - tutorial maths 3 nights/week.geoff 'n jude |
|
|
|
Post by cobber on Jul 31, 2011 20:36:30 GMT 10
NO!.... what I'm saying is that at the moment the slots are vertical, if they are turned 90deg either left or right to make them horizontal me mate gets to sit in the second row from the front...... but you're right, I didn't do too good at geometry or geography..... or anything else..... at school  and it is post dinner time and some people should not post..... post dinner time  Cobber.
|
|
Deleted
Deleted Member
Posts: 0
|
Post by Deleted on Aug 1, 2011 19:17:33 GMT 10
;D ;D ;D ;D ;D Hiya Geoff and Jude.... Yup..... Clean bowled him....  Took out the middle stump     If he thinks there is bugger all difference between 45 Degress and 90 degrees .... well then we will firstly boil up a bath tub full of water to 45 degrees.. and sit him in it... Then we can turn the wick up and bubble him up to 90 degrees... I know there is a difference between degrees of angle and degrees of Celcius ......... But the experinece will etch clearly in his mind the the difference between the 2 numbers. ;D ;D ;D ;D ;D Meanwhile ......my solicitor informs me that having the photo of the awning SHOWING ORIGINAL VERTICAL SLOTHEADS INSITUE before i started work ( i choose not to use the word restore any further as i have been kicked out of the guild ) i have a water tight case and the slotheads will remain vertical .   At least when the Old Supalite is finsihed it wont have those 3 phillips head screws stuck in it like "Ol 36 "was given at Mt Gambier back in 2008             ( names of perpetrators witheld   ) Now THAT .. is embarassing....... and a crime against originality    ;D Managed to get the right side sanded back before i ran out of daylight this arvo. Cancelled all engagements ( except the pub thursday arvo  ) this coming weekend.. Hoping this brilliant 24 degree weather holds up. Its head down .. arse up and get the thing sanded and primed...door and windows off.. Hmmmmm.. ::)Perhaps head down.. arse up might not be the best position to try and stand on a ladder with 4 litres of paint and a brush...could get messy  Cheers Reddo |
|
Deleted
Deleted Member
Posts: 0
|
Post by Deleted on Aug 11, 2011 20:07:12 GMT 10
Update .. Well folks i have been busier than a "London Looter" this past week   Even managed to " torch" a few sides on the Supalite....  Although the photos i put up the day i dragged the van home show what looks like good base paint on the sides , the old van had some major paint issues. The only side that had a good even /clean base coat of paint on it was the side that was well sheltered from the 30 years of elements that the other 3 sides had been exposed to.. even though it had been undewr shelter all 3 sides except the door side had peeling .. flakey paint.. So.. after tidying up the front i removed all the windows and hardware all artound the van... then tackled the "drivers side".. it had a lot of dimples and flakey paint. I sanded it clean then give it a coat of "3 in 1". Dimples showed up every where .. so i filled the dimples with "Builders bog"... Let it dry for a day and sanded it....end result... looked like crap.. So.. out with the 5kg gas bottle.. 2 metre hose and flame thrower.. There is something about aiming a roaring flame at timber that gives me the jitters..     Hold it in one spot on 50 year old ply too long and ya could have an inferno on your hand.. dont hold it long enough and ya wont shift the old oil based paint with the spatchular... Took about 2 hours to lift the undercoat and buidlers bog plus the two or three coats of oil based enamel off and get the van lookin like what i call "Grandmas wardrobe".. aka.. nice old natural bondwood appearance.. a hell of alot quicker that sanding i tell ya. Just gotta watch the firey bits of dry paint dropping on the ground and setting fire to the stuff you have already scraped off.. fire burns upwards.. and .. the van is upwards from the fire..  so.. one eye on the peeling paint and one eye on the foire outbreaks around my feet and the gas bottle.. as i said... busier than a London looter folks  Completely stripped the .. what i call the drivers sided... ??.. waddya call the side of a caravan that hasnt got a door in it.. "the off side".. the" right side.""... "The side without a door in it side" Who cares.. its naked now... 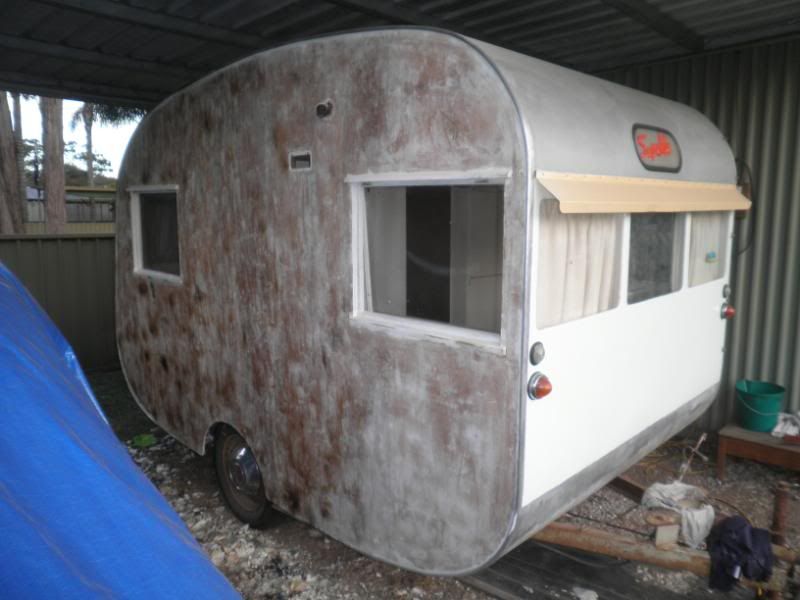 and so is the back.. 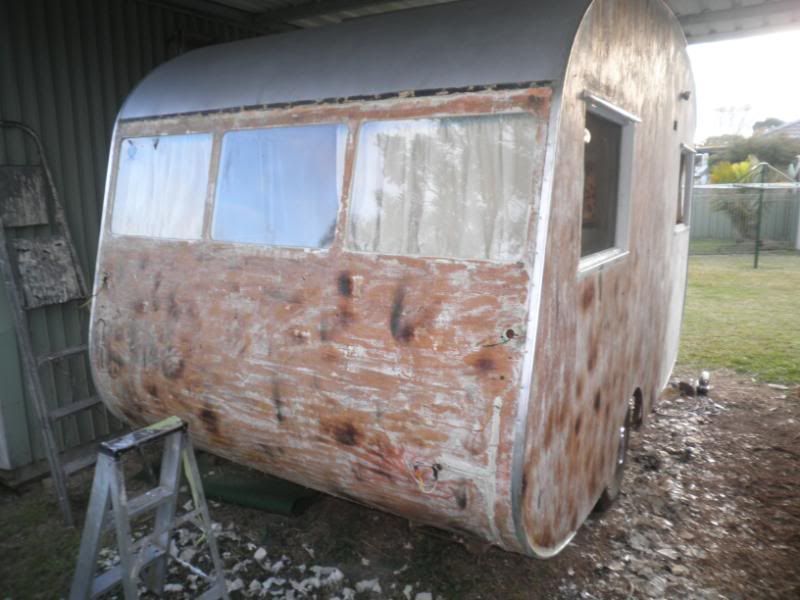 Gotta give the side and the back a good sand to knock all the burnt paint dillberrys off...then 2 coats of undercoat .. then move on to the top coats... Would love to leave the rear end as raw timber with a few good coats of clear lacquer over it to show the following traffic that the van is made of timber... Hey .. if ya got it .... why not flaunt it ;D Only prob is that if i do that i will be relogated to 100th on the waiting list to get back into the vintage caravanners restorers guild... Hmm.. couldnt have that now.....or...  .could we. ;D ;D    Not this weekend.anyway... Cessnock swapmeet is on and i have to find something to replace this with in the panelvan...  Whats that ya say?? 8 weeks to the spring tour...ooooooooooo.. bugga..Ifn i am gunna have the Cadet finished by then,,,,, well then...... i am gunna havta get fairdinkum about this restoration caper aye... Might have a bit of a go next weekend... perhaps  Until then..... Vertical Slot heads rule.. OK Reddo |
|
|
|
Post by Geoff & Jude on Aug 11, 2011 21:47:59 GMT 10
hi reddo she's coming along nicely. ;D ;D ;D won't be long before you're out and about showing her off to everyone.    you might even have her ready for a test run to kiama.    geoff 'n jude |
|
halps
Full Member
   Get out and enjoy your van man!
Posts: 229
|
Post by halps on Aug 12, 2011 18:10:18 GMT 10
Reddo,
Great job that you are doing there. You mention the wood look...has anyone ever done a caravan with the wood-style panel like they do on the cars? Was that ever part of the "scene" back in the ye olde days of good?
HALPS
Younger than the ye olde days of good
|
|
Deleted
Deleted Member
Posts: 0
|
Post by Deleted on Aug 28, 2011 19:45:50 GMT 10
Bit of an update on the Cadet.  Weather has been a bit soggy / wet of late around newy  ... Not ideal for getting a top coat of gloss enamel on a plywood caravan out in a carport. Had managed to get a coat of primer sealer undercoat on the van ... then noticed a few "divets" that needed levelling up. So .. got into it with a bit of builders bog. 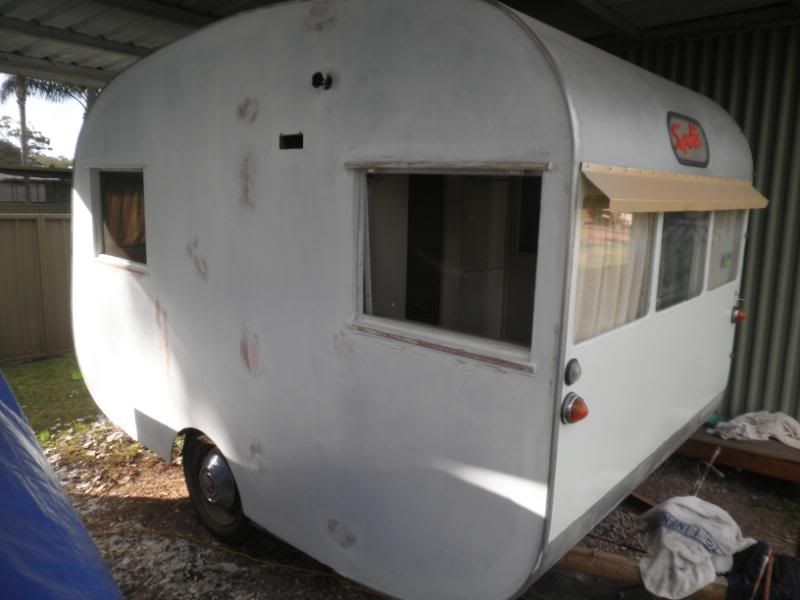 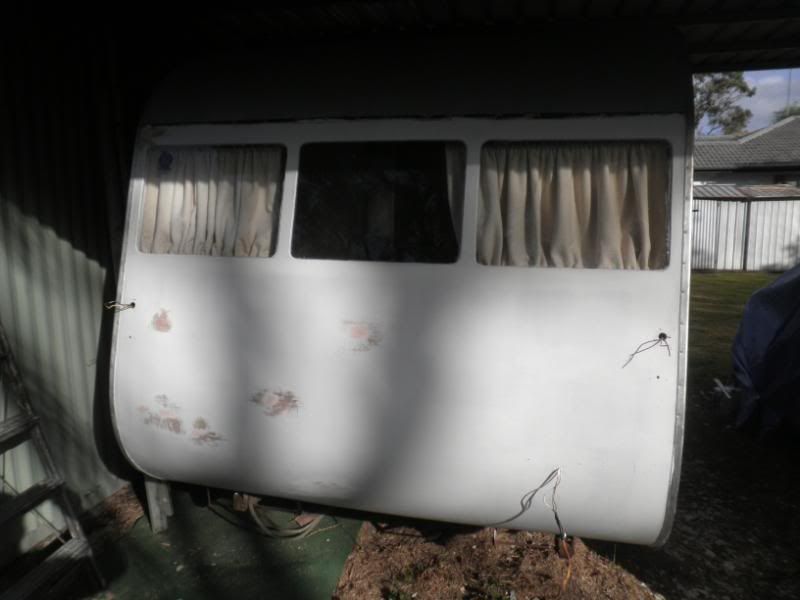 Give it a week to harden in the cool weather then sanded it off. Another coat of primer sealer undercoat . Feeling pretty pleased with the even surface.. (blank canvas) I set about giving the van its first coat of oil based enamel topcoat... colour is "sea swell" which is bloody hard to tell wether you have covered the white undercoat or not...  Twas a dull overcast day ..end result when it dried was a surface which closely resembled a ploughed paddock... or similar to a painting done with a straw broom  Oooooooooooooooo... bugga... time ta send and S.O.S to the bro .. aka .. someone who knows what they are doing.......he will set me straight. So.... on saturday morning he arrived with brush, roller and talent. Problem was that a very heavy fog had rolled in over night and at 9.00am ya couldnt see your hand in front of your face,,,  everything damp... An hour later and things had cleared up..... 2 of us with a stack of 240 Grit ..No fill sand paper went at it for an hour or so. Ready for paint... sun came out so i left the bro to it... 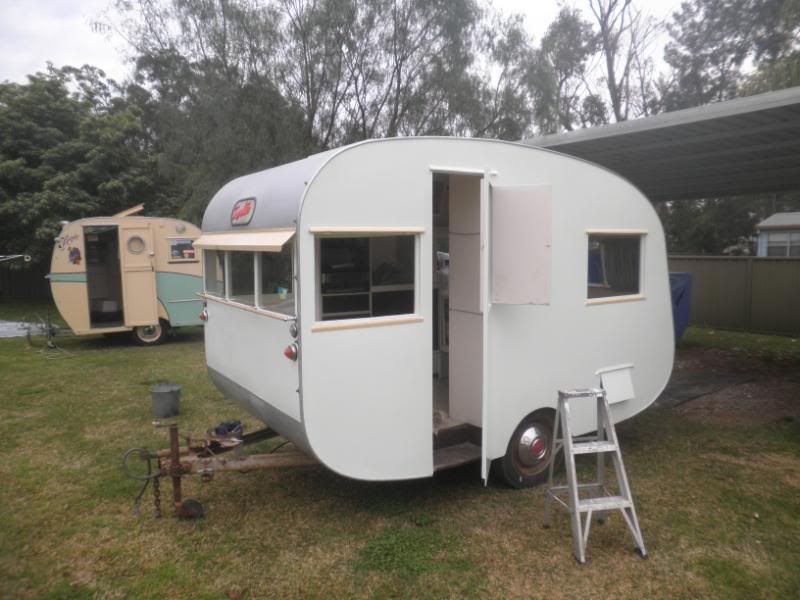 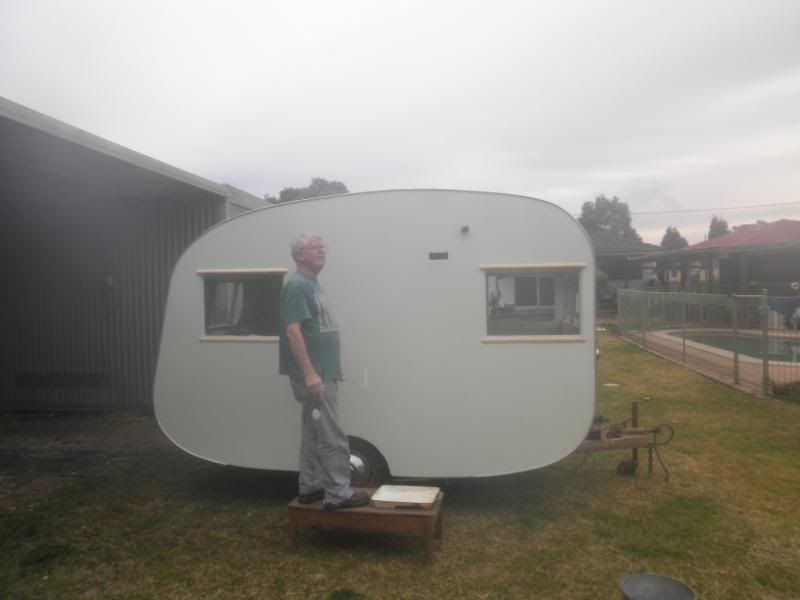 You will have to forgive him for goofing off... he loves old planes,,and .. so do i..  i snapped that shot just as an old tiger moth came into earshot...... all work stopped until it had passed over head and that magnificent noise had droned off into the distance... Then the sun went away...   .... and rain drops started appearing on the pool. Just managed to finsh two sides and the rear end. Shoved it back in the car port. all good. It has dried with bugger all brush marks and has a brilliant shine to it. ...... Not as good as spray painting .. but good just the same. While i was removing the bits and pieces off the outside of the van the other week i noticed that the old power inlet wiring....  2 reds.... scarey considering there is a certificate of compliance up in the cupboard which was issued by the Central Coast County Council at Gosford back in 1962 saying that all was legal.. ummmm.. there should have been a red... a black ,, and the earth wire which is covered in green sleeving..   It will get sorted when i fit a new 15 amp inlet and remove the old 10 Amp rota main switch from inside the plate cupboard and replace with a double pole earth leakage circuit breaker effort. Had a bit of a go at the draw bar and coupling this arvo. unbolted the coupling and then attacked the drawbar with a wire wheel in the drill. Very little rust , bugger all pitting, so it was an easy clean up and paint. Will have to sandblast inside the coupling mount. remove the jockey wheel to sand and cleanup.. .. paint .. then make up 2 extra crush tubes to hold the coupling on solid without squishing the C section. Got me beat why they didnt do something about this issue back in the fifties..  2 long bolts with crush tubes at the rear and 2 X 1 1/2" long bolts through the top plate at the front...   I can appreciate that there is less likelyhood of crushing the c sections due to the bolt holes being close to the apex of the drawbar.. bur how hard is it to simply knock up 2 extra tubes / spacers and wack em in there.. if someone has a plausable engineering theory why they left the 2 front tubes out .. then i would be interested to know.    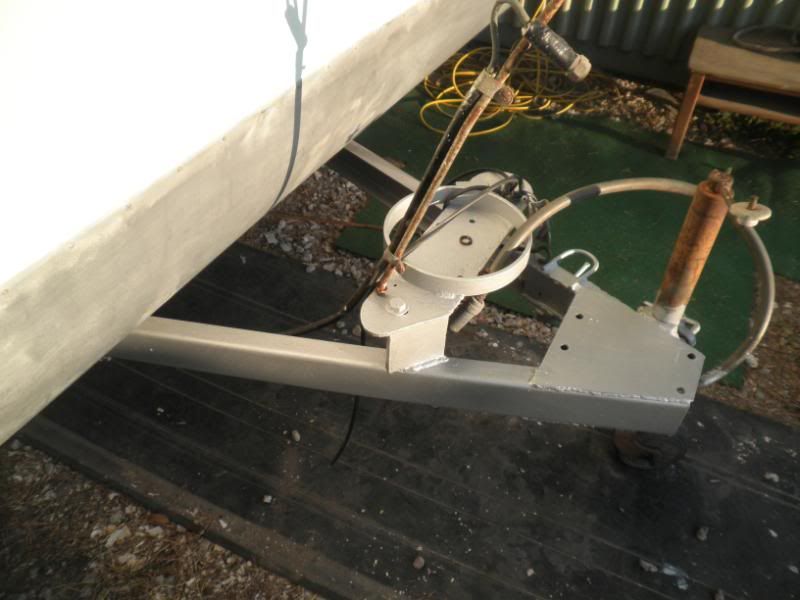 Sometime back i recieved a pair of chrome FJ rims from a well know Vintage van Amigo down Mexico way   I dragged them out of the shed and gave em a good clean up and a hit with rust converter on the inside to tame the flaking chrome and stop the rust. wasnt until i had finished that i noticed one is 15mm wider than the other.......Never mind .. ya cant look at both sides of a caravan at once .. can ya.. The important thing is they are within 5mm of the same offset and that is what matters up under the wheel arches..   Managed to do a bit during the week on the window frames..sand and paint along with the hinge up fly screens . 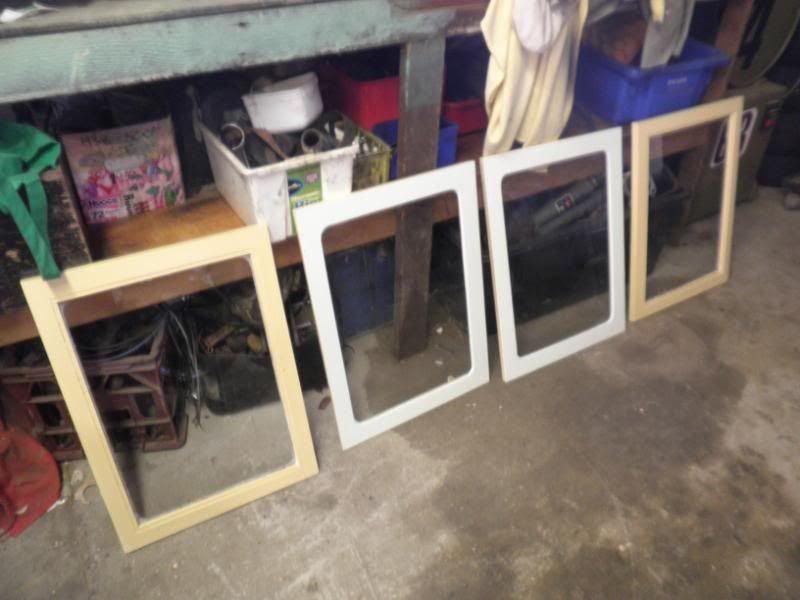 .. and spent a lot of valuable drinkin time on cleaning up all the brass and chrome window and door hardware... 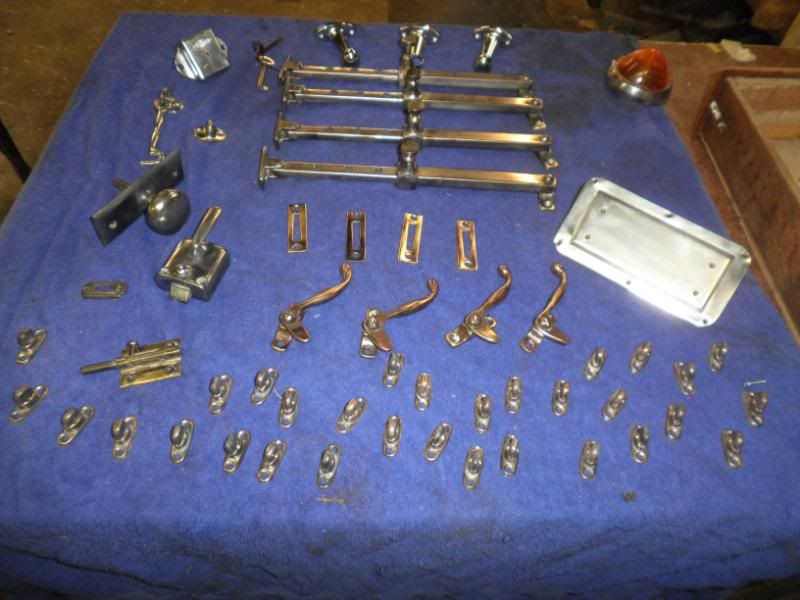 Dozens and dozens of slot head screws.. 4g X 3/8" up to 1 1/2"X 6g .. all polished and shiney... gunna approach the slot head society and show em just how dedicated i am .. who knows..... they might make me and associate member for my efforts...   Got bits n pieces scattered all over the joint.. hopefully i will reach the "resto turn around point"soon and start to piece things back together.... My site supervisor has given me the arvo off... so i can cook her a sausage sanga and make her a 100s and 1000s ice cream cone.. .  and..of course we all know that when the grandaughter says... "stop works grumps, i am here"..... well then.,, ya just havta stop work dontcha....  Regards' Reddo |
|
|
|
Post by Don Ricardo on Aug 28, 2011 21:14:59 GMT 10
Hi Reddo,
Good to see you're making your customary progress with the Supalite. I say 'customary' because once you get going on a project you really seem to achieve a lot in a relatively brief time, on most occasions anyway. Helps having a bro who is handy with a paintbrush, eh? All you've got to do is scare the Tiger Moths away so you can keep him on the job! ;D ;D ;D
Lovely to see the pic of your granddaughter. She looks so grown up, but I'm thinking she must be four or thereabouts? From memory she was born at around the same time as our oldest grandson.
Don Ricardo
|
|
|
|
Post by cobber on Aug 29, 2011 8:10:54 GMT 10
On ya Reddo, Good to see progress and good to see you're sticking to your principals   I wish I could brush paint on without it looking as though I used a straw broom but... I just have to admit I can't do it, why don't you get Bro to teach you how it's done then you can show me. Can't give you a reason why they wouldn't use crush tubes except to say if they didn't fit 'em and the “C” channels weren't crushed...... they weren't needed.....cost saving  I'll forward your application for associate membership to the “Slot Head Screw Society”..... they do insist on certain conventions being observed you know, it's not just a matter of using slot heads, it has to be done correctly   . Keep at it old mate, she's looking good. Cobber. |
|
|
|
Post by Daggsey on Aug 29, 2011 10:20:09 GMT 10
|
|
Deleted
Deleted Member
Posts: 0
|
Post by Deleted on Aug 29, 2011 20:18:08 GMT 10
S.H.S.Society member No: 14 wrote: " I'll forward your application for associate membership to the “Slot Head Screw Society”..... they do insist on certain conventions being observed you know, it's not just a matter of using slot heads, it has to be done correctly . OH GOODY..... i am being considered for membership......cant wait... cant wait... can't... Ahem.... settle down Reddo .. you are only getting an associate membership nomination.... Gunna havta do a lot more grovelling and slot lining up to get into the inner sanctum. Don R The resto ( i prefer to use the word "refurbish") work is relatively easy when ya have a good base to work with..... Dunno wether i have been spoiled over the years by scoring good solid old vans to work on. i have become choosey about which vans are worth saving. and.... i take my hat off to those on here that tackle vertual rebuilds. Takes lotsa time , effort, patience, enthusiasm... and dollars . Looking back now at that big van i brought home from down the central coast i reckon i could have done it justice. if i had just made a start on it i would have built enthusiasm .... I know where it is sitting now and perhaps if i am still keen when the Cadet hits the road i might go make em an offer.  Yerp... Hannah was 4 on the 8th August. Daggsey.... Jeff uses a 150mm X 40mm roller to lay the paint on evenly.. and yes he uses a brush about 75mm wide with long hair to cut in around the edges before rolling . Best results are achieved on a warm /hot / still day and ... the hotter you get the paint... oil based enamel.. the better it flows out /levels and holds its gloss. Needless to say ... any finish is only going to be as good as the prep work underneath. In this case we had to scrub for an hour with 240 grit to get most... not all of the "furrow" out i had left in the first coat due to me being a tear arse and trying to get the paint on in cold weather. Spent an hour on the coupling tonight. all freed up and painted. I have been granted 2 full days in the backyard this weekend. Hope to get the tyres on the chromies... brakes dismantled and cleaned, coupling back on .. windows fitted...... Ummmmmmmmmm.. wait a minute.. i have a gearbox to fit in the panelvan as well.  ... never a dull moment.. and ya wander why i drink .  Spring Tour closing in fast... so much to do...must rush... must rush.... Regards Reddo |
|
Deleted
Deleted Member
Posts: 0
|
Post by Deleted on Sept 5, 2011 14:10:39 GMT 10
Yo.. sun has been out.. and there has been a bit of progress on the Cadet.. Spent saturday and most of fathers day in ... under... and ... on top of the van... Heres a few happy snaps of where i am up to.... crush tubes in and thick plate under the bar to hold the safety chain... old chain was bolted through 2mm plate.......  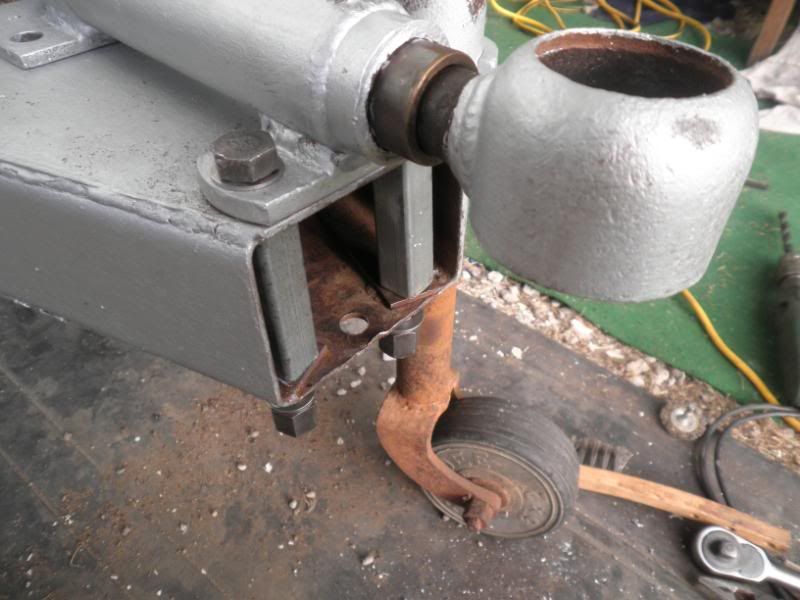 new chain will be long enough to reach the towbar and not bolt to the gooseneck...... thats a big no.. no.  ripped the wheels off and cleaned repacked the wheel bearings.,.....checked the brakes... all good... 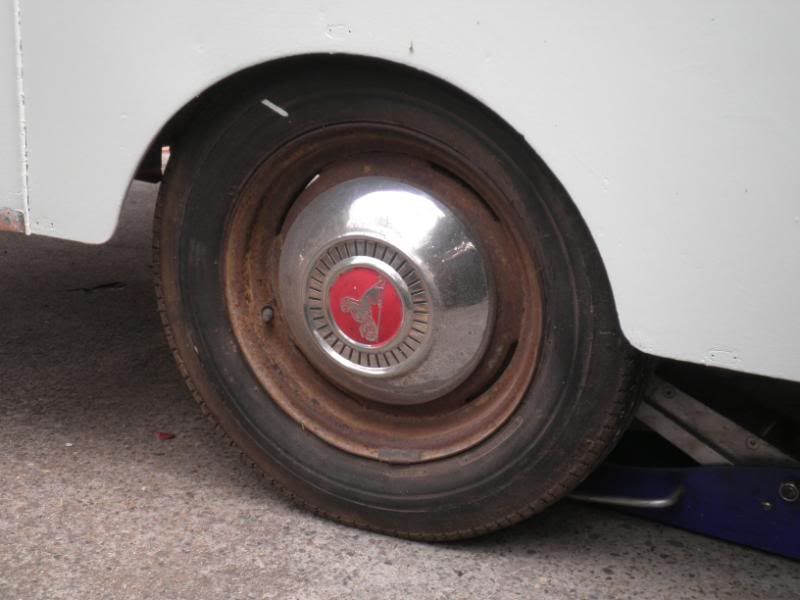 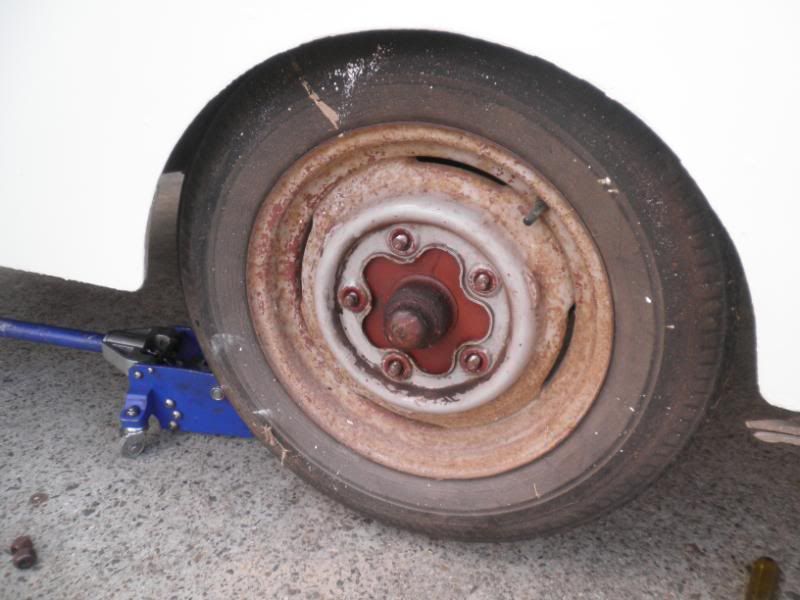 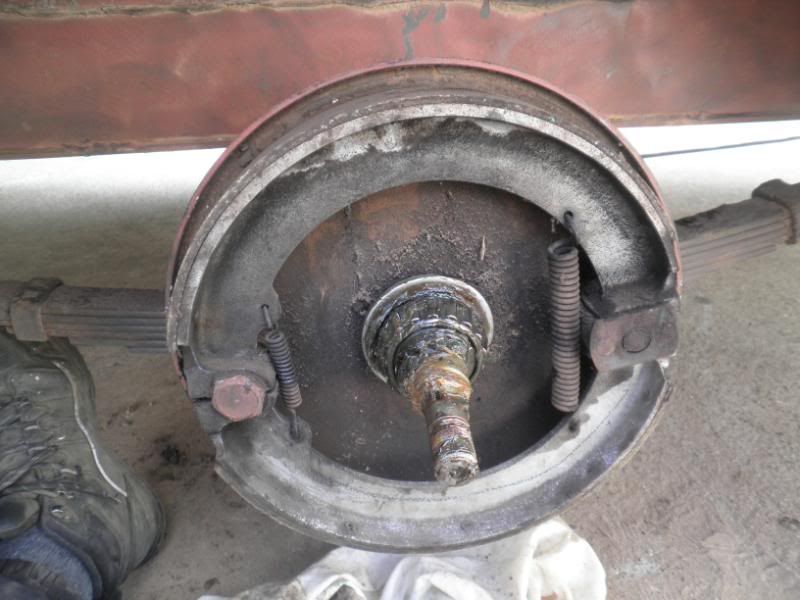 heres a shot of the old brake linkages back near the axle. No cable from the front.. just a solid 3/8 round bar. 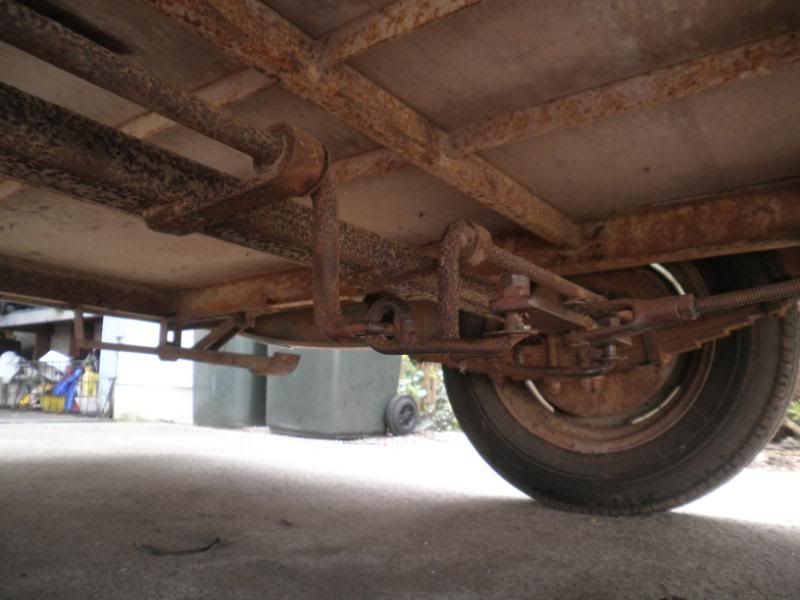 Picked up the 2 chromies .. now fitted with the same tyres that are on the ute....15x165x80 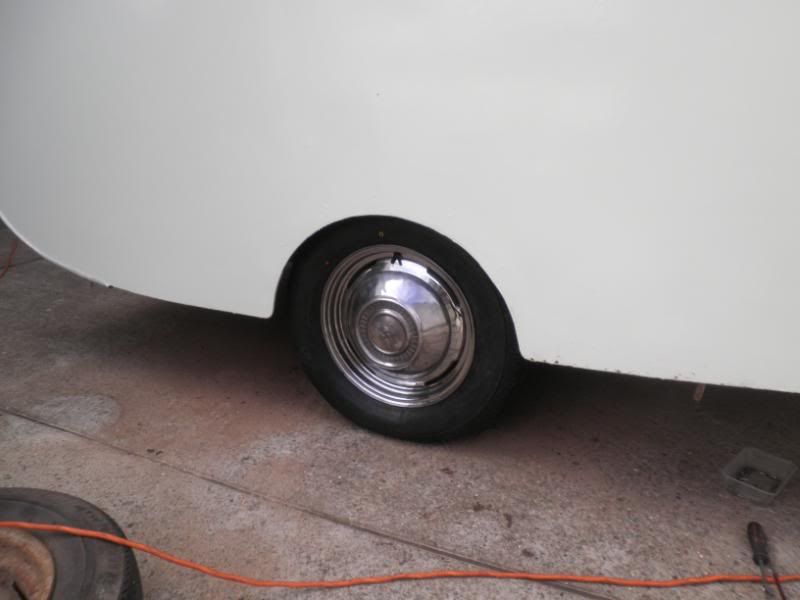 Gotta give the caps a polish and re-do the red in the centres. ripped out the rear wind down leg thingys .wire wheel and painted/ greased/ refitted... 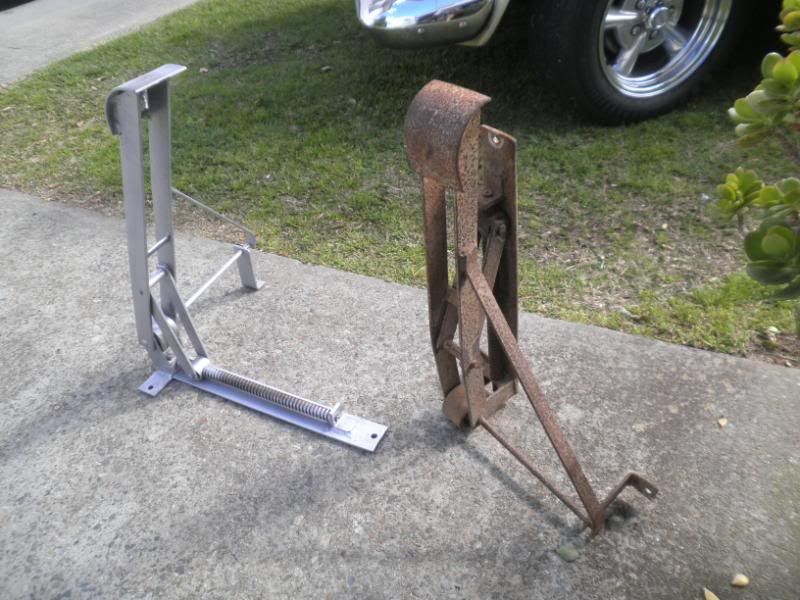 Coupling/ jockey wheel / towball ( thanks Hillbilly) all cleaned and fitted. 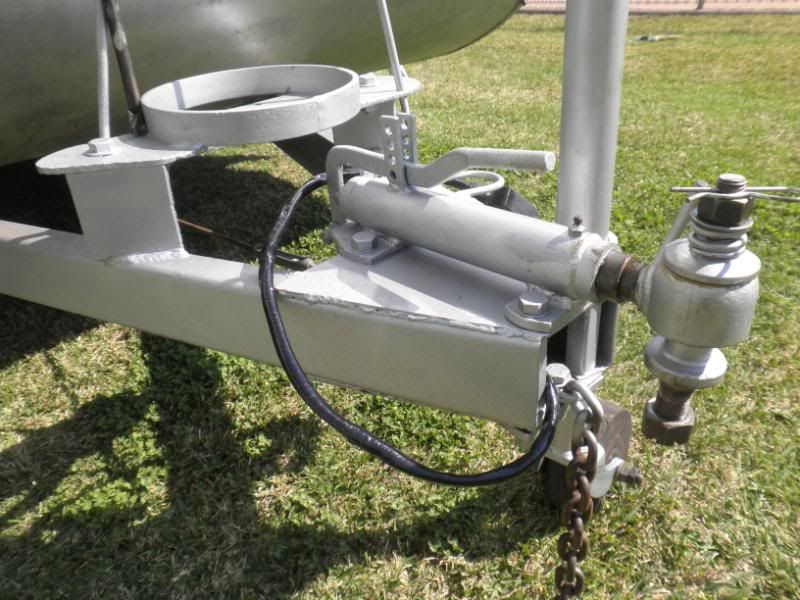 tailight and rear indicators back on and working. 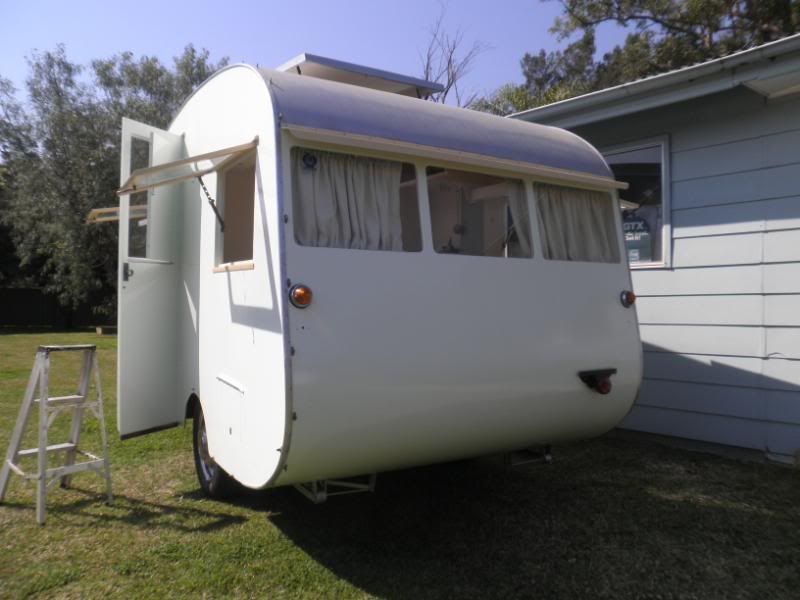 refitted all the windows and latches etc 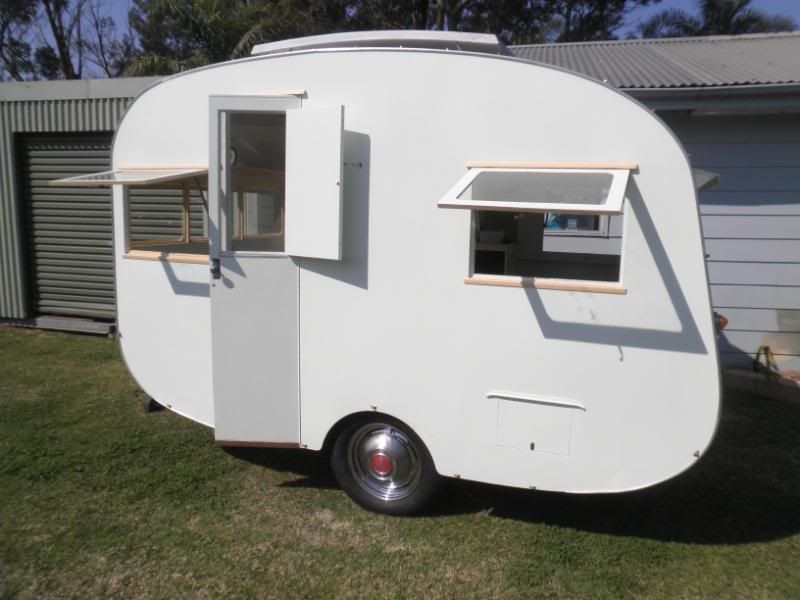 made a bit of a start on the inside.....sanded and painted the dinning area 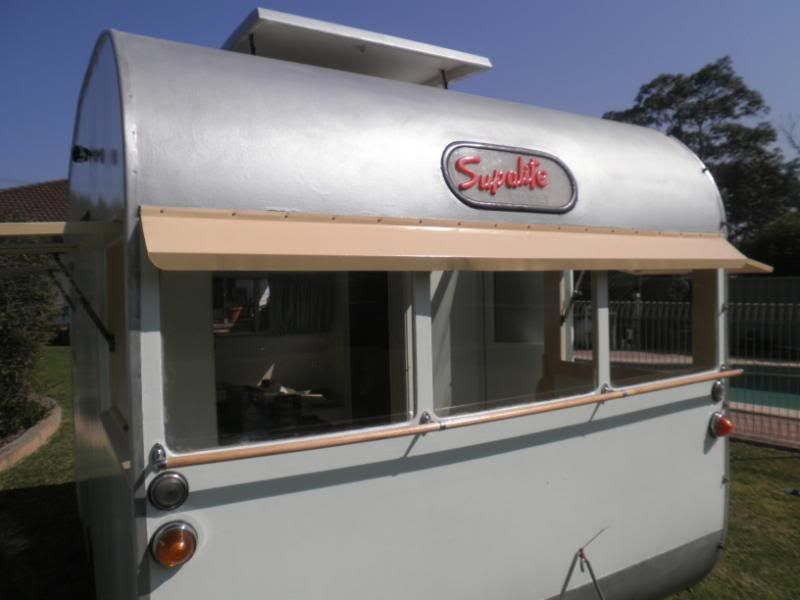 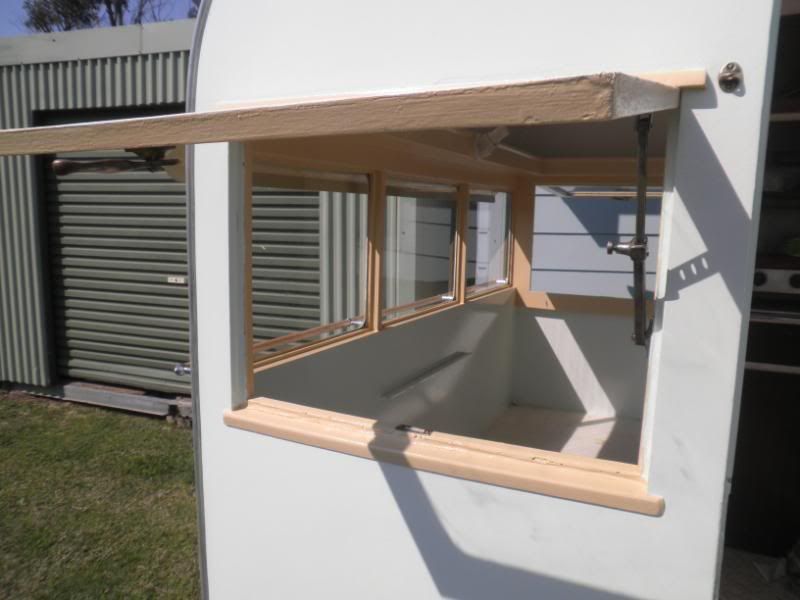 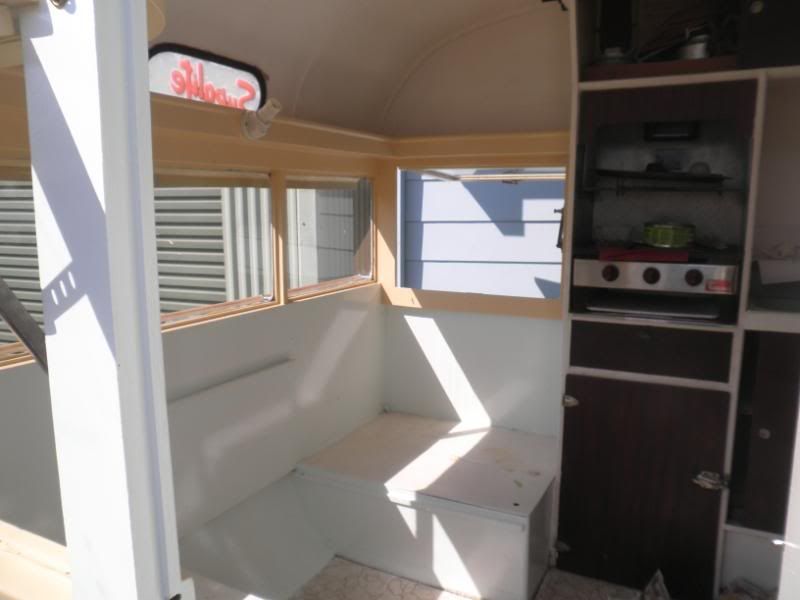 was working away happily yesterday arvo. Son Joel rang me to say there was an old van on the side of the road not far from home.. Here tis.....  Needless to say i have made him an offer...... ;D ;D ;D ;D Looks like an old Valiant or something similar. ply sides . diamond pattern aluminium roof / front and back. .. What a mess. However... has good stove and fride ... and lotsa usefull bits like moulds. hinges knobs etc. I will know if i am the lucky ( or should that read .. unlucky "owner by the end of the week, On a roster day today... took trish to hospital to get a stent installed and a couple of kidney stones removed. They have just rang.. she hasnt handled it too well... so i am off to the hospital with a bag of overnight gear for her. Looks like the bachelors will be on tinned spagetti for the next few days....  Gotta run CYA Reddo |
|
|
|
Post by DC3Td on Sept 5, 2011 18:05:03 GMT 10
Gday Reddo. You can always get another van anytime,anywhere but harder to get a good missus, so hope all goes well for Trish. Your Cadets` coming along nicely btw. cheers
|
|
|
|
Post by Roehm3108 on Sept 5, 2011 19:22:30 GMT 10
Goes without saying, Reddo, all the very best from me and I'm sure, all on the site to the cheese and kisses. Hope she improves soon!
Ray
|
|
Deleted
Deleted Member
Posts: 0
|
Post by Deleted on Sept 21, 2011 19:14:31 GMT 10
Hi All Jeff rolled up last saturday around lunch time in his series 1 major works truck.... 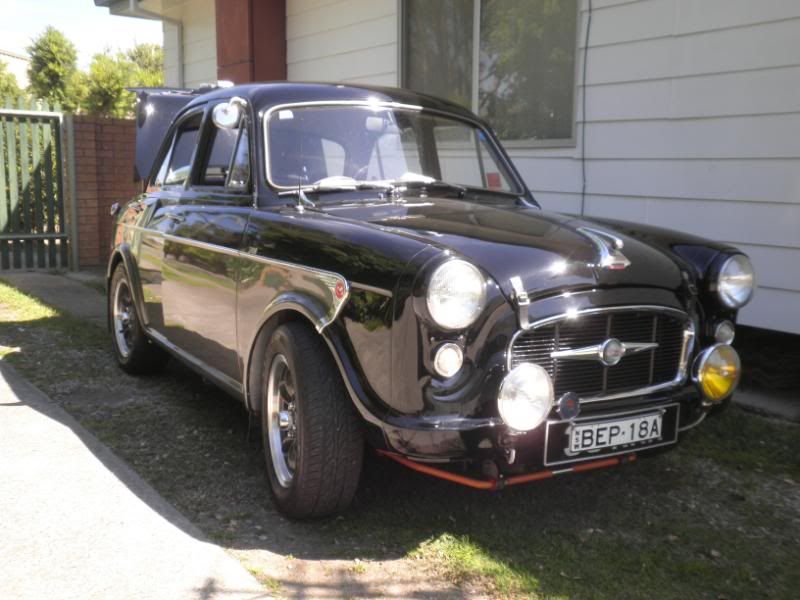 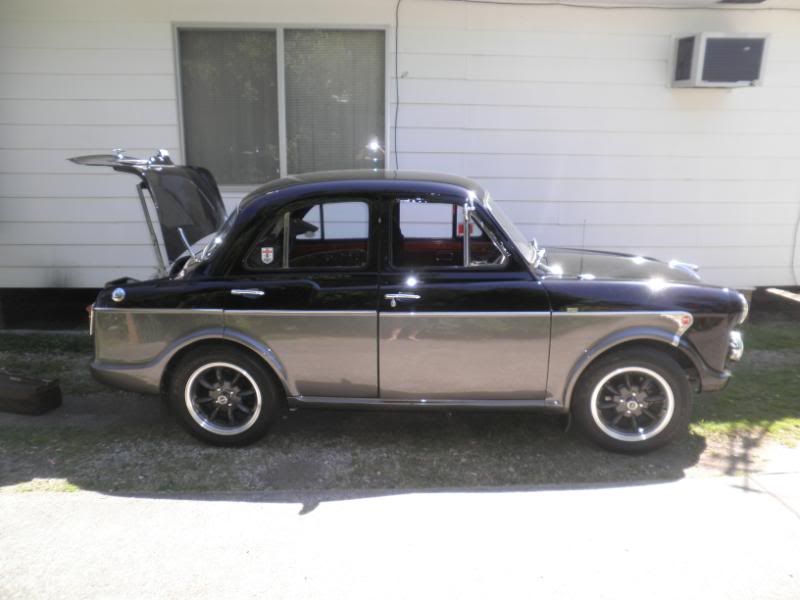     He was keen to rip into the van and get a few colours on it. I had just finished fitting a new 240v /15amp inlet... double pole circ breaker and wiring /hiding a few extra power points around the van . So with that finished we fiddled around with a few designs for a stripe on the sides.... Used a long piece of d mould timber held by hand at each end and bent to set the curves right, then sketched it out with soft pencil . Then masked it off and Jeff set to work infilling the flash/stripe. Always best to set out the door side first so that ya get the shape to sit evenly between windows and bottom edge etc... 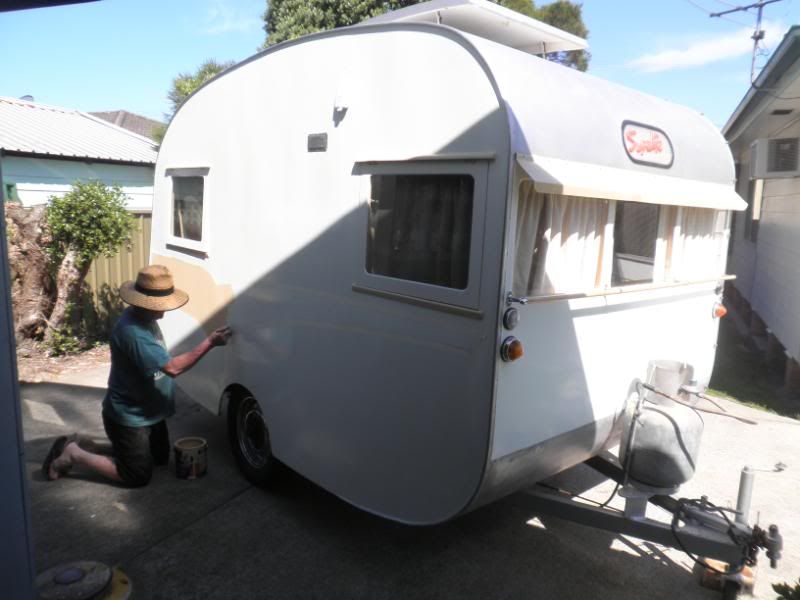 Only took around 20 mins to come up with a shape that sort of suits the van and paint the infill. I had decided to use "Birdseed"as it ties in with the colour scheme inside........ plus the fact i still had 3 or 4 litres left of the second can we used on Rosie...  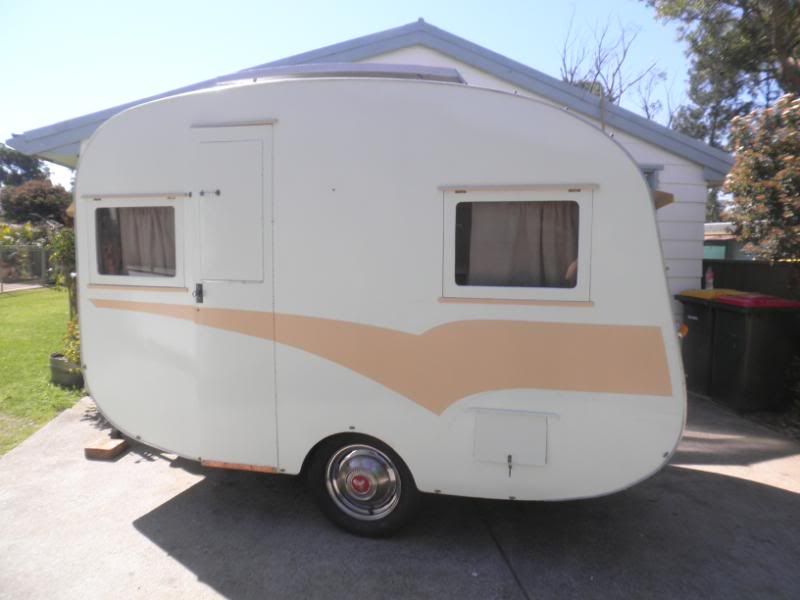 Bit different .. and .. more like what you would find on a 60s van than a 50s. I know i will have lost brownie points with the Bondwood Restorers Guild.... but hey..... i can live with that....   Finished both sides in around 1 hour ..Couldnt do a thin line around the edge of the flash while it was wet . So... we moved onto the "Christening".. As usual i hadnt settled on a name ... Jeff was standing there with paint dripping off the brush waiting for me to utter the name.. I had a short list.. Mildred.. Ethel.... Daisy.... Polly( so i could put the painting of the Rosella on the door .. Polly wanna stubby  ).. There was one other name that i had been mulling over since the day before.... Not an old fashion ladies name..... but the name of a very close mate that had died exactly 12 months ago on the friday.... 16th september 2010.. Some of you knew him ... So it was agreed the van would get a blokey type of name... Jeff nodded in agreement and set to work 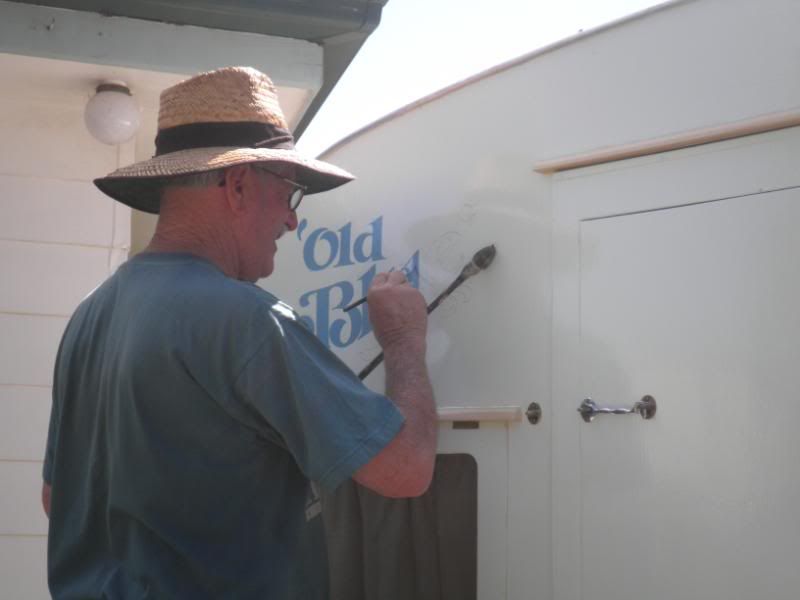 Took longer to signwrite the name than it did to bung the flash on either side... but eventualy it was done and we could down tools for a well earned beer... 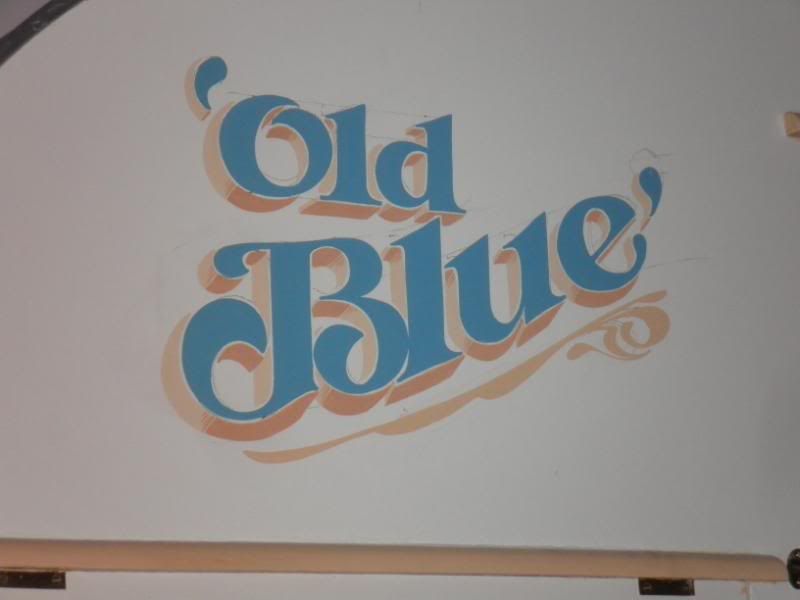 Needless to say that was the end of all progress for the arvo.. One of the mates and his wife turned up.. then the eldest son with his partner and our little grandaughter... Boys in the shed.celebrating the naming  .. and sharing a thought for "Bill" the old Blue cattledog  . Girls up on the verandah talkin girly stuff.    . It was late when we packed up. Jeff called back down monday and whacked a line around the stripe. Done an extra bit of signwriting on the back as well.. Got stuck into the interior sunday and all this week. Mostly all finsihed painting inside now. Battery box in. Gas hooked up and working. all doors off and sanded .. getting a new coat of clear lacqer. Cushions back from the upholsterer.. $400. On shedule for a finsh around the long weekend. then spend a few days on the old panelvan getting it healthy for this years east coast spring tour. More pics of the outside and where i am up to inside in a day or two... Regards Reddo |
|
|
|
Post by kaybee on Sept 21, 2011 19:35:55 GMT 10
Hi All  Bit different .. and .. more like what you would find on a 60s van than a 50s. I know i will have lost brownie points with the Bondwood Restorers Guild.... Regards Reddo ....no way Reddo...them's FE colours and styling....puts it fair and square into the mid 50's.......   ....it looks brilliant! |
|
|
|
Post by Roehm3108 on Sept 21, 2011 21:21:18 GMT 10
What a great job you've done there Reddo, congrats!!! So is this van gunna be a "keeper"  Almost havta be with such a fitting memorial name   Reddo, you mentioned about laying off the enamel paint with a 150mm by 40mm roller. I presume you mean 4mm, as in the thickness of the nape? Or am I misunderstanding "painter talk"? Is it a foam roller or mohair? Really love the new colours too, guess we'll all have to look twice now that the Reddo livery colours are updated. Ray |
|
|
|
Post by Don Ricardo on Sept 21, 2011 23:50:43 GMT 10
Hi Reddo, The Supalite is looking...supa! No other word for it!    And I like the name. A very fitting tribute to your old mate. Don Ricardo |
|


 )..... and as for alcohol, you're there already
  and it is post dinner time and some people should not post..... post dinner time


 ..
.. 


 new chain will be long enough to reach the towbar and not bolt to the gooseneck...... thats a big no.. no.


