|
|
Post by willies on Apr 25, 2016 18:16:15 GMT 10
Hi Everyone, We have started our restoration of the 1953 SA built Bondwood VVan. We are restoring it so that it is comfortable and suitable for use. It will still have plenty of character from its previous use that we will maintain. I may have the odd screw that won't be a slot head. The info re the history we have been able to obtain so far is limited to the thread title. We have contacted the daughter of the last owner and what we collected in Feb 16 was how she remembered it from her childhood. We have also picked up that the colour scheme has been changed at sometime as there is a darker blue underneath the existing white and pale blue. Quite possible that the last owner purchased it as a used van that had had a repaint inside and out. The exterior paint job is of a very high quality and has lasted well and there is only minor flaking on the front sides. Seeing as it is likely to be a homebuild it is open slather for our new colour scheme. We have decided on a homebuild as there are some areas that indicate that some recycled materials have been used. We have found under the rear seat hatches lettering from packing cases. "This side up" and "Do not drop". If someone has any other info that would indicate a particular builder we would be very interested to hear and be corrected. Over the past few weeks we have been considering how we will be best to make the van as our own but with minimal changes to the existing layout. Today has been a day of visual progress as the start has been made for the exterior paint job. To start with some pics of when we checked it out prior to purchase 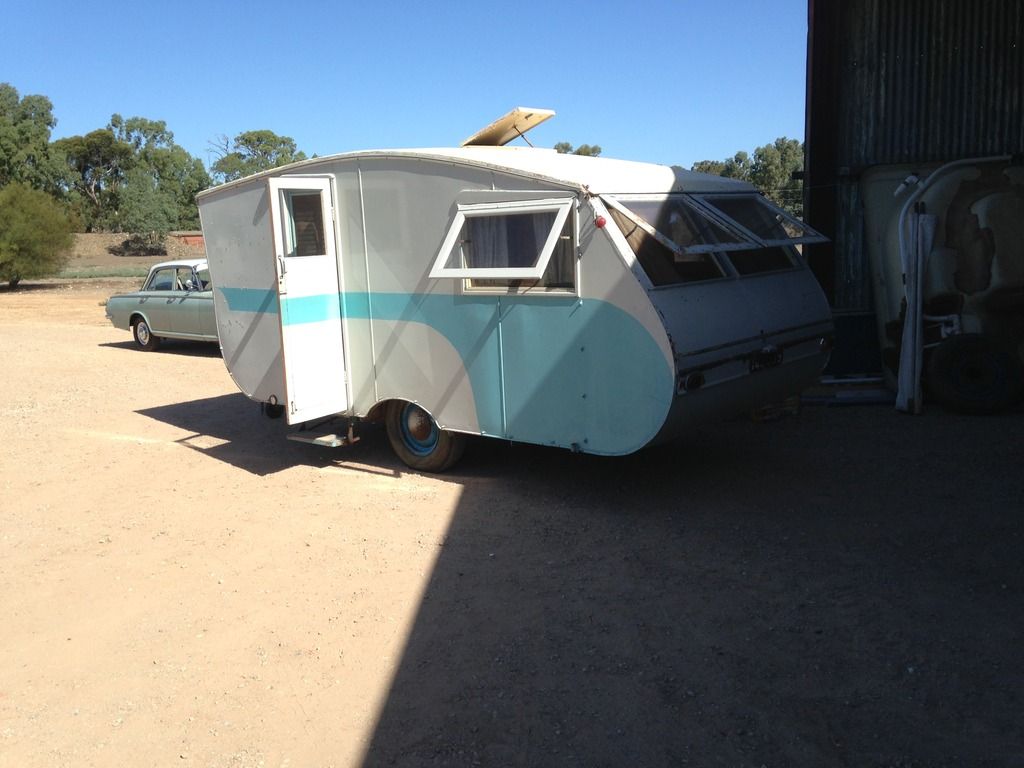 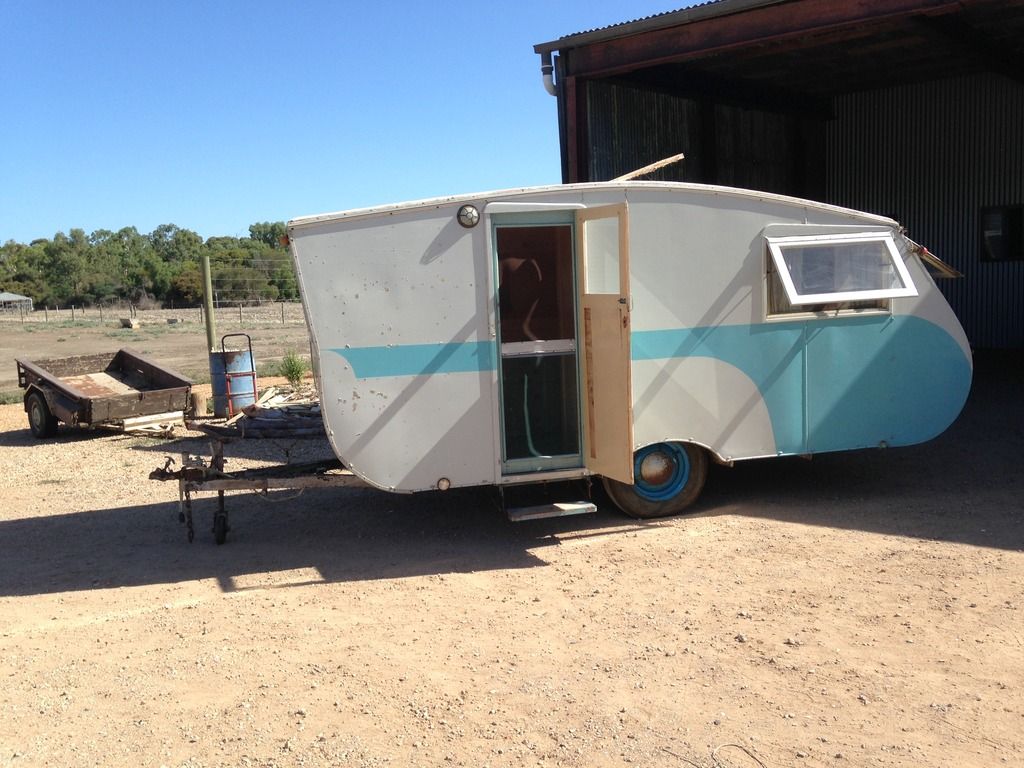 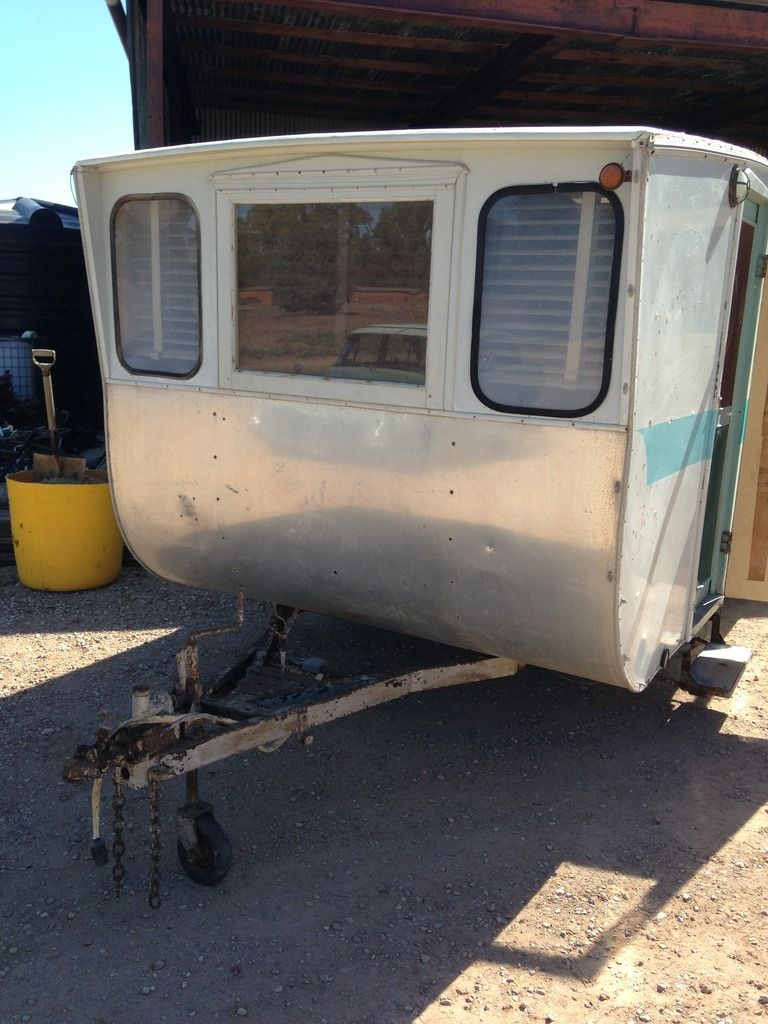 So today we have now got the first coat of primer on and completed 2 coats to the canvas roof. Roof had a couple of small areas that needed attention but in general it is in good nick for its age. Had to replace the bottom panel in the door as the inside ply was splitting and the outside masonite was swelling around the edges 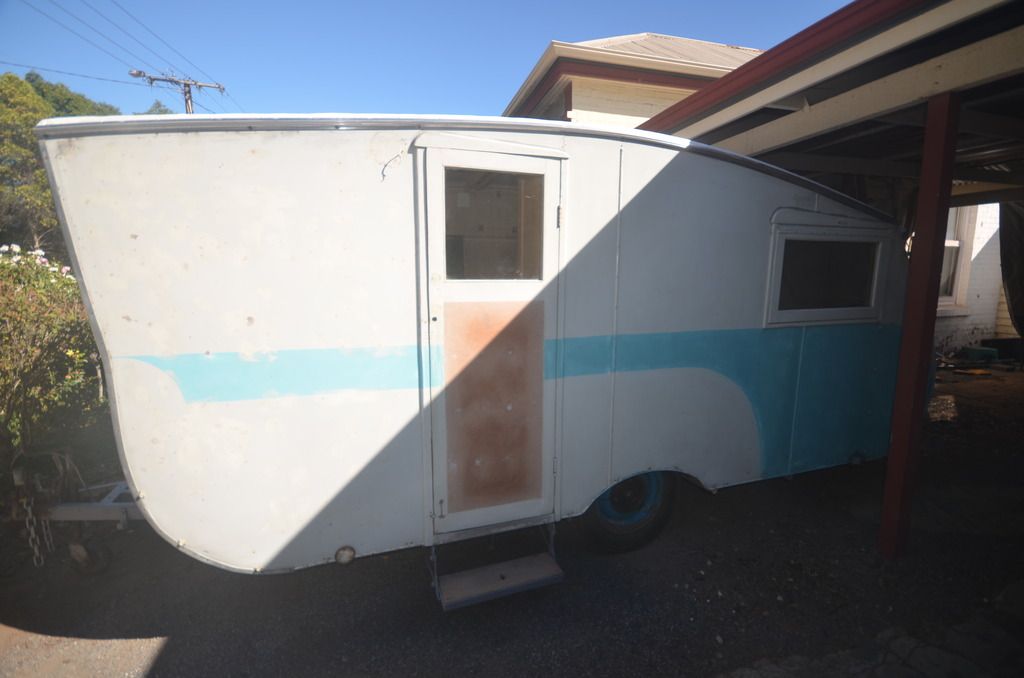 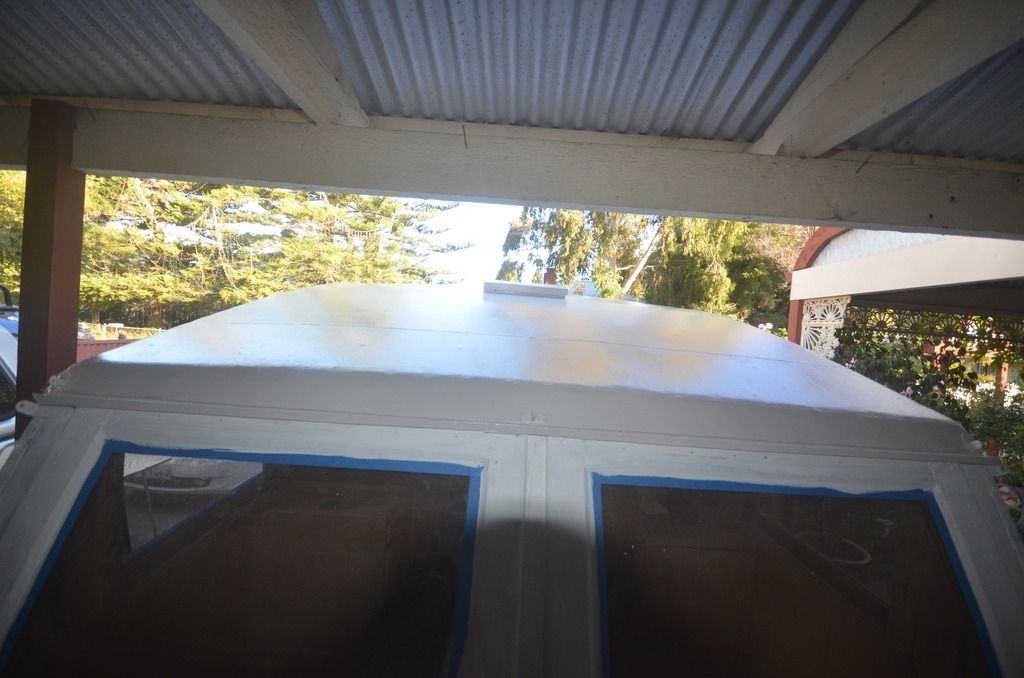 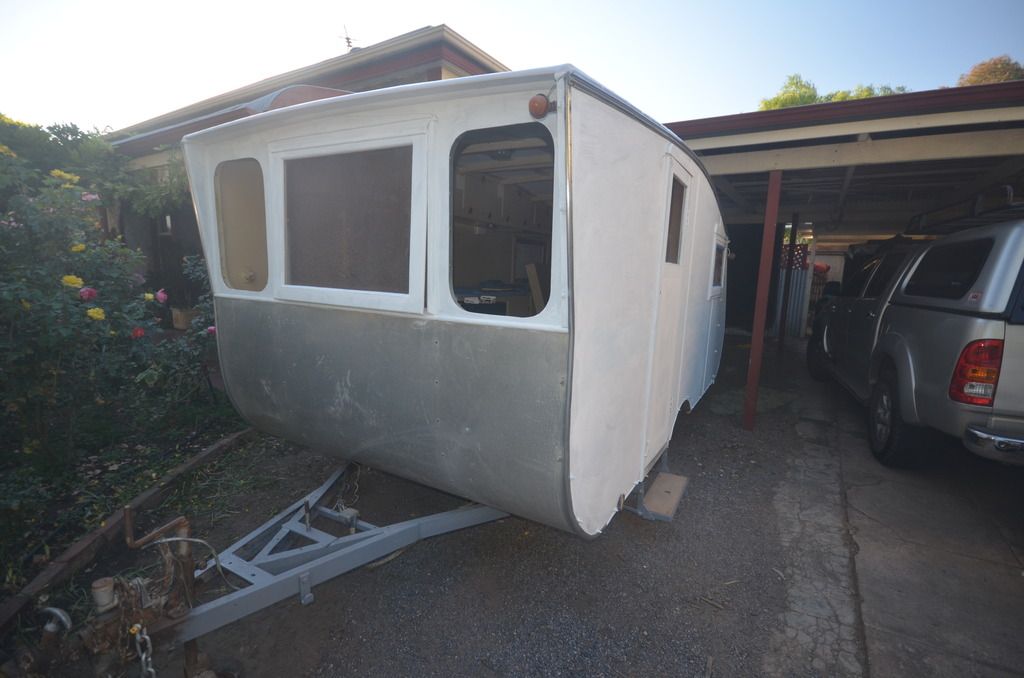 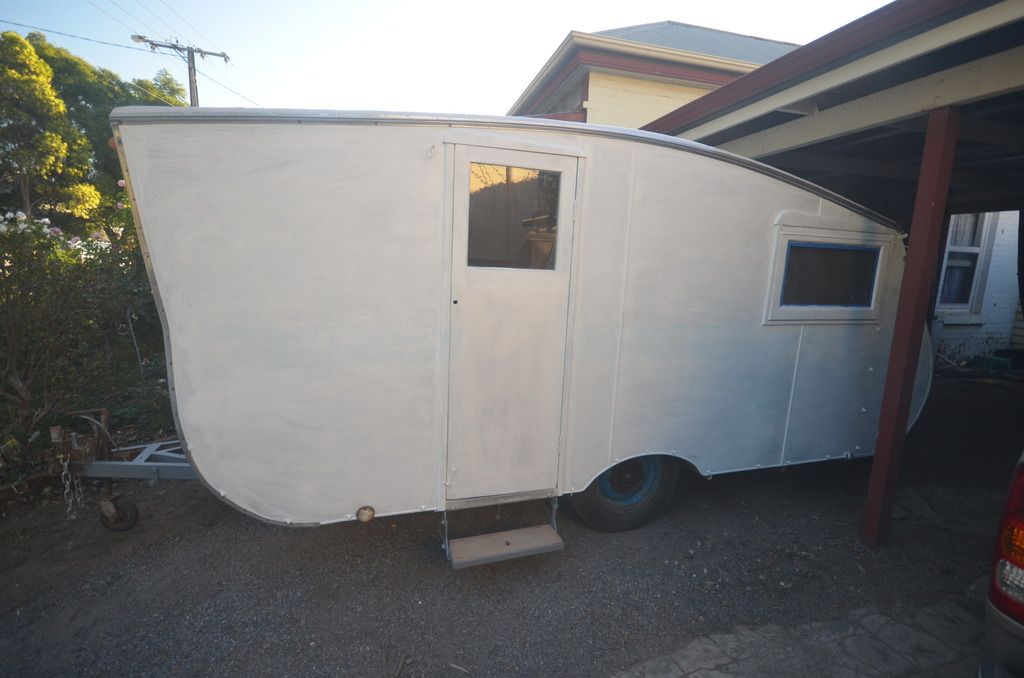  So far so good and happy with our progress. |
|
|
|
Post by Mustang on Apr 25, 2016 20:27:57 GMT 10
It's a great satisfaction to reach this accomplishment
|
|
|
|
Post by strugglebrook on Apr 26, 2016 6:39:58 GMT 10
Looking great, hope it inspires others to get stuck in.
JD.
|
|
|
|
Post by willies on May 16, 2016 21:18:31 GMT 10
Quick update on our progress. We are now painting the exterior before we get excited and hit the interior. The van was given a couple of coats of Zinser primer and sanded back. After a couple of minor repairs to the canvas roof I gave the roof 3 coats of Exterior Gloss Acrylic. Looks good. We are having a 2 toned finish on the van with a cream top half and a contrasting dark blue for the bottom half. Now we have 6 opening windows and 2 fixed windows and Brenda is lucky that we have only 2 that require to be sealed with putty. One of her favourite jobs! Now Brenda has always been the whiz with enamel painting when we have done home renos. Cutting in 6 windows was the second favourite job! Using Oil based Enamel for the Masonite. Anyway she has done one coat for the top half and when I give it a light sand she will be ready to go on the next coat. How many coats is recommended? While Brenda was painting outside I was busy removing all cupboard doors to get them ready for prep work. Going with a blue that should match the sink for the doors over a light cream colour for the rest of the interior. When you have an old van that has minimal aluminium ( that needs to be polished yet) everything bar the floor and sink gets painted. Quicker to paint our house I think. We should have a our cushions back soon as they all needed to be recovered. One drawback of having a table and seating at both ends of the van is twice the amount of upholstery work. Anyway it is coming along and we will be able to take it out for an outing in a few months. I removed the wheels one at a time and take to the tyre shop to have the old tyre removed ( they didn't like ). Clean them up and repaint before the new tyres are fitted. Old tyres were at least 40 years old. I got as close a size match as possible to the original but I had a hell of a job getting them into the wheel arch and back onto the hub. New tyres are just that little bit wider when inflated. I really do not want to have a flat somewhere down the track. May call RAA if I do. 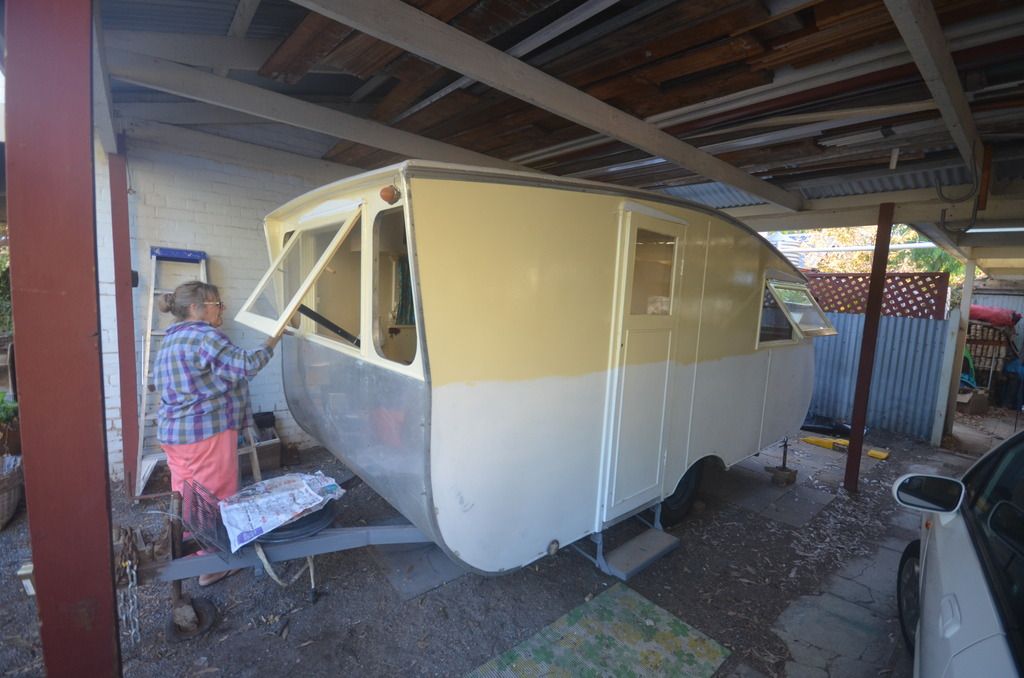   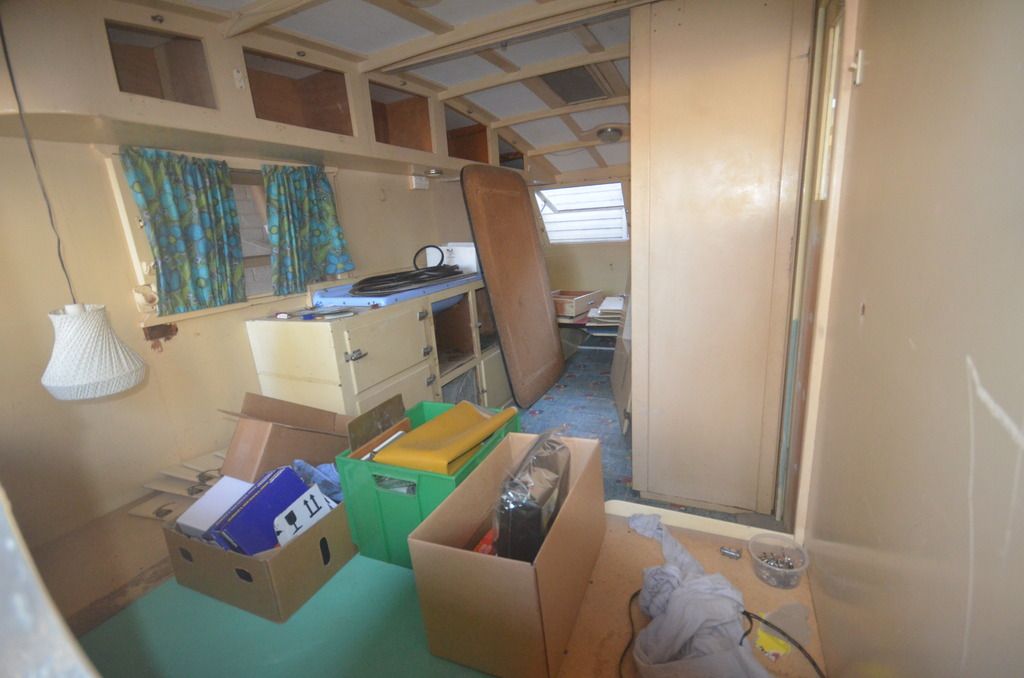 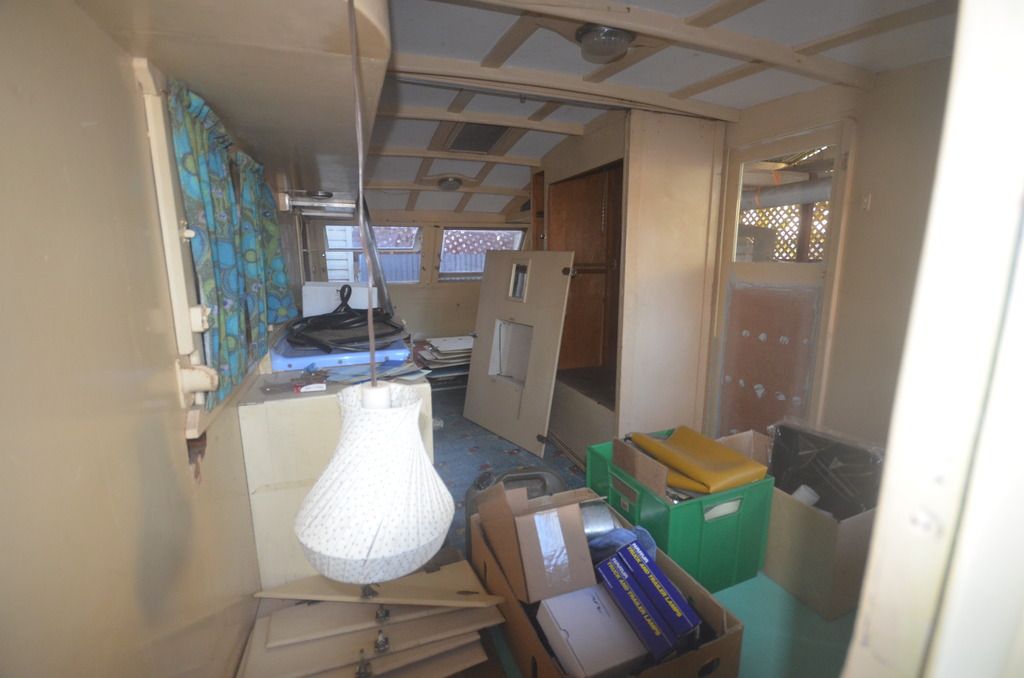 |
|
|
|
Post by jp63 on May 17, 2016 7:31:57 GMT 10
The van is looking fantastic guys. Hopefully we get to see it in the flesh at Meningie later in the year.
|
|
|
|
Post by Mustang on May 17, 2016 8:35:01 GMT 10
Seems like there's lots of room? Coming along nicely.
When one looks at all the cupboard doors piled up its no wonder we battle the weight factor.
|
|
|
|
Post by willies on May 17, 2016 10:15:03 GMT 10
The van is looking fantastic guys. Hopefully we get to see it in the flesh at Meningie later in the year. Meningie is the target. Hope to have it ready before then for a couple of test runs. |
|
|
|
Post by Roehm3108 on May 17, 2016 10:31:48 GMT 10
Nice van! But I can't help thinking that the front of this van has been remanufactured at some point, with the forward jutting top section (ala Carapark Zestline). Those front windows don't look to be in keeping with the side window, despite the trim at the top.Any chance of seeing a pic of the front interior? I say this because the drawbar has also been extended at some point. The roofline - not too sure from the pics, but does it have a double camber?
|
|
|
|
Post by willies on May 17, 2016 17:39:25 GMT 10
Nice van! But I can't help thinking that the front of this van has been remanufactured at some point, with the forward jutting top section (ala Carapark Zestline). Those front windows don't look to be in keeping with the side window, despite the trim at the top.Any chance of seeing a pic of the front interior? I say this because the drawbar has also been extended at some point. The roofline - not too sure from the pics, but does it have a double camber? Hi Roehm3108, I am in agreeance as to the front of the van being remanufactured. The roof does have a double camber and yes the drawbar has been extended at some time, probably with the remodelling. I have included some pics that would indicate that there were some alterations done. The rib on the ceiling closest to the front is actually thicker than all of the others but it is in the same design as all of the others and the lengthways slats have also been extended through to match the original. The cupboards also shows some plywood change on the wall and some is even painted within the cupboard, probably before the cupboards were reinstated. There is now a table and seating at the front that drops to a bed. We also have a canvas stretcher that sits in the holes in the wall near the door and into the brackets that can be seen on the opposite side. We have evidence of a previous dark blue colour on the exterior but it isn't anywhere to be found forward of the door so I would speculate that the masonite forward of the door is not from the original build. We would love to know how it looked it it's original shape but no luck from the last owners family as it is how they remember it from the late 50's early 60's when their Dad purchased it for the family holidays at Port Elliot. Now Kingswood308 mentioned that the last time that the numerical plate was issued was 1953. Whether this is from the original build date or from when it was re manufactured to its current shape we don't know. Many questions but few answers. 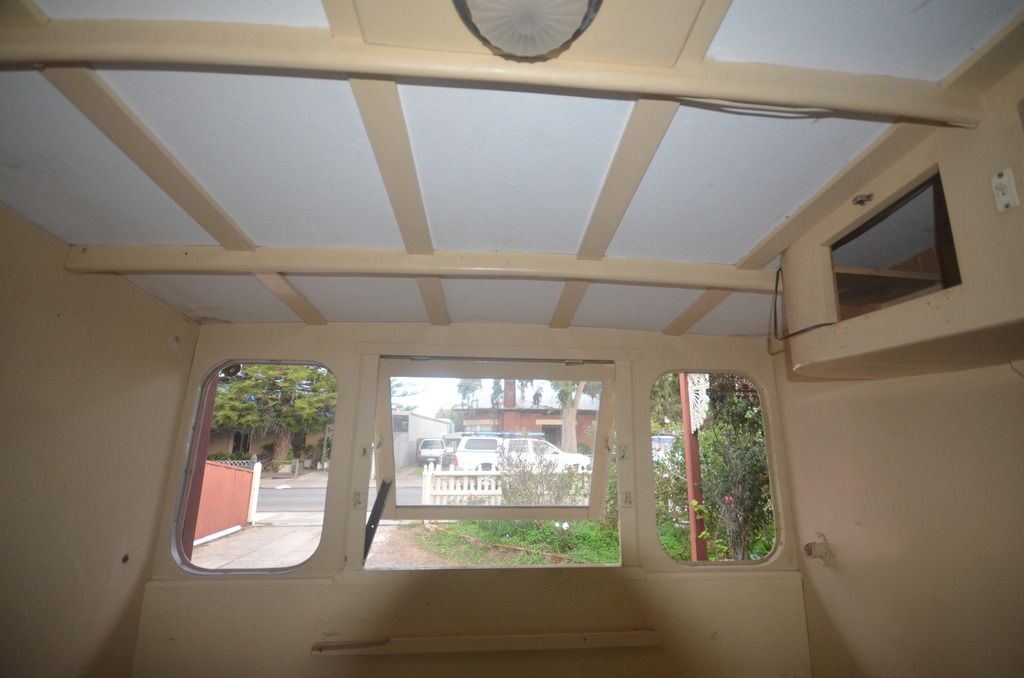 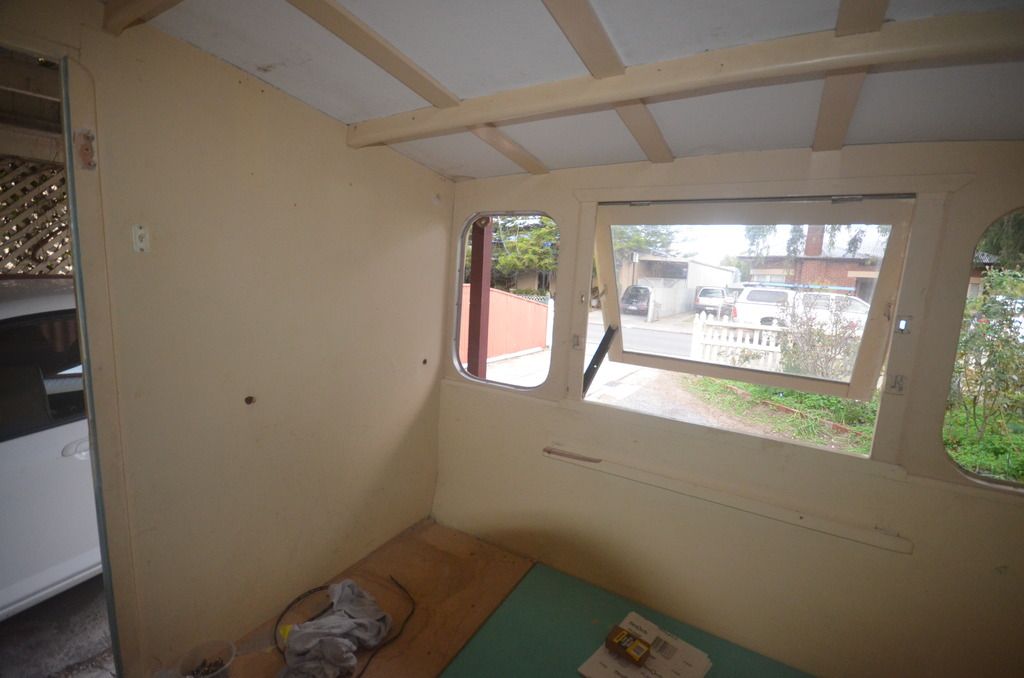 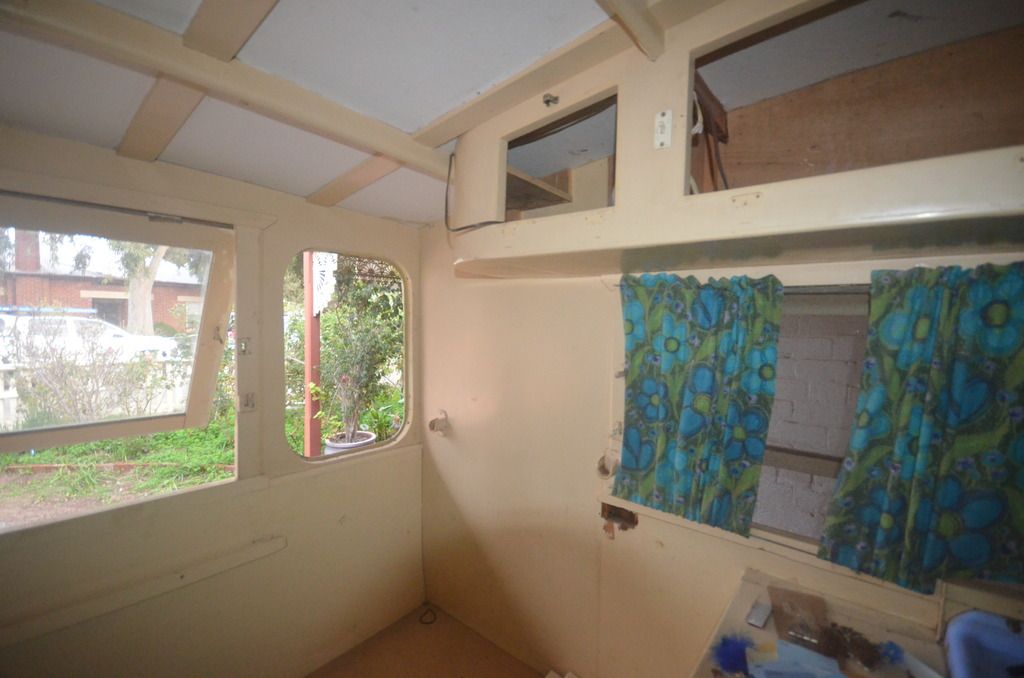 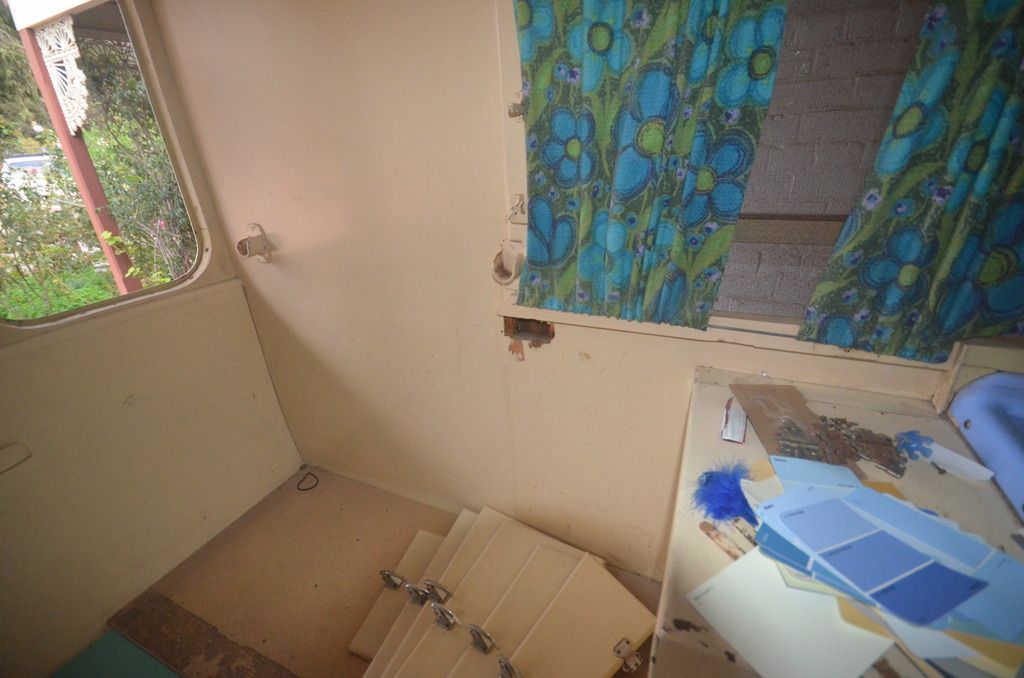 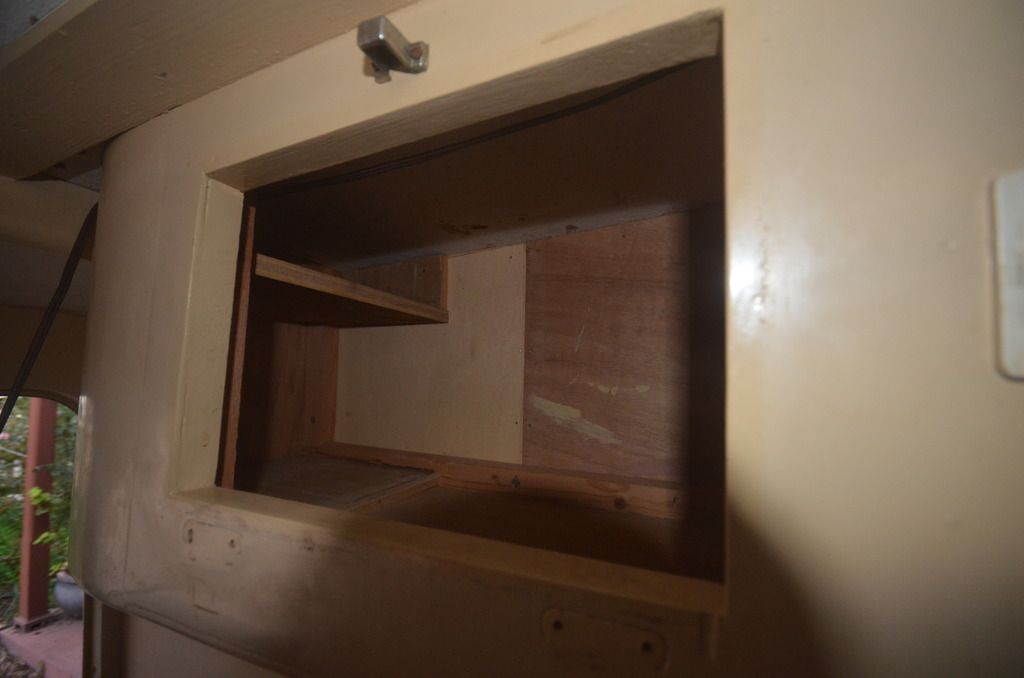 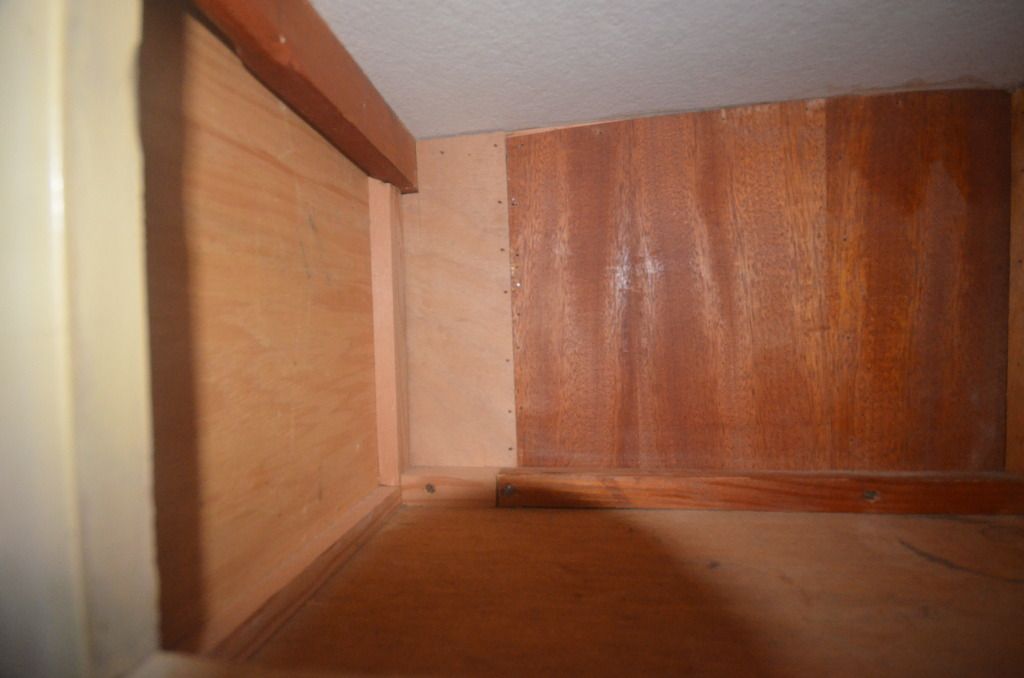 |
|
|
|
Post by Roehm3108 on May 18, 2016 15:58:13 GMT 10
Thanks for the extra pics willies and the info on what you have already discovered that the front of this van has been remanufactured. It looks like the alteration was started where there is what looks to be an extra roof beam almost next to the original one on the forward side of the wardrobe. This enabled a reduced camber of roof-line to create extra head-height space at the front of the van. That you have a canvas bunk bed and framing indicates that he may have done this to fit in the extra bunk (guessing a bit here). While I think of it, have a good look at the framing under the sink. It has been known for builders to sign and date the cupboard installation! What was the original shape? Because of its particular rear end shape and the double cambered calico covered caneite roof, it points to the typical SA building shape. You have the Adventure, Rowvan and Playmate. Personally I don't think you van had its origins in those factories - others will probably argue that. But if you use your imagination, there is quite a similarity to the very early Paramount Caravans vintagecaravans.proboards.com/thread/5351 Without knowing the length of your van, could it have conceivably have been the large 15ft model? It has two windows on the driver's side, while the 12 footer only has one (see plans). My reasons for saying this without seeing the van are: 1. The window trim above the window on the side of the van (copied on the front too) 2. The treatment of the wheel arch (curved rather than straight) 3. The window in the door (not in the other similar vans) Sadly we don't have pics of the Paramount apart from the 30's pics and what would be a late 50's model What would be interesting in support of my premise would be the chassis and stabiliser legs. Are they similar to those patented??? Might be worth checking out! All very interesting! |
|
|
|
Post by willies on May 18, 2016 20:20:39 GMT 10
Hi Roehm3108,
I see your point re the Paramount thread and I did look for any similarity to the Paramount. We don't believe that we have the patented chassis of the 30's and we definitely don't have the four wind down stabilisers. Check our original thread New purchase Unidentified 40's or 50's bondwood 14'6". The trim above the front window matches that of the Paramount but the trim above the side windows is more similar to the Furness of the 30's. Wheel arch matches both builders style in the 30's.
I will have another good look for any makers marks and dates hidden within the cupboards.
Garry
|
|
|
|
Post by willies on May 24, 2016 20:49:20 GMT 10
Thanks for the extra pics willies and the info on what you have already discovered that the front of this van has been remanufactured. It looks like the alteration was started where there is what looks to be an extra roof beam almost next to the original one on the forward side of the wardrobe. This enabled a reduced camber of roof-line to create extra head-height space at the front of the van. That you have a canvas bunk bed and framing indicates that he may have done this to fit in the extra bunk (guessing a bit here). Hi Ray, The extra roof beam that you have referred next to the wardrobe to is actually the top double slide track for the partition doors. The doors sit alongside the wardrobe when not in use. There is also a folding bottom track that sits in front of the wardrobe and swings out to a catch at the base of the cupboard next to the ice box. I now have this partition door running smoothly. When I had a look under the seats of the front diner there is the shadow on the wall of the original front lounge/bed. Whether the canvas stretcher was above this in the original format I am not sure. Anyway we have a lot of painting ahead of us. |
|
|
|
Post by Roehm3108 on May 25, 2016 12:47:18 GMT 10
Thanks for explaining that. Sounds like mum and dad certainly wanted their privacy!!! The extent of remodeling is quite extensive. I still tend to feel that the Paramount was the original model. Regardless, you will have a fun van and quite a talking point as well.
|
|
|
|
Post by willies on Jul 17, 2016 16:55:48 GMT 10
Well it has been a while since the last update. We have progressed quite well and don't have too many items left to attend to. The painting is now complete and Brenda gets the kudos for her effort. I did the primer coat on the exterior plus the roof and then Brenda did the rest. The interior is near to completion with some minor jobs eg; shelf above the sink, towel rail over the foot of the bed, some sort of shade for the light over the bed and curtain tie backs. Brenda loved the material that we used for Arnolds' ( now sold and living at Myola NSW ) curtains that we have done the same again. 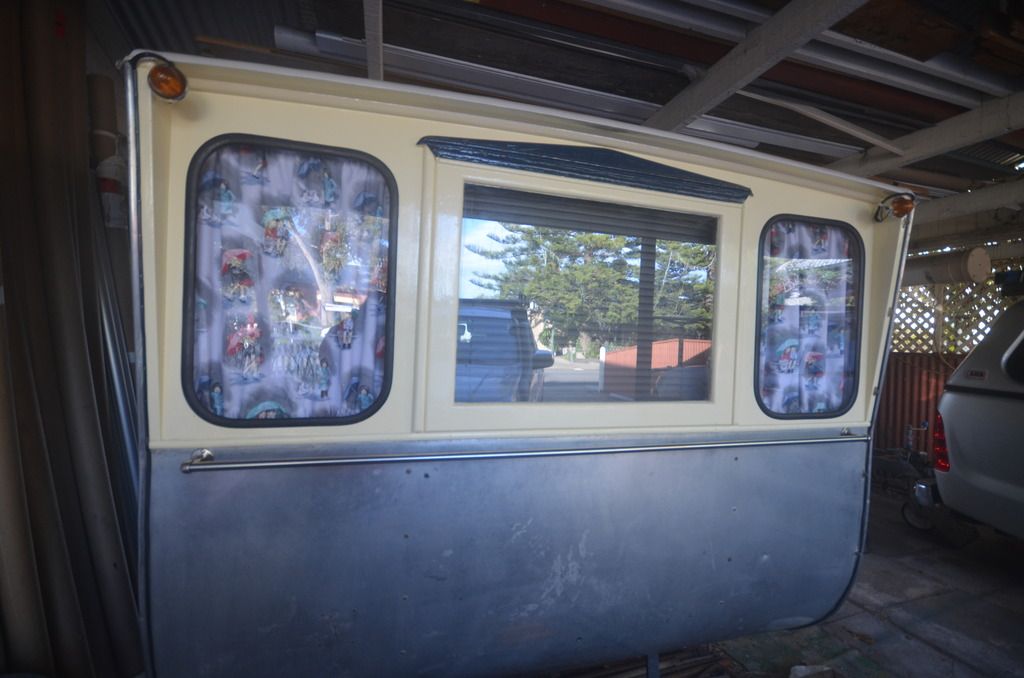 I have also been able to get the sliding privacy doors gliding smoothly. 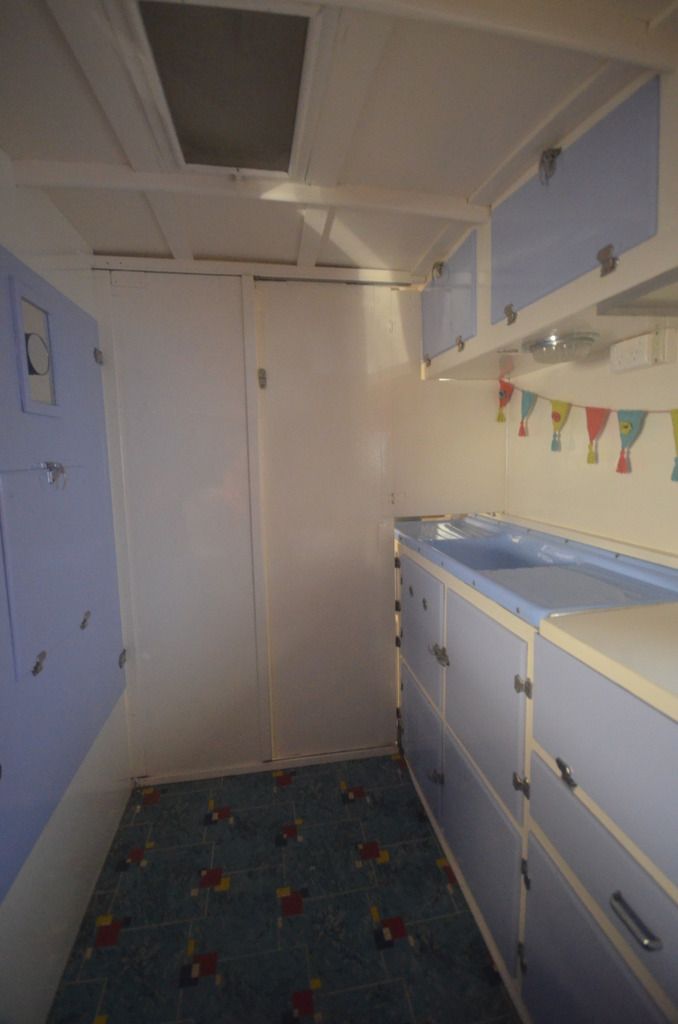 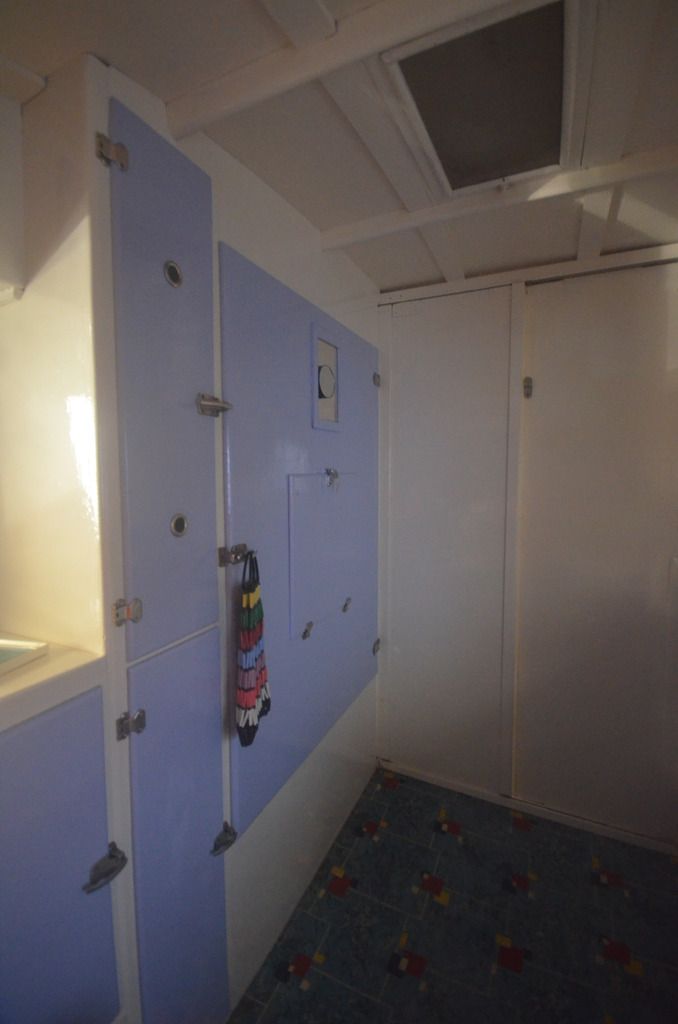 We do have an Alladin kero cooker but we will use these golden oldies electrics for our cooking. 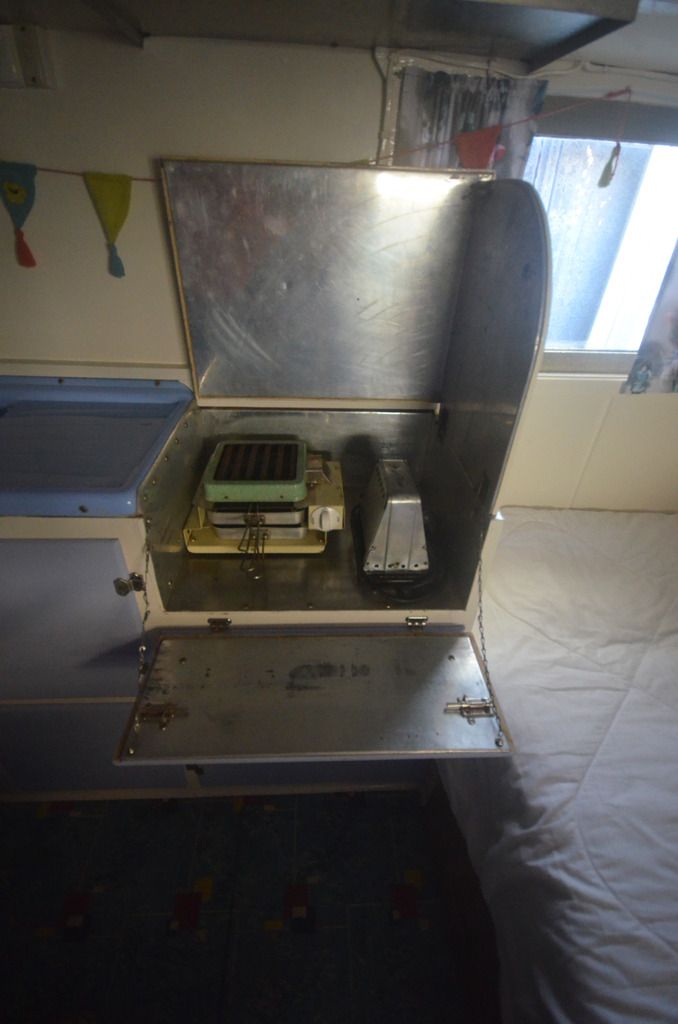 All of the cushions for the front and rear dining have been recovered. Replaced the table top at the front with a top from a old laminate table. Not sure if we are happy with the laminate pattern but we have a red basketweave top in the shed. 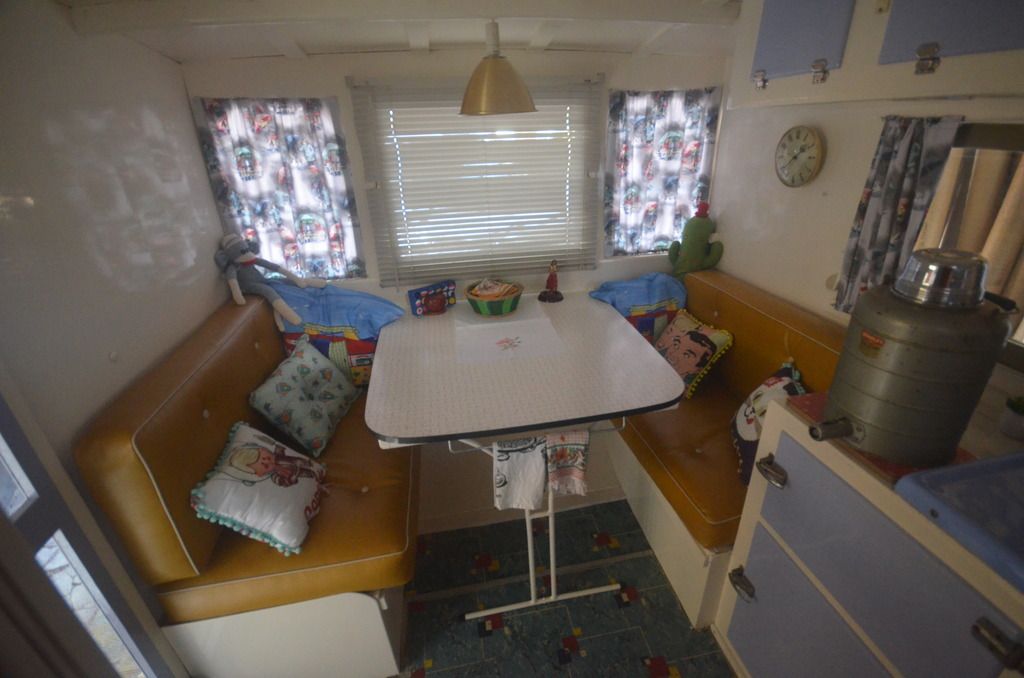 Managed to put a rail under the lip of the table for the tea towels. 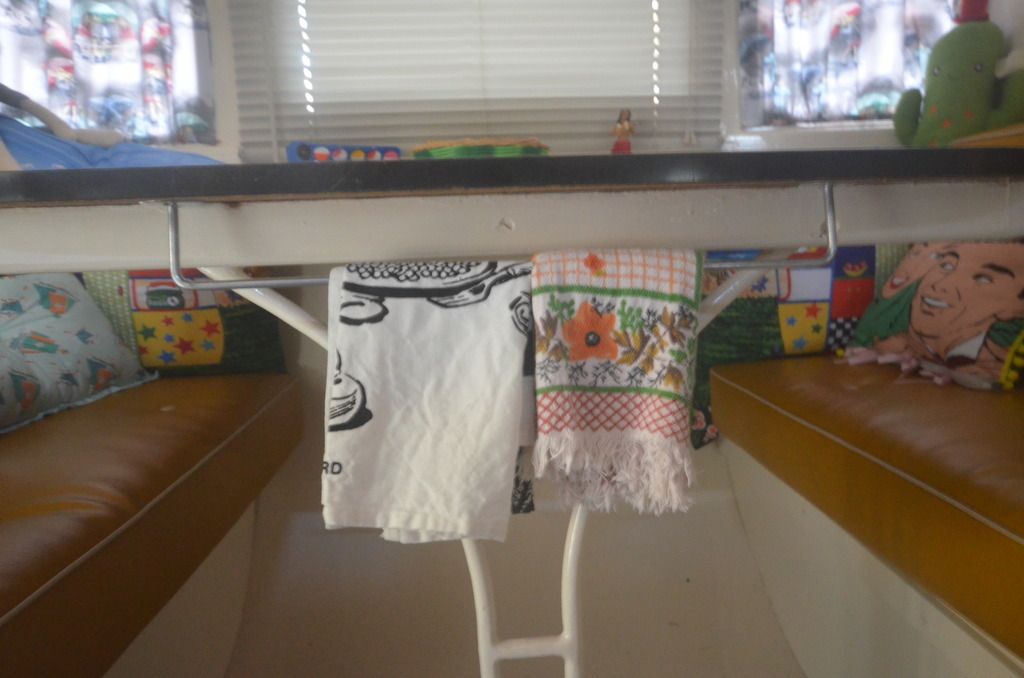 I have had success in rewiring up the caravan lights and I have been really happy with the final results for my Campbell clearance lights. I was able to snag a couple of Campbell lookalikes off ebay and I used the original lenses. That fixed the front ambers and for the rear reds I cleaned up the existing and resprayed the metal chrome and looks like new from a few meters away.  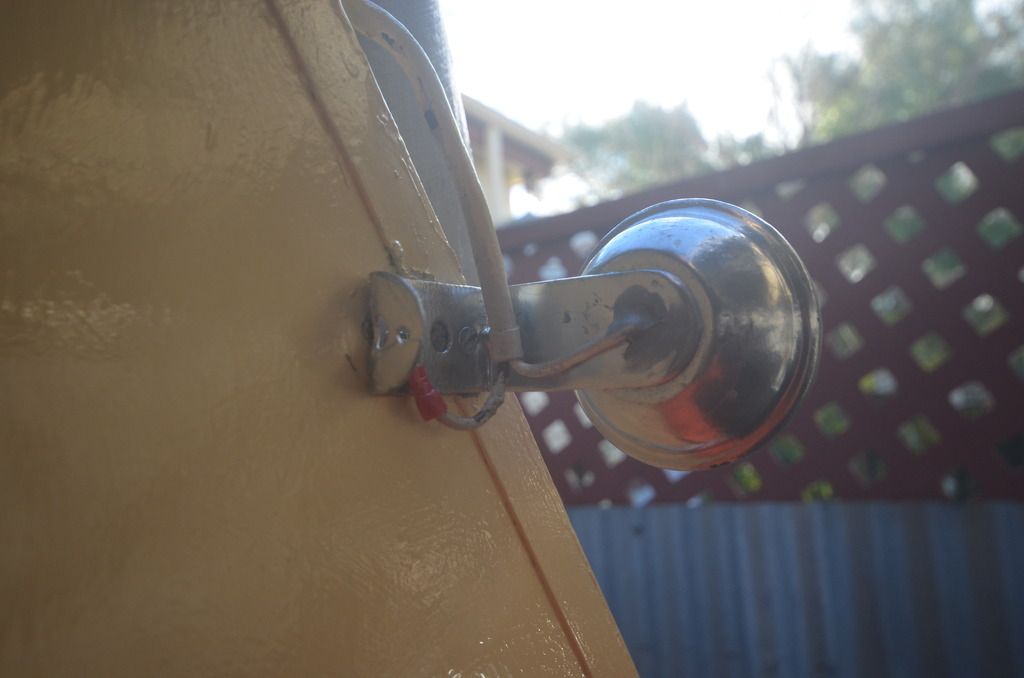 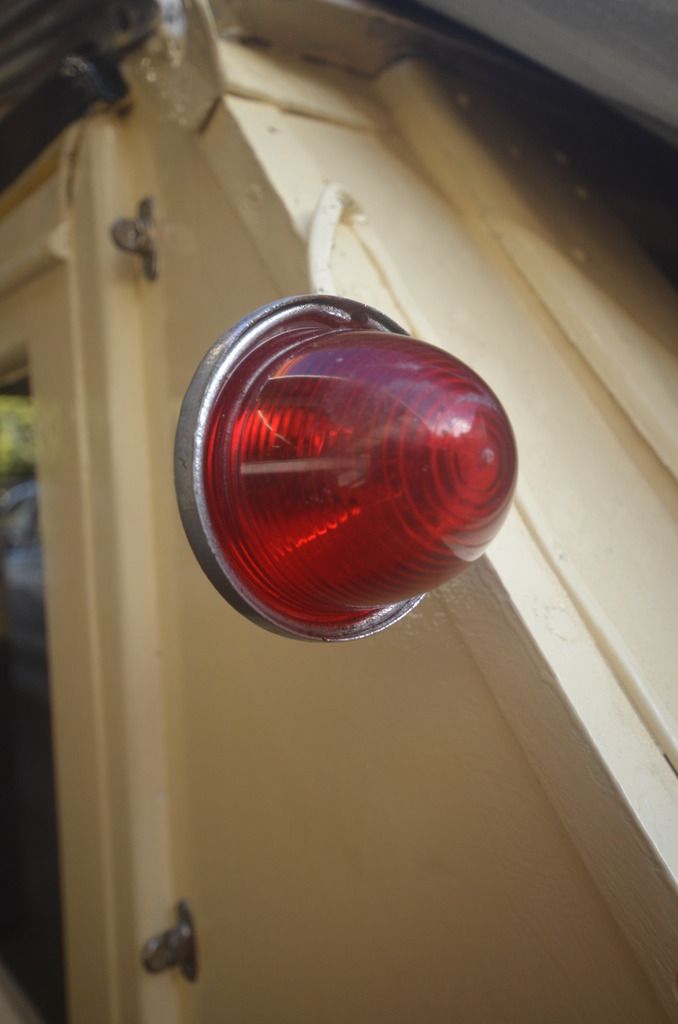 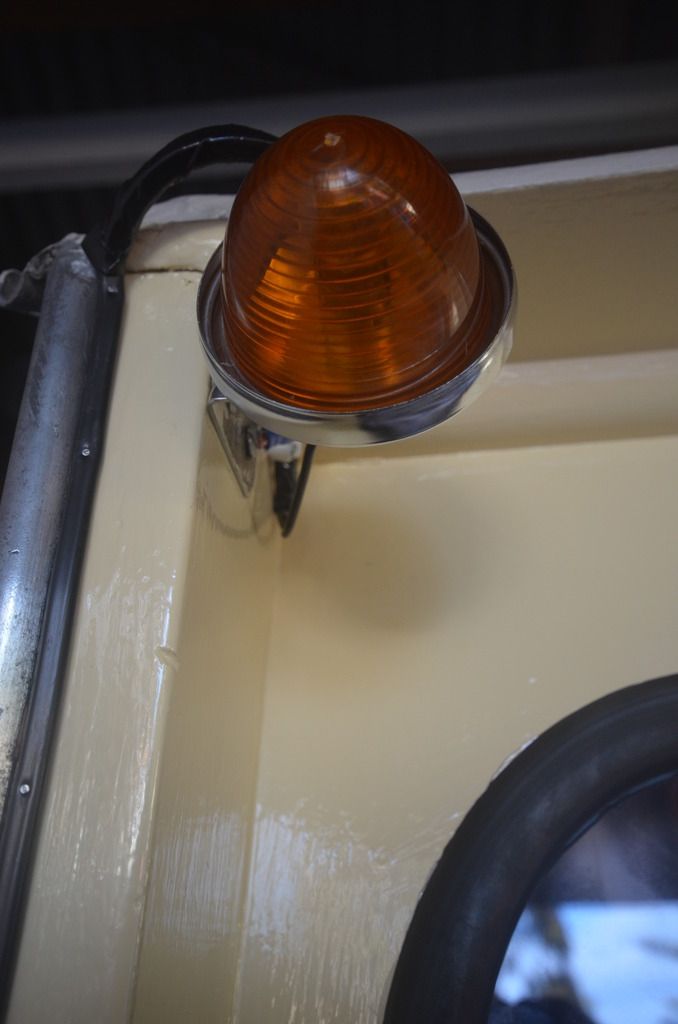 We are hoping to have a practice run in the next month or so to see that we have everything sorted. That will give us a chance to fit the annex as we have never had that on due to limited space in the driveway. But in the meantime I will take it to the brakes man and get the overide brakes sorted. |
|
|
|
Post by jp63 on Jul 17, 2016 18:30:37 GMT 10
Looks fantastic!
|
|
|
|
Post by willies on Jul 17, 2016 18:42:52 GMT 10
Thanks to Jarrad for the clearance light lenses. |
|
|
|
Post by mel on Jul 17, 2016 21:21:01 GMT 10
Looks great. The colours are a good choice. Any chance of a closeup of the curtains, I can't quite make out what the print is. Children holding umbrellas?
|
|
|
|
Post by willies on Jul 18, 2016 13:37:29 GMT 10
Hi Mel, Here is a close up of the curtain fabric. My wife purchased it from Spotlight. There is no more at the Spotlight near us now as Brenda took the lot. Not overly expensive and there are a number of Retro fabric pattern choices. 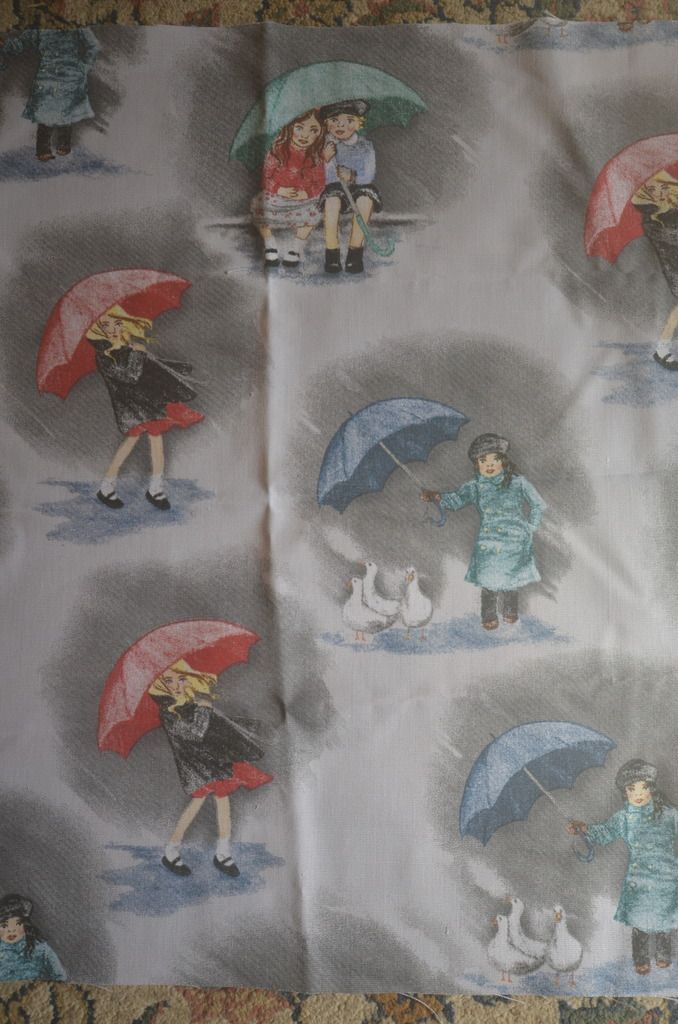 |
|
|
|
Post by mel on Jul 19, 2016 19:44:25 GMT 10
Love the fabric. I will have to head into Spotlight.
|
|
|
|
Post by Mustang on Jul 20, 2016 17:15:51 GMT 10
All very nice, a credit to you.
|
|
|
|
Post by willies on Aug 17, 2016 18:31:04 GMT 10
We are getting so close to completion.
We have had the brake system rebuilt over the past 3 weeks. Slow process as the mechanic had to deal with 1950's technology and tolerances. But after a bucket load of money we have brakes that work and we have retained our original coupling. (Sorry Brenton). Job entailed new master cylinder, copper lines, brake shoes rebonded,wheel cylinders resleeved, drums machined and while they are at it have the bearings all repacked. When they were inspected there was a mention of "them brakes have been cooked". Bearings were nearly dry as a bone so probably lucky to have made the trip home when I collected it at purchase time. Still have an original old set of Timken bearings as spares in the van.
My next job is painting up the draw bar and Brenda can make a start on an awning. At least we have the original annex (for the longer stays or inclement weather) to use as a template.Then we should be able to have a few short stays to iron out any deficiencies.
And we reckon we have come up with a suitable name but we will hold that until we have our finally finished the job photos.
|
|
|
|
Post by willies on Sept 1, 2016 19:35:21 GMT 10
After 6 months of work we are out for the first test outing this weekend. Yee Haa.
Going down to the Port Elliot caravan park for a couple of nights to make sure everything is working how it should be. This will also be the first opportunity to try out the annex that came with our van.
Will post some photos soon
|
|
|
|
Post by willies on Sept 4, 2016 22:58:07 GMT 10
|
|
|
|
Post by jp63 on Sept 5, 2016 7:41:44 GMT 10
Marvin looks great guys you have done a wonderful job.
Im glad to hear the maiden trip went well.
|
|
|
|
Post by Mustang on Sept 5, 2016 8:19:38 GMT 10
SOOooooo Cozy. That original annex looks ok! Moon Caps |
|


