|
|
Post by Franklin1 on Jun 4, 2014 14:53:47 GMT 10
G'day Leigh, "What's happening over there??" Hmmm...not much. We had 3 weeks on the road travelling to and from the Broken Hill Nats - a week getting there; a week there; and a week getting back home. I was so relaxed at the end of it all that I continued bludging when I got home. After a couple more weeks of doing nothing, I figured I should really get back into the project and start making more headway. Opened the shed up last Monday and found an abandoned caravan in there, needing more love and attention.  Started cutting up some more timber on Tuesday, and coated it with Bote Cote today. Can't rush these things, hey?!  ps. to DonR: Don't want to contaminate the Nationals thread, so I'll post here that we attended the Nats in a 1960 van that was cleverly disguised as a 1992 Windsor van. Took a lot of effort to get the van to look that way. We were between aquamum's Gypsy Gem on one side, and Ian and Annette's (Elvis) Carapark on the other side. Both neighbours played along with my little charade, and pretended we had a "lovely little bondwood there". Even cobber came for a visit and sat in our van for an hour, and had a chat. Pretty sure he didn't break out in any blotches or hives from sitting in a "white box". Musta had him fooled with the charade as well.  cheers, Al. |
|
|
|
Post by cobber on Jun 4, 2014 17:03:02 GMT 10
. Even cobber came for a visit and sat in our van for an hour, and had a chat. Pretty sure he didn't break out in any blotches or hives from sitting in a "white box". Musta had him fooled with the charade as well. cheers, Al. Yeah, G'day Al, Sure had me fooled  ... but as 'they' say ..... most people can't tell the difference between un-modified and modified Anyway, I would have been very disappointed if you hadn't come to the Nationals just because you didn't have a vintage van ready to do the trip but........ would be nice if you have something "respectable" ready for the next Nationals Could be touch and go according to the above post, aye ? .... get cracking Cobber. |
|
|
|
Post by Franklin1 on Jun 12, 2014 17:59:19 GMT 10
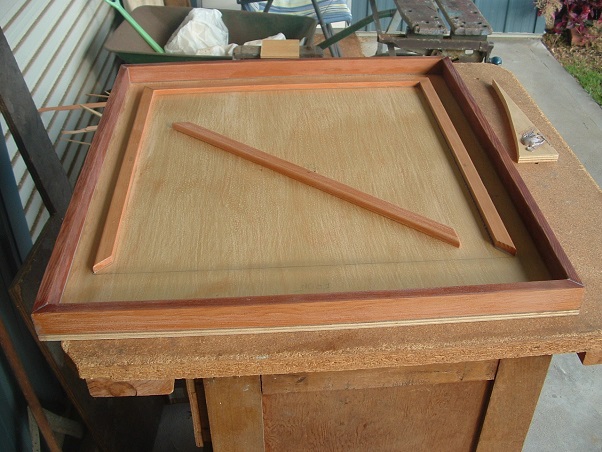
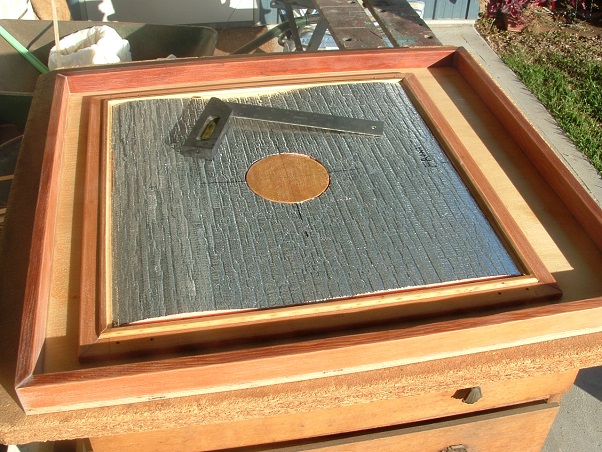
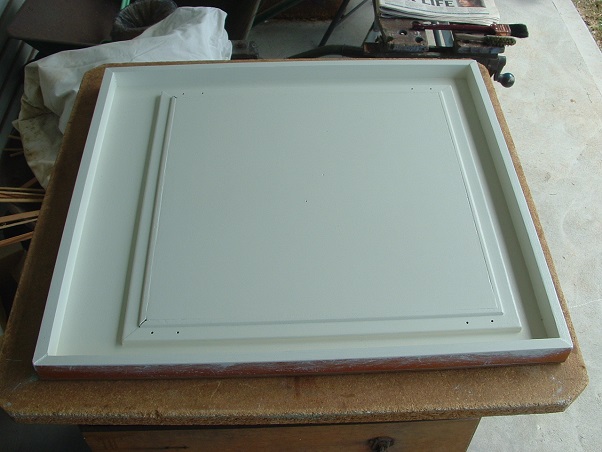
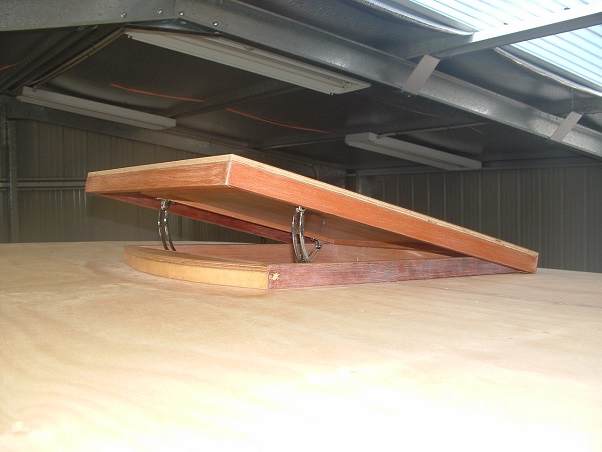
G'day All, for my 3,000th post on the forum (a Legend in my own lunchtime ), I'm going to waffle on about a side project I've just completed for the van... A number of years ago I salvaged an old kitchen table from a neighbour's clean-up. The table had been demoted to being used as a "workbench" in the neighbour's garage, and over the years of abuse, paint had been splashed on it; timber had been sawn on it; and rusty bits and pieces had been left lying on it. It was pretty much a tip job, but I thought I might as well grab it because "it might come in handy one day". I dismantled the table and left the laminex/plywood top out in the weather for a couple of years to get the ply to crinkle up and peel off. Eventually I was left with just the laminex, which I stored safely (so I thought) down the side of the house. A couple of years ago the TV technicians stood on the laminex and put a couple of cracks in it when they were putting a new TV aerial up for us. I wasn't going to give up on it that easily, so I found a spot in the shed to store it away for future possibilities. Fast forward to a week ago, and I found an old home-made coffee table in a pile of clean-up junk outside a house while I was walking the dog. This table is a timber frame with a masonite top, so I'm thinking it must have been made a fair few years ago... 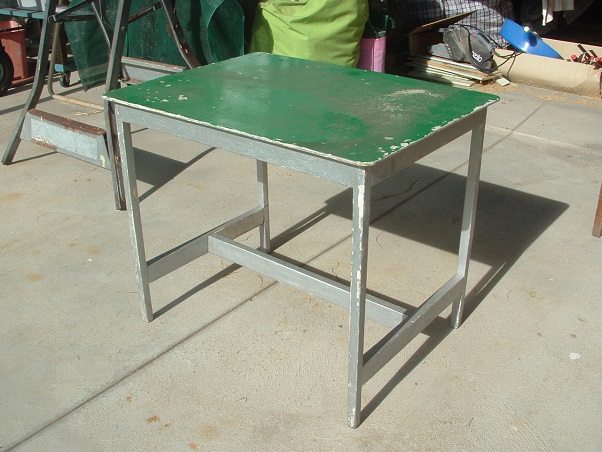 First job was to strip a few layers of paint off the table, and get the masonite back to bare timber... 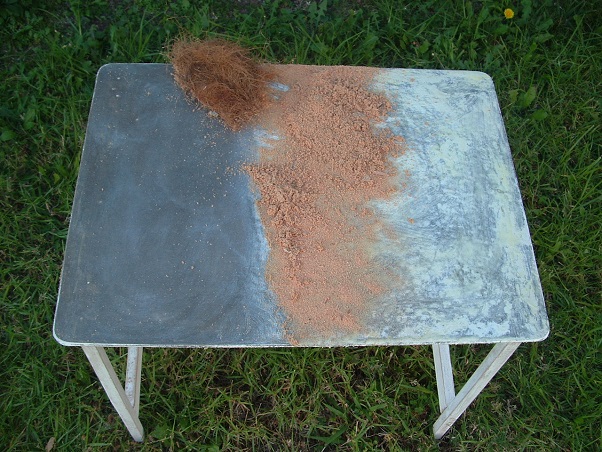 Then it was time to take a look at that old laminex, and see if it could be used. This is what the sheet looked like to start with... 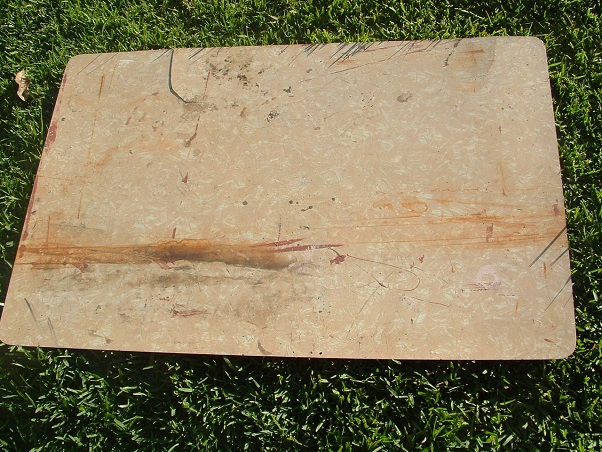 I managed to find enough useable area on the sheet to fit the top of the coffee table, so with nothing to lose, I coated that section with paint stripper, and cleaned that off and then scrubbed the surface with soapy steel wool. This photo shows the section cleaned up... 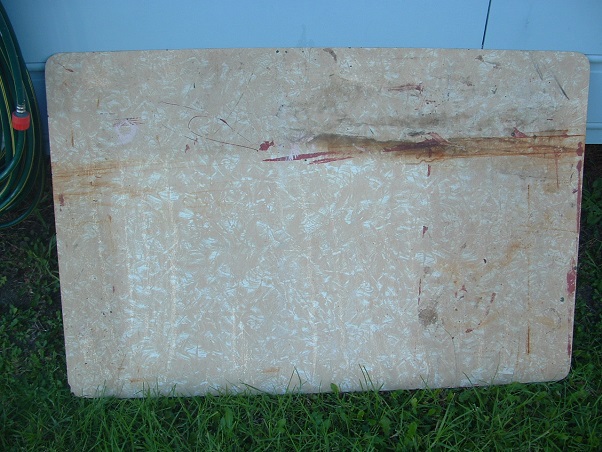 The laminex was then marked out and cut with a 1mm cutting wheel in the angle grinder (and those 1mm wheels get my vote for the "Tool Of The Year Award" - they make cutting with an angle grinder so much easier!  )... 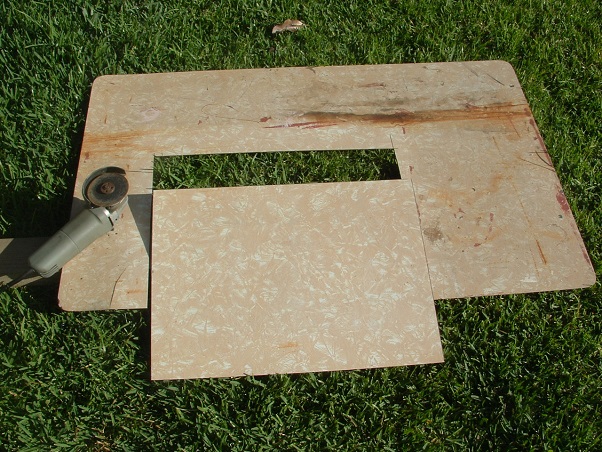 I glued the laminex to the top of the table... 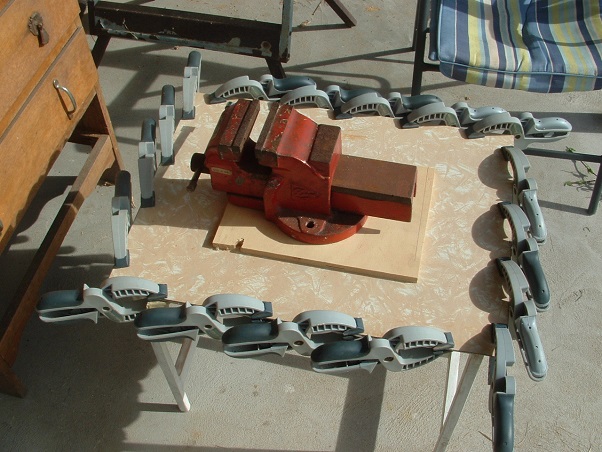 ...and then started on repainting the frame... 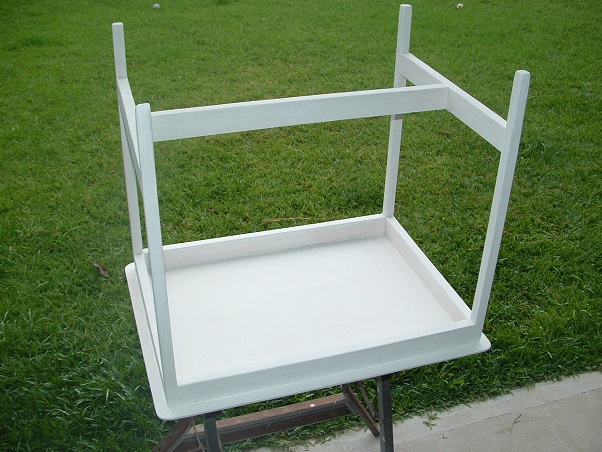 After a week's effort in between doing bits on the van, I've ended up with a handy little coffee table for use outside the van, complete with a "lovely patina" of scratches, gouges, and rust spots on the surface of the laminex... 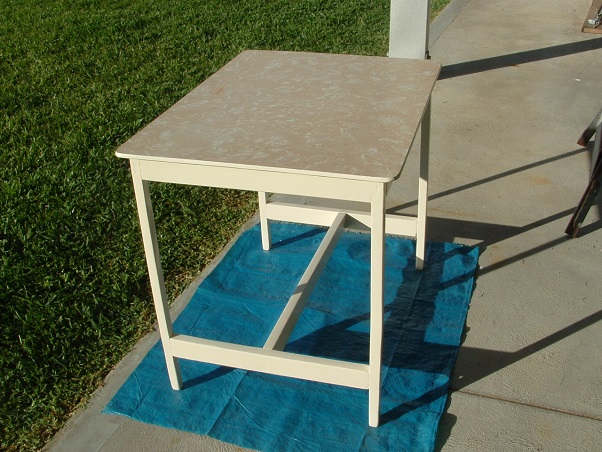 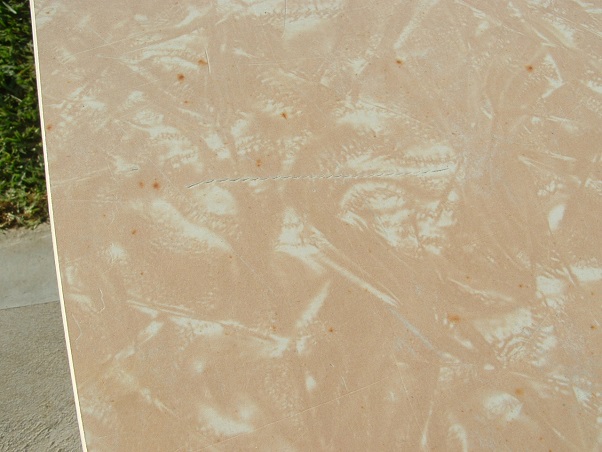  And the moral of this story is: Don't give up on anything old. Even the rattiest old stuff can be made to look "reasonable" again if you give it a go. cheers, Al. |
|
|
|
Post by cobber on Jun 12, 2014 19:10:56 GMT 10
Congratulations and welcome to the 'Legends' club Al, and in the tradition of all 'Legends' ( with the possible exception of two of 'em ) you got there with a waffle, an inspirational waffle as are most of your contributions but...... I reckon you should have modified the table to have folding legs Cobber. |
|
|
|
Post by Franklin1 on Jun 12, 2014 20:31:33 GMT 10
Struth, cobber...is your computer playing up again?? That darn spell-checker is letting you down. Did you mean to type, "I reckon you should have mollified the table.."?? Can't believe I read what you posted! Funnily enough, I modified the door opening on the van to make it wider by another 4 inches. That allows me to easily fit tables like this one into the van when packing up. Can't work out how people get by with doors that are only 400mm width. cheers, Al. |
|
|
|
Post by hilldweller on Jun 15, 2014 13:19:17 GMT 10
Lovely job Al. That's a classy looking little table now  Am surprised you can use paint stripper on formica - would have thought it would damage the surface but obviously not. No progress at all recently this side of the ditch - it's too damn cold. Will be back into it again come spring |
|
|
|
Post by Franklin1 on Jun 29, 2014 15:52:38 GMT 10
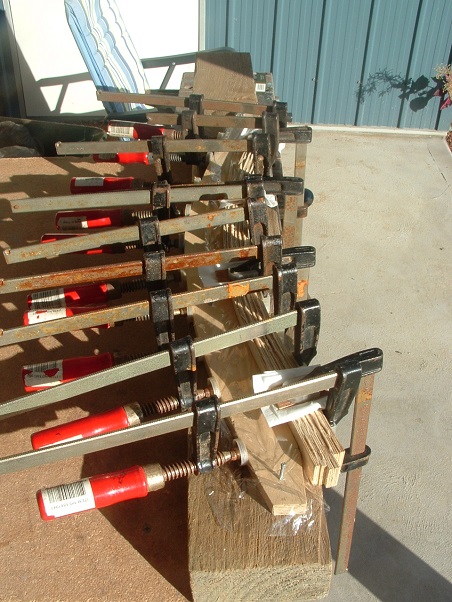
Well, like a tortoise with a gammy leg, this project inches forward slowly...  Flyscreens: Flyscreens: Originally these were an integral part of the window frame. When I salvaged these parts of the van in the demolition, there wasn't much at all worth re-using... 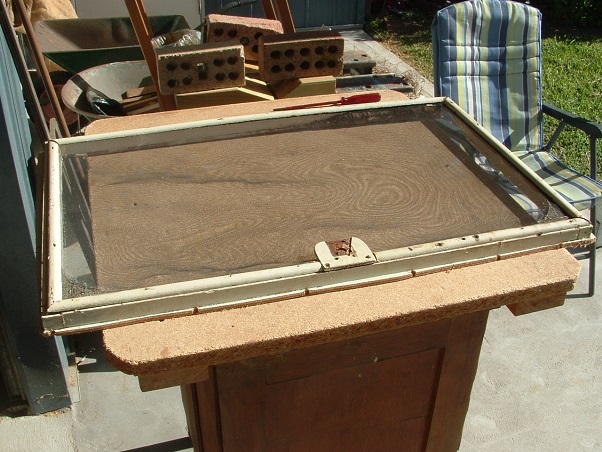 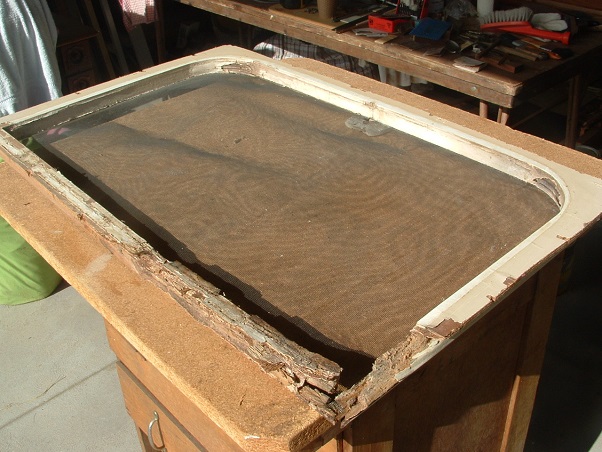 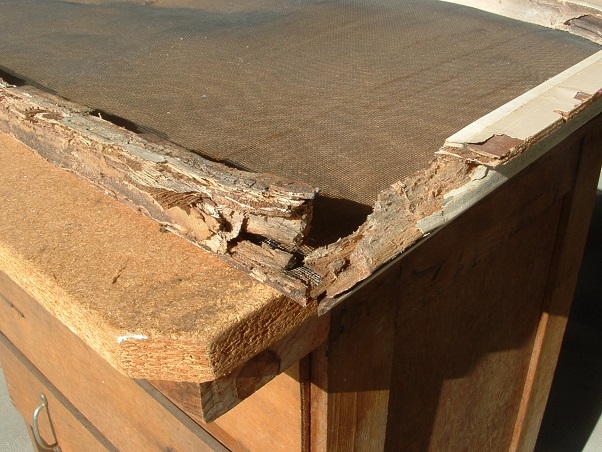 And besides, I wanted the flyscreens to be redesigned to be removable for cleaning and maintenace work if required. I decided to make complete new screens, and I ended up making some timber ledges for the screens to rest on, plus a couple of other bits for the clips to be screwed into... 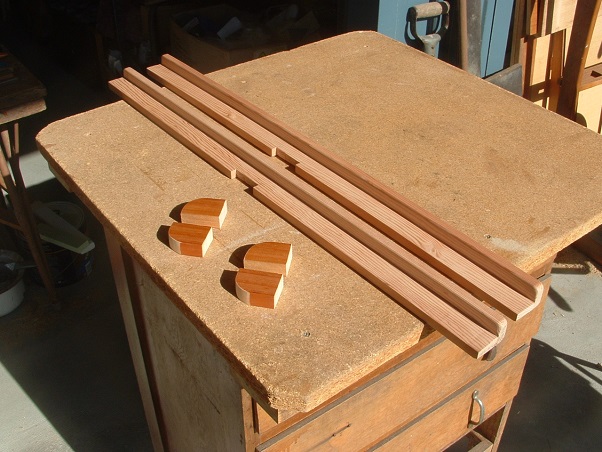 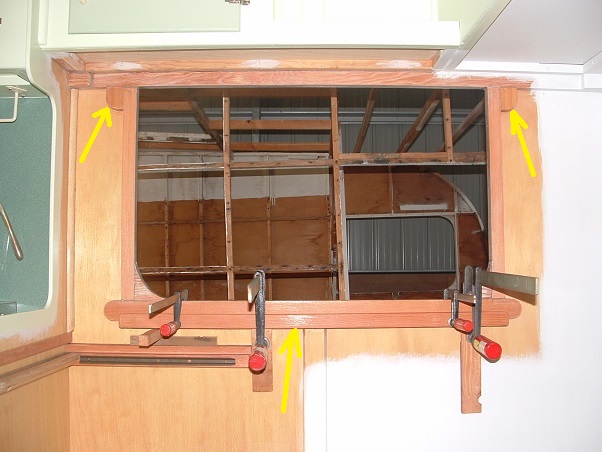 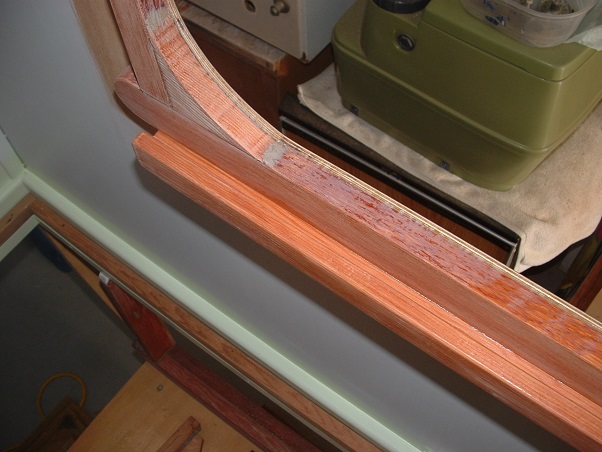 I cut all the timber up for the flyscreens framework... 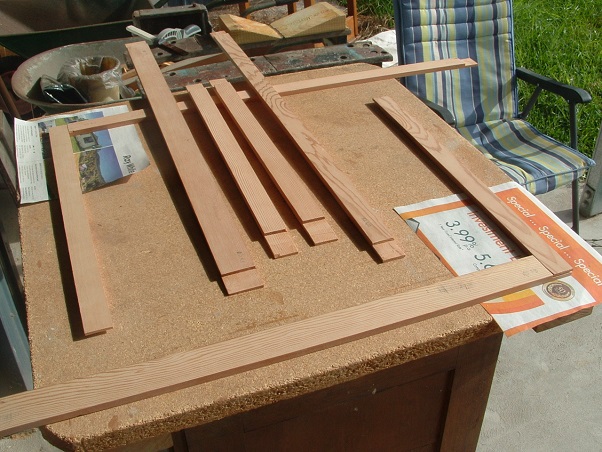 Glued it together using a high-tech clamping system ... 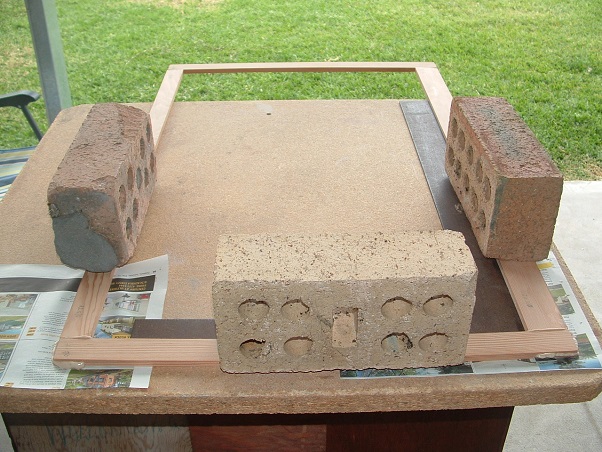 Cut and routered my own home-made version of fly mould... 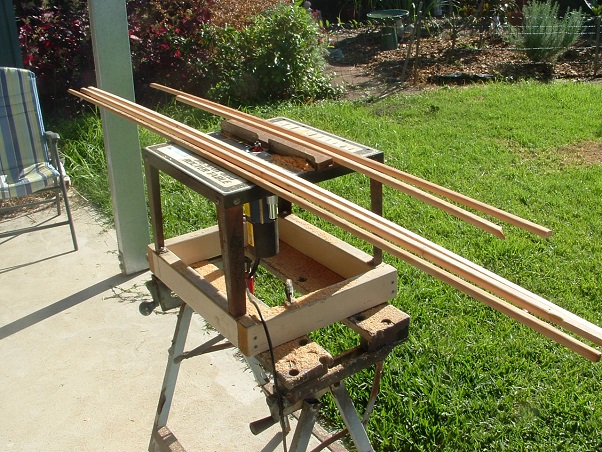 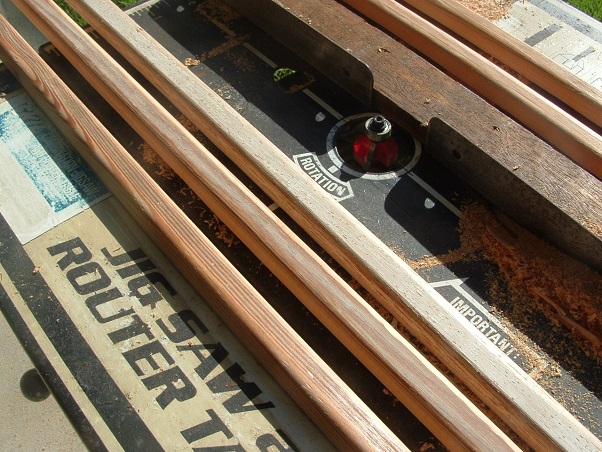 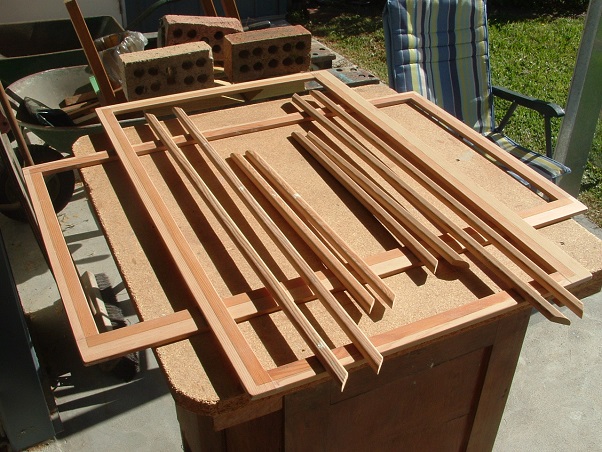 Stapled new mesh onto the frame... 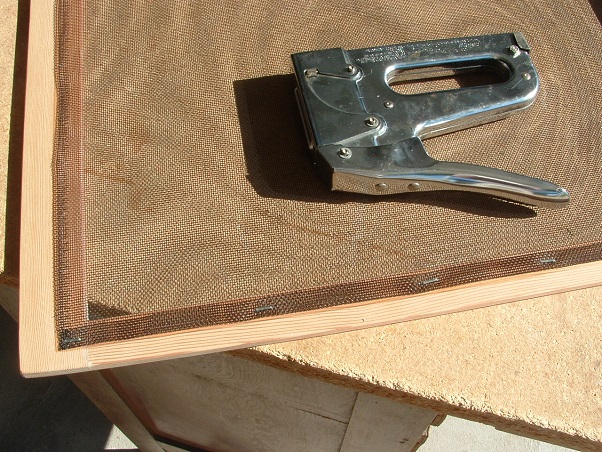 Fitted and nailed the fly mould onto the frame... 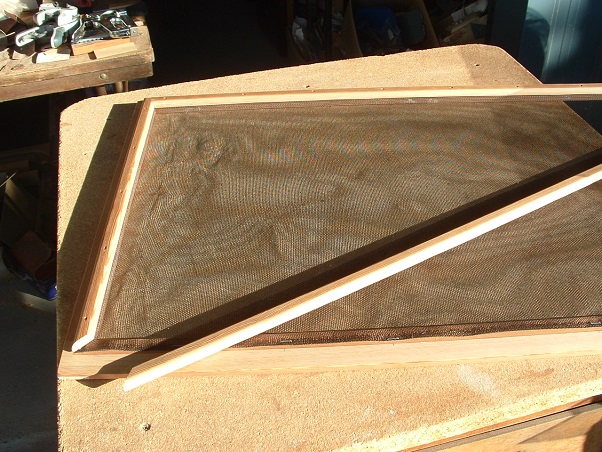 ...and test-fitted the finished frame... 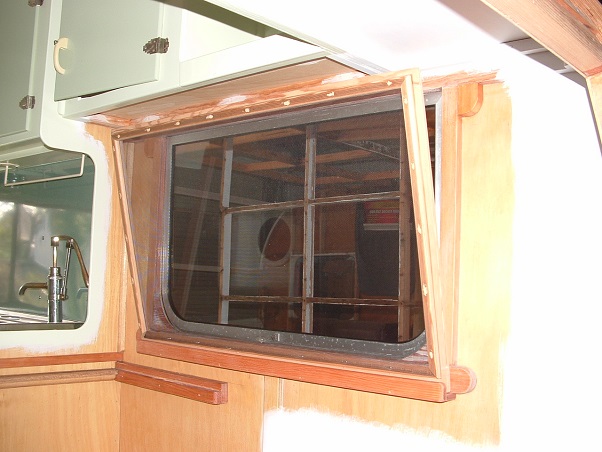 A few months ago, I found some diecast white metal clips over in the local second-hand Shed. It would have been many years ago that metal clips were last made, so I reckon these would be "honorary" vintage if not actually vintage... 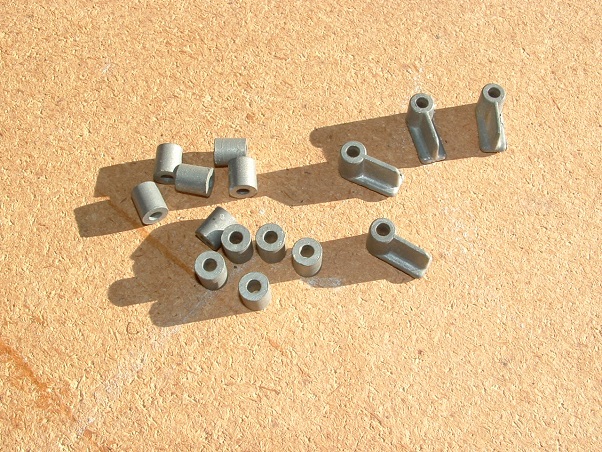 If anybody is interested in reading a "How-To" page from the January 1959 issue of The Australian Home Beautiful magazine, showing how to make your own flyscreens, you can click on the attachment and download the full page:  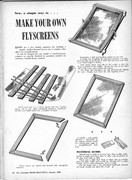 Back with more waffle shortly, about the windows... |
|
|
|
Post by DC3Td on Jun 29, 2014 16:02:47 GMT 10
Good stuff going on there Al.Btw i went shoping for some clamps today but the fellow told me some guy bought all his stock to use on a coffee table. gordon
|
|
|
|
Post by Franklin1 on Jun 29, 2014 17:05:58 GMT 10
G'day Gordon, yeah and that's only half the number of those clamps I've got! They were a clearance item in Bunnings a few years ago, so I bought as many of them as were left in our 3 local stores. They are one of the best clamps I've come across. ------------------------------------------------------------- Windows: I'm in the process of refurbishing the windows. Two down and one to go. A huge vote of thanks to the forum member who sourced some replacement glazing rubber for me. I will tip my hat to you each time I open a window. I haven't bothered to make the aluminium frames sparkle. Mainly just stripped paint splashes off, and tried to tidy up all the corrosion pits around the frame... 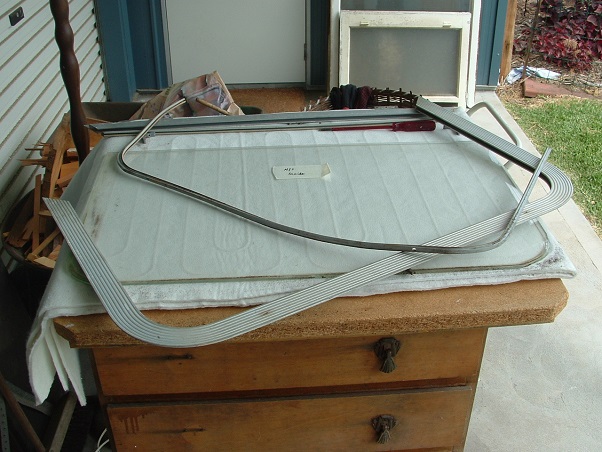  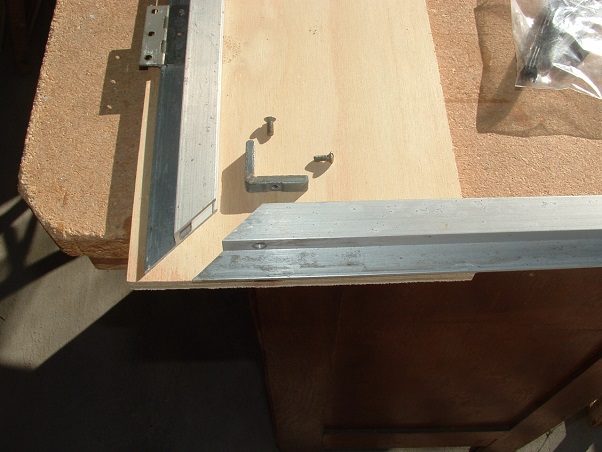 I've got bugger-all of the original window stays fitted to the windows, so that's a project to sort out in the weeks to come. Most of the parts are broken or missing, and basically this is all I've got... 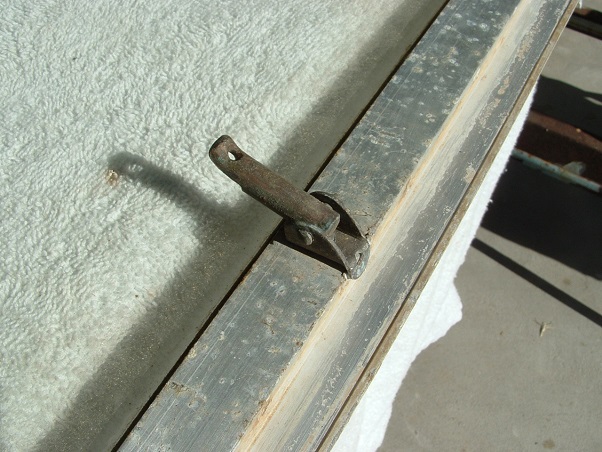 On one of the windows, someone has done a home repair on one of the hinges... 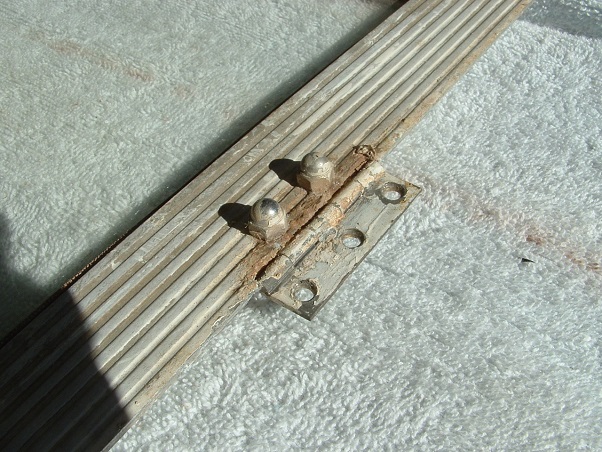 After cleaning up the frames, I had to rivet the brass catch back onto the frame for the window stay. That proved to be a bit of a challenge, because the nose of the rivet gun wouldn't fit down into the gap in the catch. I had to use a stack of small nuts to act as a spacer... 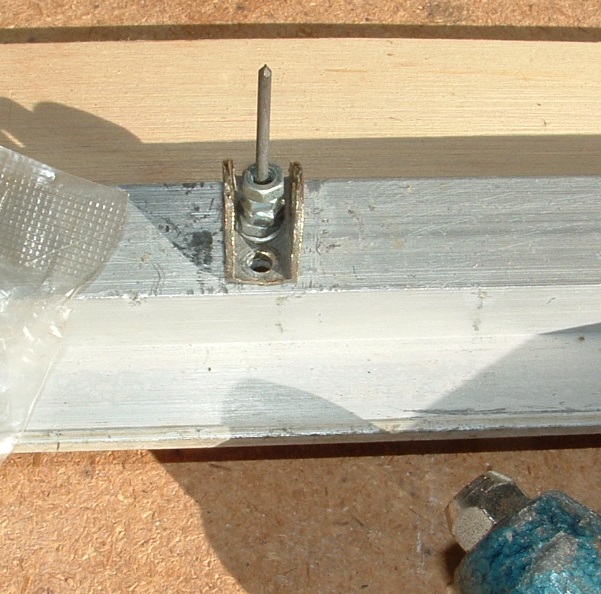 I also drilled and filed the pitifully small weep holes in the frames, and made them about 3 times larger... 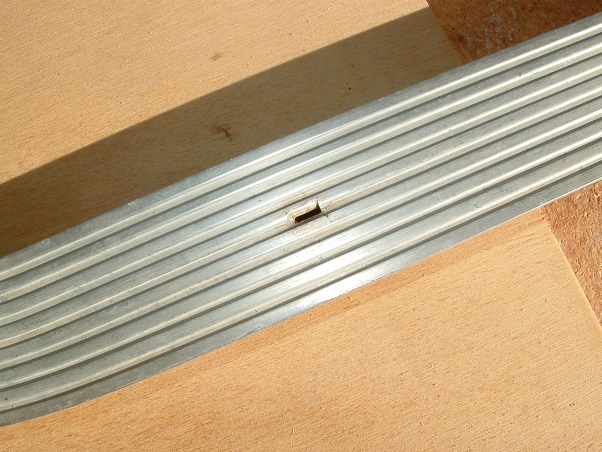 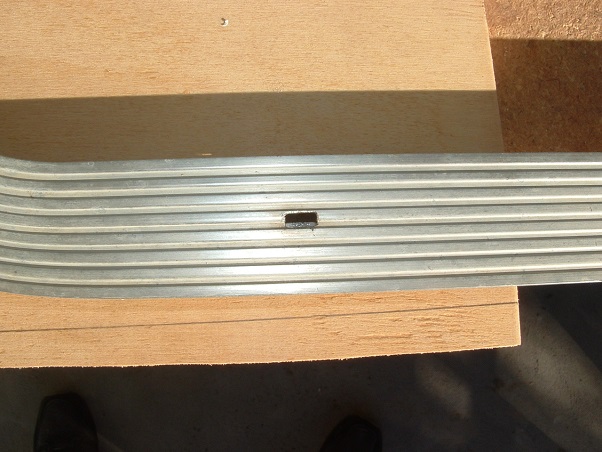 There was a fair bit of dirt trapped down inside the frames when I pulled them apart. The small weep holes never had a chance of allowing dirt to be washed out. Fitting the new glazing rubber also proved to be a challenge when trying to get it back into the aluminium frame... 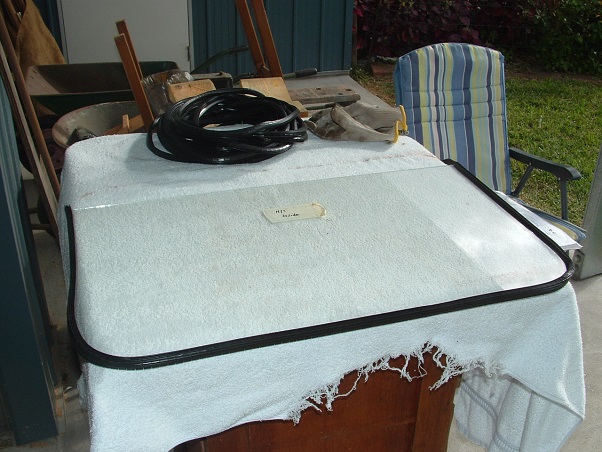 For the life of me, I couldn't get the rubber to slide back into the frame, even with copious amounts of soapy water sprayed all over the place. I ended up having to slice some of the thickness of the fins off with a sharp blade, so the rubber looked more like the original stuff... 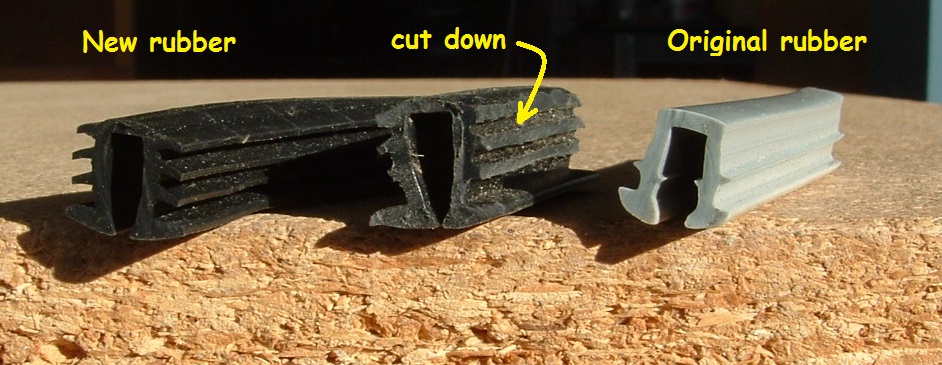 Once I trimmed the fins back, the rubber slid into the frames easy peasy. I put the first window all back together, and was pretty chuffed with how it looked... ...but then the next morning I was having a cuppa and planning to do the second window, when I had this "Oh, bugger!" moment and realised I hadn't cut the weep holes in the bottom of the glazing rubber in the first window. Had to pull it all apart and punch the weep holes through the rubber...  ...and then put it all back together again. Trying to get the mitred corners in the rubber to line up again neatly in the top two corners of the frame took a few special Chinese words, I can tell you!  Made sure I didn't make that same mistake again on the second window. Anyway, those two rear side windows have been temporarily fitted into position, so I can sort out what to do about the window stays... 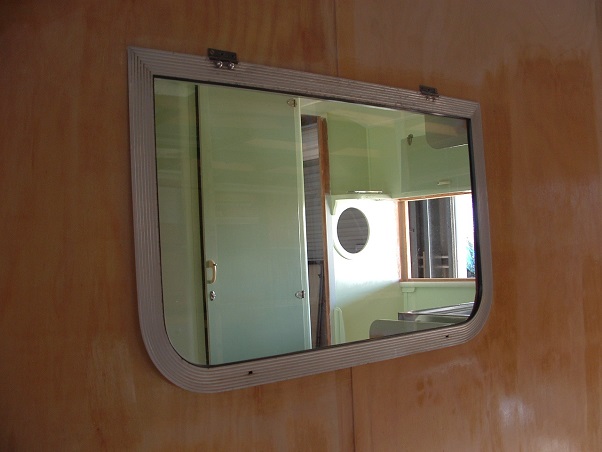 At the moment, I'm stuffing around building the framework for the windows across the front... 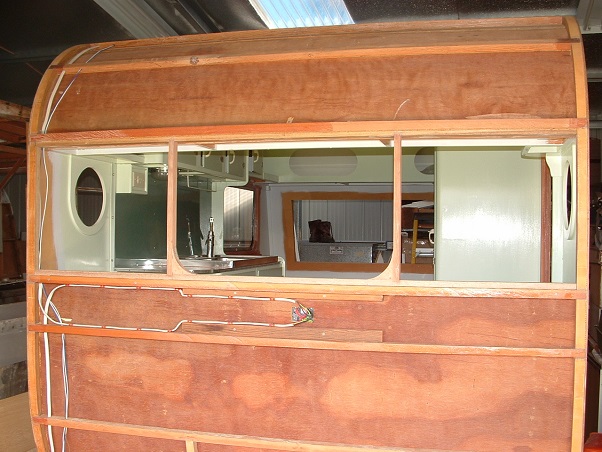 I've also had to make a couple of intricate little plywood covers for inside the front windows in the corners. I have wiring running down one side, and it needed to be boxed in... 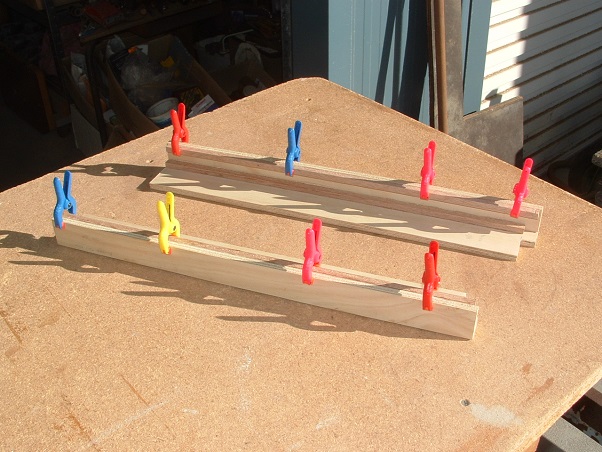 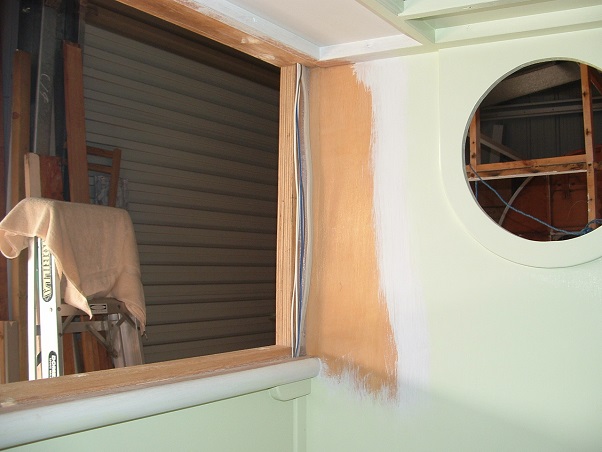 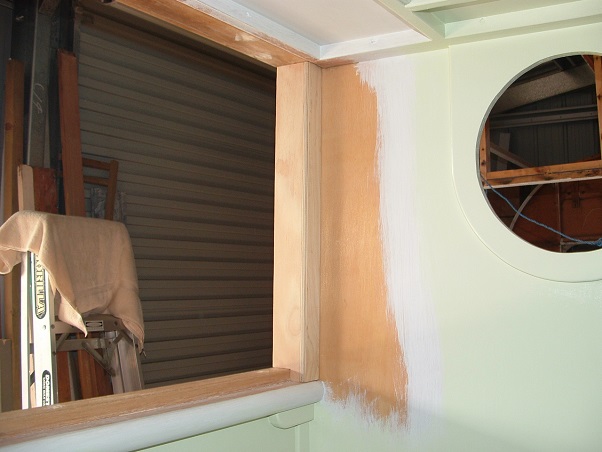 ...and obviously I had to make a duplicate copy for the other side to make the front look balanced. That's all you get for your money today... cheers, Al. |
|
|
|
Post by mausie on Jul 14, 2014 2:01:07 GMT 10
Outstanding effort Al We might have to put a heater in the carport so we can get cracking on our van again Mausie |
|
|
|
Post by Franklin1 on Aug 2, 2014 17:29:01 GMT 10
End-of-July update:
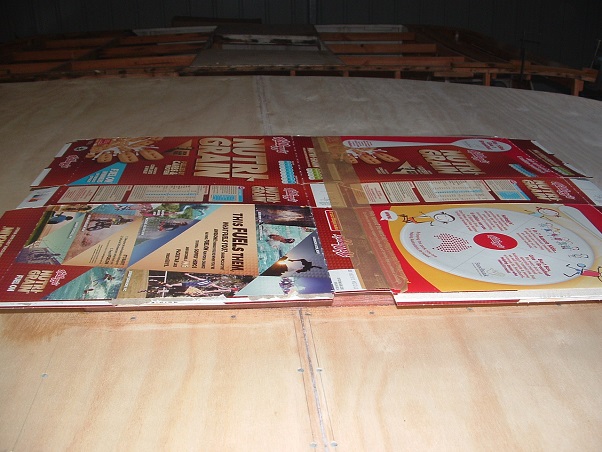
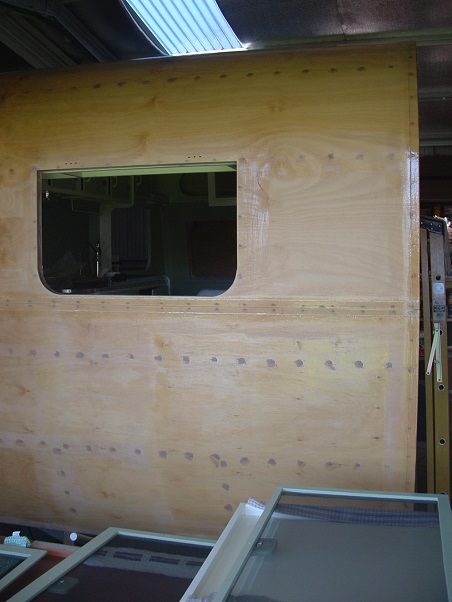
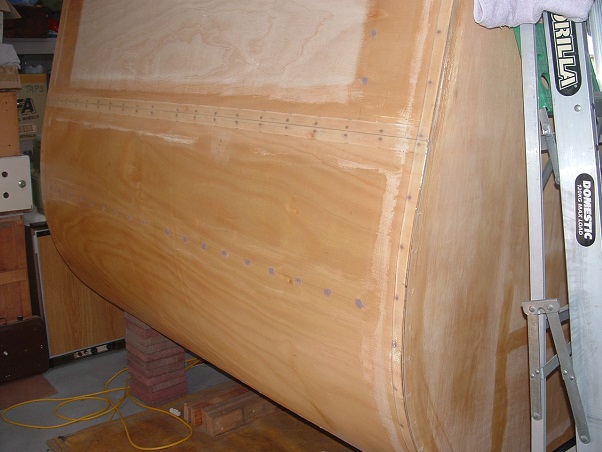
The exterior plywood skin is being progressively fitted around the top of the van. Four sheets down, and two to go. Starting at the lower front, I put Air-cell insulation into the cavities... 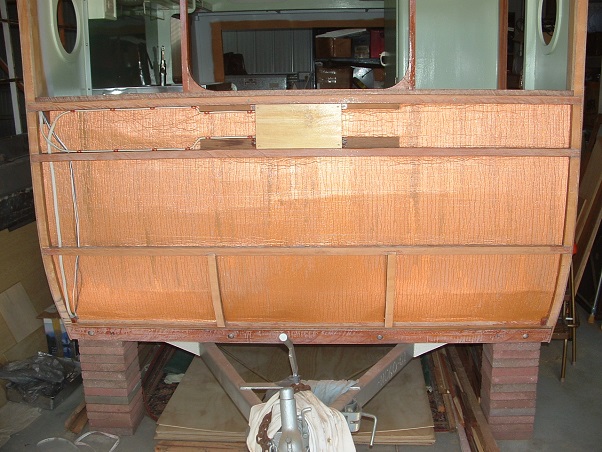 ...followed by the plywood... 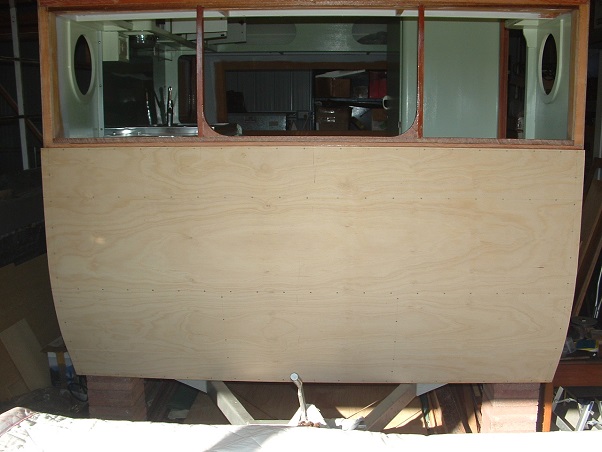 Repeat that process for the next sheet... 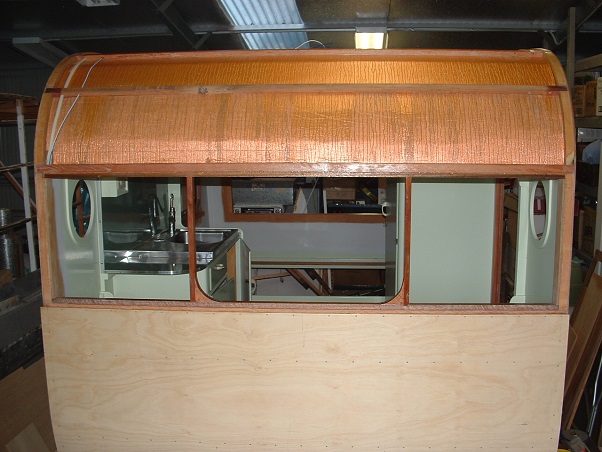 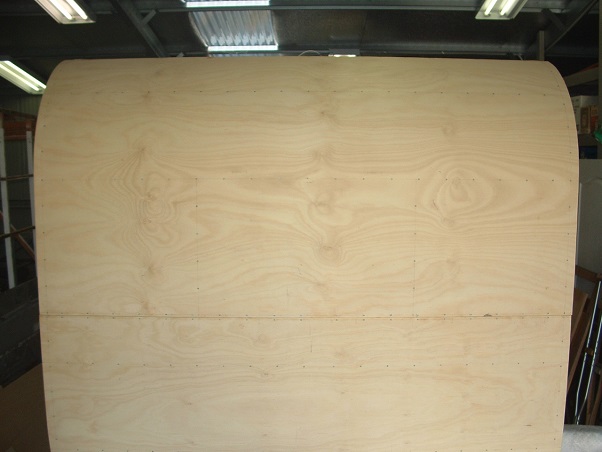 Cut the window opening...  Test fit the refurbished window... 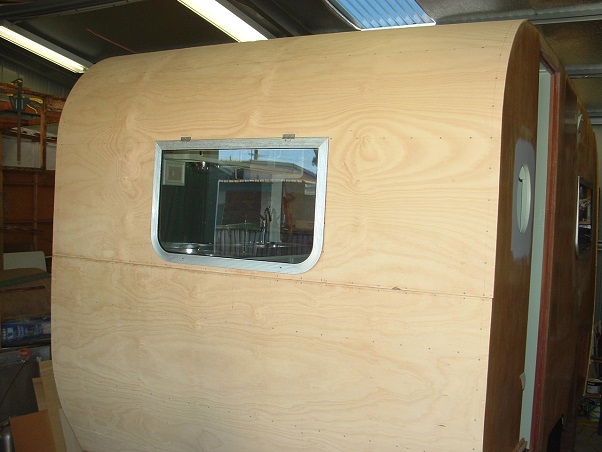 Test fit the removeable flyscreen made for the inside front... 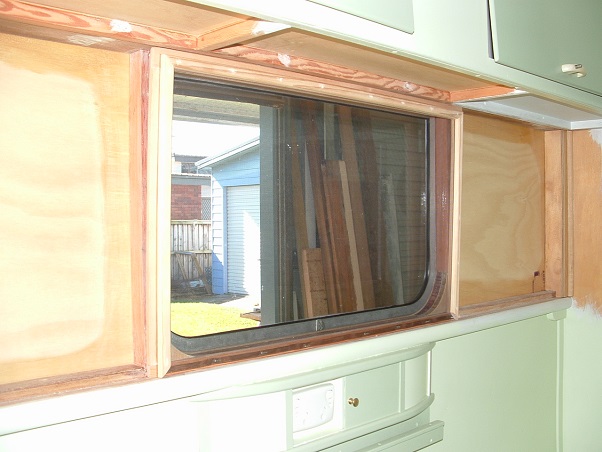 Go to the back of the van and start at the bottom... 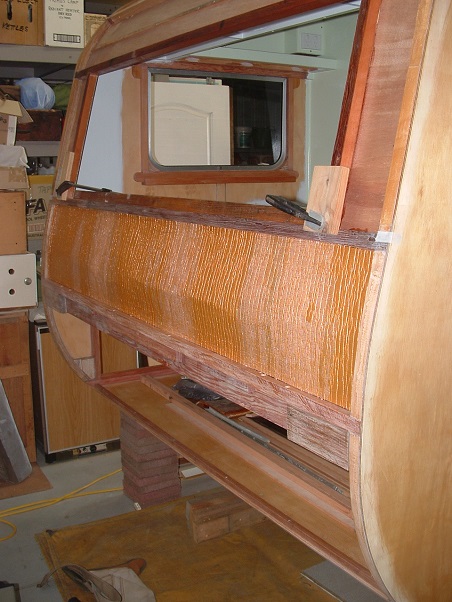 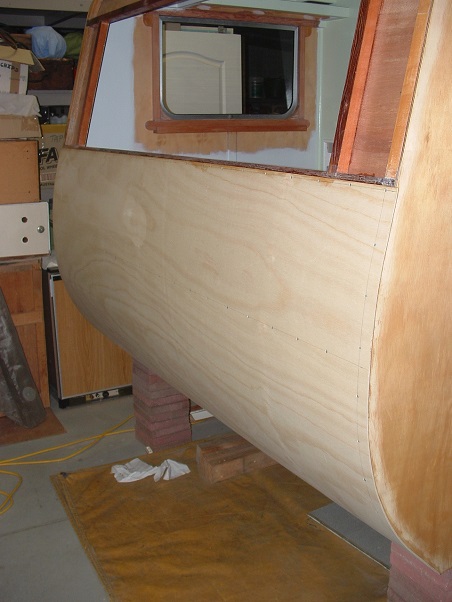 Then the second sheet... 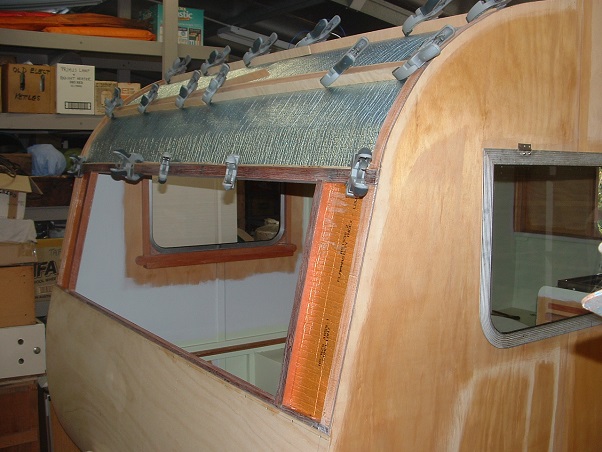 (you can see in the above photo where I ran out of the orange Air-cell, and started using a roll of silvery-blue "E-Therm" insulation I'd bought. Both products are pretty much the same - only a bit different in appearance.) 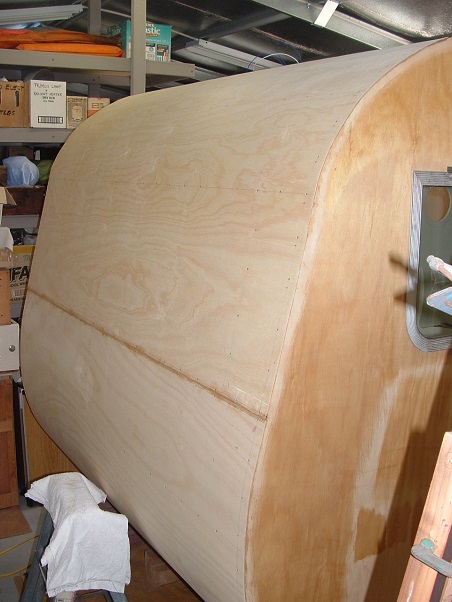 I have drilled two holes at both ends of each timber crossmember in the frame... 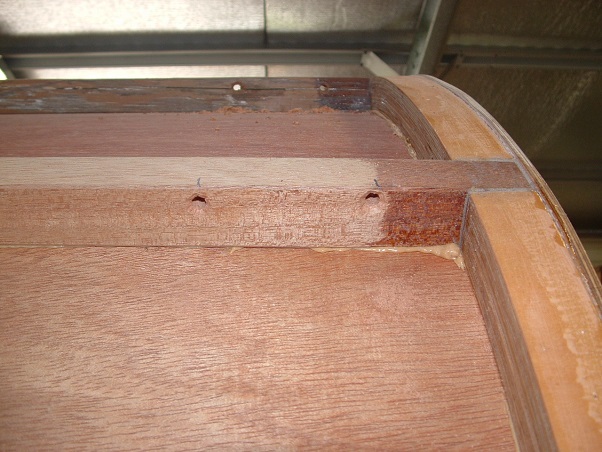 My demented logic thought the holes would be a good idea to allow air to circulate through the ceiling cavities, from the seat boxes at the front, and all the way over the top, to the bed frame at the rear. I have no idea whether it will be of any benefit or not, but I guess it can't hurt. ps. Did I tell you about the sheet of ply I stuffed up at the back of the van? Each one of these sheets goes through a 4-day process, starting with the marking out; cutting to size; coating with Bote-Cote resin; waiting a few days for the resin to cure; sanding the resin; then on Day 4 mixing up the adhesive and pasting it to the frame, followed by nailing the sheet on the van. So, I went through all of that process with the second sheet at the back. Started nailing it into position at the bottom, when I had this funny feeling it wasn't gonna be long enough to go over the top curve. Climbed the ladder and bent the sheet over the curve - and discovered it was exactly 100mm too short. Aaaargh! Had to get all the nails back out - pull the sheet off - scrape all the Bote-Cote adhesive back off the frame - chuck all that adhesive in the bin - scrape the adhesive off the ply sheet and chuck that glue in the bin as well - put the sheet aside for some other use elsewhere in the future - get a new sheet out and start all over again. Bugger!! Where I'm up to: I'm currently working on the roofing sheets that go either side of the hatch opening, and then I'll start sorting out the hatch framework and hatch cover. I still have the fixed front windows and the rear window to fit as well, but I have to go get the window rubbers for those. ____________________________________________________________________________ Canoe: Say wot?!! "What the heck has a canoe got to do with vintage caravans?" I hear you ask. Ummm...not much at first glance - but I'll tell you the story anyway... A couple of months ago a good mate o' mine bought an on-site caravan/annexe combination in a little fishing village about 90 minutes south of here. He asked me to come down for a visit and check out his van, and give him some advice on the repairs and upgrades he thought were needed. We drove down one Saturday, did all the inspections, and at the end of the day we went for a wander with our partners along the path beside the river. As we were walking along, I spotted an old plywood canoe on the riverbank - half buried in long grass - and looking like it hadn't been used in quite a long time. Being a sucker for anything old, I immediately made a bee-line for it, and wondered out loud whether whoever owned it would be prepared to get rid of it. My mate and I looked around to see if there was anyone in the nearest houses that we could maybe ask for the owner. No luck at that time, so I left it with my mate to chase up in one of his future visits down to his van. Never heard anything for weeks, but the other day he turns up at my house and says he's got something in the car for me. Opened the boot and here's the nose of the canoe poking out. He'd come across a fella in a house who knew the owner - a quick phone call and my mate was told, "Take it - it's yours!"Ahh, you bewdy!! It's an 8-footer... 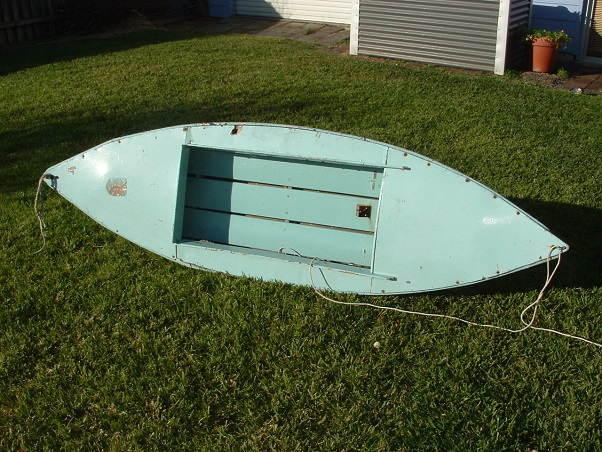 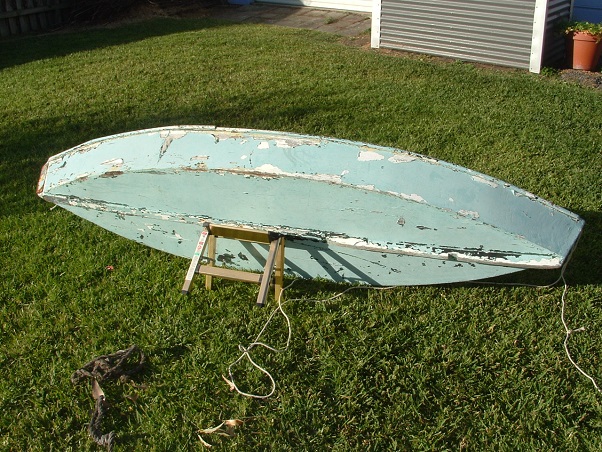 My mate had done well to fit an 8ft canoe inside his Mazda 626 sedan, let me tell you! Don't you love how marine-grade fasteners are used (Not!) when people do some repairs??... 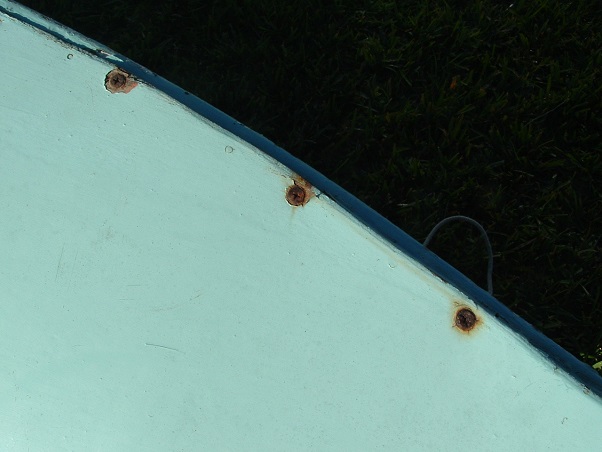 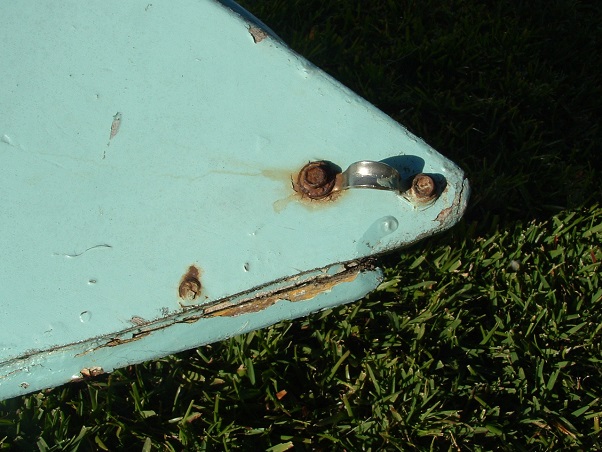 Haven't quite worked out what I'm gonna do with it yet. Maybe use it in its present condition for a "stage prop" beside the van, or maybe restore it and attach it to the van like the Bailey fella did in the old days in Tassie... 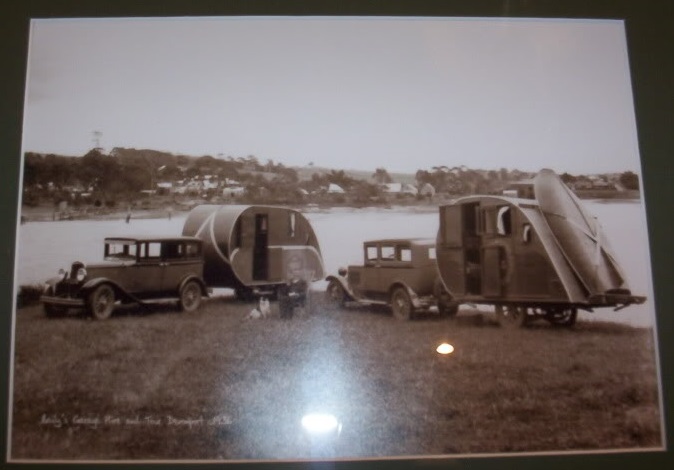 The main aim was to get hold of it before it completely disintegrated. Beyond that, I'll have to think about it a bit more. At the moment I'm up the creek without a paddle... because it doesn't have any, errr, paddles. cheers, Al.
|
|
|
|
Post by Don Ricardo on Aug 3, 2014 15:46:22 GMT 10
|
|
|
|
Post by Franklin1 on Aug 3, 2014 16:38:17 GMT 10
Thanks for your comments DonR. And yes, it's good to stand back and see that the project actually now looks like a caravan, and not just a skeleton. There's still plenty of work to be done, but at least I think I'm closer to the finish than to the start. Re the canoe - I weighed it on the bathroom scales when it was delivered the other day, and it weighed 21kgs, which is about the same as a spare wheel and bracket on the back of a van. So it wouldn't make that much difference to the overall weight of the van, hey?! Not that I'm probably gonna end up tying it to the back of the van anyway, but at least it's an option to dream about. Every time I pick the canoe up, another chunk of rotted stuff falls off it, so by the time I get around to deciding what to actually do with it, it'll only weigh about 10kgs, heh heh. And speaking of canoes, here's a family photo of my four brothers and my sister and me mucking about in two canoes sometime in the latter 1950s. That's me in the middle of the canoe at the back...  There's just something 'romantic' about old caravans, and old canoes, and "messing about with boats"... cheers, Al. |
|
|
|
Post by Franklin1 on Aug 24, 2014 22:12:59 GMT 10
August update:
Exterior cladding: This has been completed. Do you like my mosaic pattern of insulation??... 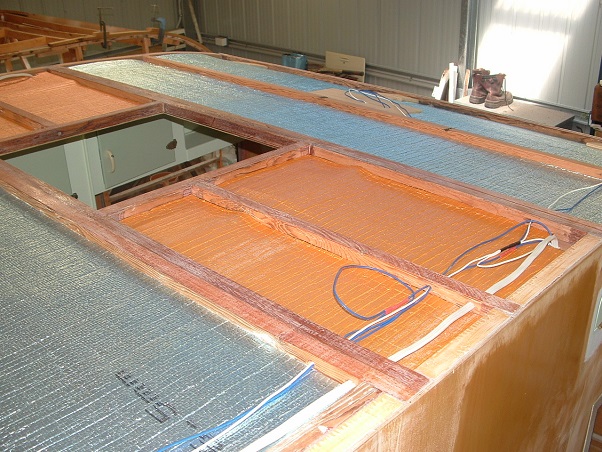 Final ply sheets in position... 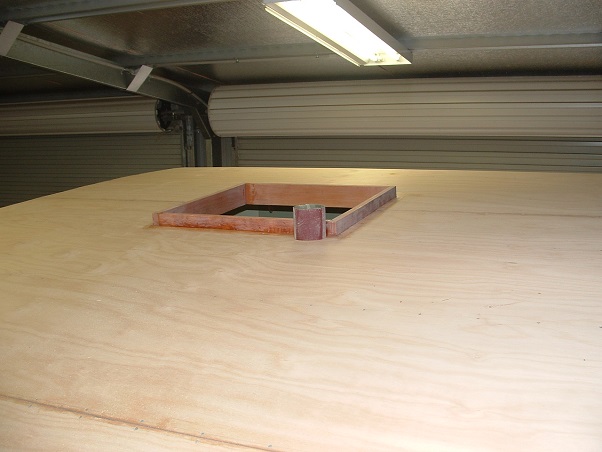 Overhang on the edges trimmed back with a router... 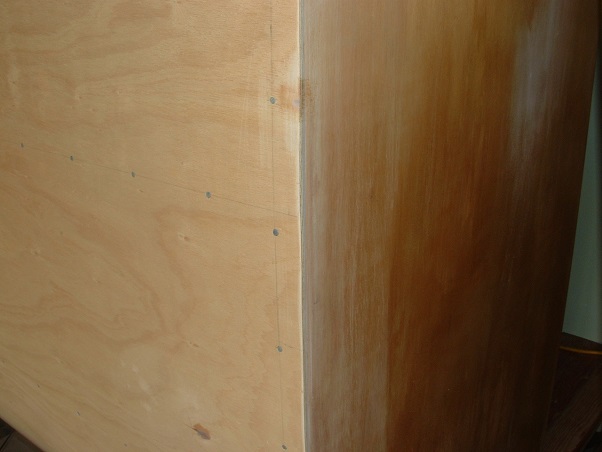 Rear access door: Rear access door: On the original van, the access door was a pokey little thing that you'd be hard pressed getting a clenched fist through. After seeing the door that JBJ created for his DeeJay van, I've ended up doing a similar thing... 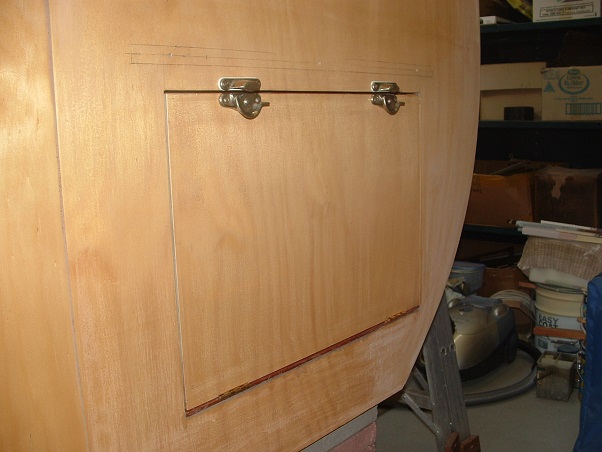 The locks are genuine 1960s sash window locks, salvaged from old timber windows and stripped of layers and layers of paint... 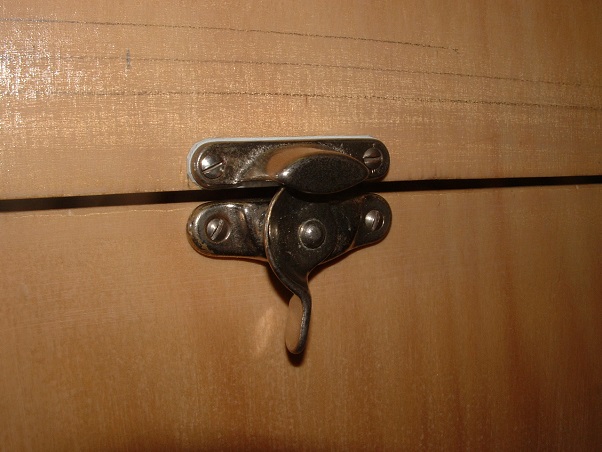 The door is a multi-purpose door. It folds down to be a table for roadside rest stops, or for use when camping. Cuppa tea, anyone?.. 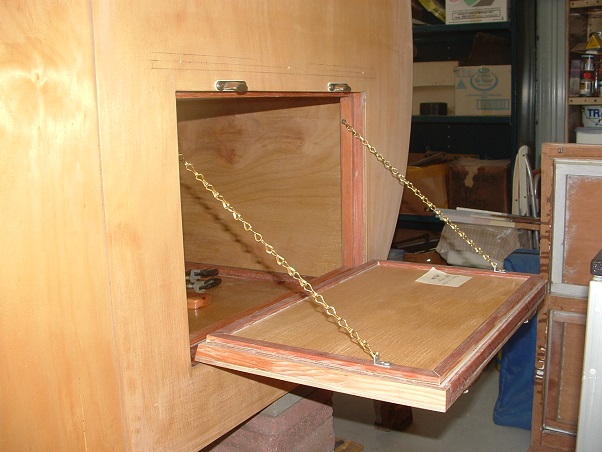 A couple of lengths of jack chain and some removable brackets I made, keep it in place... 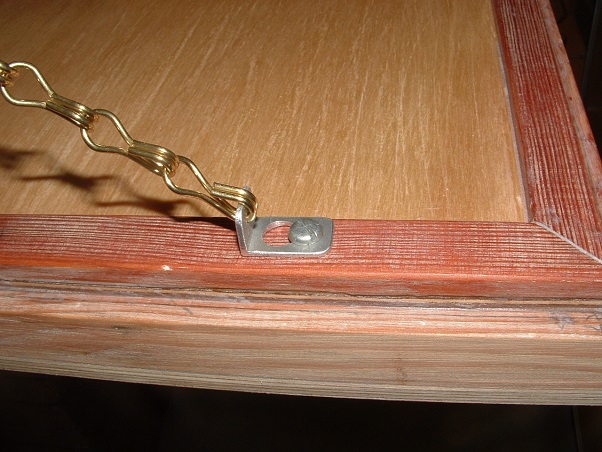 Undo the chains and the door can drop down to allow easy access into the van...  A timber weather strip was glued above the door... 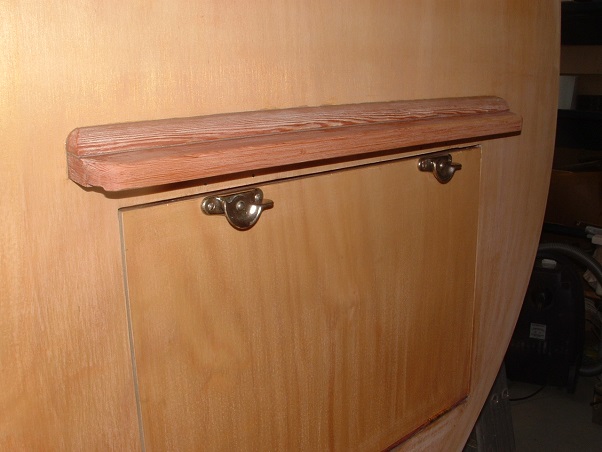 When the door is opened and used in the "table position", we don't want the van filling with flies, do we?, so I've made a removable flyscreen that fits on the inside of the door frame. When I want to load and unload stuff, I'll just lift the flyscreen and put it to the side, out of the way... 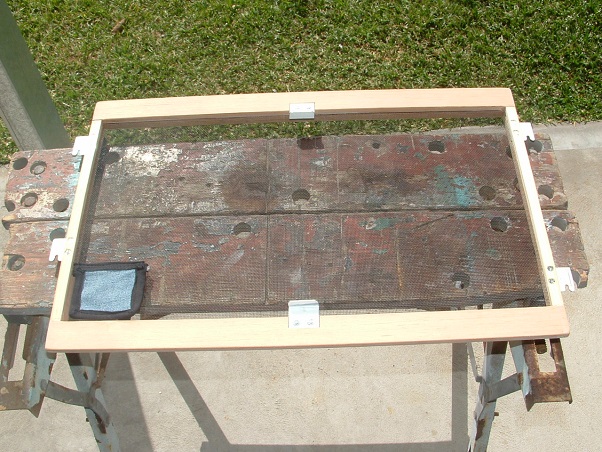 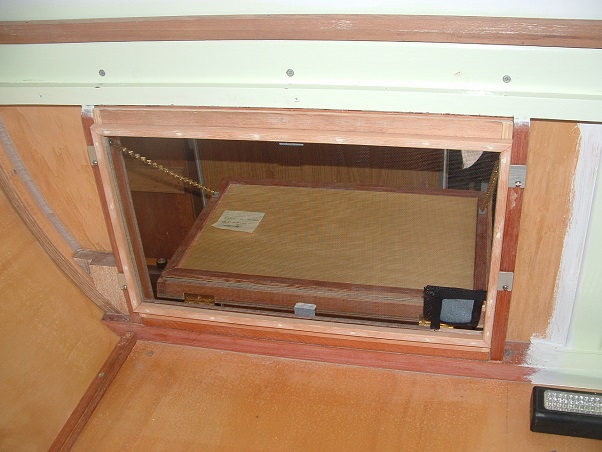 The little denim patch that I sewed onto the fly mesh in the bottom corner allows an electrical lead to be passed through the screen for use outside... 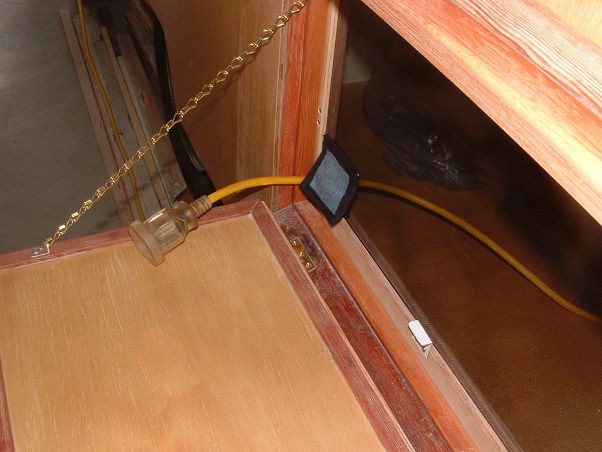 Other stuff: Other stuff: the list of all those fussy little finishing jobs is slowly being worked through. Things like timber trim around the hatch opening, and the rear window frame... 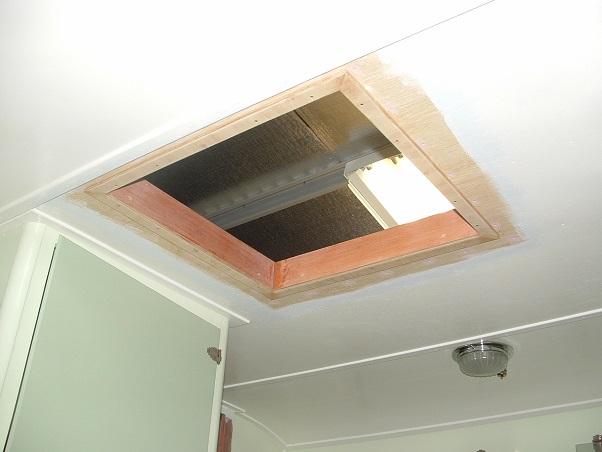 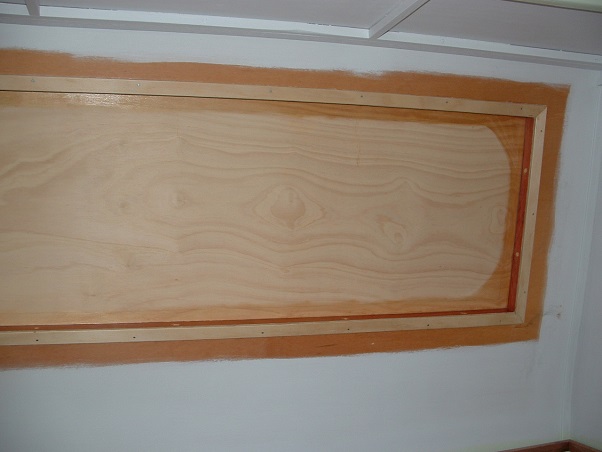 Still lots to be done. I'll be hitting the paint brush soon, to start getting some of the bare areas covered up a bit. cheers, Al.
|
|
willow5075
Full Member
 Willow & the MOTH
Posts: 355
|
Post by willow5075 on Aug 25, 2014 15:40:35 GMT 10
wow looking good! Your attention to detail is amazing!
|
|
|
|
Post by Don Ricardo on Aug 25, 2014 21:19:59 GMT 10
G'day F1, I love the fly wire screen for the rear access door! Plus the provision for the power cord. Another novel and creative Franklin1 idea. I think you missed your calling as a caravan designer! Don Ricardo |
|
|
|
Post by sportsman 1 on Aug 26, 2014 17:43:18 GMT 10
I just love that woodgrained glass!
Great for privacy too, and you wont need curtains.
Always something to learn on here.
|
|
|
|
Post by Franklin1 on Oct 3, 2014 13:20:03 GMT 10
September update:
Due to medical issues, progress on this project has slowed right down, and may be slowed down for some time to come.
To get this thread up-to-date as far as possible, today I'll talk about the hatch opening, the hatch flyscreen, and the hatch cover...
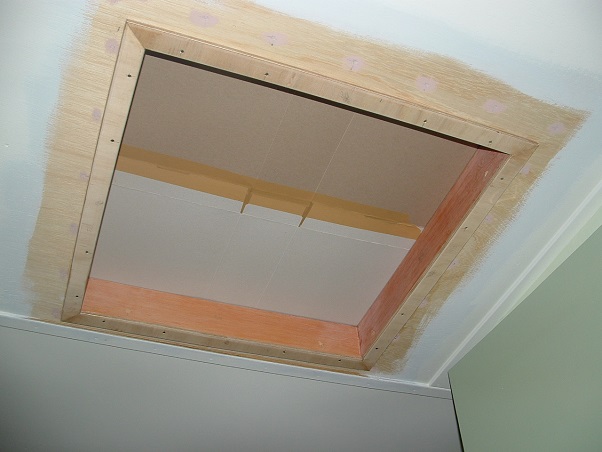
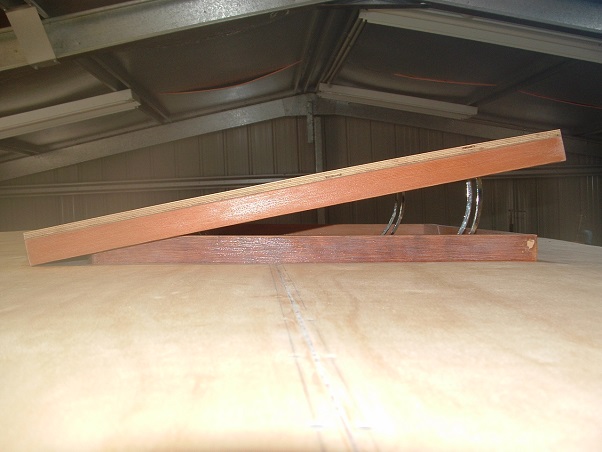
Hatch opening: the location of the hatch on this van leads to the possibility of water collecting at the front of the hatch framework, and possibly rotting the framework in the years to come. It's a by-product of the design of these old vans where the roof is flat from side to side (or is sagging), and the hatch is located on the downslope from front to back. I decided to make a small change to the design and add a curved section of laminated plywood to the front of the hatch opening up on the roof.
First I had to glue strips of plywood together to get the curved shape...
...then cut the laminated block to match the width of the hatch opening...
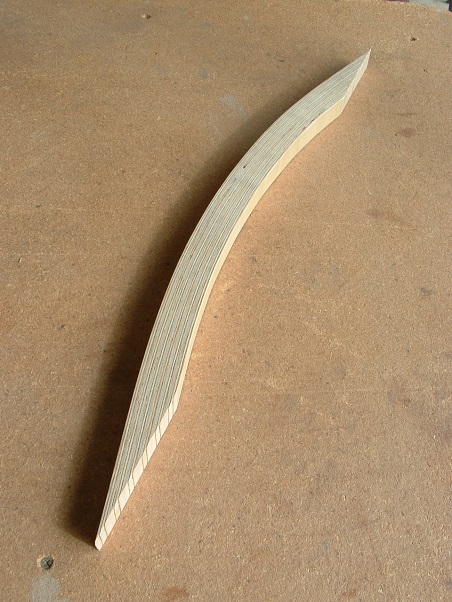
This block was then glued up on the roof in front of the opening...
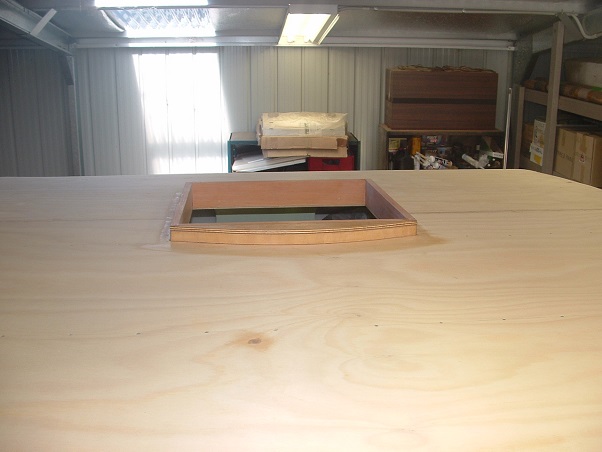
This view is looking down on the laminated block, with a plywood cap glued on it...
My logic is that this curved shape will now channel water to either side of the hatch opening, where it can then flow down the sides, and off the van more readily.
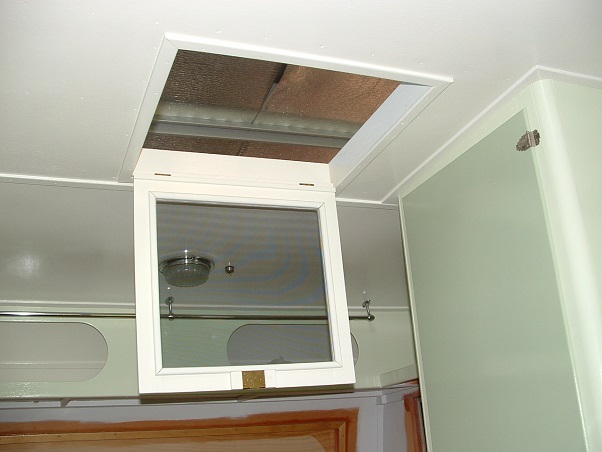
Hatch flyscreen: There is only minimal height inside this van, and for a bloke like me who is 6ft tall I need all the head space I can get. When I stand under the hatch opening, there is about half an inch to spare above my head. This meant that the flyscreen had to be flush with the underside of the hatch opening, and I couldn't have any handles sticking down lower than the hatch frame. After a fair bit of thinking, I ended up building a hinged frame that opens like a cupboard door.
I had to build the screen framework bit by bit in place, so the end result would match perfectly to the hatch opening (which wasn't neatly square due to my slack carpentry). First I laid some cardboard on top of the opening, and traced around the inside to get a template...
Then gradually build the screen...

Once I had the frame built, the wire mesh and flymould were added, followed by a brass cupboard door lock. After the final step of painting, the screen now opens and locks with a key (which is obviously stored on the keyrack near the door so I don't scrape my head on it)...
I even had to make my own catchplate for the lock by drilling and filing a piece of brass sheeting...
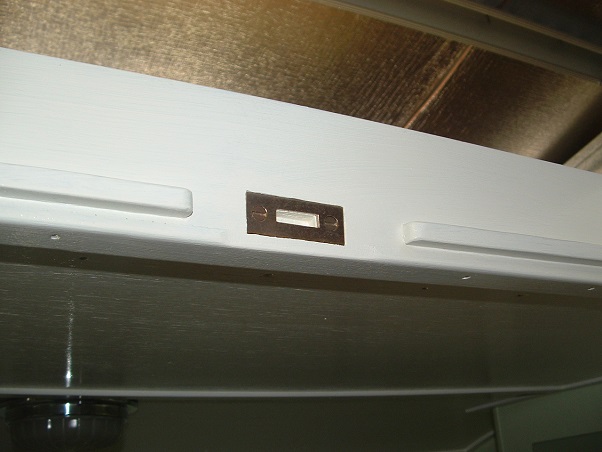
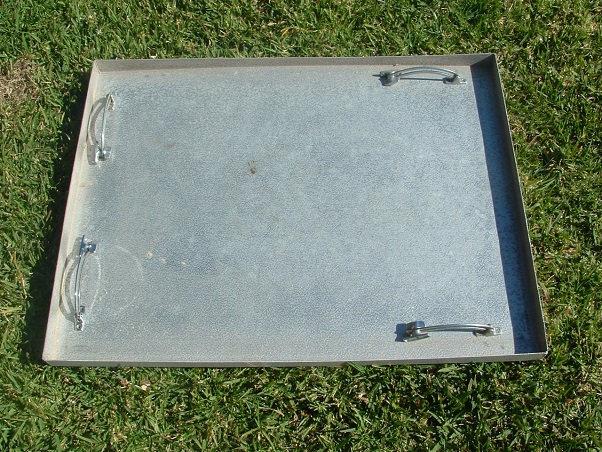
Hatch cover: At some point in the life of this van, the original plywood hatch cover had been replaced with an aluminium version. It was a lovely piece of craftmanship when you looked at the underside of it - all corners neatly welded, and four quadrant stays to hold it in position...
But it was when you looked at the top side of the cover that the quality of the work fell away a bit...
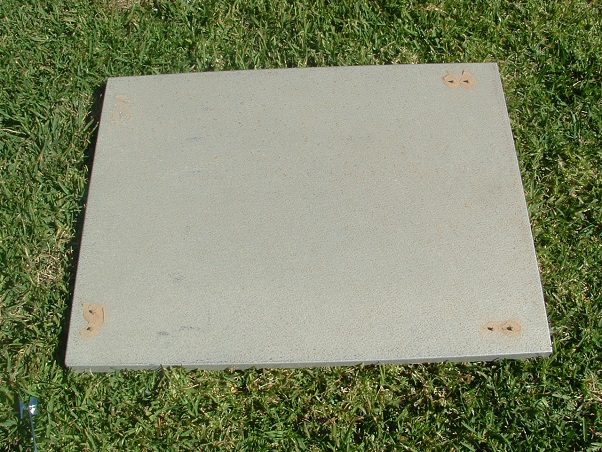
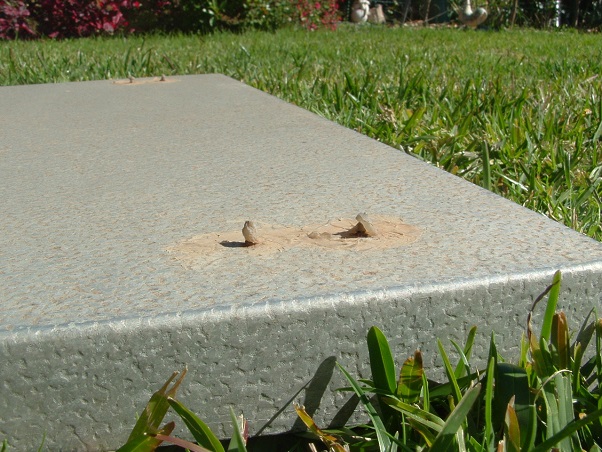
Perhaps those protruding screws were meant to stop pigeons from landing on the top of the hatch??
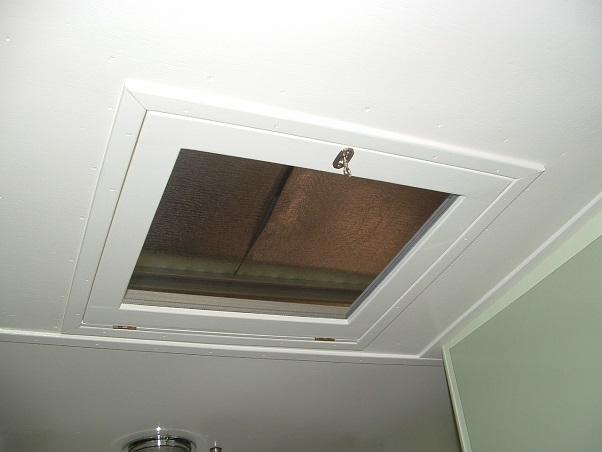
I wanted to go back to having a plywood cover, so I set about building one from scratch. But, you know me - I couldn't settle for any standard cover, and I built a deluxe version instead. It got insulation fitted, plus an extra circle of plywood for screwing the smoke alarm into...

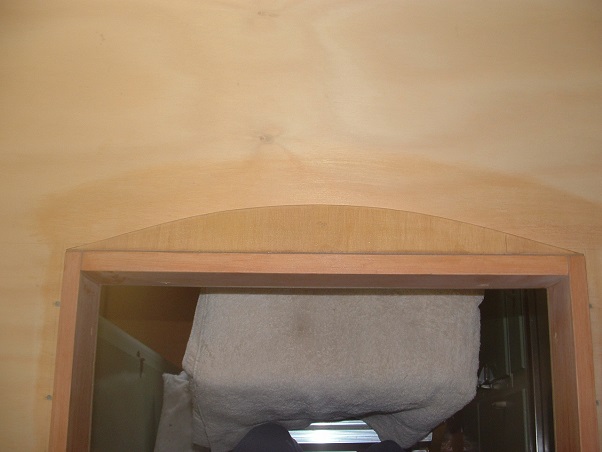
The finished hatch after painting looks like this...
I like the idea of the quadrant stays because they give some flexibility as to how the hatch cover is opened - either front up, or rear up, or both ends up. You can see in one of these photos how the cover sits down over the curved lamination block and hides it from the eyes of purists ...

See you down the track when I get my health sorted out.
cheers,
Al.
|
|
|
|
Post by DC3Td on Oct 3, 2014 22:49:09 GMT 10
Love your work as usual Al.Hope you & yours are able to overcome the health issues. gordon
|
|
|
|
Post by Franklin1 on Oct 31, 2014 20:25:23 GMT 10
October update:
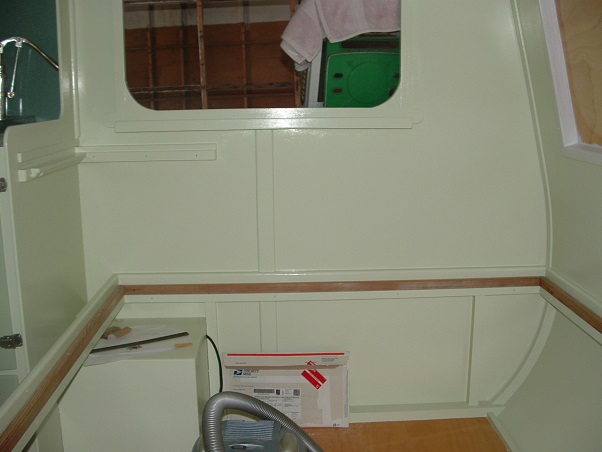
Painting: Interior painting has essentially been completed in the van, with only the areas around the front and rear fixed windows to go. I won't complete those sections until I get up to Spectrum Rubber and get the right window rubbers, and then cut out the openings in the plywood...
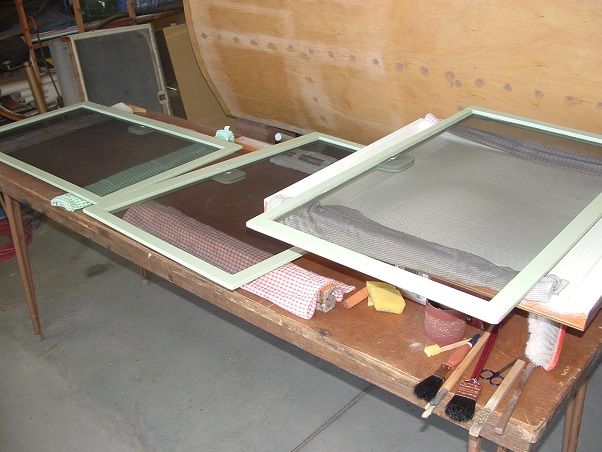
The flyscreens have also been painted in readiness for fitting...
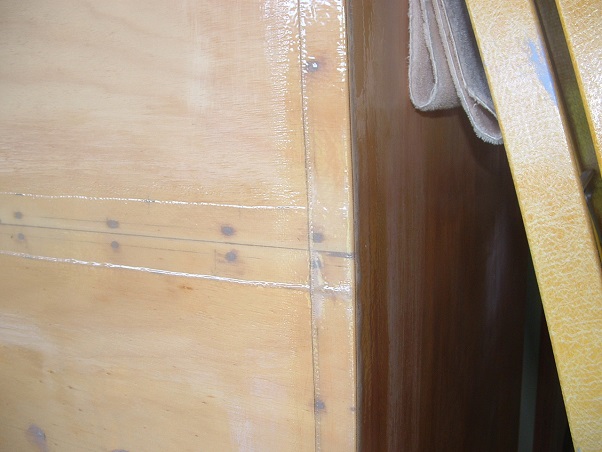
Exterior plywood shell: All the nails used to fix the plywood skin were punched below the surface and filled with a Bote-Cote "putty". About 500 nails were used on the roofing sheets, so it only took me about 5 minutes to do this job (NOT!!  )... )...
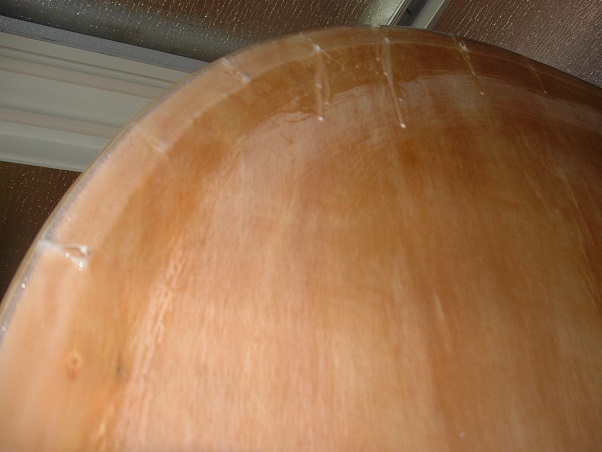
Fibreglassing: My previous experience with fibreglassing could be fitted onto something about half the size of a 2-dollar coin, and I now know that when it comes to fibreglassing, I would make a very good Butcher. I put fibreglass tape over all the joints in the roofing ply, plus taped all around the edges where the roof sheets meet the sides. It ended up looking fairly reasonable on the flat faces...
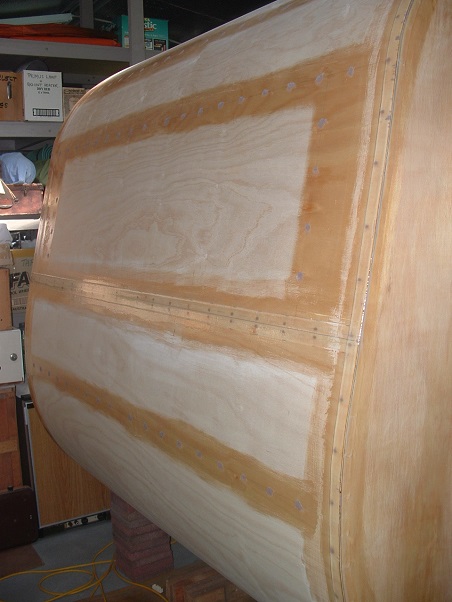
...but I was blowed if I could get the tape to sit down flat when I folded it over the edge onto the side. One thing I quickly learnt was that a 3mm radius on the edge of the ply is nowhere near generous enough to allow the tape to fold neatly over the edge. But it was too late to do anything about that - in hindsight the radius should have been at least 6mm. Needless to say, the sides of the van will now require a fair bit of "remediation" work to get the fibreglass layer to look presentable again...
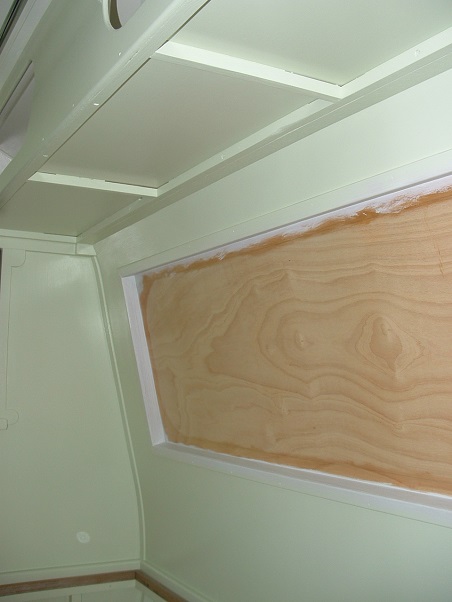
Once all the fibreglassing had been completed, it was then a matter of going back and painting resin onto all the bare ply sections in between...
I have quite a number of hours ahead of me to get the whole exterior surface sanded back smooth, ready for the adhesion of the roofing canvas and the general exterior painting. However, I'm off to hospital on the 10th Nov for an operation, and will then be on "restricted duties" for at least six weeks afterwards, so whatever I don't finish before then will have to wait for a while.
Thanks Gordon for your good wishes. Assuming all goes well with the op., we might be able to start putting our recent overload of medical issues behind us - that would be a pleasant relief .
cheers,
Al.
|
|
|
|
Post by DC3Td on Oct 31, 2014 21:10:21 GMT 10
Great to see an update Al.And only 500 nails? I remember when we used to build Morris LD5 buses for what was known as the Dept of the Interior & once up on the roof & crouched down as the workshop roof didnt allow much more height,having to mark out/drill every 3" some 1100 1/4" holes to be concertina pop riveted.Ah the joys of yesteryear - nothing much changed has it except you`re using nails.As usual love your work & keeping you & yours in my thoughts. gordon
|
|
|
|
Post by cobber on Nov 1, 2014 8:27:31 GMT 10
G'day Al, You sure are a persistent young bugga aye ?... not feeling great but still making good progress on this project. We can't buy 'Reswood' these days so....you decide to make your own, typical .... it should last forever no matter what you paint it with And in-spite of what the Fibreglass fanatics say she is tricky stuff to work with for a first timer, I tried using it on OL '36 ( keep that to yourself ) and it didn't turn out as smooth as I had hoped, but you, being a perfectionist, will fix yours up so it looks great I bet. Good luck with the operation . Cobber. |
|
|
|
Post by humpyboy on Nov 1, 2014 9:04:38 GMT 10
Good to see some more progress on this project Al, I hope all goes well with your Op and you are soon back into it.
|
|
rex
New Member

Posts: 39
|
Post by rex on Nov 1, 2014 16:27:06 GMT 10
Everytime I check on your progress I am Blown Away by the result .
It's Stunning - A Beautiful little van , All done by hand .
cheers Rex
|
|
|
|
Post by Franklin1 on Jan 8, 2015 13:35:00 GMT 10
January 2015 update:
Well, here we are in another year and this project just keeps going on ... and on ... and on ...
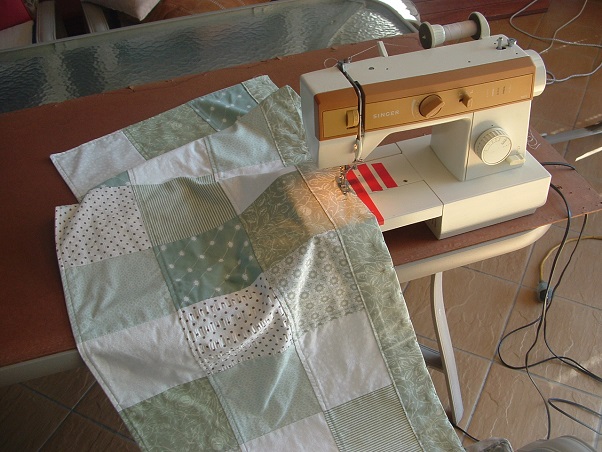
Curtains: I have been on restricted light duties following my operation late last year, and rather than sit around twiddling my thumbs I thought I would have a go at making the curtains for the van. Being an amateur when it comes to using a sewing machine, no land speed records were broken during the job, but with a lot of determination I eventually got there.
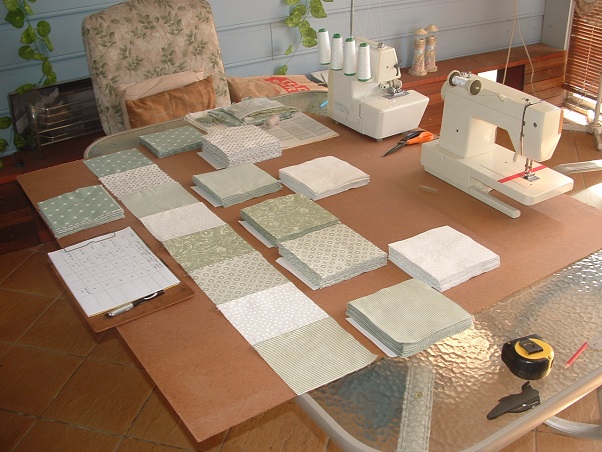
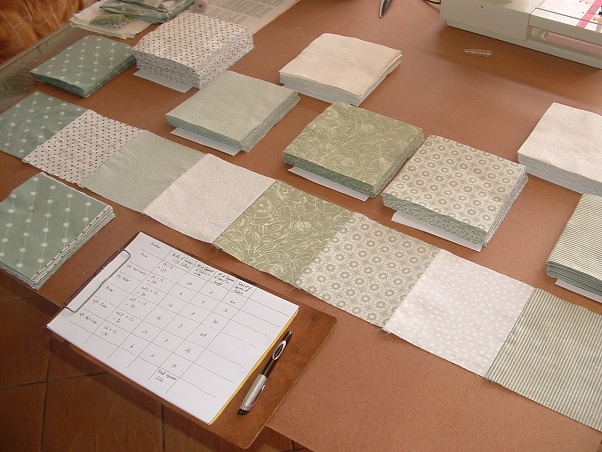
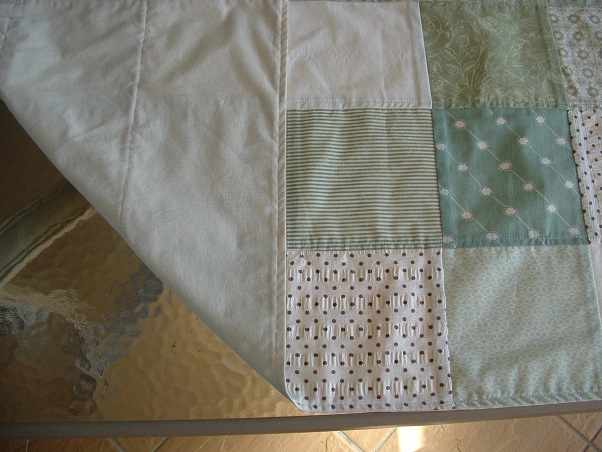
I didn't make the job any easier for myself by choosing the design I wanted, but I was looking for a "country cottage" appearance in the finished curtains, and was inspired by a quilt-type pattern I saw in a magazine last year. I had bought eight pieces of fabric/material with colours and designs that were compatible with the interior colours in the van, including the upholstery colours. All eight pieces were pre-washed, ironed, and then marked out into 7" x 7" squares and cut up (took me a fortnight to do this bit  ). ).
The squares were then sewn into strips, as shown in these photos. A total of 216 squares were sewn together to complete the 10 curtains...
Three strips were then sewn together to get the height of the required curtain (...I think the height is called the 'drop' in curtain lingo). Each curtain was then backed with natural calico...
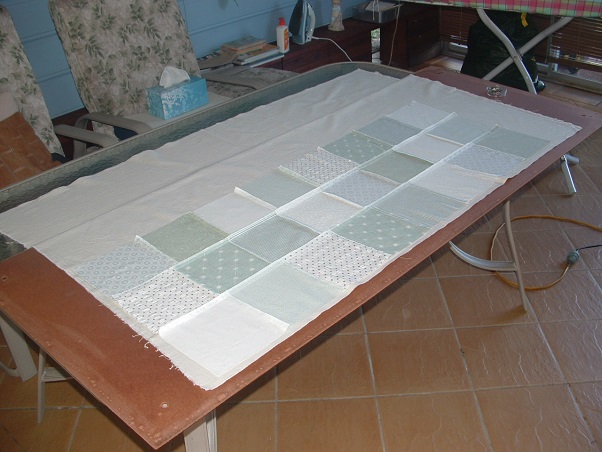
(and by jingo that calico shrinks when it is pre-washed! I was losing 2" in every foot after washing and ironing. Got caught out a couple of times for not allowing enough length for shrinkage when I was cutting it off the roll. )
The last step was to sew the pocket hem on, for the spring wire to pass through...
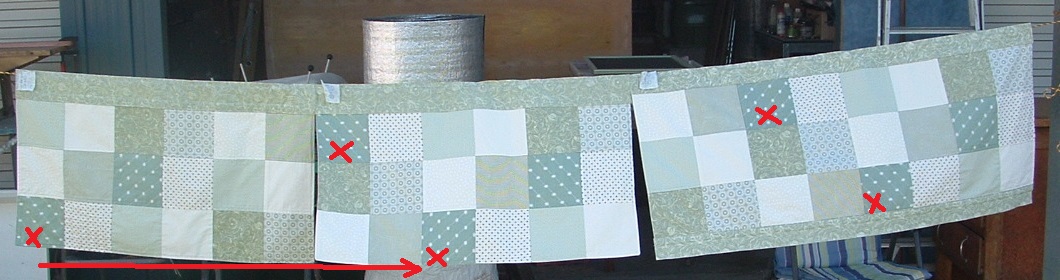
The unique feature about these curtains is that no two curtains out of the total of ten curtains is exactly the same, and yet they all seem to blend in together. Why is it so?? It's because the squares have a specific sequence which is repeated all the way around the van. If the curtains are hung out of order, the sequence is thrown out of whack. Here's a photo showing three consecutive curtains to illustrate the sequence (...follow the red cross):
I was pretty happy with how they turned out, considering I'm just a mug prepared to have a go at anything.
cheers,
Al.
|
|


 ... but as 'they' say ..... most people can't tell the difference between un-modified and modified
  )...
)...
 Am surprised you can use paint stripper on formica - would have thought it would damage the surface but obviously not.


 )...
)...

 ).
).