|
|
Post by hilldweller on Mar 17, 2014 13:04:02 GMT 10
Hi all, It is a New Zealand made Munro Pixie 10 foot. A particularly excellent choice, if I may say so   They're a cute little van - congratulations on your purchase  |
|
|
|
Post by hilldweller on Mar 16, 2014 15:47:36 GMT 10
Are you making room for another caravan?  |
|
|
|
Post by hilldweller on Mar 16, 2014 15:15:26 GMT 10
It's coming together beautifully and those curtains really are gorgeous |
|
|
|
Post by hilldweller on Mar 16, 2014 15:11:11 GMT 10
Started on the new framing for the roof. First removed the cupboard, before it fell down, and put it out of the way pending clean-up and repainting at a (much!) later date.  Decided to replace the bowed pieces with new copies and add two lighter pieces running front to back. It's not a perfect solution but hopefully the slight upwards curve on the additional pieces plus better fixing of the top cupboard and a new watertight (as opposed to waterlogged) roof will be sufficient to prevent a recurrence of the sagging problem. If not I shall have to console myself that I’ve exactly recreated the original look   . 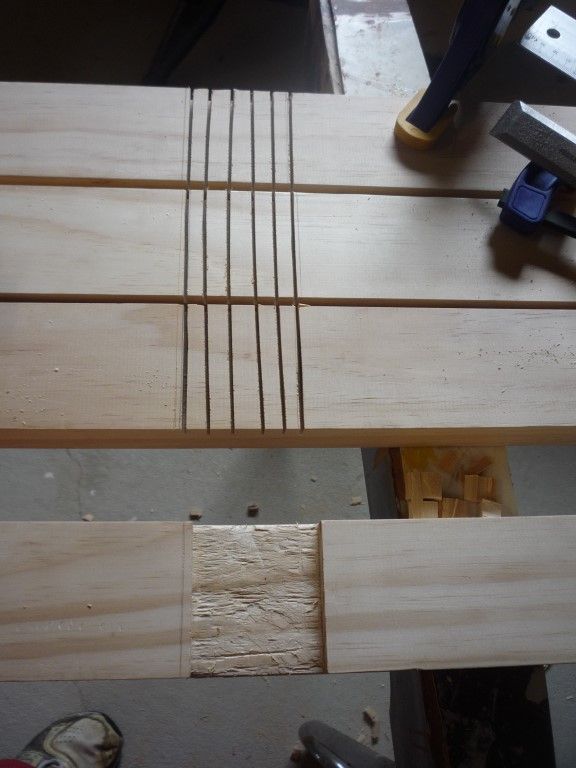 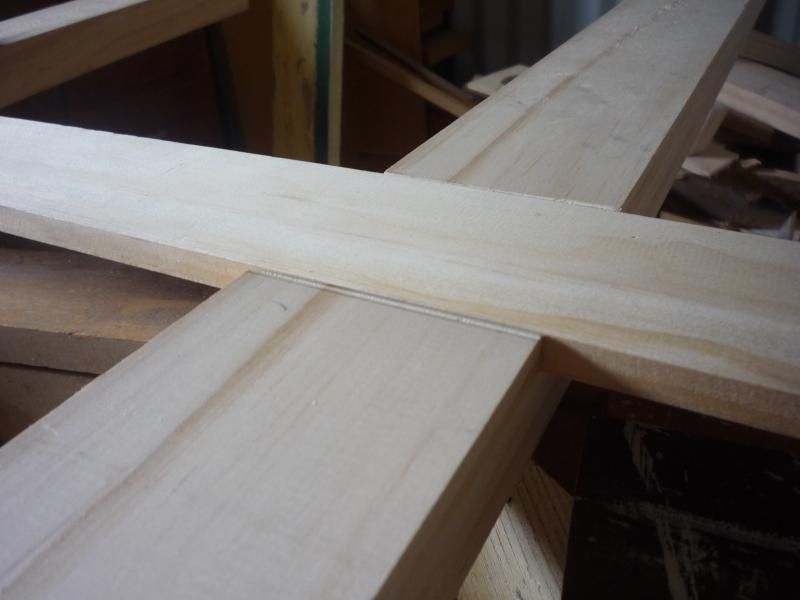 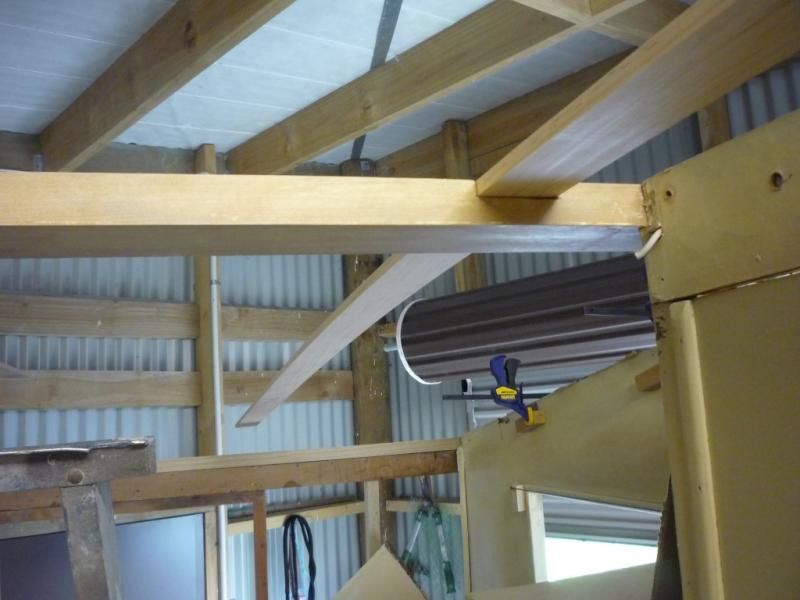 That last pic's the original centre support, minus a few layers of dirty cream paint. I am enjoying the fact that with Mabel, pretty much everything is there – so no need to think about where to put things and measure distances, just line them up with the 62 year-old pencil marks . |
|
|
|
Post by hilldweller on Mar 10, 2014 9:46:11 GMT 10
[quote author="akeepsake" source="/post/106006/thread" timestamp="1394357386
Look familiar Hilldweller?
[/quote][/p]
Wow that's virtually identical, except that yours is more up-market (real timber rather than hardboard and ply). Have you got plate holders too?
Your wheels look great Looking forward to pics once the cladding's been painted.
|
|
|
|
Post by hilldweller on Mar 8, 2014 17:36:13 GMT 10
Had time to potter around this afternoon so began by removing the nails left behind when the roof spontaneously jumped off with no help from me at all  ;)and sanding the top rails. They cleaned up quite well but there are hundreds of nail holes so I might get another bottle of the wood hardener and then try to fill the worst of them. Then the roof supports. Nothing complicated about the way they were attached – just butted up to the top rail … 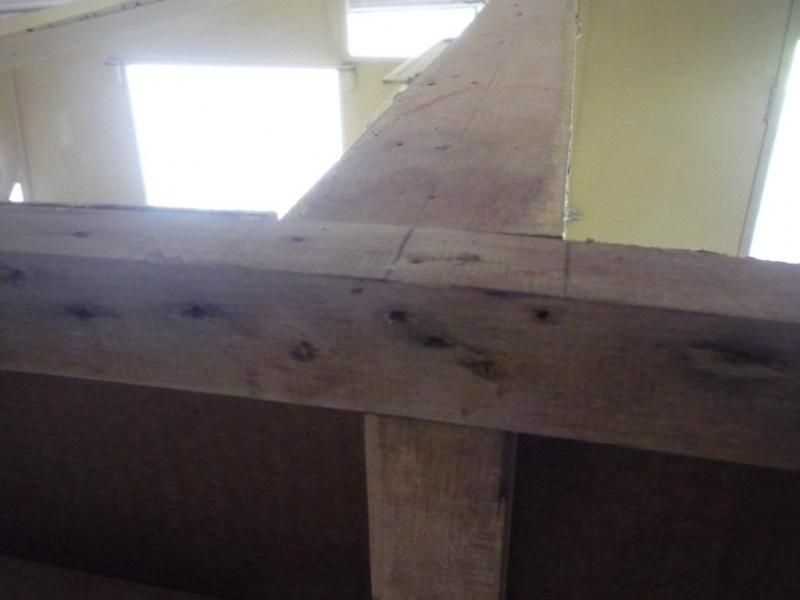 … and a couple of nails whacked in at each end. Then the canvas/hardboard roof was nailed along each rail. As an aside, the only screws I’ve found so far are where things like hinges were attached, and no glue.  I left the middle/wardrobe one in place and this is the rest, with a hopefully straight bit of pine on the right for comparison. Three of the four are out by a little over an inch in the middle. 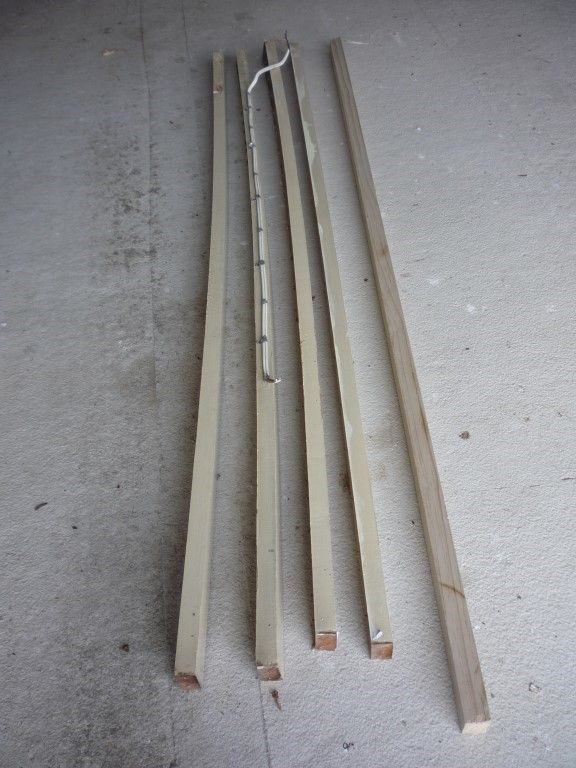 With those pieces removed it became apparent the overhead cupboards had been pretty much hanging from them with no support underneath and just some dodgy quarter-round at the front end. With all those teacups and eggcups etc there would have been a fair bit of downward pressure on the roof. There’s a perfectly good bit of framing running behind that bottom edge but the cupboards weren’t attached to it . I think they will be, pretty soon . Think I can do it so it’s only visible from inside the cupboard. I had been thinking the most likely crockery would have been enamelled tin, but looking at the shape of those cup holes they're definitely for proper teacups with little handles. The plate spaces are all a bit smaller than today's equivalents, which might be why 4'1" was a perfectly adequate width for the double bed.  6'4" long though.  |
|
|
|
Post by hilldweller on Mar 8, 2014 16:30:26 GMT 10
What happens if you heat it and then keep it flat while it cools? Do you have a spare bit you could try with? (This may be a silly suggestion as I've never tried but it's the first thing that occurred to me.)
|
|
|
|
Post by hilldweller on Mar 8, 2014 14:08:41 GMT 10
Gosh that all looks so nice and smooth and shiny - well done Love that floral curtain too - is it barkcloth? Looks fab. Looking forward to more pics. |
|
|
|
Post by hilldweller on Mar 8, 2014 12:09:27 GMT 10
Mmmmm.... still think she's lovely Can't believe she wasn't snapped up when you first posted. |
|
|
|
Post by hilldweller on Mar 7, 2014 20:04:24 GMT 10
G'day hilldweller, Just thinking a bit more about the bowed ceiling battens not being able to be turned on their edge... Could it be a simple matter of turning them over so they are bowed upwards? You could get another fifty years out of them before they sagged again...maybe... Hmmm.... now that might work. I'll see how they look when they're off. If they can be persuaded to sit more or less straight it would be a very neat solution. If they curve upwards it would introduce a whole new set of issues. Keepsake - your suggestion re a hatch and tapered roofline makes perfect sense in every respect but I really want to keep Mabel as original in her overall look as possible. (Not to mention that if she gets any taller I'll never get her out of the garage - she's already trapped in there until someone removes her wheels again!) On a different van I would probably do as you suggest. |
|
|
|
Post by hilldweller on Mar 7, 2014 19:44:06 GMT 10
That looks awesome -it's all so beautifully neat Will there be a delay in proceedings now while you munch your way through some more boxes of cereal before the next phase of work? Must remember to start saving some. |
|
|
|
Post by hilldweller on Mar 4, 2014 10:14:30 GMT 10
Water damaged ‘eaves’ removed, which changes her shape completely - funny how those little details make such a difference to the overall look. 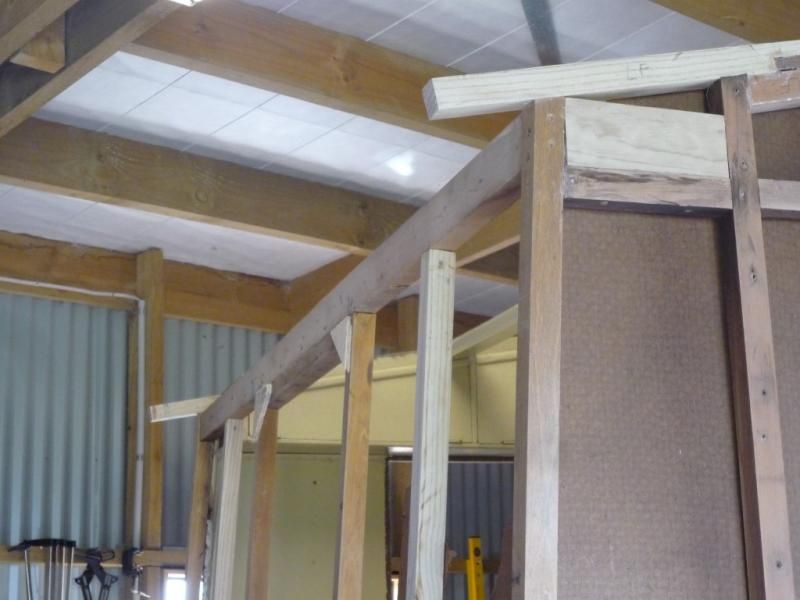 Replacements going on (loving all the new clamps even more than the multitool LOL) … 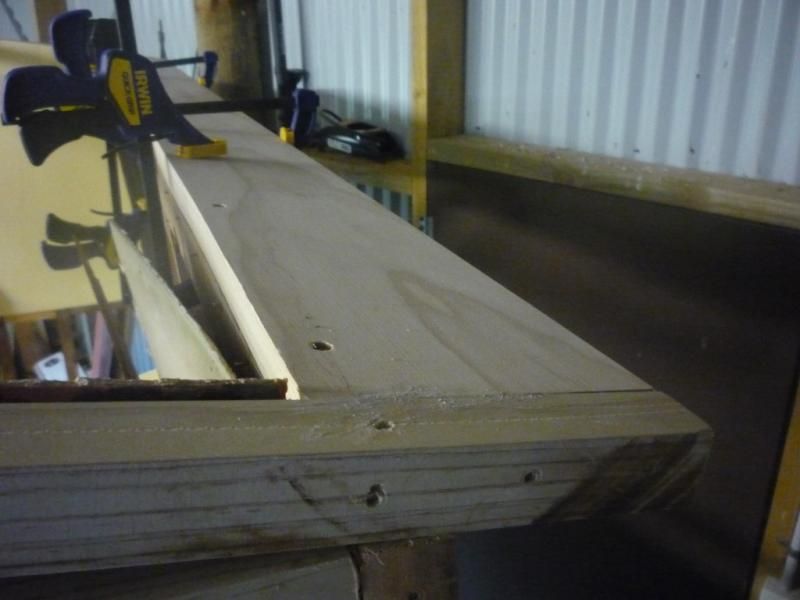 This is from the inside and will all be covered over when new hardboard lining goes on. 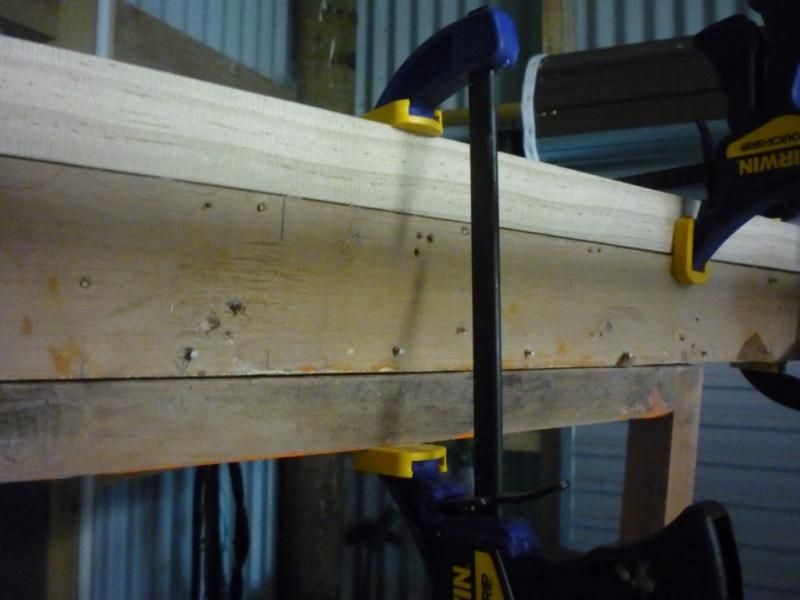 All done bar a bit of trimming on a couple of corners where the perimeter rail is slightly too long. In hindsight it would have been easier to have done this, the ends of the top rails and the curved corners all together, removing the lot and then putting the corner on first and slightly too long, cutting it down to the exact length and then putting the perimeter rail on top. But the step by step approach was probably safer with bent timber and only one pair of hands. 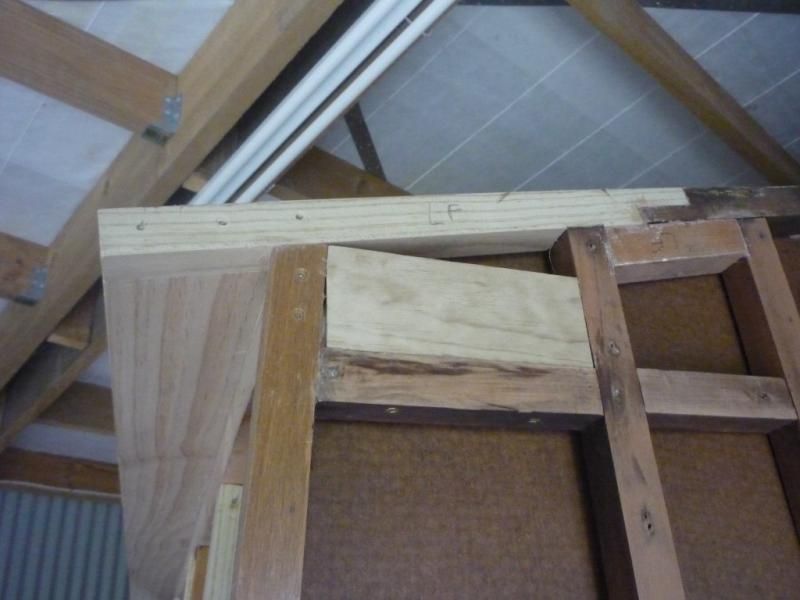 Life is about to get a lot busier with work commitments etc so today is probably the last weekday for a while where I’ll be able to find Mabel time. Will try to keep doing little bits at the weekends, weather permitting (she's under cover but it can get very cold out there!). |
|
|
|
Post by hilldweller on Mar 3, 2014 16:52:39 GMT 10
Gosh it looks wintry over there! Van looks great. I like how you've done the joins vertically and made a feature out of the cover strips.
|
|
|
|
Post by hilldweller on Mar 3, 2014 10:13:12 GMT 10
Ol' 36 looks superb Cobber. Bet you had to field an endless stream of questions.
|
|
|
|
Post by hilldweller on Mar 3, 2014 7:32:41 GMT 10
One thing that would be interesting to know is 1952 the build date, or the "reroofing" date - it's pattern and shape looks much earlier. But maybe they're slow changing fashions in NZ. Just what are you implying LOL? Interesting thought about re-roofing and I will be sure to let you know if I find any other dates, but I am quite certain that as a brand new van in '52 she would have been the most up to the minute trendsetting van in Bluff LOL. The Art Deco festival one year is not a bad idea depending how well she tows. Napier's a loooooong way from here and towing to date has been limited to slow nervous trips to the garage etc. |
|
|
|
Post by hilldweller on Mar 3, 2014 7:19:01 GMT 10
Well I hope the house doesn't need as many coats as the van LOL. All that work certainly paid off though - the surface looks like glass and I'm not surprised someone wants to include her in their wedding A superb effort! |
|
|
|
Post by hilldweller on Mar 2, 2014 15:57:25 GMT 10
Good idea keepsake - I have cut that piece out and put it somewhere safe. As for the rest of the roof……..oops! 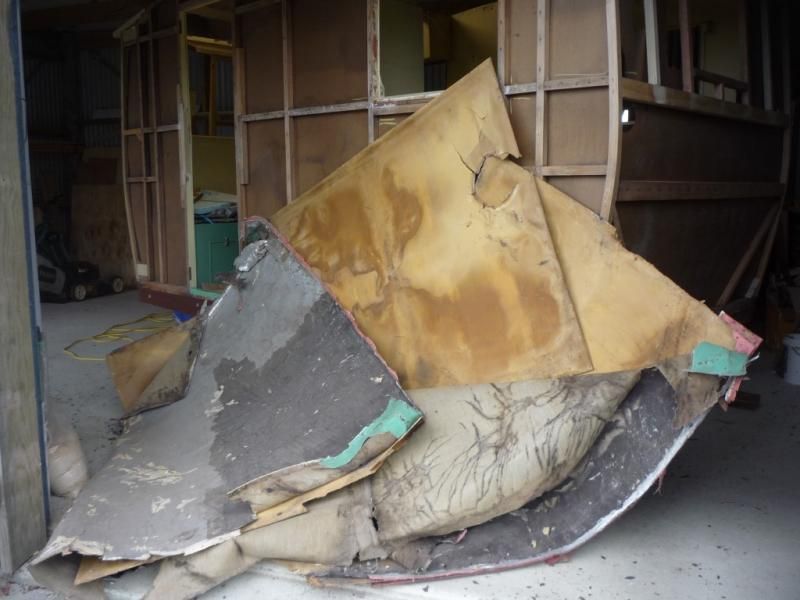 Raw canvas with cream paint which looks like the same paint that was used on the inside and top half of the outside, and then the silver which I presume is the bitumen/aluminium stuff. As others on here have reported, it has a tendency to crack and flake. The small green pieces in the previous photo are patches added at some stage. 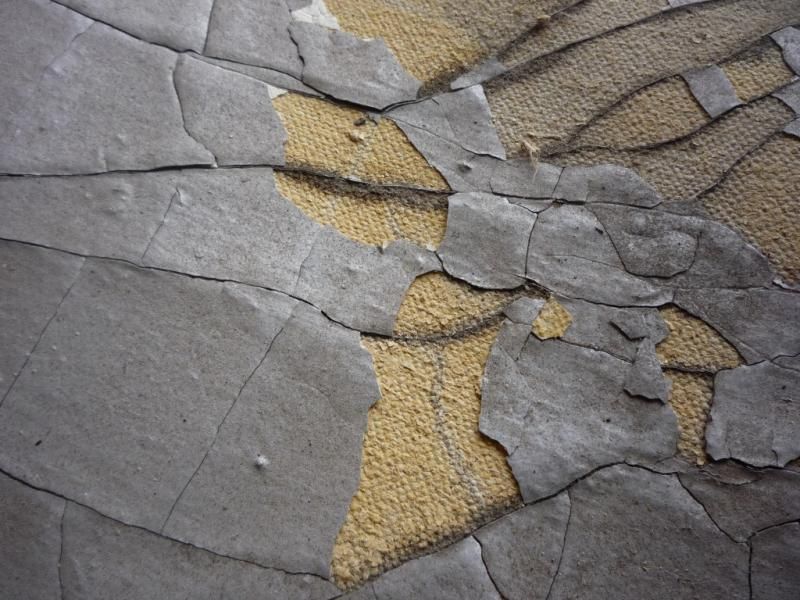 With the saggy roof off it became apparent that the middle ‘beam’, which is partly supported by the higher side of the wardrobe, is straight, or close enough. The other four will have to come off. The wide boards which form the overhang at front and back are water damaged and will also need to be replaced. Might do those first. 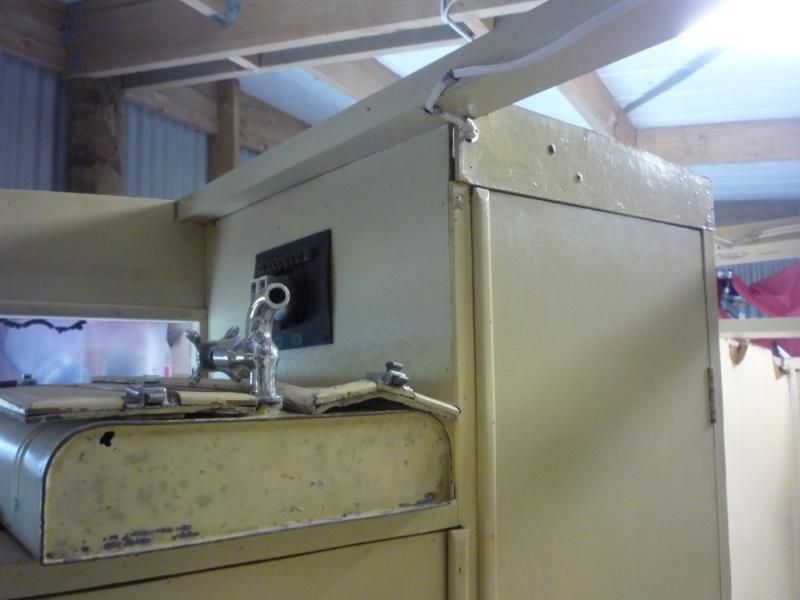 Better shot of the ‘breakfast’ cupboard for those interested in such things. I reckon Al’s egg cup suggestion is right for the smaller gaps - thanks. 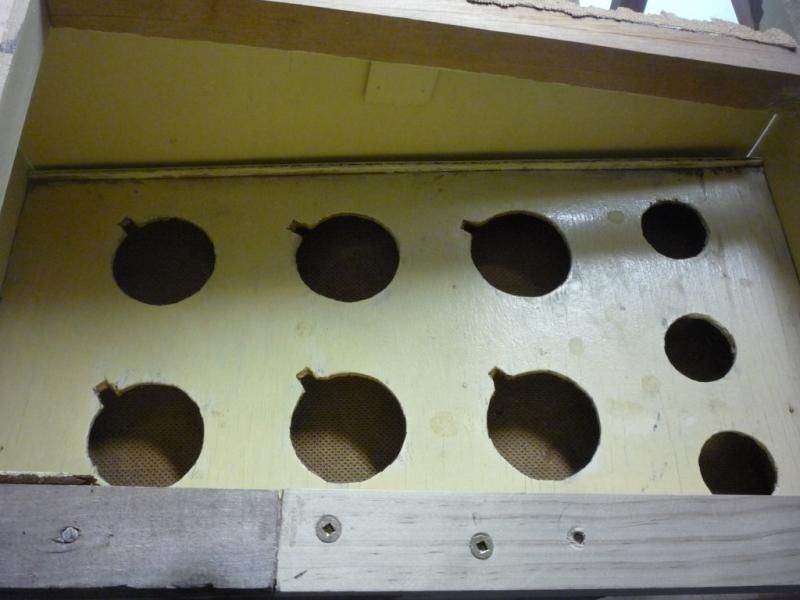 |
|
|
|
Post by hilldweller on Mar 1, 2014 17:22:19 GMT 10
|
|
|
|
Post by hilldweller on Feb 27, 2014 17:07:46 GMT 10
|
|
|
|
Post by hilldweller on Feb 25, 2014 16:38:33 GMT 10
How are you getting on with the van Jane? I have the HB cover pic pinned to the wall by my desk - it's such a pretty illustration |
|
|
|
Post by hilldweller on Feb 25, 2014 16:34:17 GMT 10
No idea sorry but what an awful thing to happen - you have my sympathies  |
|
|
|
Post by hilldweller on Feb 25, 2014 11:35:56 GMT 10
Great colour! Now do you think you could persuade your paint supplier to rename it 'vintage caravan cream', to make life easier for the rest of us |
|
|
|
Post by hilldweller on Feb 23, 2014 13:35:37 GMT 10
At least when it rains you have plenty of fresh water available from your roof. It's dawned on me that you don't have a hatch on your van. I wonder if that's one of the reasons why the front and rear windows are set so high up? Are there vents somewhere up near the roof to let stale air out? The thing I'm concerned about is fresh water coming through the roof! Yes mesh covered vents high up on both sides. Corner 4 now steamed and drying on the bench. It bent very easily so fingers crossed all will be well. And unfortunately definitely not enough head-room to turn those supports the other way Another good idea bites the dust! |
|
|
|
Post by hilldweller on Feb 23, 2014 9:35:49 GMT 10
It certainly looks waterproof now! Can you tell if the Hydroban has worked through the canvas and stuck it down, or is it working as a surface coating?
|
|
|
|
Post by hilldweller on Feb 23, 2014 9:15:43 GMT 10
Thanks Al. You're giving the perimeter roof frame far more credit than it deserves! I can see that it should be acting as you have described (another great explanation, thanks), but it's rotten at all four corners and isn't serving any useful purpose. Part of the reason I want to take the roof off is to get a better look at how far the rot extends so I can work out whether just the last foot or so at each end can be cut off and replaced, or the whole thing. Hopefully the former. However, as you say, first things first - I need to get that fourth corner sorted and then maybe take a closer look at those top rails. I might be able to pull back the edges and assess and fix the perimeter frame before removing the rest. Rotating those roof battens 90 degrees might work - I will check out the head room. I like the look of the double-cambered roofs but wouldn't go that far with Mabel as I don't want to change her shape. Actually in her current saggy state she's kind of a reverse double camber LOL - convex from front to back and concave left to right. It's not a good look! |
|


 .
. 


 ;)and sanding the top rails. They cleaned up quite well but there are hundreds of nail holes so I might get another bottle of the wood hardener and then try to fill the worst of them.


 6'4" long though.


 and that's as far as I've got.

