|
|
Post by humpty2 on Jan 29, 2010 16:35:06 GMT 10
I've got the pictures ready to go later tonight, I did it by Paparazzi's suggestion.
Re: Canon....they recognise the problem and they are updating a driver for Windows 7, be out in about a month.
Thanks for the assistance everyone, will be posting pictures later tonight.
|
|
|
|
Post by humpty2 on Jan 29, 2010 18:19:04 GMT 10
Here is a quick update of what I've been doing. A lot of sanding and filling to get the body work straightened up, this is before the final undercoat. 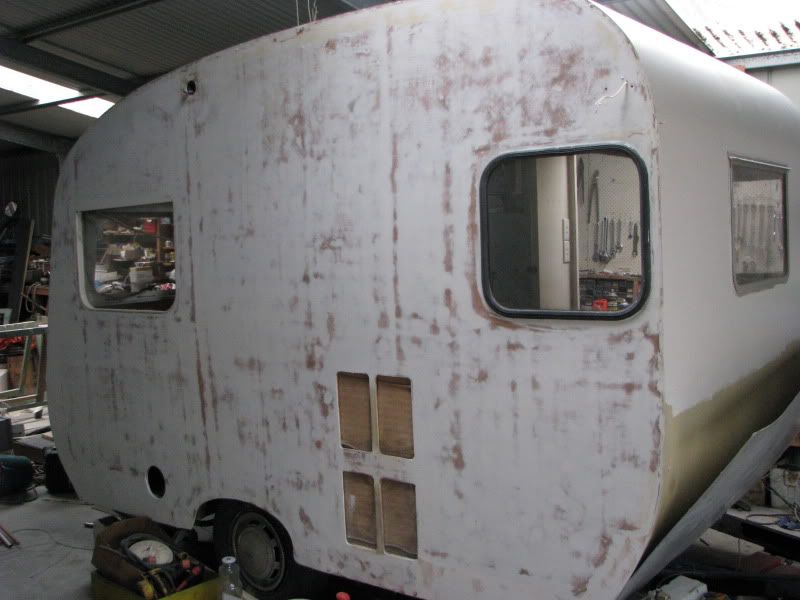 Here we are with the final undercoat. 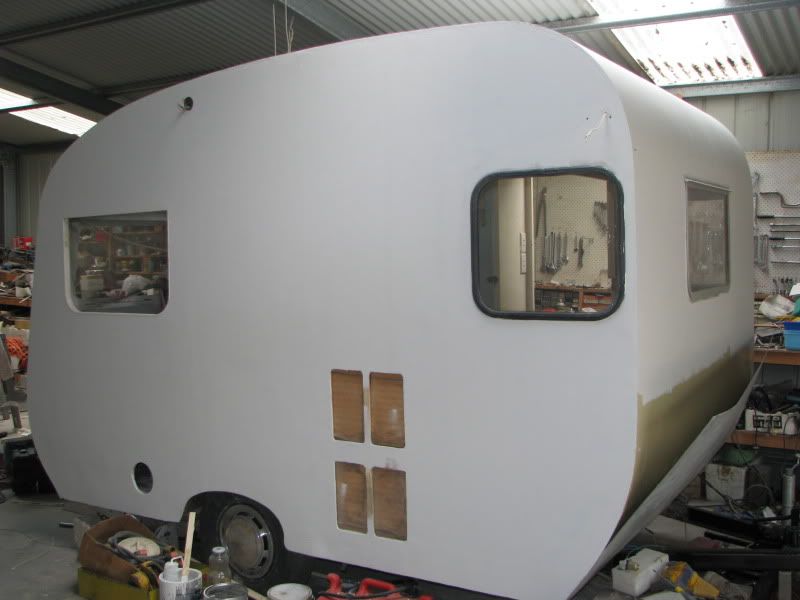 Here is a picture of the step....and some repair work that was required. 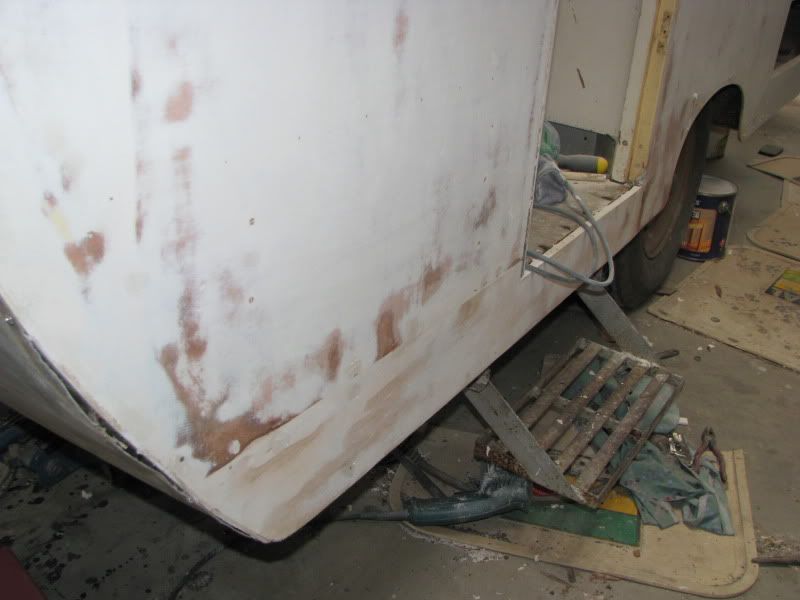 Also rejuvinated the hardware for the hatch and there was some patchwork required but you can't see it. 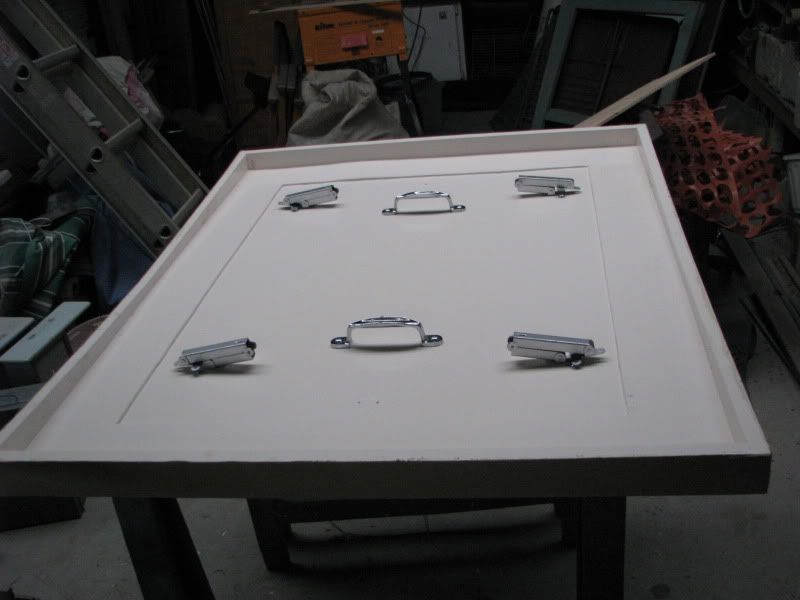 The table had to be manufactured from new as there wasn't one, I need some laminex of the same pattern in the background if anyone has a piece.....please!! 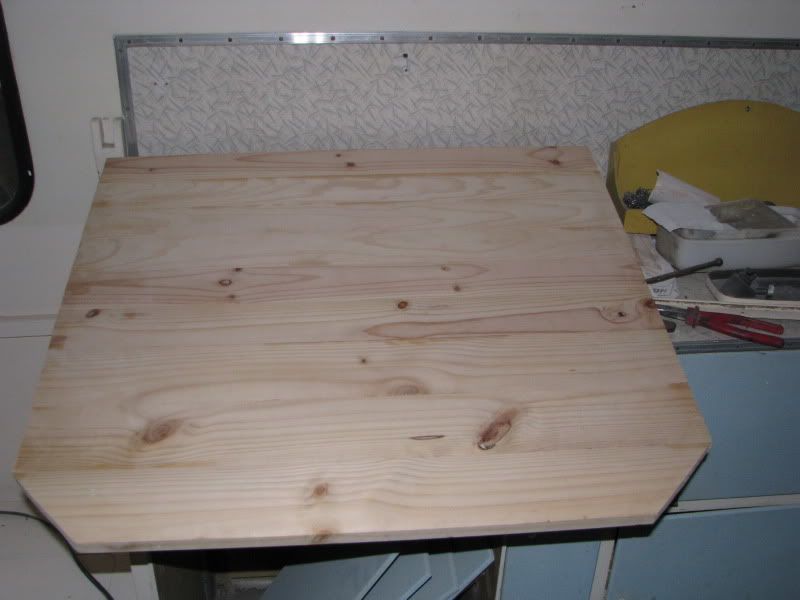 NOW FOR THE HARD BIT WHICH TOOK 2 HOURS TO DO. You will note I have the calico rolled up on a piece of dowell, the plan was to paint a foot then roll the calico onto that then paint the calico over whilst all was wet. 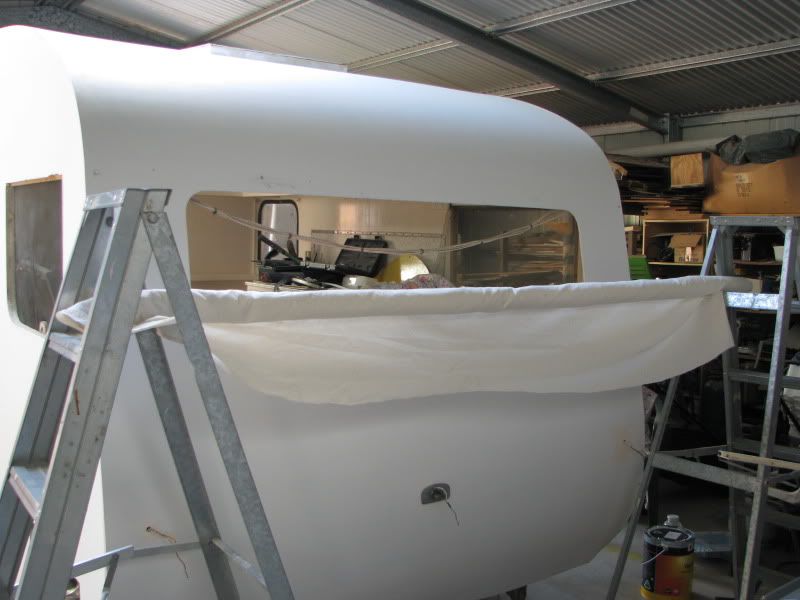 Job underway:  Mrs. Humpty lent a hand (and I couldn't have done the job without her ;D) 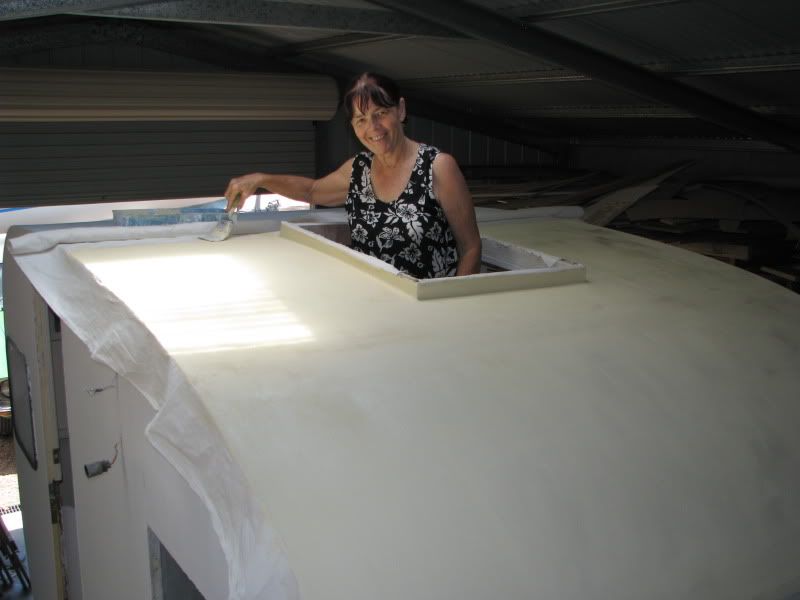 Here is a demo of the foot of paint and the roll ready to follow. 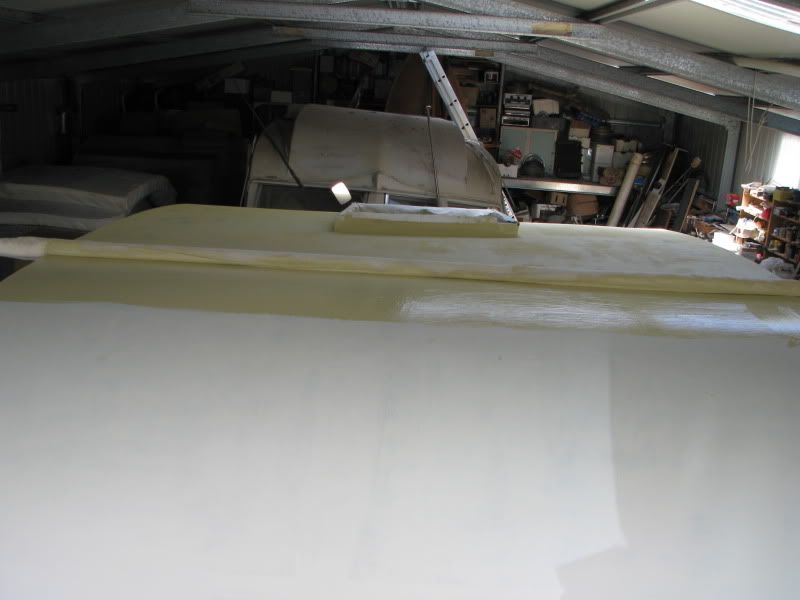 I'm getting near the end of it now! Note the paint on my hands from flattening out the calico. 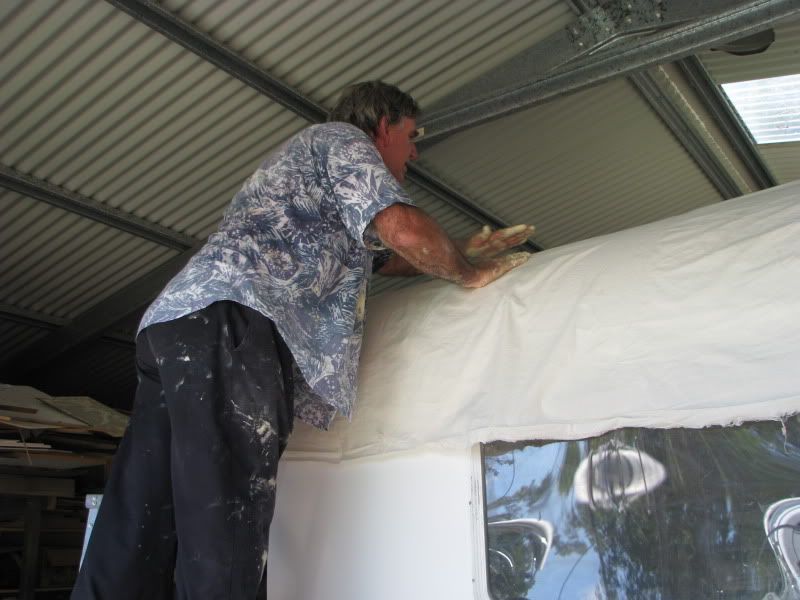 OK!!! Ladders away, and I've put on the original end of calico strip/awning holder.  It wasn't a hard job, but the problem was I was very close to the roof on such a hot day and determined to get the job done. For the technically minded......I used Taubmans Weathershield Gloss and had no problem with it skinning in the heat. I used about 4 litres. The next one will be a "doddle". Another coat to go on but that will be when I trim the sides and paint them down. |
|
|
|
Post by cobber on Jan 29, 2010 19:31:19 GMT 10
Humpty mate,
Looking back to the start of this thread it is obvious you are determine to do a job on this 'van you can be proud of.
The calico on the roof is a blast from the past and history tells us it works .. so good on you for going down that track.
Nice job, congratulations.
Cobber.
|
|
|
|
Post by kazandadam on Jan 29, 2010 20:03:45 GMT 10
That's a great job Humpty.....well done! I still have the same task to look forward to later in the year........do you think a mini roller would have worked better to flatten the calico out, or are the hands easier? Keep up the good work, she looking great.
Adam
|
|
|
|
Post by Don Ricardo on Jan 29, 2010 22:54:46 GMT 10
Hi Humpty,
Really interesting to see the pics of you applying the calico to the roof of the Castle - I've often wondered how it was done. It's certainly turned out very well. Well done to you and Mrs Humpty. From the pics it doesn't look like as hard a process as I imagined, but then I suspect you've developed some pretty useful skills that you were able to apply. As always - watching a master craftsman makes tasks look deceptively simple...until you try to do it yourself!
Looking back over your thread makes me realise how much you've achieved with the Castle. It's looking really good.
Looking on in admiration,
Don Ricardo
|
|
|
|
Post by humpty2 on Jan 30, 2010 19:06:43 GMT 10
Kazandadam,
I don't think a roller would have helped, as your hands can feel any trapped air or creases and rectify it immediately.
It really was so easy to do.
Don.....I am no master craftsman, I just think about the job at hand and try and envisage what can go wrong...........I fix that bit first. ;D ;D then the rest comes easy.
|
|
Deleted
Deleted Member
Posts: 0
|
Post by Deleted on Jan 30, 2010 19:56:50 GMT 10
 Good onya mate..  Sorry about all the niggling while ya have been pressing on with this project. You and the missus have done well. As you say ... you CAN NOT DO THIS JOB ON YOUR OWN. From what i have gleaned from Trodler aka vantoura you need at least 1.. preferably 2 people to stretch the canvas while you roll it into the paint...... And.. the base coat needs to be very, very wet / thick . rolled in thoroughly and clamped off on all four edges before it.. the calico... dries and starts to shrink. Big bonus using one piece of calico with no sewn joins. Where did you get it  Hope all is well with your efforts Humps. You and the other dumpty deserve a win. Now You can curl up on those wet nights and listen to the rain on the roof and know/ pray / hope that you have got it right  ;D Not too sure how to tackle a canite roof that bows laterally and longetudily ( spell).. gunna lead to creases somewhere along the process aye....  ( ever tried gift wrapping a league ball ) Reddo
|
|
|
|
Post by Roehm3108 on Feb 1, 2010 18:32:08 GMT 10
Good to see you back on site Humpty - we missed ya!
Thanks for your pics of applying the calico to the roof - yep, looks simple enough, but probably not as simple as it seems.
My couple of questions would be:
Is this the same method used in the original application - ie what research did you do to find out how this application is done?
Will the acrylic paint hold the calico in the longer term?
Why not glue the calico on first?
Did you consider using fibreglass resin and fibreglass cloth instead (not purist I know, but still...)
I ask because it's a job facing me with the Trailahome. Feel free to PM me if you prefer.
Cheers
Ray
|
|
|
|
Post by humpty2 on Feb 1, 2010 18:40:46 GMT 10
G'day Ray, Most of my research was asking people "how to go about it" including a couple of painters that I know. The main point that was made to me was to keep the base coat thick and wet. I didn't ask with regard to oil base or acrylic but feel that after some reading that acrylic will last longer as it is more elastic. I didn't glue the calico first as I don't believe you would get ALL the air bubbles out. Fibreglass??? on a ply van? ?  NO, I would get shot!! With regards to shrinkage......wash it first and let it dry for several days. You should see the dirt that comes out of it. We bought the calico from Spotlight and they have all widths, no need to join it. It is a personal choice whether you use oil base or acryllic, just make sure it's very wet ......and see the system I used on rolling it across. I have heard that some people start from the centre but that would mean working 4 sides at once, easier to work just in front of it. It took 2 hours in extreme heat, but was easier than it looks. Regards.....Humpty. |
|
|
|
Post by smiles on Feb 7, 2010 14:57:59 GMT 10
Hi Mr & Mrs Humpty
Great job with the canvas.
Thanks for the picture of the step, it looks like it's fixed rather than flipping over, then slides in underneath.
Rob & Cathie
|
|
|
|
Post by humpty2 on Feb 7, 2010 19:07:31 GMT 10
I will get underneath and take a better picture of the step and how it slides soon. Have spent the last 3 days flat out working on it, so I must get out and take some more pictures of it. It seems NEVER ending.......as the smallest piece of damage or rot turns from a half hour job into a day. Why do they glue the lino down  It's going to take a day at least to get it off...I wished there was a simple and easy way..............I am using a heat gun......tried a blow torch but was too busy putting out little fires to take any lino up. May get to do a bit after work each day..... .till next weekend. |
|
|
|
Post by atouchofglass on Feb 7, 2010 19:24:43 GMT 10
Hi Humpty
Mate are you trying to save the Lino?
If not maybe a shovel will shift it faster
Sounds rough but have used this method before.
Even on wooden floors it is fast.
Just a thought
Cheers
Atog
|
|
|
|
Post by humpty2 on Feb 7, 2010 19:56:59 GMT 10
I've tried a spade Atog, but it won't get it up.......takes off the top layer and leaves the middle, bottom and glue..........which need the heat gun then. I think it will be a long tedious job.
Had to rebuild the door, it was held together with the aluminium moulding that held the fly mesh on.
I've just looked at some of the original photos, and I'm very happy at where I'm at.
Also saw some photos of the Olympic restoration......that's next.
|
|
|
|
Post by humpty2 on Sept 26, 2010 20:21:11 GMT 10
Finally got all the lino AND its backing which was a sort of green cushionish base GLUED VERRRRRRRY EFFICIENTLY >:(to the floor. The weapon of choice to remove the base & the glue was a heat gun & scraper plus about a whole days labour. 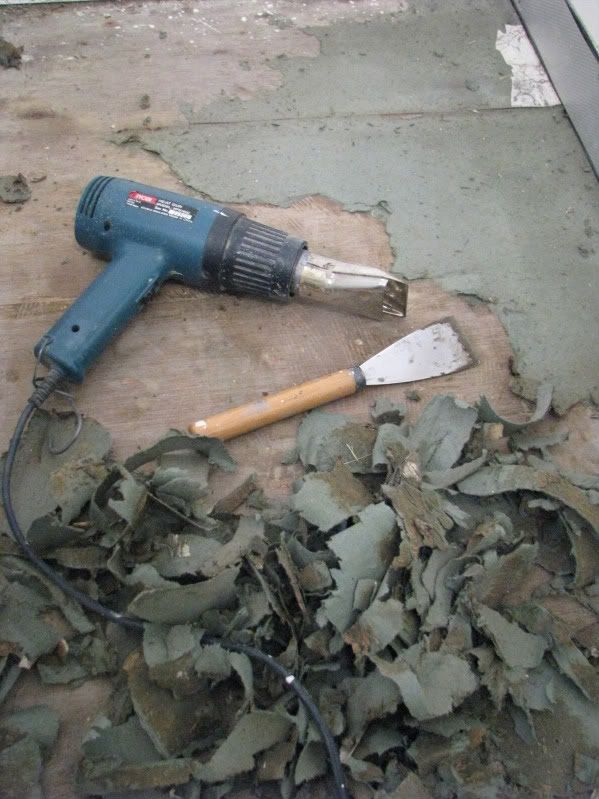 That pile of "stuff" is about 1/10th of what had to be removed After I took it off I painted the floor with undercoat which will be followed by enamel and then stick down the tiles......but not with bloody contact glue like the last lot!! 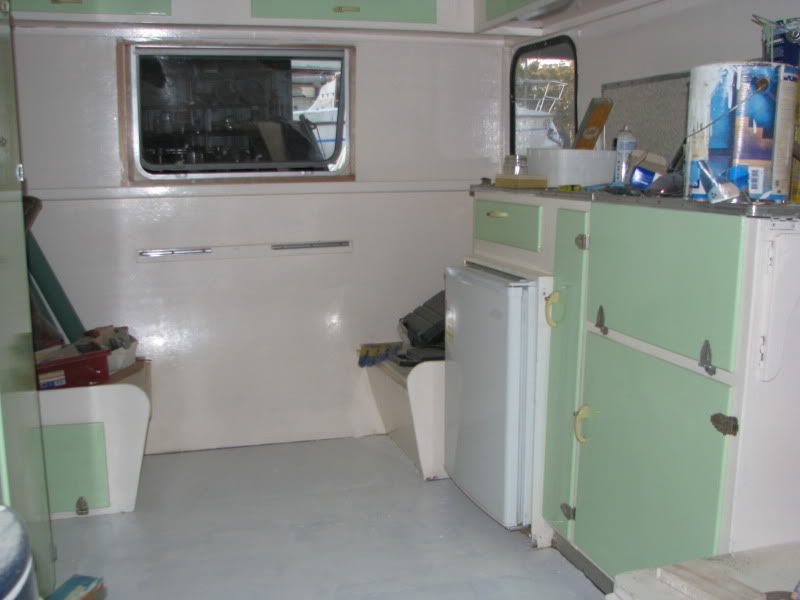 I have painted & replaced the cupboard doors. 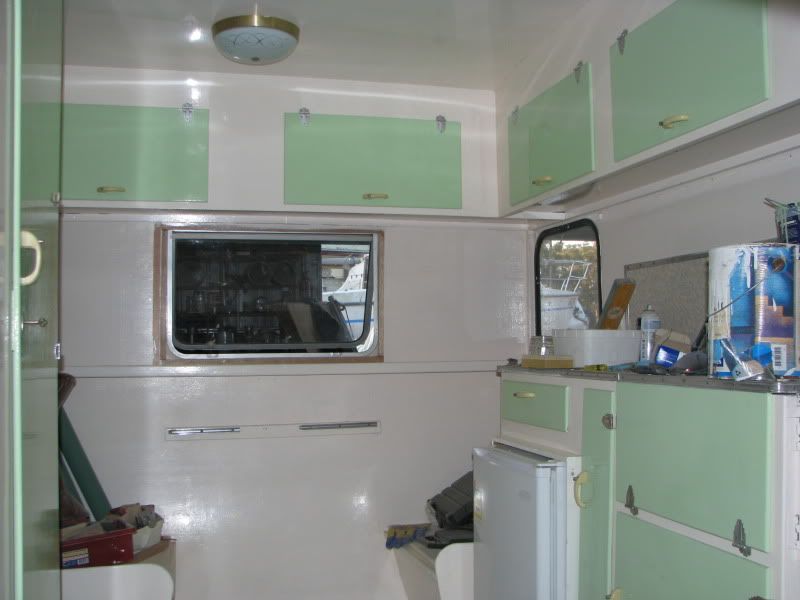 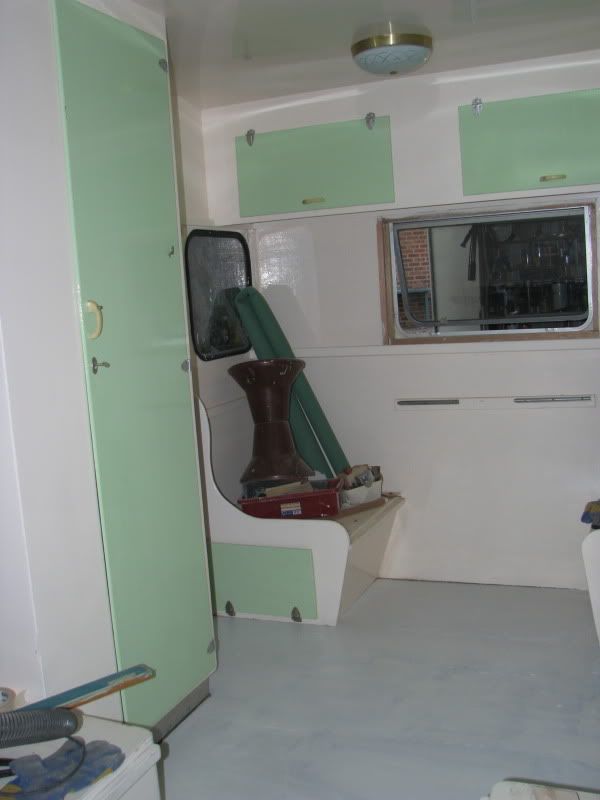 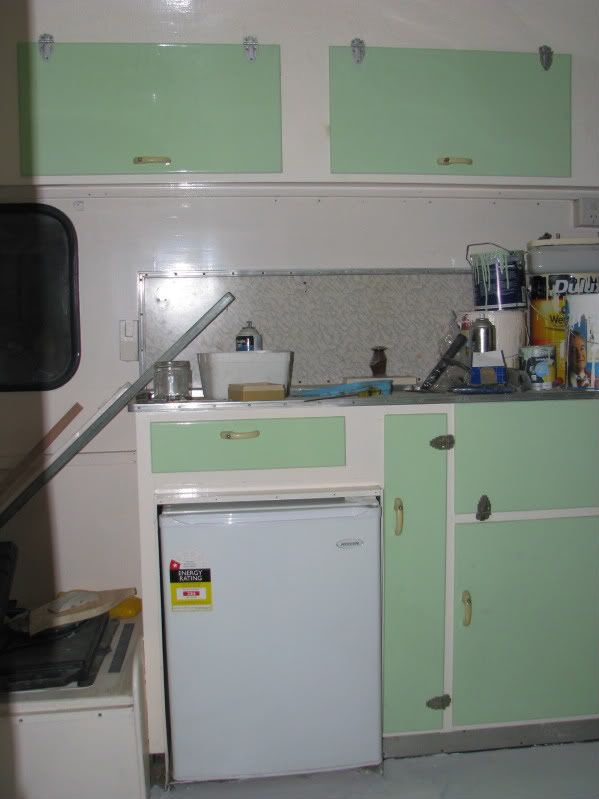 See that Laminex on the splash-board.... I need some to cover the table I have made......in the meantime I will paint it to match the interior 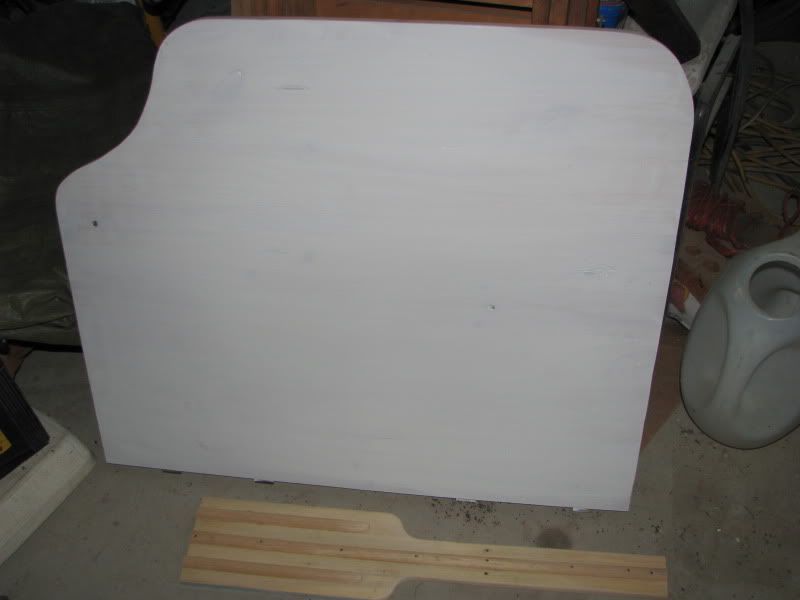 Thats the table ready for paint with a "fancy" leg ready to go on. Progress has been slow, Janorma took up some time to get her ready for Mildura....and as I have mentioned before, work gets in the way of my spare time....plus the shoulder surgery kept me out of the shed for some time. But slowly & surely progress is being made. I have painted the exterior but I will save that for another posting. |
|
sheppo
Full Member
 Love my Juke box car.
Posts: 420
|
Post by sheppo on Sept 26, 2010 21:03:11 GMT 10
Looking good Pete, keep up the good work. Glad the shoulder is recovered to it's former self.  I don't know how you fit in work with all your projects.
|
|
dorian
Full Member
Sundown
Posts: 247
|
Post by dorian on Sept 27, 2010 19:07:38 GMT 10
Looove the 50s green cupboards. Nice choice Hump! Will almost forgive you for doing up a wooden van... |
|
|
|
Post by humpty2 on Sept 27, 2010 19:34:16 GMT 10
Sheppo........I wish the shoulder was back to it's former self but I keep on struggling.  Dorian......It is all about versatility. ;D ;D ;D |
|
|
|
Post by DC3Td on Sept 27, 2010 20:33:23 GMT 10
Howdy Humpty2. Apart from all the other great work you`ve put into the old girl, you certainly are on a winner with the interior colour scheme. Makes such a vast difference to the whole outlook. Good stuff. cheers gordon
|
|
|
|
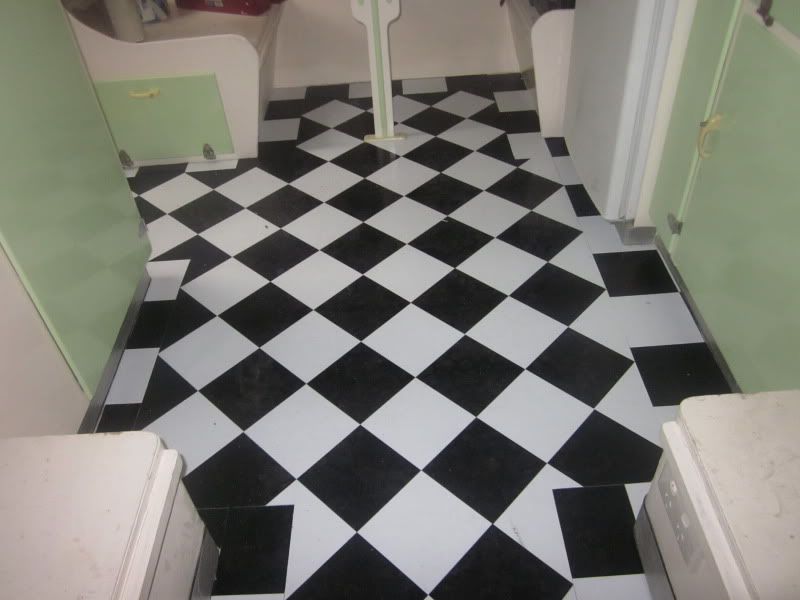
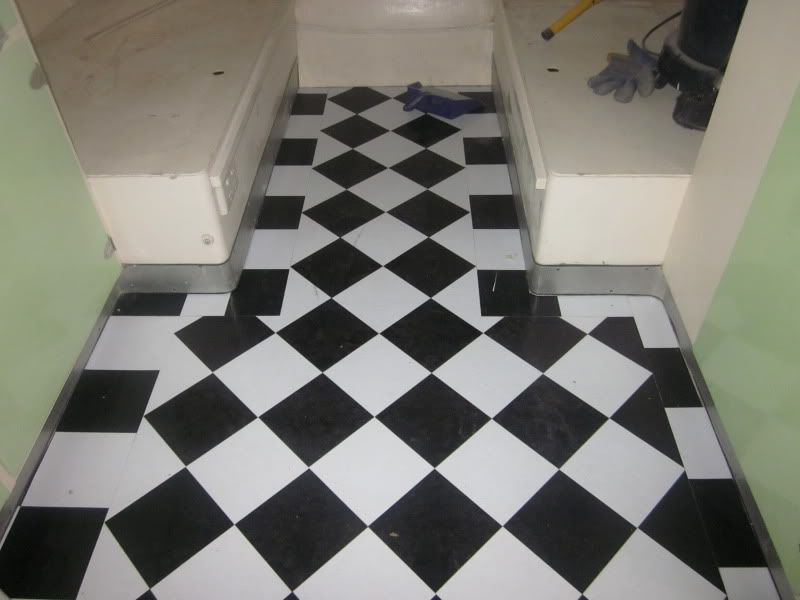
Post by humpty2 on Feb 13, 2011 19:19:14 GMT 10
|
|
|
|
Post by retro64 on Feb 13, 2011 20:05:08 GMT 10
Hi humpty2,
We think your floor looks great and like the extra detail of the boarders. A good and different looking design, well worth two days work.
We've enjoyed your progress photos to date and look forward to more.
Cheers retro64
|
|
|
|
Post by Franklin1 on Feb 13, 2011 21:22:52 GMT 10
G'day humpty2, Yep, very nice job on the floor. Is that the stuff they sell in Bunnings? I'm please you are six or more months ahead of me in the restoration. I can follow your thread closely and learn from all your good information. ;D ;D You wouldn't happen to have a photo of the underside showing the chassis, would you? And do you know what thickness your floor ply is? I, umm, forgot to measure mine before I threw it all on the tip. I'm thinking that if your chassis is the same layout as mine, then your floor thickness should be the same as I need? Nice job overall so far. cheers, Al. |
|
|
|
Post by cobber on Feb 14, 2011 6:38:18 GMT 10
G'day Humps,
Looks good mate..... you would have thought about how to do it for a couple of days before spending the couple of days doing it I bet, worth the effort.
Cobber.
|
|
|
|
Post by humpty2 on Feb 14, 2011 18:46:58 GMT 10
Al........Yes, they are the lino tiles from Bunnings. I'll check out the chassis etc. when I find time......I'm up at dark to go to work, and coming dark when I come home......come on retirment....11 months .. but who's counting...... ;D ;D ;D ;D You should get in touch with me if you are coming up to visit your friend/relo in Thornton.......I'm only 3klms away from them. You are correct Cobber, I did think it out first ;D Thanks for the positive comments. |
|
|
|
Post by humpty2 on Jan 21, 2012 18:59:27 GMT 10
Sorry to say this fellas...............some-one wanted the Castle more than I did. It is now in Sydney (West).....with a Holden owner and it will probably turn up at swapmeets. No one you all know, just a spur of the moment thing |
|
|
|
Post by greedy53 on Jan 21, 2012 20:44:23 GMT 10
sorry for the question why use enamel last is there a reason or did you just have it handy
|
|


 ;D
;D


 I don't know how you fit in work with all your projects.