Deleted
Deleted Member
Posts: 0
|
Post by Deleted on Dec 15, 2008 23:36:57 GMT 10
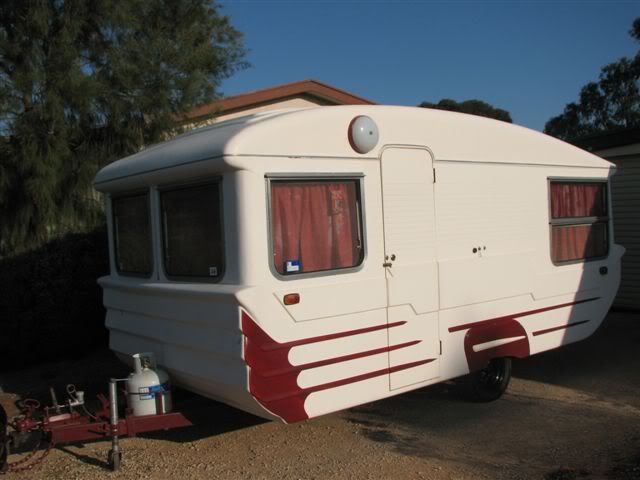
Hi all, I have finally got off my but and started a thread on the resto of my little van, that was found at Trevor's horse stud farm out at Yundi S.A. Turns out this was a caravan park back in the day and still has a couple of other van for sale which was discussed in the for sale section not so long ago. So about the van... my Dad goes out to a horse stud farm every year to pick black berries as he makes his own jam, I can even remember going out there with him when I was 16 to help him. This van has always been there but I had forgotten about it. Not long after I bought the FB I noticed something missing and the search for a vintage van began. Not long after, I was at work when my phone went off telling me I had a multimedia message, when I opened it it had photos of this litlte beauty. I knew staright away I had to have it and the next weekend we were off to have a look and see if it was for sale, this was in March this year. Some basic info on the van are as follows, it is about 10ft long and is aluminium clad. we date it late fifties or early sixties because of the shape and the fact it has a ice chest. Wheels are 13" with what we believe to be a early pommie stud pattern (4 stud). We are almost 100% she is home made. On the sink it has Cara-Rest pressed in it. It had been sitting in a paddock for the past 20+ years and was used by Trevor's friends to stay in. It had not been used for a very long time. After looking at the van and talking to Trevor a deal was done and I went home to organise the next step. 2 weeks later I hired a car carrying trailer and headed up there with my wife, my mate and my old man. When we got there we were very concerned about getting it out as the van was at the bottom of a very steep hill, and the track was very eroded with a few low lying branches thrown in to the mix it was going to be a struggle. we were up there about 9:30 and byt the time we left the thermometer in the prado was syaing 42 degrees!  . I apolagize for the size of the photos I have tried a few times to reduce them but this all I get. Any hep would be appreciated First we pumped the tyres up, using a 12 volt air compressor  Then we had to get it out of the Black berry bush that had been growing in and around it for the last 20 odd years and if you know black berry bushes you know they have big thornes! Then it was on to the trailer.  In case your wondering I am on the winch, not standing with my hands in my pockets like in photo #1   Luckily Dad's Prado was more than up for the challenge and got the van out and on it's way home effortlessly.  When we got it home the first thing I had to do was clean all of the cr@p out of it! This is the view from the door, looking left towards the front of the van.  Don't ask   Found this little beauty in it, not sure if it works or if it's worth anything   The view looking right from the door (towards the back of the van) after I cleaned the rubbish out. the couch pulls down and makes a double bed.  Work has begun and I will update pics soon, as at the moment I am playing catchups. I am missing some photos and want to try and keep it in sequence. We have named the little van and the name is... drum roll please! Berry'd Treasure  because it was found with a black berry bush trying to eat it and it really is a little treasure that we love dearly. |
|
|
|
Post by sportsman 1 on Dec 16, 2008 7:04:32 GMT 10
Hey Andrew82,
what a top little find. I am sure you will have lots of fun with that little beauty.
That Roden oven looks interesting. I see it has another oven in it as well. If either of those is not on your list of keeps I might be interested in getting one.
Good luck with your B T!
cheers, Leigh.
|
|
Deleted
Deleted Member
Posts: 0
|
Post by Deleted on Dec 16, 2008 18:19:40 GMT 10
 Onya Andrew. Shes a little ripper mate. 10ft is big enough and she will sit in behind the old FB really sweet. Should be fairly light being aluminium . Love the old stoves and a real bonus.. shes got an ice chest I reckon your about right.. 1958 to around 62. Not sure what the 4 stud 13"s are off. I have 4 stud 14" rims on "Rosie" and they are morris minor.  Keep us topped up on the resto progress. Photos being too big... ..when ya have eyesight like mine the bigger the bloody better i say. ;D Top score mate.....Homemade is something to be proud of. Reddo
|
|
|
|
Post by Geoff & Jude on Dec 16, 2008 20:16:37 GMT 10
|
|
Deleted
Deleted Member
Posts: 0
|
Post by Deleted on Dec 18, 2008 8:32:12 GMT 10
Hi Dave, no that was not me. When I bought The van we towed it from Yundi to Rockleigh, and we took most of the back roads as it was the quickest way. Sorry for the confusion.
Reddo and sportsman, thanks for the welcome and kind words I am having fun doing it and love seeing progress made on it as I'm itching to get it on the road. Still a long way to go but at least it's moving forwards.
|
|
|
|
Post by pymie2 on Dec 18, 2008 11:54:06 GMT 10
Neat little van, You say your fixing her up at rockeigh ,which way do you come up ,were at callington and have relies at rockleigh, you could drop in next time up this way could show you what happens when you get pulled into this crazy world (4 van 1 camper, etc)
Cheers and have fun
Pymie
|
|
Deleted
Deleted Member
Posts: 0
|
Post by Deleted on Mar 10, 2009 21:59:39 GMT 10
O.k, time for an update!! After cleaning all the stuff out of the caravan, first job was to remove and remake the A frame. The old one was made pretty poorly out of L shaped angaline and weighed a absolute tonne! I did have some pics of us removing the old one, making the new one then getting a professional welder out to attach a new one but the pics got lost by the trouble and strife Here's what I do have... Old A frame removed  New one fitted and wiring being done  A frame all finished  Then it was time for a new axle, bearings as I wanted to change the stud pattern to early holden (5/108 p.c.d) so it could run the samw wheels as my FB Holden. Also a good time to add cable operated disc brakes as my FB is mostly original and the extra braking won't go astray. Safety first! Had to cut off the old shackles   Old axle out  Here is where the story gets a bit interesting, we did all the measurements for the new axle and Dad went to his good trailer mob in Murray Bridge to get them to make it up. When the bloke looked at the plans he told my Dad that it wouldn't work because the tolerances were too tight in the wheel arches. He said he could no way guarentee that the axle would be the required length and that they are always a few mm out and this would cause the tyre to foul in it's desired hole . He then suggested the only way out of it was to put the wheels on the outside of the van like they do on most teardrops. Dad then thought " fine if you can't build it with your fancy lathes and so on I'll do it myself" Trial fitting new stub axles  Fabricating the new axle   Me claning up the welds in my "beard stage"  Aaaaargh another floating caravan!!   Axle all in and brakes hooked up and working.  So what do you do when you've got all new running gear? hook it up behind your pride and joy and take for a test run of course!!    I apolagise for the sizing difference of these photo's. I am still trying to work out what I have done wrong, and will fix when I have it sussed. Enjoy!! |
|
whippy
Full Member
 "Twiggy" the Globetrotter
Posts: 462
|
Post by whippy on Mar 11, 2009 11:08:26 GMT 10
Except for the axle, that's exactly how I started the restoration of the Franklin, if you have a good base, then the rest is easy.
She's lookin good, keep the photo's coming.
|
|
Hillbilly
Full Member
"Fun in the Sun ..."
Posts: 105
|
Post by Hillbilly on Mar 11, 2009 22:30:28 GMT 10
The van's coming along very nicely Andrew, albeit a long way to go, oh the joys, but its all good I've got a very similar looking "Modern" 58 van which was in the same state when I started........the pleasure it gives you in the end is well worthwhile. Keeps those photo's coming, they're great. Jabiru |
|
Deleted
Deleted Member
Posts: 0
|
Post by Deleted on Mar 12, 2009 12:17:44 GMT 10
Thanks for the responses guys! Glad to hear that we are heading in the right direction with starting on the axle / A frame etc, if it were up to me I probably would have started in the inside. Oh well it all needs doing! I can actually remember the first time I went to start work on it and thinking "Holy hell where on earth do we start . We are hoping to have it ready for the queens birthday long weekend, as we plan to go over for the FB / EK nationals, but we'll see. Whippy, I'm green with envy at your Globetrotter! love everything about it, the shape, the fact it's a bondy, how you found it and the price . As for the dust if it were mine I would attack it with a bucket of soapy water and a sponge. Can't wait for more progress pics! |
|
Deleted
Deleted Member
Posts: 0
|
Post by Deleted on Mar 12, 2009 12:48:23 GMT 10
Oh and for anybody who thinks that Vintage caravaners are a bunch of old farts reliving their youth, I am 26 years old. Would anybody have a clue on who is the youngest member on this great forum?? MarkT I am looking in your direction  |
|
|
|
Post by yellowuki on Mar 12, 2009 13:49:30 GMT 10
Not sure if I'm the youngest but I'm 17 and I've got a 1958 bondwood.
Cheers, yellowuki
|
|
|
|
Post by willyn on Mar 12, 2009 19:47:35 GMT 10
HI ANDREW 82 Tickos one opf our members has a son who is seventeen has his own vintage van they were kind enough to offer Lyn and I the use of it at Coledale last year I am not sure of his name regards Will and Lyn
|
|
Deleted
Deleted Member
Posts: 0
|
Post by Deleted on Mar 12, 2009 19:58:03 GMT 10
Hi Andrew
Daniel is his name ... or "Tick" here on the forum. His not old enough to get his license yet but has been into caravans since just after i joined this forum in 2004.
Ya wouldnt meet a keener vintage vanner.
Reddo
|
|
|
|
Post by minicamper on Mar 13, 2009 12:21:41 GMT 10
Hey Andrew, Looks like it's between Yellowuki and Tick then, down to the months I'd say... As for the oldfarts bit, there are plenty of sub 50 and sub 40's people here, they're probably just shy On the whole axle thing, wot a load of rot! So glad you guys did it yourself. I took Alby's old axle down to get an electric braking equivalent and got it remade to the exact specifications as the original so I don't know why you guys couldn't get the same. Still at least now you can say that you did it ALL yourself. ;D Cheers Chris |
|
HDTodd
Junior Member

Posts: 97
|
Post by HDTodd on Mar 13, 2009 14:19:09 GMT 10
Hi Guys,
Tic (Daniel) is actually 15 so I guess that makes him the youngest but as Reddo says he is definitely one of the keenest.
I know Jrod and myself are both 25 so I guess there's a few of us on here and if I'm not mistaken we all own old Holdens? Must all be a bunch of top blokes then hey?
|
|
|
|
Post by ozman on Mar 14, 2009 18:49:52 GMT 10
not sure if my 4 year old counts but he spends more time in my shell of a sunny then i assume the average punter would.. he is always asking if he can go 'on adventures' in the van.... certainly provides considerable inspiration for me to get it done....
|
|
Deleted
Deleted Member
Posts: 0
|
Post by Deleted on Mar 31, 2009 11:46:05 GMT 10
Update!! I have the van at my Dad's, which is an hour away from where I live, as hard as I try as you all know you can't always get away as much as you like. The answer to this? bring some work home with you! The old cushions were absolutely stuffed so we went to Clark Rubber and bought $250 worth of foam and had it all cut to size. Then it was off to Spotlight to pick the material. Lucky for me the missusis handy with a sewing machine. Almost all done now, just 1 more smaller one to do and she's all finished.  As well as this we took all the cupboard doors draws off to repaint them and fit new knobs as almost every door etc had a different style of knob on them. This is the new style and colour combo with the cupboards, walls just being a white of some description.  All pieces of the puzzle. I'll be going up to do more work on it at Easter, pics to follow. |
|
Deleted
Deleted Member
Posts: 0
|
Post by Deleted on Apr 20, 2009 16:12:37 GMT 10
Went up to Dad's at Easter and did some more work on Berry'd treasure. I had a few distractions this time with Dave (olfarts)coming up, having our horse up there and meeting up with Pymie for a shed run, but still managed to get some more stripping finished! These are some from the last time we went up. First of the stripping  Found this sticker, under it was a bit dollop of bog and under that wa a tear in the alluminium thankfully you can still buy this in sheets  Photo of the wife stripping  All done except for the roof  These are the pics of the Easter trip doing the roof... fun   4 and a bit hours up a ladder and this is the end result  Oh and 2 sore legs, horse riding probably didn't help this either I have bought more of the ally to replace the panel with the hole and also the panel beneath it has had a hole cut into it at some stage, it has then had a round piece of galv screwed on top of it. It serves no purpose so it will be going all together to neaten it up a bit. Still hoping for June long weekend it being ready but we'll see. the most important thing is that we ARE making progress and it WILL be finished. Regardless of finish date. |
|
Deleted
Deleted Member
Posts: 0
|
Post by Deleted on May 23, 2009 20:00:14 GMT 10
Another update! went up there today and did some more work on the poor old girl. It's funny, since I have bought Jezebel this thing seems so much worse. I was in it today looking around saying that's rotten and that will need replacing. I really bought it with my heart not me head. Still I'm not giving up and it's a good learning expierance for me. Here's todays efforts. Picture one, showing the damage that needed replacing.  With the old panels removed, we got our first look at the frame work. Still looks really sloid and cleaned up well.  Trial fitting the new panel  Panel pop riveted on (used 93 in total) extierior j mould put back on with sealant and pop rivets.   So there you have it, 1 hole, 1 dent and 1 totally useless hole gone forever. Next job is to finish of the step and remove the top j mould and reseal it. Stay tuned.... |
|
|
|
Post by sportsman 1 on May 25, 2009 13:33:24 GMT 10
Keep up the good work Andrew, it will all be worth it in the end. How would your missus like to come over here and do some stripping for me? ? cheers, Leigh. |
|
|
|
Post by firefighter on May 25, 2009 15:59:21 GMT 10
|
|
|
|
Post by sportsman 1 on May 25, 2009 16:38:34 GMT 10
Thanks Geoff, I dont know what you mean. Have a look at the pictures of Hilda and you will see she needs lots of paint stripped off. I cant see Karon out there with smelly messy paint stripper any time in the near future.  ;D ;D |
|
whippy
Full Member
"Twiggy" the Globetrotter
Posts: 462
|
Post by whippy on May 25, 2009 20:26:28 GMT 10
|
|
Deleted
Deleted Member
Posts: 0
|
Post by Deleted on Oct 12, 2009 20:39:34 GMT 10
Wow! I didn't realise how long it had been since I had updated this post untill I found it at the very bottom of the 5th page Well, a little bit has happened since the last post I went up there not long after and Dad and I took all the j moulding off cleaned it, ran a bead of sealant between the 2 edges and re - poprivet the moulding back on. I didn't bother taking photos as although it was alot of work the van looked exactly the same after we had finished. The other day Dad recorded 20mls of rain and poked his head inside and couldn't see any sign of water! Dad has his own Vintage caravan (2009 vintage) ;D and late July normally takes off for a couple of months or so and does some travelling. Because of this I wasn't really able to do any work on the van, it's been quite good actually as I have been able to concentrate on my FB Holden which is basically getting a full resto. Dad came back the other week and I have been really keen to go up and do some work on it. Last weekend the wife and I went up with the plan to fix the rotted floor. The majority of the floor is actually in really,really good condition but had one rotted corner where water had been getting in  First job was to cut out the rotten bits   Then it was time to cut the new planks to fit.  Believe it or not these were the closest I could get to the original with out getting something custom made. They are treated pine timber decking planks.  Attaching said planks  Hole gone!   We also fixed the rotten floor near the step while we were at it  The wife then gave the floor a complete sand and it came up a treat! so that's the floor finished. Next item on the agenda is to do the internal wiring and start recladding the inside. It's getting exciting now, it feels like we have finally turned the corner and are starting to peice it back together instead of pulling it apart! As for the deadline...... well I hope to have it done for the Van nats next year. The earlier the better as I will want to take it for a shakedown run before going all the way to Mildurah in it. |
|

 . I apolagize for the size of the photos I have tried a few times to reduce them but this all I get. Any hep would be appreciated


 because it was found with a black berry bush trying to eat it and it really is a little treasure that we love dearly.