Deleted
Deleted Member
Posts: 0
|
Post by Deleted on Sept 22, 2019 13:06:04 GMT 10
I have recently be progressing on the renovation / re-invigoration of my Vacation Bondwood & Aluminium van and have now found that the bondwood/ply along both sides is severely damaged through long term exposure being paper thin in patches, it has previously been painted and a thin ally strip nailed along it to try to protect it but this has become brittle and falling off through corrosion. How have people previously repaired this, I have considered replacing the entire wall, which would be 4 sheets of marine ply on each side and around $1000 or trimming the wall to the mounting block then sheeting with a strip of 1.6mm ally checker plate which folds under and mounts to the mounting block and is sealed with sika, then rebolting using Stainless coach bolts.. again prob in the same $1000 region... or just cut the rotten wood out and replace that section along both sides sealing it with bathroom membrane.... The other issue is the original timber was painted with a petroleum based flat black (believe it to be called "Japan") that you simply can not sand (it just clogs the paper) and nothing sticks to it. but that's for later once the rot is fixed  In this image you can see the row of coach bolt heads which run through the side and a 50x50 block on the underbody which is bolted to the chassis.. the damage is from this area downwards... 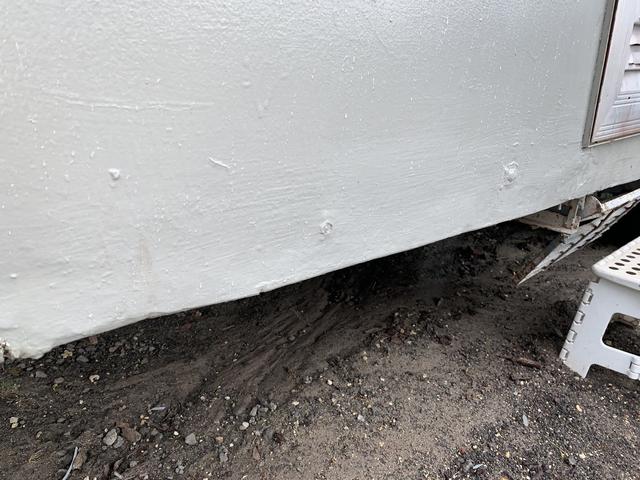 Looking forward from under the wheel arch with the chassis mounting block top centre and the wall protruding down to the left and the thin strip of ally visible on the bottom of the wall 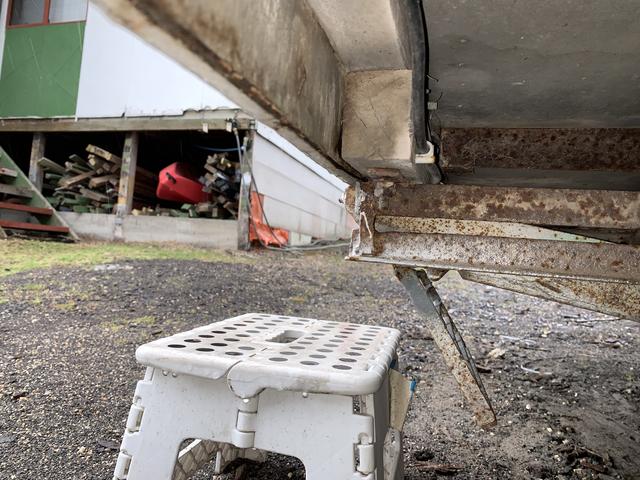 |
|
|
|
Post by Koala on Sept 22, 2019 18:39:05 GMT 10
Our 64 Wayfarer had the same problem with rot which required the lower 6" of the walls be replaced. We also had some accident damage to be repaired.   To do this, using a router and a straight edge I cut a 20mm wide overlap 50% of the thickness of both the van wall and a new piece of ply. Glue and clamp in place. In places like under the beds I was able to add a reinforcing piece of 19mm Meranti overlapping the join glued on the inside and screwed through from the outside. It is not a hard job and worked out well for me. Koala |
|
Deleted
Deleted Member
Posts: 0
|
Post by Deleted on Sept 23, 2019 15:34:08 GMT 10
Our 64 Wayfarer had the same problem with rot which required the lower 6" of the walls be replaced. We also had some accident damage to be repaired. To do this, using a router and a straight edge I cut a 20mm wide overlap 50% of the thickness of both the van wall and a new piece of ply. Glue and clamp in place. In places like under the beds I was able to add a reinforcing piece of 19mm Meranti overlapping the join glued on the inside and screwed through from the outside. It is not a hard job and worked out well for me. Koala Bloody champion Koala, I knew someone here would have the answers I sought... Don't own a router or anything too technical wood wise, lucky you can weld metal  but I do have the space to reinforce with internal lap joints glued and screwed as you have done.. did you seal all the joints with a membrane such as a shower membrane or just wood glue & water mixture or just etch prime and top coat ? Cheers Grumpmiester |
|
|
|
Post by Koala on Sept 23, 2019 18:49:29 GMT 10
Pleased to help Grumpmiester. I seems that you need to buy yourself a small router and do a bit of learning  Best advice I can give is to take your time and do one section at a time. Do some test cuts on some scrap to get the depth of the cut correct. The adhesive which I always use where high strength is required is Sika Supergrip 30 minutes which is available at Bunnings No.1210254. This is all you need,no membranes etc. Good luck with it. Koala |
|


 but I do have the space to reinforce with internal lap joints glued and screwed as you have done.. did you seal all the joints with a membrane such as a shower membrane or just wood glue & water mixture or just etch prime and top coat ?
 Best advice I can give is to take your time and do one section at a time. Do some test cuts on some scrap to get the depth of the cut correct.