|
|
Post by retro1 on Jul 31, 2005 21:10:37 GMT 10
In storage over the past 30 something years through a hole in the shed roof, the van has had a constant leak dripping on it. This has caused the van to rot in the rear left corner. It is the hole about half way up the glass. This posting is on how to fix the rotten section. 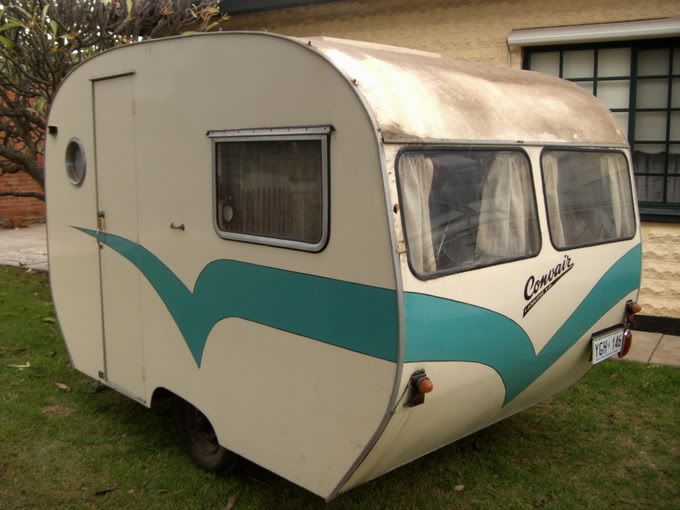 The sides on the Convair are 6 mm ply. The rear and roof sections are of 4mm ply and masonite. First I removed the glass and sash . The lower panel was also removed so I could put in new wiring for rear lights. As you can see in the first picture the wiring is nailed to the outside.These lights are to be replaced with some that are larger and easier to see. I know that they are not going to be original but originally it only had a brake light. 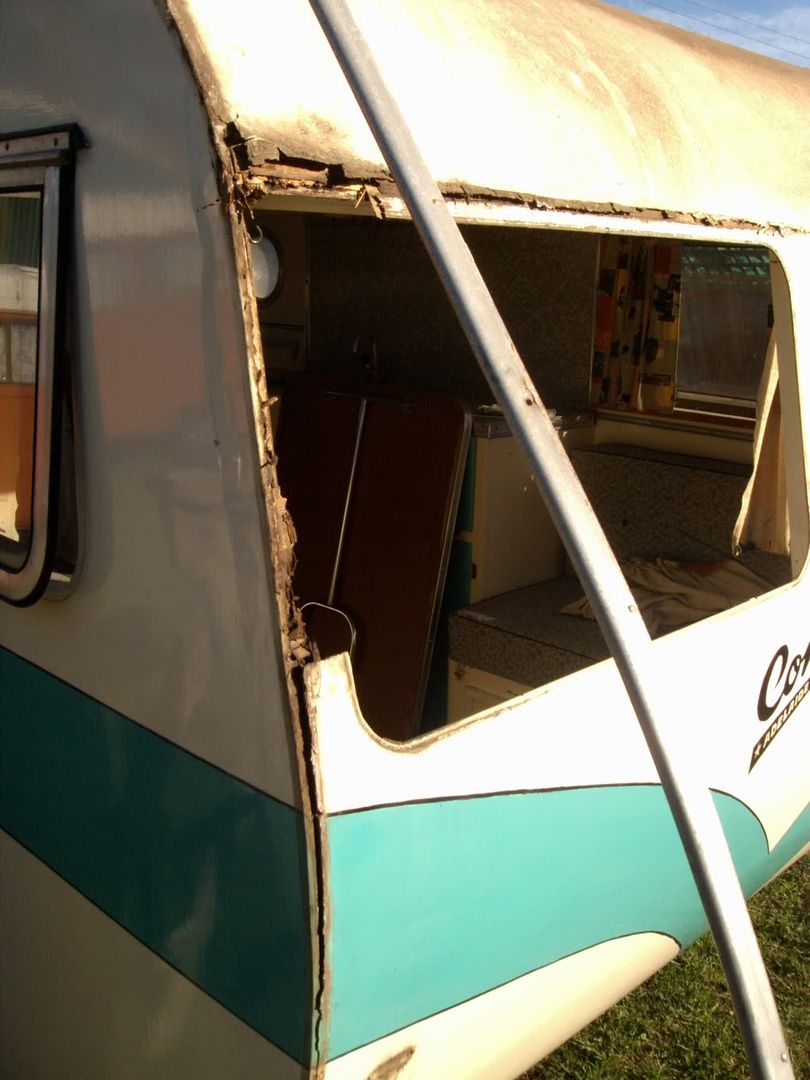  This picture shows the rotten section I removed . The reason for it being this shape is that the line of the join is protected by the closing of the window and the over all join is smaller than if I was to take out the whole rear section.This is done by routing it with a block(straight edge ) fixed to the van. The ply being 6 mm thick I rebated out 4mm to take the new ply panels leaving on 2mm to make sure the glue joint was as large as possible. Always allow the timber to dry out before going any further. 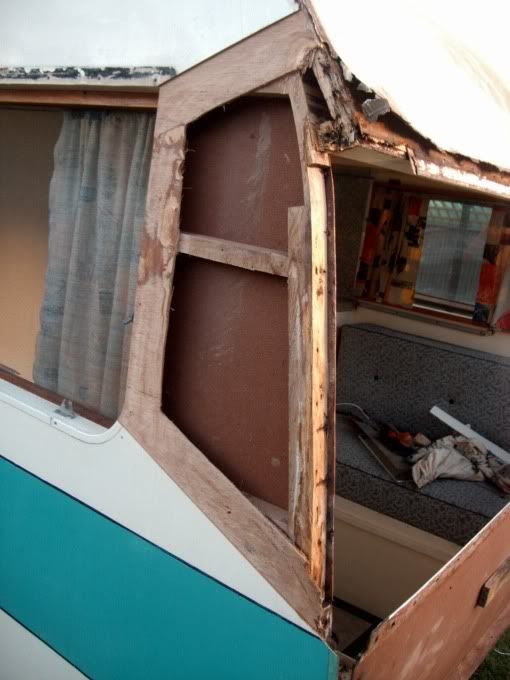 The next picture shows a small off-cut of ply demonstrating the rebate for the new outer layer of marine ply. 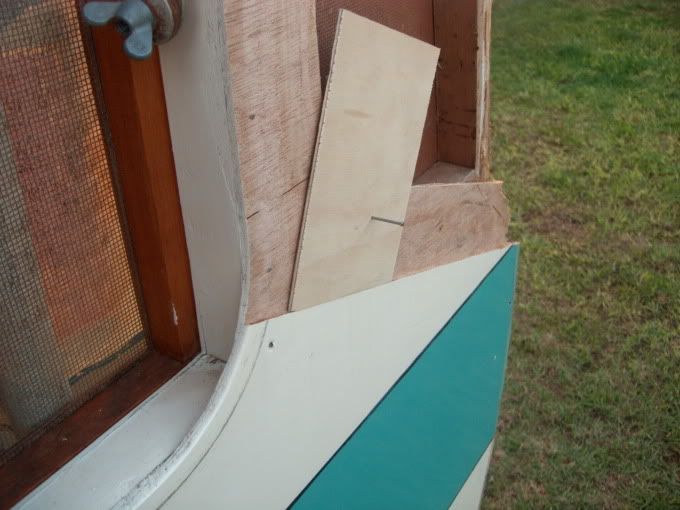 Some blocks are placed in behind the original ply to support the first layer of ply to be placed in. 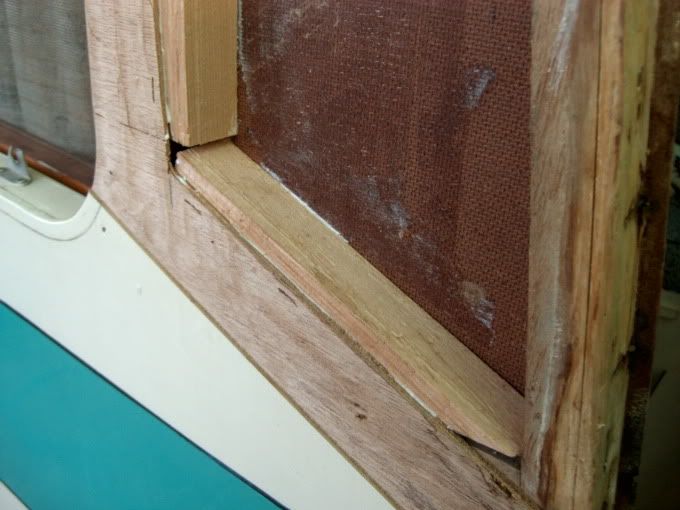 The support layer of ply is put in place by gluing to the support blocks and stapled in.  The top layer of marine ply is glued in placed the staples will be bogged up later with fiberglass filler. The overhanging ply layers ( approx pencil line) will be trimmed of later with a router. 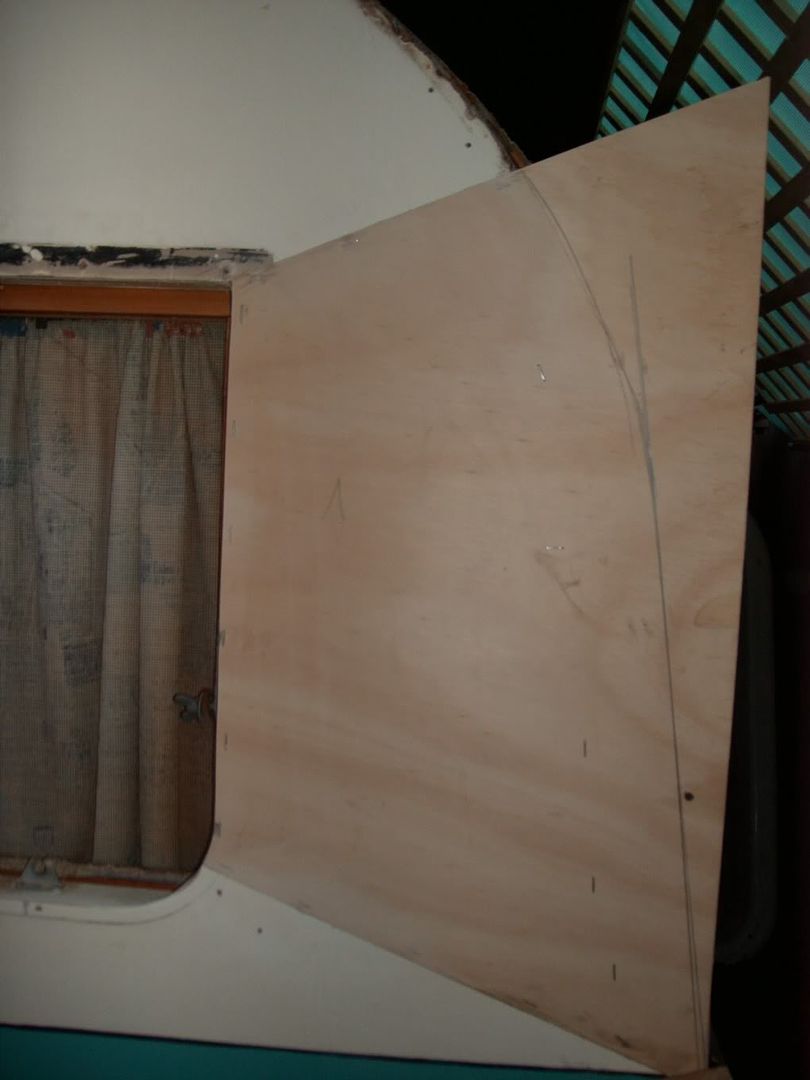 Next lot of posting I'll show the back section being repaired. If you have any questions please ask me as I will be glad to help any one out. |
|
|
|
Post by retro1 on Jul 31, 2005 21:32:40 GMT 10
Thanks for that comment but the repairs to this van are minor and if I ever sell the van I want to be sure it leaves me in A1 condition. I'll sure help you out if you need advise just email me any pictures.
|
|
|
|
Post by cobber on Aug 1, 2005 17:38:36 GMT 10
Thanks Retro,
That sort of information is worth heaps.
Tell me why you leave it till later to trim the overhanging ply off, I would of drawn the pencil line on the other side and cut it off first (I may be tall but I ain't smart)
Cobber.
|
|
|
|
Post by retro1 on Aug 1, 2005 21:34:30 GMT 10
The overhang is left on until the outer layer of ply on the rear of the van is glued back in then a router with a roller on it trims it to shape.
|
|
|
|
Post by retro1 on Aug 11, 2005 23:41:54 GMT 10
After the water damaged framing is fixed the rear ply is replaced with 4mm marine ply. I have raised this a little as the ply was rotten underneath the canvas but the drip seal piece of alluminum ( to be replaced) will cover both ply and canvas. At this stage the windows are cut in roughly as the original piece of masonite has to be replaced. The reason for this is to accurately mark the glass and rubber seal cut out. 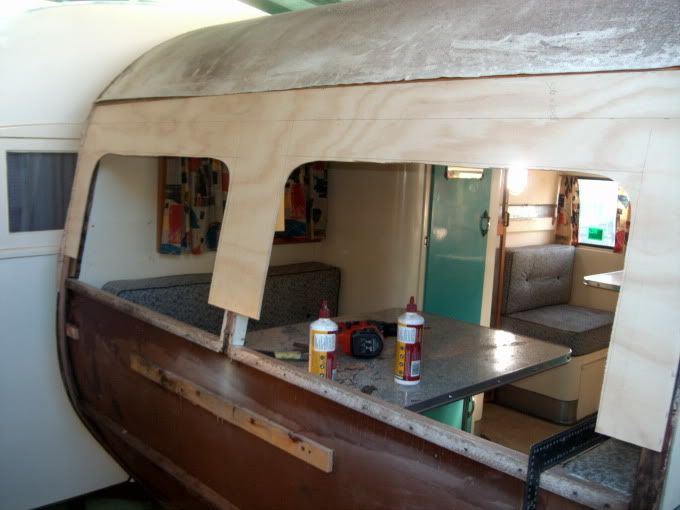 This is the picture of the rear section being replaced. The new wiring for the lights has now been consealed behind this panel. The glass panels will be marked out and cut out later. All that needs to be done now is some putty work, sanding, sealing and a coat of paint. 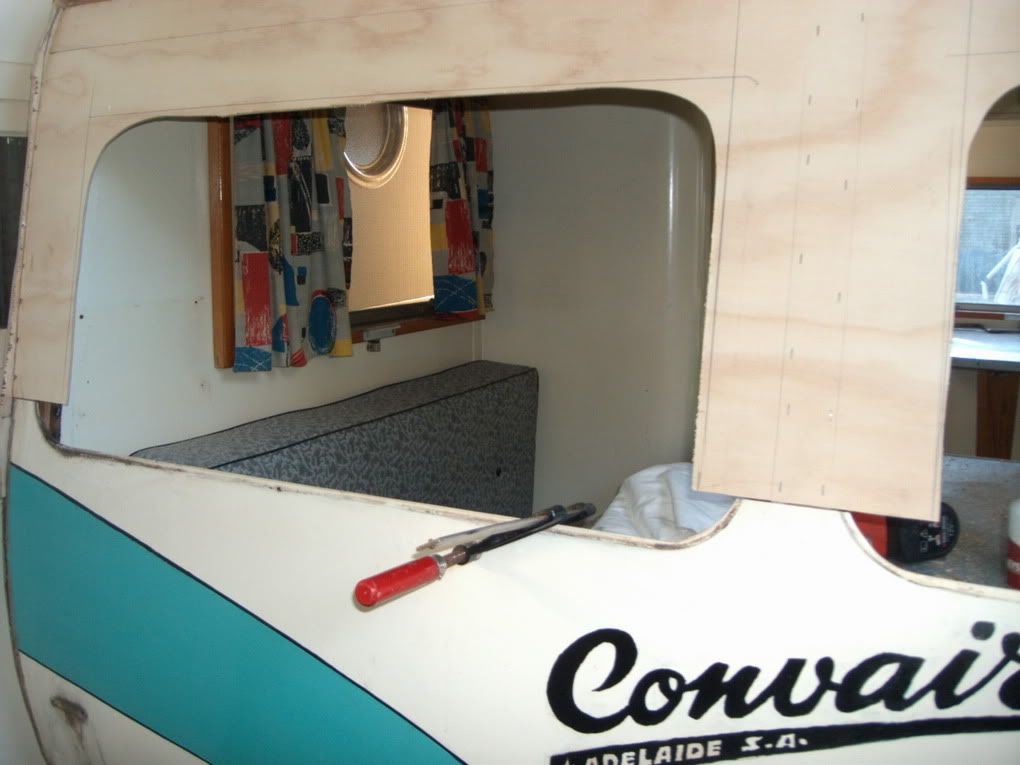 |
|
|
|
Post by earlee on Aug 17, 2005 20:00:05 GMT 10
jailbardrink,
maybe sikaflex may be the answer - it is used to stick windows into buses and has an inbuilt longlife flex factor. Linseed putty actually sets hard over time and may pop out after you drive over a few gutters after having a few juices.
Sikaflex is available at good hardware stores.
regards earlee
|
|
|
|
Post by retro1 on Aug 17, 2005 23:53:55 GMT 10
It sounds like the windows are similar to the Castle.
I used silicone to put the windows in place . This was done to strenghten the sash and stop the vibration . I then used the old putty over the top. I have never used Sikaflex and can not comment on it. As for the holes drag out all the old crap and bog up with a fibreglass based putty ( Car bog , Plastibond) this stuff can be painted over and sands up great.
Cheers
Retro1
|
|
|
|
Post by belinda on Aug 18, 2005 11:57:25 GMT 10
Hi Jailbarjuice,
our van has the older-style windows fitted in with putty.
We were having problems with leaks at the back (where the van is sloped) and got a glazier to take out the glass panels, clean out all the rock-hard putty and re-install them using grey silicone which matched the silver paint.
It was better to get a tradesman to do the job as if we'd tried it ourselves we would have smashed the panels for sure. The cost of his labour was cheaper than new glass.
This is described on the post "leaking vans"
|
|
|
|
Post by will and Lyn on Aug 19, 2005 21:50:59 GMT 10
 Hi Retro Sikaflex is a top product made in sweden We used to use it as corking on the joints in the deck of our boat it is impervious to salt and most chemicals once set and can be sanded once it sets it has huge grabbing power and lasts for a long while Will  ;D
|
|
|
|
Post by surferboy on Mar 24, 2007 23:52:14 GMT 10
G,day Retro Question time starts now...and will probably continue for the next 12 months The same corner on the ''cubbyhouse'' is water damaged and needs similar repairs Q1. what timber is the frame made from ? ...I need to replace the bits my finger goes through As I dont have a rear window I am considering reshaping the tailend and taking out the flat areas to make it curved from top to bottom ....maybe Q2.. The ongoing debate ...Marine or Exterior ply ? Imported marine grade ( which is only marine on one side..which I figure is all I need as the poorer side would go on the inside ) is cheaper than the exterior grade Q3..1001 small panel nails held the original ply on, how do you fix the replacement ply on Q4.. assuming I manage to eventually get all the new ply on ...what products and methods do you reccomend to protect and decorate it with...and do I need to do any sealing/protective stuff before i put it on the van SORRY Retro But this is probably only the beginning  The one who failed woodwork miserably at highschool but suddenly decided to rebuild a wooden caravan  ?? ( and is a teatotaller so can't blame it on being intoxicated ! ) |
|
|
|
Post by retro1 on Aug 8, 2007 22:40:40 GMT 10
I was looking at this post and noticed that some questions that had been post I have not answered SORRY  Here are the questions Q1. what timber is the frame made from ? ...I need to replace the bits my finger goes through. A1 Depending on where it is most vans were made of light soft timber ie: types of pine ,oregon etc. Any light timber is fine. [/font] As I dont have a rear window I am considering reshaping the tailend and taking out the flat areas to make it curved from top to bottom ....maybe Q2.. The ongoing debate ...Marine or Exterior ply ? Imported marine grade ( which is only marine on one side..which I figure is all I need as the poorer side would go on the inside ) is cheaper than the exterior grade A2 Marine is always better. It is of better quality with no air, gum or gaps in the internals laminations.If the van is not going to get to wet use an external grade but that also comes in different qualities. AAA AA AB etc Q3..1001 small panel nails held the original ply on, how do you fix the replacement ply on A3 With modern 2 part glues you only need to clamp the ply but I use galv staples as well. Q4.. assuming I manage to eventually get all the new ply on ...what products and methods do you reccomend to protect and decorate it with...and do I need to do any sealing/protective stuff before i put it on the van A4 This is a topic that is personal. I used a that was for use on ponds ( very water proof). It is waterbased acrylic and can be seen in " MY Castle Caravan" It depends on the finish you want. There is no right or wrong it is up to you!! I hope this has been a help  Cheers retro1 |
|
|
|
Post by frankidownunder on Aug 8, 2007 23:02:43 GMT 10
Hi retro,
thanks for a very good article, very informative. wooden structures are always a problem when water gets in, my franki leaked along the angle trims (J trim) due to ageing sealant and slight displacement of the side skins. I am in the process of repairing the damage now.
Ps , do you mind me asking what your background is ? you certainly appear to have good knowledge and skills in woodwork. I have an Aviation background in metal and wood aircraft maintenance.
Cheers, frankidownunder
|
|
|
|
Post by diyman on Jun 9, 2008 16:53:08 GMT 10
Hi Retro Great information in this old thread but I have a question for you re post #4 where you have just fitted the new back. Now please take into account that I am a novice at working on Caravans but what actually is on the roof in that photo, it looks like alluminium but from your post I take it to be canvas, but it does'nt look like canvas to me. ???Remember I am a novice and have never even seen caravan canvas before so I have no idea what it looks like, to me canvas is canvas.  . This thread is a terrific help to me because I am doing (attempting) almost the same repair/rebuild on my old Globetrotter. Regards Jim |
|
|
|
Post by retro1 on Jun 15, 2008 22:12:23 GMT 10
Thanks for the interest in this post. I"m sorry for taking so long to get back to you. The roof is canvas. It is a heavy grade canvas that was sealed with bitumen then painted( on the site there are many posts on this subject) Contact if you want more info is easier through the PM emails. Cheers retro1  |
|


 Hi Retro


 .
.