|
|
Post by mel on Nov 10, 2015 18:31:22 GMT 10
I am getting ready to put my kitchen back in and noticed that while I have had the kitchen splash back stored, it has developed a crack in it. I had it stored sitting up on its side. In hind sight I should have stored it laying down flat. 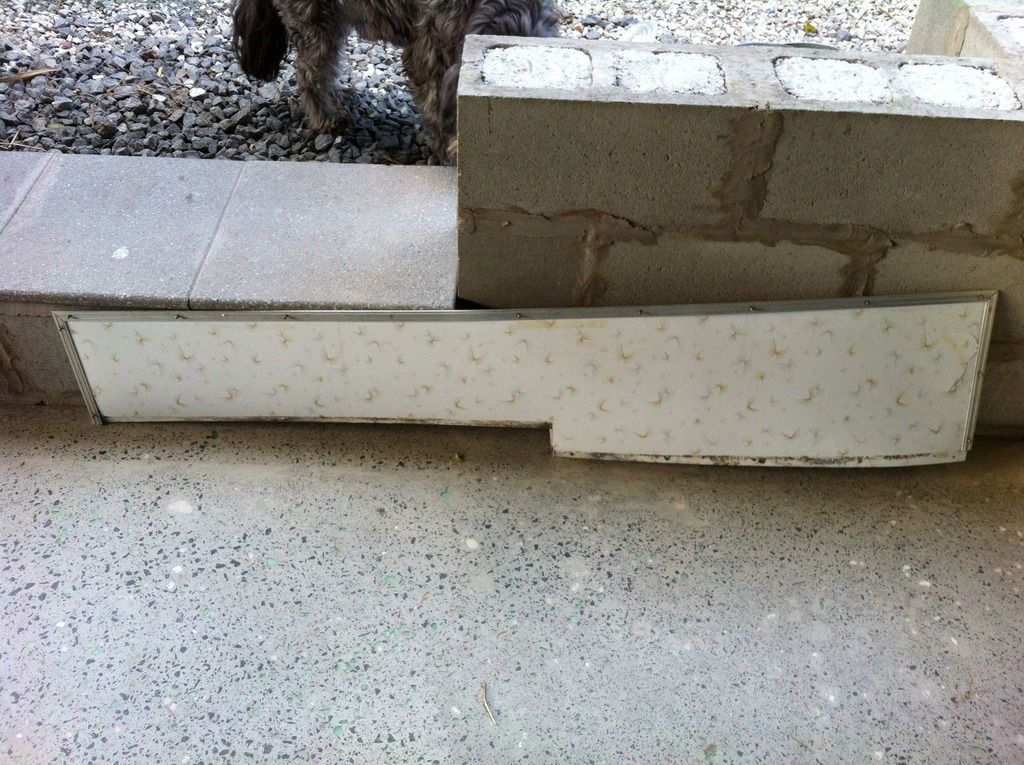 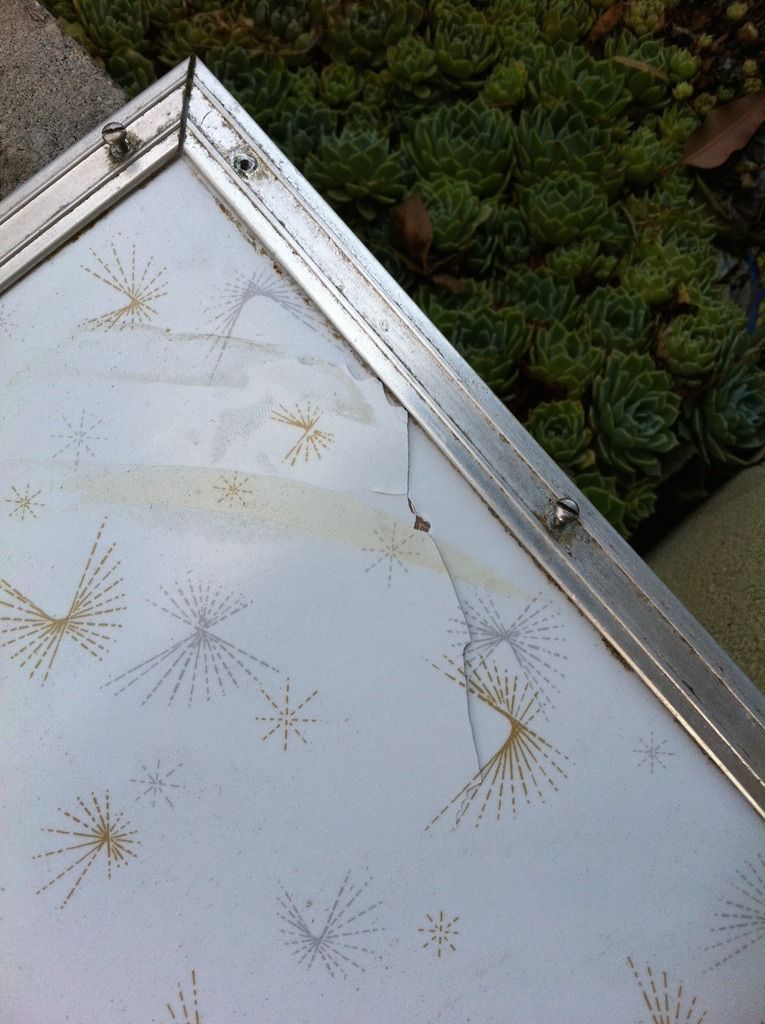 If by some small miracle I can find a piece with the same pattern, I will replace it. But for now I will have a go at repairing it. Any tips? |
|
|
|
Post by adamcharch on Nov 10, 2015 19:54:27 GMT 10
A powerpoint might work.
|
|
|
|
Post by seeshell on Nov 11, 2015 15:12:31 GMT 10
Hi Mel
White is not the easiest colour to match. There are dozens of shades of white. Yours looks slightly grey but it's always hard to tell from photos. You will need some Selleys white epoxy porcelain repair. I'm hoping that it will be a good match but it may look a little on the ivory side compared to the white in your table.
If I was repairing it I would take these steps...
1. Where you can, lay the pieces together and glue them down so they are stable. Where there are gaps, clean out the base of the hole and trim the jagged edges of the formica at 45° using a Stanley knife. Make sure there's no grime left in the hole.
2. Place 50mm long parallel strips of masking tape either side of the hole / breaks - about 2mm clear of the edges.
3. Mix the resin as per instructions. You might like to try a small blob first for colour match. Metho on a soft cloth will remove it will it's still wet.
4. Overfill the hole with the white epoxy. Scrape of the excess with a paint scraper or spatula by bridging over the masking tape. This should then give you a level surface that is slightly proud (depth of the tape) of the formica surface. It may be necessary to put more layers of masking tape down to achieve a slightly elevated level.
5. Allow to set overnight.
6. When hard sand back using wet 1200 grit paper with a flat backing block. This can tack some time - it's slow going with such a fine grade of paper. Stop sanding when it's within a hair's breadth of being flush.
now for the tricky bit....
7. If the colour is a reasonable match using a steel straight edge and a sharp stanley knife cut some fine V shaped disecting lines into the patched section. The idea is to replicate one of those asterisk paterns - perhaps make fine crisscross V shaped grooves go slightly deeper than the formica surface. You could also make a few little random craters with a small drill bit (hand held) to replicate the speckle in the pattern.
8. Mix up some more epoxy (you can use either white or clear) and add some coloured powdered cement colouring, or black paint tint, or finely crushed graphite (from an old pencil) or black pepper, or whatever dark pigment you can find to get the white to grey - try other colours if you're going for the other colour in the pattern. Only add a small amount of tint add a time. Trowel the colour mixture over the top of the white patch making sure it penetrates into the V groves.
9. Leave overnight to set.
10. Sand back until it's all flush with the formica and all excess has disappeared. You should now have a filled hole or pattern area with the right colour!
11.Polish and/or buff to suit using VERY fine car polish.
Presumably if the background colour were different the advice above would involve you tinting the white Selley's material before using it. The other advice about the graphite was to tint the material to match in a little asterisk pattern - if that didn't apply to your situation, or the broken areas don't need it, skip it!
Cheers
Seeshell
|
|


