dawso
Full Member

Posts: 141
|
Post by dawso on Aug 26, 2014 15:07:10 GMT 10
Attachment DeletedHi All, Having finished restoring my Stardust I have been looking for a new project and have finally scored what I have been looking for. A Franklin Regent number 1905.8 in poor condition but it will come back, I get it home on Thursday so will include some photos then. Can anybody tell me what year it would be. Regards, Dawso.
|
|
Deleted
Deleted Member
Posts: 0
|
Post by Deleted on Aug 30, 2014 20:25:51 GMT 10
looks like one of the first ones to me,when they changed from framework and aluminium sheets,to Thermo panel,which is the nice flat walls in one piece.
The windows are the old type too,so this must have been a changeover model.These early ones also didnt have a kitchen window.
Does it have a continuos run of cupboards on the kitchen side,or 4 tall cupboards over the kitchen only?
if the former I would suggest its about 1968 or 69.
cheers
hughdeani
|
|
dawso
Full Member
Posts: 141
|
Post by dawso on Aug 31, 2014 21:30:24 GMT 10
Hi Hughdeani,
Thanks for replying to my post,
It would appear as if I have a 1968 model as the cupboards follow the line of the ceiling and the number 8 is stamped on the frame.
I have finally cleaned out the interior of the van ( one trailer load of rubbish) the owner died 20 years age and his daughter put all his belongings in the van and closed the door. The van had sunk into the mud to just below the frame so all the wheels, jockey wheel, and jacks have rusted away.
I will post photos on Members Photo Album as soon as I can .
Regards,
Dawso.
|
|
|
|
Post by apinder on Sept 24, 2014 19:45:30 GMT 10
Hi Dawso,
That's a great van you've got hold of. Looks like a lot of work ahead of you. I have an old franklin freeway late 60's maybe 69 I believe. Anyway I have started the process of resealing it since all 4 corner windows leak. The old mastic or what ever it was has basically turned to a hard clay. Can I get your thoughts on what type of sealant is best to use? A lot of people say just use silicone or sikaflex but I'm not convinced. Do you think using butyl mastic is the better option?
Cheers
Al
|
|
dawso
Full Member
Posts: 141
|
Post by dawso on Sept 24, 2014 20:06:18 GMT 10
Hi Al,
I used Sika Flex Butyl mastic on the windows of a Olympic Stardust and had no problems, do not use silicon as it sets, remove the windows, clean all old sealant then reseal and replace, if its the same windows as mine they are only held in by screws at the top of the window.
Dawso.
|
|
|
|
Post by apinder on Sept 26, 2014 10:14:35 GMT 10
Hi Dawso,
I'm trying to track down a butyl mastic tape which would probably be easier to apply. The sealant which was under the edge trims of the van (joining the roof and side panels) was a sticky substance with some type of cloth strip, probably butyl I guess. It had hardened where is was squeezed out of the joint. It still looked like it was sealing well. It was easy to clean off with turps. I have some photo's but how do you upload them?
Al
|
|
dawso
Full Member
Posts: 141
|
Post by dawso on Sept 26, 2014 22:24:08 GMT 10
Hi Al,
Had the same sort of stuff on mine, you must remember this was applied over 40 years ago and hopefully the newer butyl mastic will be better, I got some Selleys butyl mastic from Bunnings today, it forms a tough skin but remains soft under it, it is also paintable. There are threads on how to download photos somewhere on this forum using photobucket, its not hard once you get your head around it. Removed and painted the fridge on my Regent today and found the origional warranty card attached to the back of the fridge made out at August 1968 also texta'd on the fridge was a notation that the fridge was installed in Aug 1968, so our guess of the year model appears to be correct. Have removed wheels, axles and springs, sanded down all steelwork underneath, removed drawgear and replaced pneumatic brakes with override braking system, now waiting on new hubs to replace old ones which I will put back on old axle. Have also removed all inside cupboards and bed, also windows, removed all ply on one side of the van and will replace as soon as I get the under carriage back in place.
|
|
|
|
Post by apinder on Sept 30, 2014 9:27:39 GMT 10
Hi Dawso, You're certainly not mucking around with the restoration. I am not certain of the exact manufacture date of our van as we haven't found any indication of a date. I have had a go at this photobucket so there is a link below for a couple of photo's.  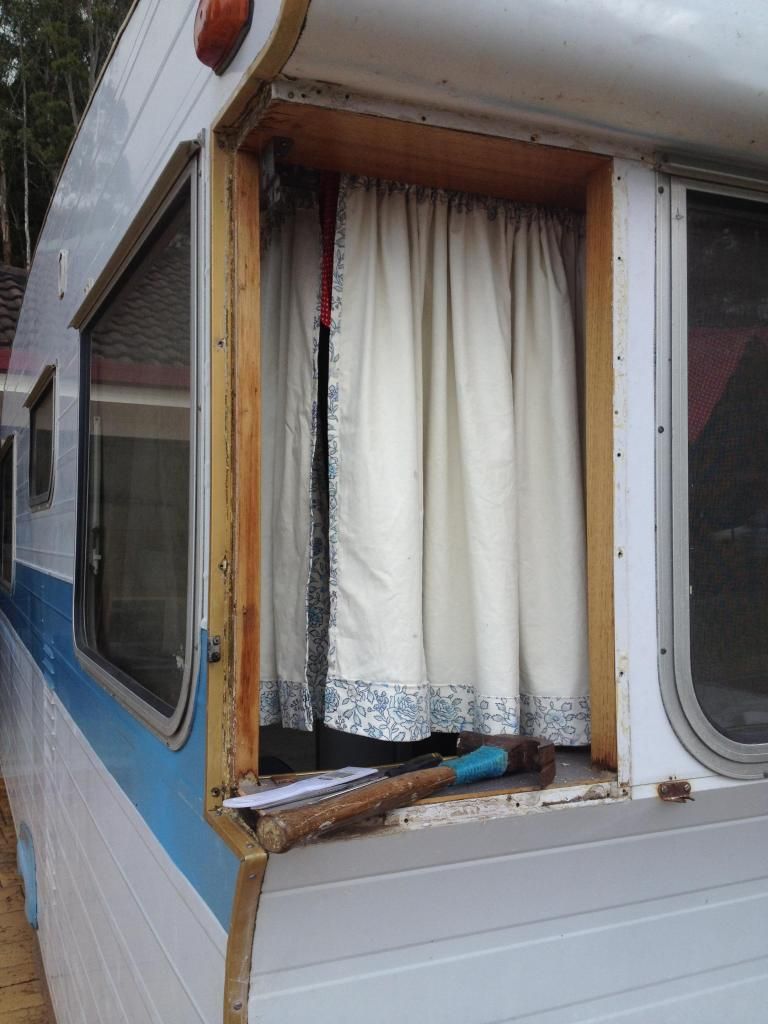 You can see the stained/damaged wood where water has got in. It is worse at the rear windows. I considered rebuilding the damaged wood but probably to much for me. I don't have a shed as you can see and with 2 young kids its hard to get time alone to work on it. I will treat the wood rot with wood rot hardener which I got from bunnings then seal in the windows. I am in a dilemma as to what to seal the corner moldings of the van with. I am considering sikaflex polyurethane sealant for all the corner moldings and butyl for all the windows. Not sure if I should also use butyl for the corner moldings as well. I know if I use polyurethane sealant I will have trouble detaching the corner moldings but if done right the first time it should last the life of the van. Alex. |
|
dawso
Full Member
Posts: 141
|
Post by dawso on Sept 30, 2014 20:35:09 GMT 10
Hi Alex,
I will post photos next week of my van on members photos.
I am hoping my van will eventually look as good as yours does now!!!
Dawso
|
|
|
|
Post by jazzboss on Oct 1, 2014 20:15:35 GMT 10
apinder, nice Franklin, I have a similar model which I am restoring as well. But I have taken the front window and window bracing timber out as they were so rotten and dead I had no choice. I will post some photo's as soon as I can. I was wondering what timber was originally used (looks like Meranti) and whether I could use something more durable instead (cypress, Oregon maybe) any thoughts team?
Thanks
Great forum
|
|
dawso
Full Member
Posts: 141
|
Post by dawso on Oct 1, 2014 23:01:59 GMT 10
Have a friend who is a cabinet maker and he has advised me to use Tasmanian Oak because of the better grain.
It is available from Bunnings.
|
|
|
|
Post by Koala on Oct 2, 2014 8:59:28 GMT 10
I have replaced both the front and back window sills in my Franklin Freeway and photos can be.found in my thread 'Freda the Franklin Freeway' . My originals were made up from 3/4 meranti with a piece of three ply glued on top..
The roof of these vans which overhangs the chassis does not have much strength and even less when the window sill rots out as it is load bearing.
I added some extra bracing from the chassis up to the window sill and this can be seen in the photos.
I used a UV resistant clear sealer for the corner windows. The trick is to lay a bed of sealer and don't tighten the screws fully. The screw holes need to be drilled larger than the screws to allow the Perspex to expand and contract without cracking.
Koala
|
|
|
|
Post by apinder on Oct 14, 2014 10:12:07 GMT 10
Hi Koala,
Nice job with your restoration. I'm afraid I won't be going that far with restoring mine, I will be resealing all windows, fittings and corner mouldings and then some fresh paint. The front window sill wood is not too bad but the rear had a bit of rot. I was thinking of replacing the rear window sill piece but how to get it out without being too destructive is the question? I thought I could peel back some of the roof and replace the whole lot from there? How did you go about replacing the rear window sill wood? It's surprising they didn't originally brace the front window sill as you have, is this the case for the rear window sill as well? Reading your past posts from Freda the franklin freeway you said the tare weight was 750kg's, the tare weight of ours is 950kg's. Any ideas where the extra weight is from?
Alex.
|
|
|
|
Post by Koala on Oct 14, 2014 21:10:42 GMT 10
Hi Alex,
To get the window sill out you need to remove the beds the centre set of drawers and the lower screws in the back window. You then cut the old window sill into pieces to get it out........there are some big nails which you need to cut off using an angle grinder coming from the underside into those timbers between the windows and replace with large screws when fitting the new window sill. The rear sill is harder to replace than the front because of the angle that the interior ply sheeting meets the window sill. I used Meranti and marine clear and it looks great..
Sent you a PM with my phone number so we can have a chat.
Koala
|
|


