|
|
Post by 53vicky on Feb 10, 2017 20:20:09 GMT 10
Well, finally got the first surfacer / primer on today. Seemed to come out OK which I was hoping as 6weeks of sanding most nights were getting a little tiring. Now it's a quick guide coat and get into the surfacing side of it.   
Cheers ted |
|
|
|
Post by Mustang on Feb 11, 2017 11:09:07 GMT 10
Looking very "RIPPLEfREE".
The FJ tail light changing its days to be so distinguished, very sensible to as the tail-gaters will see you braking.
|
|
|
|
Post by 53vicky on Feb 11, 2017 17:46:27 GMT 10
Cheers Brent
The sparkie has suggested putting a reversing camera in the lower part of the fj lens which will be a good addition I think.
He is roughing the wires in tomorrow so things are starting to happen.
|
|
|
|
Post by 53vicky on Feb 20, 2017 19:15:23 GMT 10
Hi all Been sanding, sanding , sanding. Just about ready for the 2nd primer surfacer. Starting to come out OK for an amateur anyway. Got a call from nickd15 saying that he heard of a NOS fibreglass hatch at a local caravan shop. Went down there and picked it up, I think it's probably from a 70's -80's van but gives me a base to start with, thanks Nick. The sparky has now roughed in all the power so once I have got the body prepped for top coat I will begin cladding the interior which should be good. I am advised I will need a seperate indicator to wire all the lights so they work on both th 54 ford as well as a modern car and will probably use these 65 mustang rear backup lights as they seem to match with the rest of the lights? We will see, still need to pick a position but will probably go with the lower position.  |
|
|
|
Post by Mustang on Feb 20, 2017 19:43:06 GMT 10
That hatch looks like a Viscount, same as ours, what amazing condition?   This is what they are normally like 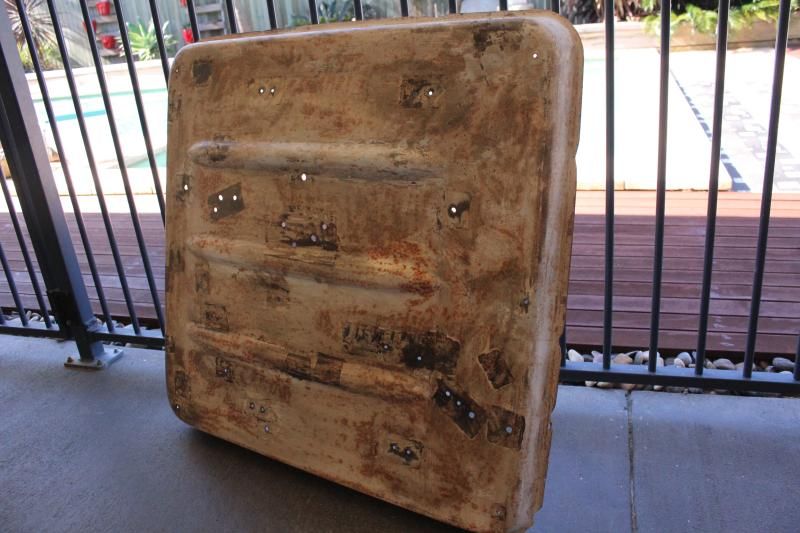 |
|
|
|
Post by 53vicky on Feb 20, 2017 19:56:27 GMT 10
Hi Brent
l knew I had seen one before it was on your build thread!!! It had been packed away and never used but should suit pretty well and is a great starting point
cheers
|
|
|
|
Post by 53vicky on Feb 21, 2017 21:10:45 GMT 10
|
|
|
|
Post by Mustang on Feb 22, 2017 8:13:03 GMT 10
|
|
|
|
Post by 53vicky on Feb 23, 2017 19:30:44 GMT 10
Haha......don't worry Brent it's nearly back to how it was, just a little bit bigger !!!!!!  |
|
|
|
Post by aussied on Feb 24, 2017 10:36:04 GMT 10
All your hard work is really coming together. Well done!
Are you going to run Cussie wheels on it?
|
|
|
|
Post by 53vicky on Feb 24, 2017 11:28:24 GMT 10
Hi, Yes I will run with 15" ford wheels, whitewall and hubcaps the same as the Victoria
Cheers
|
|
|
|
Post by 53vicky on Feb 25, 2017 18:01:48 GMT 10
|
|
|
|
Post by Mustang on Feb 26, 2017 7:45:28 GMT 10
Nice open space to work, I see a couple of other projects in the background?
Your van is looking so straight!!
|
|
|
|
Post by 53vicky on Feb 26, 2017 10:51:57 GMT 10
It's coming out pretty good although there is a few areas which have "woop de do's " as sutcac puts it which were obviously there when the vans was built. Back to rubbing but at least now it will be less dusty, yoohoooo!!!
|
|
|
|
Post by 53vicky on Mar 1, 2017 19:19:28 GMT 10
Just needs laminating to the steel, trimming and a clean up   |
|
|
|
Post by gerrynshaz on Mar 7, 2017 14:37:42 GMT 10
Hi
great job that's a serious restoration but well worth it.
Can I aske what timber you used for the frame
Cheers Gerry
|
|
|
|
Post by 53vicky on Mar 7, 2017 21:20:42 GMT 10
Hi Gerry
Yep, it all fun though......
I have used a lot of old Oregon that I had here which I ripped down as well as treated pine and plain pine.
Cheers ted
|
|
|
|
Post by nickd15 on Mar 8, 2017 18:05:27 GMT 10
Looking good Ted.
|
|
|
|
Post by 53vicky on Mar 8, 2017 21:24:07 GMT 10
Cheers Nick Well, finally got the hatch finished, just a bit of smoothing out and setting up hinges etc but looks ok.   |
|
|
|
Post by 53vicky on Apr 9, 2017 17:51:12 GMT 10
Onto the inside, more sanding!   |
|
|
|
Post by aussieute on Apr 9, 2017 19:07:51 GMT 10
It looks great and your progress is coming along quickly look forward to seeing your van complete cheers chris
|
|
|
|
Post by 53vicky on Apr 10, 2017 22:38:23 GMT 10
Thanks Chris, yep pretty happy with how it's coming along. Have got 2 weeks off over Easter so hope to get the interior ready for paint and the kitchen done
Cheers ted
|
|
|
|
Post by 53vicky on Apr 13, 2017 20:39:07 GMT 10
Started to frame up the kitchen, hopefully the original sink will clean up ok....... Just going to have a fridge, microwave and not doing an oven......   |
|
|
|
Post by cardygeorge on Apr 13, 2017 21:31:18 GMT 10
I was hoping someone would post photos of their cupboards during construction. The search function was, ah, uncooperative  How are you attaching them to the wall? |
|
|
|
Post by 53vicky on Apr 13, 2017 23:17:19 GMT 10
Hi Cardygeorge
First time doing this but in the latest photos l have juslt fixed the cupboard in place to confirm all my measurements are correct and the sink fits etc. I have screwed a horizontal piece of timber to the vertical wall studs so I can fix the rear of the frame to it. You can see it in one of the photos. I am happy to take some more shots and post them in the next few days as I will mock up the whole frame before uninstalling and fixing it all together. There are more knowledgeable folk on here on how the best way to do it is though but this is one way .....hope this helps
cheers ted
|
|