|
|
Post by Franklin1 on Dec 10, 2011 15:08:04 GMT 10
Progress has slowed considerably on the project, due to a medical situation with my partner requiring daily attention (infected foot). Bit by bit, I've managed to essentially complete one wall, which involved glueing the laminated block around the perimeter of the wall. In preparation for the big glueing job, I first cut some spacers out of a thick cardboard milk carton... 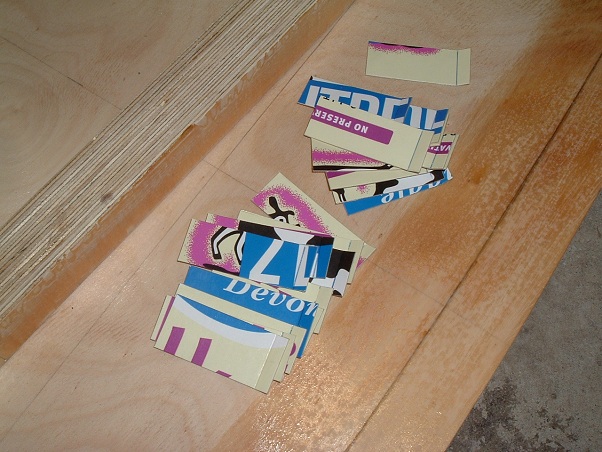 After the glue was applied to the joint, the laminated block was carefully placed into position, and the spacers were inserted on one side and clamps applied over the spacers. This meant that the pressure was applied to the spacers, which stopped the glue being totally squeezed out of the joint. Once the glue had "cured" sufficiently, the spacers were pulled back out... 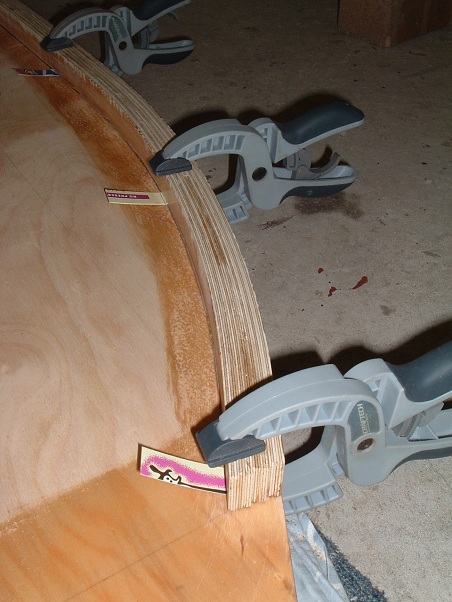 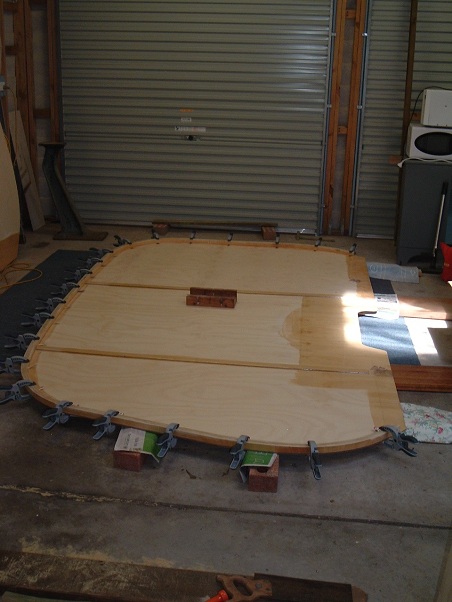 The next step was to apply a strengthening "fillet" around the inside of the laminated block. There is a powder filler available in the Bote-Cote range, which is added to the resin mix to thicken the mix up... 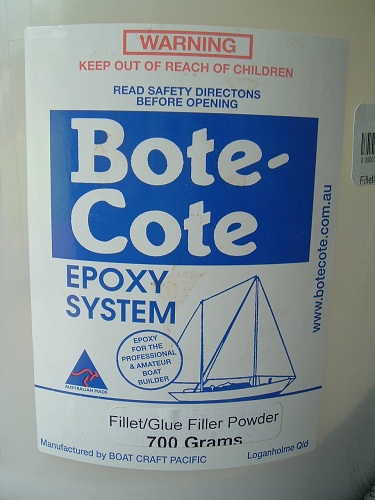 The thickened mix is used to make the fillet. The mix is pasted into position roughly, and then shaped to give a curved appearance. Using a $2 coin to give me the right radius, I cut and shaped the handle of a plastic scraper to use for shaping the fillet... 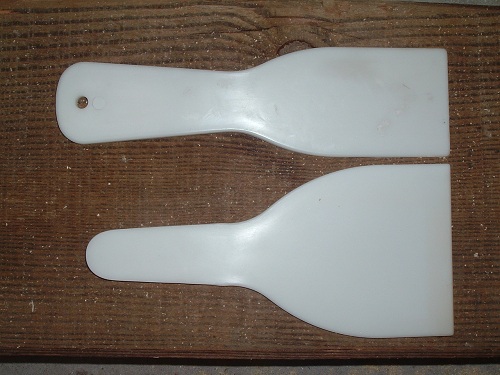 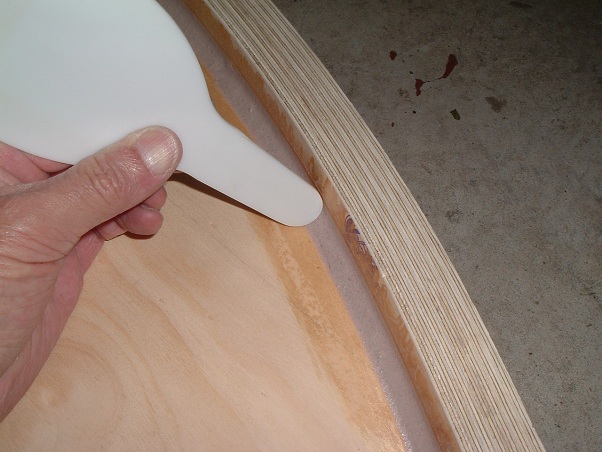 And here is the wall completed and ready for fitting to the chassis... 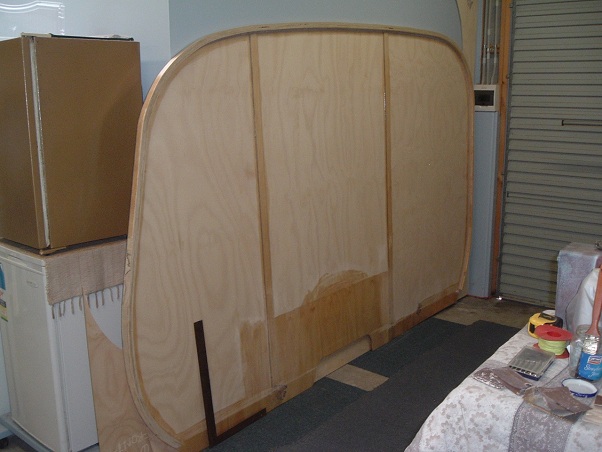 Now for the other wall, so I'll see you in another month...    cheers, Al. |
|
|
|
Post by Franklin1 on Jan 6, 2012 10:03:31 GMT 10
Another quick update... The other wall has now been completed. Here's a couple of photos showing the Clamps Regiment on active duty during the lamination block-making process... 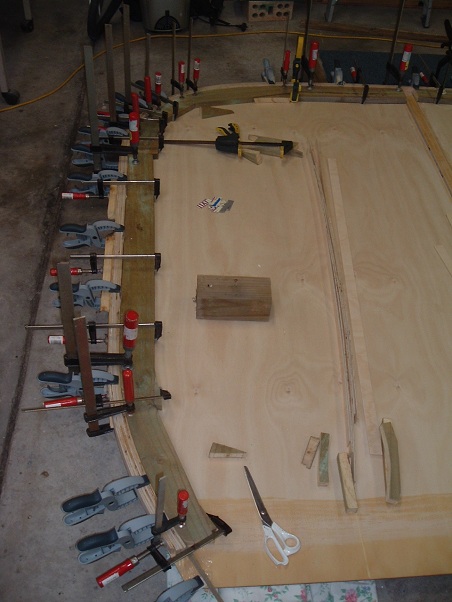 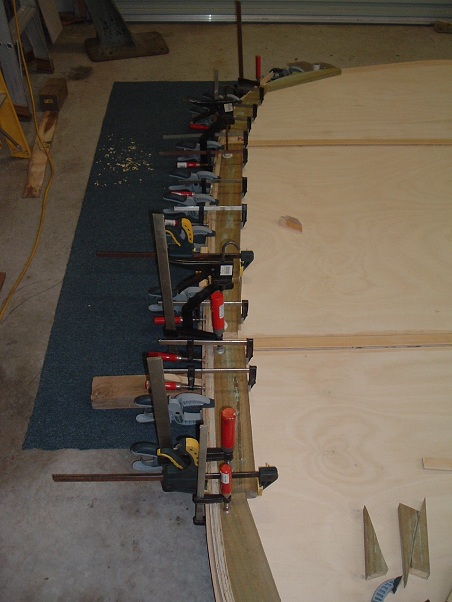 The chassis floor has been given a soaking coat of resin, in readiness for any bits and pieces that will be glued on top of it... 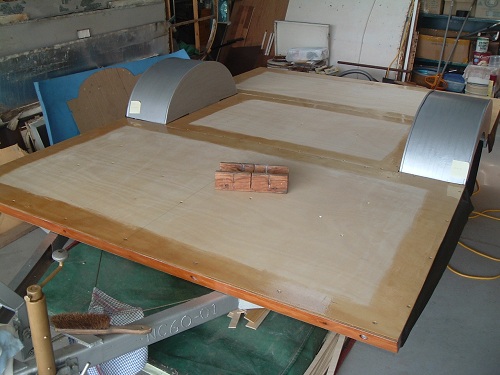  I'm now at the stage where the walls can be lifted into position, but I'm patiently waiting for a stash of secondhand oregon timber to become available. Negotiations are continuing. The oregon will be used to make cross beams to hold the two walls together, as well as being the timber strip on which the roof sheets joints are made. cheers, Al. |
|
kaz
Junior Member

Posts: 99
|
Post by kaz on Jan 8, 2012 21:27:25 GMT 10
wow thank you for all the updates you are doin sensationally!!!!
|
|
noblesgarage
Full Member
 A Man with many projects Dosen't have a lot of time."Cause He Walks Round In Circles"
Posts: 363
|
Post by noblesgarage on Jan 9, 2012 8:45:43 GMT 10
|
|
|
|
Post by Franklin1 on Jan 9, 2012 10:24:32 GMT 10
G'day kaz and Brian... Thanks for your comments. Very pleased to read that others think the project is going well. It's sometimes hard when you're in the middle of it to appreciate what you've achieved. Sorry Brian, ol' mate, you're on your own as far as a caravan kit goes. I reckon this'll be the one and only time I have a go at making one "from scratch". I've always had a hankering to have a go at building a caravan, and even bought the Culbert's "Build A Caravan" book way back in the mid-1970s, with great ambitions. It's taken me 40 years to find the time to finally make a start. I get more and more nervous as I get further into the project. I spend a lot of time thinking about the "how to do it" bit. If I stuff it up, it's not like I can rebuild another wall in a couple of days for a replacement. Consequently, the project is gonna take a long time to complete. I've also decided this project won't take over my life like the previous caravan restoration did. I try to do a little bit each day, but if I've got other things to do, I'll drop the project and do those. Not like the last time. We've had our four year old granddaughter stay with us for the last couple of days. She walked into the garage where the van wall was laying down on the supports on the floor, and then promptly walked across the wall. Two good things came out of that... One, I now know the wall is capable of withstanding the weight of a 4 year old; and Two, I don't need to go for my annual heart check-up this year. She's already given it a good stress test, and things seem to be ok in that department.  Thanks again for your feedback, ;D cheers, Al. |
|
|
|
Post by Roehm3108 on Jan 9, 2012 11:48:23 GMT 10
Hi Al Great to hear the wall survived the grandchild test AND that you saved a stress test at the doctor's ;D  You're certainly doing your usual fastidious job on the van and it's interesting to watch your progress. I am curious about why you chose to rebuild it the way you did, that is, ala teardrop construction method of doing the walls and then the actual frame, rather than the other way around - building the frame and then skinning it. Was there a reason for that? Keep up the good work Ray |
|
|
|
Post by Franklin1 on Jan 9, 2012 18:26:21 GMT 10
G'day Ray, Thanks for your comments. There wasn't any framework in the original van, at least not any framework that we typically see in vans. There was obviously framework for all the cupboards, seats, bed, etc., but no wall or roof framework as we know it. The original wall ply was 7mm thick, and the roof was 5mm thick. All were just one piece of ply in each case. I couldn't get those thicknesses in the ply made these days, so I settled for 6mm for the walls and 4mm for the roof. I just decided I would try and simulate a one-piece wall by joining three sheets together. When I build all the fixtures inside, the van will sort of look like it did originally in appearance. The roof, however, is another matter. I'll have to fit the roofing sheets on one by one (I think about 6 sheets will be required), so I'll be positioning a number of strips of timber across the roof and joining the sheets on top of each strip. At the beginning of the project, I did contemplate building some wall framework and then skinning it as you've mentioned. I did a test run with my offsider here at home (a.k.a the 'Boss') and we could lift three sheets of ply together 'reasonably' easy, which meant we should be able to lift the finished wall. On that basis I decided to go ahead and do the "sheet joining" method. I think if the van had been any longer than it's 11ft, a solid wall would have been too heavy for us to manage, and the framework/skinning method would be the only choice. cheers, Al. |
|
noblesgarage
Full Member
A Man with many projects Dosen't have a lot of time."Cause He Walks Round In Circles"
Posts: 363
|
Post by noblesgarage on Jan 10, 2012 8:04:03 GMT 10
;D ;D Only havin a dig Al about the kits I will be attempting to do one myself next year after Iv'e got over the HR  That took a lot out of the system. The Dons next so that's just a repaint and tarty up. Taylor's done most of the ground work on the rub back, so shouldn't take to long to get her back on the road. Besides , Its got to be ready for the spring tour in October. As I said before ;D Mate ;D keep up the good work its a credit to you and when they can pass the grandy's test you must be doing something right. Brian. |
|
|
|
Post by Roehm3108 on Jan 10, 2012 8:11:59 GMT 10
Thanks for that Al - didn't notice the original walls were that thick. I agree that your sized van would be the limit for that form of construction, especially for a home handyman.
The whole thing sounds like hard work to me ;D ;D ;D
Cheers
Ray
|
|
|
|
Post by Franklin1 on Jan 10, 2012 9:28:33 GMT 10
G'day Brian, yeah I knew you were only having a dig about the kits. That's the problem with just seeing words on a computer screen. You couldn't see me when I busted out laughing, "Ha ha ha, that Brian sure is a kidder!" ;D ;D Ray, all the health experts reckon we retirees should keep our minds active during retirement. I can assure anyone that building your own caravan does exactly that. It ain't hard work physically as such, but it sure keeps the ol' grey matter occupied.  All the best, Al. |
|
|
|
Post by cobber on Jan 10, 2012 11:38:19 GMT 10
G'day Al...'n Ray, Maybe it's the way some Carapark (Newcastle) vans were built..... somebody with similar model Caraparks might be able to confirm that. My single skin 14ft Newcastle (Carapark) van doesn't have frame work...in the conventional sense either, but it uses the cupboards, wardrobes, beds and seats to give strength to the plywood sides. It doesn't even have framing in the corners where the ply at the sides meets the ply at the front and back (except low down where framing is required for the seats) it relies on the external aluminium edging to hold it together. The roof is double skin so I assume there is frame work involved there. Like Ray said...it all sounds like hard work to me but knowing you Al... you'll get a lot of satisfaction from what you're doing and the rest of us will get a lot of inspiration and............ education . Cobber. |
|
|
|
Post by Franklin1 on Jan 12, 2012 13:26:05 GMT 10
Here's a side story relating to the project... Just over a year ago, my son and his family bought a house that was built in 1960 (he got all the original paperwork with it, including a diary of all the timber sizes, amounts, and prices, that were used in the house ). I went all round the house during our first visit, and "baggsed" all the bits and pieces I wanted when he did any renovations. Yesterday I picked up one of the outside lights that became available. It carries the Clipsal branding... 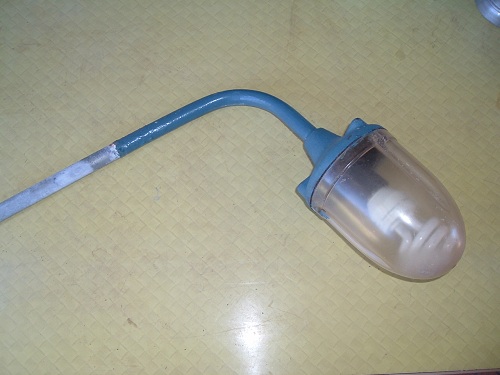 Inside his garage, there are a couple of vitreous enamelled lampshades on the lights, so I pinched one of those as well... 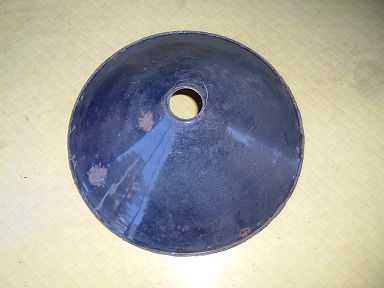 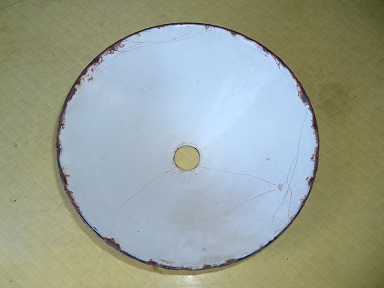 First I stripped all the paint off the light fitting...  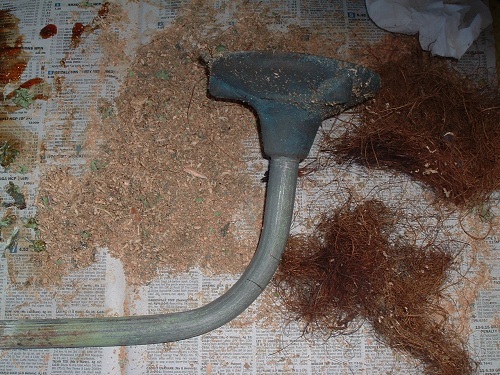 The top moulding is made of bakelite, and the gasket is a cork-based one, both in great condition... 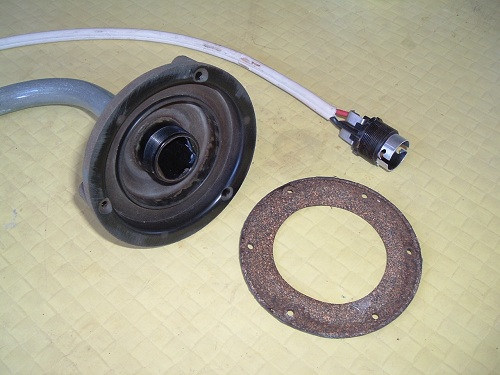 Here is the cleaned-up light fitting and shade put together. I'm now thinking of ways I can use the light on the side of the van as a quirky annexe light. Somehow I'd need to have a bracket fitted to the van so the light fitting is detachable for travelling. Thinking cap is on... 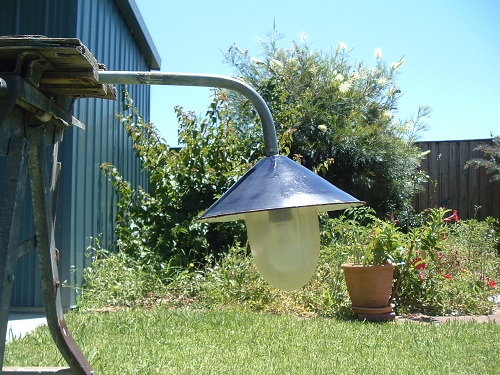 cheers, Al. |
|
|
|
Post by Franklin1 on Jan 15, 2012 9:52:32 GMT 10
G'day again, I've been pottering in the shed...  A few weeks ago a friend of ours demolished a couple of small, but really old, sheds in the backyard of her house. She rang me and asked if I'd bring the trailer over to help her take all the crap to the rubbish tip. "No problem", I said. When we loaded the trailer, I salvaged all the oregon timber roof battens that the corrugated roofing iron had been nailed to. I brought all that timber home and de-nailed it... 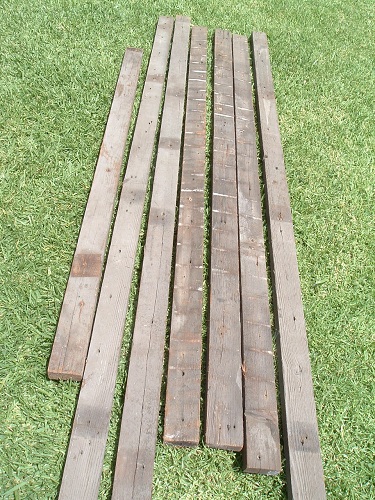 Old oregon is a great timber for making fake antique stuff out of. Only problem is that it's as splintery as buggery, so ya gotta be careful when handling it. First job was to remove 30 to 50 years of accumulated dirt and dust off the surfaces. Nothing that a good going-over with a wire wheel in the drill won't fix... 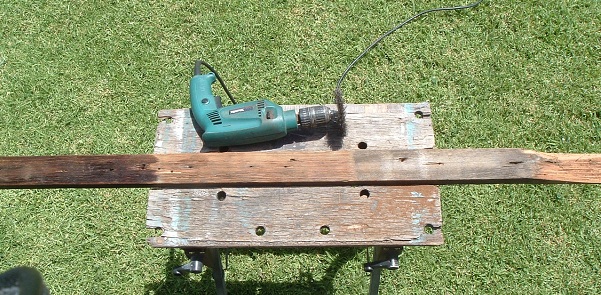 Out came the drop saw, and bits were chopped up into smaller pieces... 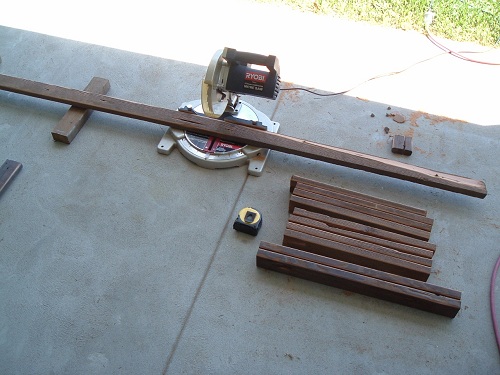 One hammer and a few nails later, and this started to appear... 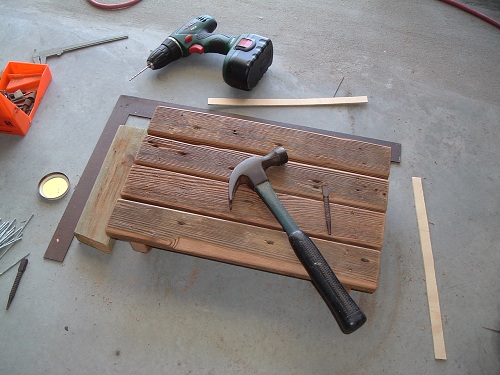 A few more nails, and a few bolts later, something was almost completed... 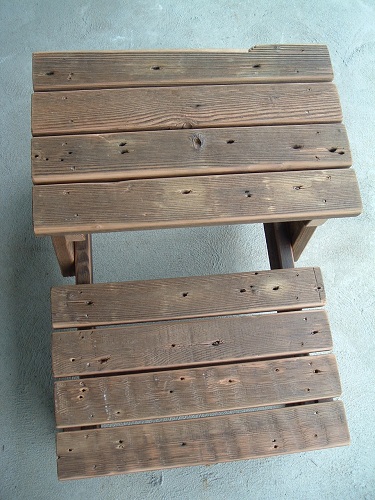 Ummm...what is it? Answer: A set of "vintage-looking" steps for the caravan project. I even designed the steps to sort of look like a picnic table and bench seat that you'd see in a park somewhere... 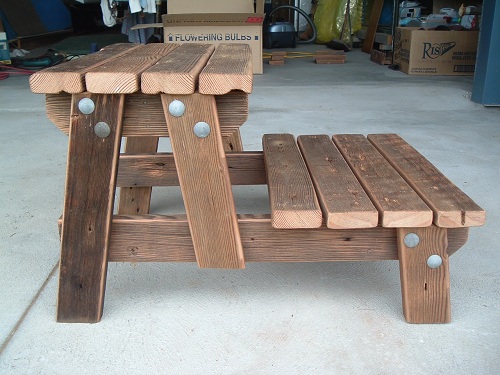 Second-last job was to whack some coats of decking stain onto it, to help preserve the timber against the elements... 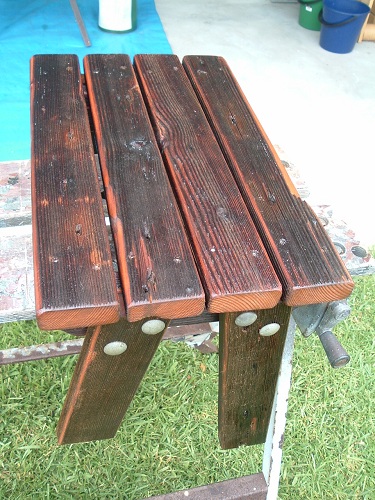 Why do I need these steps? The current height from the van floor to the ground is 560mm. Far too high to navigate in two steps with dicky knees. So, the van's metal step is useless. It's much more comfortable to negotiate the height in 3 steps, or approx 185mm for each step. I'm hoping that the full weight of the finished van will lower the van floor closer to the ground. A better height would be about 510mm, which means each step would be 170mm high, which is about what a standard step height is. See what happens when you go pottering in a shed? cheers, Al. |
|
|
|
Post by robby1960 on Jan 15, 2012 10:11:05 GMT 10
Hi Al
Love your work.... those steps are fantastic!!!!
Robby
|
|
|
|
Post by Franklin1 on Jan 19, 2012 9:49:23 GMT 10
G'day again, People often say there are "two sides to every story". If you've got a spare minute, I'd like to give you both sides of mine... Here's one side... 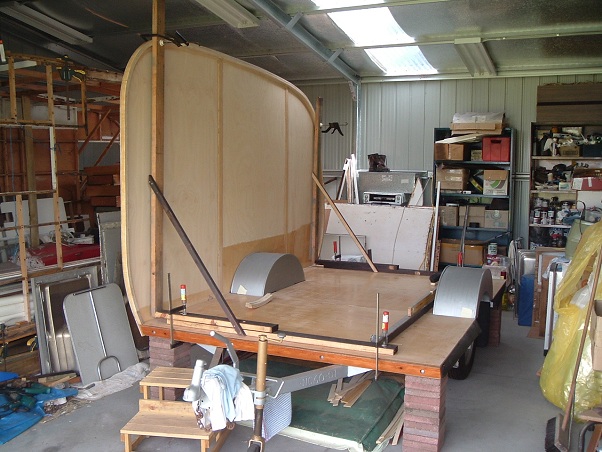 And here's the other side... 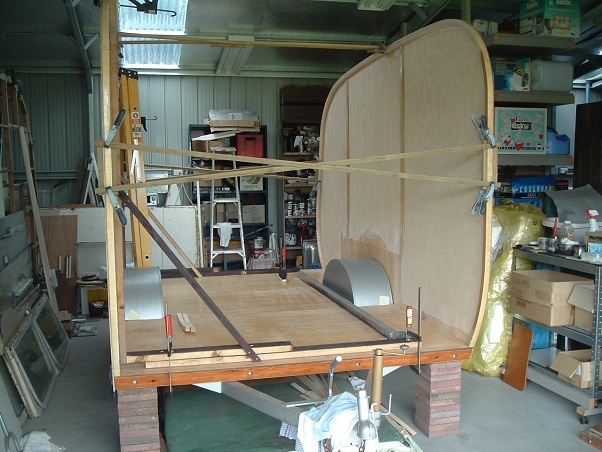 Thanks for listening. |
|
|
|
Post by cruisindoug on Jan 19, 2012 20:06:28 GMT 10
G'day Al As always, love your work ... Do those steps fold up? They look great. Its good to see that you don't have a one sided argument in the shed Cheers Doug. |
|
|
|
Post by seeshell on Jan 19, 2012 20:46:06 GMT 10
Hi Al Normally listening to both sides of the story is about deciding on or finding fault - I sure can't find any with those sides. Perfect! So clearly building the second wall is easier than the first, that seemed so quick! It looks fantastic - how are you going to "mind the gap"?  Cheers Seeshell |
|
|
|
Post by Don Ricardo on Jan 19, 2012 20:46:46 GMT 10
Hi Franklin1, That photo supposedly showing "both sides" of your van is very impressive. A very clever use of mirrors... Nice work. Good to see the progress you are making. Don Ricardo |
|
|
|
Post by Franklin1 on Jan 19, 2012 21:28:27 GMT 10
Thanks guys for your comments. It was certainly a moment of excitement yesterday when the walls were carried from the garage to the shed and fitted onto the chassis. Especially when the darn things fitted almost exactly how the were supposed to. There had been lots of anxiety during the building of the walls because I couldn't do any test fitting. That meant that lots of measuring, and measuring, and checking, and measuring again was required. But, like some people say, "I love it when a plan comes together!" Doug, you asked about the steps. Do you mean the steps in front of the van in the first photo? If so, nup, they don't fold up. They are the MkI version I built for my non-vintage van... 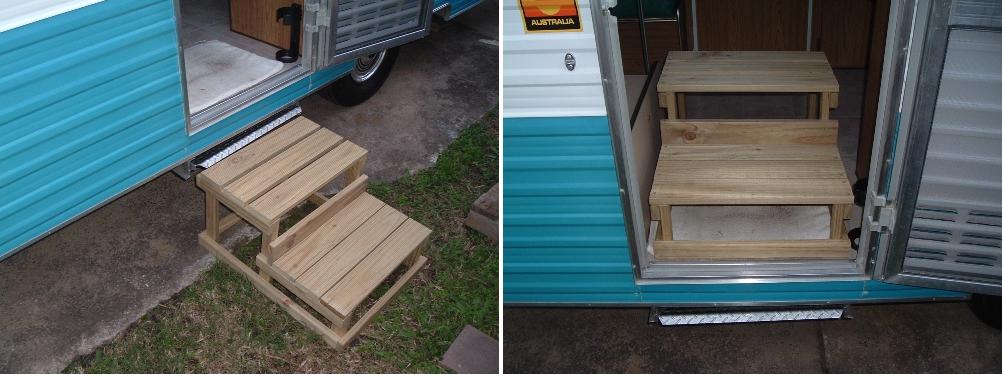 As you can see, they fit just inside the door when travelling. They are the last thing in and first thing out when packing and unpacking. The latest 'vintage' steps I've made are the MkII version, and are designed to have a classier antique look about them. A MkIII version is on the drawing board. That one will be steam-driven escalators. How cobber-cool will that be!! cheers, Al. |
|
|
|
Post by cruisindoug on Jan 19, 2012 21:33:12 GMT 10
Just as long as you use slot head screws and the original steam (from a period correct boiler of course), I am sure Cobber will be impressed. OK so the next question is .... why did you use bolts for three of the joins (on one side) and not the other two??? |
|
|
|
Post by seeshell on Jan 19, 2012 21:50:39 GMT 10
Hi Al Don't go all steampunk on us now! Seeshell |
|
|
|
Post by Franklin1 on Jan 19, 2012 22:13:39 GMT 10
Cause it t'aint finished. It's in two parts at the moment, with the top step separated from the bottom step. Once the project van is finished, I'll be able to measure the final height from the van floor to the ground, and then divide that height by three. Then I'll cut the legs so that the step heights correspond to the first two heights (am I making sense?). Then I'll put the 'missing' bolts in place to lock it all together. cheers, Al. |
|
|
|
Post by cruisindoug on Jan 20, 2012 6:49:11 GMT 10
Ahhhh .... NOW it makes sense, could see any fixings so was wondering how it was all held together!
Cheers Doug
|
|
|
|
Post by Franklin1 on Jan 31, 2012 17:31:43 GMT 10
I've been spending a fair bit of time getting paint off timber using a hot air gun... 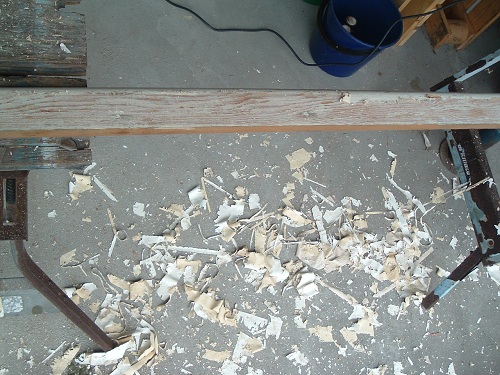 After a particularly heavy day, the air gun conked out on me. I thought I must have burnt it out, but a check of the innards revealed a wire had parted company inside the housing. A bit of resoldering and she was good as new. Thank goodness, because it had to get through a stash of timber I salvaged from my son's 1960 house when he was doing some renovations last year... 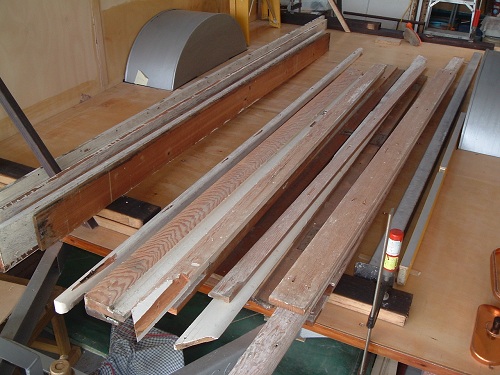 Some of the timber bits will be glued in position, so they needed a bit of sanding with the belt sander... 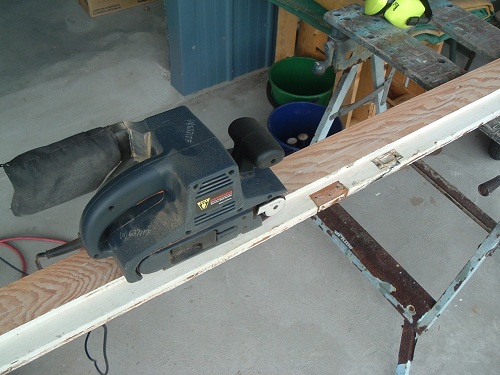 Then came a bit of slicing... 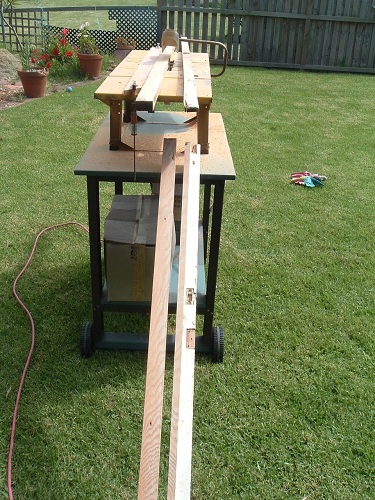 ...and dicing... 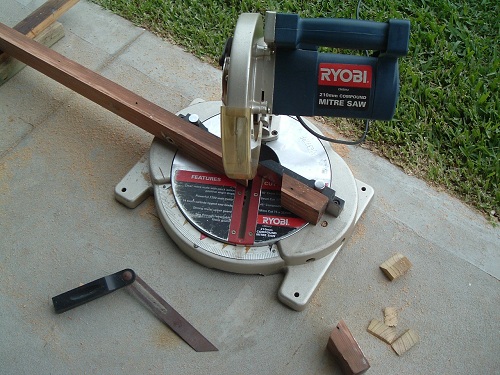 A couple of bits were put into the blender to see what intricate shapes the cutters could make on the ends. Yep, that looks about right... 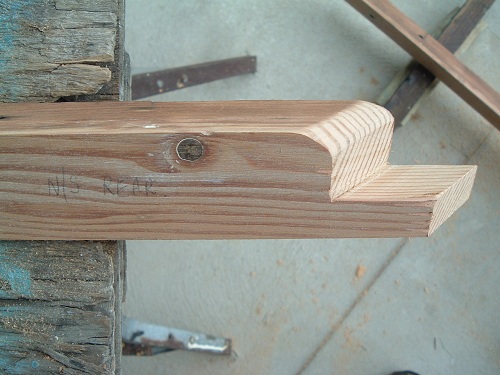 These bits fit into these corners... 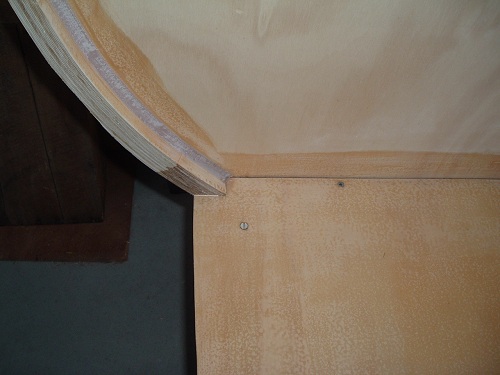 ...and look like this... 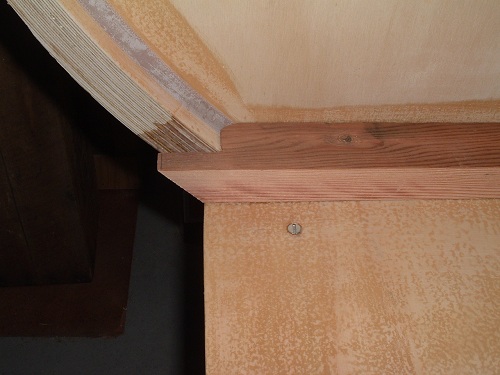 There's a strip of timber on all four sections that locks the wall to the floor, after they've been glued into position... 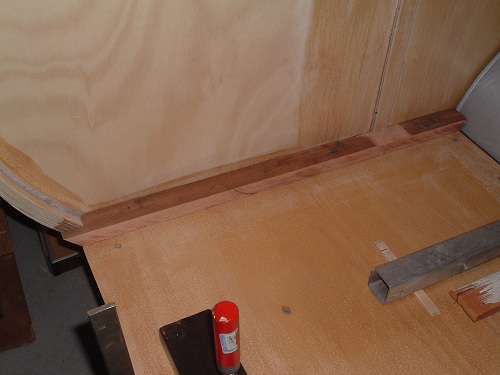 There's plenty more photos where these came from, but you get the idea of what I've been up to. cheers, Al. |
|
|
|
Post by Don Ricardo on Jan 31, 2012 22:13:56 GMT 10
G'day Franklin1, Another good day's work by the look of it! I continue to stand in awe of your skill, creativity, resourcefulness and patience. That Newcastle of yours is going to be a wonderful thing to behold. Don Ricardo |
|


 Don't worry about a port hole window mate, Iv'e got a few stashed under the bench ;D ;D ;D ;D Oh yeh got a couple of FJ axles lying around too.

 That took a lot out of the system.


