|
|
Post by JBJ on Dec 6, 2005 6:44:42 GMT 10
Hi Ray, I originally thought of using ply, but as my hands shake a bit sometimes of a morning, I considered it unlikely I could finish the edges smoothly, as you can when bending D mould gently. I also prefer the half round shape, & its easier to finish paint I feel. After looking at how earlier cars stainless is finished around the doors, I believe I can taper the D mould to allow the door to hinge back on itself. As my door has a flyscreen door inset in it, its going to be a bit tricky, but I think I can get it to work. As for getting both sides of the flash the same, it takes a pretty tricky person to be able to see both sides at the same time ;D ;D ;D ;D ;D ;D ;D ;D My portholes turned up today, hopefully some enlightenment coming up for others when I get them fitted. You wont believe how simple they are, & I wont have Wolseley restorers chasing me.  Jailbarjuice |
|
Deleted
Deleted Member
Posts: 0
|
Post by Deleted on Dec 6, 2005 7:56:31 GMT 10
Hi Juicey I am surprised you went with water based paint after all the posts that have been put up about oil based enamels being the go. If you are gunna use a drying inhibitor with acrylic make sure that you get it the van coated with enough time to allow it to dry thoroughly before the night air gets to it. Even gloss acrylic will end up as flat as a ducks bum if the day cools off or rains. ideal matt finish if ya want to turn your van into a mobile blackboard and write or draw on your van with chalk!!!! Still reckon gloss oil based enamel either rolled on with short napped roller or sprayed looks the best. easy to wash . and you can drink the clean up turps just like mum did.!! If ya gunna persist with a brush , put the first coat on thick then the second coat on thinned down and "lay off " with the brush to prevent brush strokes. The grey i used on just croozn is called "tilt grey". and that is exactly what happens to me when i drink jailbar turps. Just like an old pinball machine. "Tilt" lights up, flippers and bumpers stop functioning, lights go out, everything goes silent........ balls drop  .........game over.... goodnight Reddo. From the accounts or Fingal i think Earlee suffers the same problem. ;D The answer to the doors opening with timber moulds lies with the EH stainless side moulds . Just cut the timber back at an angle greater than 45 degrees on either side of the hinged edge of the door or plane it flat for an inch or so back from the hinged join. Too easy. stick with the d section moulding. i reckon it looks great. Am thinking about doing the same thing to my house of splinters on rubber piers. Mr Nyagia Reddo says - Remember when brushing ..... steady strokes....wax on wax off Daniel son!!!! |
|
|
|
Post by earlee on Dec 6, 2005 9:34:22 GMT 10
JBJ - I was going to use 1/2 inch timber D section for the side strips but could only get it in 2.4 meter lengths which would have meant having joins on the side of the van without doors.  EJRay suggested using aluminium strips which comes in various lengths. The local aluminium place has a 12mm D section with a concave bottom - good for invisible liquid nails or sikaflex adhesive. It bends very easily- cheap at $5 per 4 meters and will add a bit of sparkle to the external trim. ( just like schultzys teardop)  I might be a bit late for the suggestion but we dont want our vans all looking the same anyway, do we. ;D ;D yours in vanning earlee |
|
|
|
Post by JBJ on Dec 6, 2005 10:13:28 GMT 10
Hi Earlee & Reddo.
I thought about oil based paint, but the gripset rubberised sealer I used will not accept anything other than water based paint, so i'm stuck with it.
With regards the timber D moulds, on the long side I'm cutting a 30^ join in the front section where the flash will still have a level top, then put the 2.4 length on the rear section. The rest of the van will have pieces all less than 2.4
The reason I am using timber rather than aluminium is that timber will spring into a smooth curve, but most aluminium bends where you put the pressure, making it harder to get a uniform smooth curve. If you can get some aluminium that allows a smooth sideways spring curve, go with that. It will allow you to have a polished moulding , which looks better than painted i think.
|
|
Deleted
Deleted Member
Posts: 0
|
Post by Deleted on Dec 6, 2005 11:11:28 GMT 10
strips/stripes. I find that paint bends the best. If ya haven't got a steady hand just mask it off and paint it. Sounds like a crazy idea .... but it might just work  Just kiddin' . Anyone thought of cutting 16mm electricians plastic conduit lengthwise and bending it to shape? comes in grey or orange . might have trouble fixing it to the van ? But look on the bright side no splinters or rot and will never need painting  . Awww c'mon you'se guys. i thought it was great idea.  I seen these really cool potholes... Ooops, PORTHOLES the other day made out of Wolsley........ Naa. i wont tell em about that one. Reddo - From outside the square ......and not likely to be allowed back in for some time to come.. |
|
|
|
Post by JBJ on Dec 6, 2005 19:42:38 GMT 10
Hi Reddo & Earlee, Thought I might explain my brilliant porthole idea. I had this thought one arvo, while sitting back looking at Horrie sipping a nice cold juice, that as it’s a ply van what would Horace have done if he wanted a set of portholes.? I then figured that as he was a cabinet maker, he would probably make them from turned timber. So the next day I happened to be in Bunnings, & lo & behold, theres a timber ring up on display. I enquired, & found I could get a surround machined in various sizes. So I ordered a pair of 270mm OD & 180mm ID surrounds. Cost about $75 the pair delivered to my door.  I then took them & several pix of the aluminium portholes to a wood machinist, who is now remachining them to look like the proper units. A couple of coats of paint & they will pretty well indistinguishable from aluminium. Ive just a couple of hours playing with the D mould colour flash. 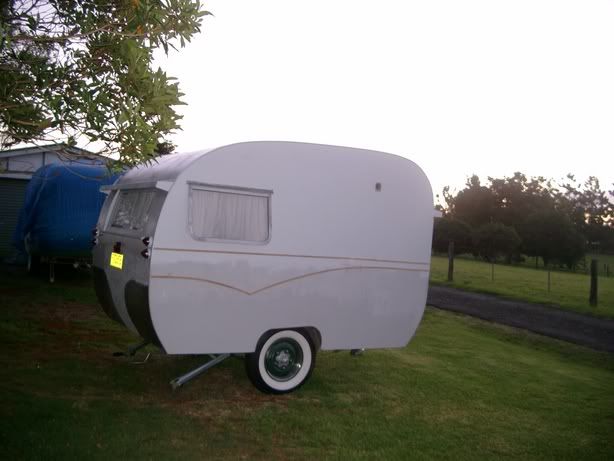 I based the shape on a colour flash I remember from a friends FE Holden, that was fitted by the dealer new. The timber D mould will do the job with a bit of patience & lots of panel pins. I’m going to glue it as well. The vans colours will now be light grey top, chrome yellow flash, & Brunswick Green bottom. I’m pretty happy with the way it is working out. Jailbarjuice |
|
Deleted
Deleted Member
Posts: 0
|
Post by Deleted on Dec 7, 2005 7:48:07 GMT 10
Onya JBJ The three colours you have chosen are very similar to my van except reversed. I used "Artic daisy" cream on the top half. "mid bristol " green flash and "Tilt " grey bottom half. Have you done something with the springs or axle on your Purdon she looks to be sittin higher now. Maybe its the tyres... higher profile or something??? I picked up an old round timber picture frame about 3 months ago form the recycle joint at the local tip. I wrote about it under "portholes" somewhere back in the posts. It measures about 250 mm on the outside and about 200mm on the inside. it has a 1/4" rebate around the edge of the inner circle so i cut a piece of 1/4" thick lexen at 210 mm and fixed it to the frame with silastic. Bingo ... instant porthole!! I was gunna fix it to the van with 6 brass cuphead screws. The problem i have is that i cant seem to find anywhere on the van where it sits/looks "right" . Everywhere i position it , it just doesn't look like it was meant to live there.!!! Because of the Roo painted on the left side i think a porthole would clutter it up too much. The right side is all cupboards sinks etc so no point fitting it on that side. The two that are in your picture look great and with that finishing off machining and a coat of paint they will certainly look like the Real McCoy Portholes.... great stuff mate. Reddos thought for the day : "How come we only ever hear about Portholes. ....Didn't they make Starboard holes" Sorry fellas .... just had to get that one off my chest Reddo |
|
|
|
Post by will and Lyn on Dec 7, 2005 8:19:04 GMT 10
Reddo
gidday Mate
did you get my email
I sent you on monday
Ineed your help
Will
|
|
|
|
Post by will and Lyn on Dec 7, 2005 8:19:53 GMT 10
Reddo
gidday Mate
did you get my email
I sent you on monday
Ineed your help
Will
My email is Billbay@iinet.net.au
|
|
|
|
Post by humpty2 on Dec 7, 2005 18:50:47 GMT 10
Hate to sound technical.but I believe that the terminology involving portholes would have come from 'portals'..............or the inability to shove a starboard through a hole wheras you can put port through a hole!!
JBJ.......great work mate........soon you will be having retro coming to you for advice the way you are going with that van
|
|
|
|
Post by Roehm3108 on Dec 7, 2005 23:05:08 GMT 10
Good onya JBJ. Looks like we have to shut up about portholes now  I can see the day when you will say you don't want your Sunliner anymore, with the great job you are doing on the Purdon!!! Cheers Ray |
|
|
|
Post by JBJ on Dec 8, 2005 5:18:24 GMT 10
Hi Ray, As soon as I get the Purdon finished, its back into the Sunliner. Sue's agreed we can keep both, & that the Purdon wont get sold. We'll give it to one of our daughters families when we dont want it. Then I've got the Dodge to rebuild, the EH needs a bit of rust repair, the juice to brew, ......... ( I think I've been here before ;D ) Jailbarjuice |
|
|
|
Post by JBJ on Dec 8, 2005 17:38:48 GMT 10
Hi All, Progress pix on my you beaut super cheep portholes. The wood machinist charged me $ 20 to reshape the 2 surrounds I bought from Bunnings. I’ve given them a few coats of enamel, then sanded them, & reapplied more enamel. I reckon another couple of paint/sand cycles I’ll have them looking like aluminium. 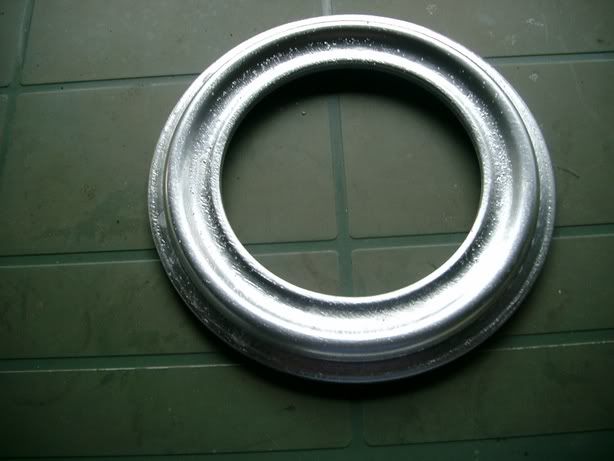 Next step is to get some glass cut, then work out the best spot to fit them to the van Jailbarjuice |
|
|
|
Post by earlee on Dec 8, 2005 18:19:14 GMT 10
good looking portholes JBJ - you have a captive market who want them if you produce a few more.
When will you be going into mass production?
|
|
|
|
Post by JBJ on Dec 8, 2005 19:05:45 GMT 10
Hi Earlee,
I thought I'd look at them on the van, & compare with aluminium to get the shape/size right. Then I will approach a production company to see about cutting a few sets. I reckon I can probably do them at about $75 with glass each, but that is subject to getting realistic prices.
I really havent had time to consider it through yet.
Jailbarjuice
|
|
|
|
Post by earlee on Dec 9, 2005 13:56:52 GMT 10
Earlee's Porthole. I thought I should share my porthole with everyone ( as if anyone is really interested) This is the Wolseley special porthole from a 1964 model with the eyebrow – not sure whether to rechrome it or get a JBJ special?  Also not too sure about how to finish off the inside of the porthole in the van – any suggestions? ;D ;D  |
|
|
|
Post by JBJ on Dec 9, 2005 14:58:46 GMT 10
Hi Earlee
On the inside I was going to use white plastic angle section, as Bunnings have various sizes. I figured about 6 or 8mm might work. Cut to accurate length & pushed tightly into the hole it should finish good.
I see a problem in rechroming any diecast metal like your headlight, that has bubbles under the chrome. The platers have difficulty replating then, & generally make a hell of a mess of the piece trying to polish the pitting out. I think you woyld be better with a stainless steel rim off an early US car, or a bigger diameter rim of e real early, say 20's light. Should be able to find one at a swap meet.
If mine work out OK I'll talk turkey (or juice) later.
Jailbarjuice
|
|
|
|
Post by JBJ on Dec 28, 2005 16:41:12 GMT 10
Hi All, Another progress report on Horrie. I’ve managed to get most of it painted, just needs a final rub & top coats on green & yellow bits. I used Flotrol in the gloss acrylic, & brushed it. It came out pretty well like I hoped, and as my memory tells me the vans my Mum painted in the 60”s looked. Its difficult when a swarm of flying ants attack the wet paint, but most of them have brushed off. 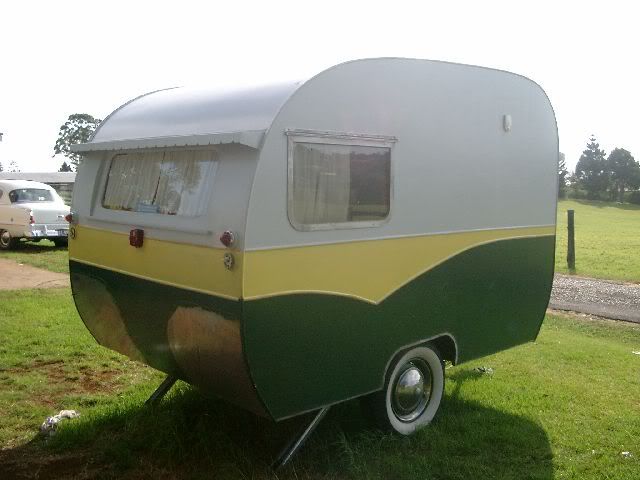  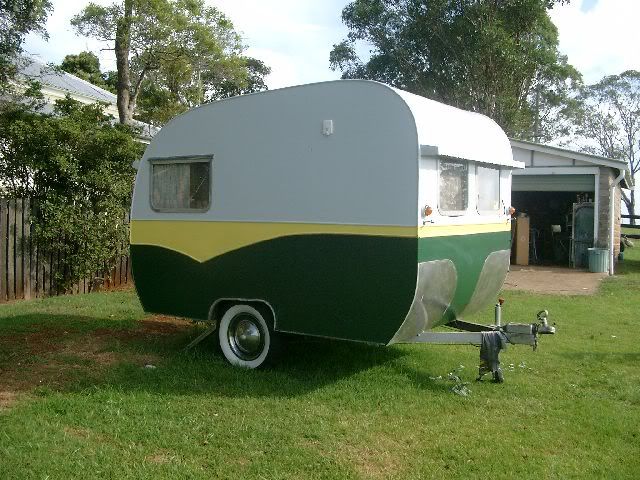 With my wheels & brakes, the brakes are PBR mechanical over ride, with FX-FJ bolt pattern. When I fitted the FJ wheels, the center of the hub protrudes so far that the hubcap will not fit without alterations. So I found a pair of rough FX caps, beat out the dints as best I could, & gave them a buff on my polishing wheel. I then cut a hole in the middle to allow the cap to fit the wheel. As you can see in the pix, it is about 20mm protruding. I’m looking for 2 chrome caps I can rivet to the hubcaps to cover the hub. 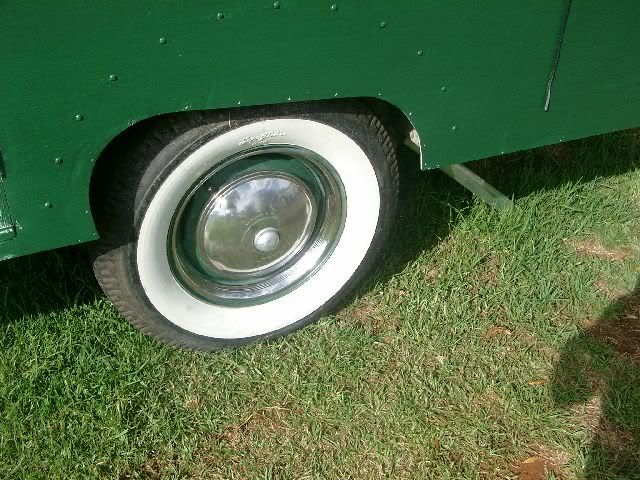 Next is fitting the portholes when my wood turner finally gets them finished. Jailbarjuice |
|
|
|
Post by will and Lyn on Dec 28, 2005 18:26:50 GMT 10
;D hey Jailbar Neato!!! what are you towing it with Will
|
|
|
|
Post by JBJ on Dec 28, 2005 19:32:10 GMT 10
|
|
|
|
Post by earlee on Dec 28, 2005 19:47:10 GMT 10
The new paintjob looks great JB ( no 2nd J ). The tip of flotrol must have worked as well. How did you attach the timber stripe edging to the sides of the van? Brads or liquid nails or chewing gum? It looks ready for Esk already! ;D ;D earlee |
|
|
|
Post by JBJ on Dec 28, 2005 19:58:38 GMT 10
Hi earlee,
I used 1/2" panel pins every 4" or so, then after I was satisfied with the lines I screwed it on with 4g x16mm brass phillips head screws at ends & about every 18". I'm going to prime the strips on the van, & pressure pack paint with chrome silver in a week or so after the paint hardens a bit. I'll be doing the portholes in the same, but off the van. I believe they should stay in place OK, especially with the paint overlap bonding as well. The acrylic throws a strong skin across the gaps if you lay it on a bit.
Jailbarjuice
|
|
Deleted
Deleted Member
Posts: 0
|
Post by Deleted on Dec 29, 2005 12:42:11 GMT 10
G'Day jaibarminusjuice Just sprung your updates on the purdon. She looks beaut mate. I wouldnt do anything about the hubs sticking through the caps. I like em the way they are. IMHO. Maybe you could use a couple of early holden horn buttons with the southern cross stars on them. Ek/EJ /Eh just file the hub caps centres out until the horn button is a press fit or supa glue em in if you are worried about them coming off. Love those whitewalls. Should look cool with the strips painted silver/chrome . Veeeerrryyy retro. Now all we need is that porthole to put the icing on the cake. Esk will never be the same after February ;D Reddo |
|
|
|
Post by JBJ on Jan 13, 2006 13:48:09 GMT 10
Hi all,
Got a problem just started happening with the door on my van. When I bought it , it had been stored undercover for 25 years.
Since I got it I have to keep it in the open, & at best it will get a waterproof throw over cover made soon. With all the heavy rain & 90% humidity we get here in summer, the door has grown to the extent its jammed closed most of the time. It was always a very tight fit from the day I bought it.
Has anyone else had similar problems with timber doors?
I plan to take it to the timber joinery thats making my portholes, & run it through their thicknesser to remove 1.5 to 2 mm off each face, to allow clearance for a couple of coats of paint as well. I dont want it to stick after I paint it. Anyone have any thoughts whether this is too much, or not enough?
jailbarjuice
|
|
|
|
Post by JBJ on Feb 3, 2006 13:21:37 GMT 10
Hi Scoot,
Got your message OK. Send me another with your email adresss & I'll scan the labels if I can or send you the detailsover the weekend..
jailbarjuice
|
|


 .........game over.... goodnight Reddo.


 .
.

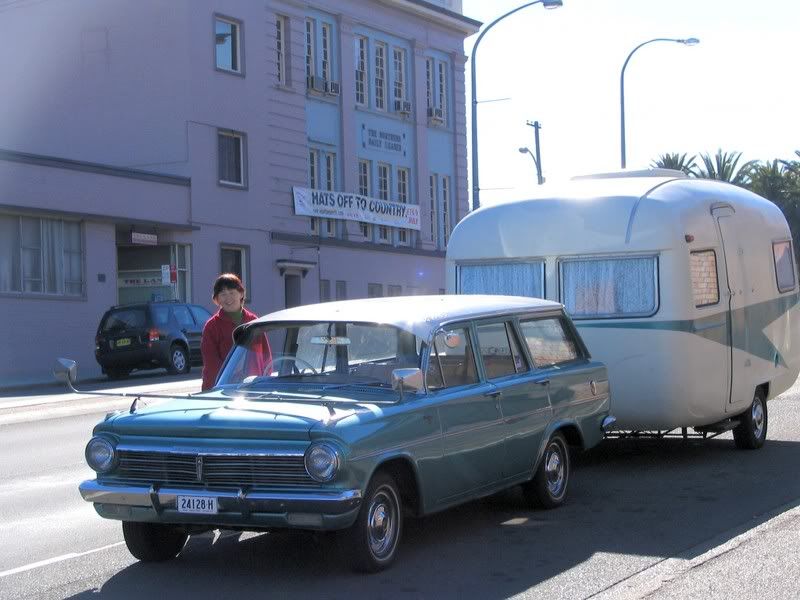


 , but if Sue had her way it would be behind the Dodge all the time.