mikeoz22
Full Member
   Back from hiatus. Looking to finish the Valiant now step son has finished with it.
Posts: 107
|
Post by mikeoz22 on Jul 11, 2013 17:54:47 GMT 10
I'm new to the forum and am seeking some advice please to restore a Viscount Valiant caravan. This project has come my way due to a need to find temp accommodation for my step-son. The van itself seems quite sturdy, but does need work. Two windows are broken and the weather has gotten inside and made a mess of the interior ply. The ceiling is also a little suss and feels damp (I think its made out of a paper fibre type of board - but not sure on this. So before I get started - what pitfalls etc should I be aware of for a project like this. Any advice gratefully received. Many thanks 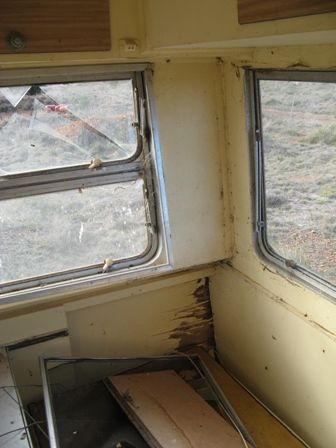 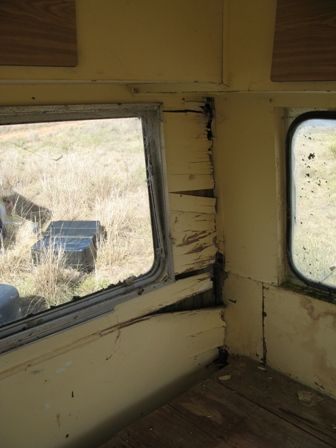 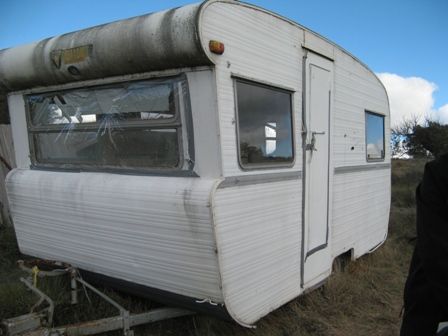 |
|
|
|
Post by cobber on Jul 14, 2013 14:16:28 GMT 10
G'day mikeoz22, Welcome to the forum, and I'm sure somebody will be along to advise you soon, a few photos of your van will get them started. I suppose you have discovered the threads on Valiant vans posted in our Down History Lane section ? click here and the thread on Viscount vans click hereA few members have been down a similar track to the one you are venturing down with your Valiant, there is one here and you can see Murrays restoration in progress Here and that's just to get you started  Photos of what you've got is what is needed, there is advice on posting photos hereGood luck, Cobber  |
|
mikeoz22
Full Member
   Back from hiatus. Looking to finish the Valiant now step son has finished with it.
Posts: 107
|
Post by mikeoz22 on Jul 15, 2013 18:02:06 GMT 10
|
|
mikeoz22
Full Member
   Back from hiatus. Looking to finish the Valiant now step son has finished with it.
Posts: 107
|
Post by mikeoz22 on Jul 15, 2013 18:05:24 GMT 10
Chassis number is B2270 which I think makes it a pre 64 model. 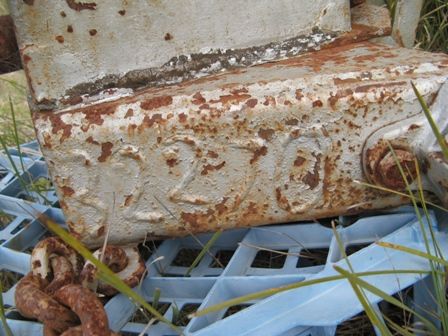 |
|
mikeoz22
Full Member
   Back from hiatus. Looking to finish the Valiant now step son has finished with it.
Posts: 107
|
Post by mikeoz22 on Jul 16, 2013 17:37:39 GMT 10
|
|
|
|
Post by murray on Jul 16, 2013 19:57:47 GMT 10
Mike,
You certainly have a challenge on your hands.
Probably the first thing to do is to check for leaks and find out if there is any rot in the framework.
good luck with it all
Cheers
Murray
|
|
mikeoz22
Full Member
   Back from hiatus. Looking to finish the Valiant now step son has finished with it.
Posts: 107
|
Post by mikeoz22 on Jul 19, 2013 20:40:02 GMT 10
So this weekend we pick the van up and bring it home - then the fun begins. My first task is to get it watertight - so with that in mind, can anyone please advise me where I can get replacement windows for the front and rear of this van from or is it just a matter of getting a glazier to replace the windows?
|
|
|
|
Post by humpyboy on Jul 19, 2013 20:48:37 GMT 10
G'day Mike, in answer to your question, Yes provided the frames are in good condition, loose corners or joins should be okay as they can be fixed, the biggest thing is if they have the rubbers but they should be able to tell you that when you make inquiries, good luck and keep us posted.
|
|
mikeoz22
Full Member
   Back from hiatus. Looking to finish the Valiant now step son has finished with it.
Posts: 107
|
Post by mikeoz22 on Jul 21, 2013 17:42:07 GMT 10
Ok so Weekend 1 on the voyage of discovery begins. Van successfully retrieved on the back of a tilt tray and delivered home - many thanks to Stan at ACT Towing. My step son and I spent the rest of Sunday afternoon looking at what needs doing, so far here's the list:
Rot ijn the framework - needs replacing
Leaking roof seam
framework at the rear of the van almost non existent and what was there not tied into the van. So over the next few weekends were are going to be pulling the skin off the van to see what frames need replacing. We've also torn out the soggy roof lining consisting of painted fibre board. Will post pic shortly.
|
|
mikeoz22
Full Member
   Back from hiatus. Looking to finish the Valiant now step son has finished with it.
Posts: 107
|
Post by mikeoz22 on Jul 21, 2013 18:00:22 GMT 10
|
|
mikeoz22
Full Member
   Back from hiatus. Looking to finish the Valiant now step son has finished with it.
Posts: 107
|
Post by mikeoz22 on Jul 21, 2013 18:01:29 GMT 10
Here's whats left of some of the frame... 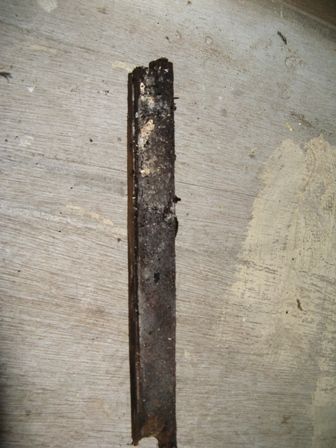 |
|
mikeoz22
Full Member
   Back from hiatus. Looking to finish the Valiant now step son has finished with it.
Posts: 107
|
Post by mikeoz22 on Jul 21, 2013 18:03:19 GMT 10
During pressure washing the outside of the van this afternoon - its original colour was revealed - its silver - so I will try and get it back to it's original colour if possible.
|
|
mikeoz22
Full Member
   Back from hiatus. Looking to finish the Valiant now step son has finished with it.
Posts: 107
|
Post by mikeoz22 on Jul 22, 2013 12:14:45 GMT 10
Given that parts of the frame are black and soggy (see previous pic) what type of wood is generally used for the frames in these old vans? As I'd like to do things properly.
|
|
|
|
Post by murray on Jul 22, 2013 13:09:40 GMT 10
mokeoz22
meranti is the go but I used treated pine as I only needed to do a little replacement. I used this because of cost and made sure it was old so it would not shrink
Not sure on the price of meranti .
Cheers
Murray
|
|
mikeoz22
Full Member
   Back from hiatus. Looking to finish the Valiant now step son has finished with it.
Posts: 107
|
Post by mikeoz22 on Jul 26, 2013 19:19:35 GMT 10
Voyage of discovery continues - with the cladding coming off. (pics to be posted), so far the framing looks ok - but I know there's a bit of work to do with most of the corner timers rotted away. Set of 2nd hand tyres going on tomorrow as well to replace the perished ones. At least then we can move the van around.
|
|
|
|
Post by isambard on Jul 27, 2013 9:49:02 GMT 10
hi Mike  enjoying your story and pics. admire your willingness to put in the effort given there's a fair bit of work. it does go to show that there are vans out there that might appear to be a poor proposition, but really it's just a matter of time and energy. yours is a good example because it has qualities worth working for. a good size and shape, nice straight panels, and a sound chassis and draw bar. everything else is irrelevant really, if you have that time and energy  |
|
mikeoz22
Full Member
   Back from hiatus. Looking to finish the Valiant now step son has finished with it.
Posts: 107
|
Post by mikeoz22 on Jul 27, 2013 17:58:08 GMT 10
|
|
mikeoz22
Full Member
   Back from hiatus. Looking to finish the Valiant now step son has finished with it.
Posts: 107
|
Post by mikeoz22 on Jul 27, 2013 18:00:53 GMT 10
Thank you - I appreciate the support, and am really enjoying restoring this vv.  We also got new tyres on today which makes the job of moving the van around a lot easier!!!! |
|
mikeoz22
Full Member
   Back from hiatus. Looking to finish the Valiant now step son has finished with it.
Posts: 107
|
Post by mikeoz22 on Jul 27, 2013 18:03:04 GMT 10
Bright idea of the day - how about we hinge the whole of the back section of the van so it opens up like the tailgate of a Hercules splitting down the mid section.... deathly silence from my wife followed by a distinct No!!!! Oh well did try!!!  |
|
|
|
Post by murray on Jul 27, 2013 20:49:13 GMT 10
Mikeoz22,
Thanks, this is good .
Now I can see how the wiring goes in mine.
Saves me taking the whole side of mine off
just need a picture of the other side ;D ;D
keep it up
Cheers
Murray
|
|
|
|
mikeoz22
Full Member
   Back from hiatus. Looking to finish the Valiant now step son has finished with it.
Posts: 107
|
Post by mikeoz22 on Jul 28, 2013 17:39:24 GMT 10
So, in removing all the skins today, I've discovered that I detest the use of silicon, as its on every joint on every panel, and will need removing before I put this all back together again. Does anyone know of a product that will effectively remove silicon?
|
|
|
|
Post by isambard on Jul 28, 2013 21:04:59 GMT 10
So, in removing all the skins today, I've discovered that I detest the use of silicon, as its on every joint on every panel, and will need removing before I put this all back together again. Does anyone know of a product that will effectively remove silicon? silicon - the tool of the devil. it has it's uses, but plastered lavishly and carelessly in and around ever possible seam or aperture in a caravan is not one of them. my hatred of the stuff knows no bounds! I estimate it took me roughly a month to get it all off our Globe - and theres probably a fair bit still hiding in crevices. in 1000 years time archaeologists will dig up caravan shaped and still fresh nets of silicon - the van itself having long since gone to god. a bit like robber trenches as the only remaining evidence of an ancient wall. |
|
|
|
Post by JBJ on Jul 28, 2013 22:30:05 GMT 10
Hi, I recently repaired the fridge that was in my Olympic. It had been brush painted inside in several different types & shades of white. Door didnt shut real good either. Had a door shelf missing, & pretty sad seal. It was so dirty & rough that I considered throwing it out, but as it fitted the opening in my new kitchen cupboards I decided to try to save it. So I tested it on 240 volt, & it froze ice in the freezer. I already new it sorta worked on gas, so I figured it was worth repairing. So I sanded the interior & around the door opening as best I could, then sprayed it with Norglass Shipshape 2 pack white primer. Its supposedly food quality paint, & dries semigloss. I'm using that paint to refinish the interior of the Olympic. I didnt paint the plastic inside of the door. I then bought a new door seal, cost $270 fitted, & it took a lot of time heating it up to seal properly after refitting & adjusting the door. I made a steel tray for the door to match the one I had, & replace the missing one. The cream coloured tray in the door at the bottom has been fabricated from 1.6mm sheet metal, then painted with gloss enamel, like the freezer door & a couple of other bits. So hey presto, hopefully I have a good working fridge thats nice & tidy inside & out. 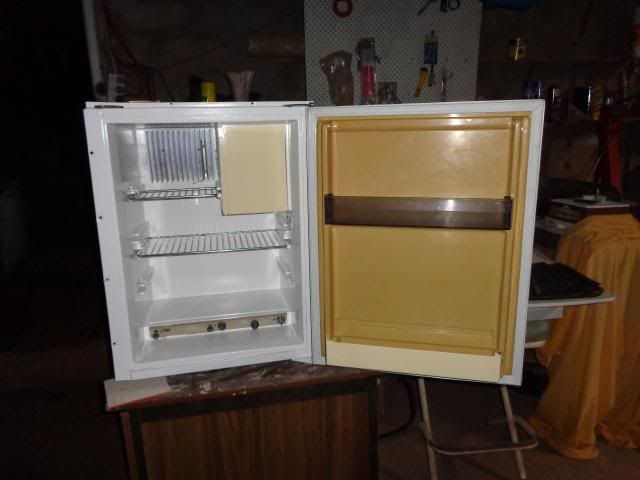 The exterior door panel was painted to match kitchen cupboard doors. 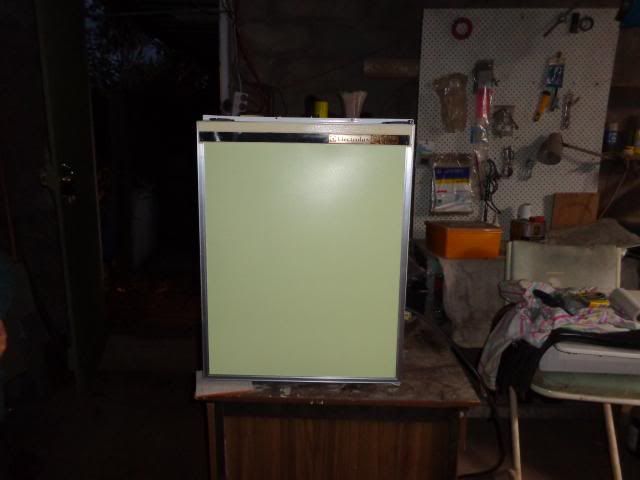 I have modify this post to include the pix of the fridge. My fridge was no better looking than the one posted in this thread, with bits missing. Any reasonably competent tradesman can make shelves & bits, just takes a bit of thinking out sometimes. JBJ |
|
|
|
Post by Roehm3108 on Jul 29, 2013 7:24:59 GMT 10
It's good to see the job you're doing on this van. It's a big one, but your approach is spot on - starting with the bones - chassis and framing. Am watching it with interest and look forward to progress updates.
Regarding the silicone problem. It comes back mostly to hard manual work. Perhaps finish it off with acetone or thinners?
Good luck with it all and keep us updated!
|
|