|
|
Post by nutter on Oct 1, 2011 19:13:06 GMT 10
Hi Dave & George, My Car is a 1936 Wolseley 12/48 series II which as was the case with a lot of these type cars was imported from England as a rolling Chassis/ drive-train, with the body built by hand locally at various coach builders of the day. George, i am amazed at the similarities of the vehicle you pictured but mine was built here in Sydney by GH Oldings & Sons. My Grandfather bought the vehicle from a soldier going to war on the 17th Feb 1940..... i have the original receipt ,transfer of rego and even an NRMA pre-purchase inspection...  I have a photo of myself in 1972 in the dickyseat as a toddler and not long after that he parked it in the back of his Garage, covered it with a blanket where it remained until about 5 years ago when i convinced him to let me restore it!!  Unfortunately he passed away in Jan this year at the ripe old age of 91, before i got a chance to take him for a ride in her again, but he was kept up to date with the progress of the resto and was always very excited to see her coming back to life again..... Slowwwwly  I also have a letter from one of the coach builders which granddad managed to get back in the 70's and he recalls that there was only a batch of approximately 6 of this body style built and amazingly she has a sister vehicle in a similar state of repair in Maryborough in Vic...... and we are both very excited to reunite them again soon!! ish  |
|
|
|
Post by griffin on Oct 2, 2011 10:45:06 GMT 10
Hi Nutter Certainly amazing that two independent body builders came up with coachwork so similar  And they reckon all cars today look alike. I'd have bet important parts of my anatomy on it being a matching Damyon Bros. body It' great that you have a fully documented history of the car too, it will be really something to pass onto your grandkids one day. The fact that it was built by G.H. Olding and Sons is of special interest too as I found them listed as exhibitors in the caravan section of the 1939 N.R.M.A. Camping and Caravan Exhibition but apart from finding they had a business at 47 Parramatta Road, Glebe I haven't been able to work out what they did. Maybe they produced an odd caravan or provided chassis? George |
|
|
|
Post by mgsa1524 on Oct 8, 2011 3:57:17 GMT 10
Hi there
I do not seem to get how to put photos on to this but if you want to go to MG SVW cars 1936 to1937 you can see my cars and lots of others.You may find it interesting as all the SVW cars have the same roots as yours.
Regards Paul Turner.
|
|
|
|
Post by Don Ricardo on Oct 8, 2011 13:40:07 GMT 10
Hi MGSA1524, Re having difficulty with Photobucket, there is a thread in the Forum Guidelines and Helpful Hints section which explains how to post photos. If you've already seen that and still having difficulty, PM me your phone number and I will be happy to try and talk you through it. It's one of those things - using Photobucket the first time can be tricky, but once you've done it, it's not that hard. Good luck with it, Don Ricardo PS I just checked out the MG SA via Google, and swooned!  Is there anyway we could become related, and you can write me into your will? |
|
|
|
Post by mgsa1524 on Oct 8, 2011 15:43:22 GMT 10
Ha ha. I have got three teenage boys that may have a bit to say if I put you in my will.
I was very lucky to have been given my first SA from my father who bought it in 1968 which was not that silly of him because I pay all the bills and do all the hard work keeping it on the road.I think I was about 18 when he gave it to me so I have had it a lot longer than he did now. I bought the other one last year.This one was stripped down to parts about 40 years ago and then just sat with no work done on it at all. A bit sad looking but give me 10 years or so I hope it will be a runner again. There is another SA being rebuilt just down the road from me as well so it is all good fun and having a complete one makes it easy to see where all the bits go.
Rgds Paul.
|
|
|
|
Post by curtis on Jan 1, 2012 22:02:27 GMT 10
There were 2 things that amazed me today... 1. It is 2012 already - not sure what happened to 2011, but it has GONE!! 2. It was last February when I made an update to this post. Again not sure what happened there, but like the first lesson GONE!! OK 2011 did not see a lot of progress on the Morris, there were driveways to lay, back yards to landscape, our twins turned 18 (epic party - which I am told means it was good) and the youngest turned 16. Several weeks working in Singapore and Bangkok (no vintage vans in either place) Still 2012 is the "Year of the Car", on good authority from my wife so I have started out well. Firstly last September (my birthday) my wonderful wife paid for a new toy for me.  We settled on a MIG after lots of research, and gotta love e-bay picked up this machine for a bargain (it has done very little work). Anyway so I had a couple of days after Christmas and this week end as well, so it was time to get stuck in. First job was to repair where a previous owner had hacked away at the bumper holes in the rear of the car to fit a tow bar. (Don't worry guys - I will fit a tow bar, just with less butchering!!) First up fold back the steel that had been bent away.... 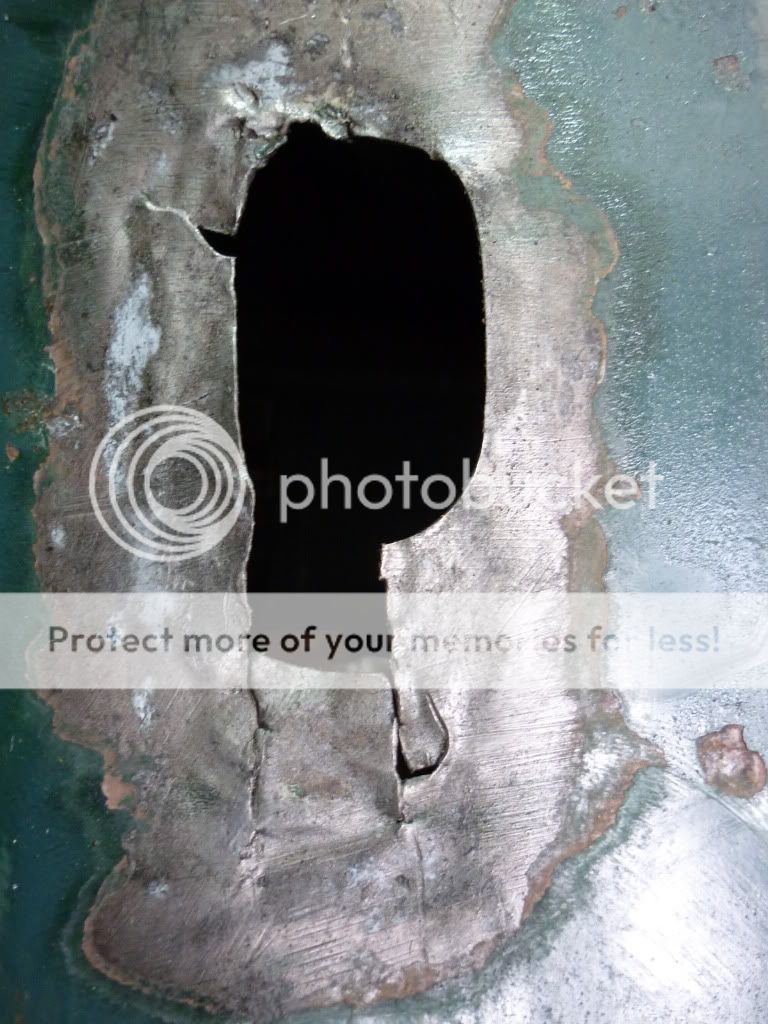 Next, weld it up and grind off the excess.... 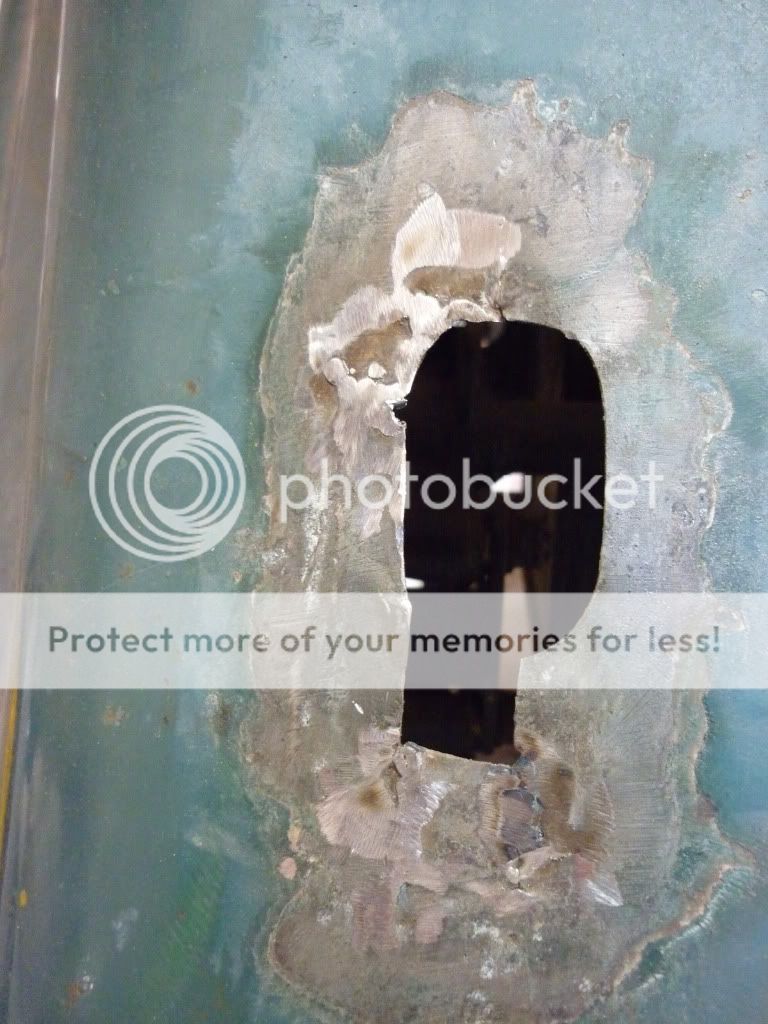 Then make a little section to replace the missing bit. Actually this was cut from the rear panel of a washing machine. 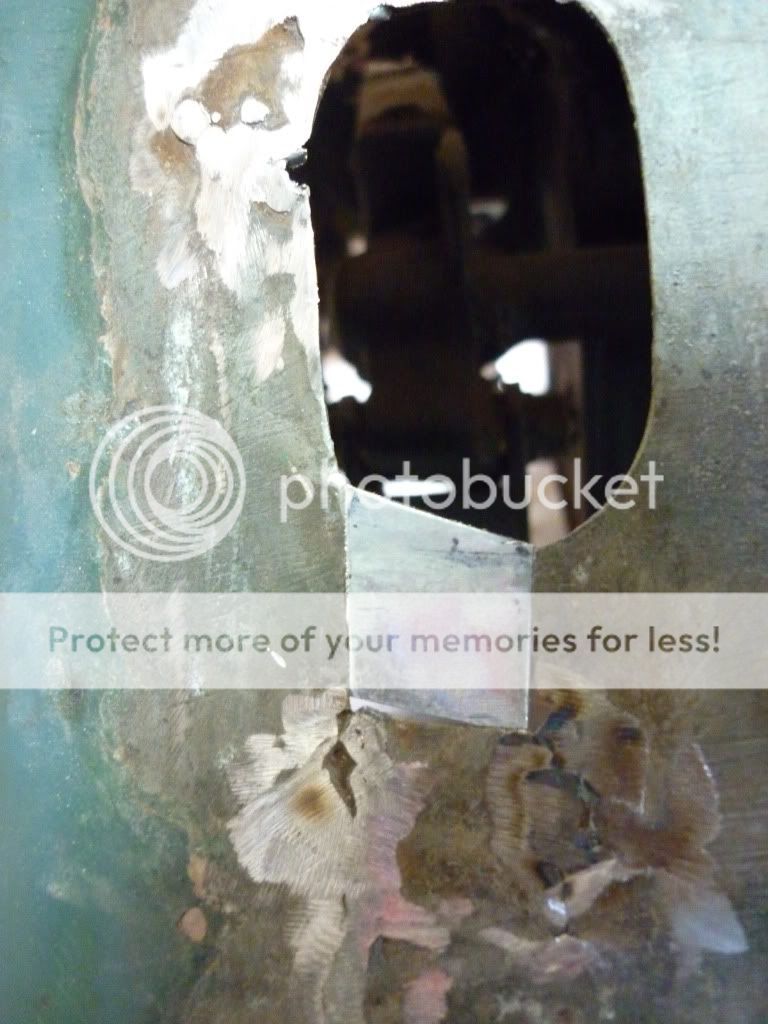 Weld that in.... 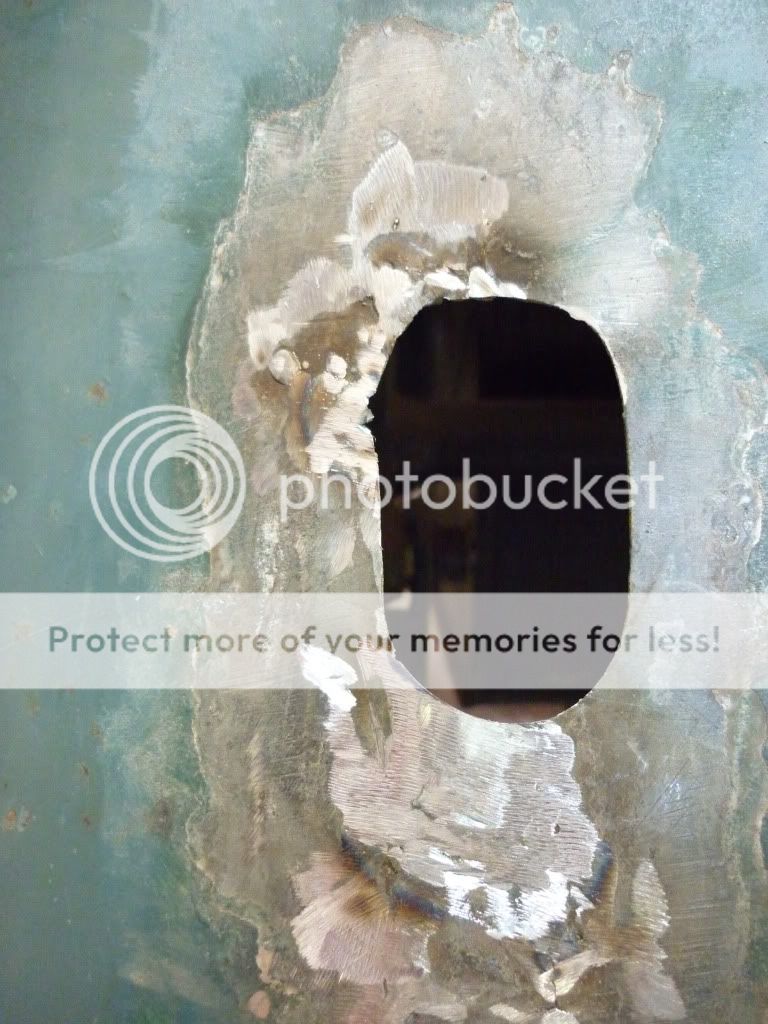 So now the back of the car looks much better....  OK so I got some confidence up and so let's move on to bigger bits!! Here is inside the rear guard before...  Here is inside the rear guard with the new piece fitted (still needs some additional welding and filling, but I think you get the idea! 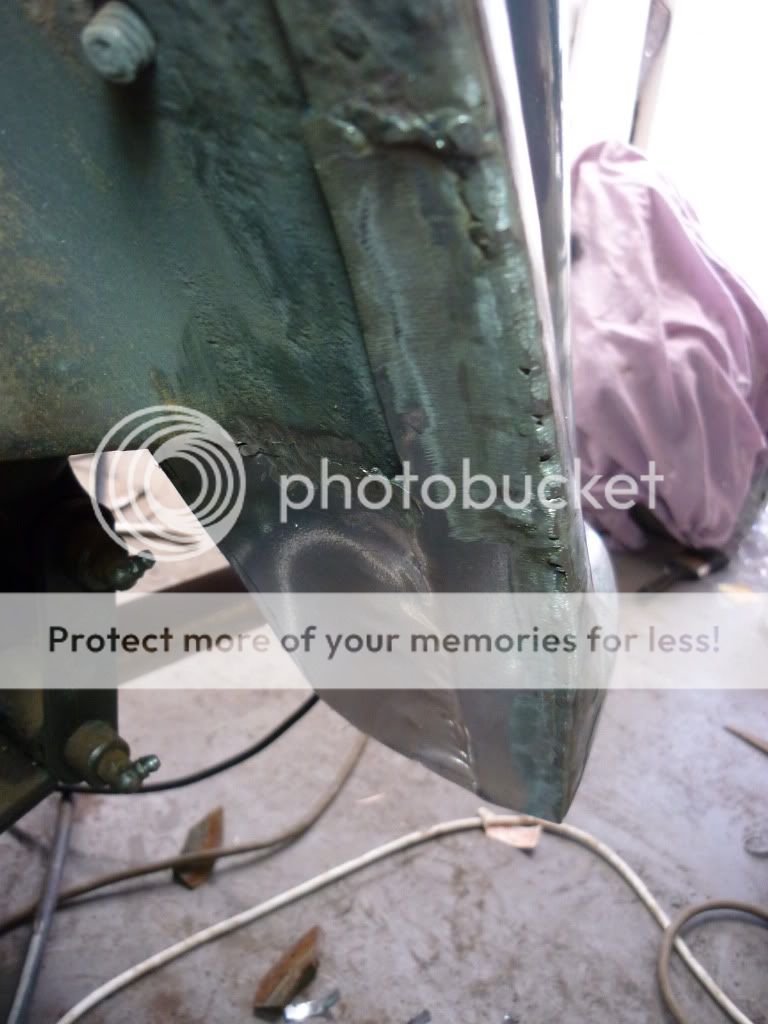 I have also been working on the timber frame - some progress with the rear quarter window sills. It is going to take some time I think to get the frame all sorted, but will continue cutting out rusty bit and replacing with washing machine back panel! 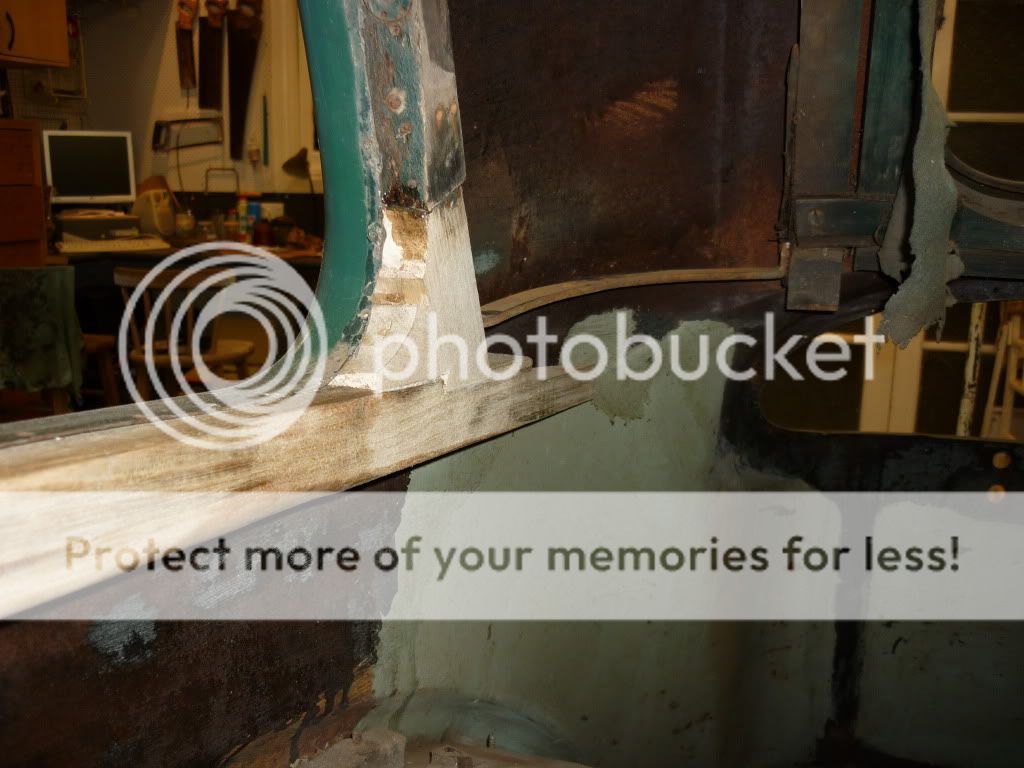 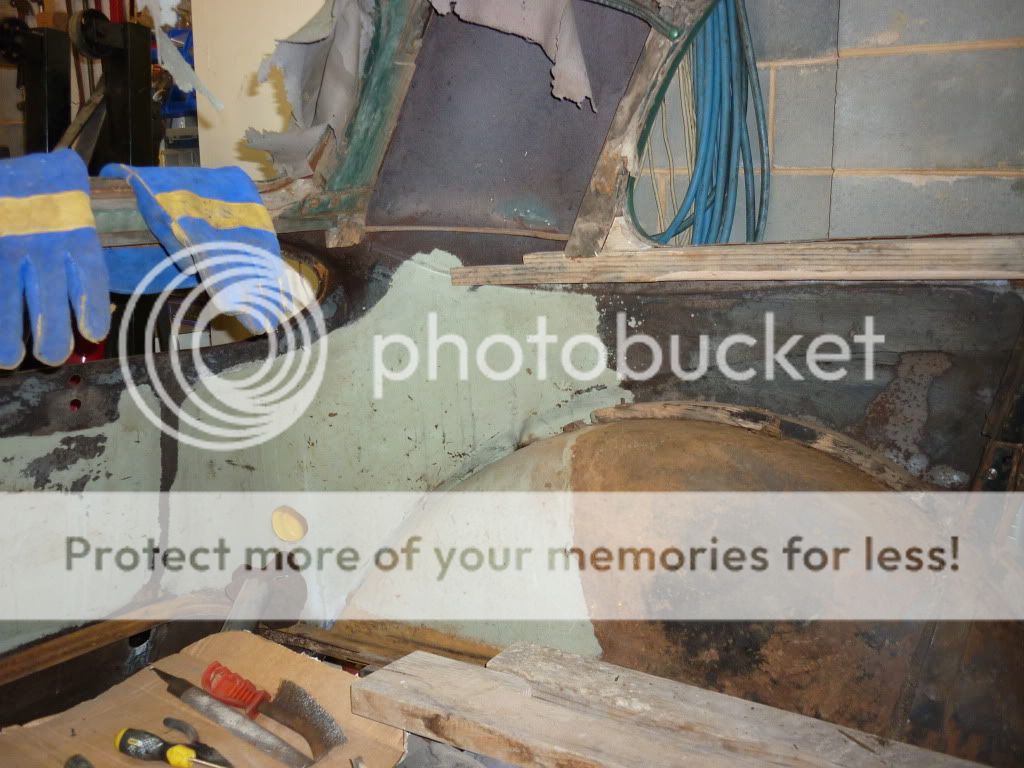 So there is the update for today - hopefully the updates will be a bit more regular this year!! |
|
|
|
Post by humpyboy on Jan 1, 2012 22:12:43 GMT 10
Nice to see you getting back into it again, start small and finish big, just keep chipping away at it and you'll be done in no time, trust me, I've got 2 under my belt and a third one waiting in the wings, does that make me clever or just plain stupid ;D I don't know but while it's still fun I'll keep doing it, hang in there curtis as you near the finish line you'll want to spend more and more time out in the shed.
|
|
|
|
Post by curtis on Oct 21, 2012 17:58:49 GMT 10
Greetings again fellow Vintage Vaners (and tow car lovers). I have realised that is is about 10 months since I last updated the resto of Amy-Lee. Actually is is about 10 months since I did any real work on her. Still the Morris Minor is done (youngest daughter), the Nats are over, and I think all other cars are now working so I can get back into the Twenty Five. So here is the update. I have restored, replaced and refitted all of the timber work in the rear of the car. 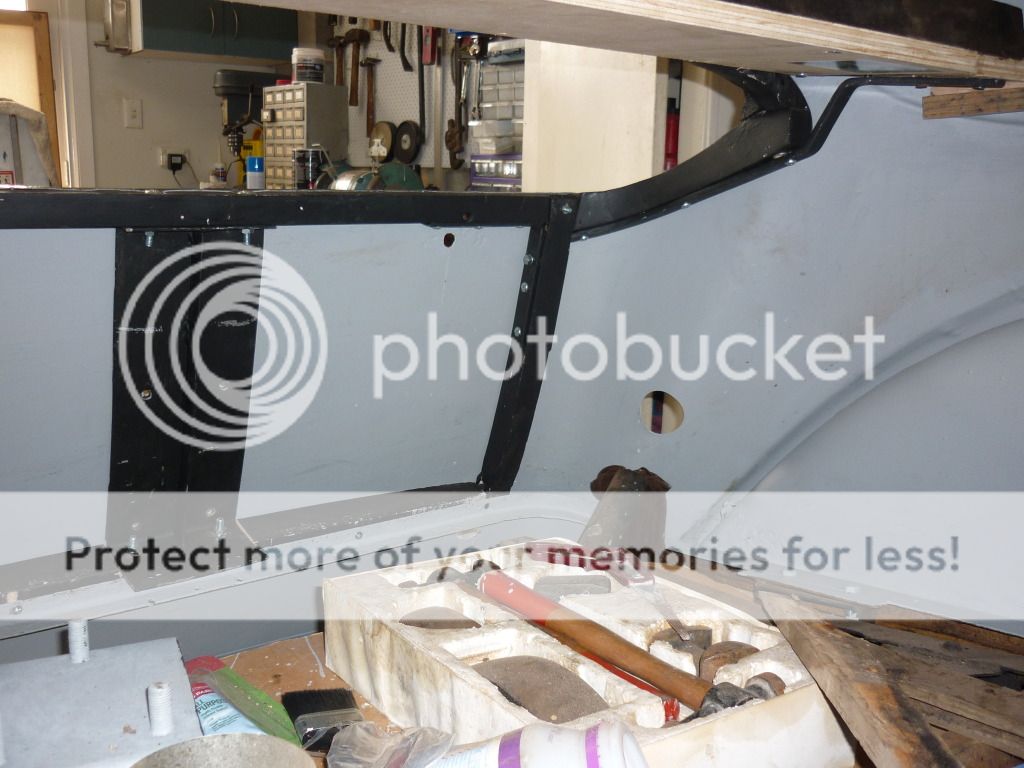   Thankfully I had posted photos on the forum before I pulled it all apart. Used those to help me put it back together. ;D ;D ;D There was also a little more timber work to do. Adding some new to the old. I really am impressed with the 2 part epoxy resin - the joint is stronger than the hardwood (which at 75 years old is VERY hard) 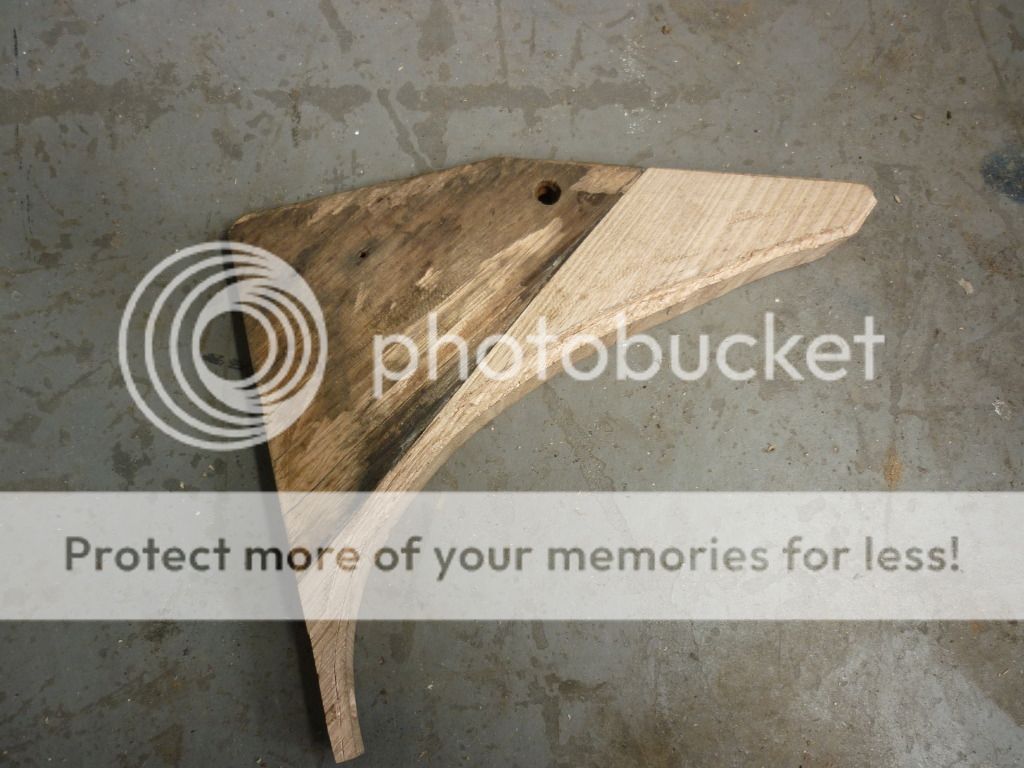 And then the part painted and fitted. (Yes I used steel slot head screws) 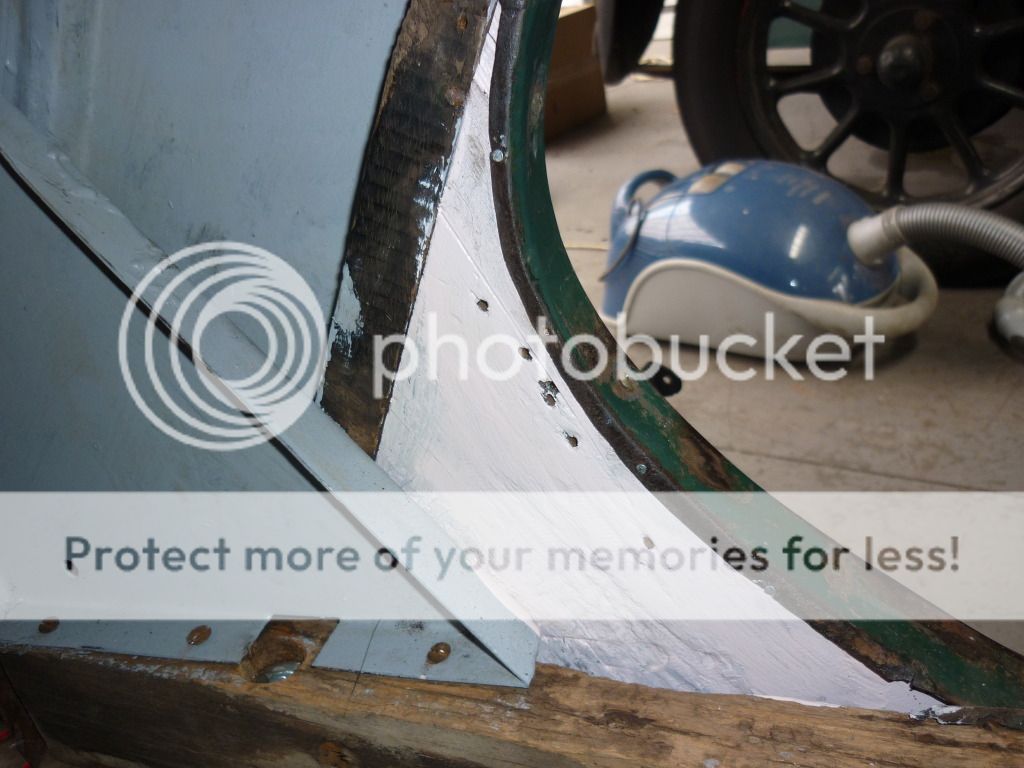 So now it is time to start getting ready to paint. All of the welding and timber is done, so out comes the tonneau roof panel. Remove the aluminum strip and piece of tonneau.   Then 2 layers of hessian and cotton wadding.  Then the chicken wire! 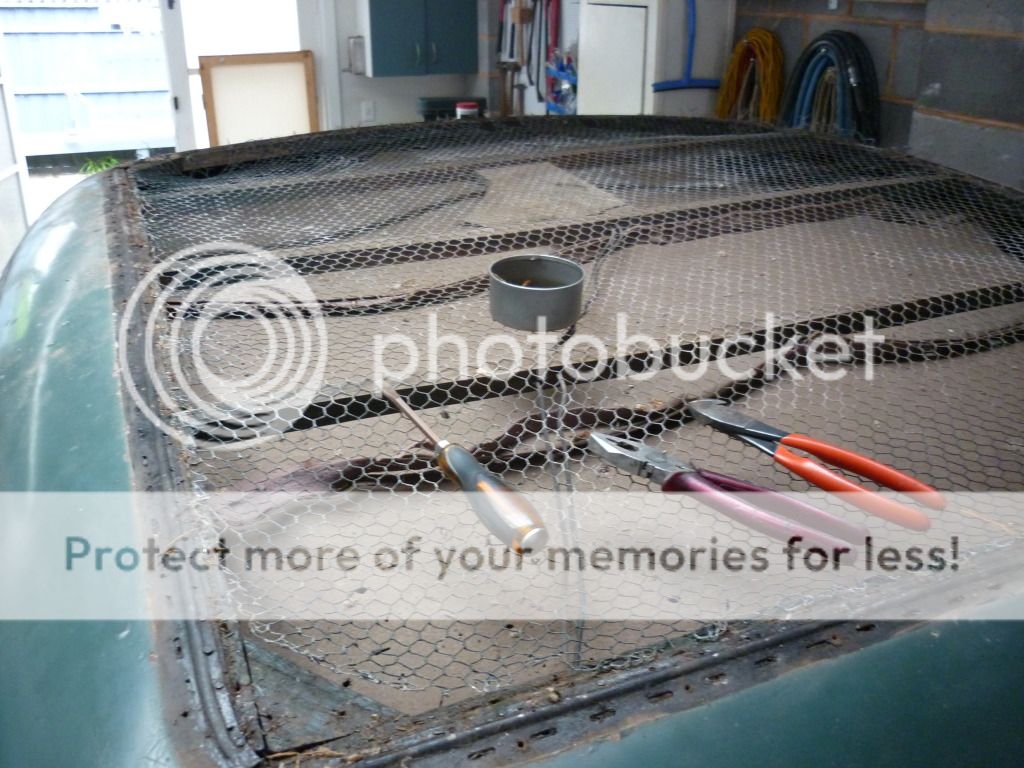 And finally the head lining  Then the remainder of the interior trims. Must have pulled out 500 - 600 little tacks!! 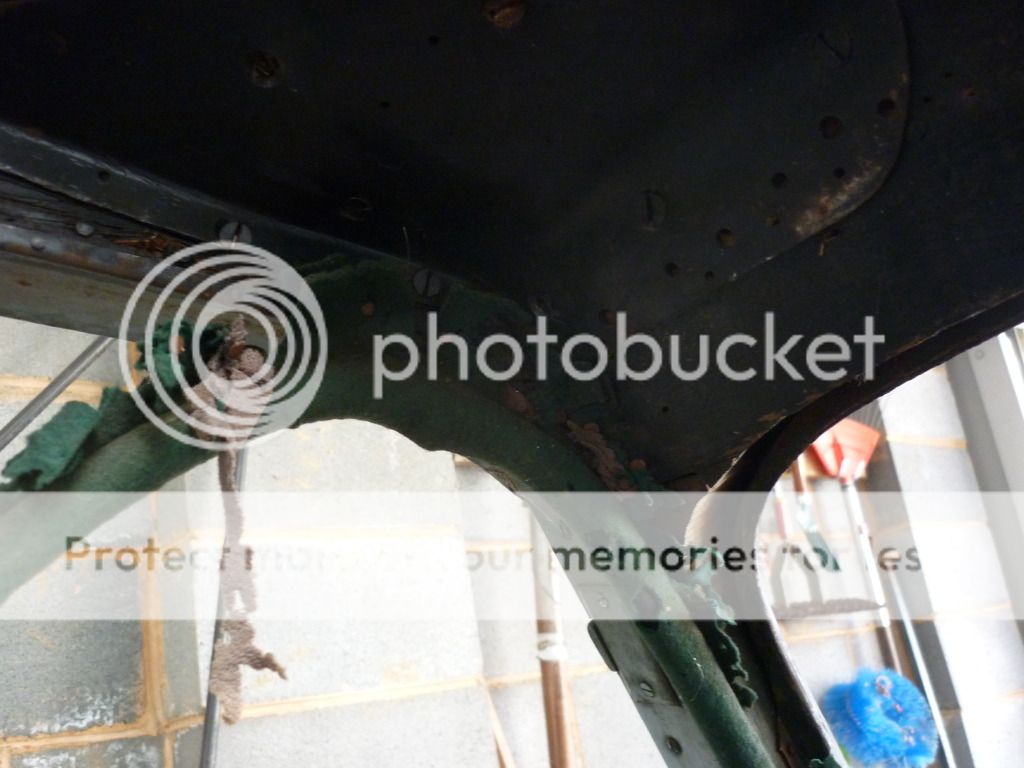 So here is what I have now. 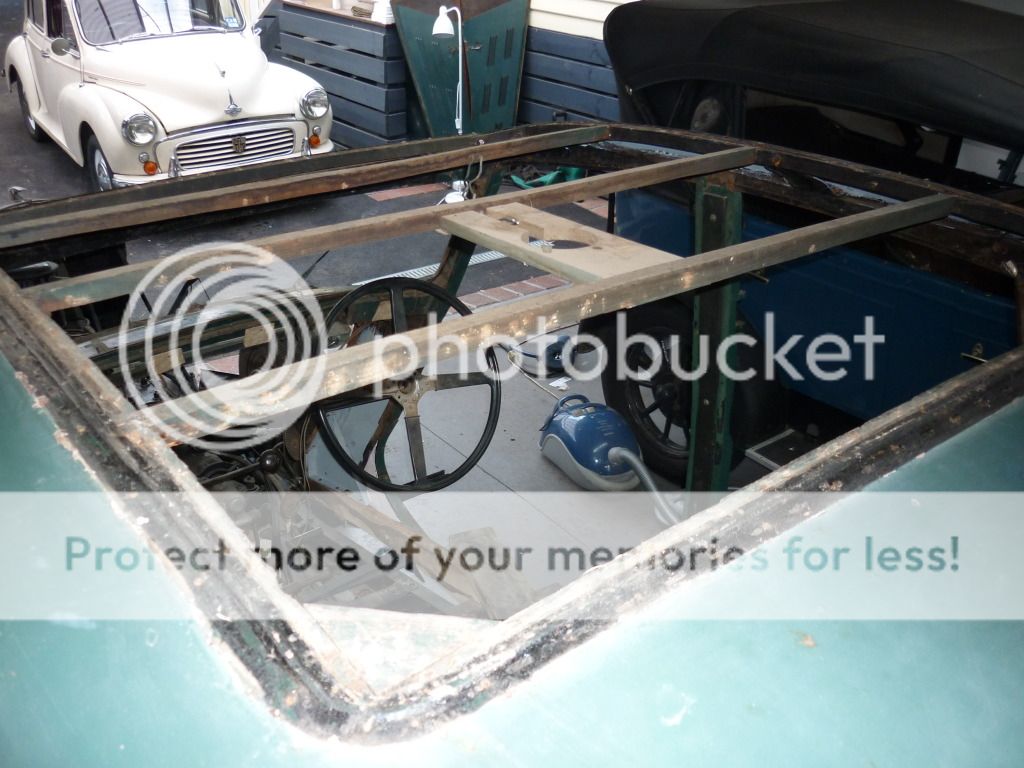 Hopefully the progress continues!! Dave |
|
|
|
Post by humpyboy on Oct 21, 2012 20:23:26 GMT 10
Was just this arvo wondering what was happening with this project, good to see your on to it again Dave, your making some good headway there although removal of the roof looked a little Tacky ;D get it? Tacky  OK back under my rock. |
|
vinny
New Member

Posts: 1
|
Post by vinny on May 28, 2013 6:18:03 GMT 10
Typing Morris 25 into google and your details came up, good site, hope you get this finished in 2013!
I own a pre-series Morris 25 with a saloon 4 door body, not good at posting links but google shows it quite easily. It was blue and black and is now ivory and black, I bought it from the widow last year of a good friend, it's a stunning car and they are very rare.
Whilst we're half a world away, it is nice to see you re building one.
|
|
paulb
New Member
Posts: 1
|
Post by paulb on Sept 5, 2013 7:57:32 GMT 10
Hi Curtis. Found my name earlier in this thread as owning what is probably the only remaining Pre-Series Morris 25 in Australia. Correct! Work is continuing, and hope to have it mobile in a matter of weeks. Will now try to post a photo ...
No joy. Try sending me a PM.
|
|
|
|
Post by curtis on Oct 27, 2013 6:03:38 GMT 10
Hi Vinny and Paul,
Seems like the Pre series 25s are appearing everywhere!! This is excellent news as one day I would myself aspire to own one of these as well!!
Paul - I saw photos of yours in the Victorian Morris Register Newsletter. I hope you do make it to the national rally in Forbes!!
Dave
|
|
|
|
Post by curtis on Oct 27, 2013 7:13:35 GMT 10
OK, so it has been a while since I even logged in to the forum, what with work, family and doing an MBA there is little time for anything else, but I really do owe this community an update on the progress with Amy-Lee.....so here goes: After a whole lot of paint stripper, some repairs to the lead filler, panel beating and elbow grease - it was time to start painting. (sorry for the lack of progress photos of this part)   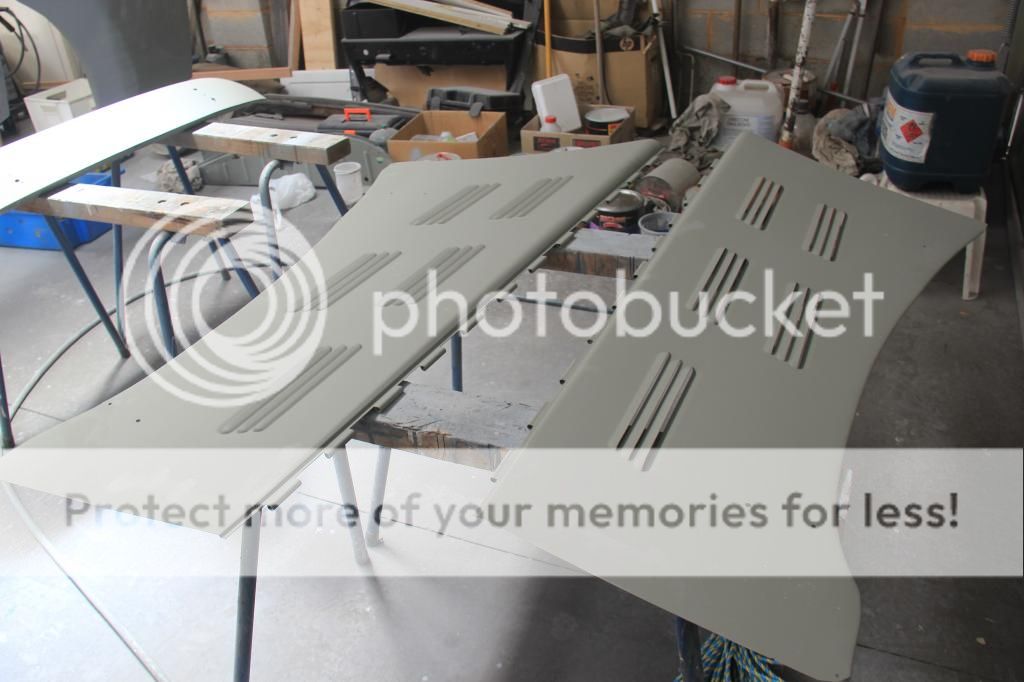   But after putting the etch primer on with the doors hanging (and swinging) I decided I should mount the doors on the car for paining. Glad I did, as the driver's door no longer fitted. I must have bent the body when I took it off and stored it.  VERY SAD......  Also had a couple of broken door hinges to contend with..... 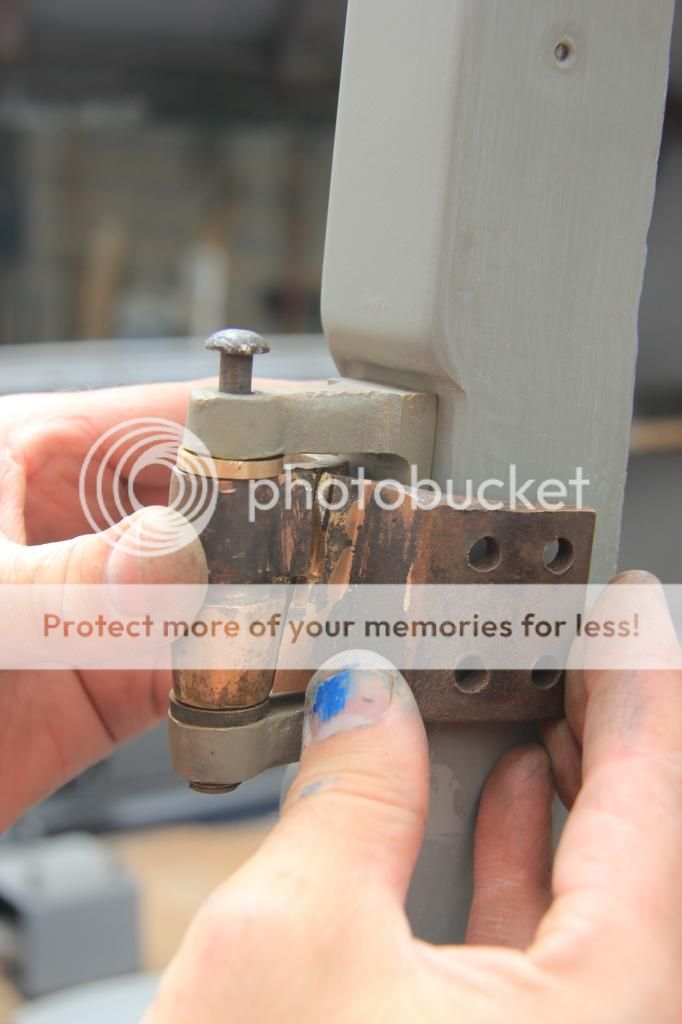 So while I took some time to think about what to do - I was keen to try some colour on the car. 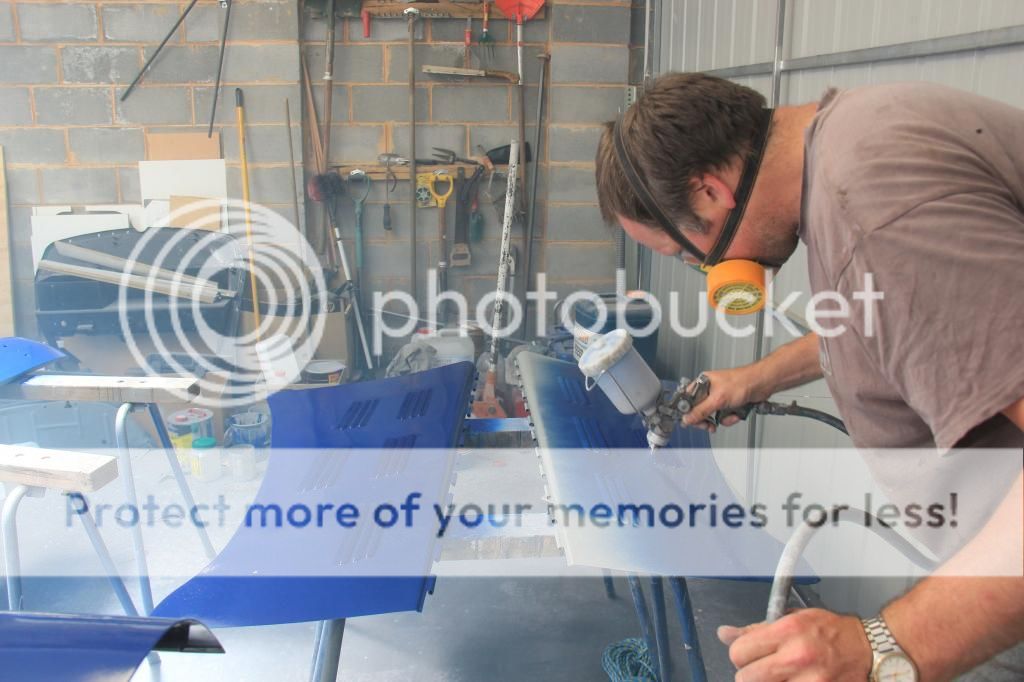  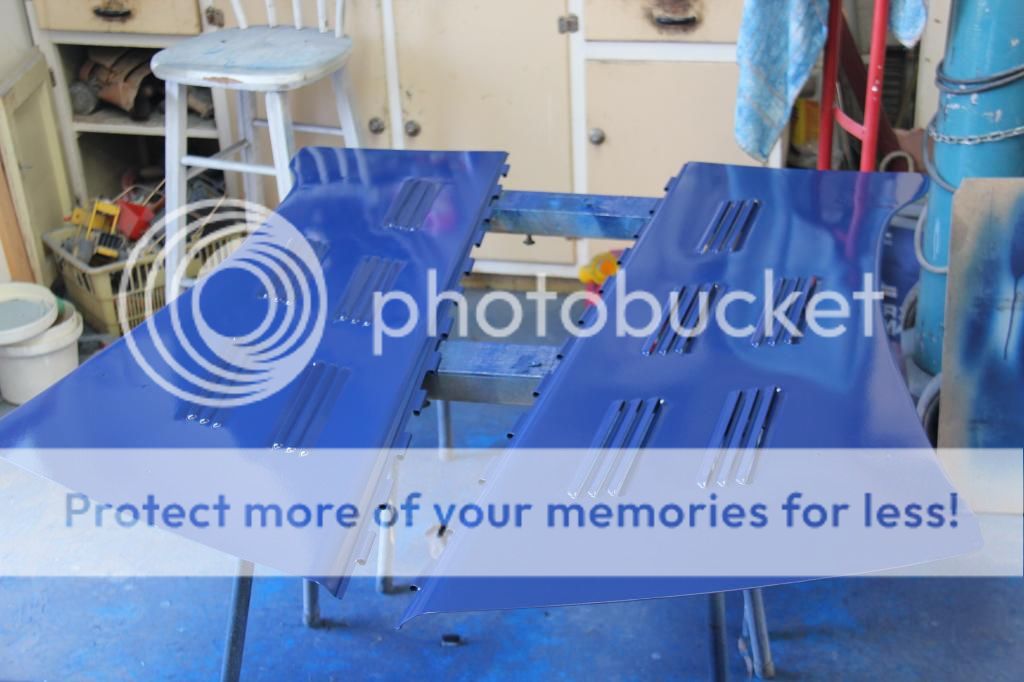 I spoke to Leigh (Sportsman 1) from the forum and he gave me some great advice about how to align bodies on the old cars, so we re-assembled all we could to work out the problem.... 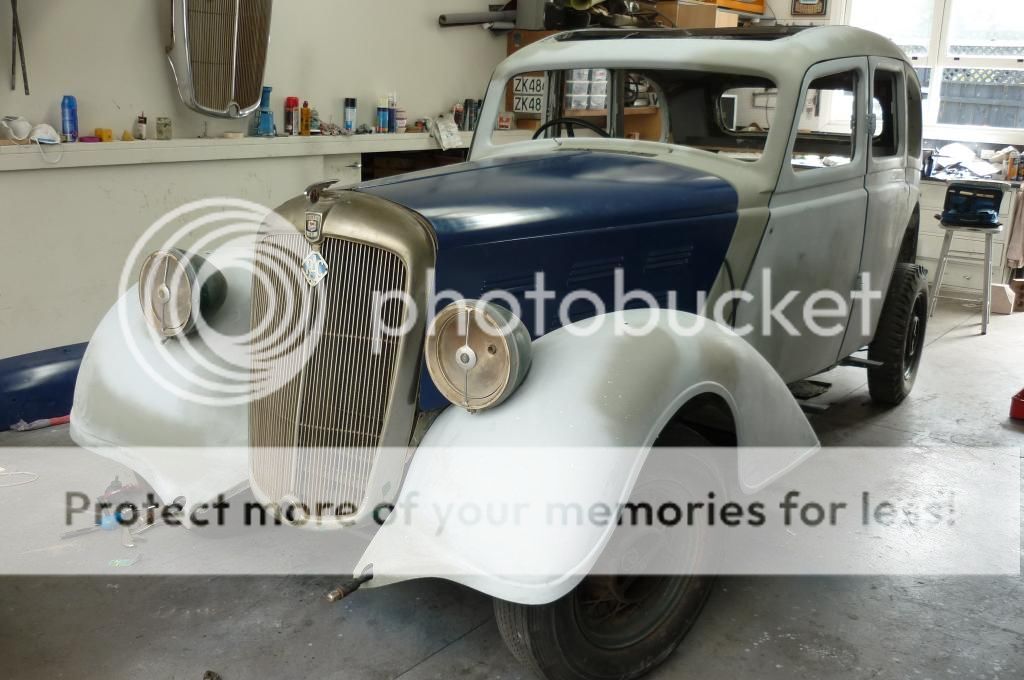  And after a full day of mucking around, we got is pretty good. Actually with out a word of a lie, fitting the doors back tot he car has been the hardest part of the entire project!! They are not perfect still, but I have checked the original photos and discussed the topic with many people, and I think they were never a perfect fit from new!! Anyway, back to the progress. It was time to paint for real now!! 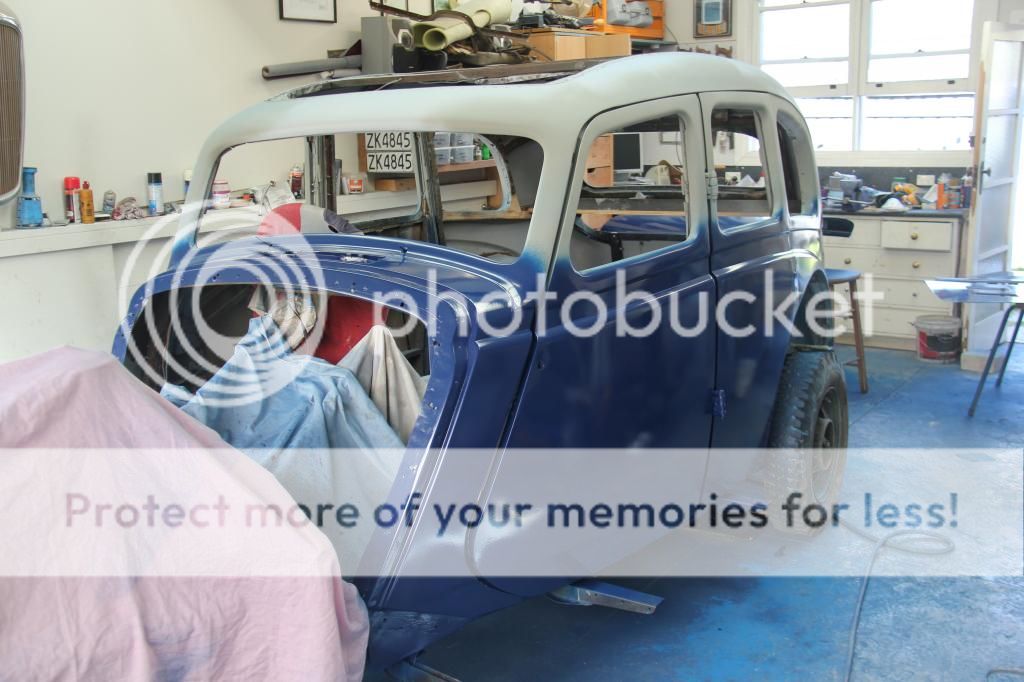 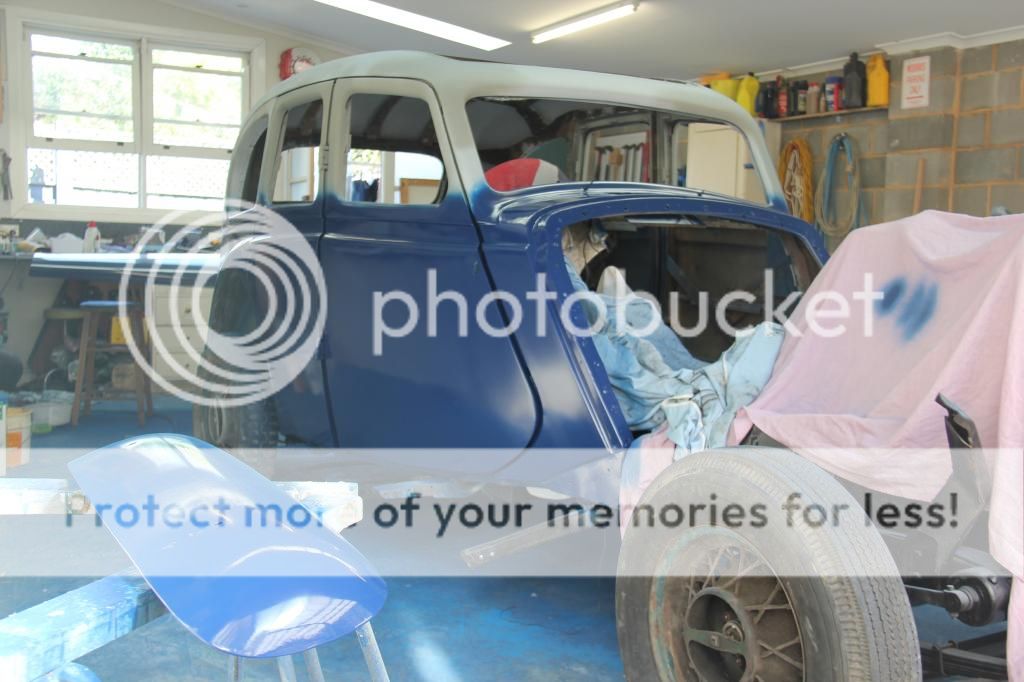  I am pretty happy with the blue by this stage, and so we moved on to paining the black! There is a photo somewhere of the black going on, but its whereabouts eludes me currently... Anyway here is what she is looking like with a black roof:   The I started to put her back together....  I have also had some chrome plating renewed - golly that is expensive. Will have to save up to get the rest done!! Still it does look nice..... ;D ;D  And here is where we are up to now.  Includes the wheels done, new tyres, and some brand new hubcaps I found on the Internet from the UK!! So there you have it - some progress. Next I am making anew marine ply floor, and starting on the interior. I will try to make sure I update the post more regularly. Dave |
|
|
|
Post by sportsman 1 on Oct 28, 2013 12:24:03 GMT 10
Well done Dave,
much better than last time! Keep it up and it will go back together again before you know it.
Leigh.
|
|
|
|
Post by humpyboy on Oct 28, 2013 13:17:35 GMT 10
Nice one Dave, always a good feeling when the colour goes back on, means your just that bit closer to the end.
|
|
|
|
Post by davethecollar on Jul 17, 2015 17:52:09 GMT 10
Hi Curtis
I know it's been some time since the last post on this thread but ......
I like the renovation pictured in this thread, great job!!
I live in a place called Ruthin in North Wales in the UK and I'm renovating a 1935 Morris 16hp Big 6 side-valve
When I bought it, the pillock who had it before me had bought a new loom :-) but, he had cut the old one out complete without running the new one (hi ho)
I have had to replace all the floor and now, having cut and painted all the new floor panels ready to fit, I'm in the process of spray-painting the chassis before I fit the new floor and loom.
As you have removed all the floors and body from your 25 I wondered, could you let me know if the loom runs over or under the floor panels? Myself, I thought it should be 'P' clipped to the chassis I just need to confirm that
Any help regarding the position of the loom would be much appreciated.
You might be able to access some of the photos of my renovation so far on my Facebook home-page (Dave Evans Ruthin UK)
Thanks in advance
Dave
|
|


 And they reckon all cars today look alike. I'd have bet important parts of my anatomy on it being a matching Damyon Bros. body


