|
|
Post by humpyboy on May 29, 2011 23:23:51 GMT 10
It's a good feeling when they fire up after all that work isn't it, top job and as seeshell said, full marks on the air cleaner.
|
|
|
|
Post by cruisindoug on May 30, 2011 9:04:55 GMT 10
Must be running smooth Curtis - didn't even move the sockets sitting on the chassis rail  Nice work, its a bit of corner being turned once things are coming back together and the assembly can move itself! Thanks for the update, looking forward to the next one. |
|
|
|
Post by curtis on May 30, 2011 9:33:06 GMT 10
|
|
|
|
Post by curtis on Jun 7, 2011 20:40:37 GMT 10
|
|
|
|
Post by curtis on Jun 7, 2011 20:45:06 GMT 10
If you reckon you are going to pull me around with that, you better get it looking somewhat better than it does now..... Yes it does move under it's own power, but Dad, when you backed past me in the carport, and I had a good look, I was not amused at all..... Good progress Dad, but there is no way I will be pulled around by that until you get it cleaned up a WHOLE LOT MORE THAN IT IS NOW!!  Curtis |
|
|
|
Post by richard on Jun 7, 2011 21:55:20 GMT 10
Thanks for sharing - keep us posted!
|
|
|
|
Post by humpyboy on Jun 7, 2011 23:48:43 GMT 10
Ummmmmm looking good Dave  can I ask who did your upholstery? then I'll know where not to go ;D ;D ;D keep cruising round the streets like that and the neighbours might chip in a few dollars thinking it's the best you can afford then you'll have her finished in no time P.S. Curtis, have a little more respect for your father, you could at least get a little dirt on your hands or should I say wheels and help him a little, after all he is doing all this for you. |
|
|
|
Post by Don Ricardo on Jun 8, 2011 0:24:57 GMT 10
G'day Dave, Thanks for the photos of the Morris moving under its own power. It must have been a real thrill for you all to take it for a little run, even if Curtis was unimpressed! You know what they say: "Fools, children and vintage caravans should never see work half-done". ;D ;D ;D I like the open air look. It's obviously where BMC got the idea for the Mini Moke! Like your work. I'm sure it will be a stunning car when you're finished. Don Ricardo |
|
|
|
Post by Bake`s on Jun 8, 2011 10:49:20 GMT 10
What a fantastic job your doing,just a question on the rear brake piping,are they copper? the reason for the question is I have just replaced brake lines on a tandem trailer,I wanted to install copper tube,but was told the law makers have outlawed copper tubing on brakes because they become brittle and crack with vibration, just a thought.Regards Bakes.
|
|
|
|
Post by curtis on Jun 9, 2011 8:47:24 GMT 10
Thanks all for the great feedback. Yes it was a momentous occasion when we went for our first drive. Very exciting!! ;D ;D ;D I have seriously chastised Curtis of his post as well.  Bake's - yep I did replace the original copper lines with new copper before I discovered it was now outlawed. Interestingly, the 70+ year old copper was still quite soft and had not work hardened at all. There are a lot of mounting points to prevent vibration and work hardening. Still I will replace all the lines again with modern steel lines before we go for a road worthy (which I think is a while away yet  ) Dave |
|
|
|
Post by humpyboy on Jun 9, 2011 12:47:09 GMT 10
Dave just as a point of intrest, are you aware that you can get steel brake lines in a COPPER colour, the guy that put mine together for the Ute ran out of the Zinc coated stuff just as he got to the last piece so made it out of the copper coloured stuff may be worth your while to ask hey.
|
|
|
|
Post by curtis on Jun 12, 2011 18:57:31 GMT 10
|
|
|
|
Post by humpyboy on Jun 12, 2011 19:13:37 GMT 10
I feel heaps better now knowing that I'm not the only with a tidy work bench ;D thanks for the pics Dave.
|
|
|
|
Post by richard on Jun 12, 2011 19:55:11 GMT 10
Going to need to have a think on this for a while as I only have an arc welder and it will melt what remains of the steel. I've never seen a better excuse for buying a MIG, TIG, or Combo welder! ;D They start under $500 for a small one, nowadays. And you only need a small one for panel work. |
|
|
|
Post by griffin on Jun 13, 2011 19:32:53 GMT 10
Hi Curtiss For my 2 bobs worth I think your fabrication technique so far is fine ;)but you need to extend it to both the repair jobs you show. I'd bet any money once you start trying to weld (regardless of the welder type/method/skill level) the holes under the body they will just get bigger as that metal is now very thin and really not worth the time and effort you will put into it, replace it and do it properly  Panel steel is easy to work, it will just take time and patience if you aren't skilled in it, I've seen lots of amateurs do really great jobs. That section doesn't look structural and you could even use one of the glass fiber reinforced fillers to do the job, no one is going to see it They are as tough as goats knees and will stick like poop to a blanket but you really have to treat the rust well first or it will continue to rust  The bumper bar mount area is the same, make a patch to fit the panel, set it up and cut out the old bit and weld in the new which will then have to be dressed up. I'd make sure to know what you are doing in regard to a tow bar first though so you don't have to attack it again It doesn't look like you are doing half a job, have you thought of getting to know a local retired panel beater ;D I can't comment on the type of welder to get, I'm strictly an oxy man and if you are new to it then it won't matter what you get there will need to be a lot of practice before to take to the real job. I couldn't perfect TIG and MIG at Tech, just made lots of funny little porcupine bits of steel so didn't bother, I had oxy. My son in law is a gun welder though and he loves his gasless flux core MIG, that everyone else seems to think is crap, he just reckons they can't weld for crap Good luck, hopefully we will eventually get our Big Sixes side by side one day, Vauxhall and Morris, what a team  George |
|
|
|
Post by curtis on Jun 13, 2011 19:59:32 GMT 10
OK here is today's progress - it is a long week end after all!! Thought I would start on the back of the car, as I know there are a few issues with the timber framing around the side windows, as as with any timber framed car/caravan, where you think there may be an issue, it is gunna be a whole lot worse when you pull it apart to have a good look. Always start by taking lots of photos - might be useful later. 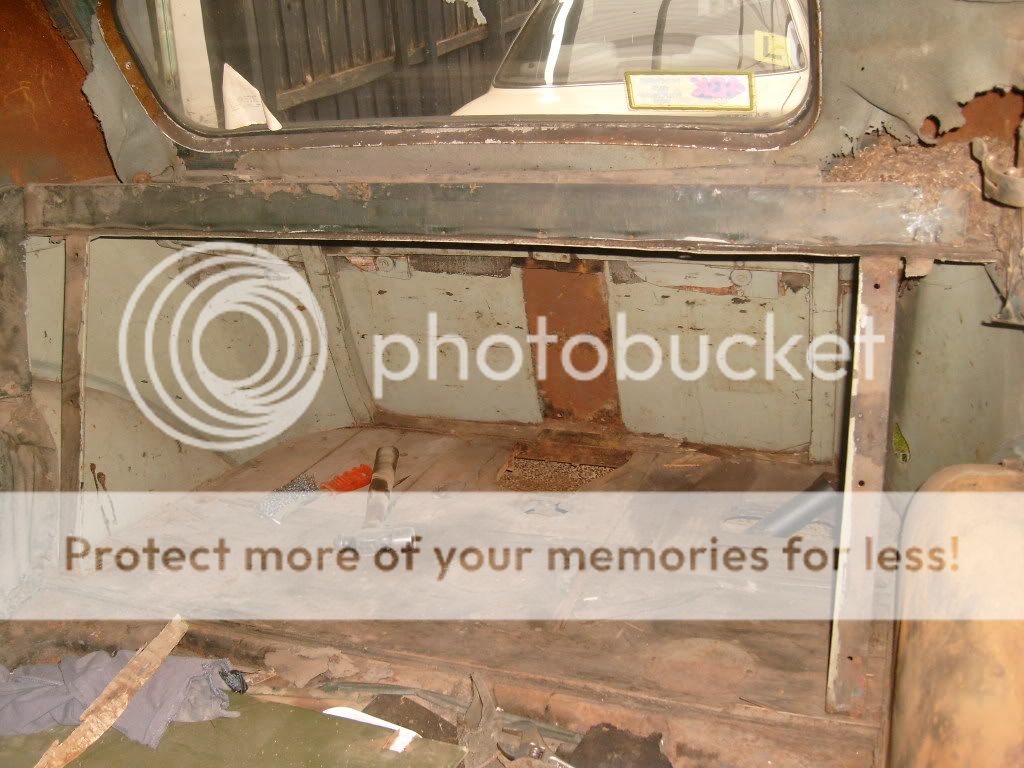 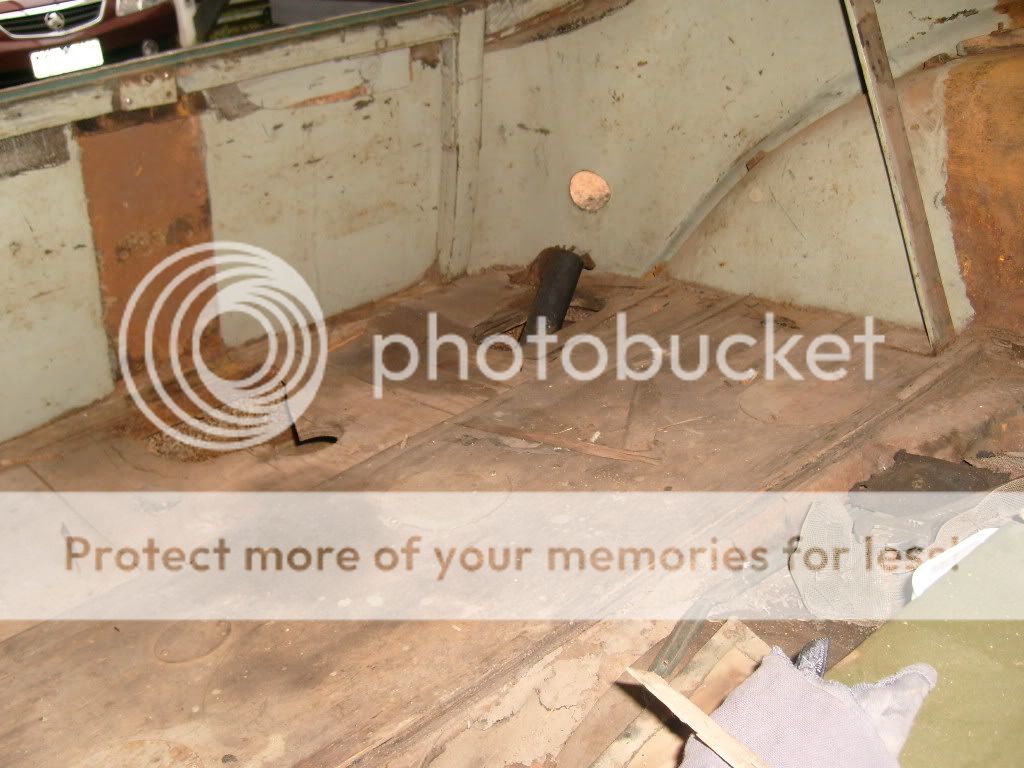 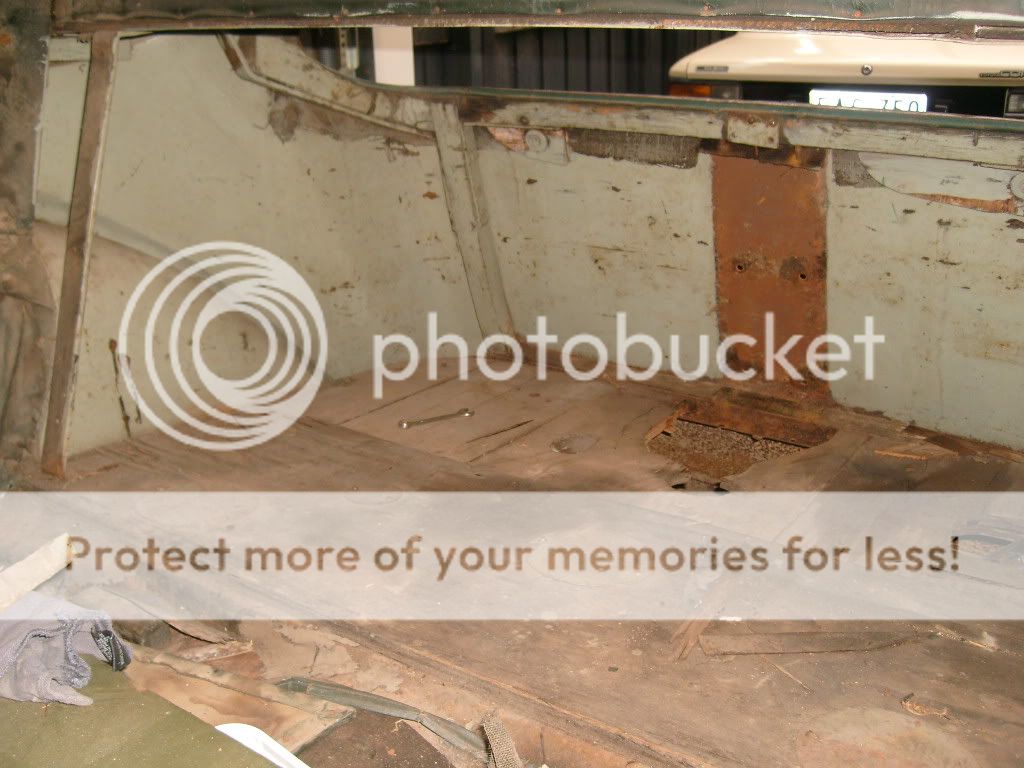 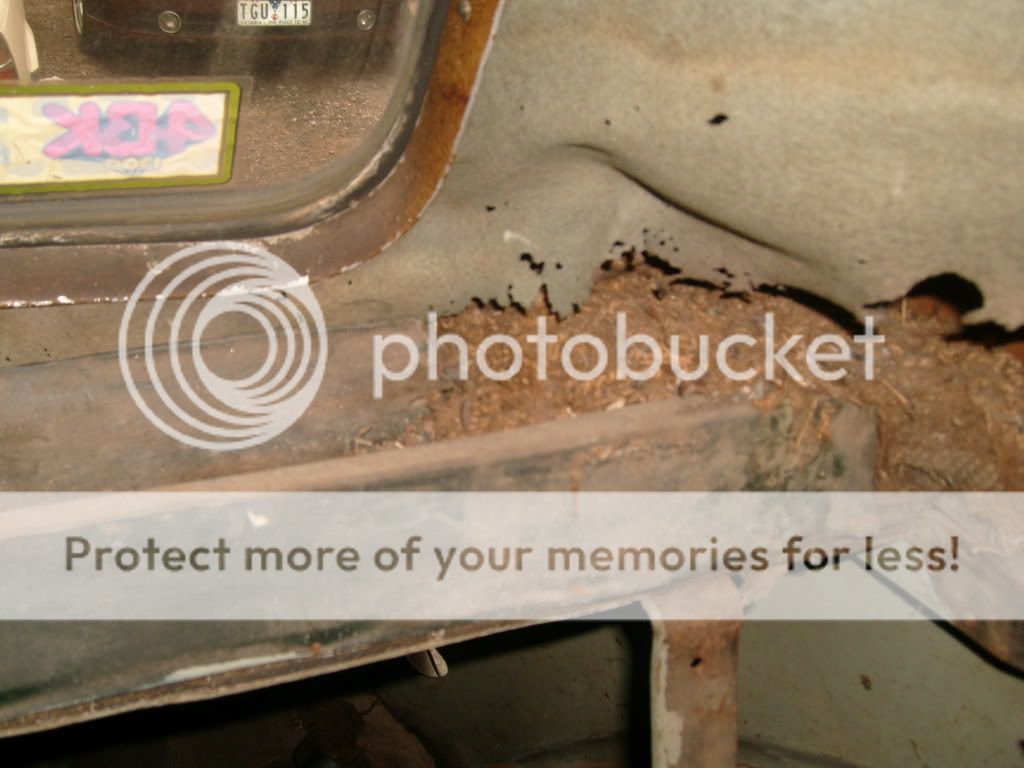 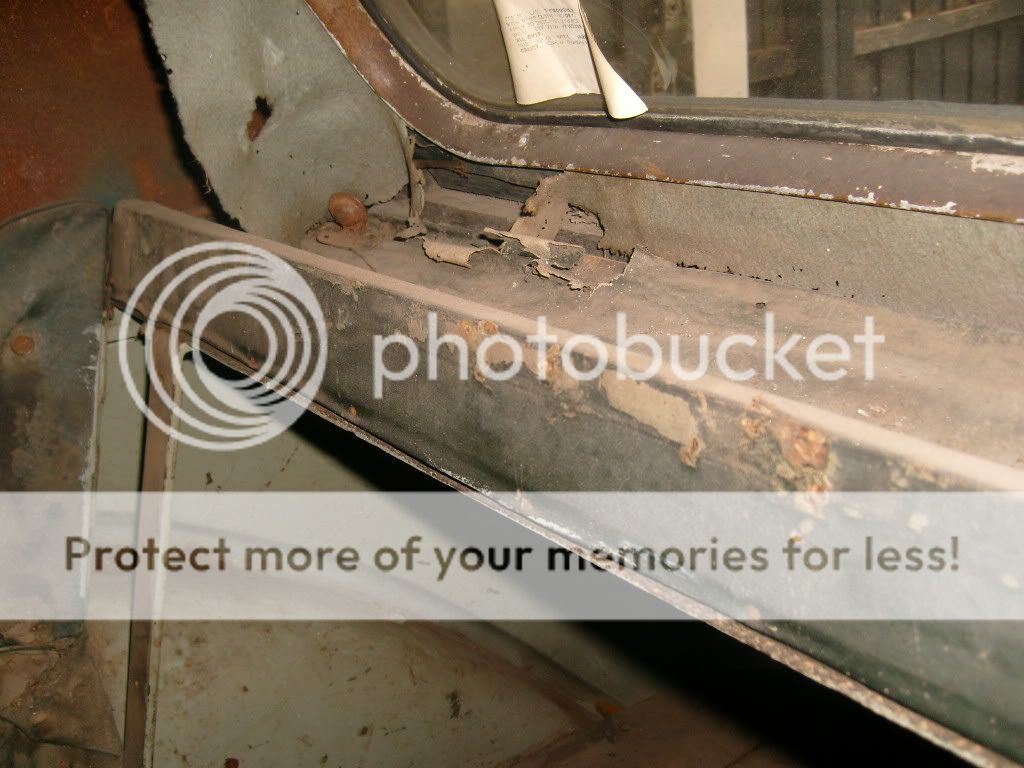 Then start pulling bits out to have a closer look.... Out come the rear shelf..  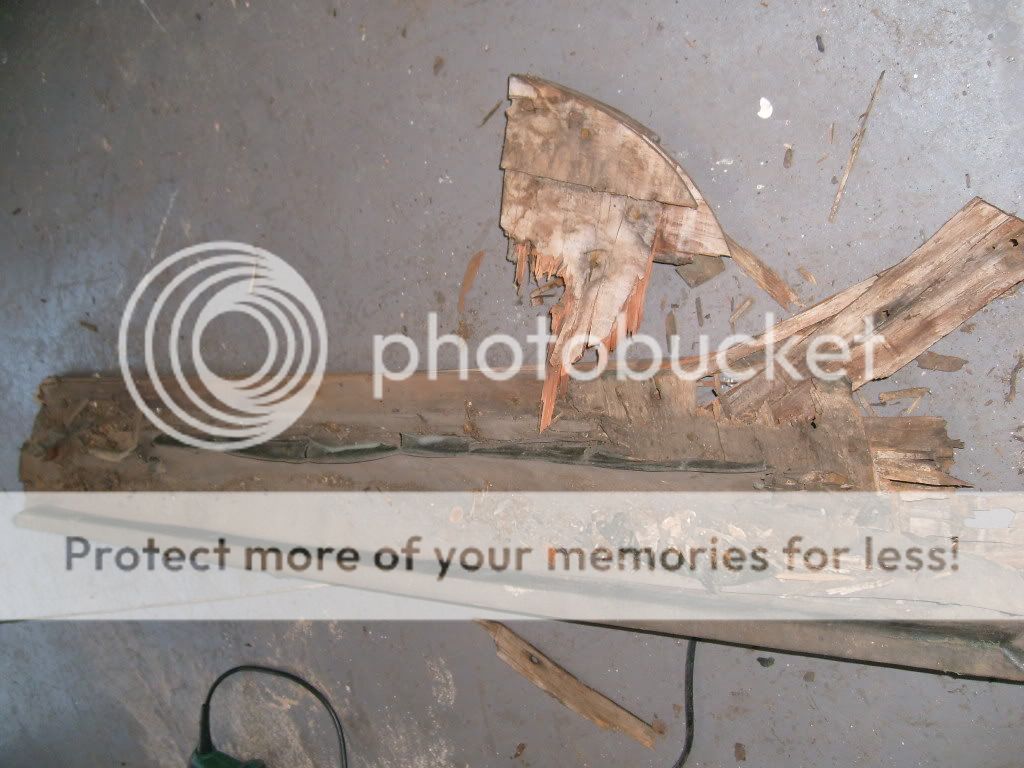 Back right corner.. 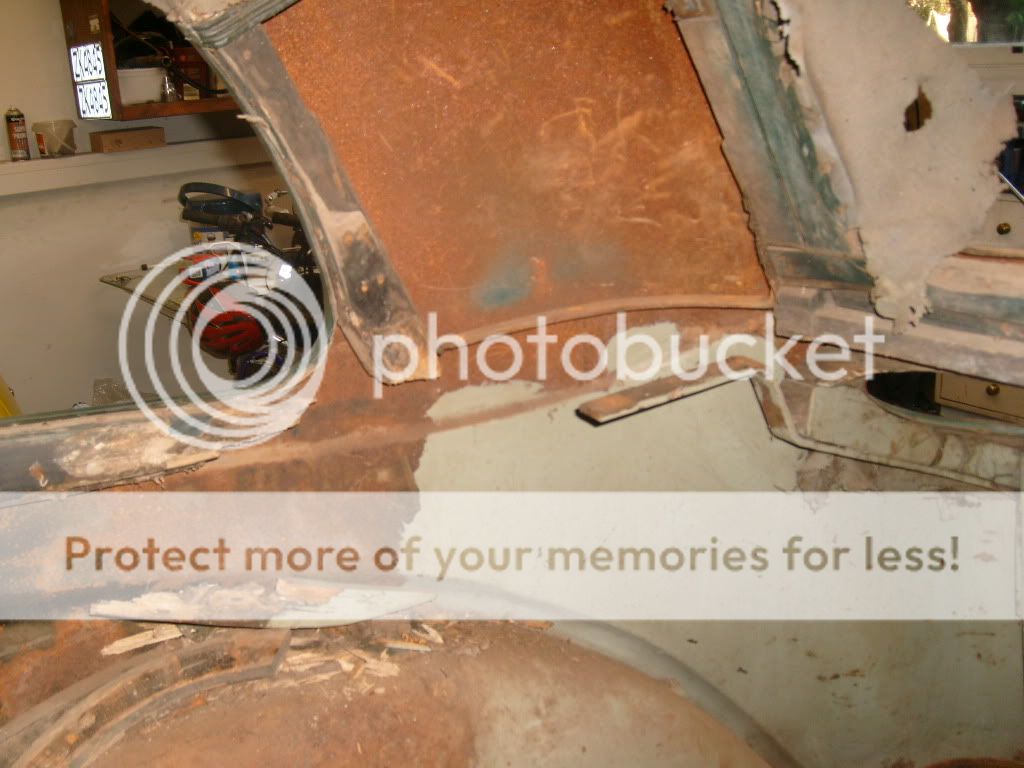 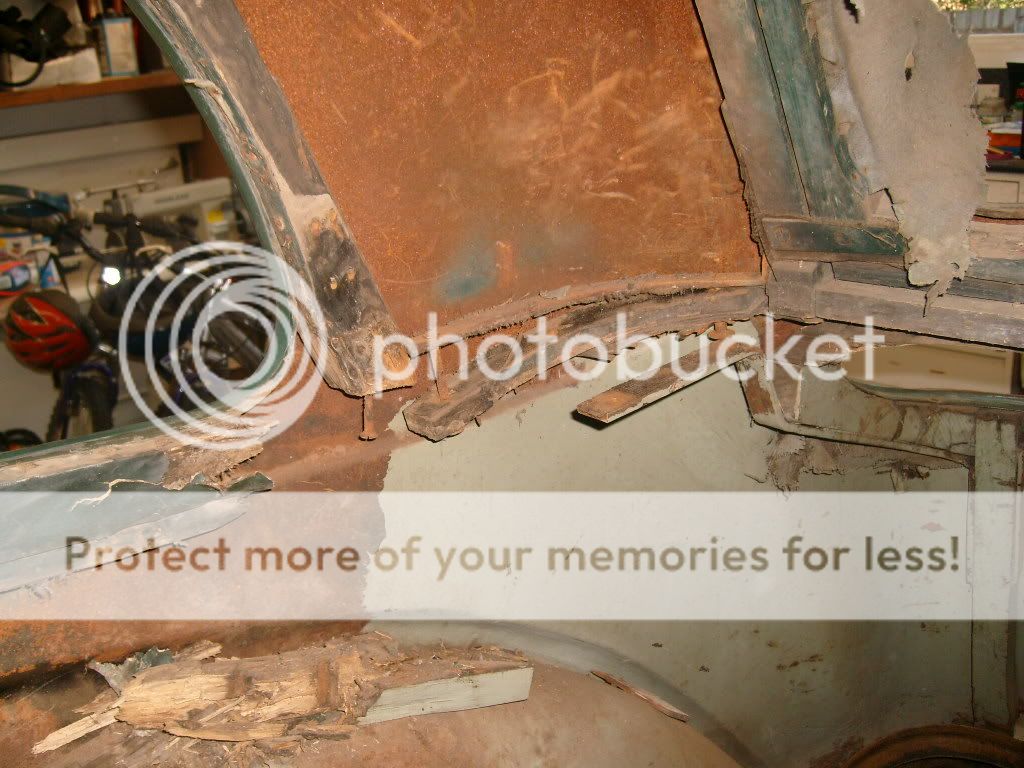 Back left corner.. 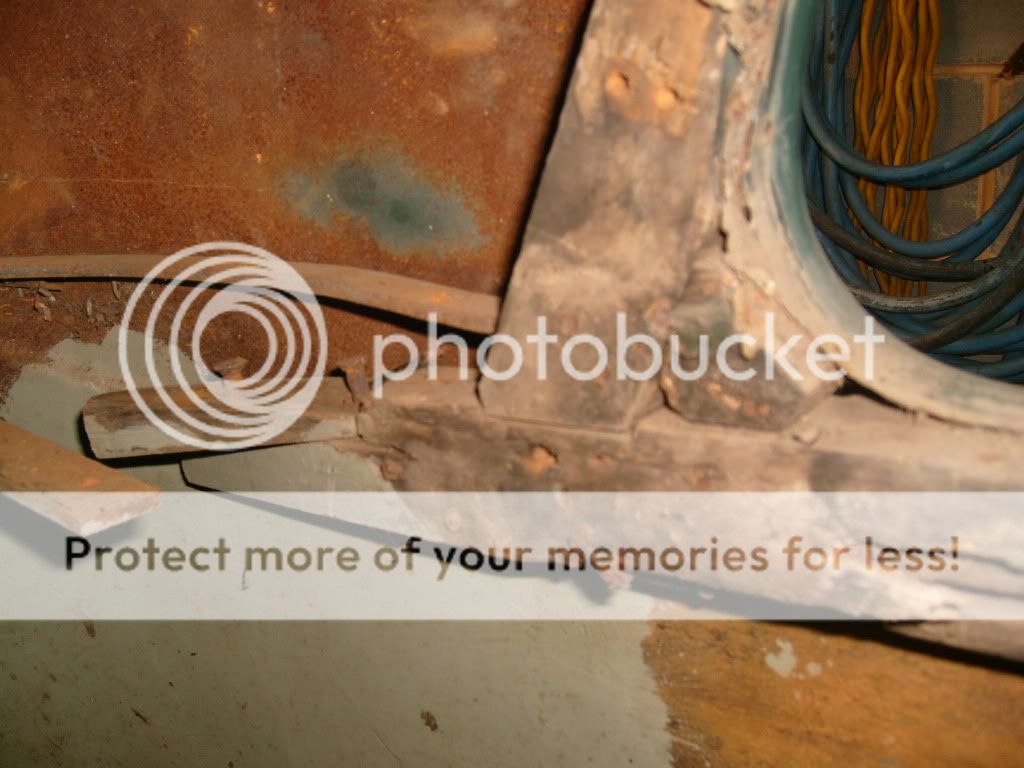  Hmmmmmmm. Reminds me of a certain, mischievous, Franklin Freeway!! Lucky I kept a few off cuts of floor joist from when I extended the house ;D ;D ;D Out came the kiln dried hardwood, the jigsaw, hand plane, chisels, tenon saw and sander.  Made my first bit before the light failed. Hopefully more progress next week end..... Dave |
|
|
|
Post by nutter on Sept 22, 2011 12:22:16 GMT 10
Hi again Curtis ! Lost this thread and only just found it again! ... and WOW ... awesome job your doing, very impressed. I will attempt to upload a couple of photos of my Wolseley .... love what you did with the air cleaner.... if you havent put a copyright on that idea i think i will copy it! ;D. I too ripped out all my brake lines after initially replacing the copper lines... BUGGER!.... but anyway they are mild steel double flared now as reqd!!... i have now overhauled the jackall pump /selector and just need to locate someone who can supply seals etc to rebuild..... Anyway , just thought i would let you know im loving the build and look forward to some more progress reports... |
|
|
|
Post by nutter on Sept 22, 2011 12:48:18 GMT 10
rolling out of the garage after 33 years of no sunlight |
|
|
|
Post by nutter on Sept 22, 2011 13:00:29 GMT 10
the engine bay is almost done,.... need to make up some leads!
|
|
|
|
Post by nutter on Sept 22, 2011 13:01:33 GMT 10
just the bones ;D
|
|
|
|
Post by nutter on Sept 22, 2011 13:02:31 GMT 10
that should look familiar.... as removed!!
|
|
|
|
Post by nutter on Sept 22, 2011 13:03:26 GMT 10
midway through the repaint...
|
|
|
|
Post by mgsa1524 on Sept 26, 2011 14:57:22 GMT 10
Hi there.I have 2x MGSA one 1937 and the other 1936 which I am rebuilding.The Morris 25 has a lot of the same parts on it and the chases is almost the same. There is a parts supplier in England called SVW spairs who can supply new type seals for the jack all rams. There are also a lot of other parts that he may be able to help you with.
I see that the dif is the same as my MGs and you have made a new seal for it. SVW have got modern type seals that fit with
out any mods and they work well. No leaks ! It looks like you are doing a nice job of your Morris and it is interesting looking at your photos and seeing the same parts on a different car.
Regards Paul Turner New Zealand.
|
|
|
|
Post by curtis on Sept 30, 2011 20:45:14 GMT 10
Hi Nutter and Paul,
Thanks for your interest in our old 25. Progress is slow at the moment due to some landscaping and a driveway that needs to be laid. Bummer...
I am very curious about your Wolesley Nutter - is the body English or local?? It kinda looks like a doctors coupe, but I have not seen anything quite like it before on an Englisch car. Looks lovely though.
Paul - would love th see a photo or 2 of your MGSA? MG being a part of Morris it is no suprise that the parts look similar, but an MGSA is quite a special machine. Good tip on the jackall system parts - will look them up!!
Dave
|
|
|
|
Post by griffin on Oct 1, 2011 12:35:45 GMT 10
Hi gents I suspect Nutter's Coupe has a custom body by Damyon Bros., Melbourne, like the one in the attached photo on a 1936 25hp Vauxhall that was published in The Coach and Motor Body Builder, Aug, 1936. The usual body was by GMH and a much more rounded and along the lines of American coupes. Nice find, good luck with it. Let me know if you find it's Vauxhall brother sometime George |
|


 can I ask who did your upholstery? then I'll know where not to go ;D ;D ;D keep cruising round the streets like that and the neighbours might chip in a few dollars thinking it's the best you can afford then you'll have her finished in no time


