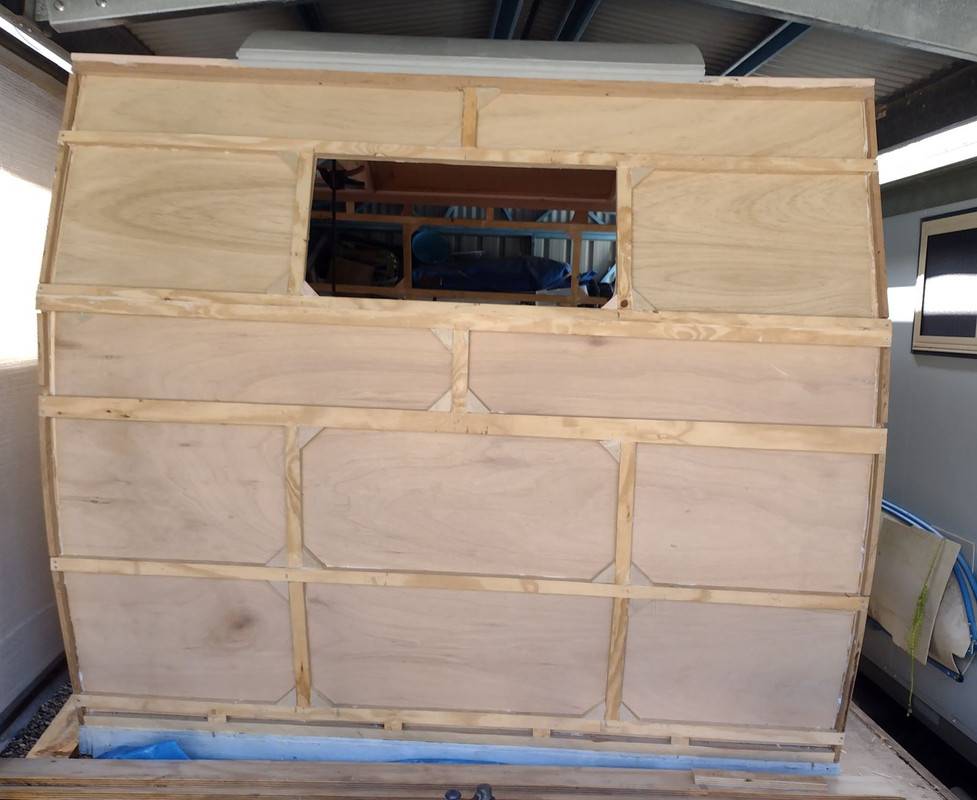
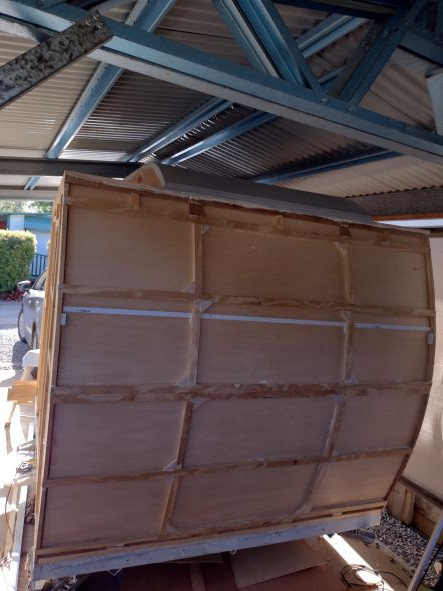
|
|
Post by Roehm3108 on Nov 25, 2022 21:57:02 GMT 10
Hi all I finished the driver's side interior lining today. Yay!!  I noticed on a video from Caravans plus, where they showed a caravan being built, that the next step after the floor was fitted, was to instal the vinyl flooring. Makes sense because it avoids a lot of corners when you only have to trim around the wheel arches and then the edge of the chassis. So I think I will make that my own next step after the weekend. DonR, I can see where you're coming from in your comparison and agree that once the roof drops on, it will take on its own unique form. |
|
|
|
Post by Roehm3108 on Nov 29, 2022 15:56:26 GMT 10
|
|
|
|
Post by Roehm3108 on Nov 30, 2022 17:05:35 GMT 10
It was time to see how good a builder I really was!!! Building the roof apart from the framing may sound strange, but I'm pleased to say, the hat fitted to within 3mm!!! This pic was taken before any pinning down. I'm SOOOOO pleased! So good to see it taking shape.  |
|
|
|
Post by Roehm3108 on Dec 1, 2022 14:54:18 GMT 10
This cooler weather is certainly agreeing with me, just a shame that we're also getting wind-driven rains as well!! The roof is all screwed and glued on and now the rafters for the lower part of the lantern roof are also installed. The whole thing is starting to take on its shape and stiffening up nicely.   |
|
|
|
Post by Roehm3108 on Dec 6, 2022 14:44:51 GMT 10
A bit more progress today, with the front framing finished. Some might say it's a bit of overkill, but I'd rather err on the side of caution. Too often I see news items locally here, where 20plus ft caravans had no structural integrity and as a result ended up as pulp after an accident! The bit without chocks is where the front window will go.  |
|
|
|
Post by Roehm3108 on Dec 8, 2022 10:59:06 GMT 10
Reached another milestone today. The framing is finished! Rather pleased about actually seeing some shape!  |
|
|
|
Post by Don Ricardo on Dec 8, 2022 12:37:29 GMT 10
Looking good R3108.    What's the next step? Don Ricardo |
|
|
|
Post by Roehm3108 on Dec 8, 2022 19:01:40 GMT 10
Thanks DonR
The next step is the internal lining of the framed bits - front and rear walls and lower roof sections.
From there I have to firm up the interior layout design, so that I can do the electrical wiring first fit. I want to hide as much 12 volt wiring in the wall cavities, as is possible. The 240 wiring will be in conduits as this will only be below waist level for power points
Once that's done, there is the task of insulation installation before fixing the outer walls.
|
|
|
|
Post by Roehm3108 on Dec 15, 2022 12:12:01 GMT 10
A bit more progress, the interior front wall lining is fitted.  |
|
|
|
Post by Mustang on Dec 16, 2022 6:59:09 GMT 10
Looking great, I've never had any luck bending ply, yours is hugging the frame, nice work.
Mustang
|
|
|
|
Post by Roehm3108 on Dec 16, 2022 10:51:51 GMT 10
Hi Mustang
I really don't like this ply, especially the interior one as it has so little flex. I used small blocks from the inside and screwed the blocks to pull the ply onto the frame. It meant a few screw holes to bog afterwards, but this polyurethane glues ain't letting it pull back.
|
|
|
|
Post by tooleyau on Dec 16, 2022 19:06:54 GMT 10
Hi Mustang I really don't like this ply, especially the interior one as it has so little flex. I used small blocks from the inside and screwed the blocks to pull the ply onto the frame. It meant a few screw holes to bog afterwards, but this polyurethane glues ain't letting it pull back. For I formation. There is a type of ply called "Bendy Ply". It is very flexible but only Bends along 1 plane. Ie . You can bent it around a curve but not a ball. MT. |
|
|
|
Post by Roehm3108 on Dec 17, 2022 7:52:33 GMT 10
Hi MT Thanks for your input. My understanding of the bendy ply is that it is 3mm thick, not cheap and only an interior ply. I bought this 3.6mm falcata plywood for the interior, because it was well priced and also because it is 35% lighter than ordinary ply. The thickest middle layer is very similar to balsa. When I built the roof, I tried to get it to bend a bit better using hot wet towels and weight, with only marginal success. For that reason, I made the front and rear frame curve less round than I would have liked. I haven't lost any real "useable" internal space with what I have, but gained a positive in that there is room for a toolbox on the drawbar, where I will put my house-battery. Which then gives me the problem of where to put the spare tyre!!  |
|
|
|
Post by Roehm3108 on Dec 20, 2022 7:31:06 GMT 10
Rear wall interior lining finished!! In the second pic, where the carport post is visible, you will notice a little plastic box just under the bracing arm. This will have a solar regulator fitted eventually. When I bought the van it had a rigid solar panel fitted. I've installed it onto the carport roof and will use it to charge the battery when the van is not being used. During the February floods, we were cut off by flooded roads in all directions and without power. This way, if it happens again, I still have an operative fridge to use in the van and can maintain the charge to it.   |
|
|
|
Post by Roehm3108 on Dec 20, 2022 12:07:43 GMT 10
I just finished the lining of the lower part of the lantern roof and thought I'd share a pic of what the effect is (sans trim and paint of course!). I'm really happy with the resultant "look". The height in the higher section is 1980mm and the lower 1800mm. Which gives pretty good head clearance for a little van.  |
|
|
|
Post by Mustang on Dec 22, 2022 8:27:54 GMT 10
What a unique look without overhead cupboards, but you could add a narrow shelf above the window line?
Mustang
|
|
|
|
Post by Roehm3108 on Dec 23, 2022 12:03:37 GMT 10
That inner roofline looks almost as if those portholes are overhead cupboard openings!! Mustang, I still haven't decided on a final interior fitout, something I'll think about over Christmas. I'm sure there will be some shelves, but really only for lightweight stuff like tissue boxes etc
|
|
|
|
Post by Roehm3108 on Dec 30, 2022 6:58:31 GMT 10
One thing I hadn't checked since buying this rig was to check that the brakes were OK. A little birdie told me that I should do that, and this is what I found on the driver's side wheel!!! For the sake of $95 per side for new backing plate and brake kit, it's a no-brainer when it comes to making the decision. Better safe than sorry!  |
|
|
|
Post by Roehm3108 on Jan 12, 2023 19:03:00 GMT 10
I ordered the replacement brake kit on the 29th Dec, fully aware that the business, Couplemate, wouldn't be back at work till the 9th Jan. On their website they assured customers that they would dispatch all orders on that date and threw in free postage for good measure. The business is in Brisbane and I live near Gympie. The package arrived on Tuesday, 10th Jan. Not the first time I had such good service from them and thoroughly recommend them for your trailer needs! Had already started on my 12v wiring first fitout, but got stuck into fitting the new brakes kit:  Much nicer now!! In case anyone is interested, that black stuff on the wheel well is a heavy-duty bitumen waterproofing membrane from Crommelin |
|
|
|
Post by Roehm3108 on Jan 24, 2023 12:55:29 GMT 10
The 12v wiring cavity fit is done. Also winning on the insulation installation, which should be finished tomorrow.  |
|
|
|
Post by Mustang on Jan 25, 2023 8:05:11 GMT 10
Tis tad tight under the roof frame. !!!!!
|
|
|
|
Post by Roehm3108 on Jan 26, 2023 10:44:44 GMT 10
Tis tad tight under the roof frame. !!!!! Well spotted Mustang! That's partly because it was on stands, slightly higher than the wheels. I put it back on its wheels yesterday and you can see the difference. It's also not centred across the width of the floor and will have more space when I can remove the ply stored under it at the moment. Hopefully when I worked out the dimensions, I correctly allowed for the roofline.  |
|
|
|
Post by Roehm3108 on Jan 26, 2023 12:09:41 GMT 10
The weather here has been in the high 30's the past few day. So progress has been slow with the insulation. Not helped at all when I found that there was an outward bow of the internal ply in the middle of the back section. I suspect the late afternoon heat on that particular ply. Which meant that the insulation panel would be proud of the framing thereby making it impossible to fit the outer skin. Hence that piece of framing that doesn't seem to form part of the whole. I decided to fit a shelf on the inside and pull the panel back into place with the timber you can see. That shelf will be useful as it will be above the bed and can hold tissue boxes et-al.   When life gives lemons, make lemonade!!! |
|
|
|
Post by Roehm3108 on Feb 2, 2023 11:54:08 GMT 10
Those members living in SE Qld would know what humid weather we're having here. Not much fun! Which is why I'm pleased when I can make even a little progress. Have installed the passenger side outside skin! It's glued, nail-gunned and perimeter screwed, so it shouldn't blow off!! I decided to have a curved wheel arch rather than the multiangled style originally there.  |
|
|
|
Post by Roehm3108 on Feb 7, 2023 7:11:54 GMT 10
Finally some humidity relief, and a good day yesterday to fit the driver's side outside wall. Limited space made for a tight squeeze. Manhandling 3 metre long pieces of plywood without risking it cracking also made for interesting times!  |
|